Modern eCommerce forms should respond instantly to user input.
Customers expect fields to appear, disappear, and validate without refreshing the page.
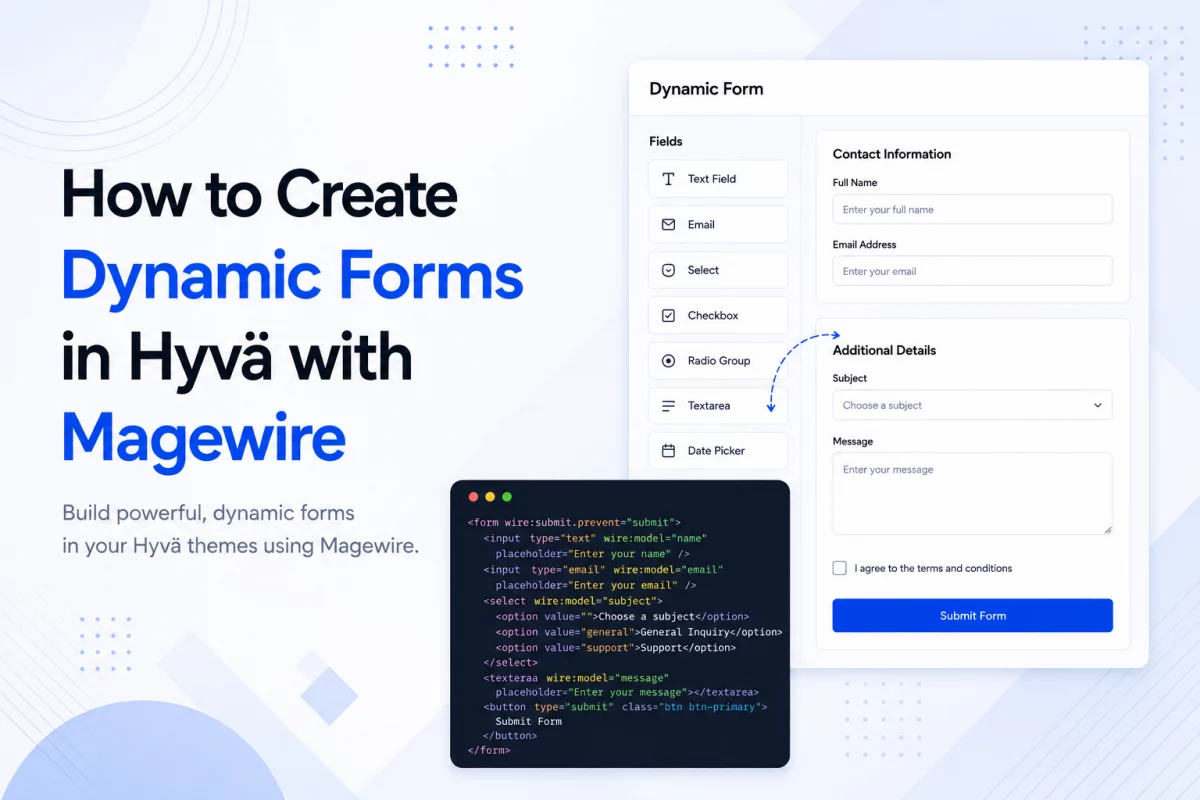
Magewire makes this possible inside Hyvä Theme development while keeping almost all business logic in PHP.
Instead of writing large amounts of JavaScript, you build reactive components using PHP and let Magewire synchronize the frontend automatically.
Why Use Magewire for Dynamic Forms?
Traditional Magento forms usually depend on JavaScript.
As forms become more complex, maintaining frontend logic becomes difficult.
Magewire moves most of that logic back into PHP.
Some common examples include:
- Showing VAT fields only for business customers
- Dynamic checkout forms
- Registration forms
- Address forms
- Contact forms
- Multi-step forms

How Magewire Handles Dynamic Forms
Every public property inside a Magewire component is reactive.
When a user changes an input field, Magewire automatically updates the corresponding PHP property.
If the backend changes another property, the frontend updates immediately without a full page refresh.
This creates a two-way data binding experience similar to Livewire.
Step 1: Create the Magewire Component
Create a new component inside your module.
File
app/code/Vendor/Module/Magewire/DynamicForm.php
<?php

declare(strict_types=1);

namespace Vendor\Module\Magewire;

use Magewirephp\Magewire\Component;

class DynamicForm extends Component
{
    public string $email = '';

    public string $companyType = 'individual';

    public string $vatId = '';

    protected array $rules = [
        'email' => 'required|email',
        'vatId' => 'required_if:companyType,corporate|min:5'
    ];

    public function updated(string $property, $value): void
    {
        if ($property === 'companyType' && $value === 'individual') {
            $this->vatId = '';
        }
    }

    public function submitForm(): void
    {
        $this->validate();

        $this->dispatchBrowserEvent('form-submitted-successfully');
    }
}
This component stores the form state and handles validation.
Understanding the Component
Let’s look at what each section does.
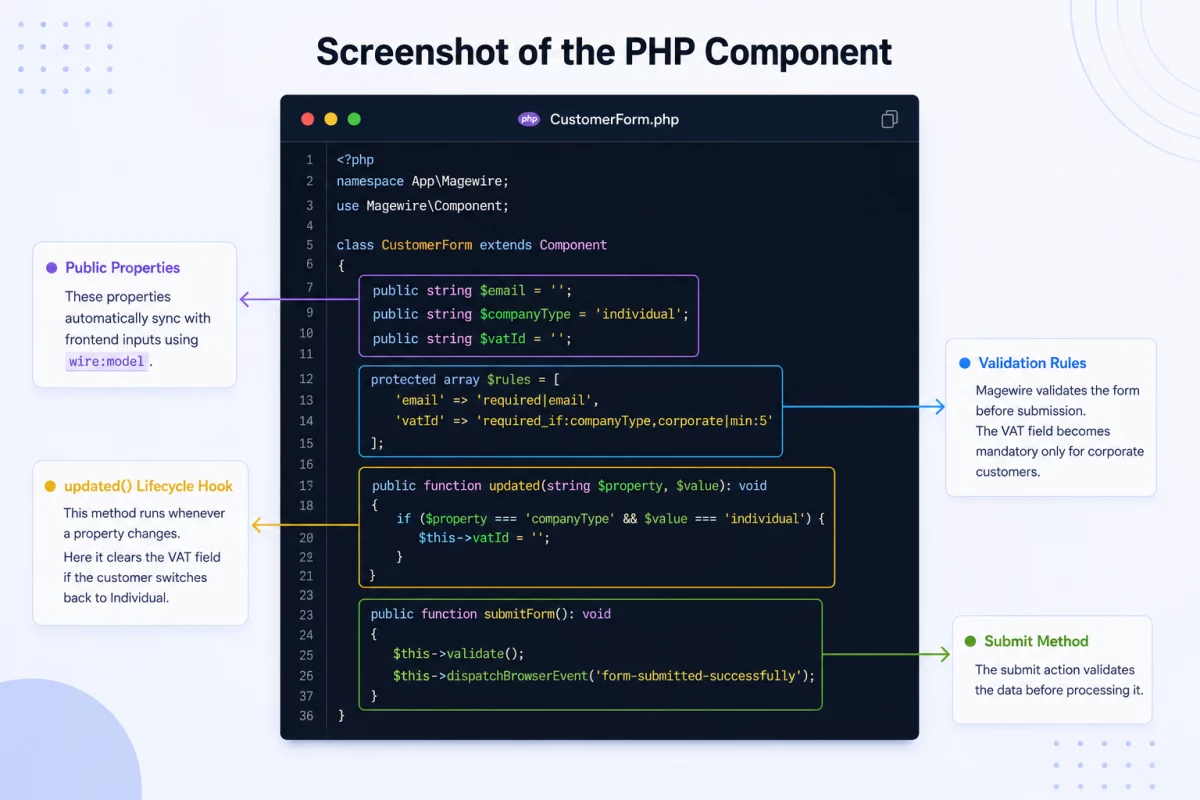
Public Properties
public string $email = '';

public string $companyType = 'individual';

public string $vatId = '';
These properties automatically sync with frontend inputs using wire:model.
Validation Rules
protected array $rules = [
    'email' => 'required|email',
    'vatId' => 'required_if:companyType,corporate|min:5'
];
Magewire validates the form before submission.
The VAT field becomes mandatory only for corporate customers.
updated() Lifecycle Hook
public function updated(string $property, $value): void
{
    if ($property === 'companyType' && $value === 'individual') {
        $this->vatId = '';
    }
}
This method runs whenever a property changes.
Here it clears the VAT field if the customer switches back to Individual.
Submit Method
public function submitForm():void
{
    $this->validate();

    $this->dispatchBrowserEvent('form-submitted-successfully');
}
The submit action validates the data before processing it.
- Public Properties
- Validation
- Lifecycle Hook
- Submit Method
Step 2: Create the Frontend Template
Next, build the form template.
File
view/frontend/templates/form.phtml
<?php
$magewire = $block->getMagewire();
?>

<form wire:submit.prevent="submitForm">

    <input
        type="text"
        wire:model.blur="email"
        placeholder="Email">

    <?php if ($magewire->hasError('email')): ?>
        <span><?= $magewire->getError('email') ?></span>
    <?php endif; ?>

    <select wire:model.live="companyType">
        <option value="individual">Individual</option>
        <option value="corporate">Corporate</option>
    </select>

    <?php if ($magewire->companyType === 'corporate'): ?>

        <input
            type="text"
            wire:model.blur="vatId"
            placeholder="VAT ID">

    <?php endif; ?>

    <button
        type="submit"
        wire:loading.attr="disabled">
        Submit
    </button>

</form>
The template connects HTML inputs with the backend component.
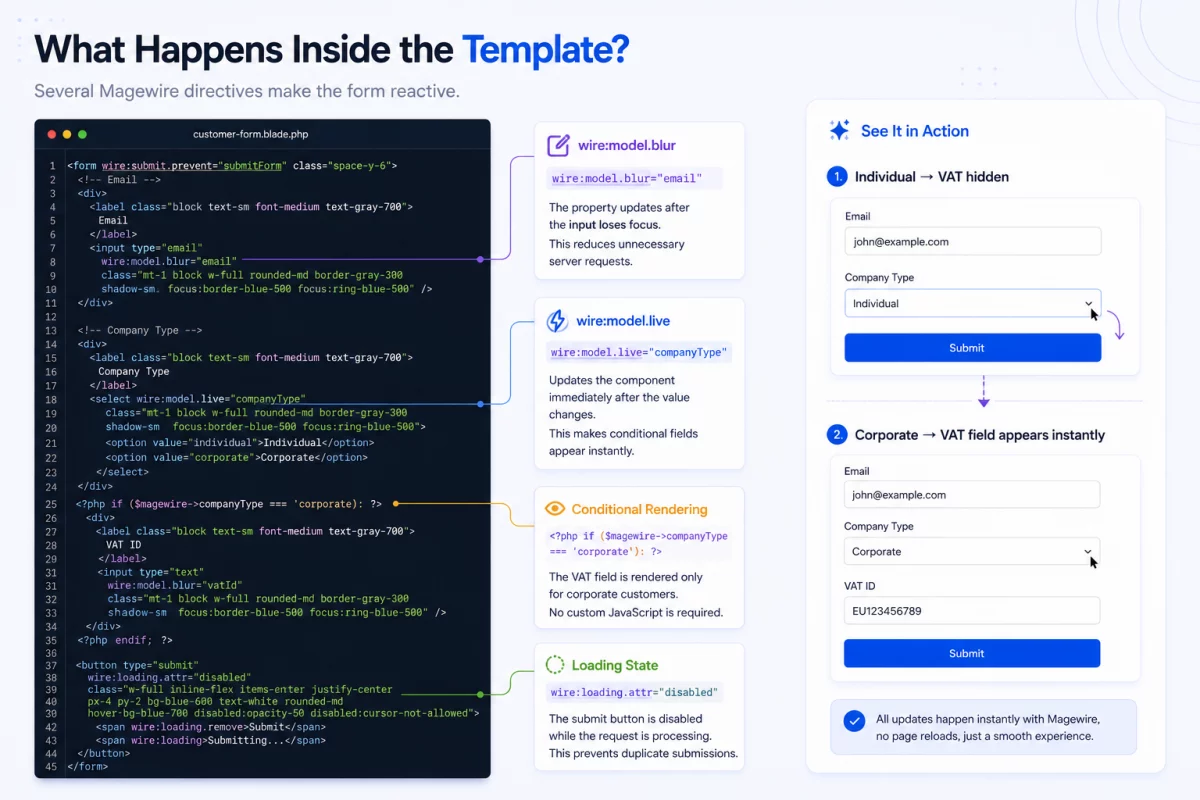
What Happens Inside the Template?
Several Magewire directives make the form reactive.
wire:model.blur
wire:model.blur="email"
The property updates after the input loses focus.
This reduces unnecessary server requests.
wire:model.live
wire:model.live="companyType"
Updates the component immediately after the value changes.
This makes conditional fields appear instantly.
Conditional Rendering
<?php if ($magewire->companyType === 'corporate'): ?>
The VAT field is rendered only for corporate customers.
No custom JavaScript is required.
Loading State
wire:loading.attr="disabled"
The submit button is disabled while the request is processing.
This prevents duplicate submissions.
Step 3: Register the Component
Finally, register the component inside your layout XML.
<block
    class="Magento\Framework\View\Element\Template"
    name="vendor.dynamic.form"
    template="Vendor_Module::form.phtml">
    <arguments>
        <argument
            name="magewire"
            xsi:type="object">
            Vendor\Module\Magewire\DynamicForm
        </argument>
    </arguments>
</block>
Magento now knows which Magewire component powers the template.
How Data Flows
The complete workflow is straightforward.

Best Practices for Dynamic Forms
- Keep business logic inside the Magewire component.
- Use lifecycle hooks for reactive behavior.
- Validate on the server instead of JavaScript.
- Prefer
wire:model.blurfor text inputs. - Use
wire:model.liveonly where instant updates improve the user experience. - Keep templates focused on presentation.
Common Use Cases
Dynamic forms built with Magewire work well for:
- Customer registration
- Checkout customization
- Contact forms
- B2B registration
- Company account creation
- Shipping address forms
- Product configurators
- Multi-step forms
You can also check hyva checkout form component documentation.
Conclusion
Magewire makes building reactive forms in Hyvä simple and maintainable.
Instead of managing complex JavaScript, you handle state, validation, and business logic in PHP.
The result is cleaner code, easier maintenance, and a faster development experience while delivering the responsive interactions users expect.

Be the first to comment.