Introduction
Odoo Mobikul POS Mobile App Builder helps businesses manage Point of Sale operations from Android and iOS devices. Store staff can browse products, create customer orders, manage payments, and generate invoices from a mobile device.
Businesses can continue POS billing even without an internet connection. The application securely stores offline orders and automatically synchronizes them with the Odoo backend when the internet connection is restored.
It helps retail stores, supermarkets, restaurants, and pop-up shops speed up billing, reduce manual work, and keep sales records accurate and synchronized.
Features
- Odoo Mobikul POS Mobile App Builder supports Android and iOS devices.
- Continue POS billing even without an internet connection.
- Search products or scan barcodes for faster order creation.
- Hold multiple customer carts and resume them anytime.
- Create and manage customer records from the mobile application.
- Switch cashier accounts without restarting the application.
- Accept payments and generate invoices directly from the app.
- Synchronize orders and payment details with the Odoo backend.
- Manage daily POS operations from one mobile application.
Installation
- Once you purchase the App from the Webkul store, you will receive a link to download the module’s zip file.
- Extract the file on your system after the download finishes. As a result, you will be able to see a folder named- ‘mobikul_pos’.
- Copy and paste this folder inside your Odoo Add-Ons path.
- Now, open Odoo App and click on the Settings menu. Here, click on Activate Developer Mode.
- Then, open Apps menu and click on ‘Update Modules List.’
- In the search bar, remove all the filters and search ‘mobikul_pos’.
- You will be able to see module in the search results. Click on ‘Activate’ to install it.
Workflow
Configuration of Odoo Mobikul POS Mobile App Builder
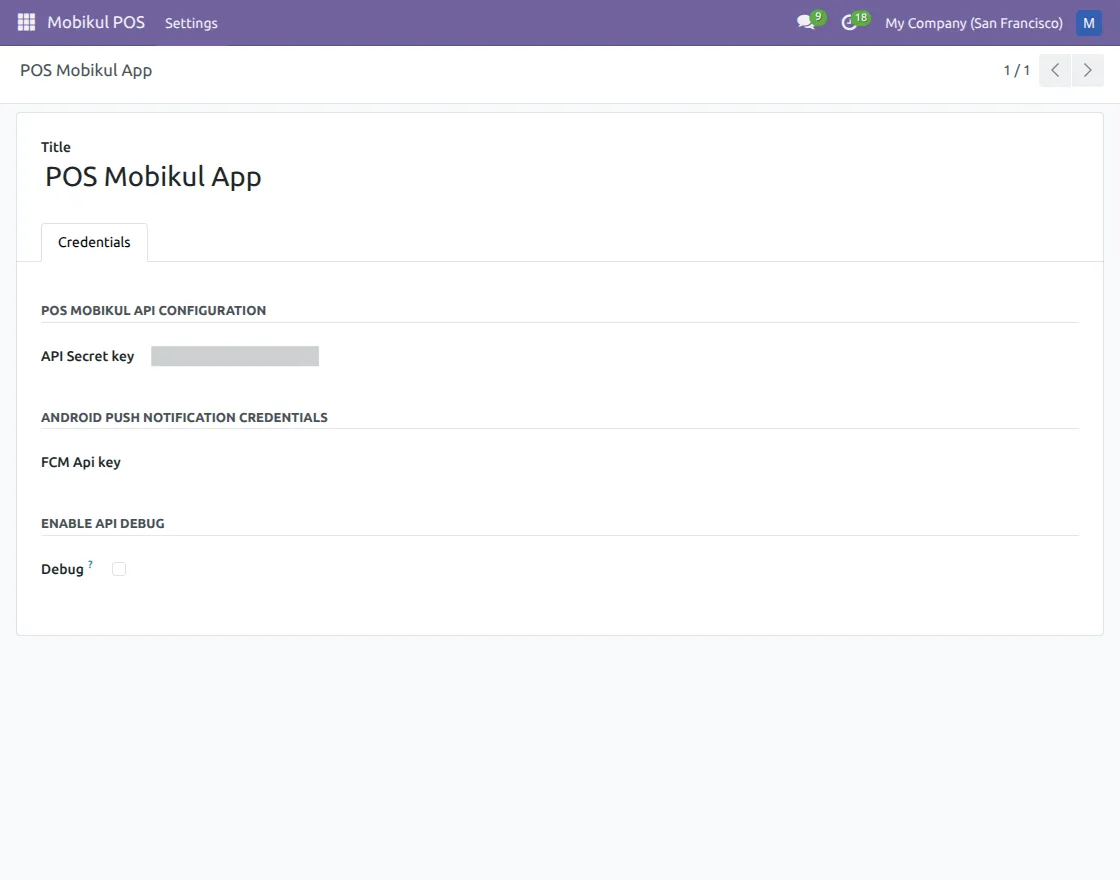
1) After installing the module, go to Mobikul POS -> POS Mobikul App. Open the configuration page to access the application credentials.
Copy the API Secret Key; you will use this key while connecting the mobile application with your Odoo database.
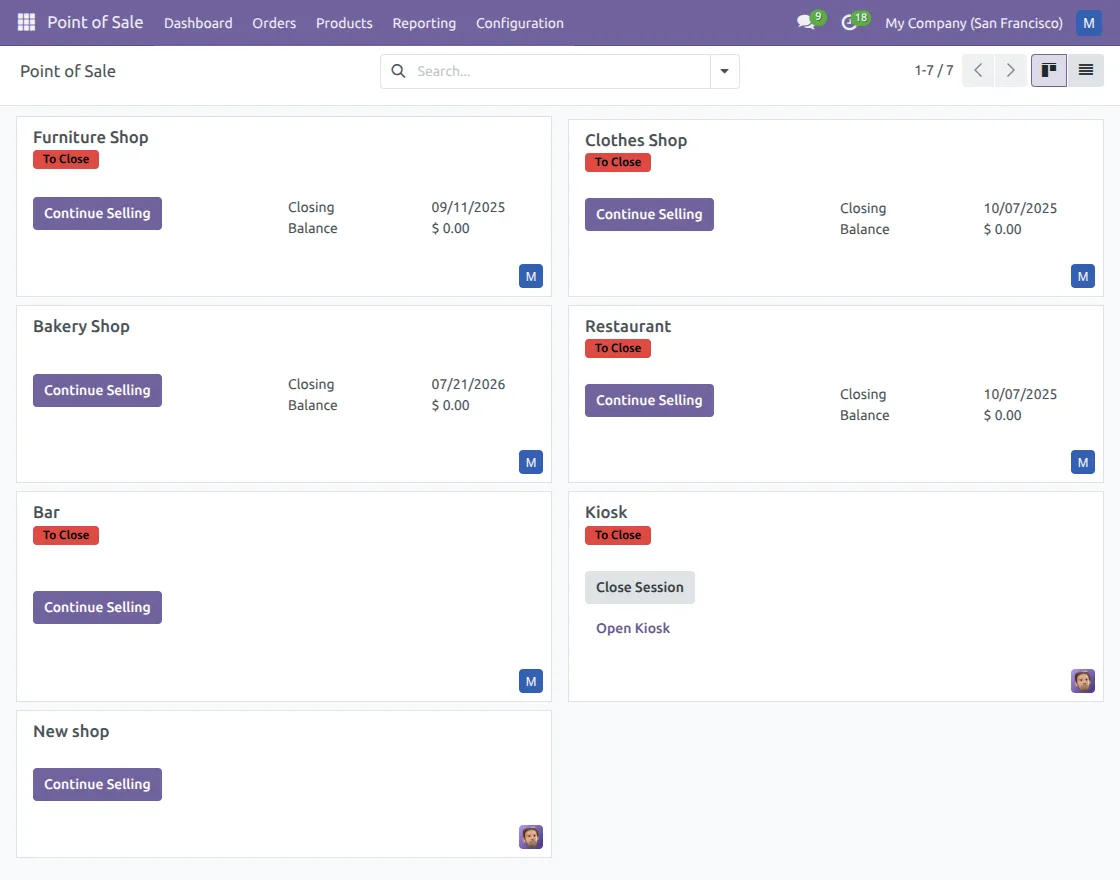
2) Open the Point of Sale module and choose the POS shop you want to use with the mobile application.
Click Continue Selling to open an active POS session. If no session is running, start a new one before using the mobile app.
3) Open the Mobikul POS mobile application and enter your registered email address and password. Tap Login to access the application and continue with the Point of Sale operations.
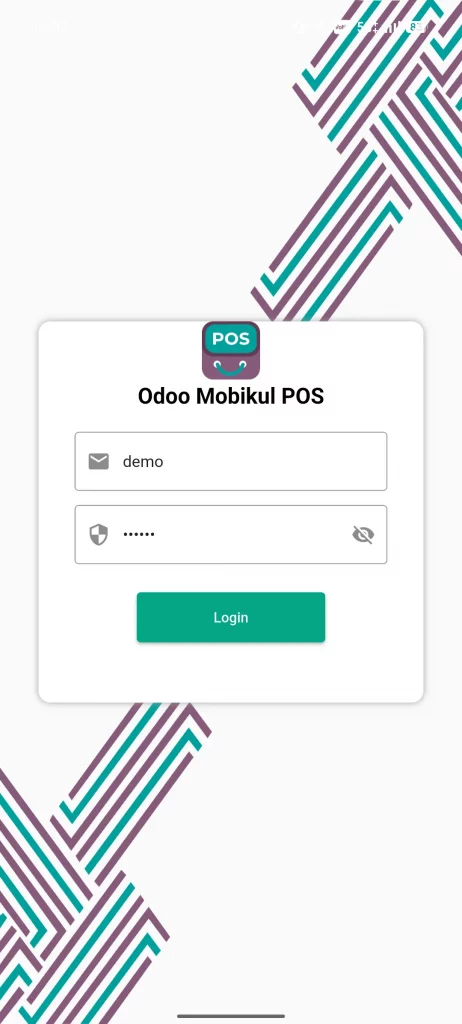
Mobile App Login
Log in to the Mobikul POS app using your registered email and password.
4) After logging in, the application displays all available Point of Sale shops assigned to your account. Tap Resume to continue an active session or New to start a new POS session for the selected shop.
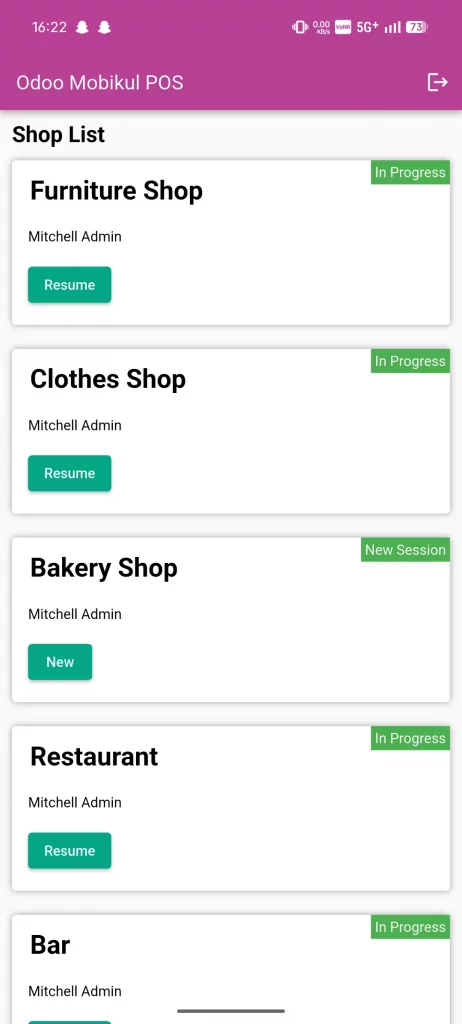
Mobile Shop Selection
Choose a POS shop and resume or start a new sales session.
5) After selecting a POS shop, the application opens the product catalog.
Browse products, search by name, or scan barcodes to find items quickly. Tap a product to add it to the shopping cart and continue creating the customer order.
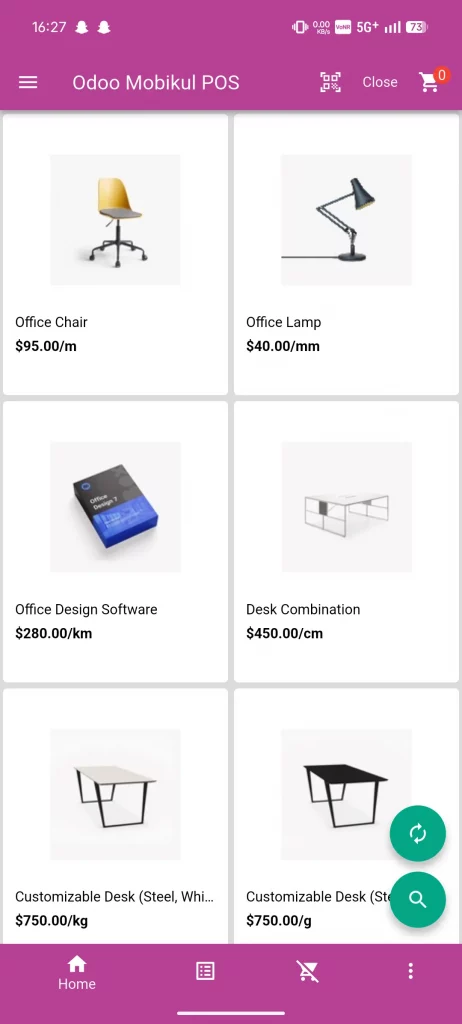
POS Product Catalog
Browse products, search items, or scan barcodes to create customer orders quickly.
6) After selecting products, review the shopping cart before completing the order. You can update quantities, apply discounts, change prices, or remove products as needed.
Verify the order total and customer details. Once everything is correct, tap Payment to continue with the checkout process.
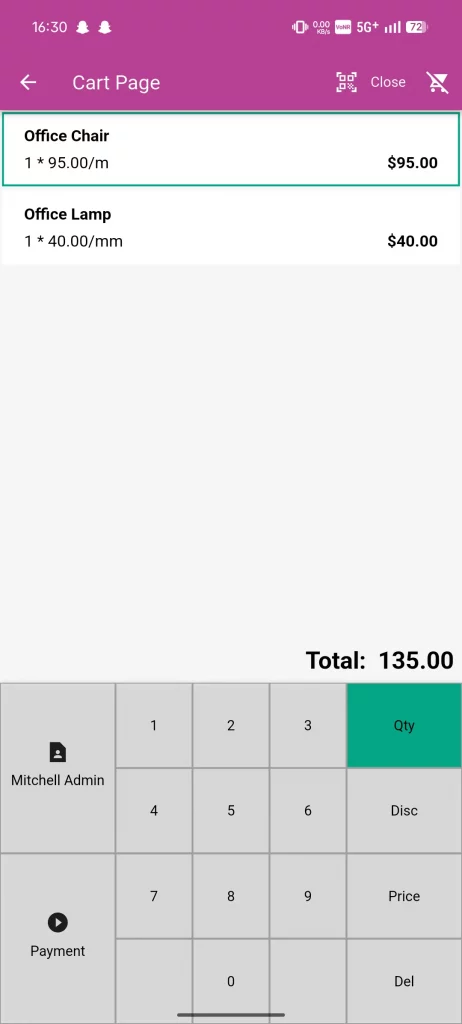
POS Shopping Cart
Review cart items, update quantities, and proceed to payment for checkout.
7) Tap the Customer option from the shopping cart to open the customer list. Search for an existing customer or choose one from the available records.
You can also edit customer details or add a new customer using the Add Customer button before continuing to payment.
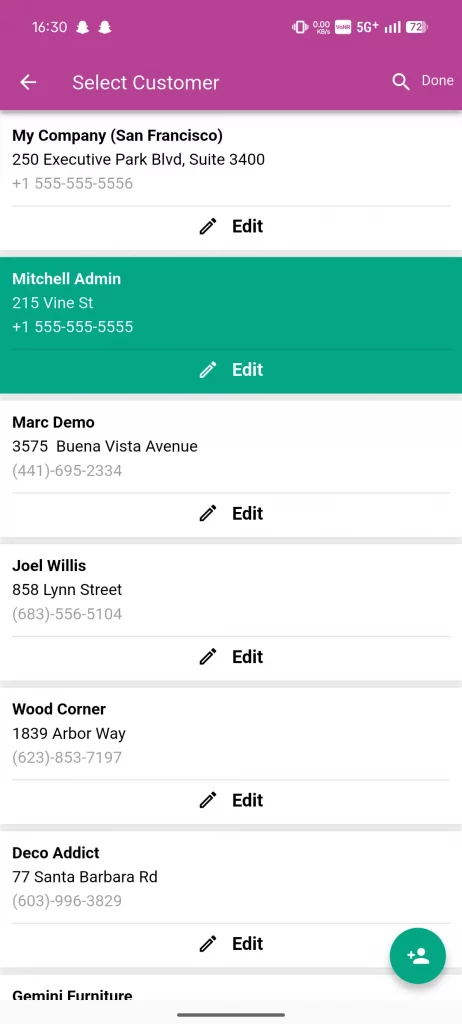
POS Customer List
Select, edit, or create customer records before completing the POS checkout process.
8) If the customer is not available in the list, tap the Add Customer button. Enter the required customer details, such as the name, email, phone number, address, and country.
After filling in the information, tap Create to save the customer. The new customer is added to the customer list and can be selected for the current order.
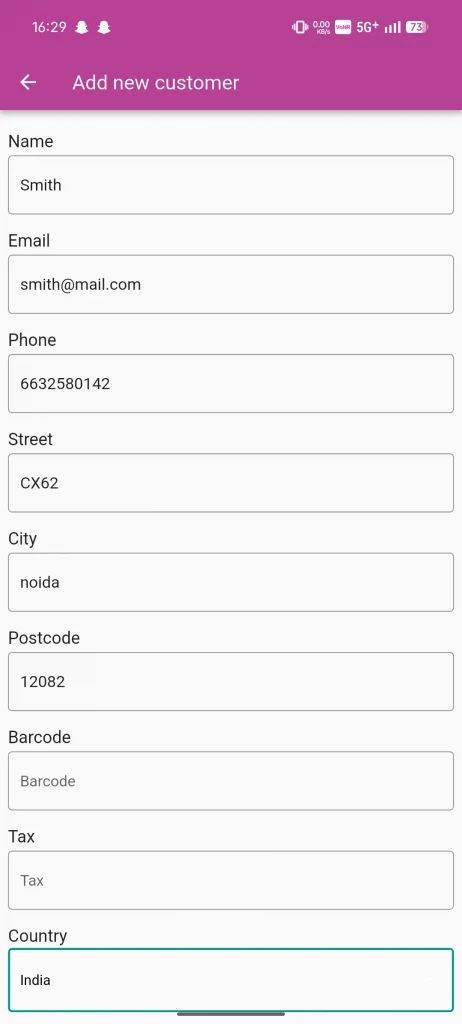
Create New Customer
Enter customer details and create a new customer directly from the POS application.
9) After reviewing the shopping cart, verify the products, quantities, and order total. Make any required changes before completing the sale.
Tap Payment to continue to the payment screen and select the preferred payment method for the customer.
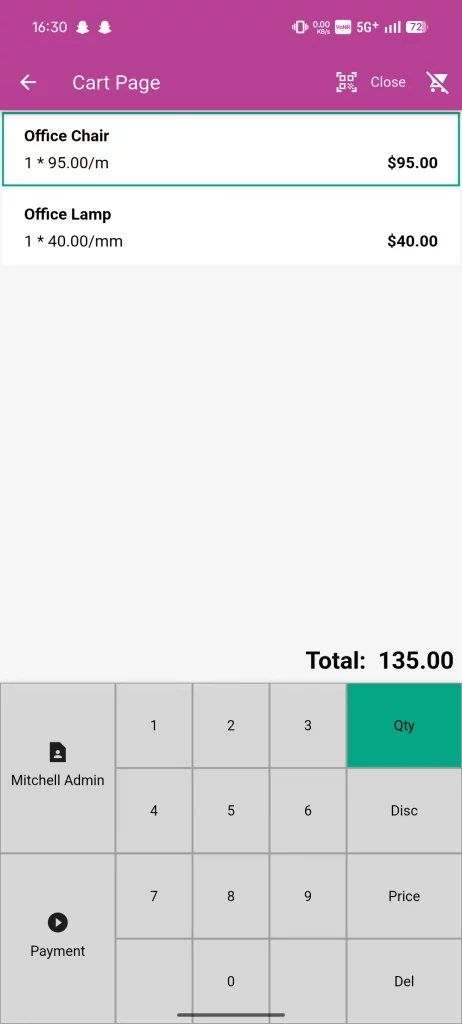
POS Order Checkout
Review cart items, adjust order details, and proceed to customer payment.
10) If the customer is not ready to complete the purchase, tap the Hold Cart option.
Confirm the action by clicking Yes to save the current order; the held cart can be resumed later, allowing you to continue billing without creating the order again.
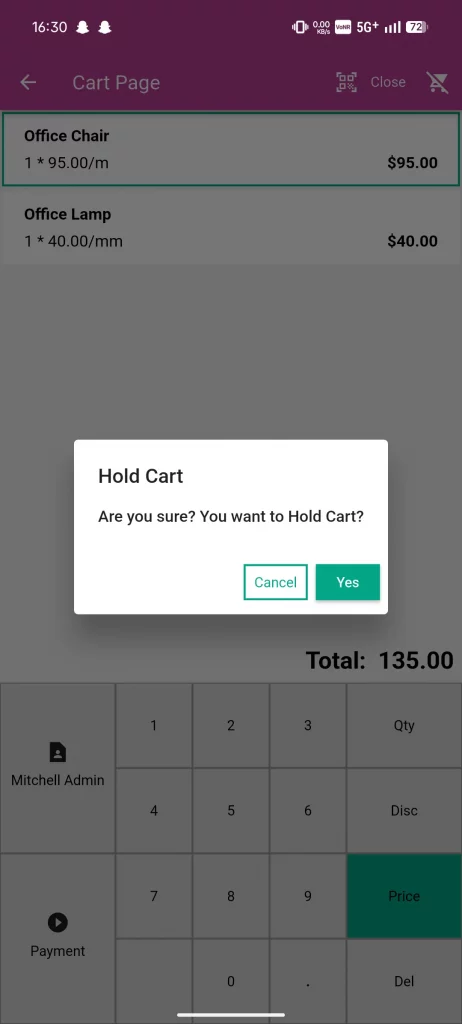
POS Hold Cart
Hold the current cart and resume customer checkout whenever needed later.
11) After reviewing the order, the application displays the Payment Summary screen. Select the preferred payment method and enter the payment amount if required.
Review the payment details, then tap Make Payment to complete the transaction and proceed with order confirmation.
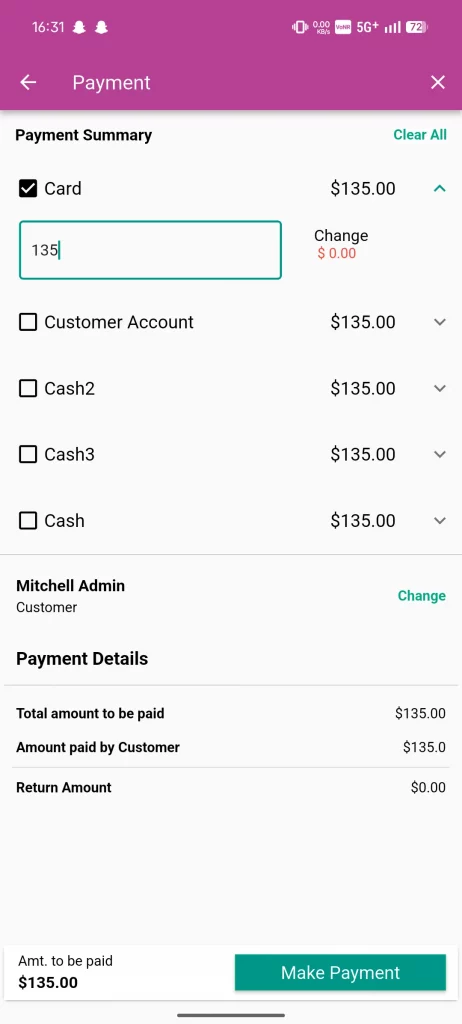
POS Payment Method Selection
Select a payment method, review details, and complete the customer transaction securely.
12) After successful payment, the application displays the order confirmation screen with the generated Order ID and customer details.
Tap Invoice to view the invoice or New Order to start another customer transaction.
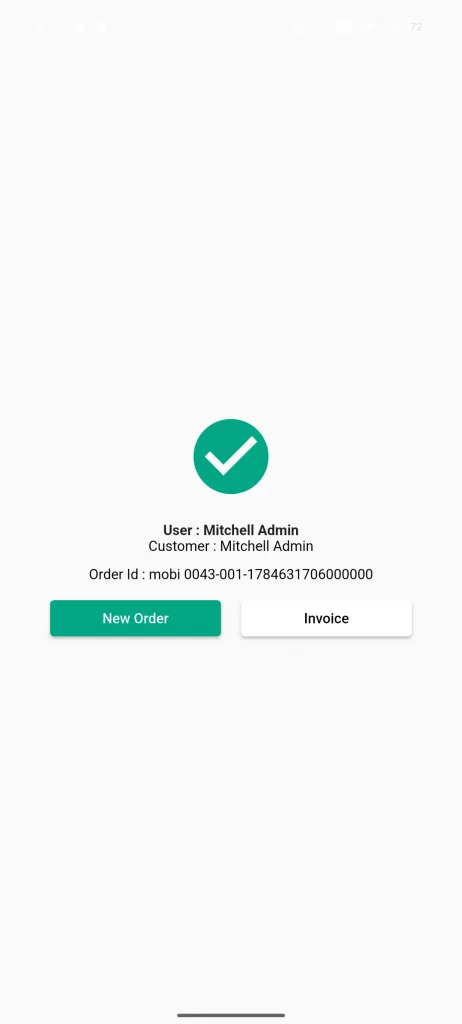
Order Confirmation
View order confirmation and generate invoices or start a new customer order.
13) After the order is confirmed, tap Invoice to open the generated receipt.
The application displays complete order details, payment information, customer details, and the total amount. You can print, share, or save the invoice directly from the application.
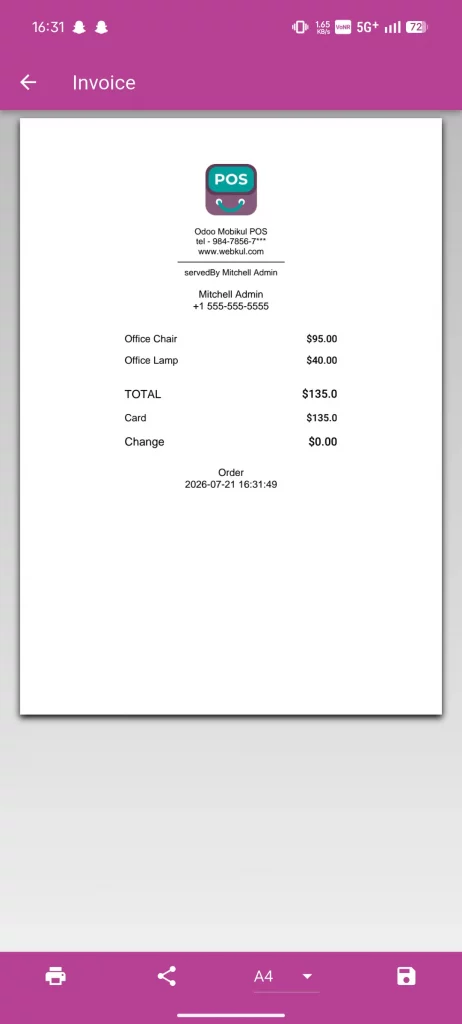
Invoice Receipt
View, print, share, or save the generated invoice directly from the application.
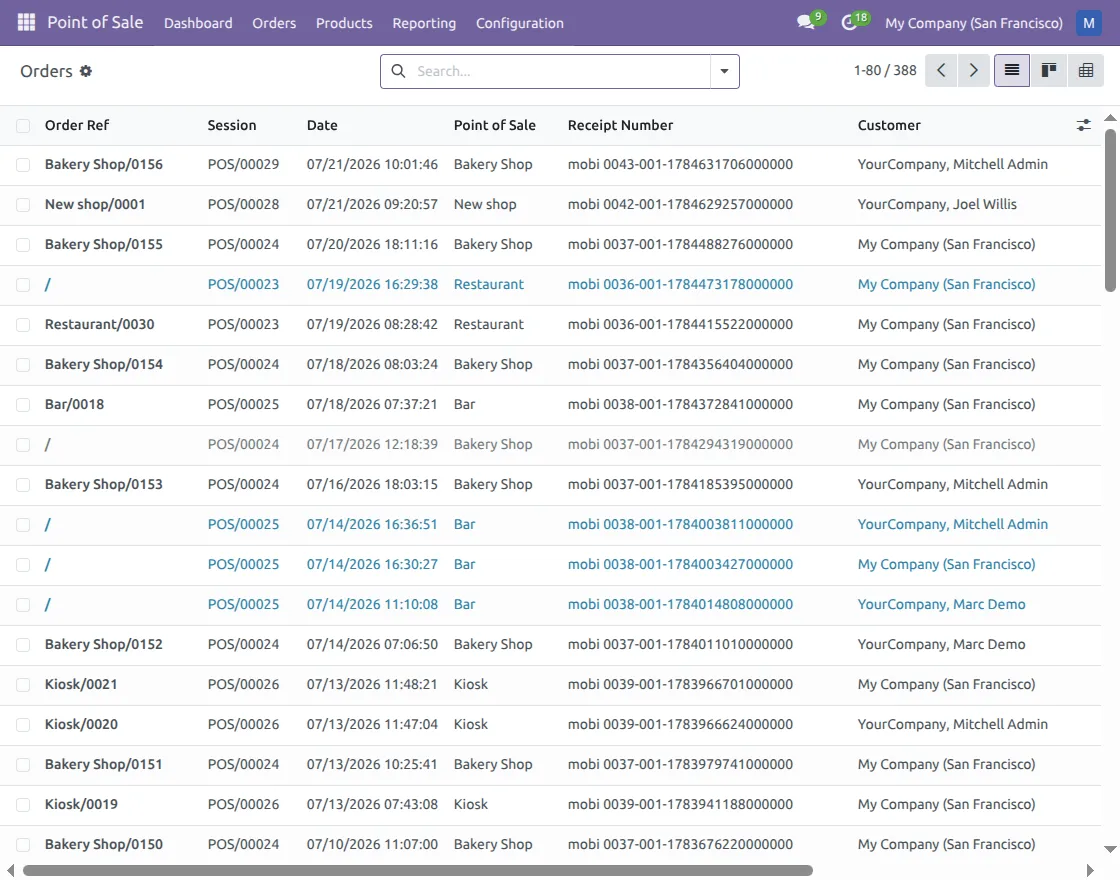
14) After the payment is completed, the application automatically synchronizes the order with Odoo.
Open Point of Sale → Orders to view the synchronized order along with its session, receipt number, customer, and order details.
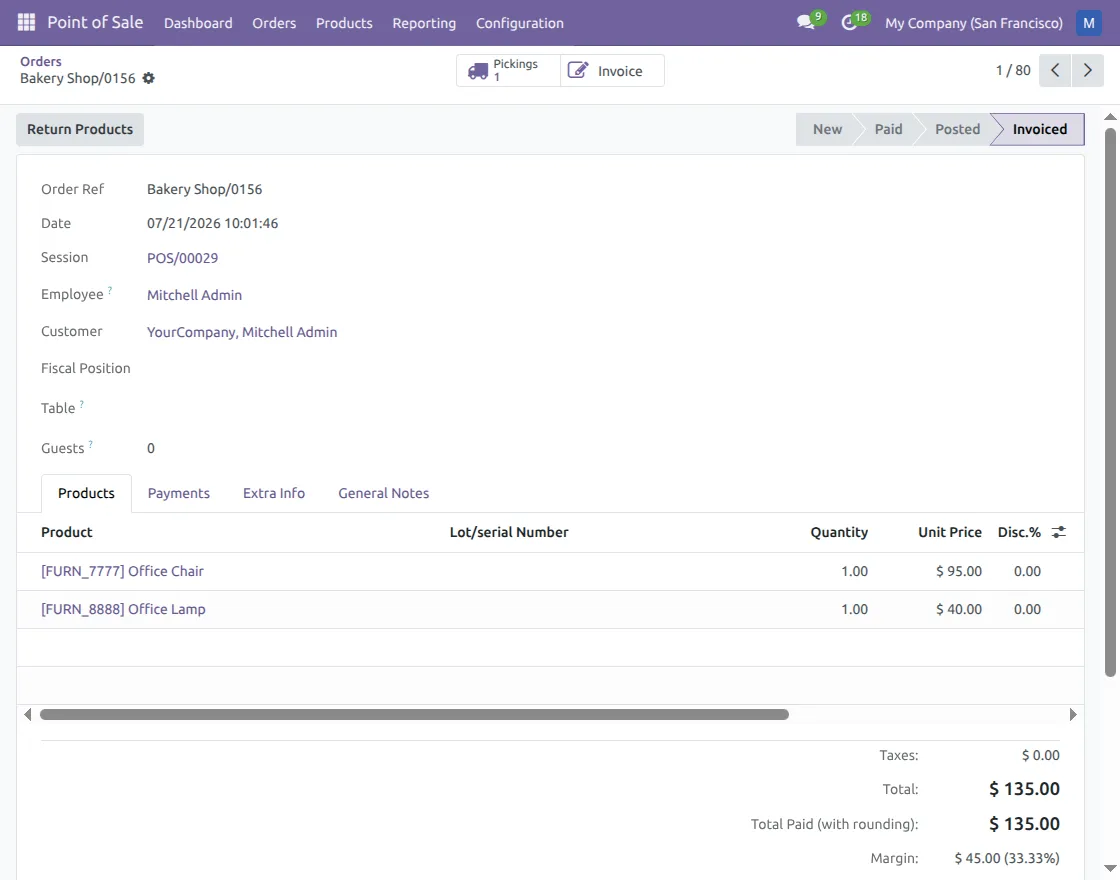
15) After completing the payment, the mobile application synchronizes the order with Odoo automatically.
Open Point of Sale → Orders, select the required order, and review the complete order information, including products, customer, payment, totals, and invoice status.
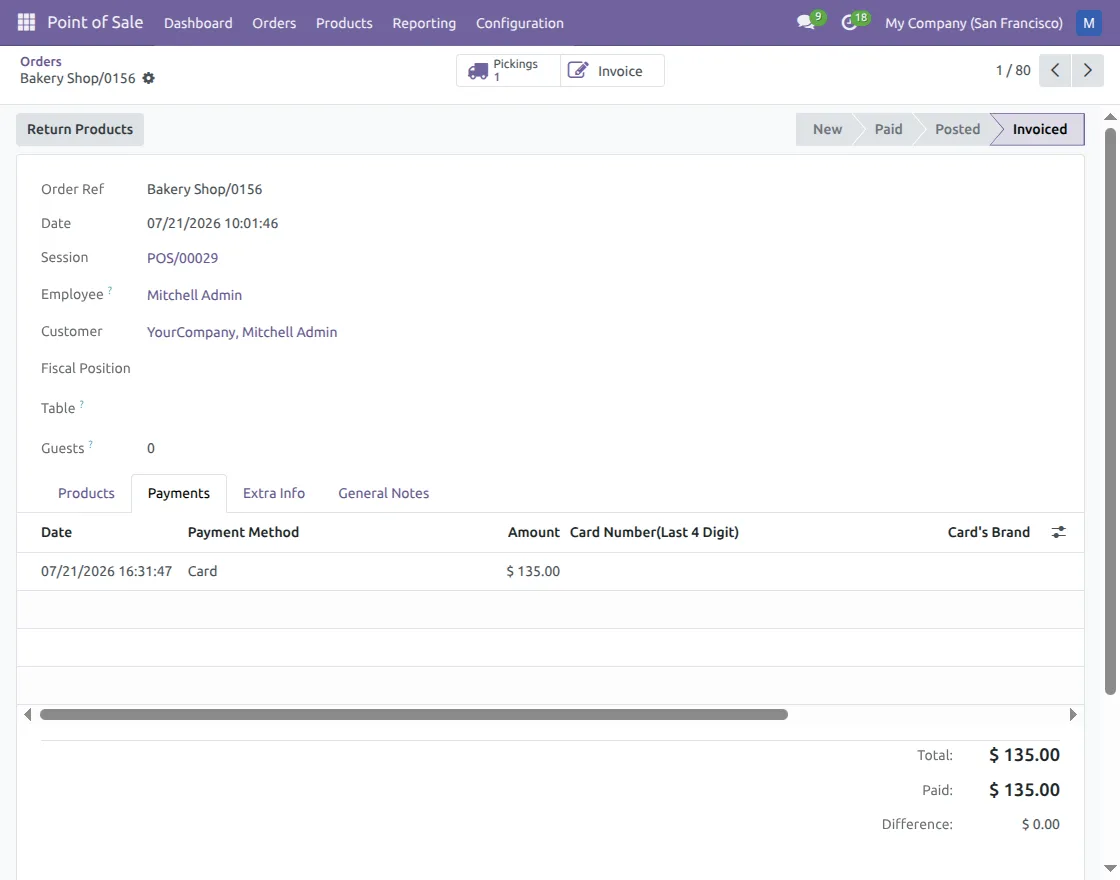
16) After the order is synchronized, open the POS order and navigate to the Payments tab.
Here, you can verify the payment method, paid amount, transaction details, and payment status recorded from the mobile application.
Need Help?
Hope you find guide helpful! Please feel free to share your feedback in the comments below.
If you still have any issues/queries, please create a ticket at the UV Desk.
I hope this helps. In case of any further queries, contact us at our support mail.
Thanks for paying attention!!
Current Product Version - 1.0.0
Supported Framework Version - Odoo V19, V18, V17, V16, V15, V14, V13, V12

Be the first to comment.