Introduction
ERPNext Website Minimum Order Quantity (MOQ) allows admins to set the minimum quantity customers must order for ERPNext website products.
You can purchase ERPNext Website Minimum Order Quantity (MOQ) from the Webkul Store.
The module supports a default MOQ as well as a separate Item-wise MOQ for selected products.
ERPNext Website Minimum Order Quantity (MOQ) can validate quantities in the website cart, during checkout, and while creating Sales Orders or Quotations.
Admins can also configure custom validation messages, select the error display mode, automatically adjust low quantities, and manage MOQ for products in bulk
Prerequisites for using ERPNext Website Minimum Order Quantity (MOQ)
ERPNext Website Minimum Order Quantity (MOQ) works in conjunction with the following modules:
You must install the above-mentioned modules to use ERPNext Website Minimum Order Quantity (MOQ).
Features
- Set minimum order quantities for ERPNext website products.
- Configure a separate Item-wise MOQ for selected products.
- Apply a Default MOQ Quantity when no item value is set.
- Validate product quantities when customers update the website cart.
- Check the complete cart before customers submit an order.
- Apply MOQ checks to ERPNext Sales Orders and Quotations.
- Automatically increase low quantities to the required MOQ.
- Show MOQ errors through inline, toast, or popup messages.
- Enable or disable MOQ for products through bulk actions
Installation
1. After purchasing the app from Webkul Store, you will receive a link to download the module ZIP file.
2. Extract the ZIP file after the download finishes.
3. Set up the module in your git repository, then fetch it using:
bench get-app --branch main https://github.com/your-org/erpnext_website_minimum_order_quantity
4. Replace main with the required branch and add the HTTPS clone URL supplied with the module.
5. Install the app on your ERPNext site using:
bench --site <your-site-name> install-app erpnext_website_minimum_order_quantity
6. Run the following command to complete the setup:
bench migrate
Workflow
1. Log in to the ERPNext dashboard and open the Website.
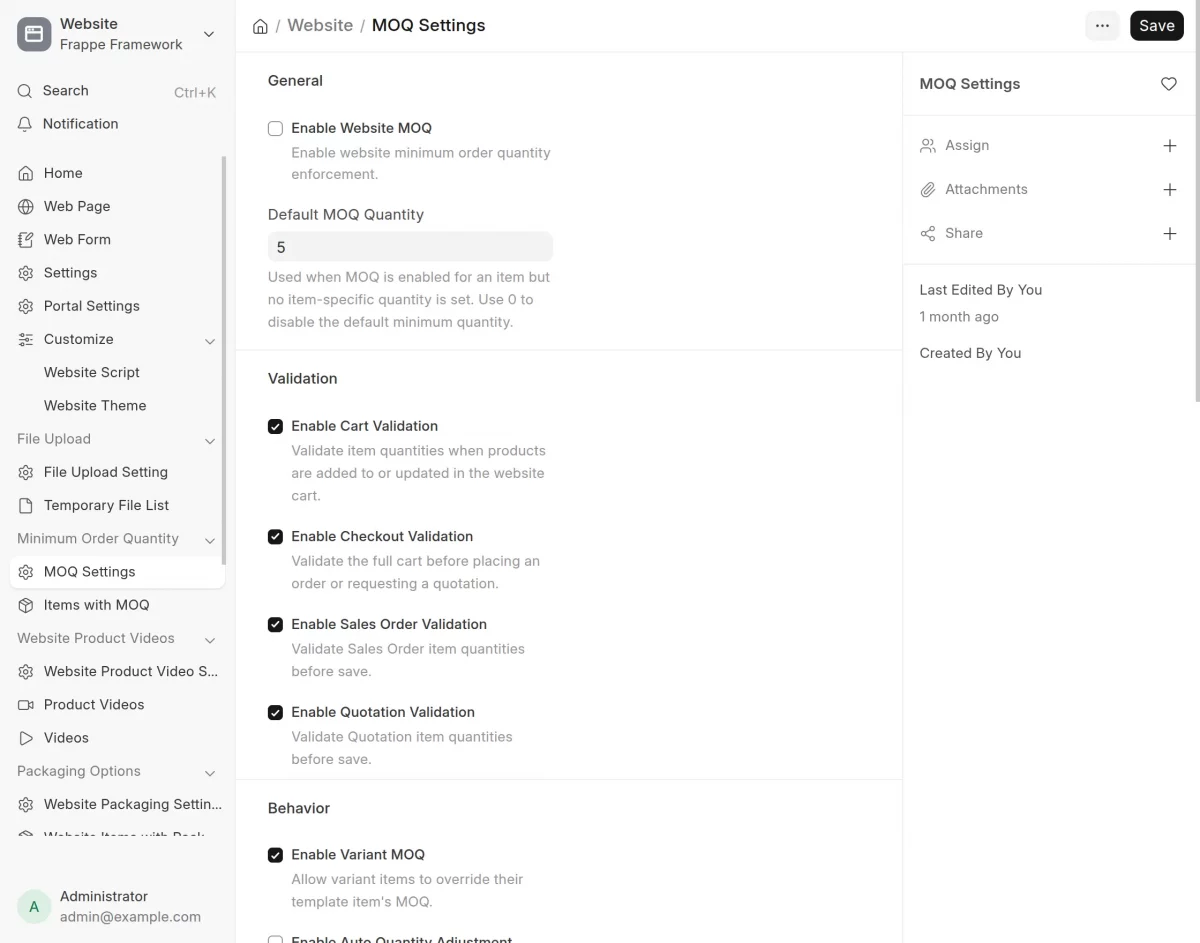
Go to Minimum Order Quantity > MOQ Settings to configure the main Website MOQ rules.
Enable Website MOQ and enter the Default MOQ Quantity. The default value applies when MOQ is enabled for an item but no separate quantity is defined.
You can also enable Cart Validation, Checkout Validation, Sales Order Validation, Quotation Validation, and Variant MOQ as required.
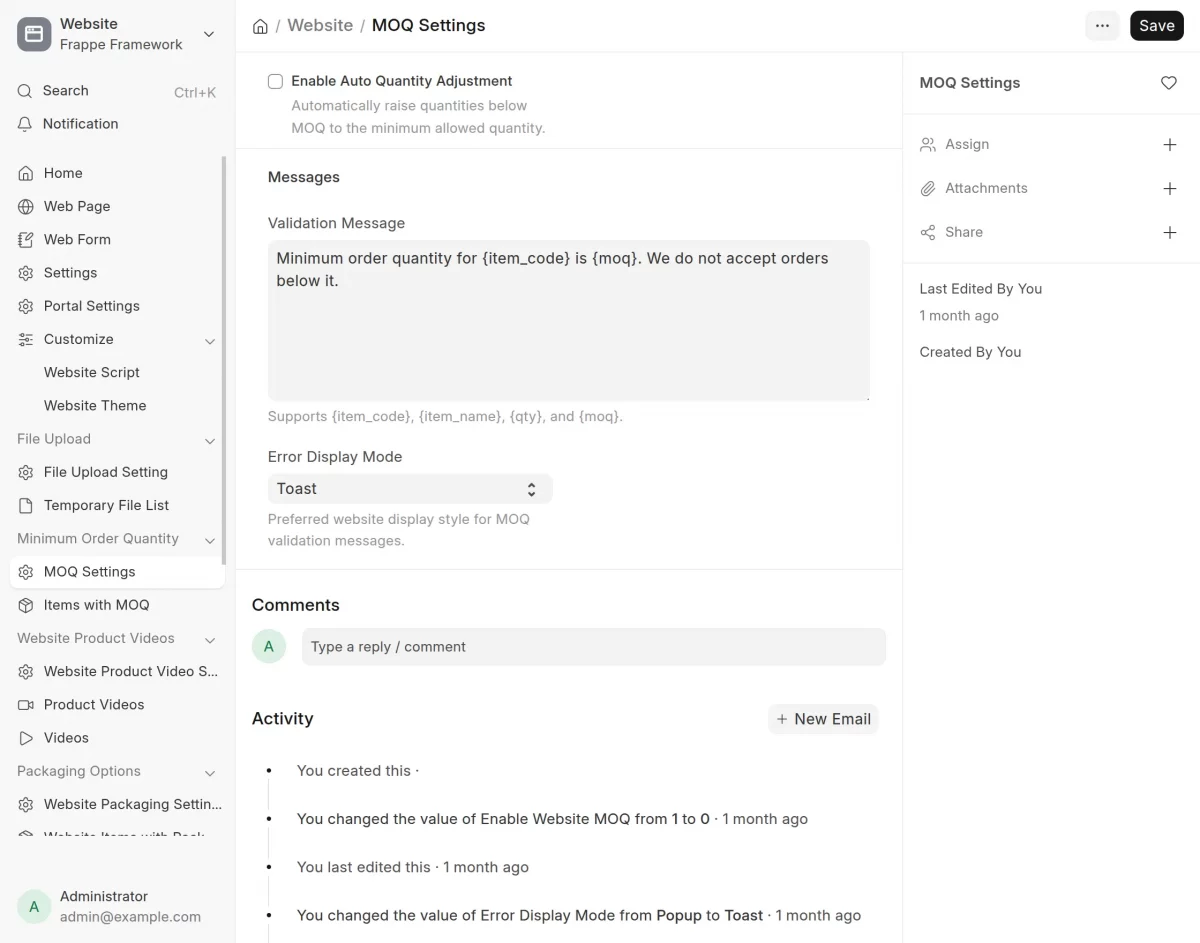
2. Scroll further on the MOQ Settings page to configure quantity behavior and validation messages.
Enable Auto Quantity Adjustment if quantities below the allowed MOQ should automatically increase to the required minimum.
Enter the Validation Message shown when a quantity does not meet the MOQ. The message supports {item_code}, {item_name}, {qty}, and {moq}.
Select the required Error Display Mode to control how the message appears on the website.
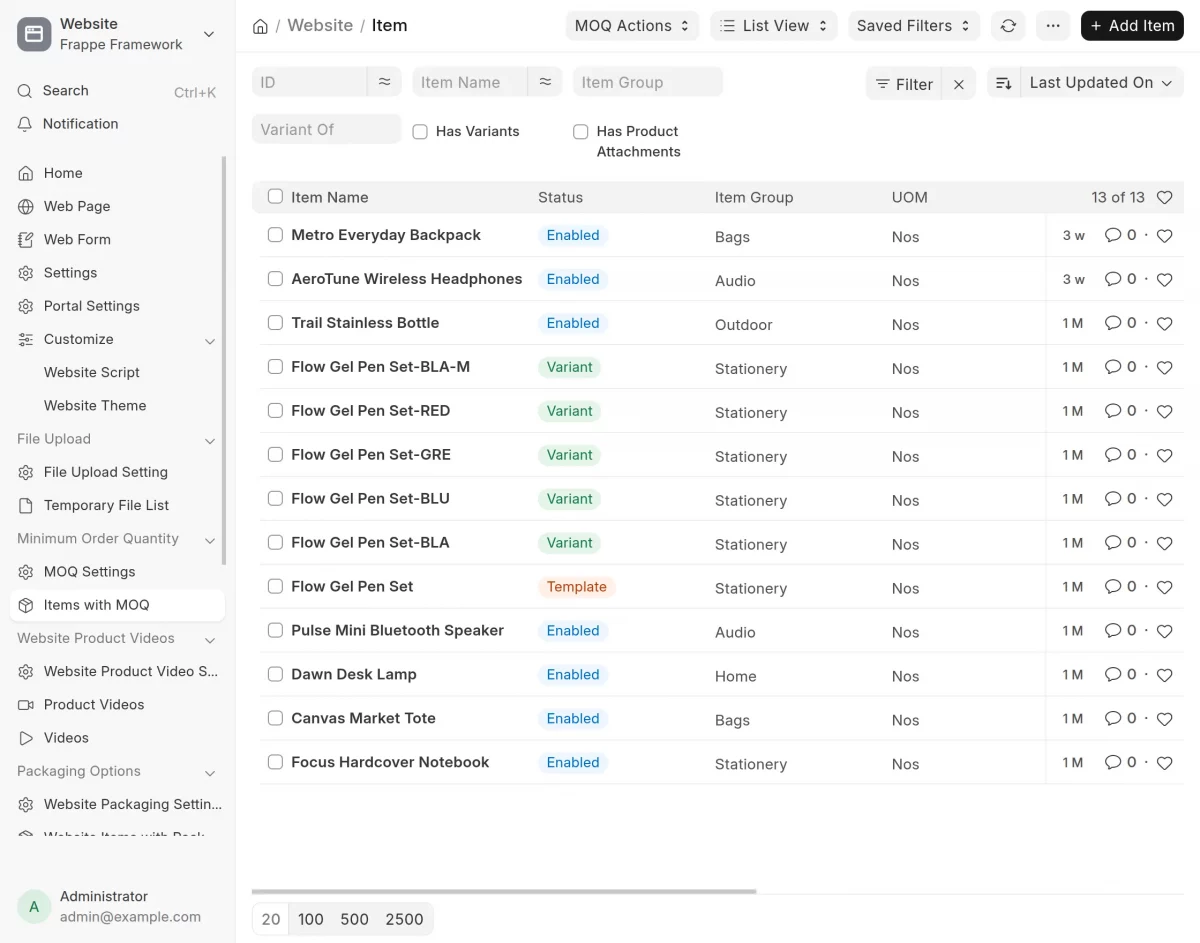
3. Next, go to Website > Minimum Order Quantity > Items with MOQ.
The Item list shows the ERPNext products available for MOQ management.
Use the MOQ Actions menu when you need to enable or disable MOQ for products in bulk.
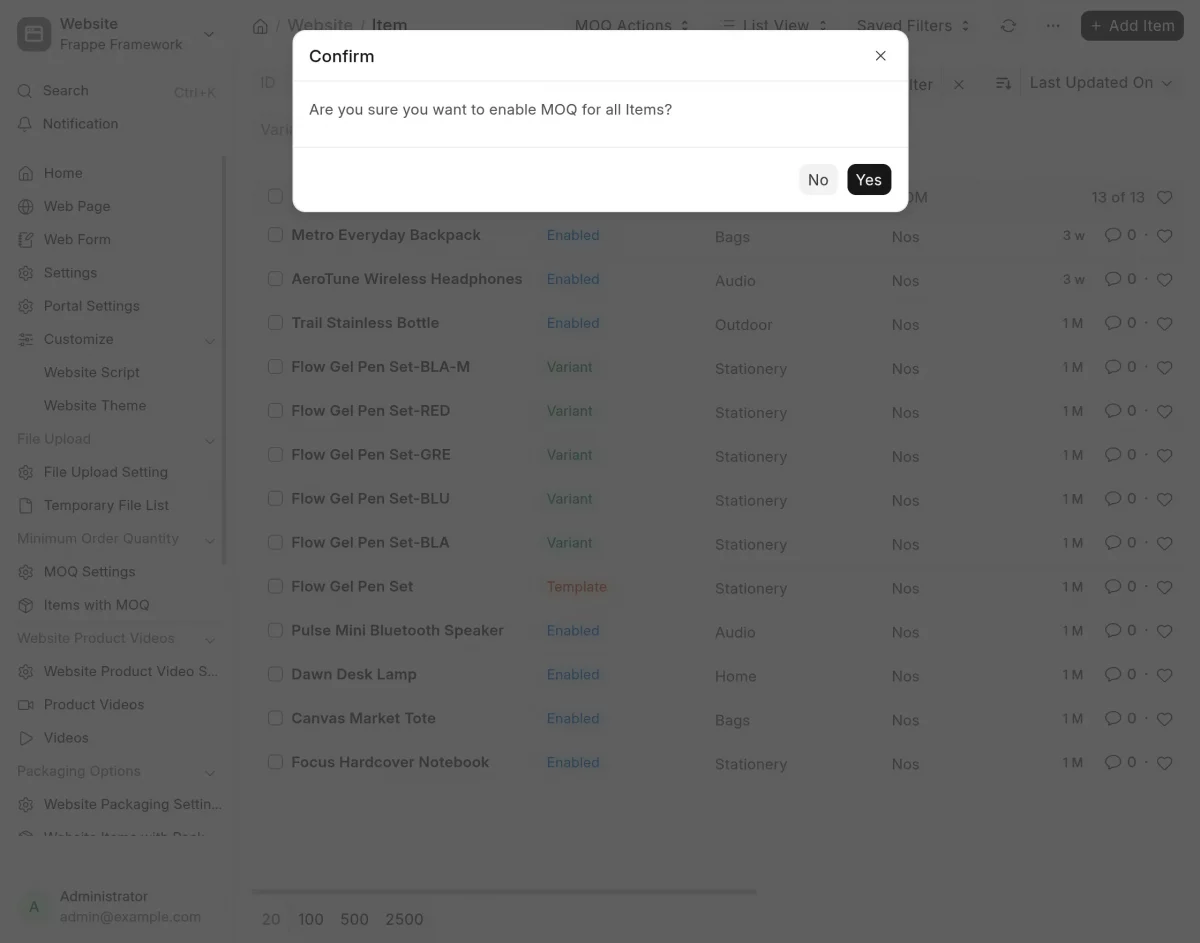
4. Select the required bulk action from the MOQ Actions menu.
ERPNext displays a confirmation popup before applying the action to all items.
Click Yes to confirm and enable MOQ for the listed items. The same menu can be used to disable MOQ in bulk when required.
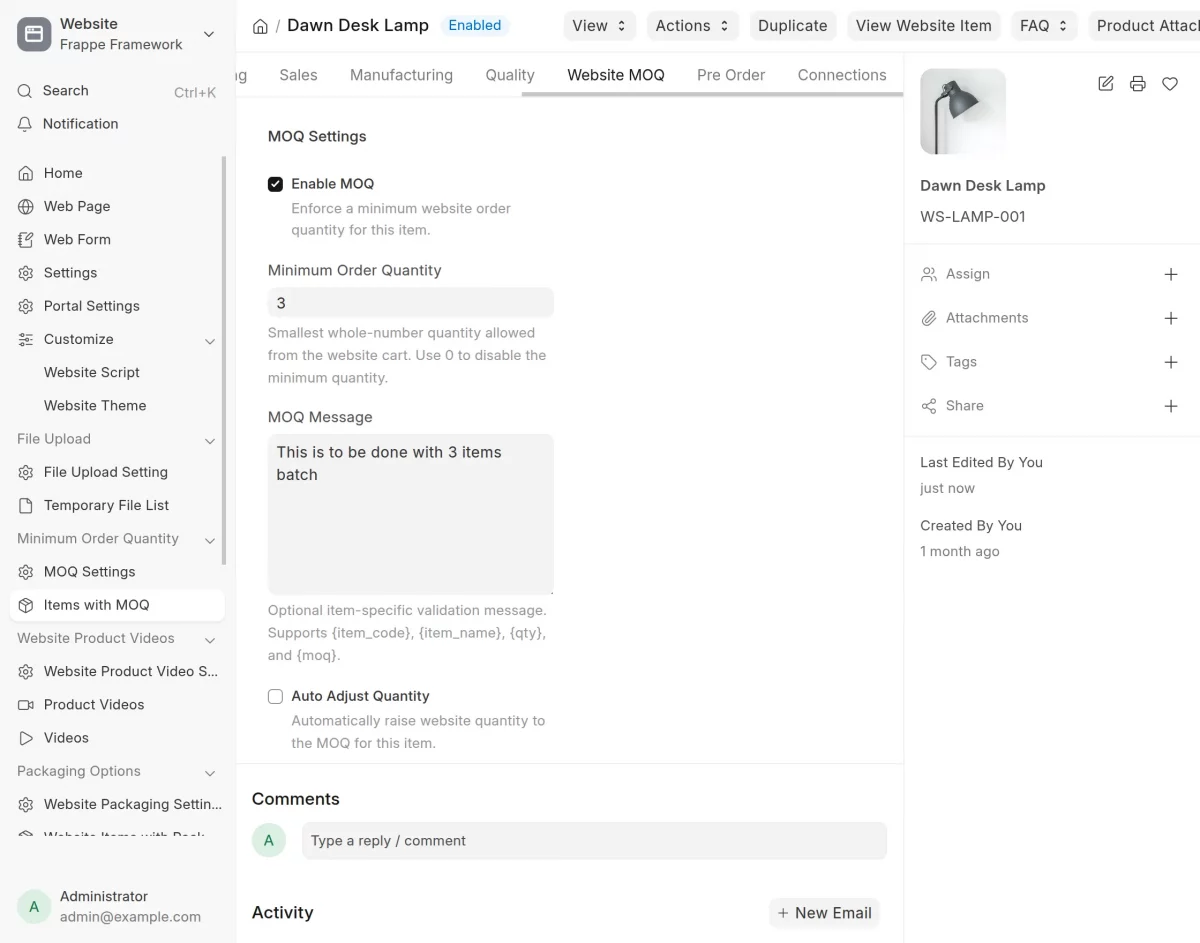
5. To configure a separate MOQ for one product, open the required Item and select the Website MOQ tab.
Enable MOQ and enter the required Minimum Order Quantity for the selected product.
You can also enter a custom MOQ Message for that item and enable Auto Adjust Quantity when the website quantity should automatically move to the required minimum.
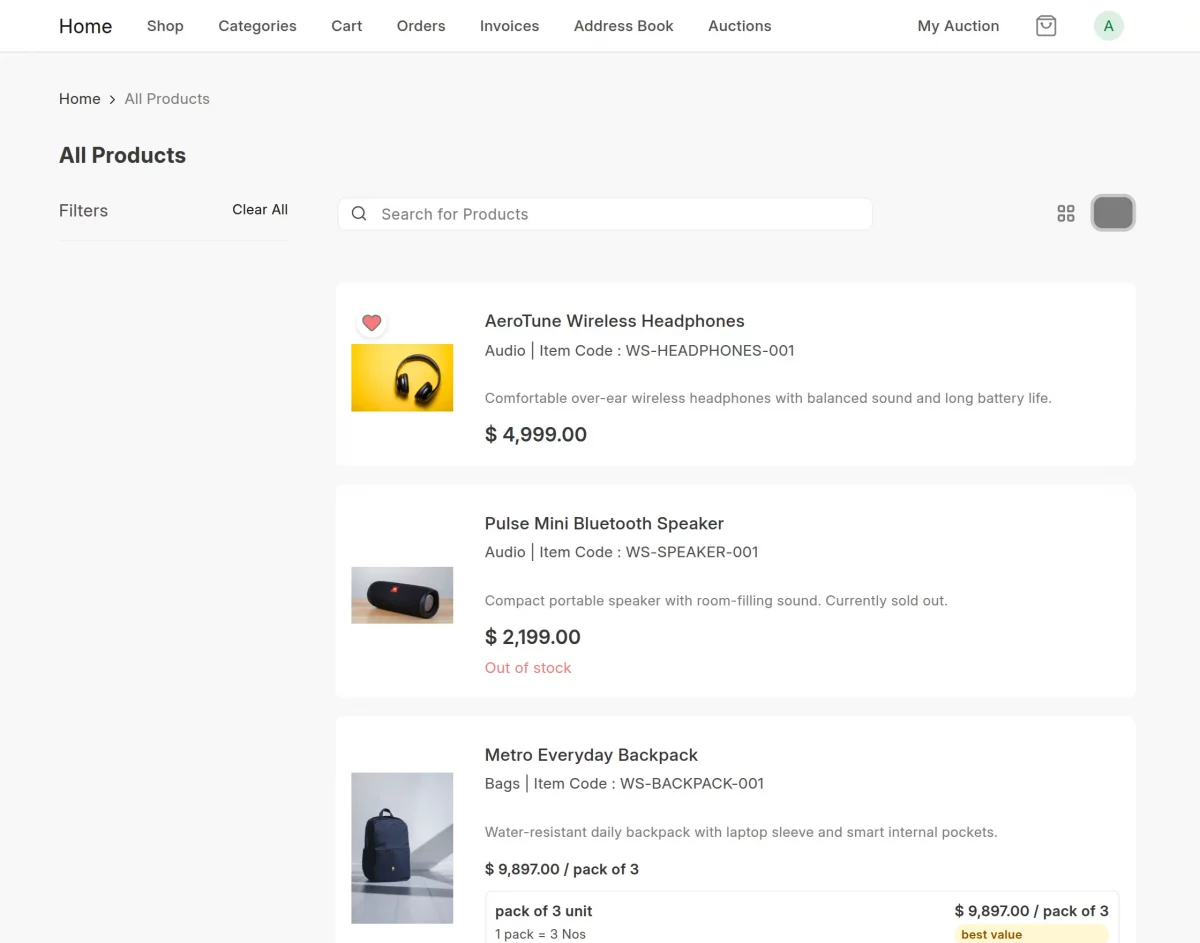
6. After completing the backend configuration, open the ERPNext website and go to the Shop.
Products with Website MOQ follow the minimum quantity rules configured from the ERPNext backend.
Customers can browse the products normally before selecting an item for purchase.
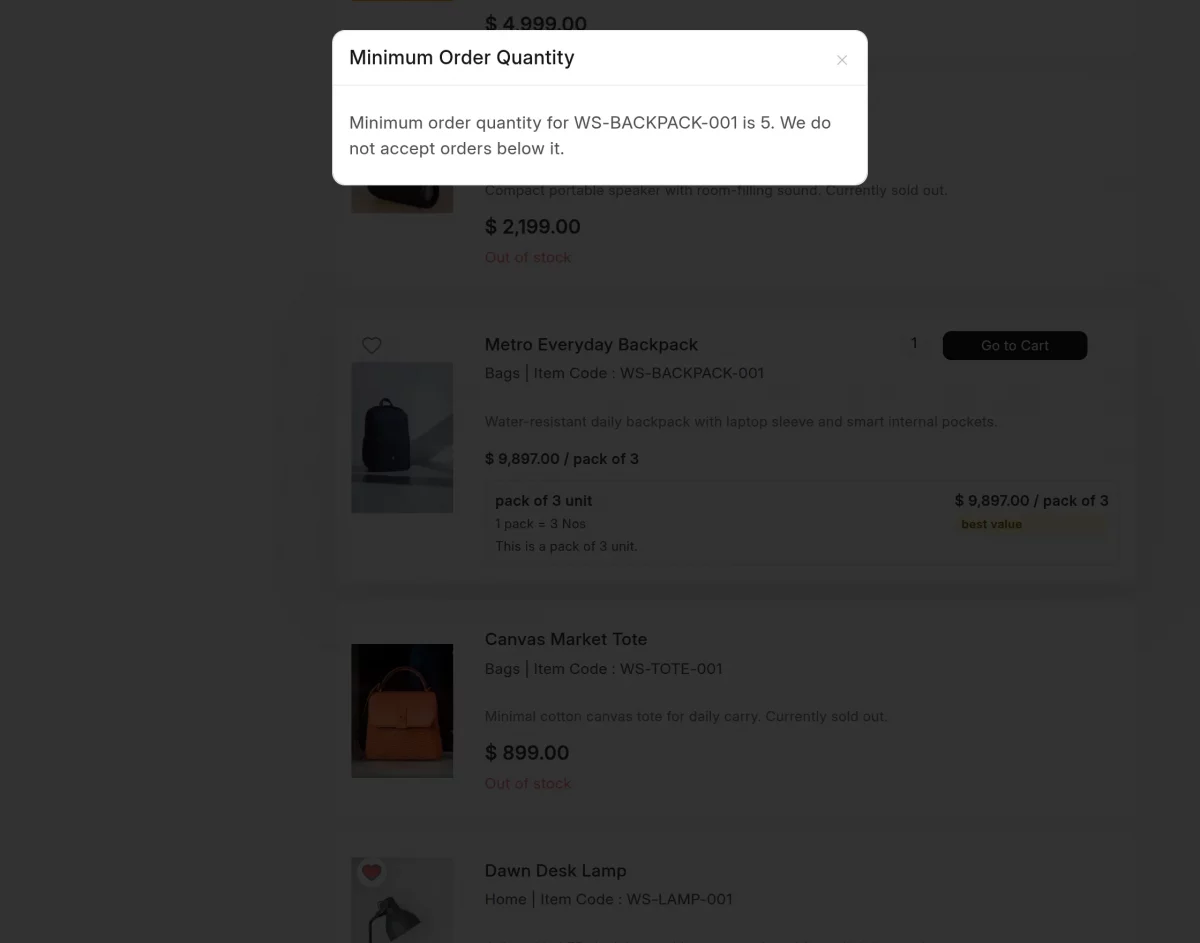
7. When a customer tries to order a quantity below the configured MOQ, ERPNext Website Minimum Order Quantity (MOQ) prevents the invalid quantity from proceeding.
The website displays a Minimum Order Quantity message with the affected item and the quantity required to continue.
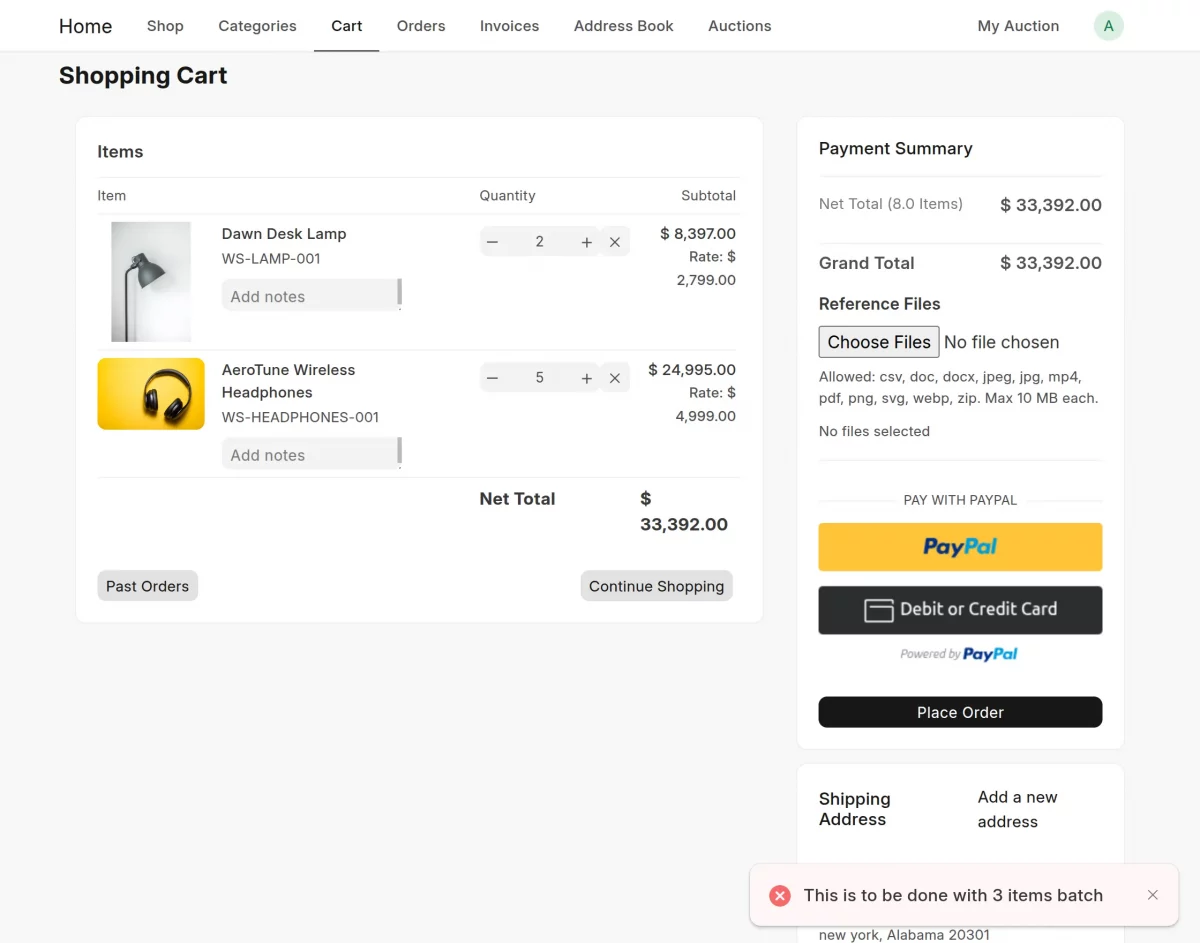
8. If Toast is selected as the Error Display Mode, an item-specific MOQ message can appear as a toast notification in the Shopping Cart.
This also supports custom messages configured from the product’s Website MOQ settings.
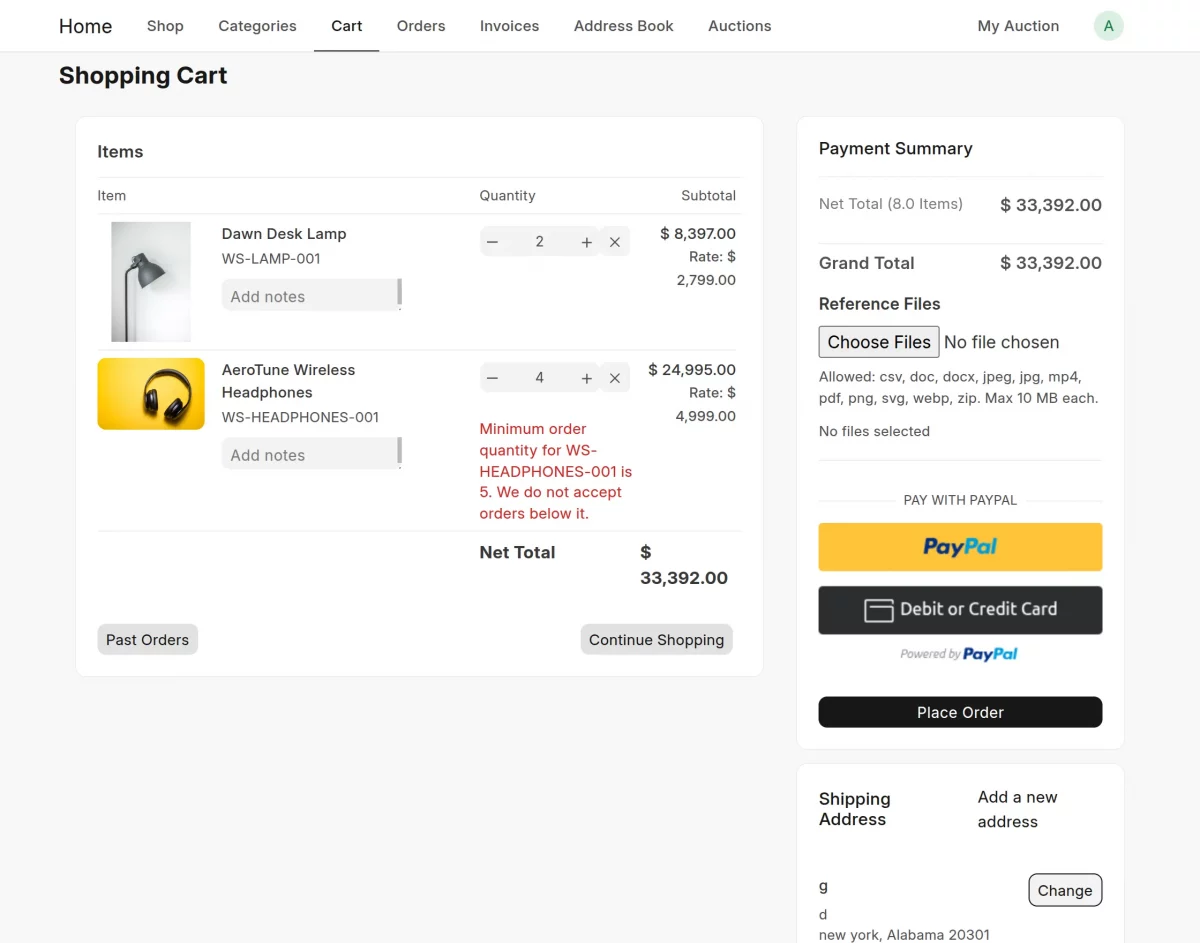
9. If Inline validation is used, ERPNext displays the MOQ message directly beside the affected product in the Shopping Cart.
The customer can see the required minimum and update the quantity before continuing with the order.
Need Help?
Hope you find guide helpful! Please feel free to share your feedback in the comments below.
If you still have any issues/queries, please create a ticket at the UV Desk.
I hope this helps. In case of any further queries, contact us at our support mail.
Thanks for paying attention!!
Current Product Version - 0.0.1
Supported Framework Version - V16

Be the first to comment.