Introduction
ERPNext Website Product Multi Videos allows admins to add multiple YouTube and Vimeo videos to ERPNext website products.
The module lets admins control the video location, display order, visibility, captions, thumbnails, and playback settings for each Website Item.
You can purchase ERPNext Website Product Multi Videos from the Webkul Store.
Product videos can appear in the Gallery, the Description section, or both, depending on the selected display type.
Admins can also reuse existing Video records or create new videos using supported YouTube and Vimeo URLs.
The module provides common settings to manage video limits, layouts, autoplay, lazy loading, captions, thumbnails, and supported providers.
Prerequisites for using ERPNext Website Product Multi Videos
ERPNext Website Product Multi Videos works in conjunction with the following modules:
You must install the above-mentioned modules to use ERPNext Website Product Multi Videos.
Feature
- Add multiple videos to one ERPNext Website Item.
- Display videos in the gallery, description section, or both.
- Use existing Video records or create new product videos.
- Add Product Video records directly from the Product Video list.
- Set the display order of multiple product videos.
- Enable or disable individual videos on the website.
- Add website-specific captions and thumbnails.
- Choose Inline or Popup playback for product videos.
- Manage autoplay, lazy loading, layouts, video limits, and providers.
Installation
1. After purchasing the app from Webkul Store, you will receive a link to download the module ZIP file.
2. Extract the ZIP file. You will see a folder named ‘erpnext_website_product_multi_videos’.
3. Set up the module in your git repository, then fetch it using:
bench get-app --branch main
https://github.com/your-org/erpnext_website_product_multi_videos
(Replace “main” with your branch name and replace the “HTTPS URL” with your HTTPS clone URL.)
4. Install the app on your site:
bench --site <your-site-name> install-app erpnext_website_product_multi_videos
5. Run bench migrate to complete the setup.
Workflow
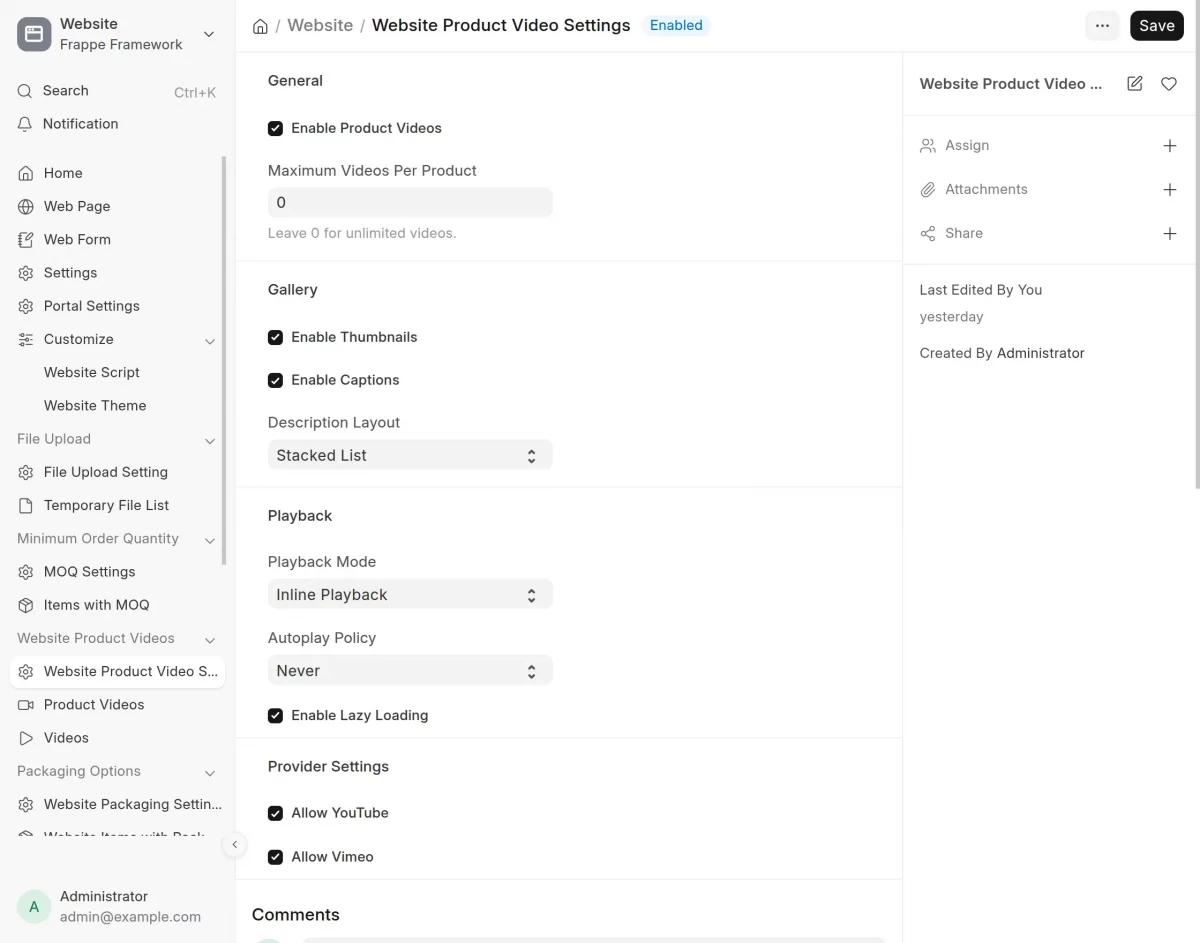
1. First, open the ERPNext backend and click Website. Then, select Website Product Video Settings.
Enable product videos and configure the video limit, thumbnails, captions, layout, playback, autoplay, lazy loading, and supported providers.
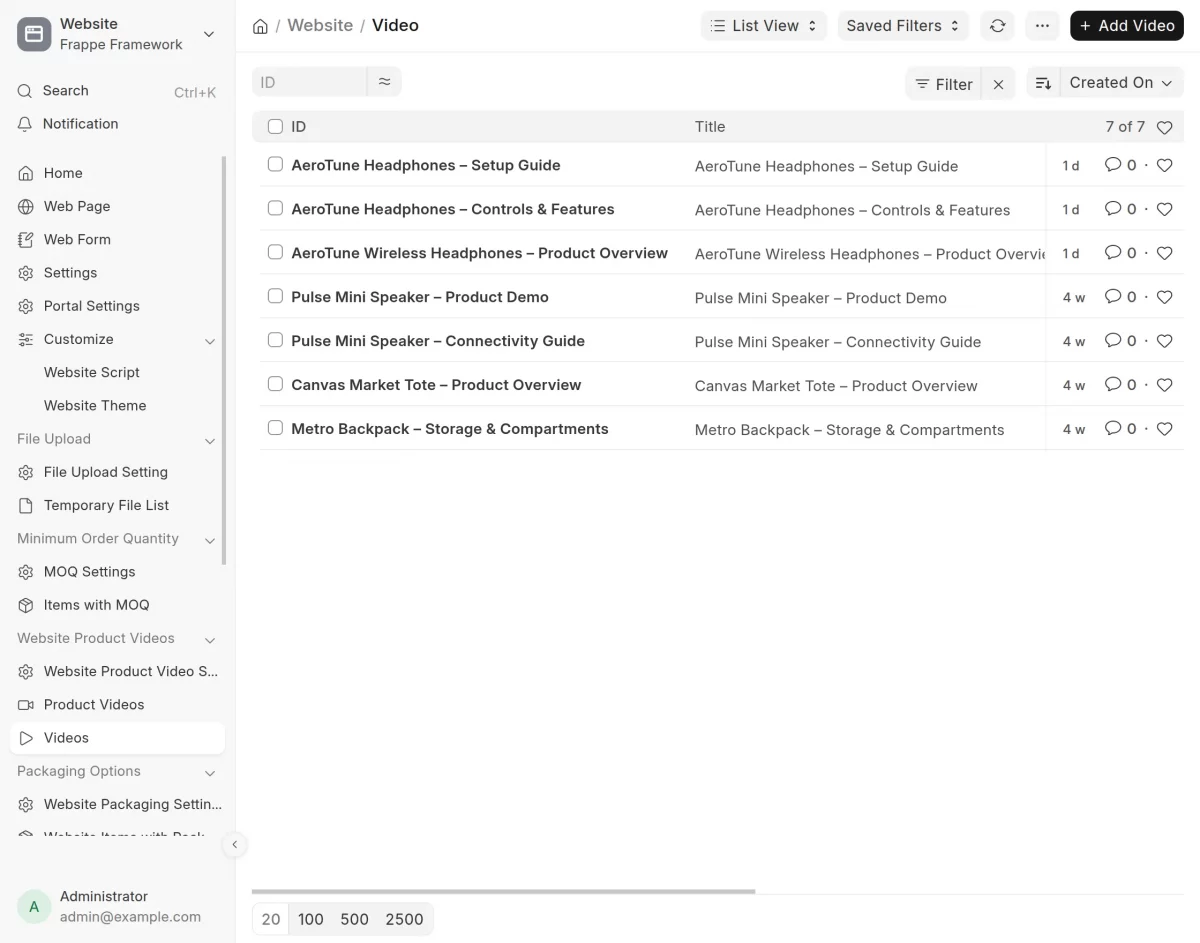
2. Next, open Videos under Website Product Videos.
Here, you can view saved videos or click Add Video to create a new Video record.
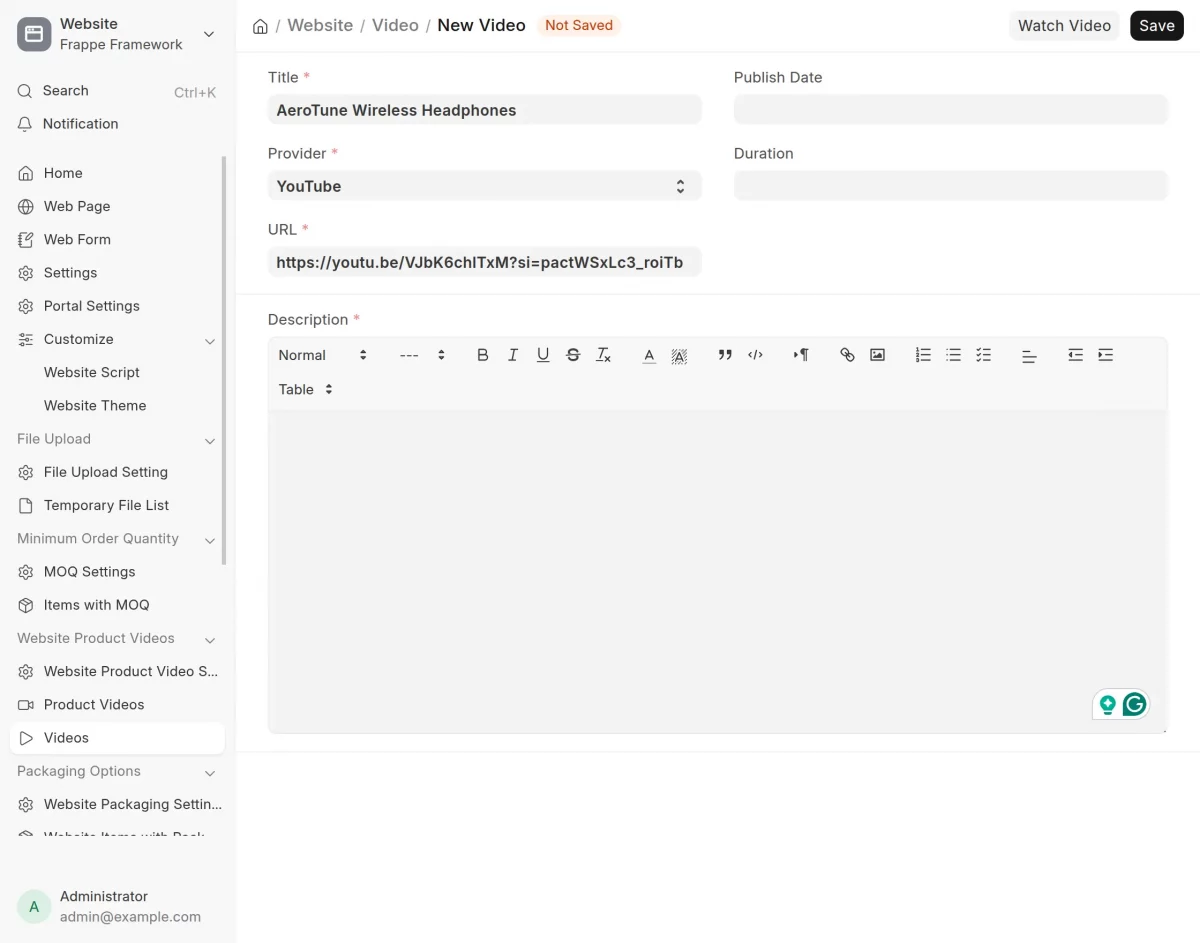
3. Then, click Add Video and enter the Title, Provider, video URL, and description.
After that, click Save.
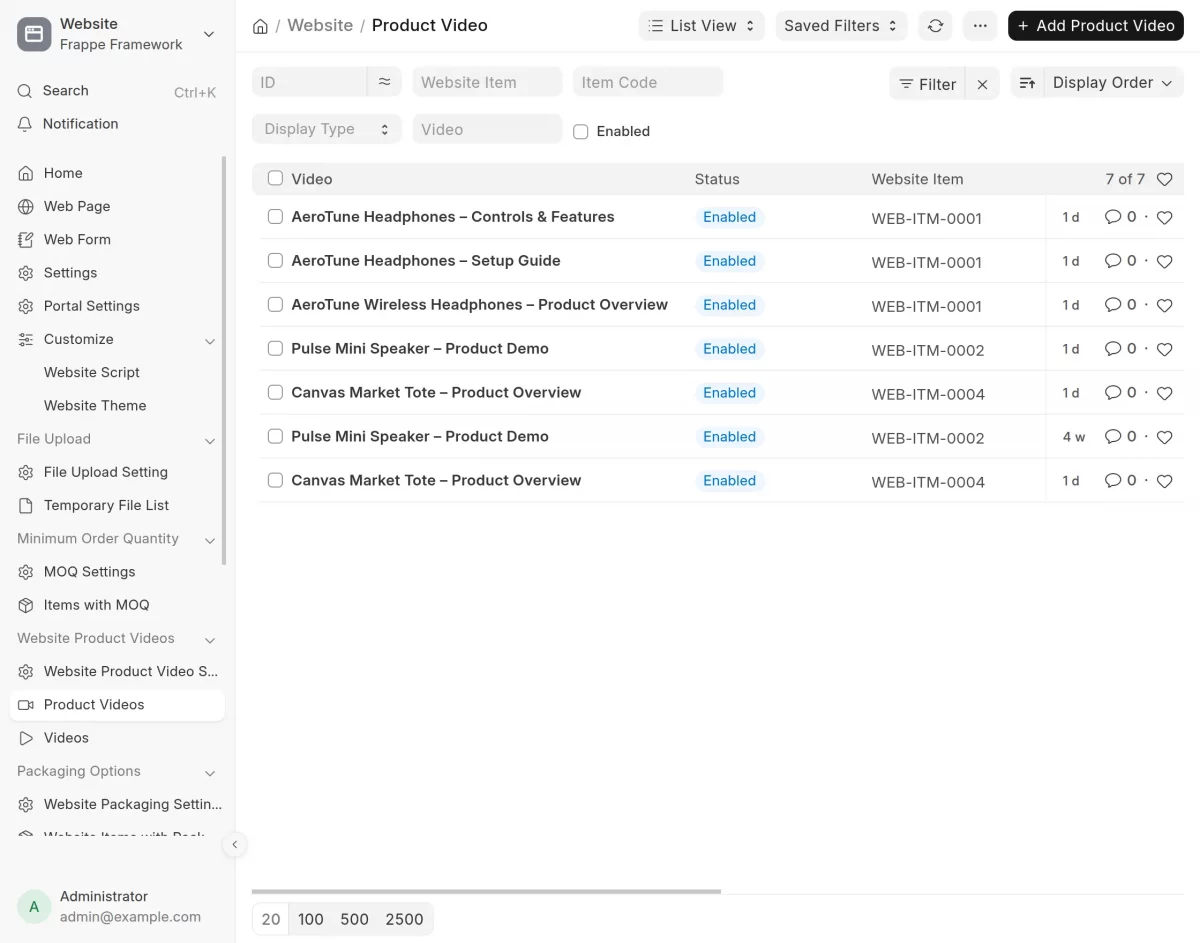
4. You can also open Product Videos from the Website Product Videos menu.
From here, click Add Product Video to create a product-video assignment directly.
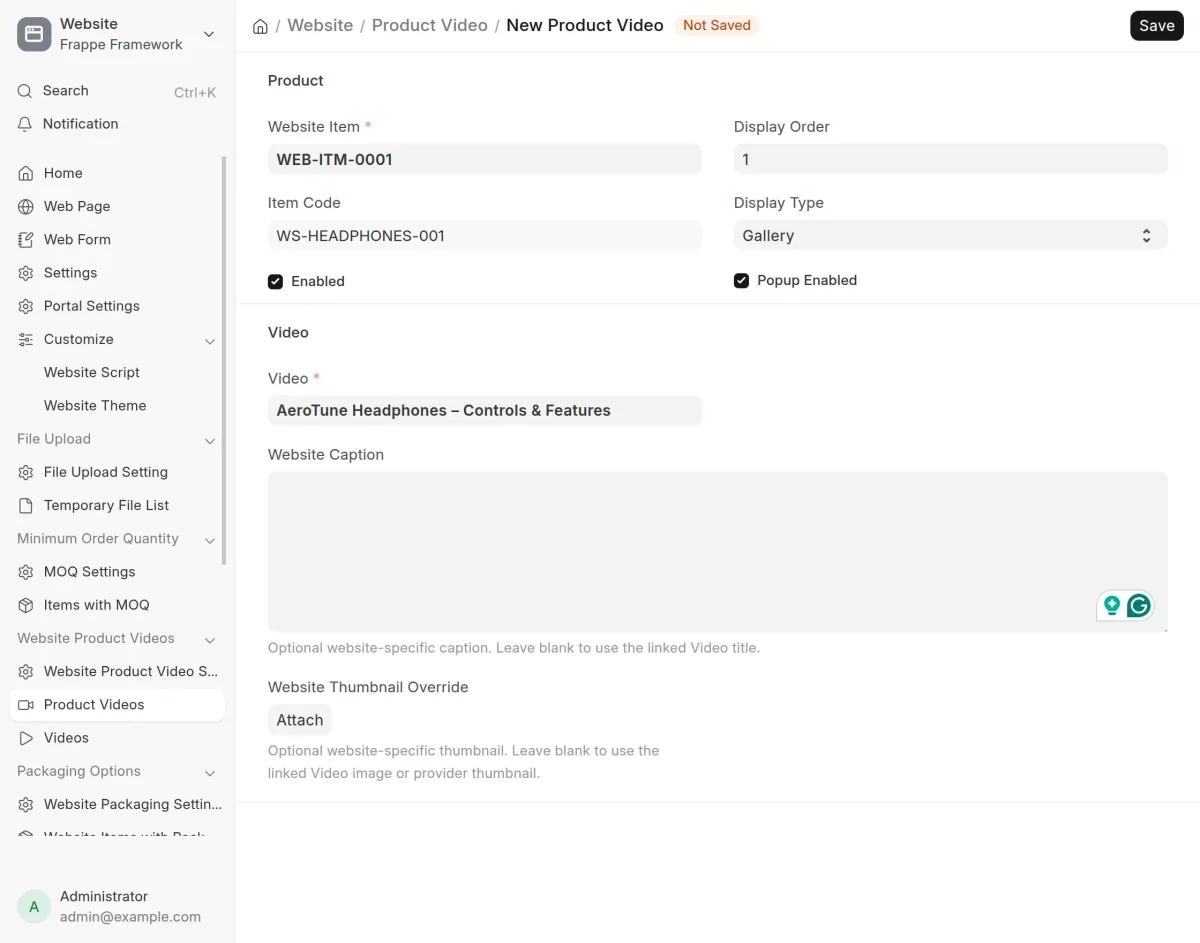
5. Next, select the required Website Item and Video.
Set the Display Order, choose Gallery, Description, or Both, and configure the required caption, thumbnail, visibility, and popup options.
6. Alternatively, you can add videos directly from a Website Item.
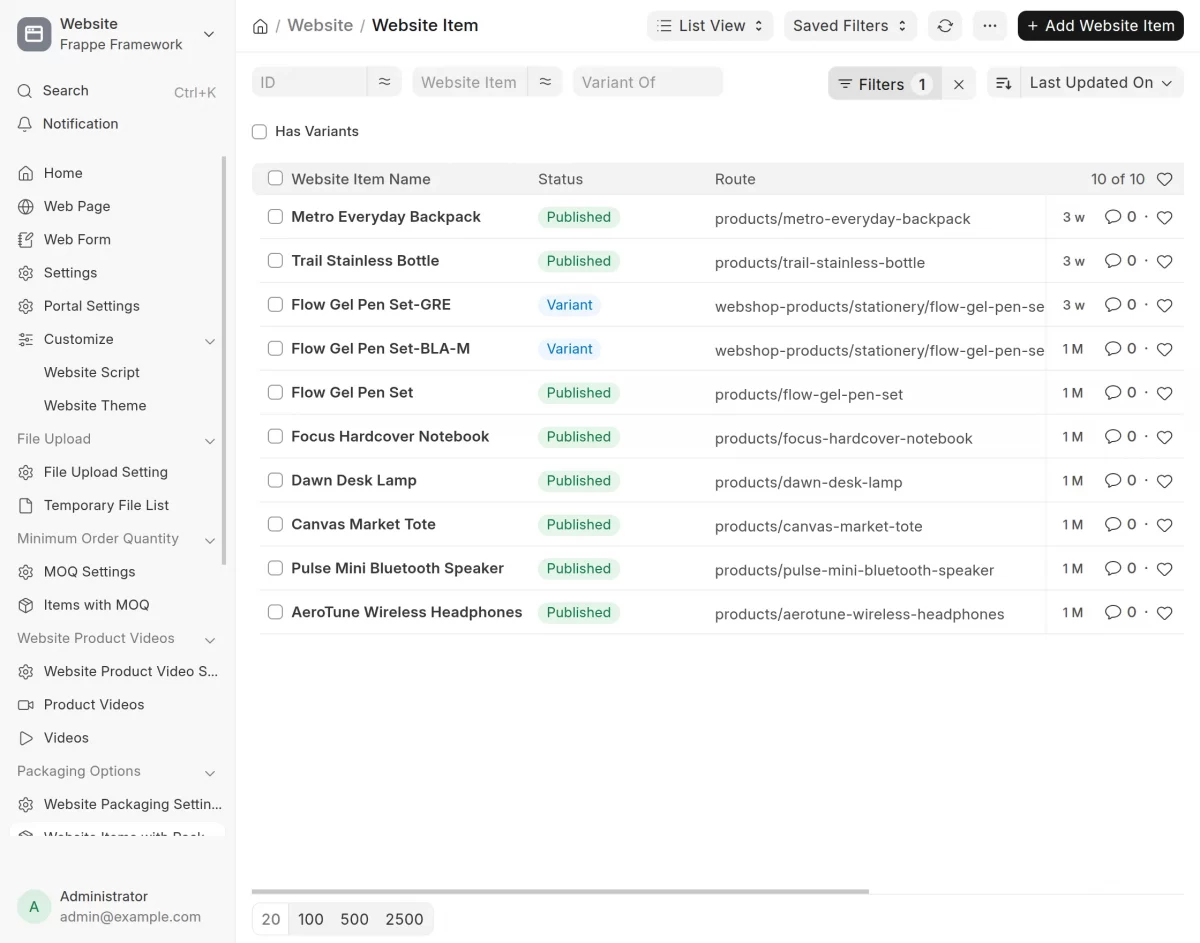
Open Website Item from the ERPNext backend and select the required product.
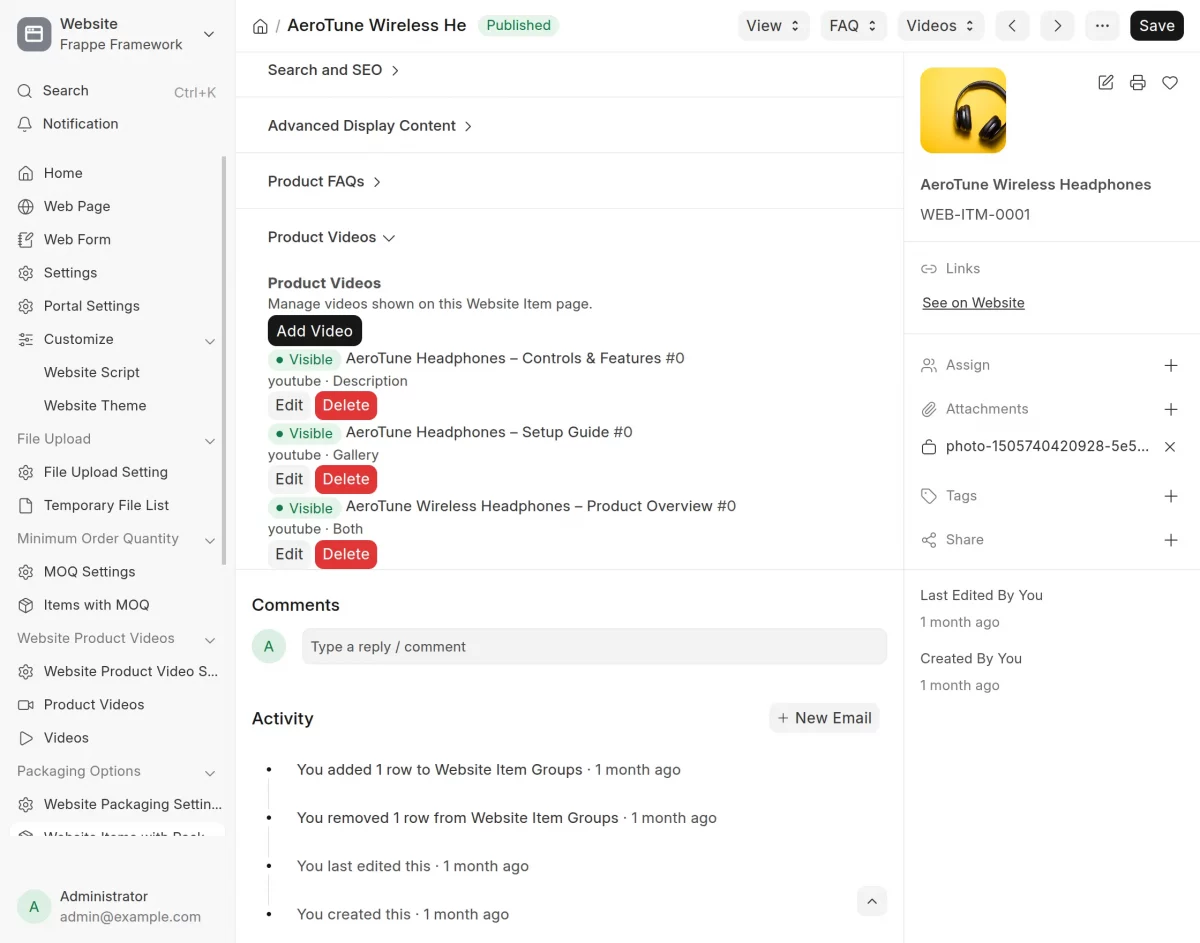
7. Scroll to the Product Videos section of the selected Website Item.
Here, you can view the videos already assigned to the product and manage their visibility, provider, and display type.
You can also edit or delete existing video assignments.
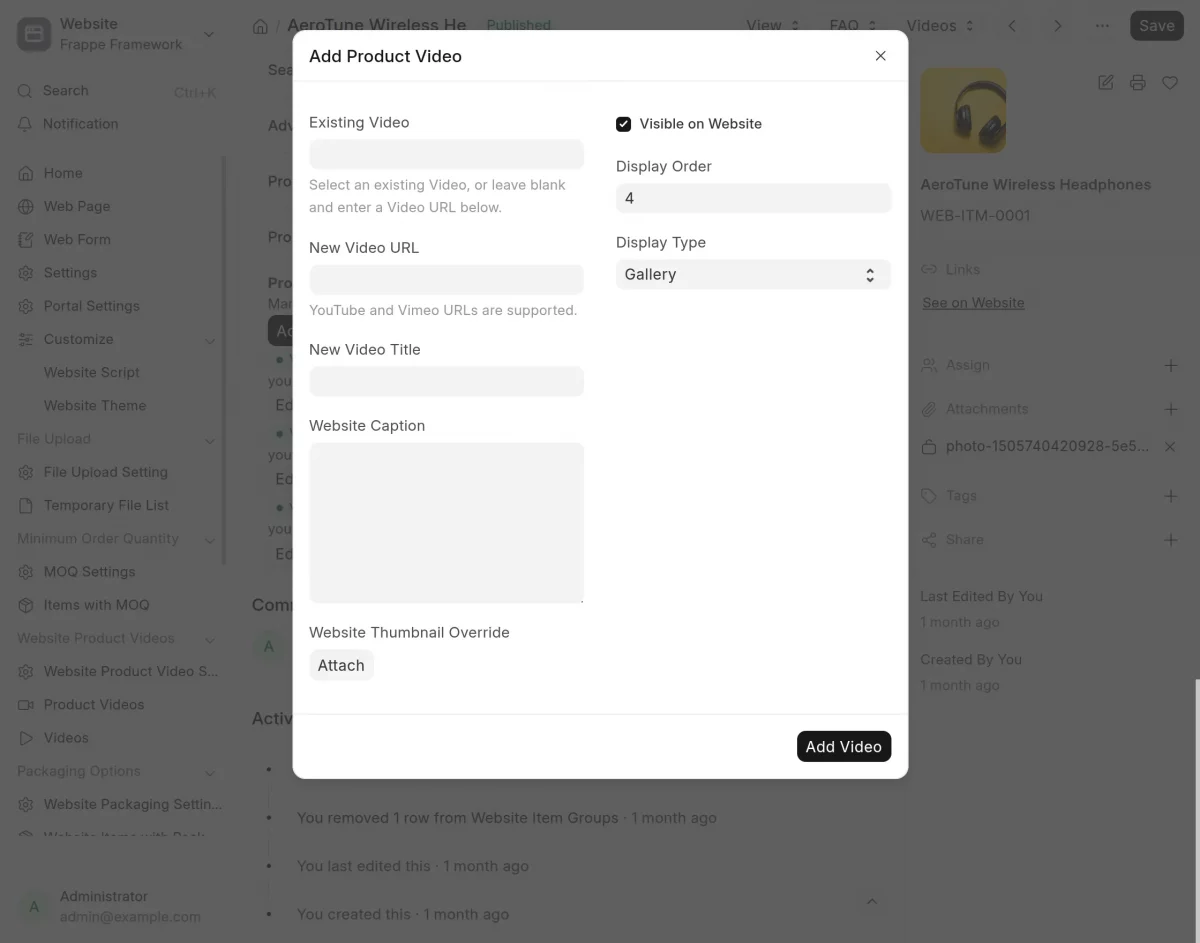
8. Click Add Video in the Product Videos section to open the Add Product Video popup.
Select an Existing Video or enter a New Video URL. Then, configure Visible on Website, Display Order, Display Type, Website Caption, and Website Thumbnail Override.
Click Add Video to save the assignment.
9. Finally, open the product page on the ERPNext website.
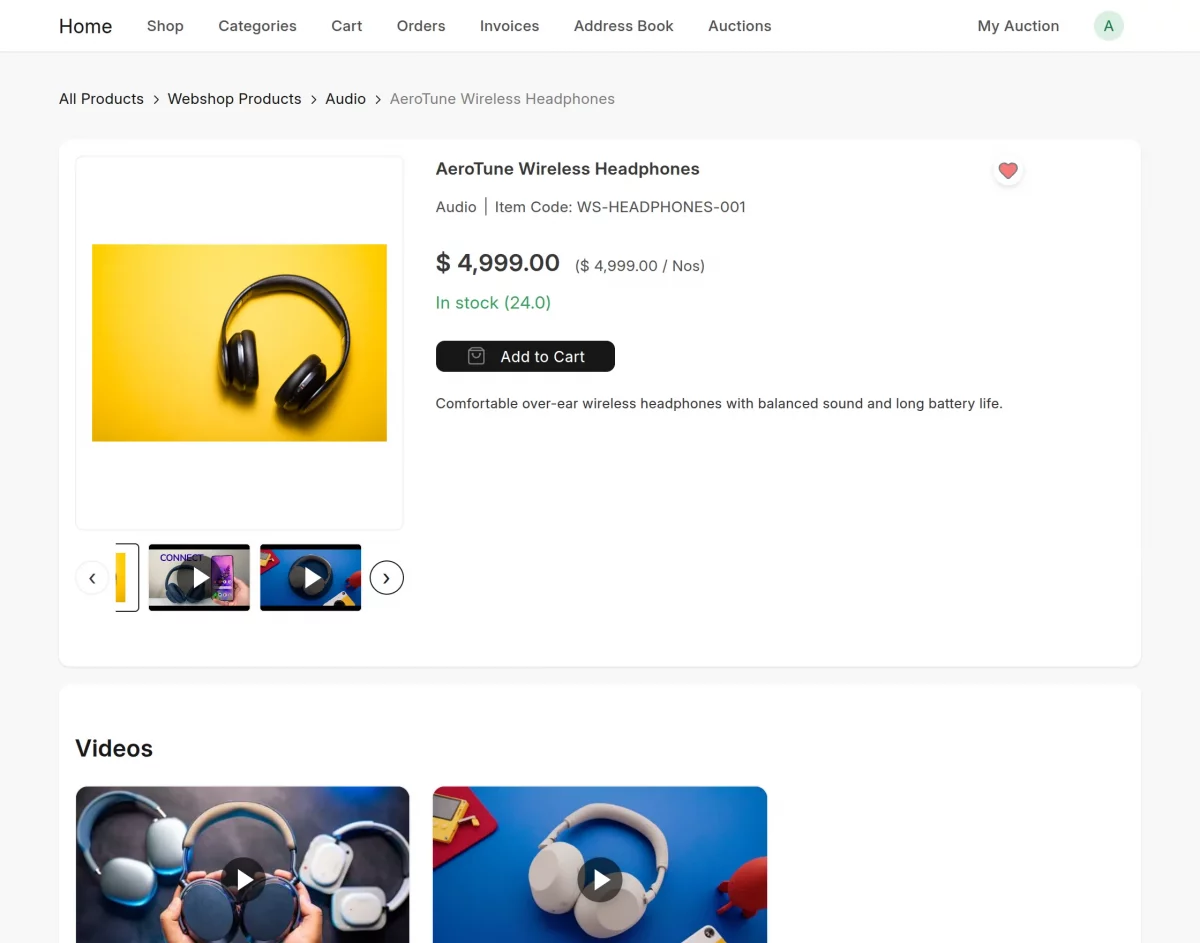
Videos configured for the Gallery appear with the product media, while videos configured for Description appear in the Videos section below the product information.
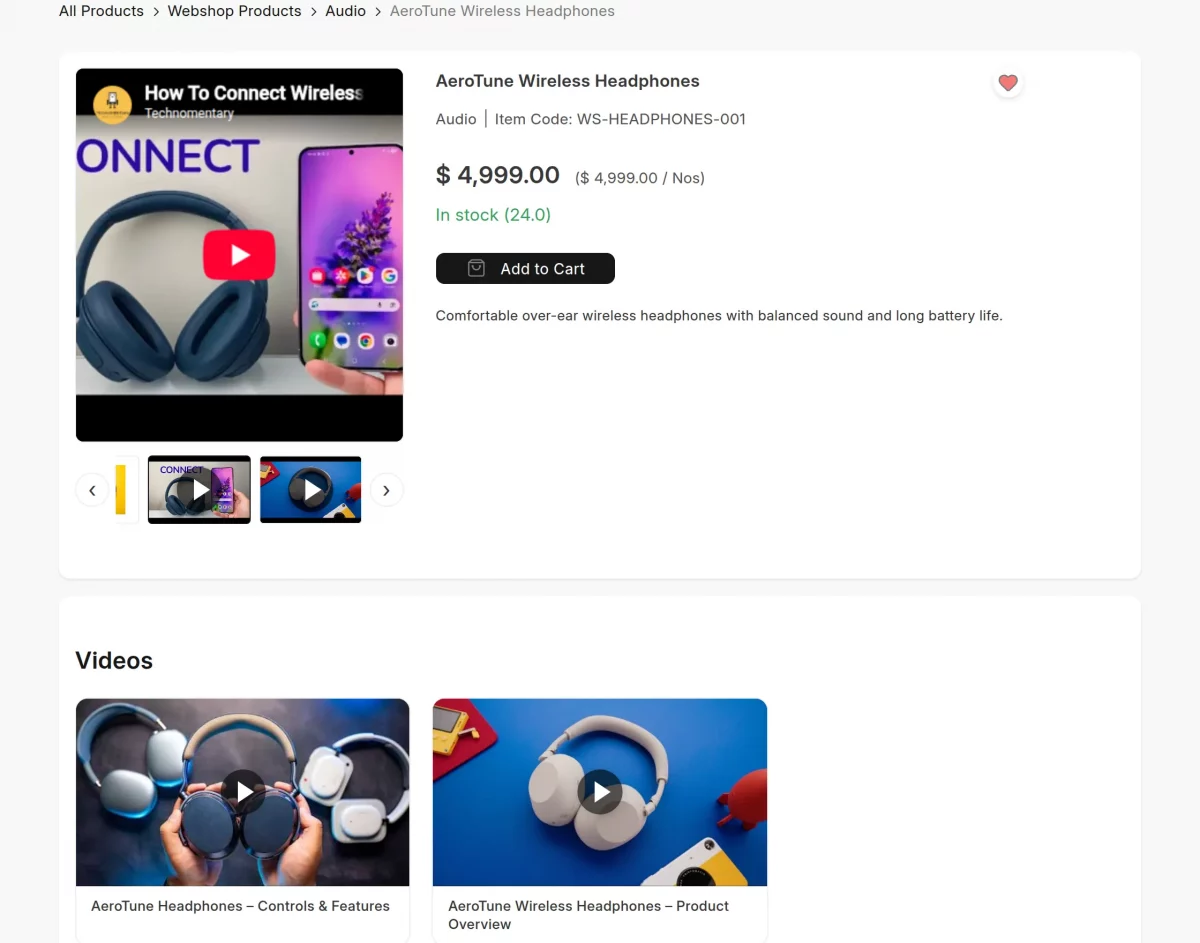
10. Select a video thumbnail from the product gallery to view the configured video playback.
The video will open according to the selected playback settings.
Need Help?
Hope you find guide helpful! Please feel free to share your feedback in the comments below.
If you still have any issues/queries, please create a ticket at the UV Desk.
I hope this helps. In case of any further queries, contact us at our support mail.
Thanks for paying attention!!
Current Product Version - 0.0.16
Supported Framework Version - V16

Be the first to comment.