Introduction
ERPNext Appointment Management System helps businesses manage appointments, service providers, schedules, billing, and payments from one place. Customers can also book appointments online through the website.
ERPNext Appointment Management System lets you create appointment groups, add service providers, and reuse time slots for different schedules. It tracks every appointment through stages like New, Pending, Approved, Rejected, Done, and Cancelled, making it easy to manage the complete appointment process.
When an appointment is approved, a draft Sales Invoice is created automatically. Customers can book appointments, make payments, and view their appointment history online, while businesses can monitor bookings through the dashboard, calendar, reports, and automatic email notifications.
Prerequisites for using ERPNext Appointment Management System
ERPNext module name works in conjunction with the following module:
You must install the above-mentioned module to use the ERPNext Appointment Management System.
Features
- Create and manage appointment groups and service providers.
- Create reusable time slots for weekly schedules.
- Book appointments from ERPNext or the website.
- Track appointments through a complete status workflow.
- Generate draft Sales Invoices automatically after appointment approval.
- Accept both offline and online payments.
- ERPNext Appointment Management System lets customers book and manage appointments through the website.
- View appointments using a dashboard and calendar.
- Send automatic email notifications and reminders.
- Manage booking and payment settings from one place.
- Analyze booking trends through reports and dashboards.
Installation
1. After purchasing the app from the Webkul store, you will receive a link to download the module ZIP file.
2. Extract the downloaded ZIP file, and you will see a folder named ‘erpnext_appointment_management_system’.
3. Set up the module in your Git repository.
4. If the app is hosted on GitHub, fetch it using the command:
bench get-app --branch main

https://github.com/your_account/erpnext_appointment_management_system.git
(Replace “main” with your branch name and replace the “HTTPs URL” with your HTTPS clone URL.)
5. Install the app on your site using the command:
bench --site <your-site_name> install-app erpnext_appointment_management_system
6. Finally, run the “bench migrate” command to complete the installation.
Workflow
Backend Configuration
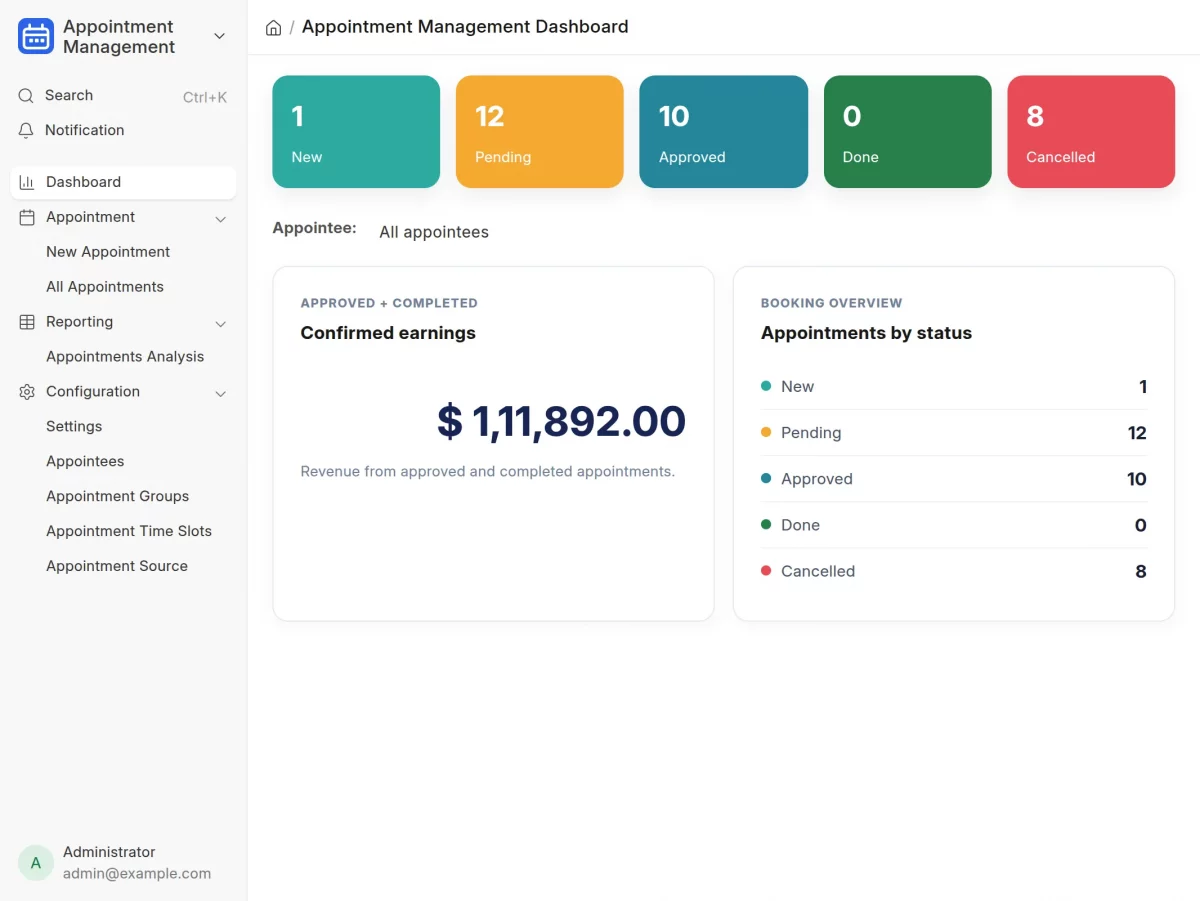
1. First, click Appointment Management from the ERPNext backend to open the ERPNext Appointment Management System.
The Main Dashboard provides an overview of all appointments.
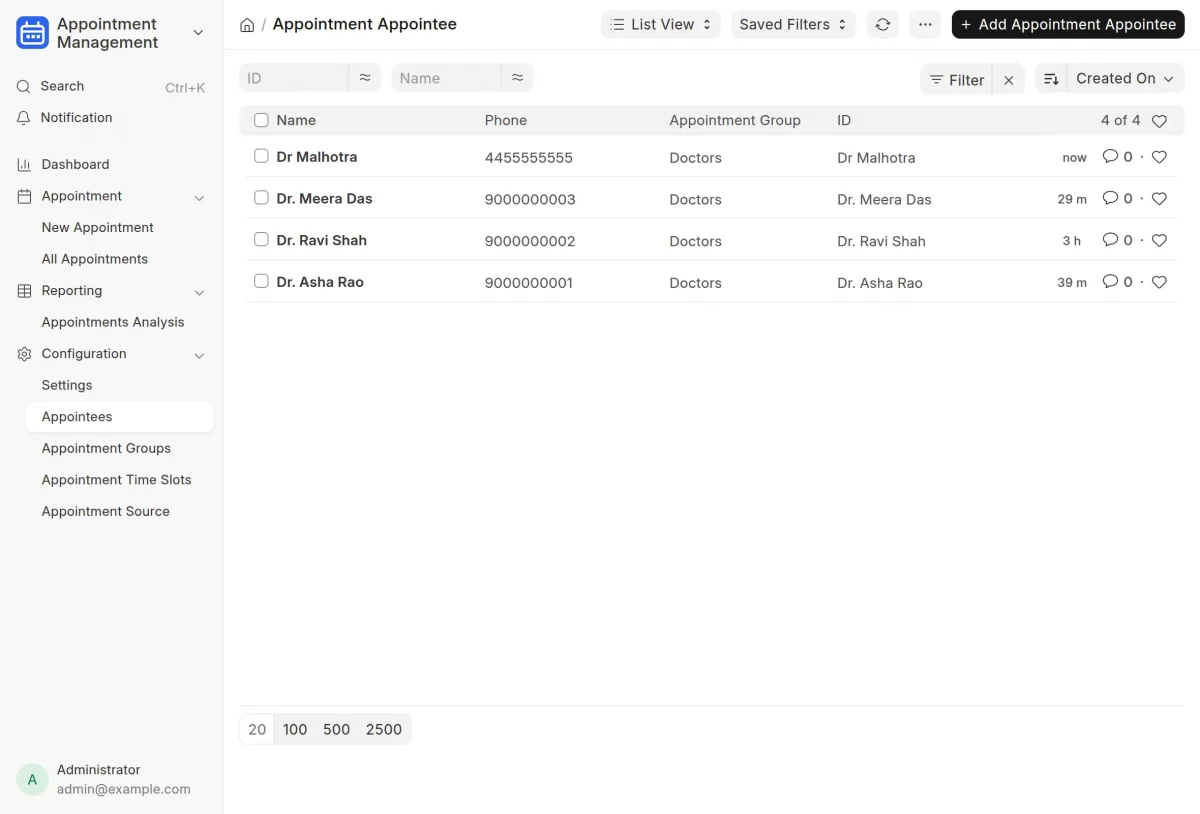
2. Next, click Appointees from the main dashboard menu.
This will open the Appointee List, where you can select any appointee to view or update their details, or click Add Appointee to create a new appointee.
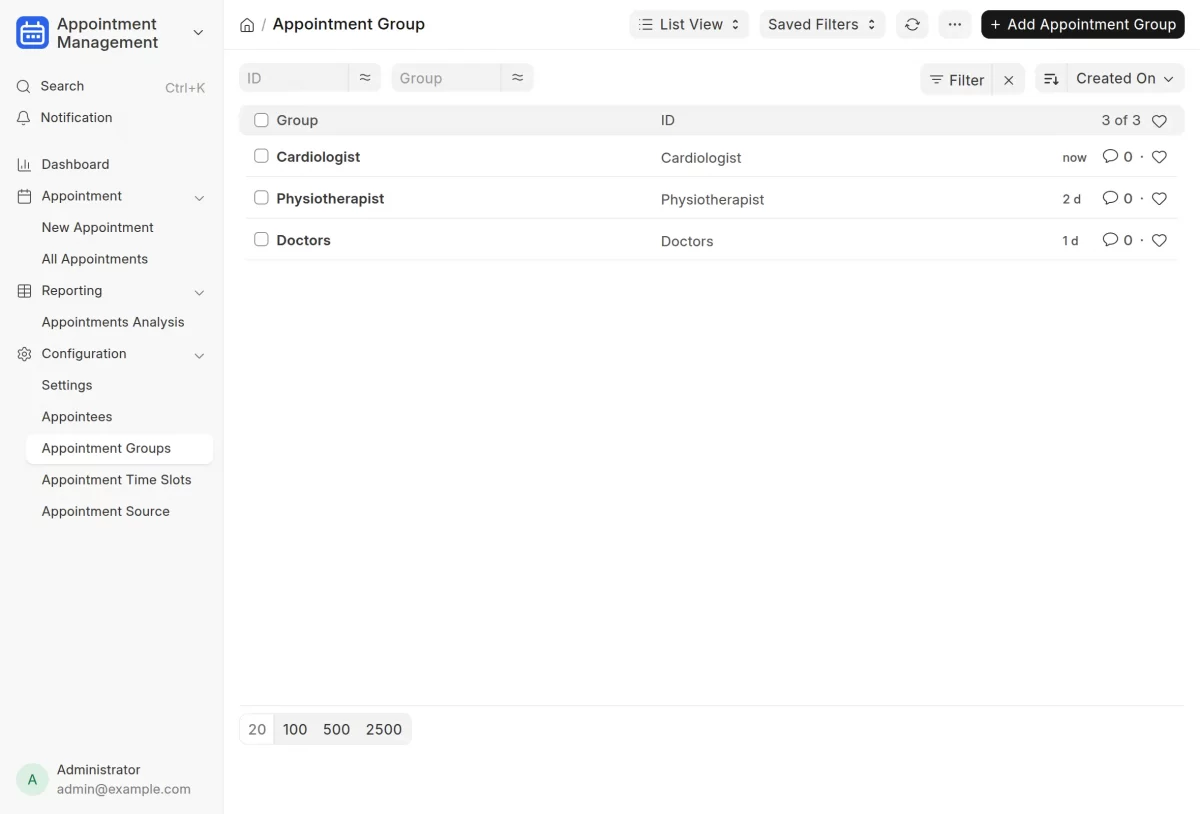
3. First, click Appointment Groups from the main dashboard to organize similar services.
Next, the Appointment Group List will open, where you can view existing groups or click Add Appointment Group to create a new one.
Finally, use appointment groups to organize similar service providers together, such as placing all Cardiologists in the same group.
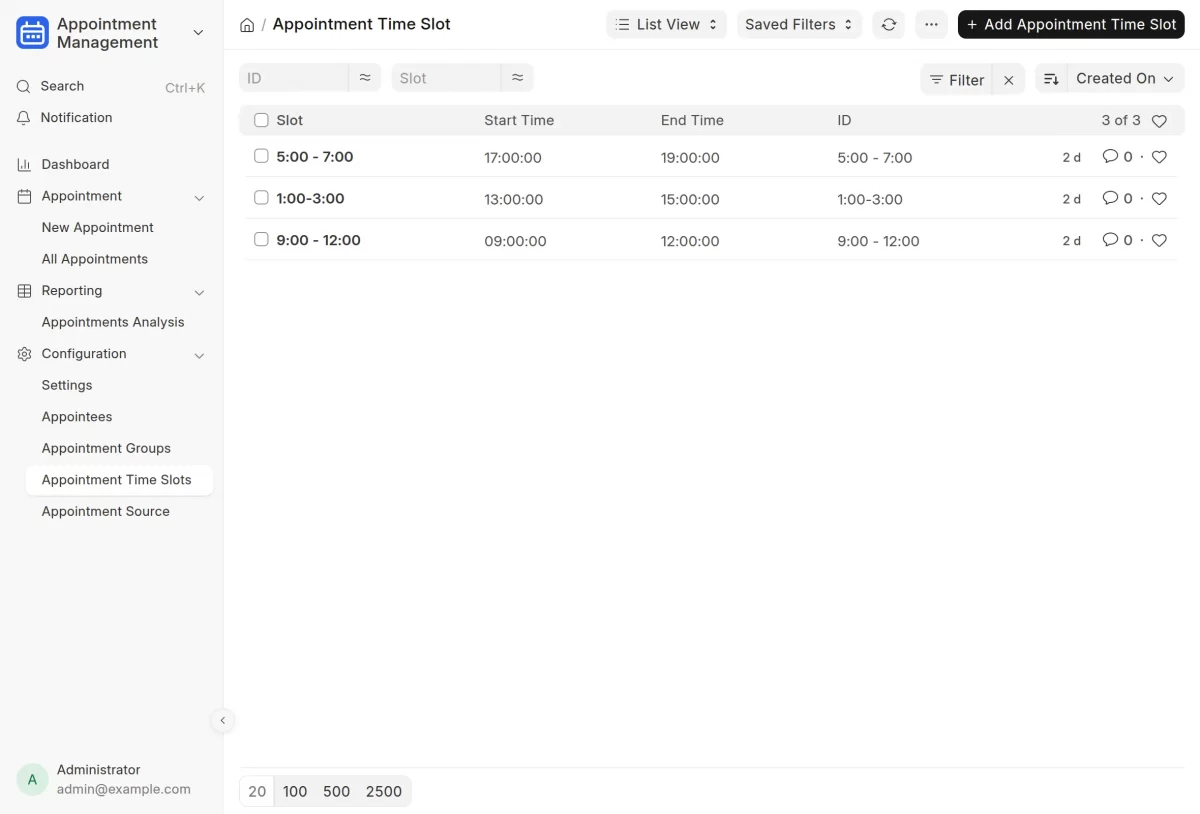
4. Click Appointment Time Slots from the main dashboard to open the Appointment Time Slot List.
In the ERPNext Appointment Management System, you can manage all existing time slots or click Add Appointment Time Slot to create new time slots.
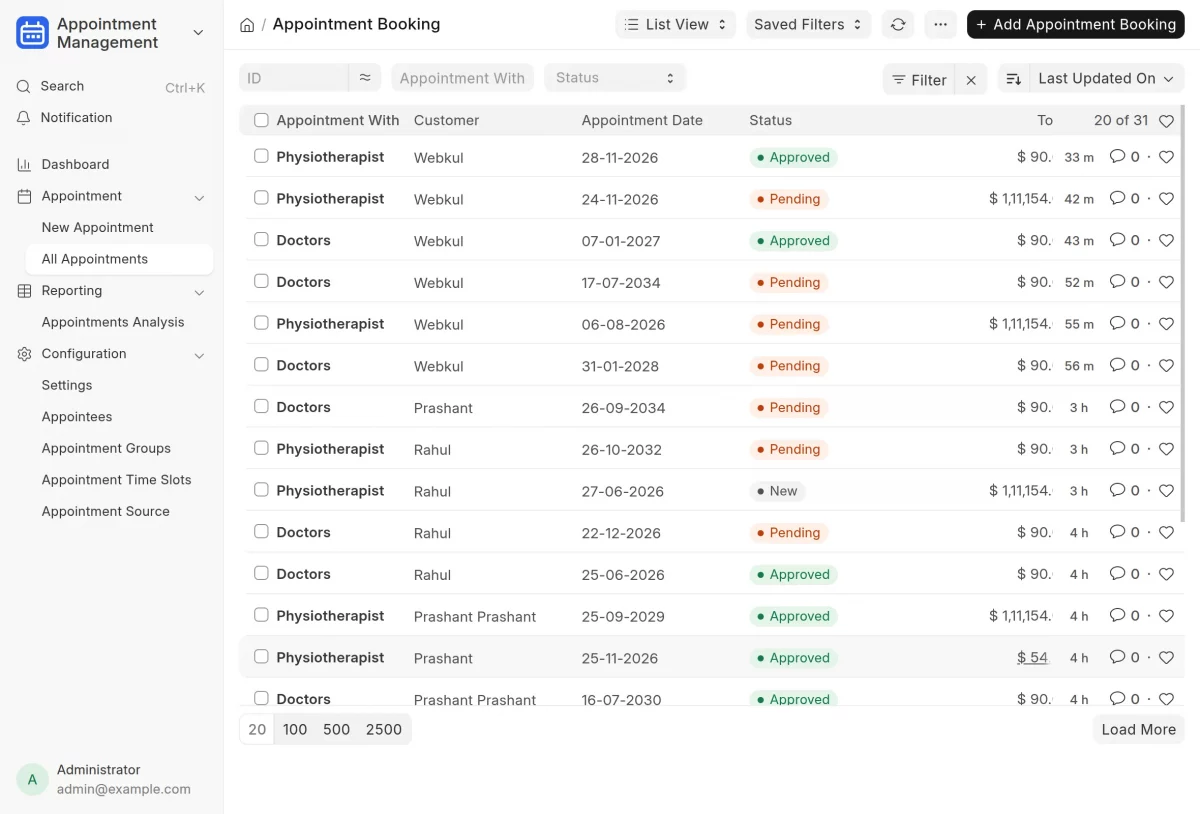
5. Click All Appointments from the main dashboard to open the Appointment List.
Here, you can view the details of all existing appointments or click Add Appointment Booking to create a new appointment.
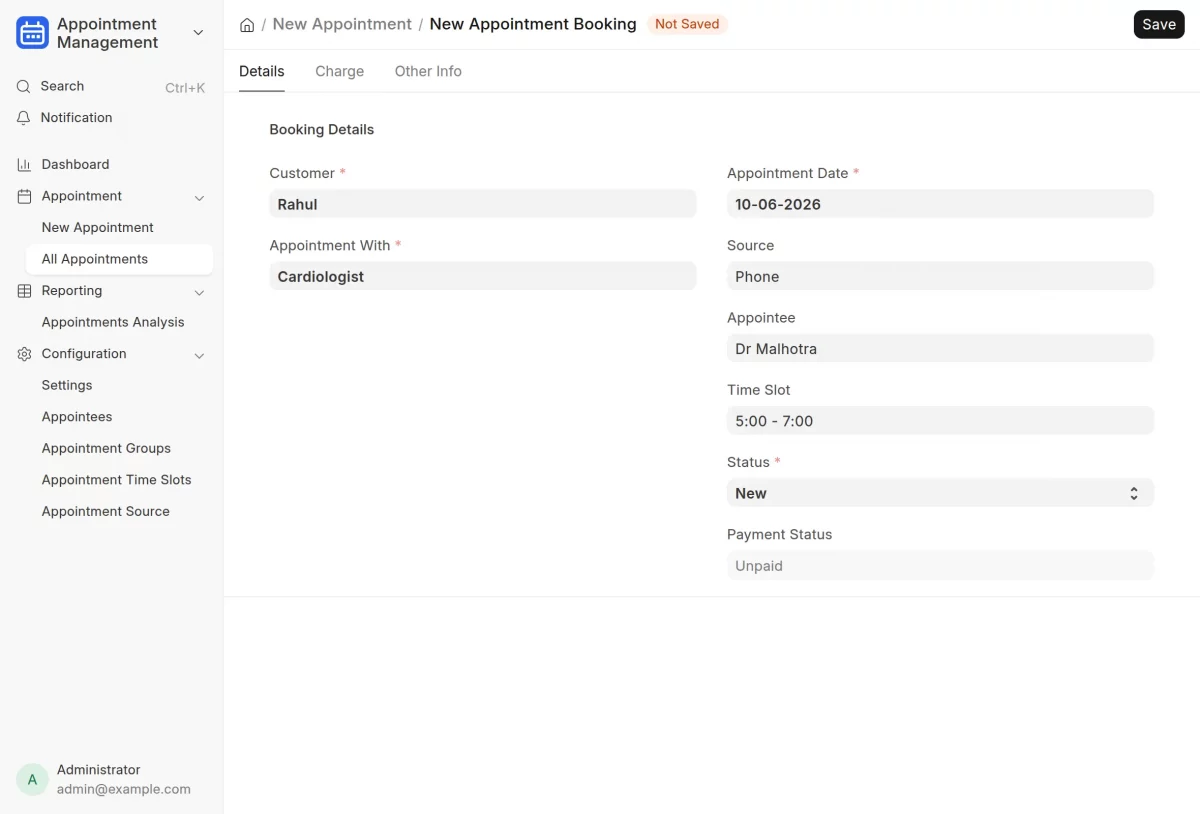
6. Then, after clicking Add Appointment Booking to create a new appointment. A new page will open where you need to enter the appointment details.
After filling in the required details, finally click Save to create the appointment booking.
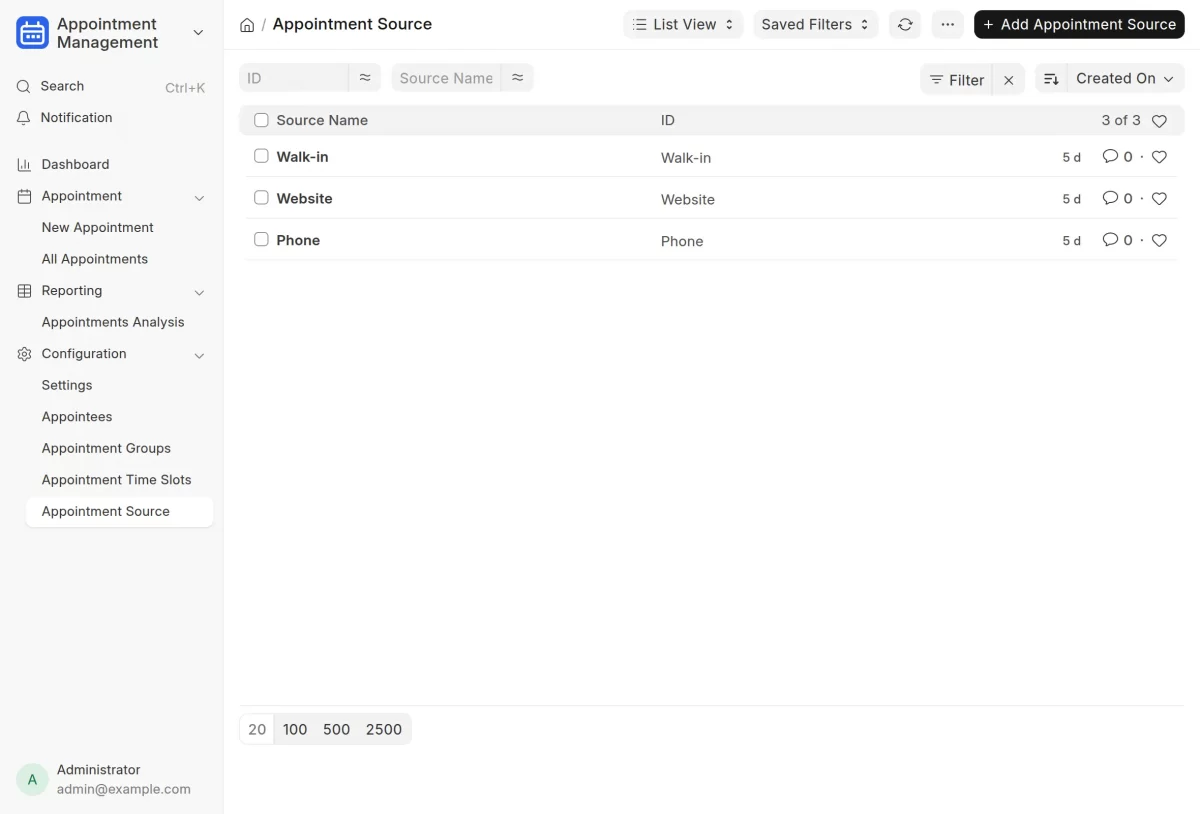
7. Click Appointment Source from the main dashboard to manage the sources of appointment bookings.
Then you can view existing sources or click Add Appointment Source to create a new one.
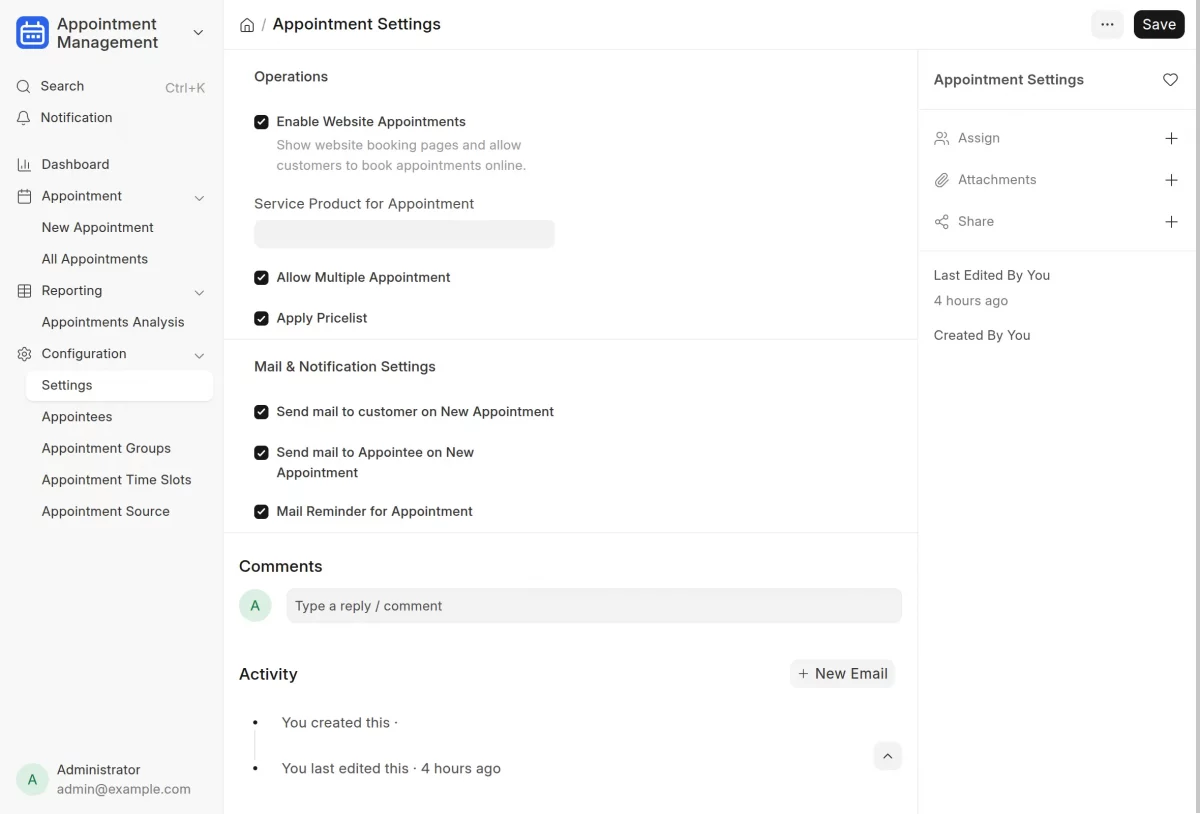
8. Click Settings from the main dashboard to configure the Appointment Management System.
Here, you can enable or disable options under Operation Settings and Mail & Notification Settings.
Also, you can click Enable Website Appointments to show website booking pages and allow customers to book appointments online.
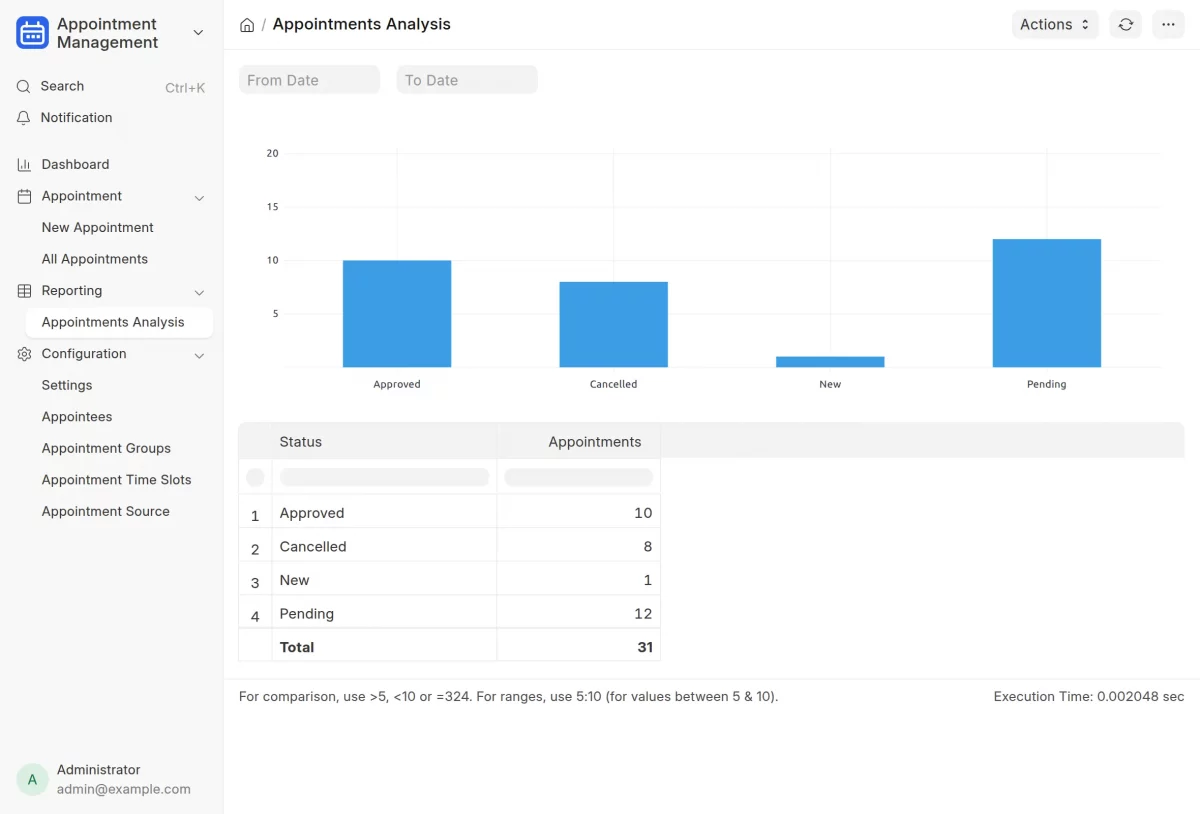
9. Click Appointment Analysis from the main dashboard to view the statistical analysis of all appointments. Then you can analyse appointment data for a selected time period using graphs and tables, along with each appointment’s status.
Customer-Level-View
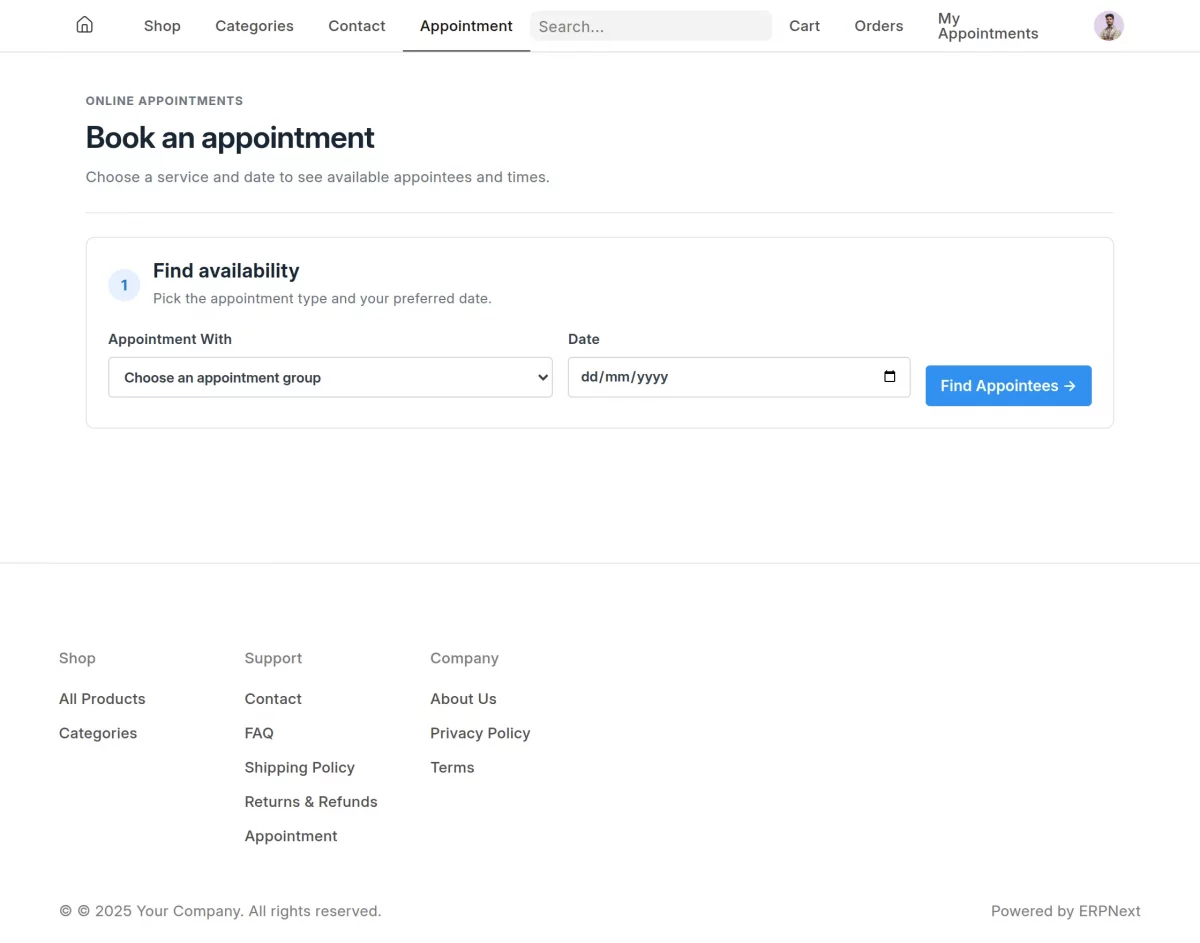
1. Customers can book an appointment from the Webshop by clicking Appointment in the top menu.
First, select an Appointment Group and choose a date. Then the system will then display the available appointees and their time slots for the selected date.
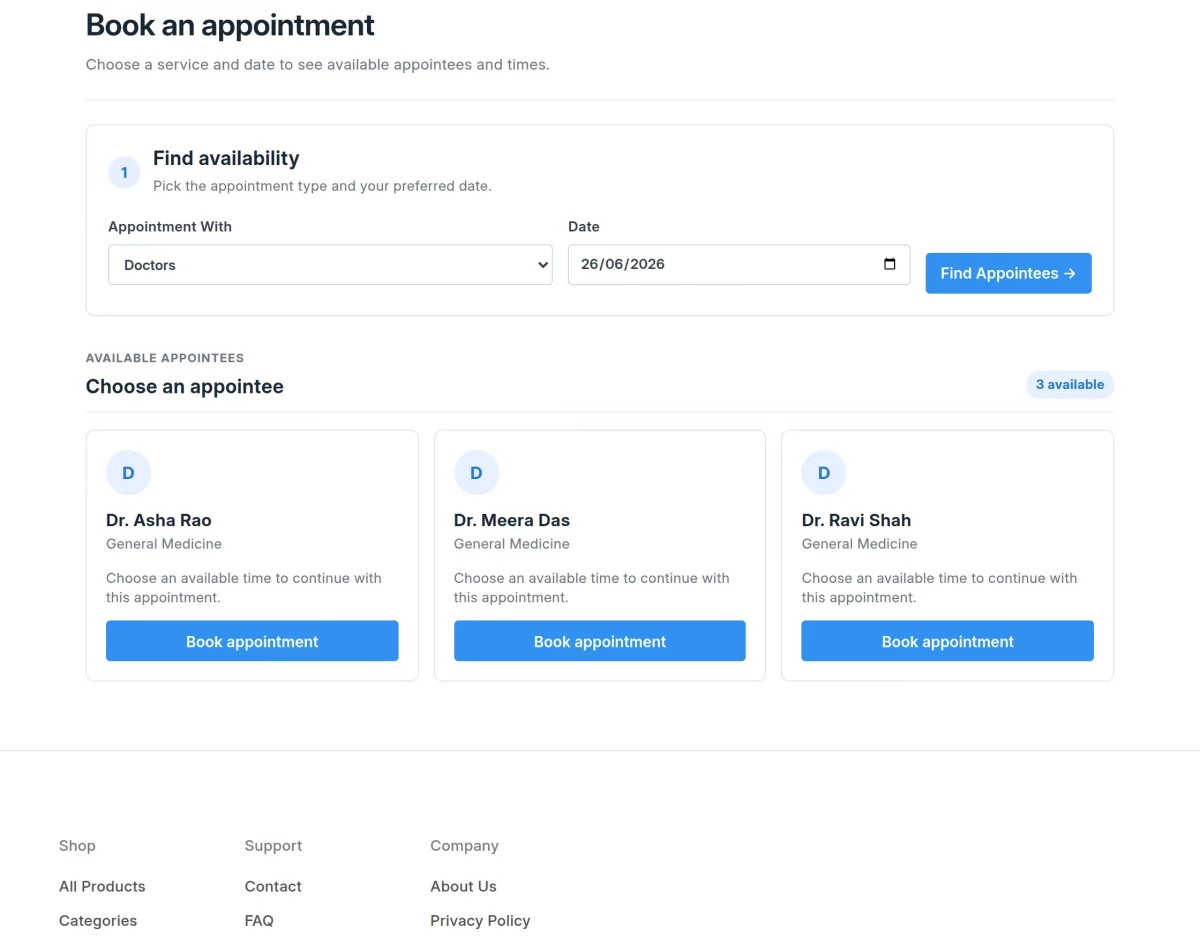
2. Select an appointee from the available options, choose a suitable time slot, and then click Book Appointment to confirm your booking.
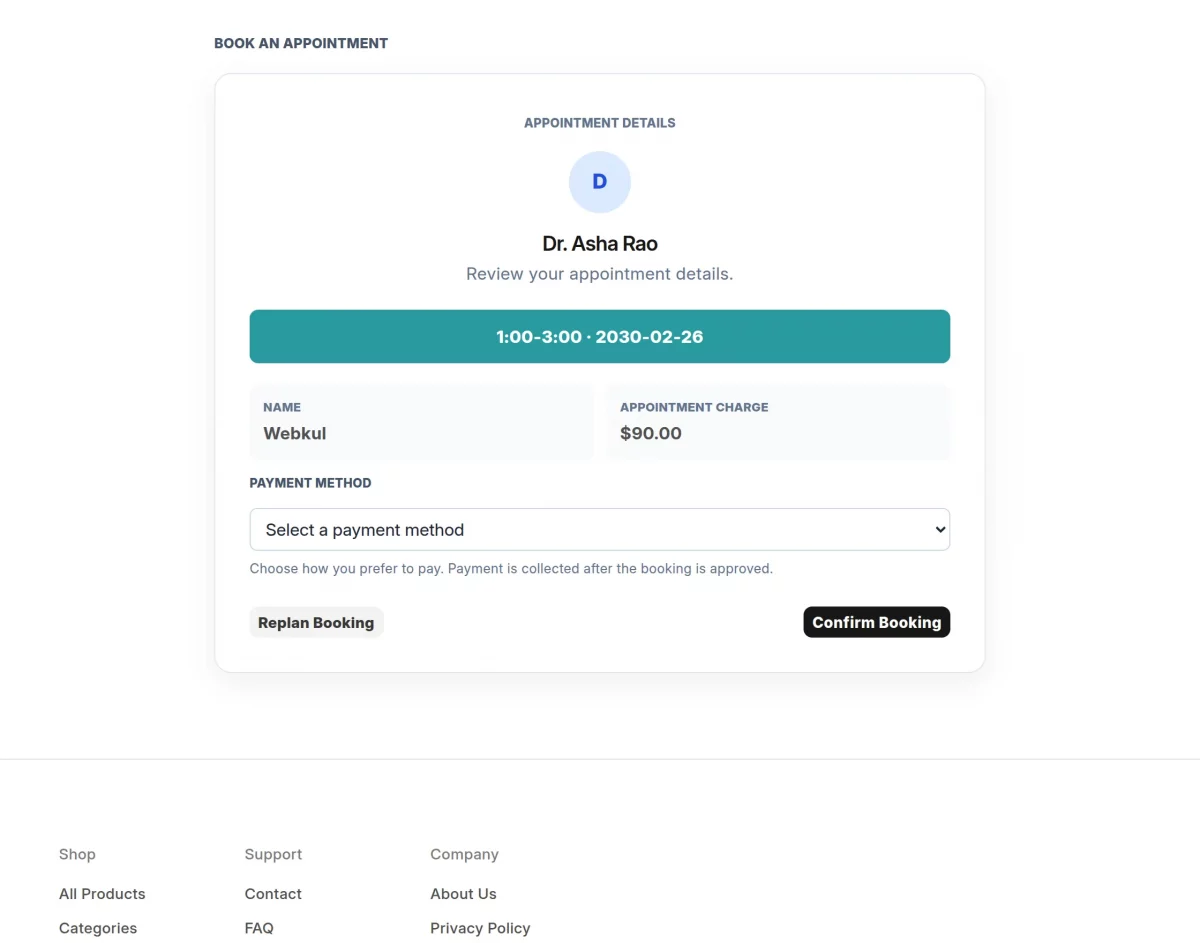
3. After booking the appointment, select your preferred payment method and then click Confirm Booking to complete the appointment booking.
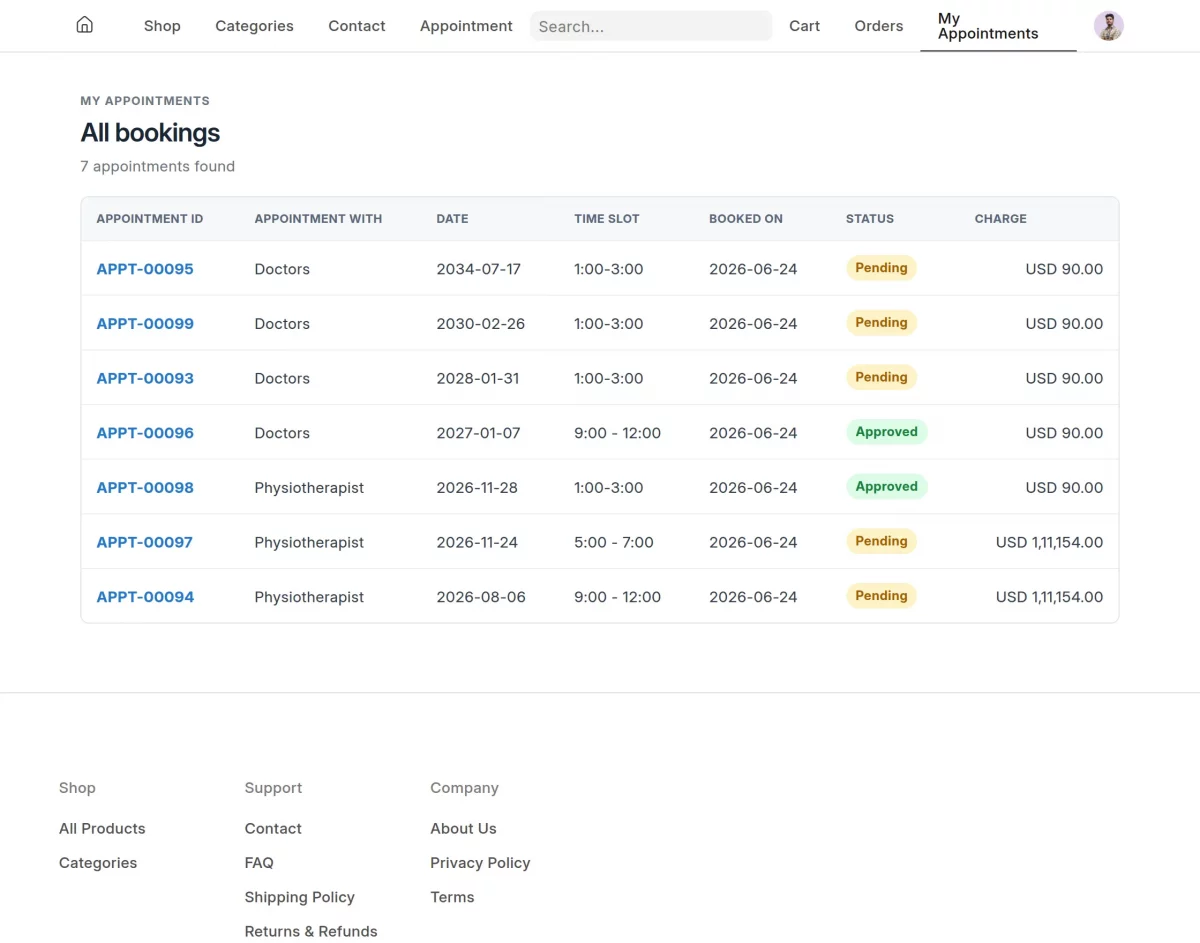
4. To view your appointment history, click My Appointments. Then you can see the details and status of all the appointments you have booked.
Need Help?
Hope you find guide helpful! Please feel free to share your feedback in the comments below.
If you still have any issues/queries, please create a ticket at the UV Desk.
I hope this helps. In case of any further queries, contact us at our support mail.
Thanks for paying attention!!
Current Product Version - 0.0.1
Supported Framework Version - ERPNext V16

Be the first to comment.