This splendid extension works with checkout for payment in CS-Cart via Stripe. Stripe payment gateway accepts cards and Alipay.
It also supports both full and partial refunds, offering flexible transaction management. In addition, the service that authorizes payments in CS-Cart is fully compatible with Apple Pay.
The upgraded version of the add-on extends support to several new payment methods, including ACH, Klarna, and Bancontact.
Furthermore, it now accommodates iDeal and 3D Secure Payments through the Inline Payment method, enhancing security and expanding regional payment options.
This version comes with the feature of Auth and Capture (Two-phase commit for payments), and money on the card. An authorization uncaptured for 7 days will be automatically reversed.
Note: The split payment functionality is not supported in this add-on. However, you can use Stripe or any other compatible solution to manage split payments separately.
- Before installing the add-on, extract the downloaded package.
- Install the License Manager add-on first.
- Then install the required add-on.
- Follow the license activation steps to generate your license key.
You may consider exploring Webkul’s Stripe-based add-ons, CS-Cart Stripe Connect Custom Account, for this functionality.
Features
- Seamlessly integrated with the CS-Cart store.
- Supports major card types, including Visa, Mastercard, American Express, Discover, and JCB.
- Compatible with Stripe-supported currencies.
- Supports both Test and Live payment modes.
- Easy to configure and manage from the admin panel.
- Provides full and partial refund functionality directly from the admin end.
- Displays payment response details in the backend order view.
- Allows the admin to configure order statuses based on different payment responses.
- Includes a dedicated tab to manage and view Stripe refund details and logs.
- Provides an option to enable or disable the save card feature for future transactions.
- Supports 3D Secure payments with an inline payment solution.
- Offers multiple payment methods, including Alipay, ACH, Klarna, Apple Pay, Payment Intent, Payment Request, and Inline Payments.
Note:
- Utilising the recurring payment option in the Stripe payment gateway requires the CS-Cart Recurring Payment Access Add-On.
- Explore CS-Cart Stripe Recurring Payment to experience how Stripe features and recurring payments work seamlessly together.
Installation
After downloading the CS-Cart Stripe Payment Gateway add-on, you’ll get one zip file, one install.txt file, and a relevant User Guide manual doc. Read it carefully for proper configuration.
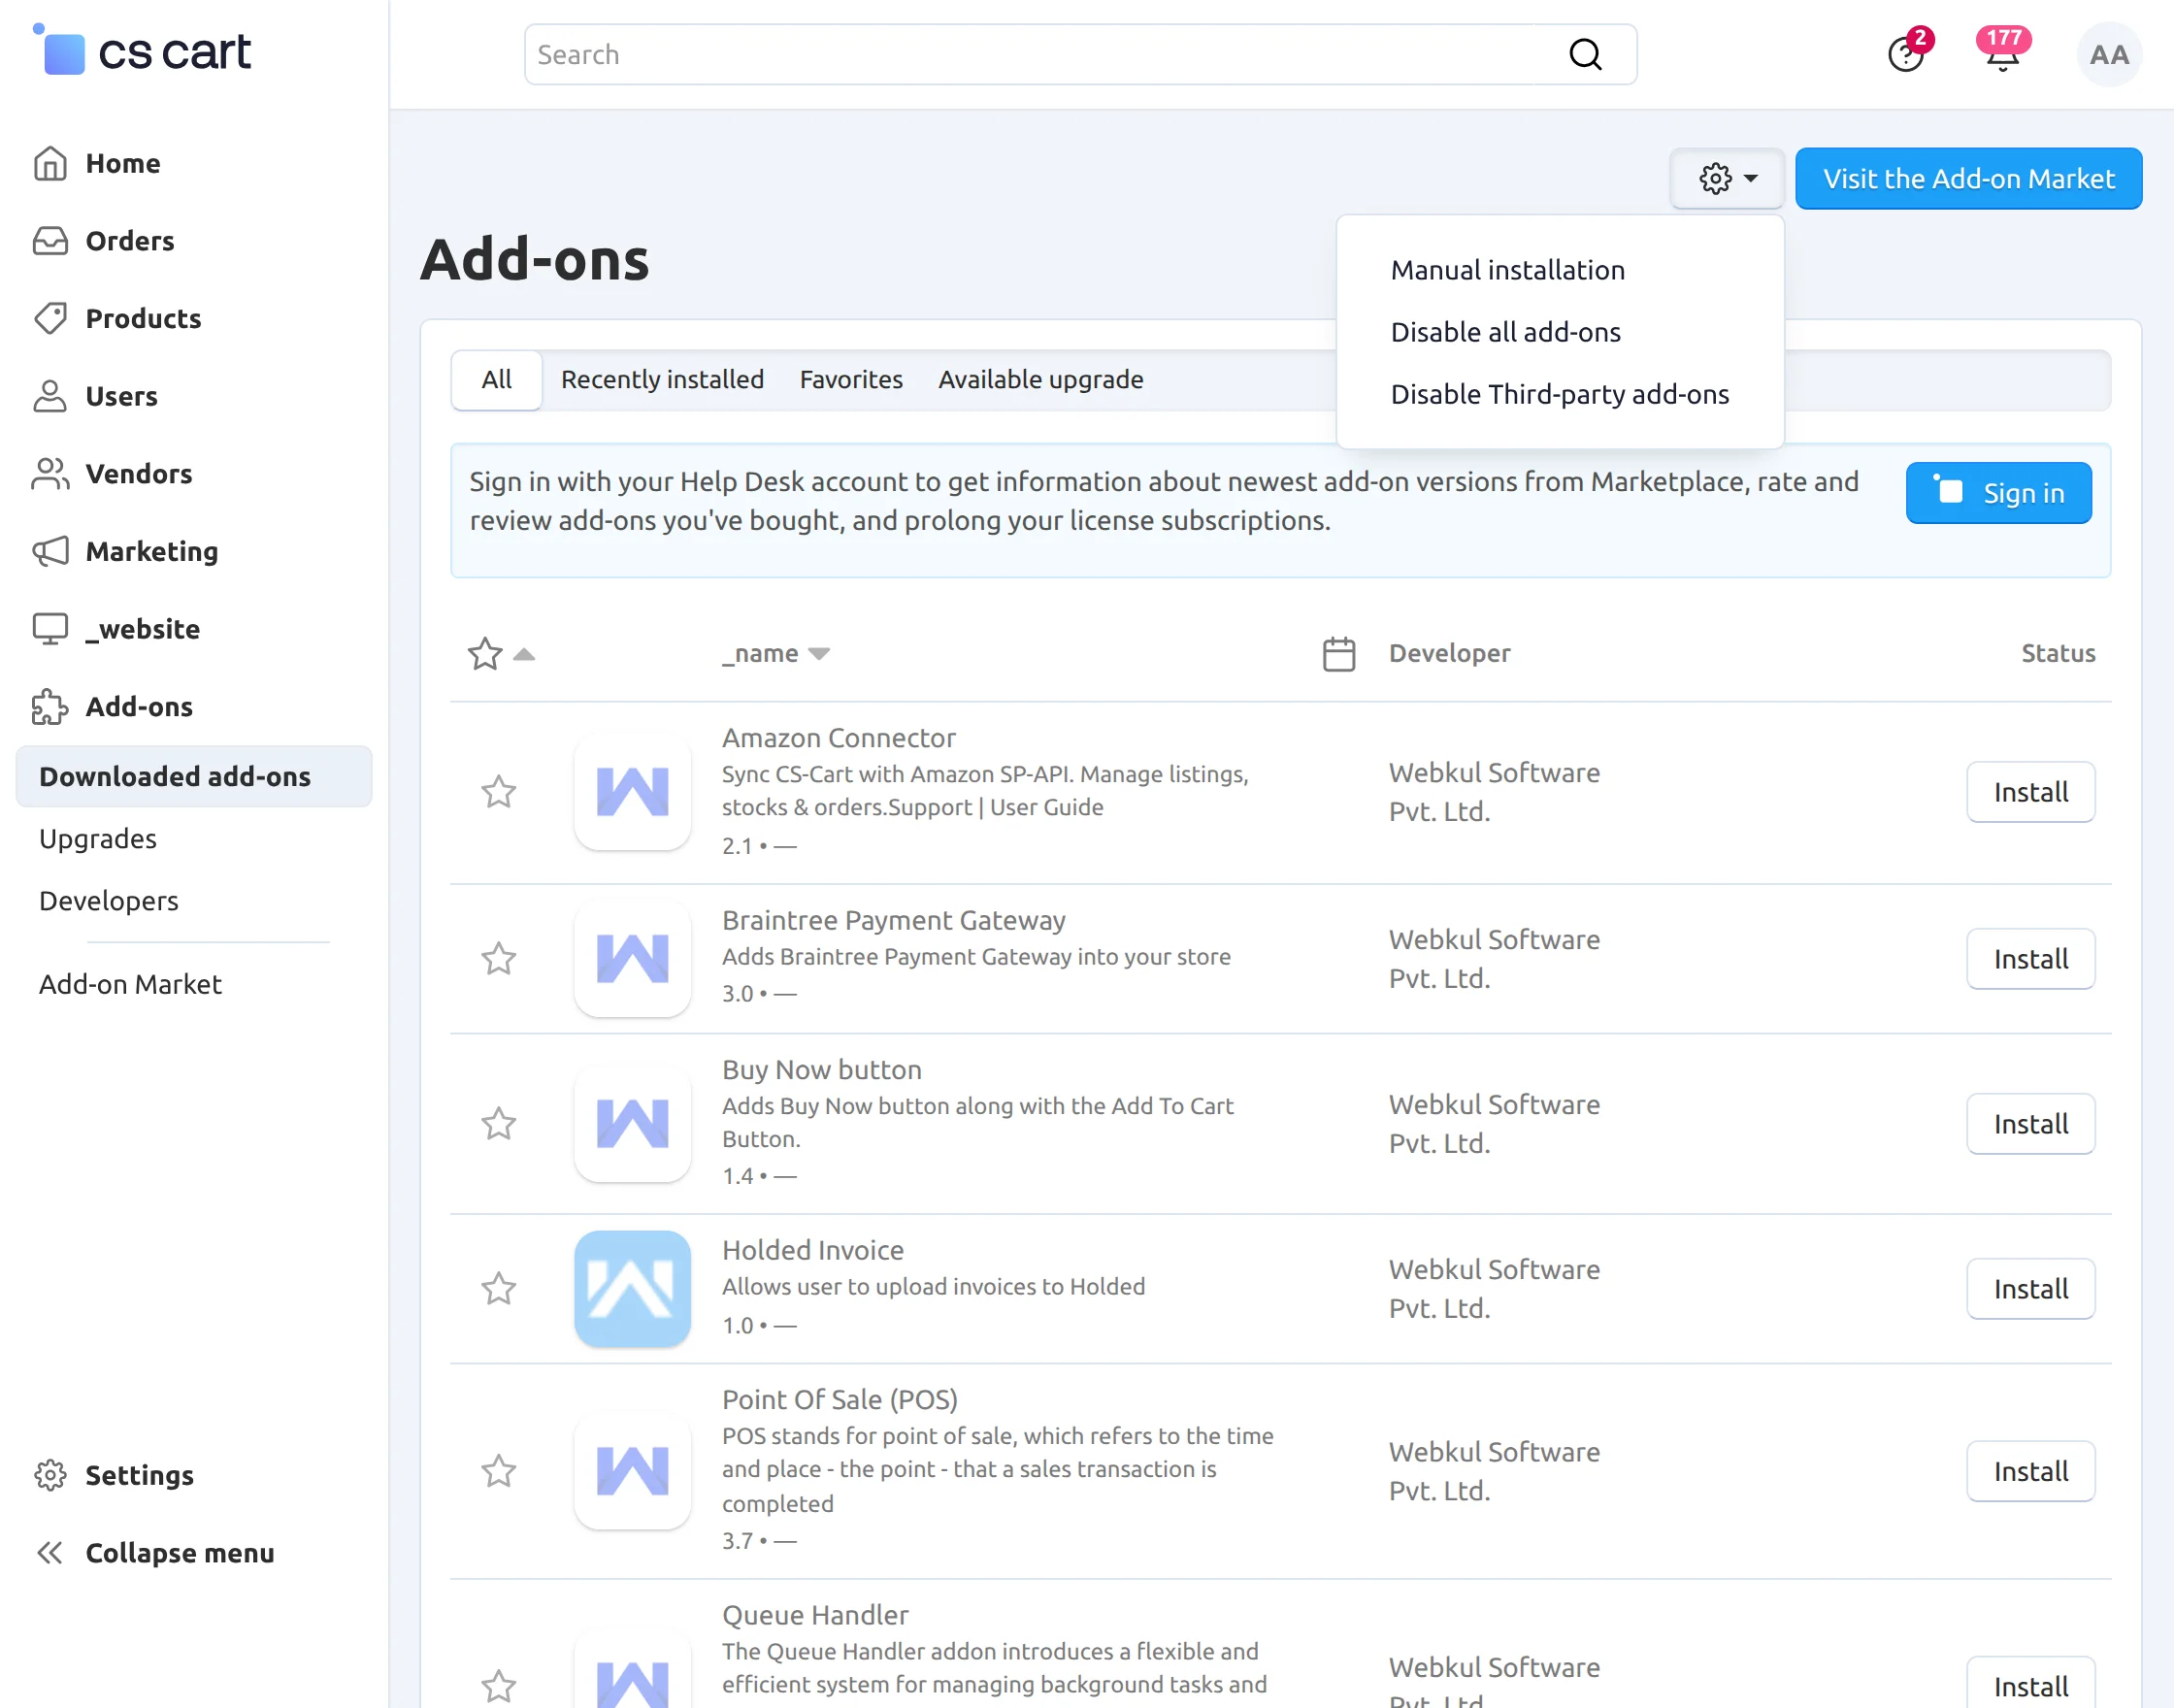
Navigate to Add-ons > Downloaded add-ons and click on the settings icon, from here you can manually install the zip file as shown below:
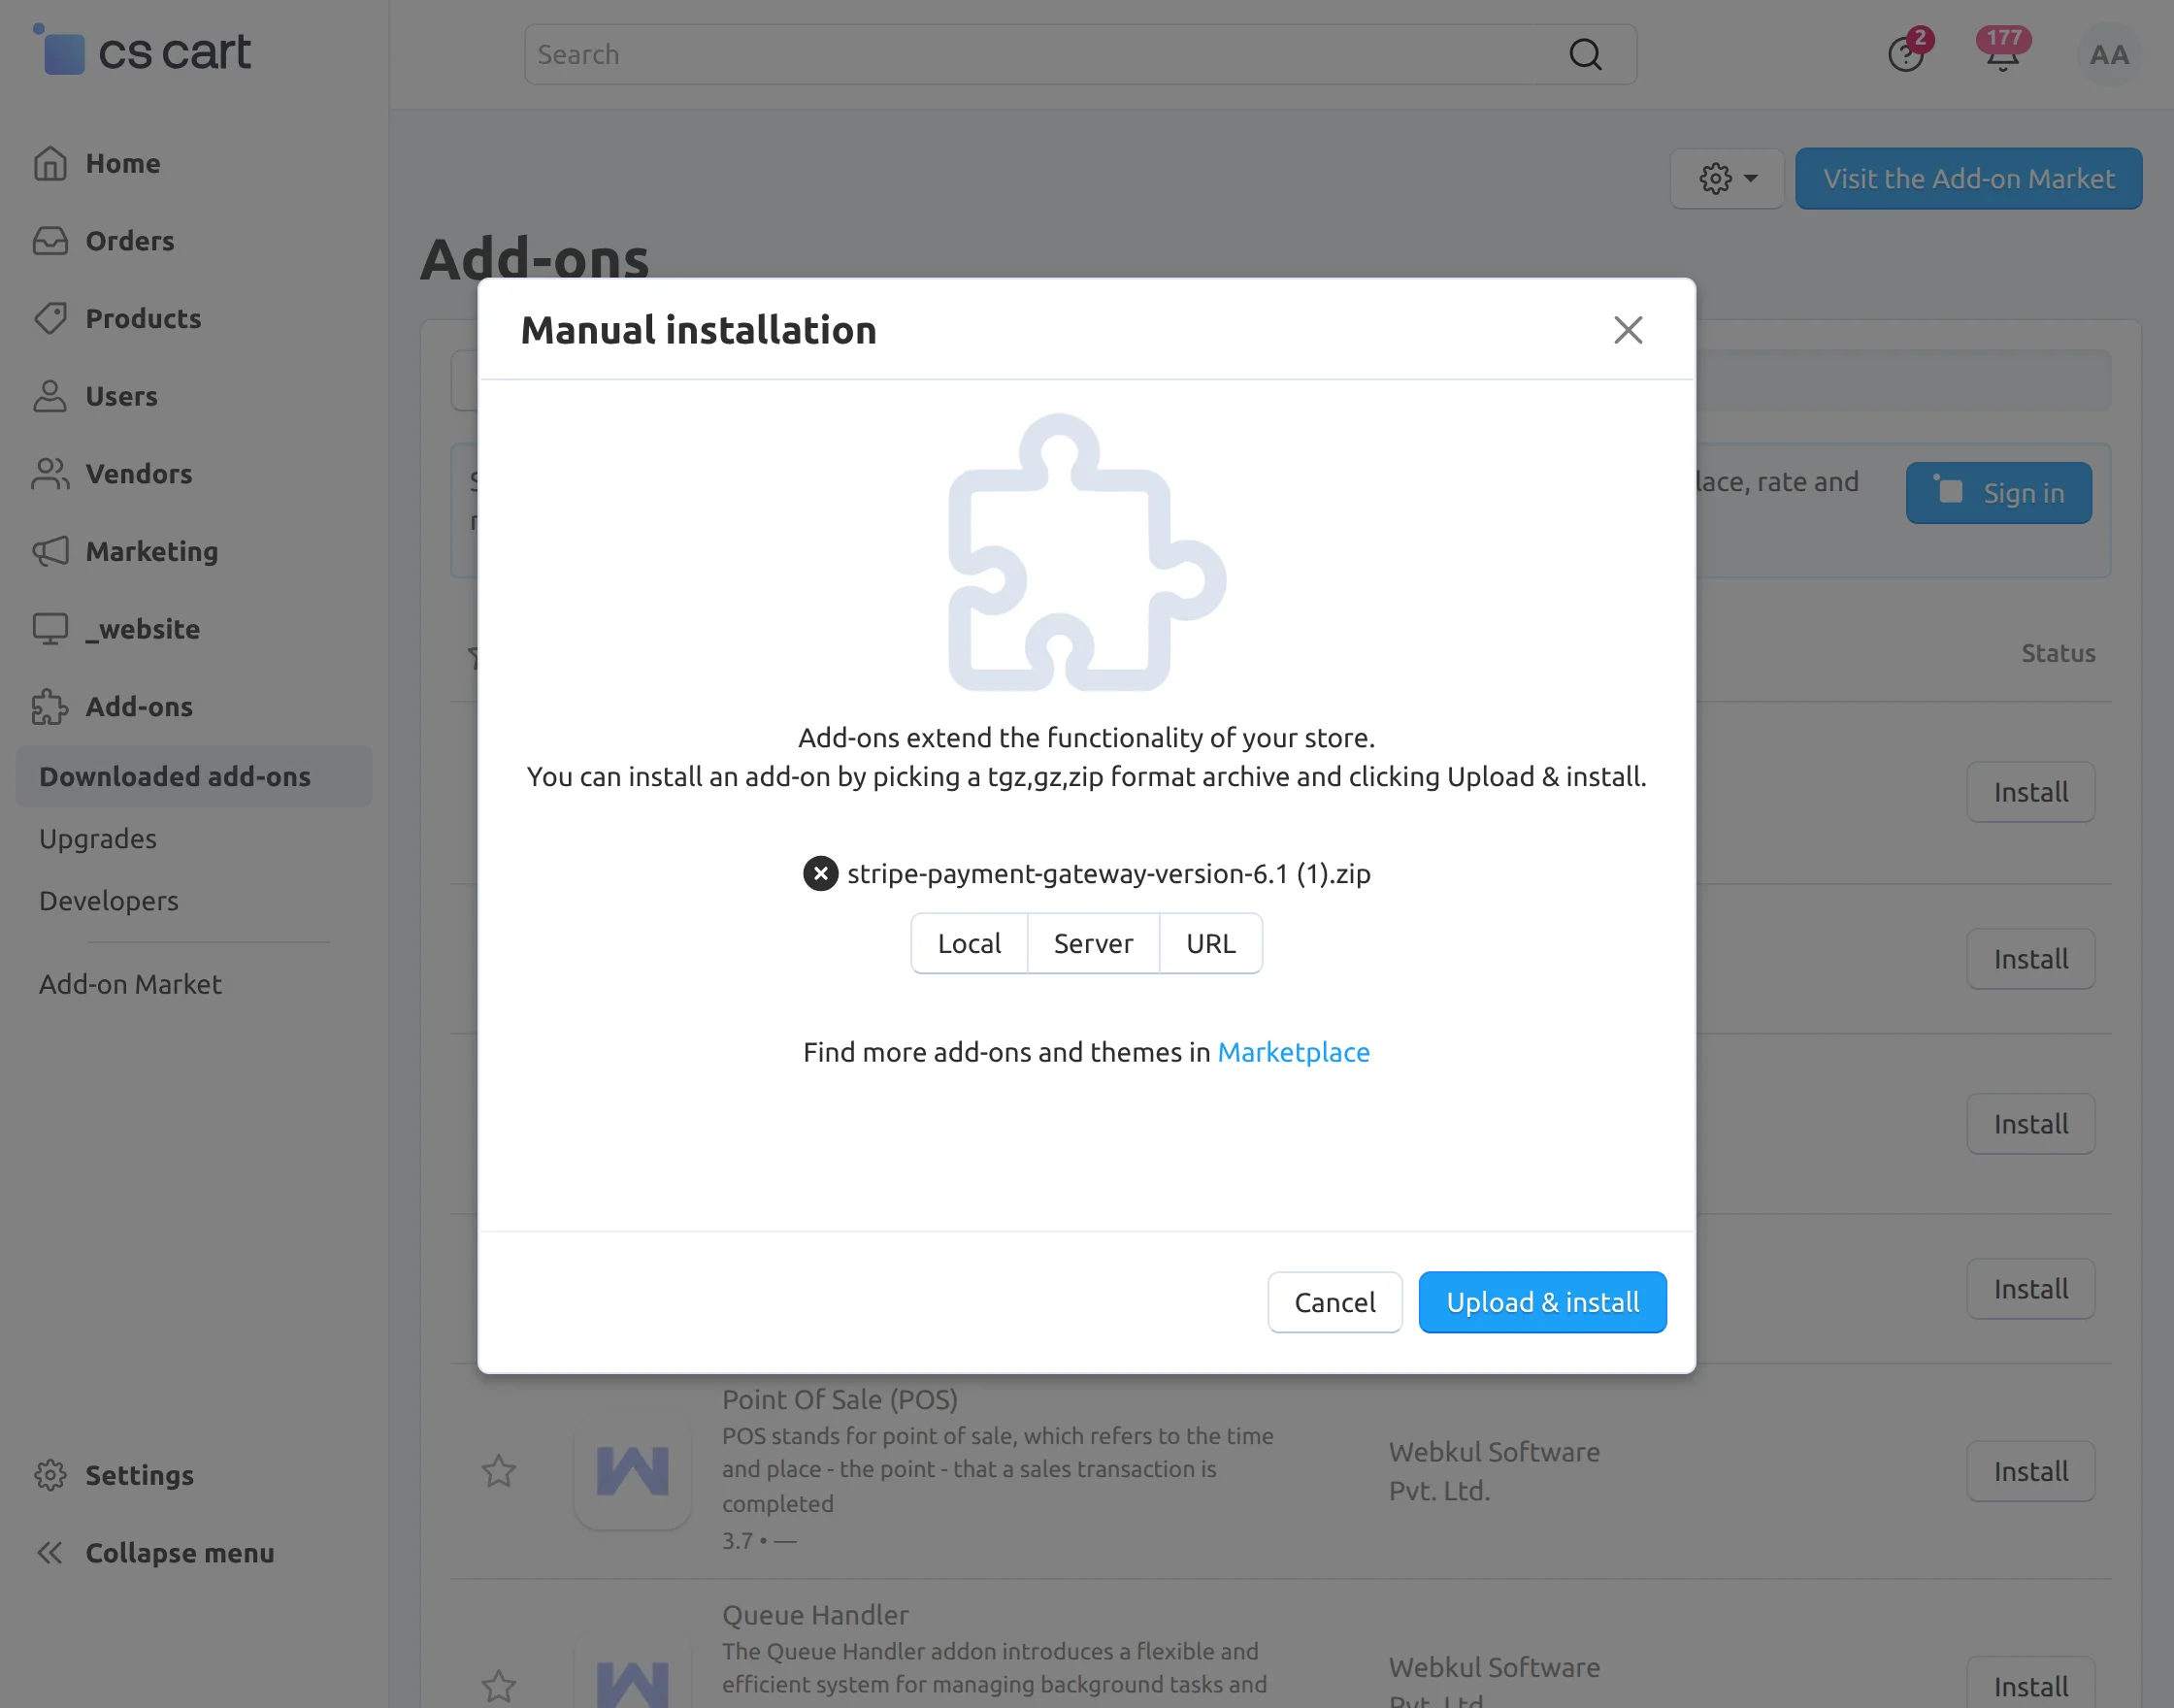
Click on “Local” to browse the zip file and then click on “Upload & Install” as shown below in the snapshot.
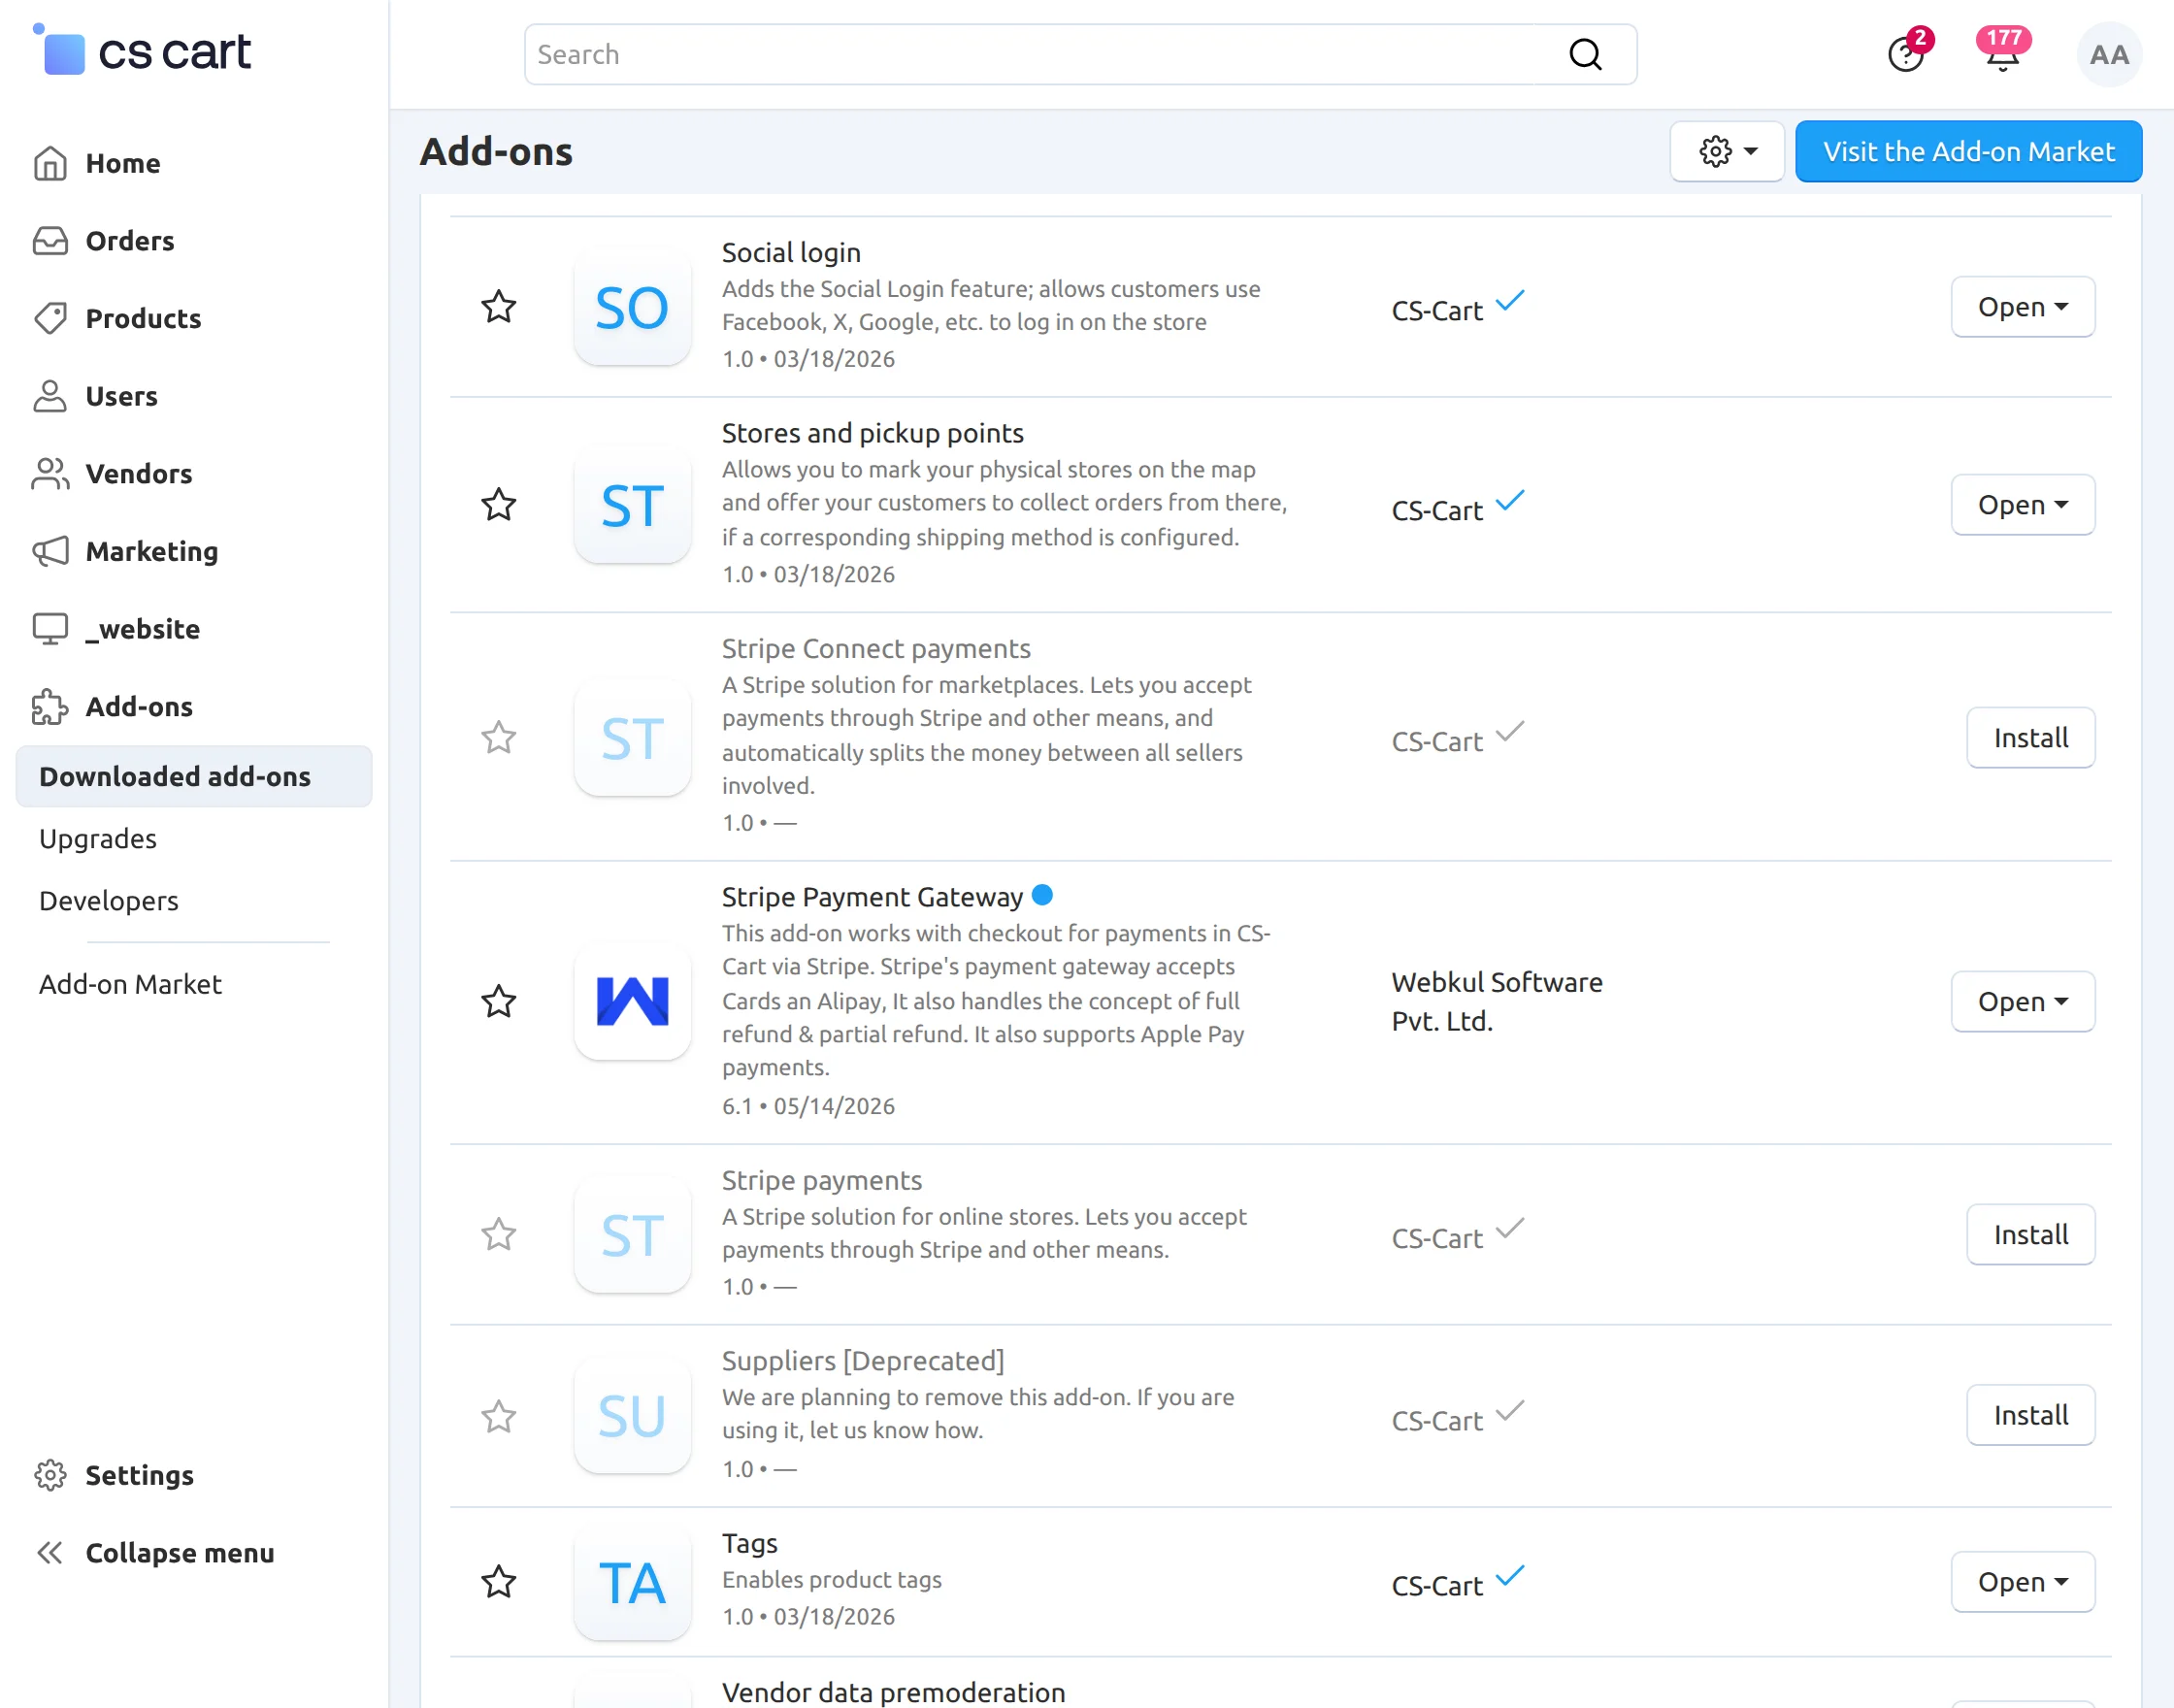
Click on “Stripe Payment Gateway” to configure the Stripe payment gateway as shown below in the snapshot.
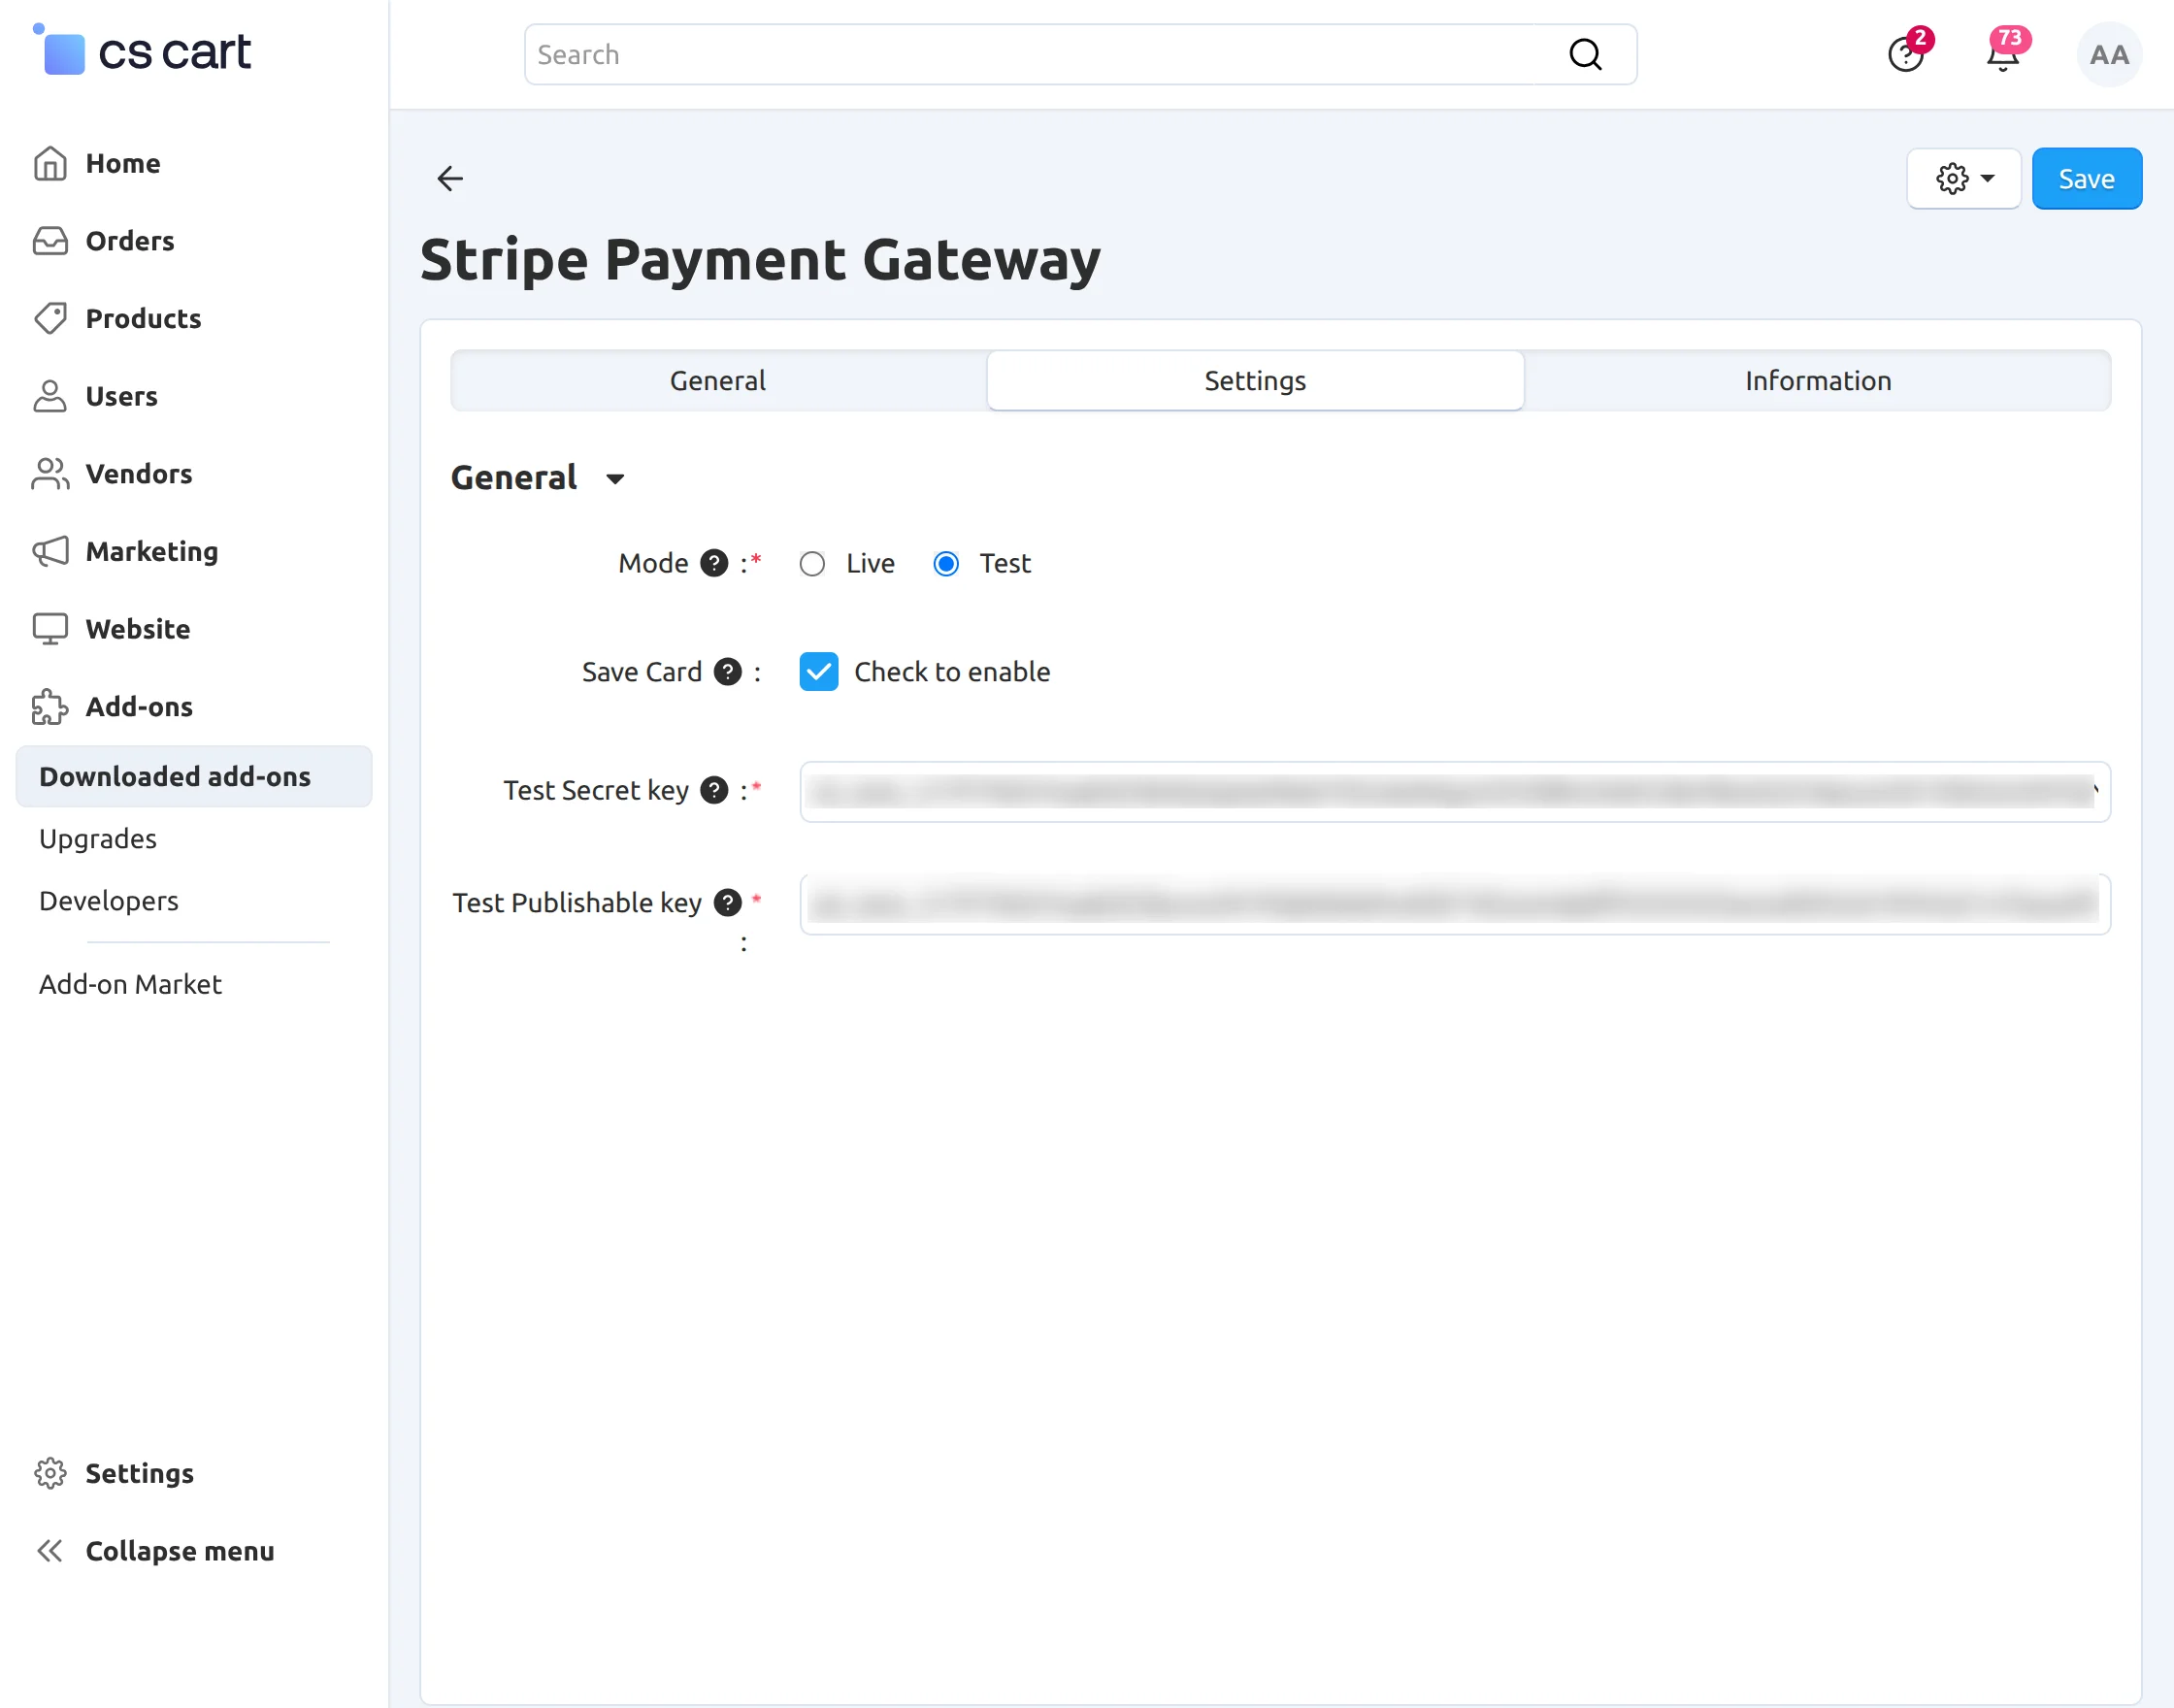
Configure the Add-on Settings
1. Mode – Select the payment mode as either Live or Test.
- Live Mode allows customers to perform real transactions.
- Test Mode is used only for testing and demo transactions.
2. Save Card – Enable this option to allow customers to securely save their card details for future purchases.
This feature works only with the Stripe Payment Inline method.
If the Save Card option is enabled, customers will get the option to save their card details at the storefront during checkout. Otherwise, the save card option will not be displayed.
3. Secret Key – Enter the Stripe Secret Key provided in your Stripe account dashboard.
4. Publishable Key – Enter the Stripe Publishable Key available in your Stripe account dashboard.
How to Get Stripe Credentials
Steps 1:
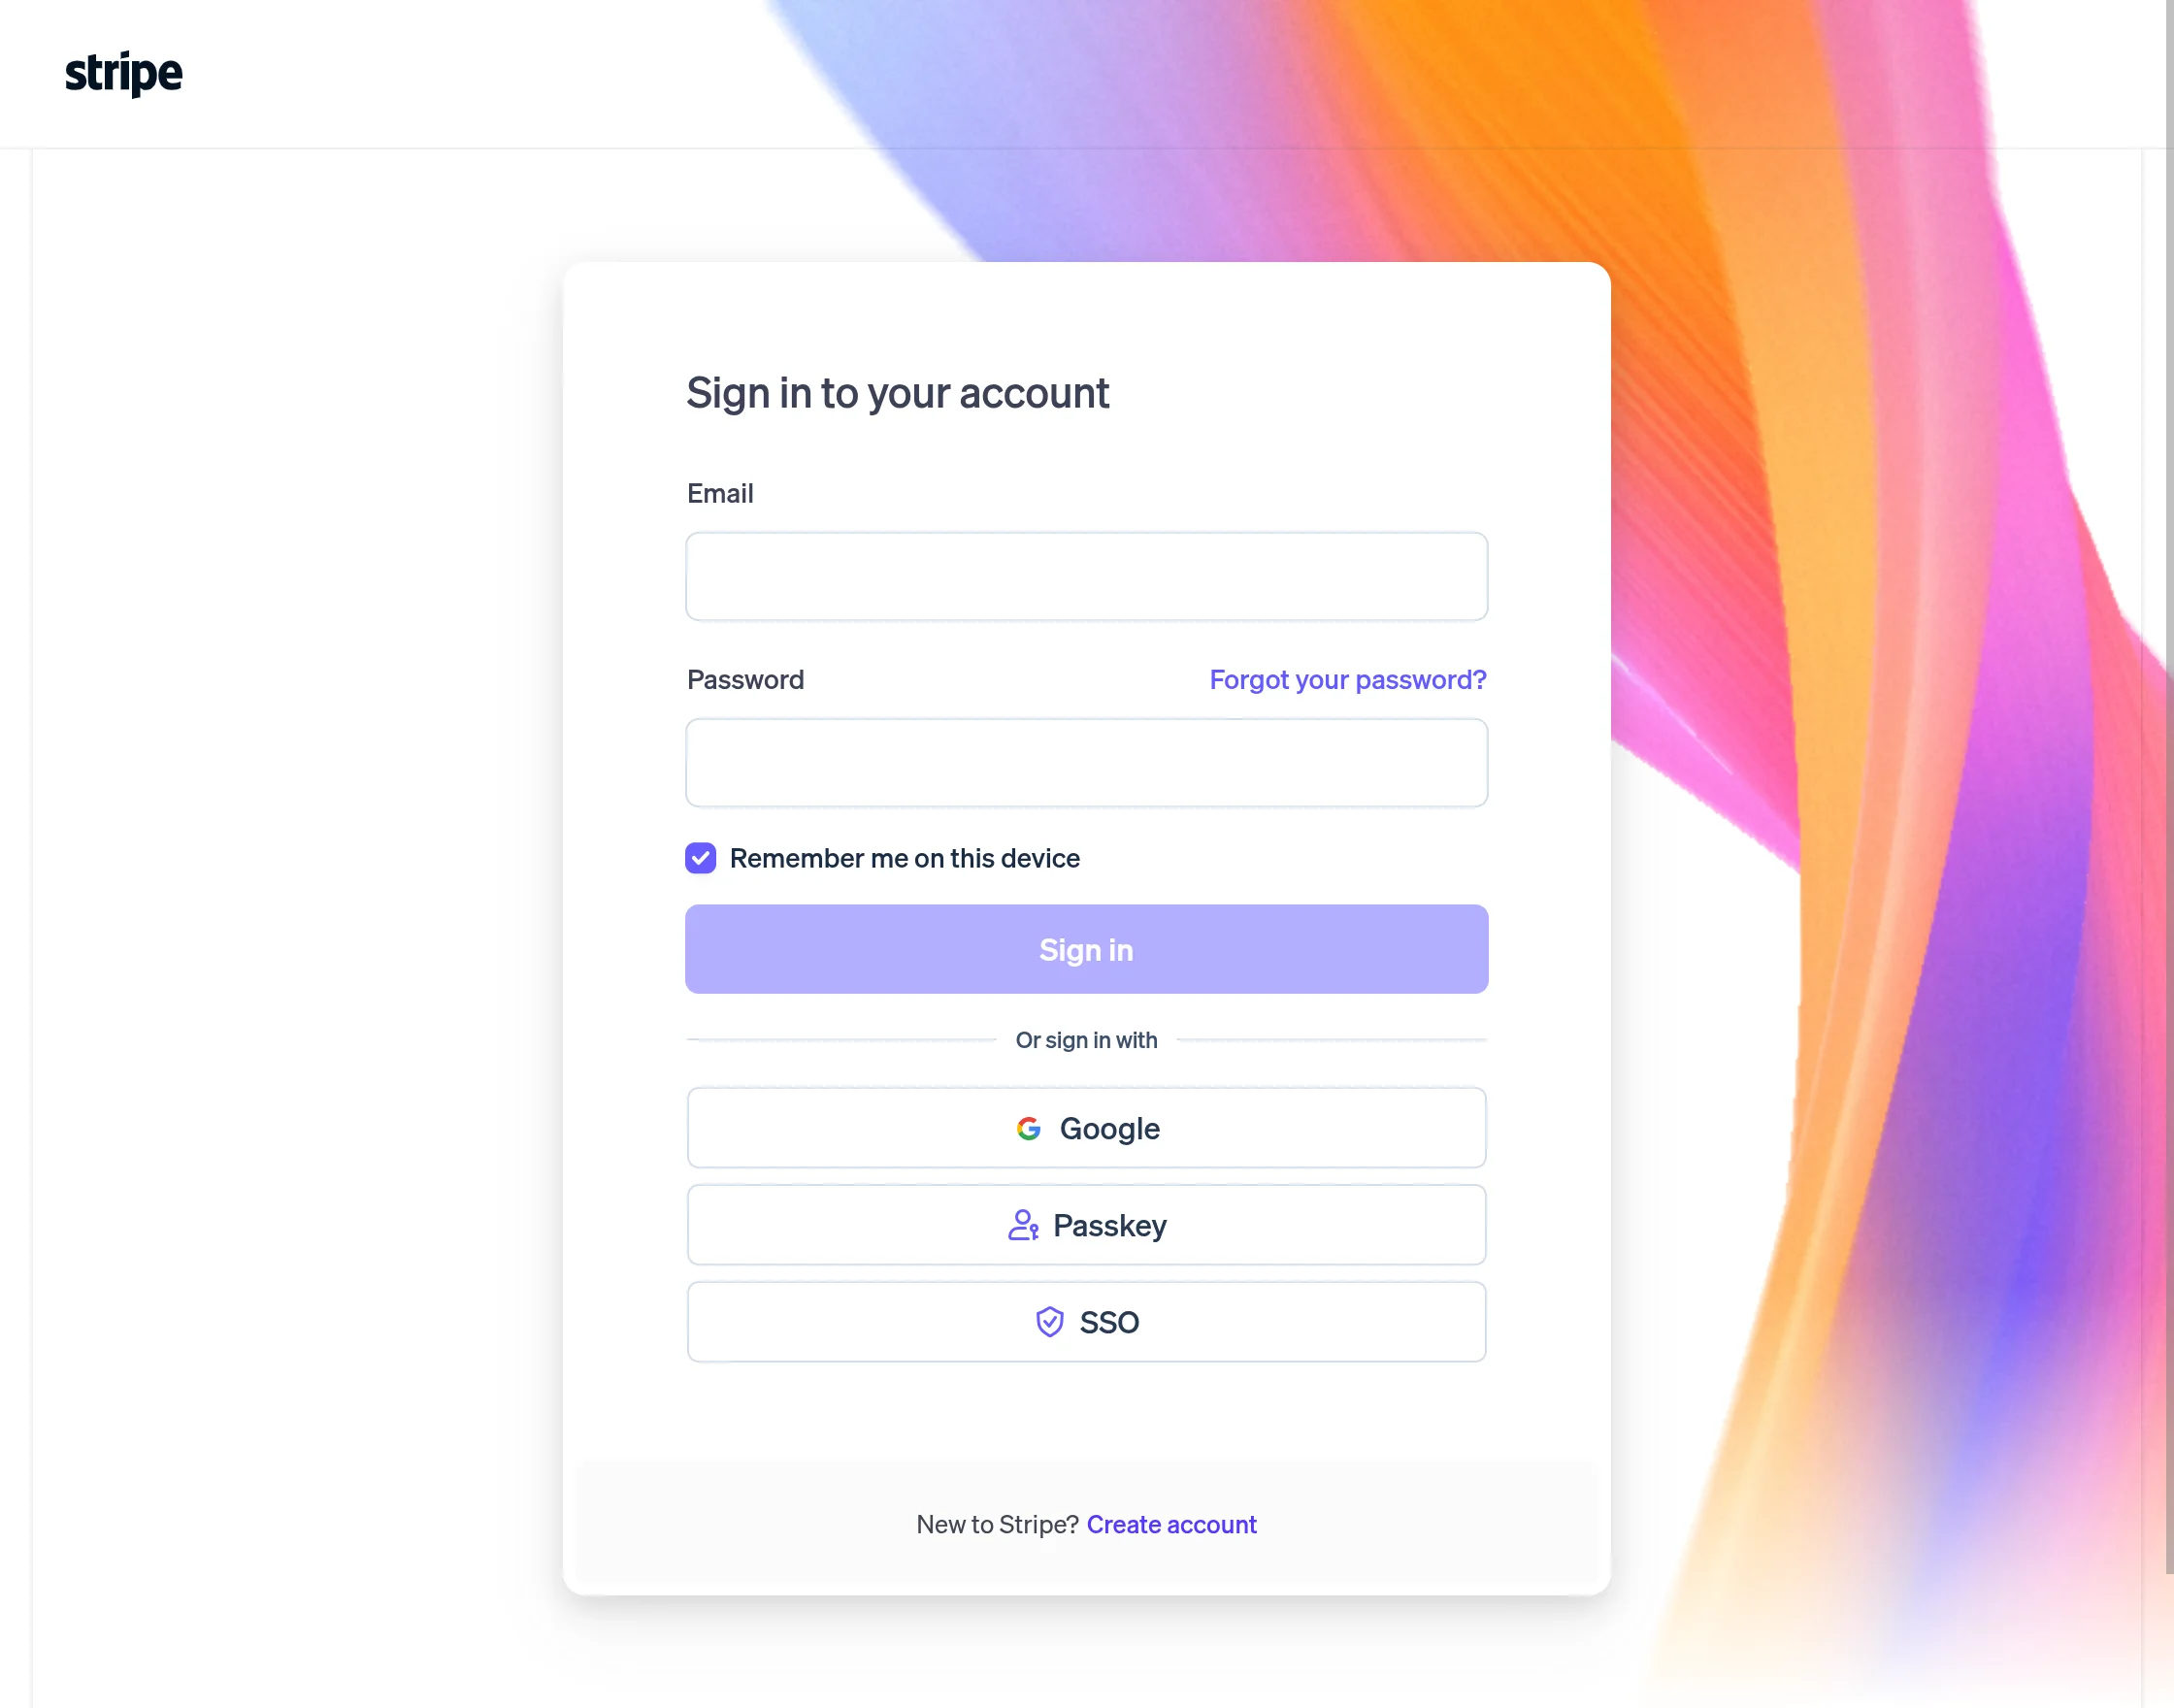
To get the API Keys, you can use the Stripe website. First, you’ll need to sign in to the Stripe account or create an account.
Go to https://dashboard.stripe.com/login and enter your login details.
Steps 2:
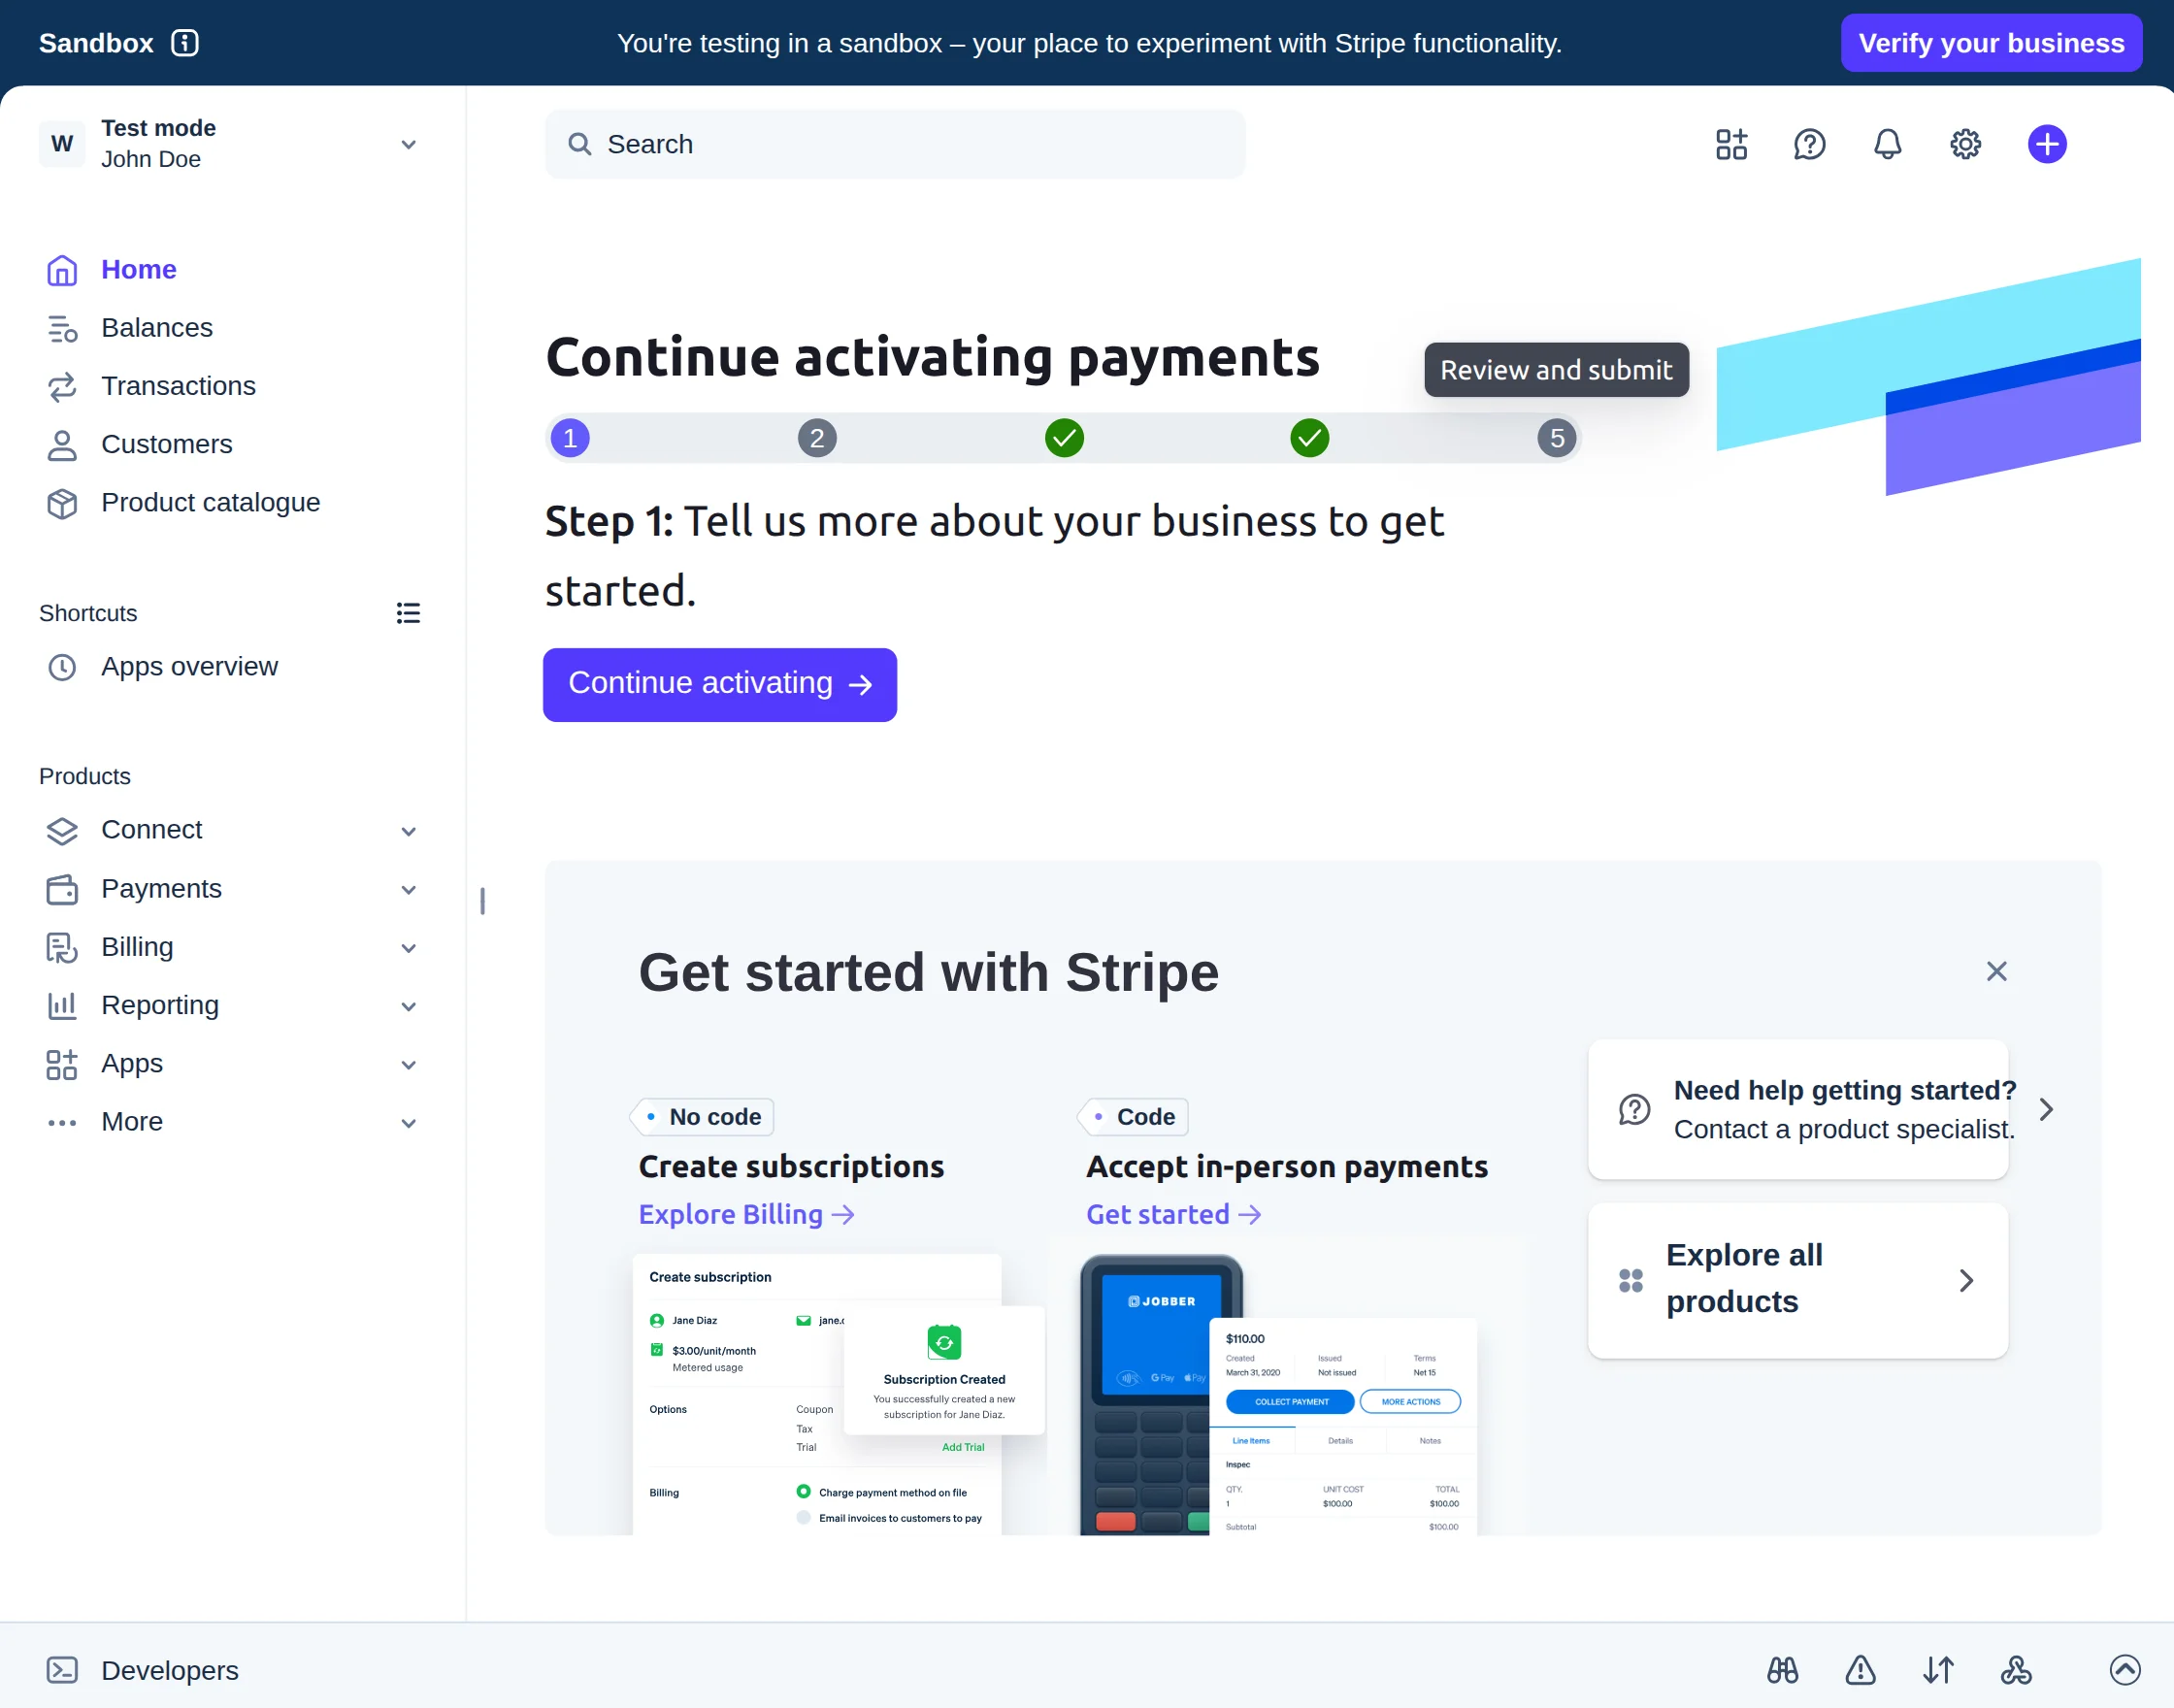
From the Stripe dashboard, enable the View Test Data toggle if you want to use the module in test mode.
This will allow you to access the Stripe test API credentials for performing demo transactions.
If you want to use the module on a live website, you can use the live API credentials available in your Stripe account.
To proceed with test transactions, simply enable the Test Mode option from the Stripe Dashboard.
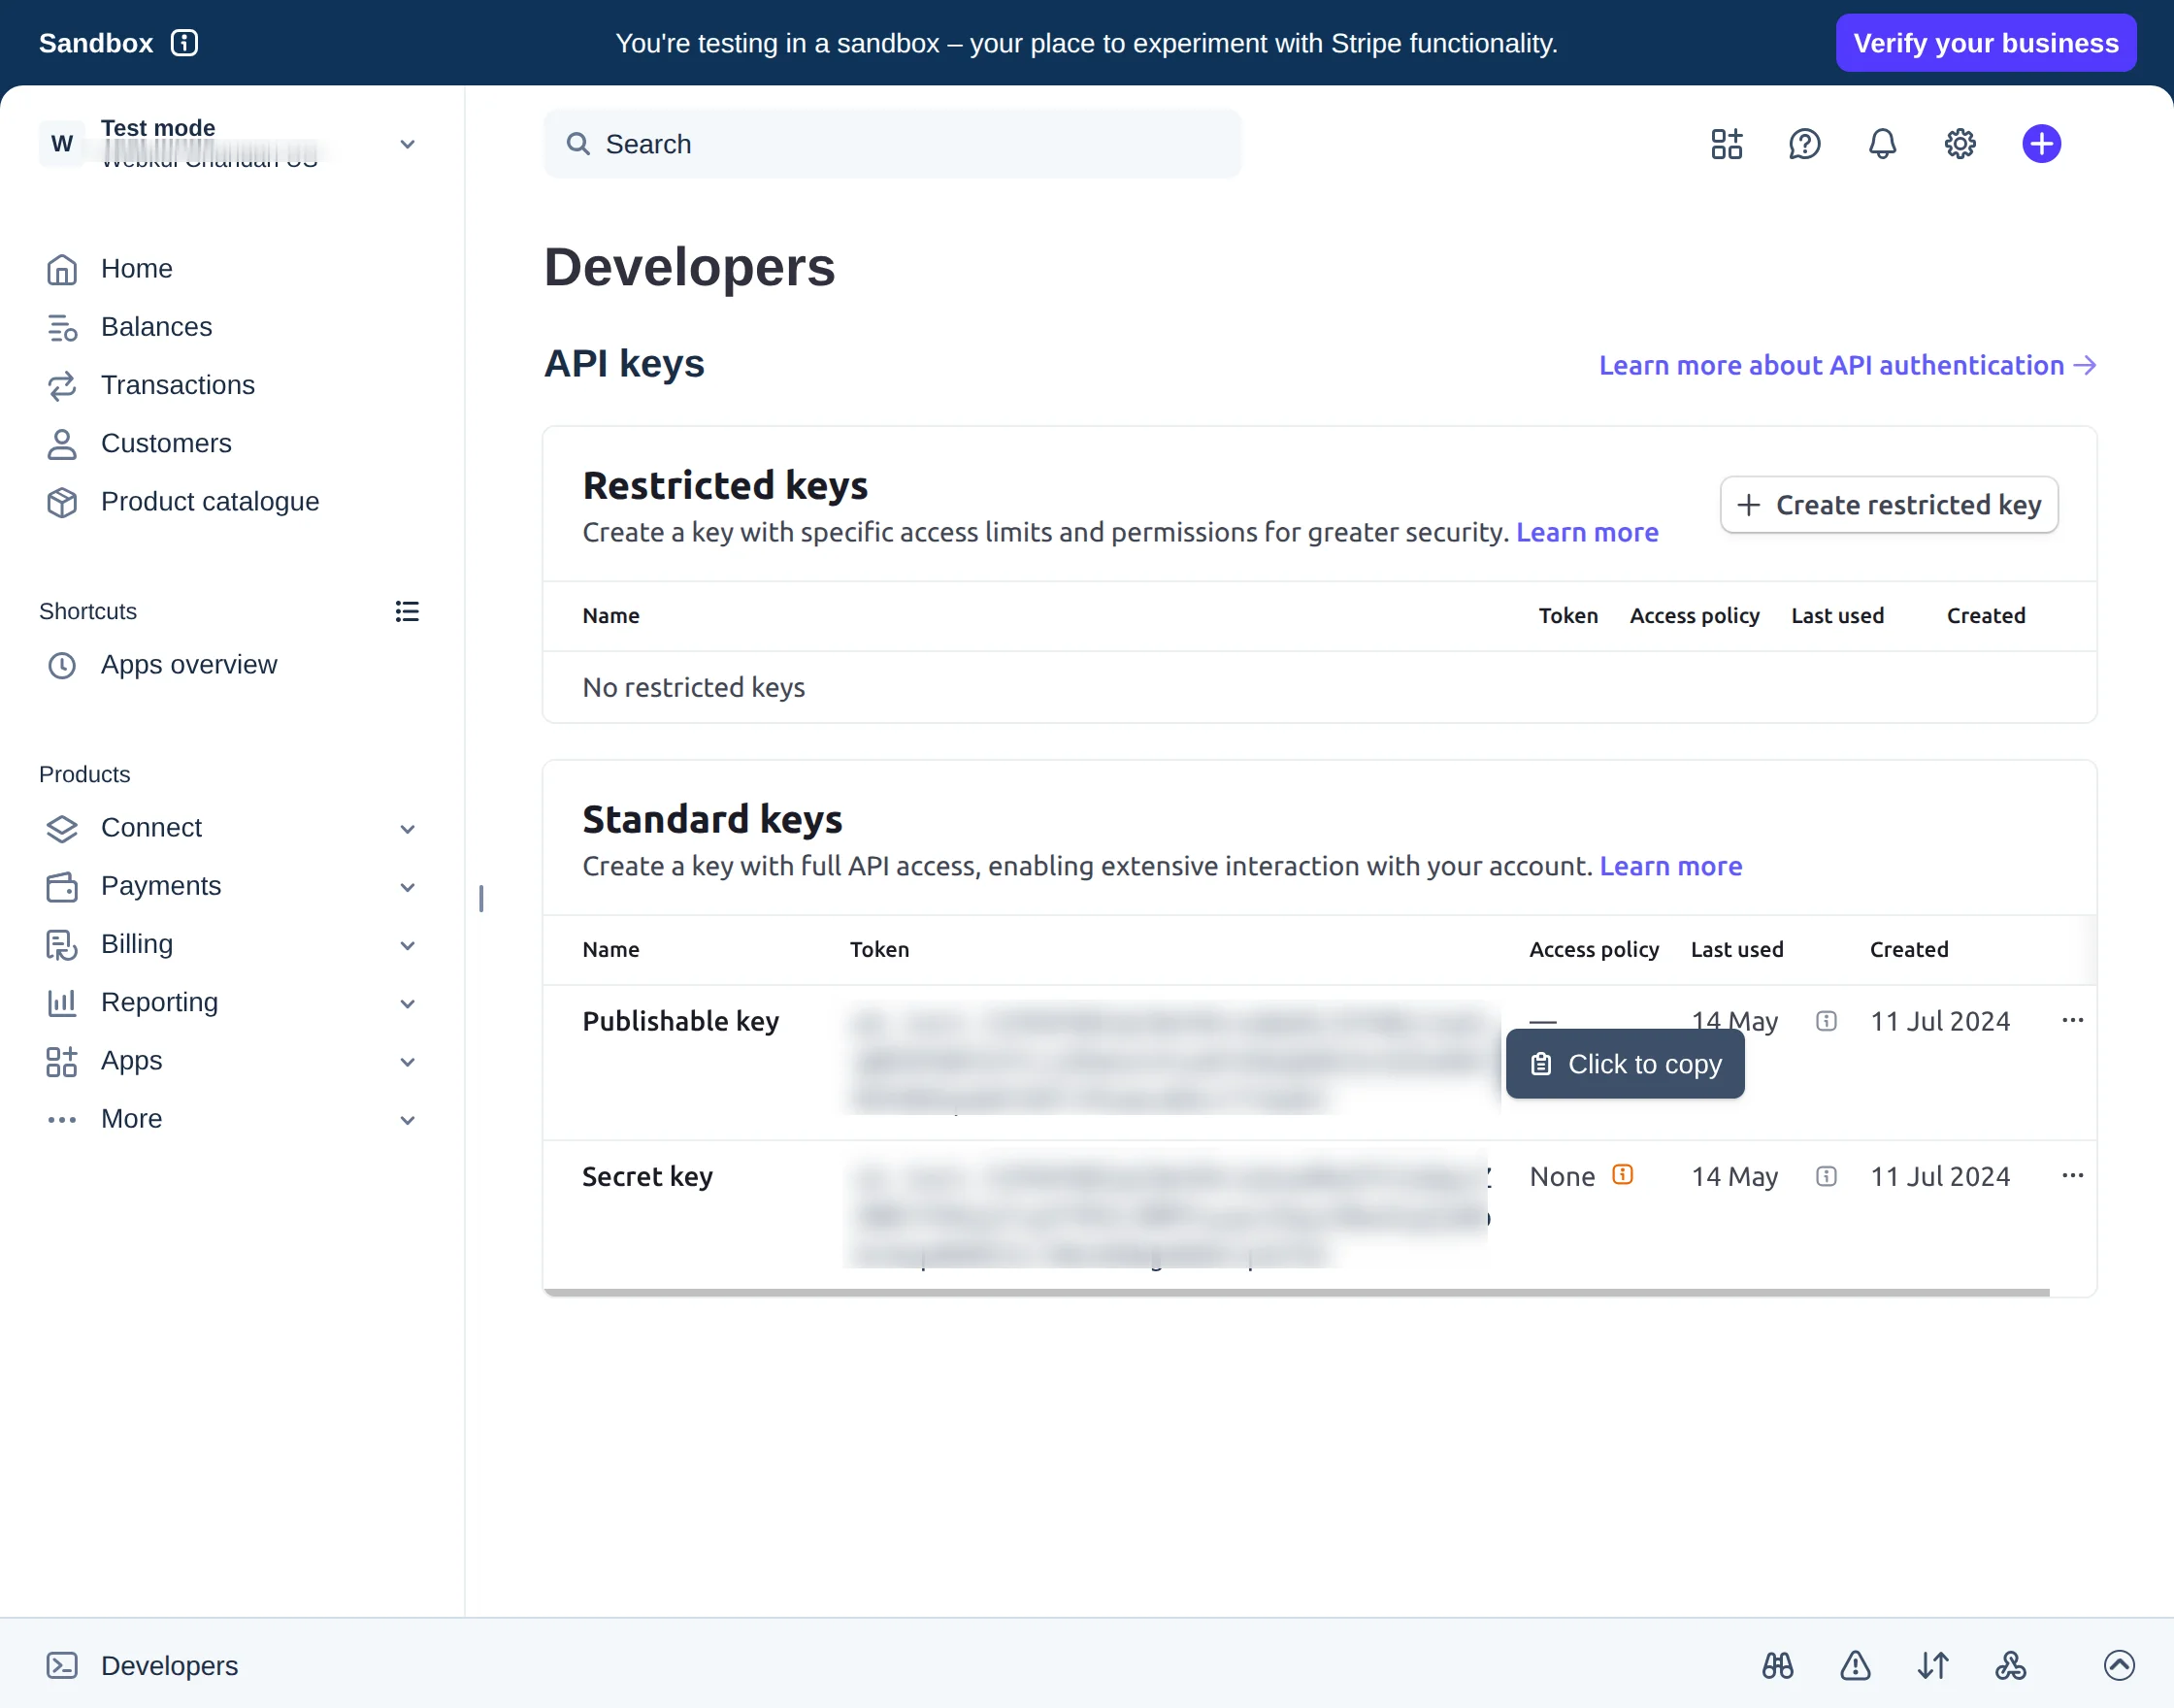
Steps 3:
Click on the API Keys option from the side panel to view the Publishable Key.
To access the Secret Key, click on the Reveal Test Key button.
You can then copy both API credentials and configure them in the CS-Cart Stripe Payment Gateway add-on.
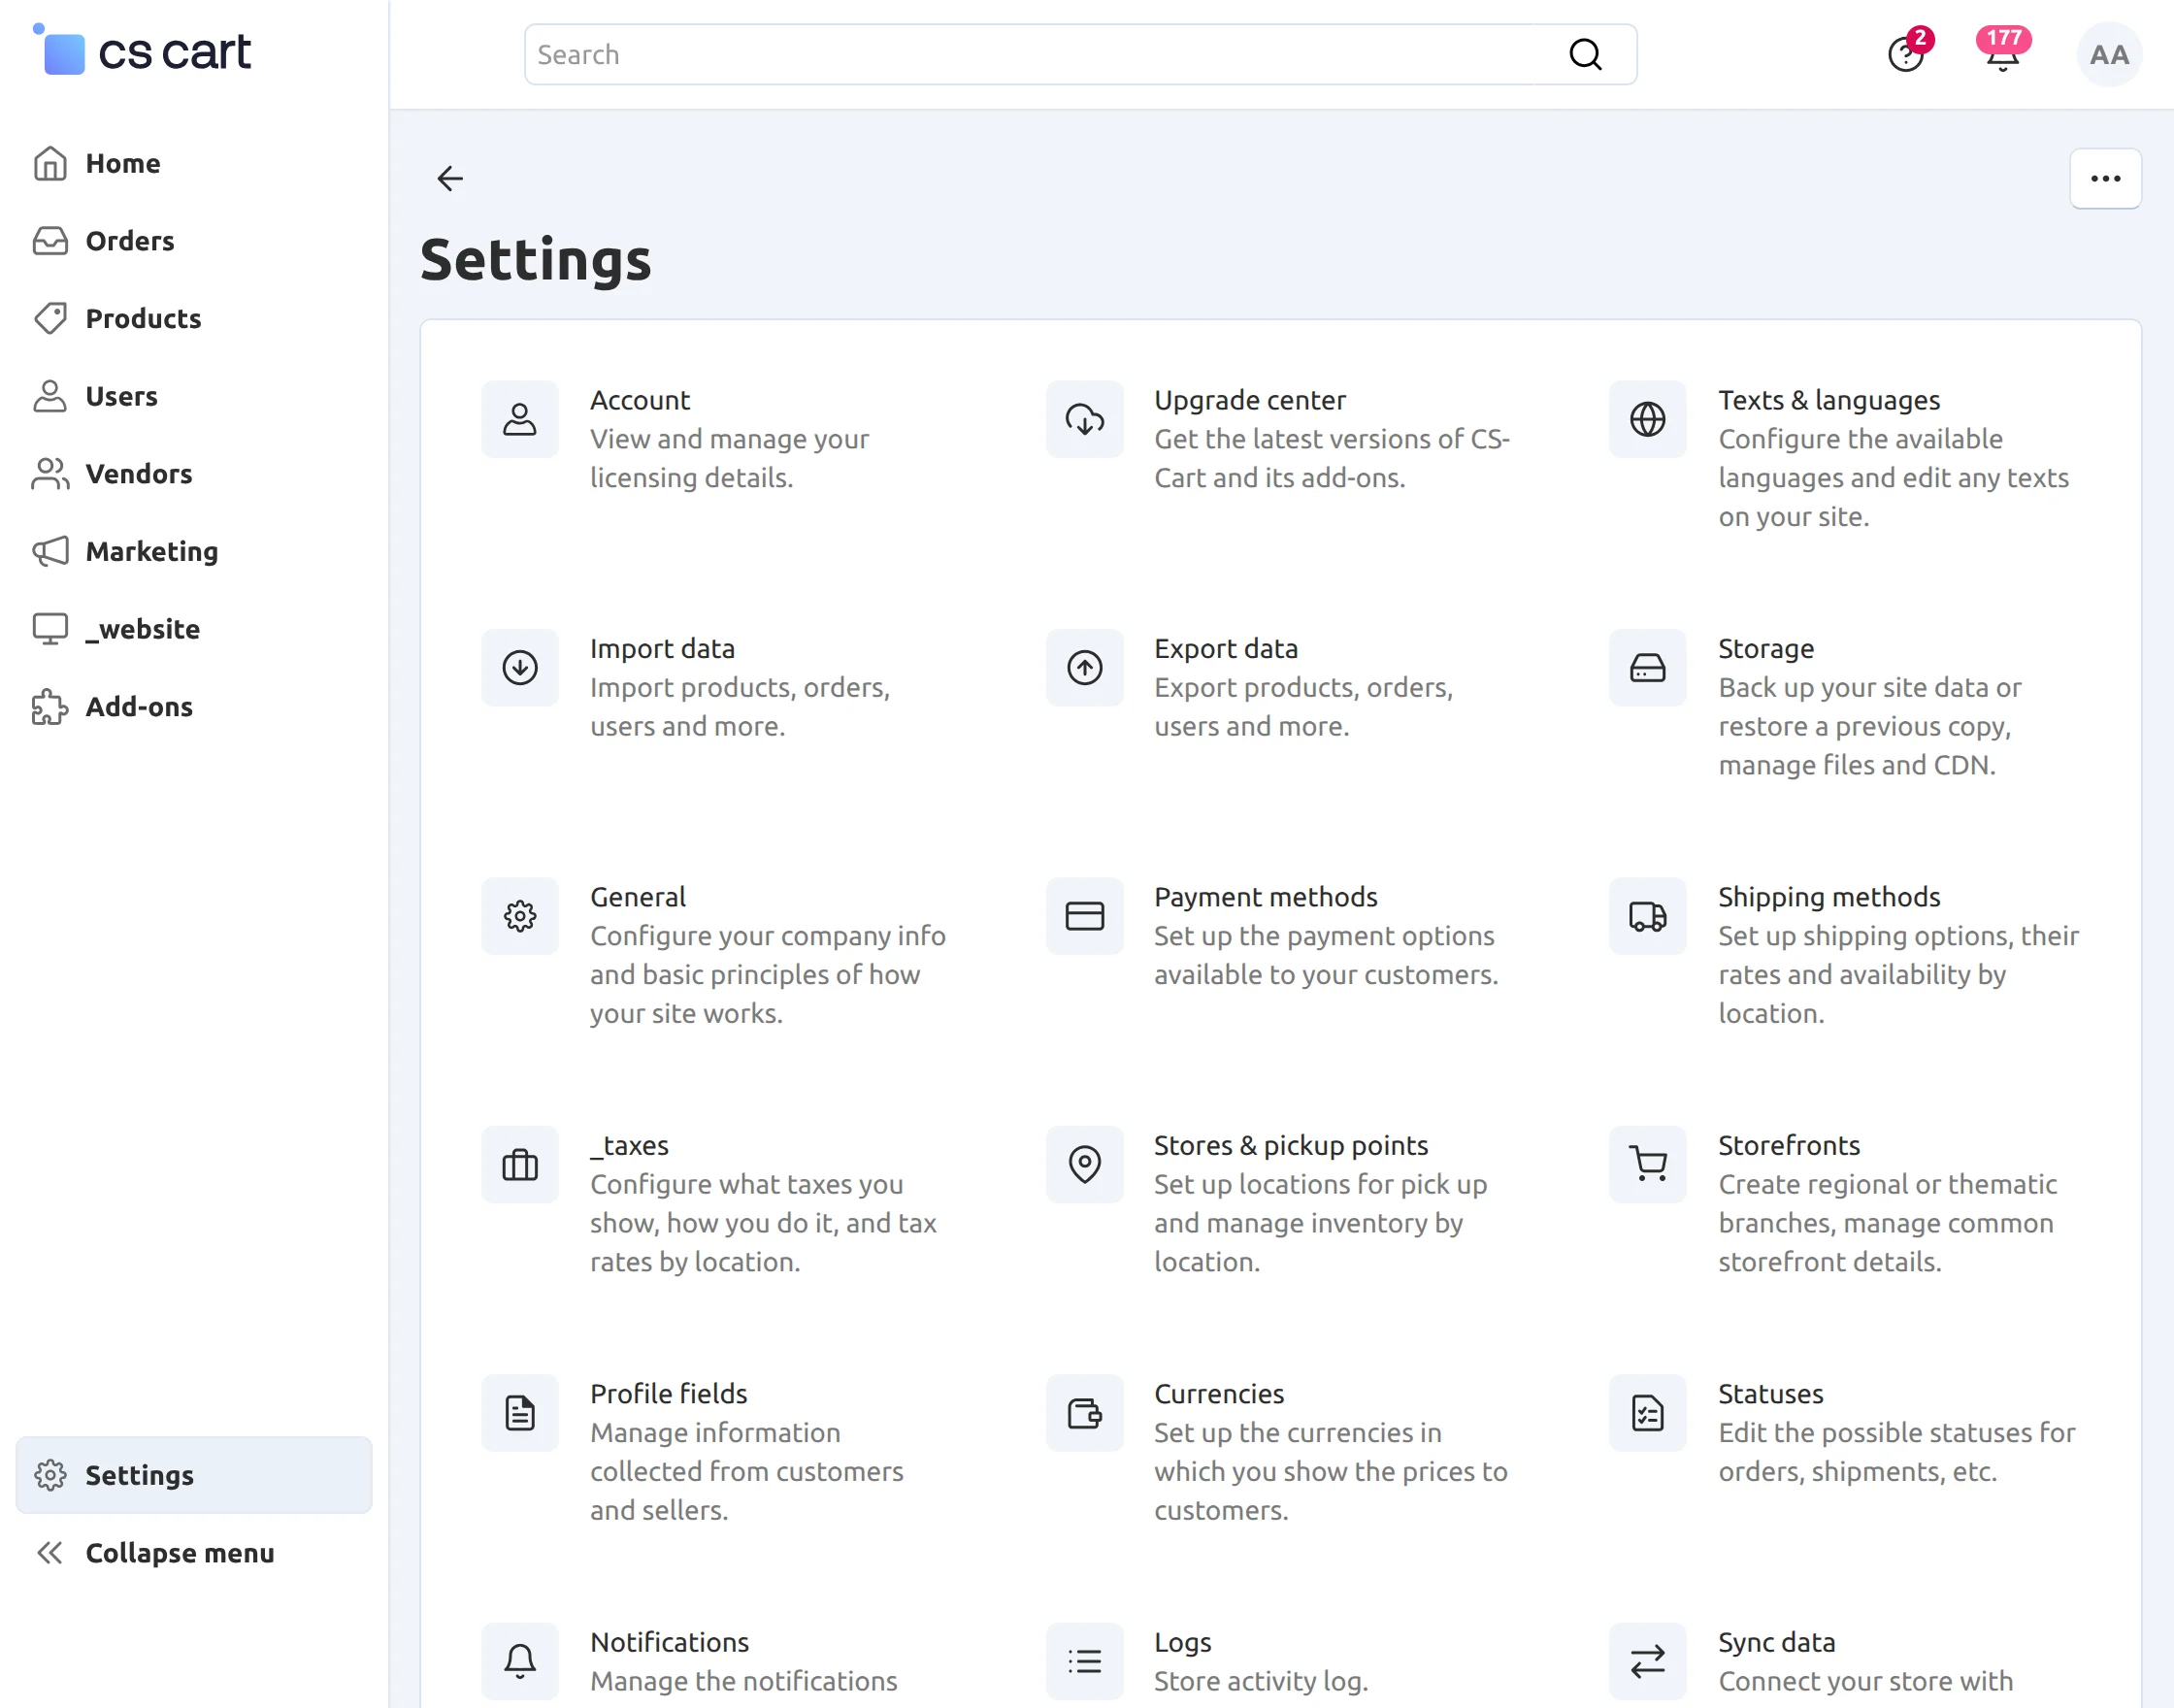
Configuration of Stripe Payment Methods
To use Stripe on the checkout page, you need to create a new payment method in your CS-Cart store.
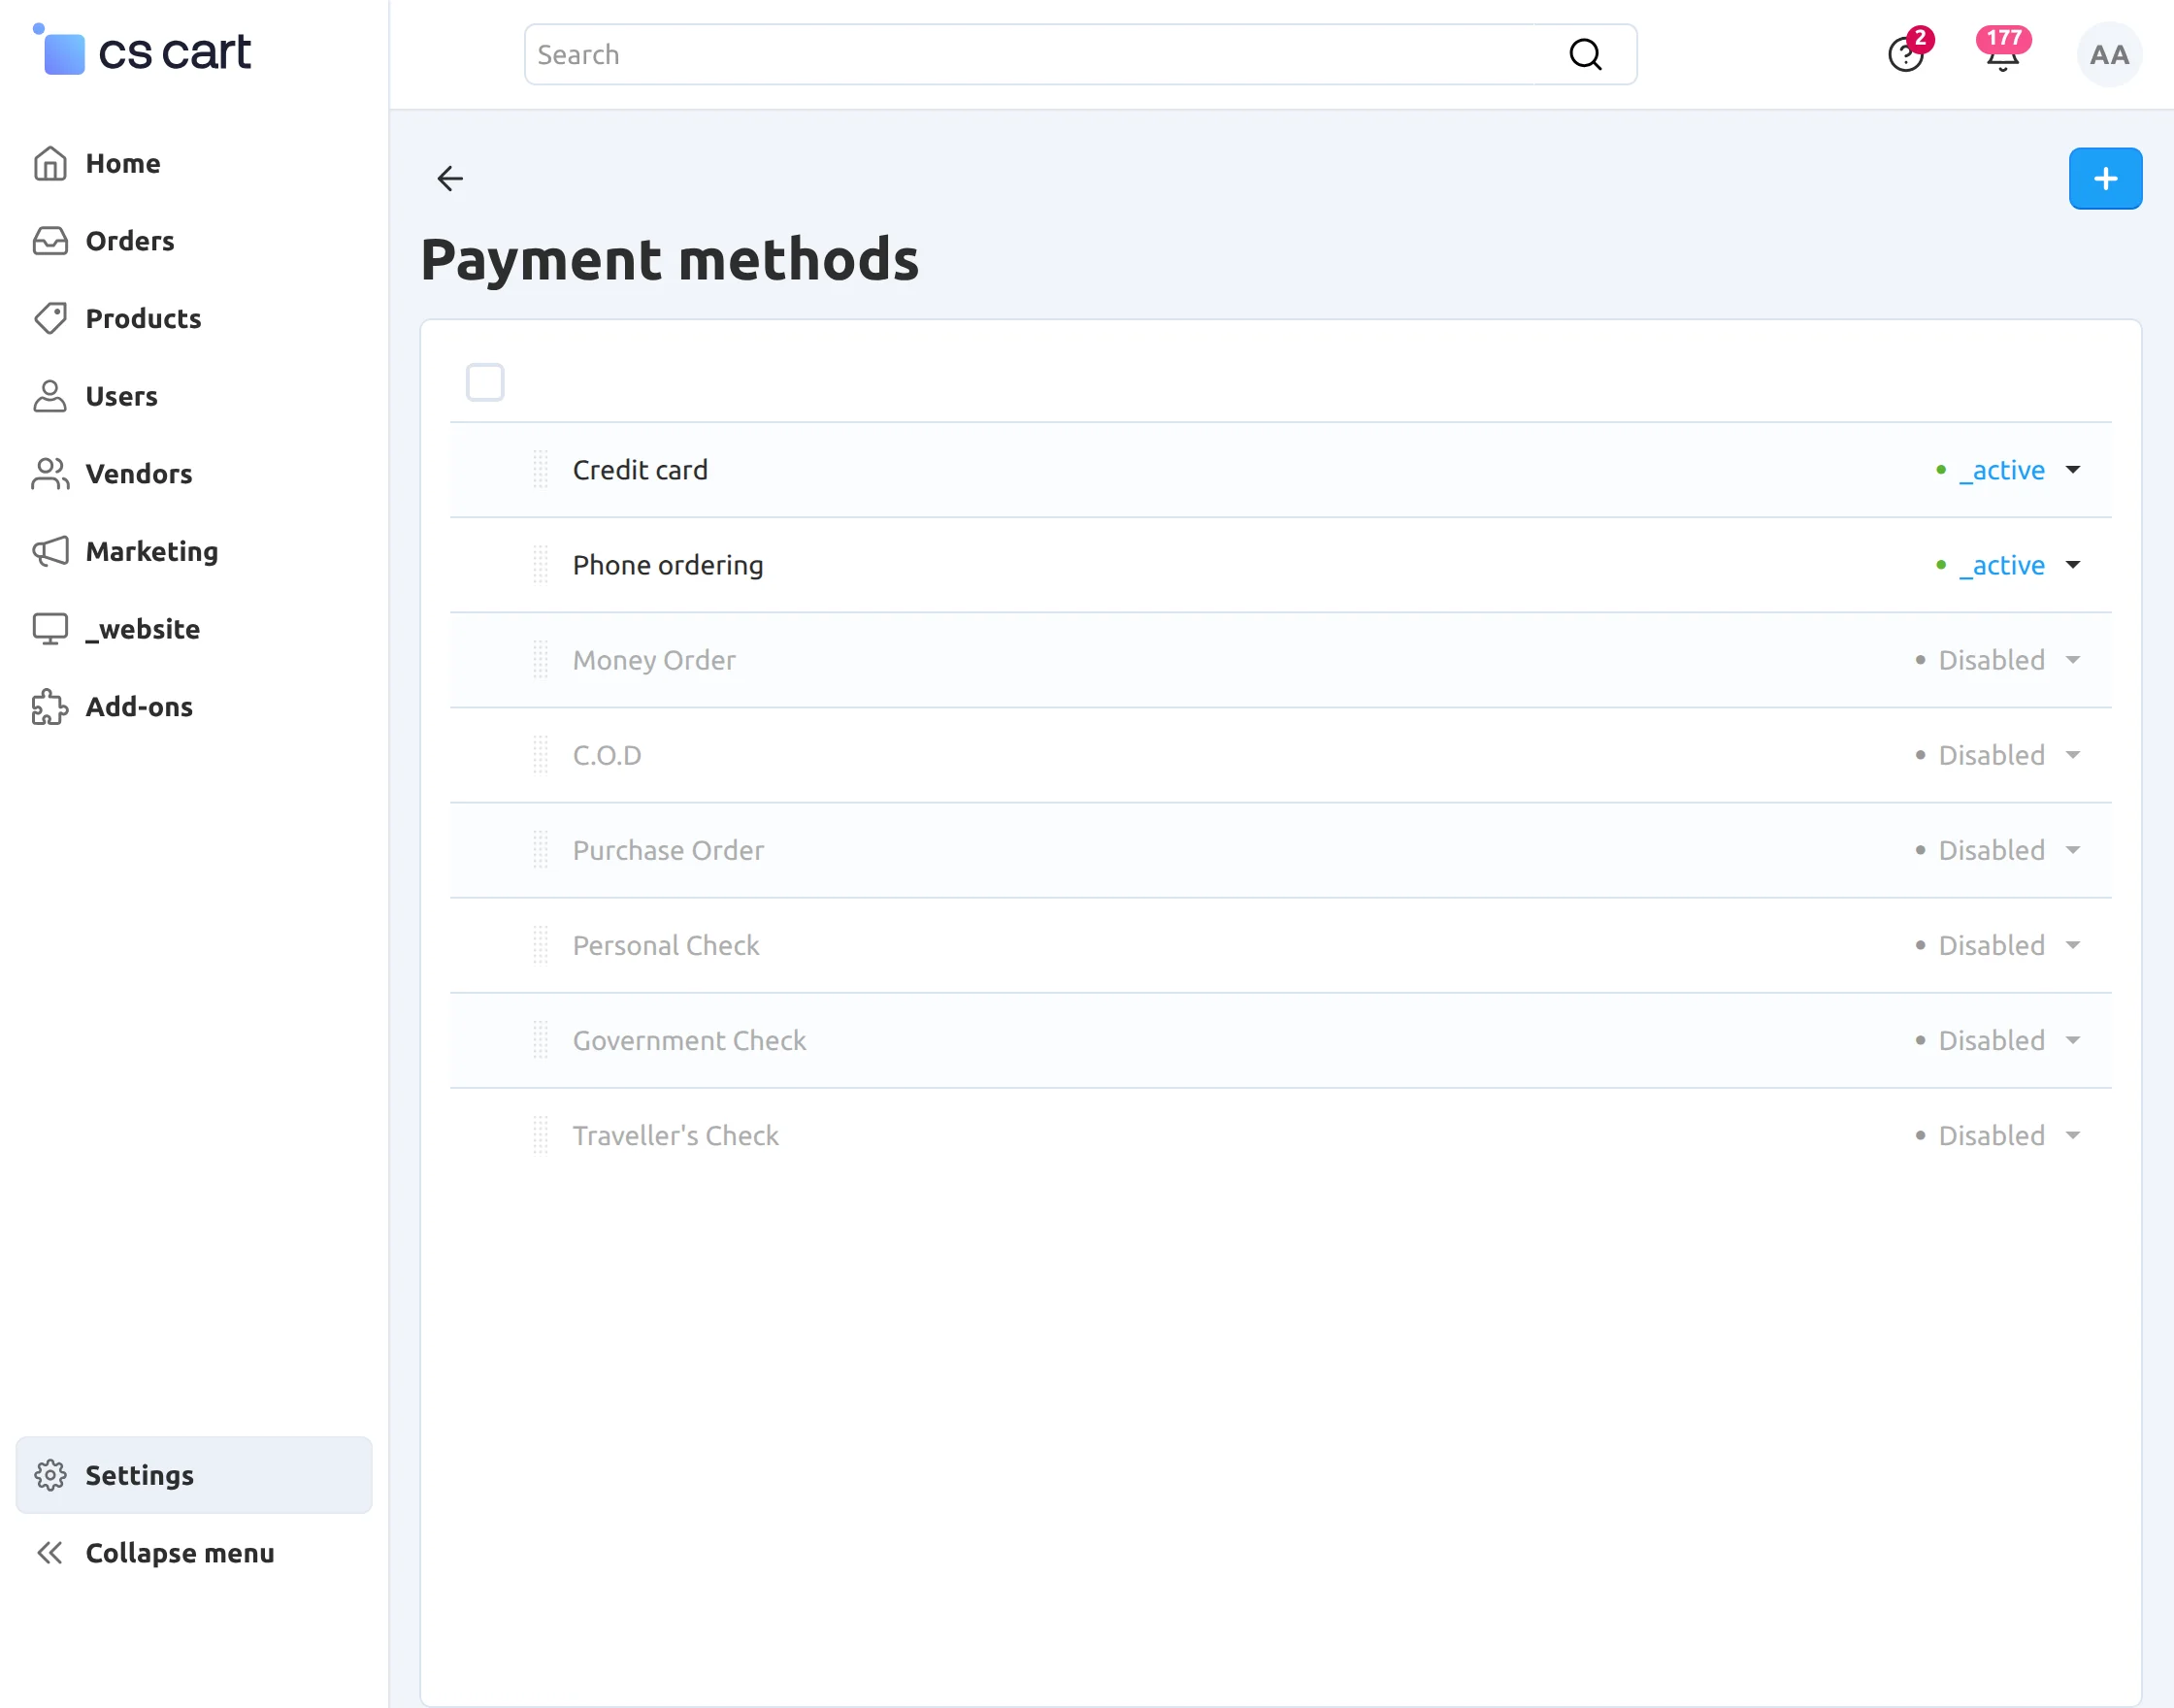
Click on “Payment methods” under Settings, as shown below in the snapshot.
Click on the “+” button to create a new payment method, as shown in the snapshot below.
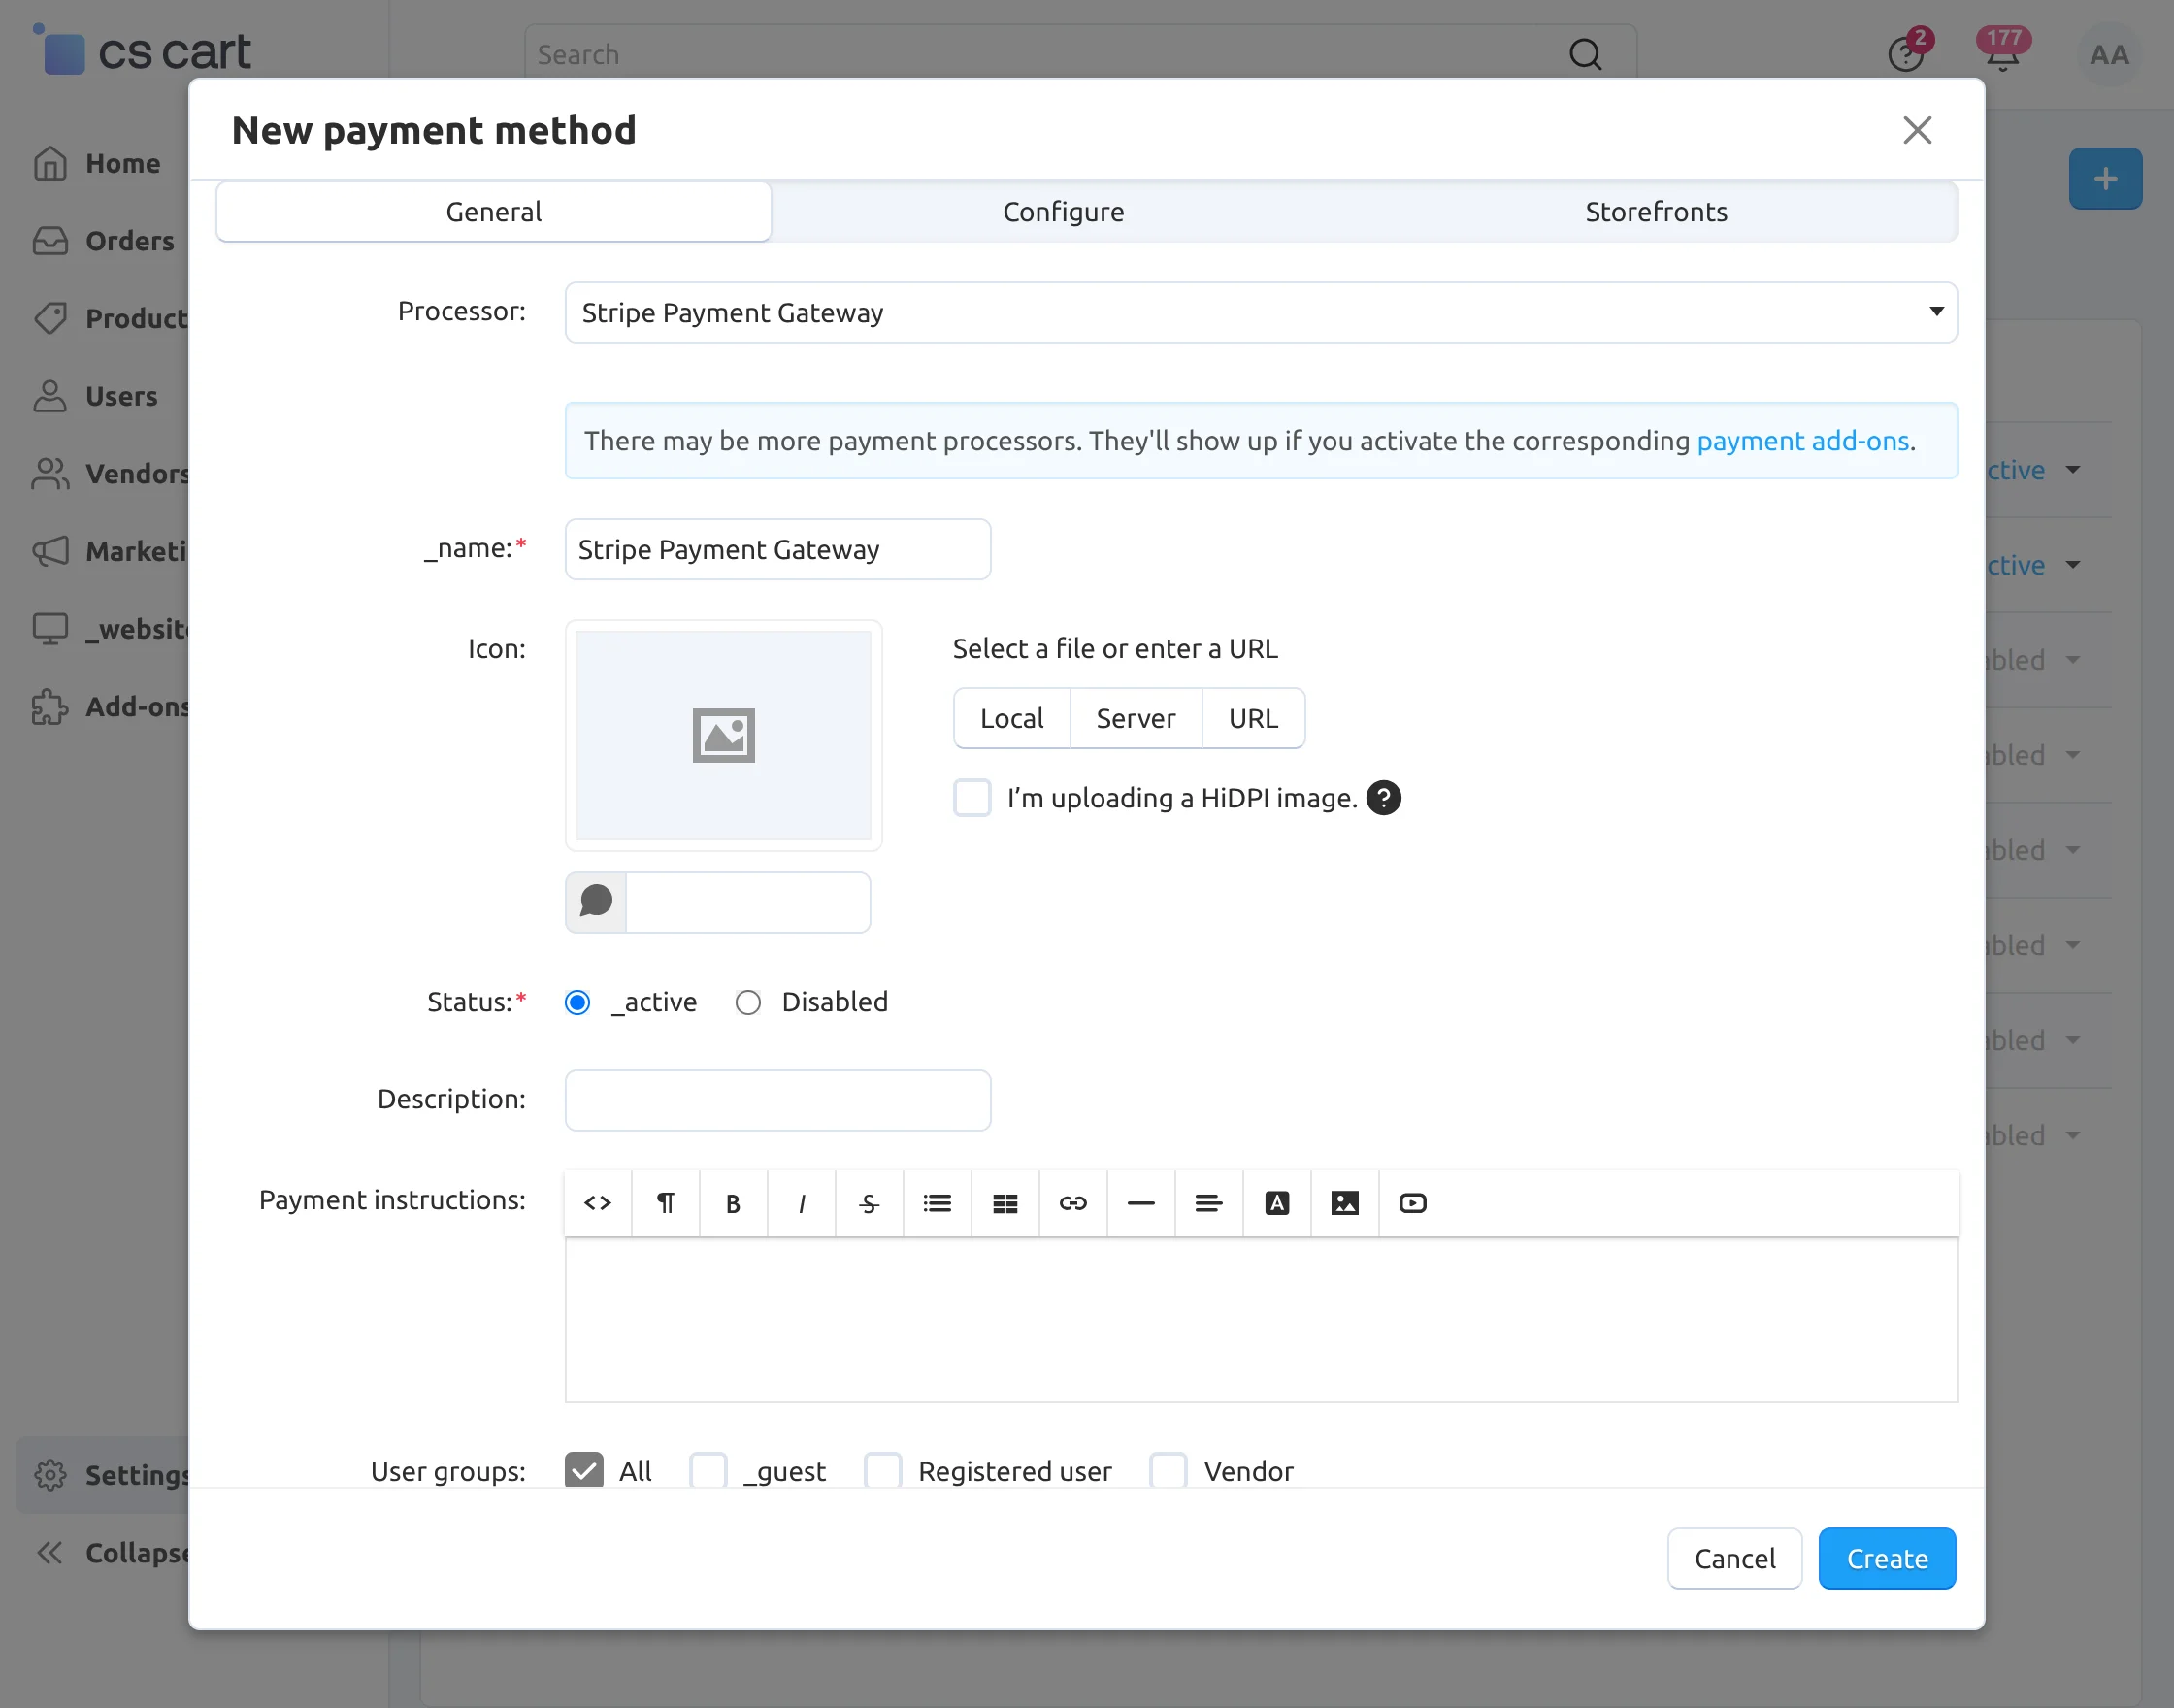
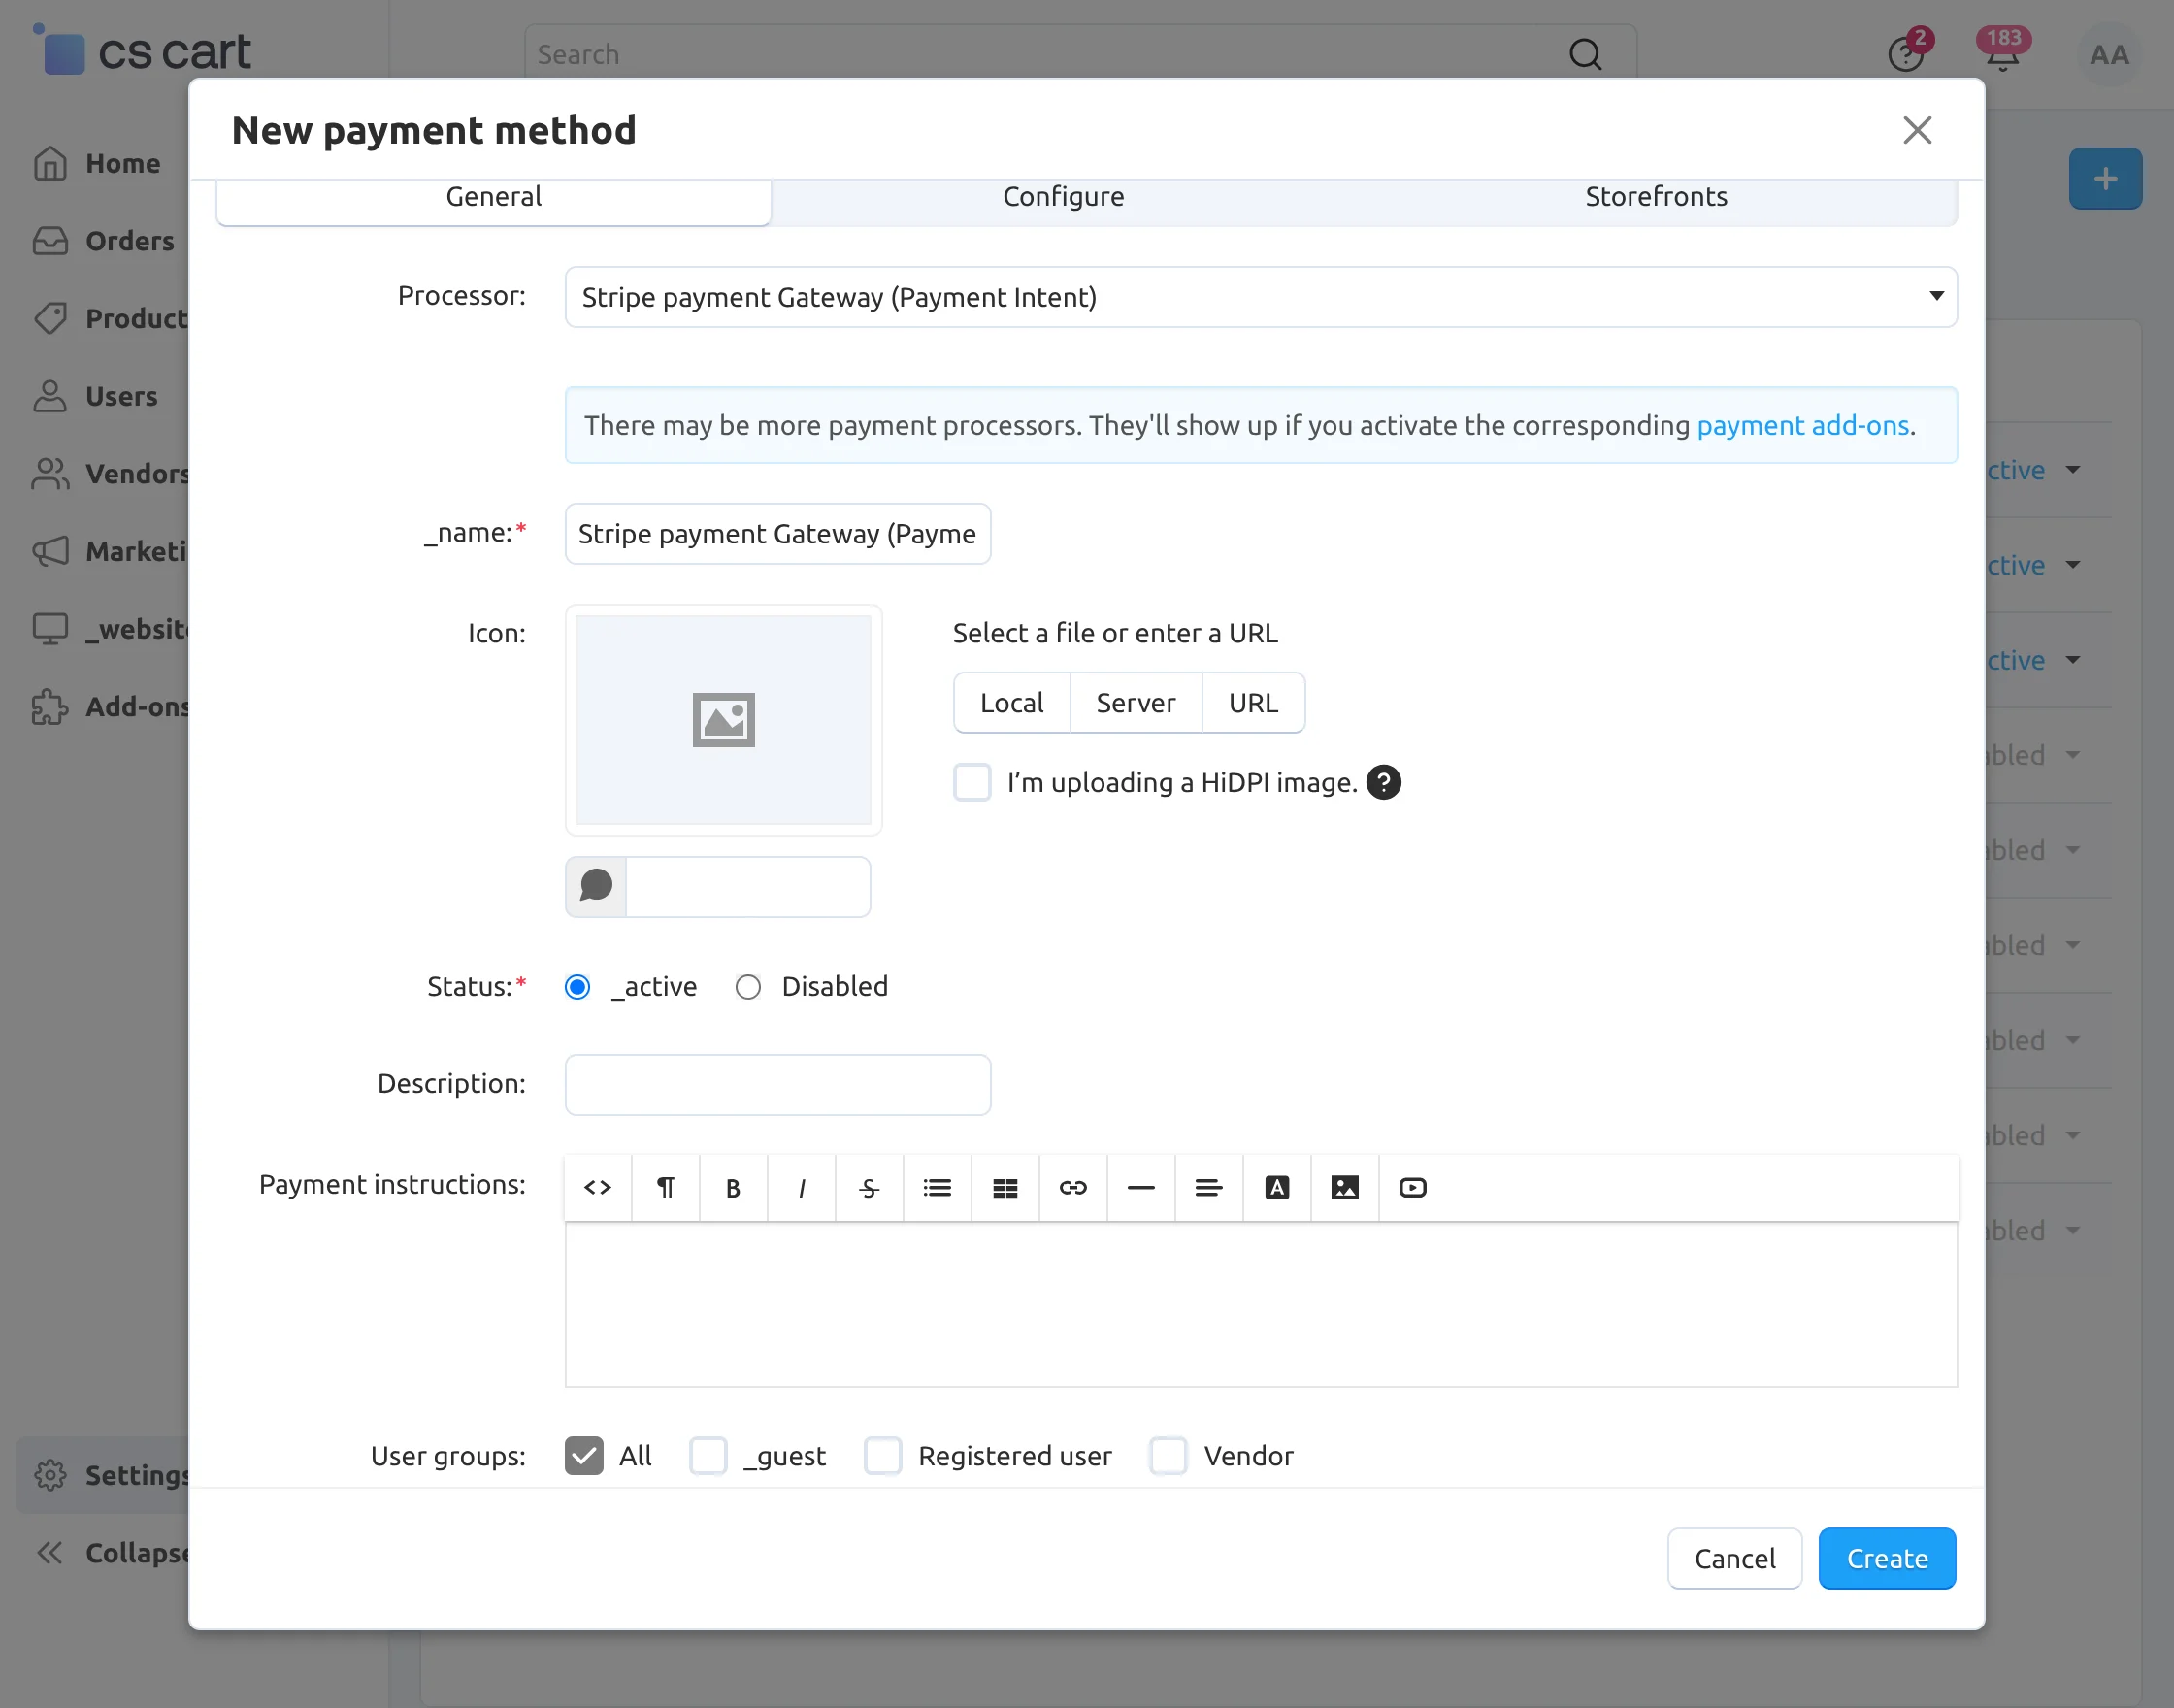
Configure the Stripe Payment Gateway
- Set the name of the payment method.
- For checkout, choose the processor as “Stripe Payment Gateway“.
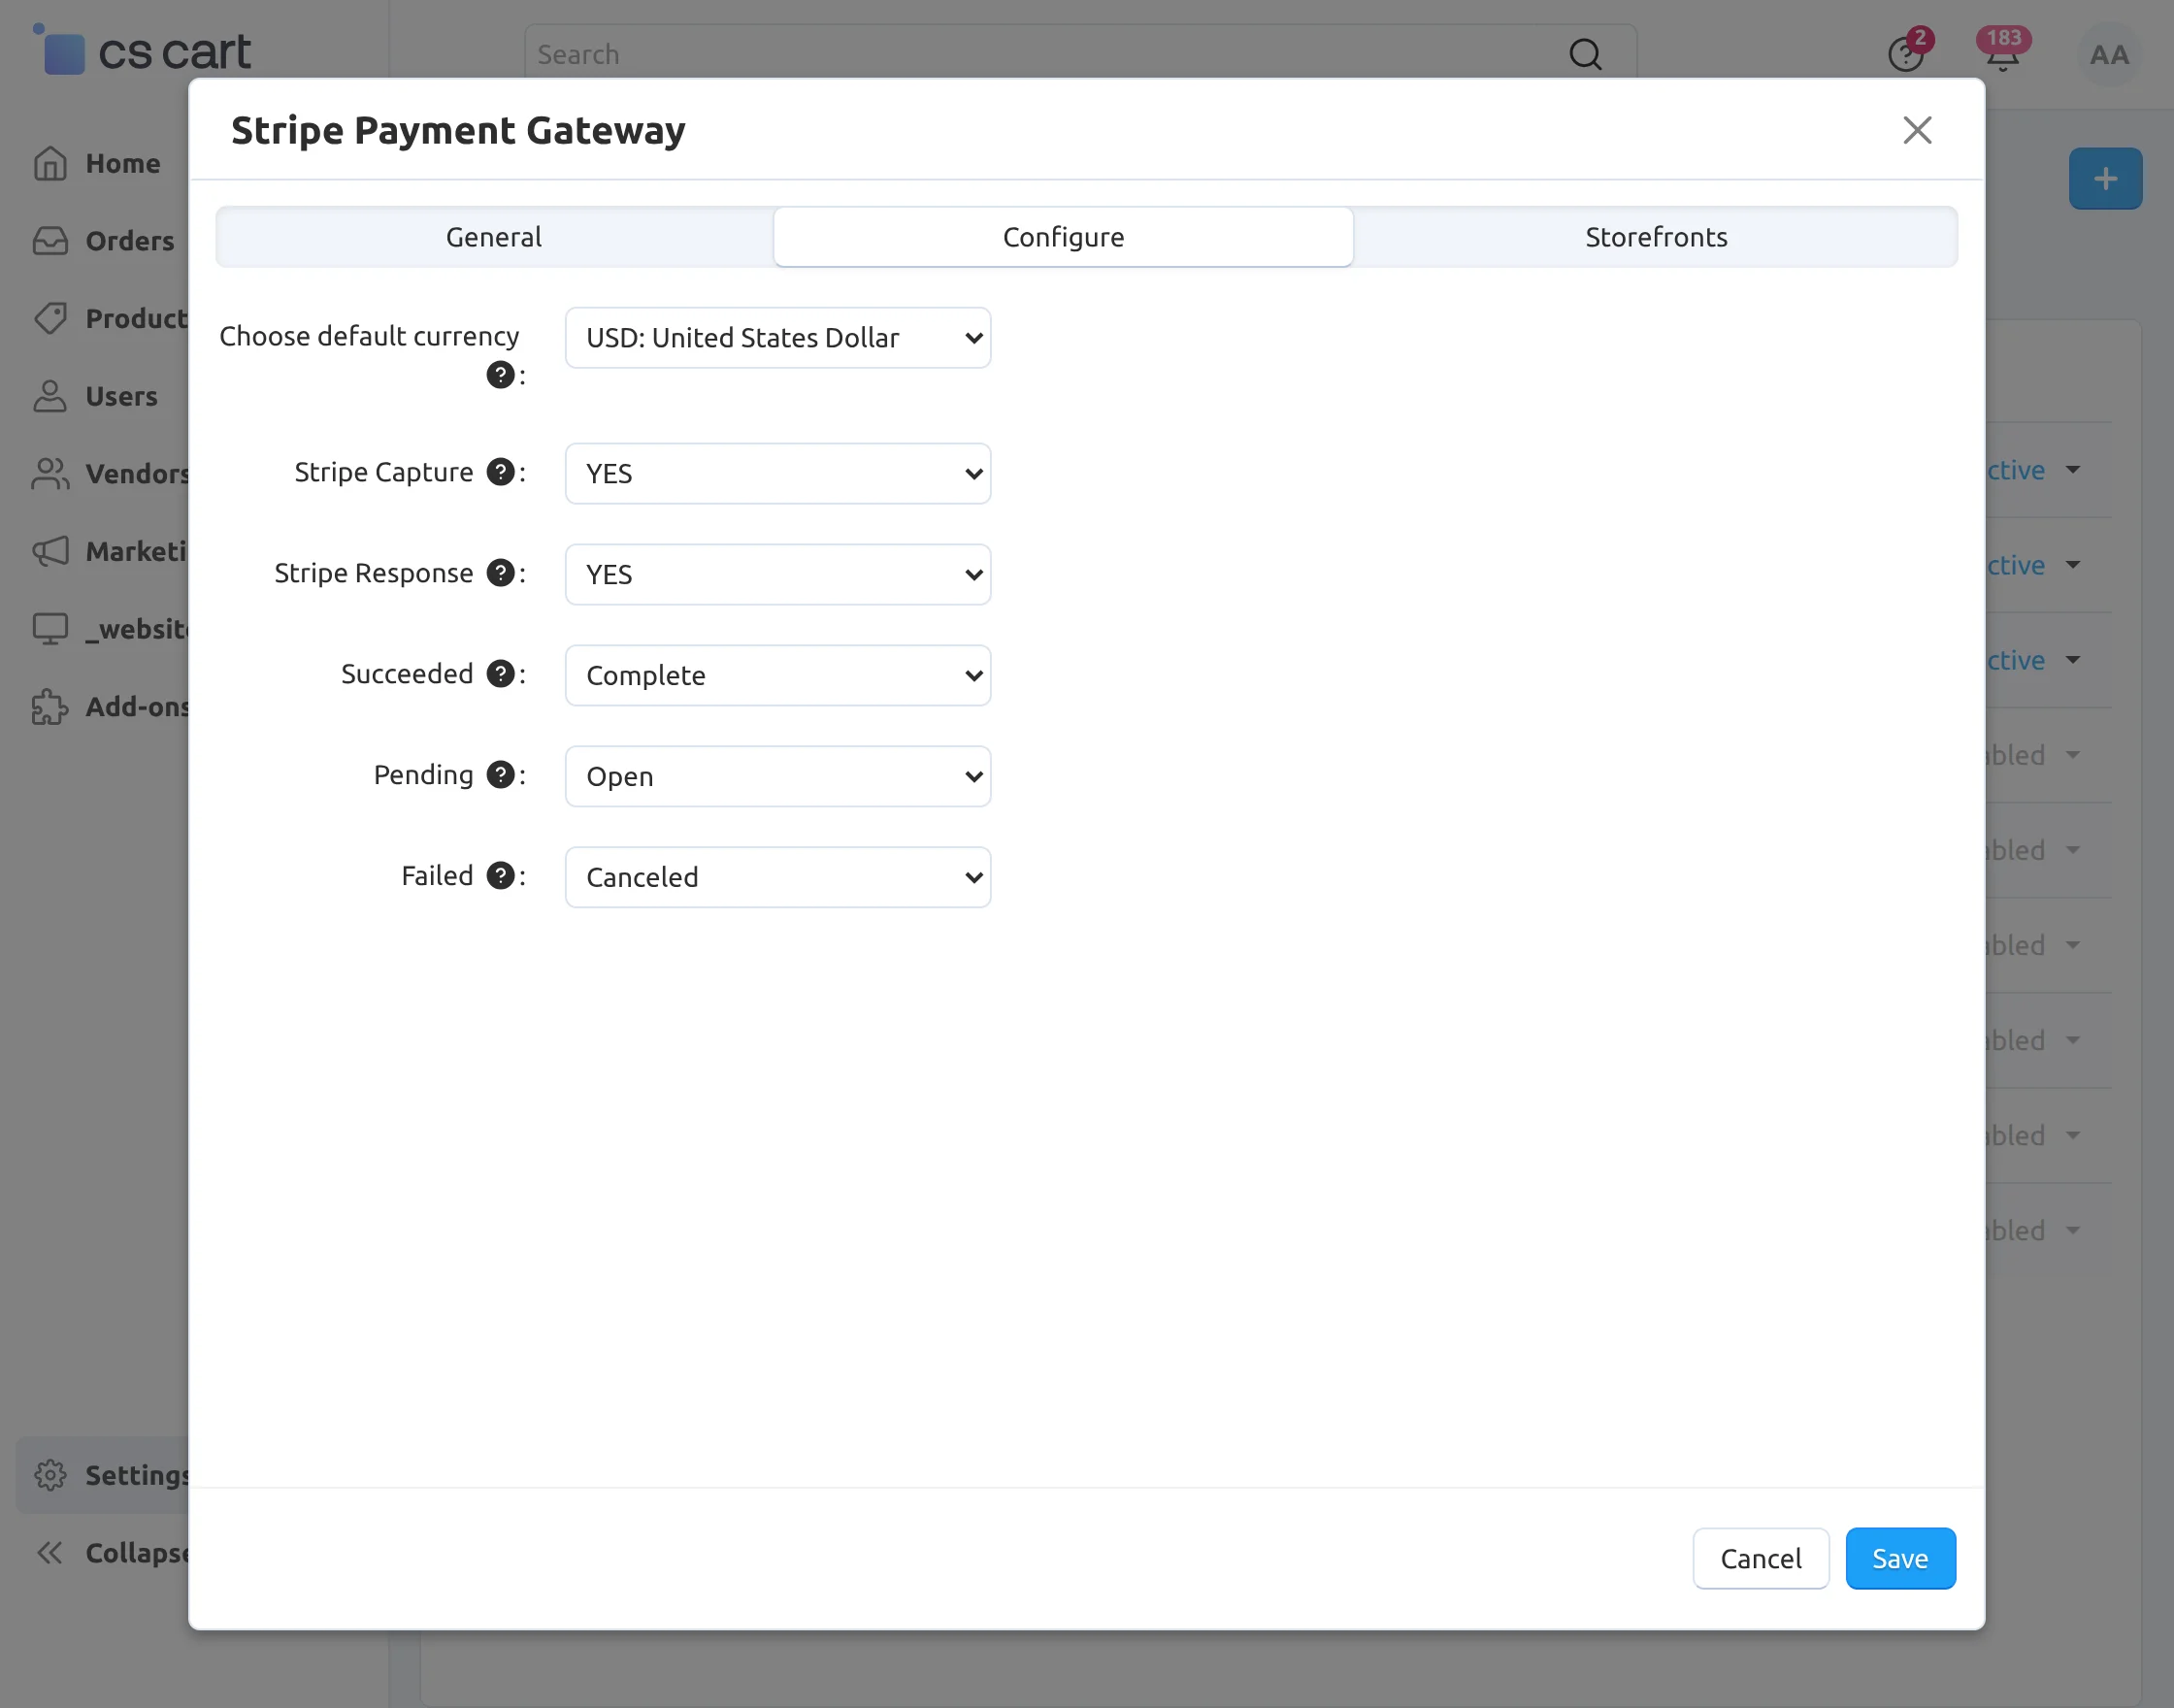
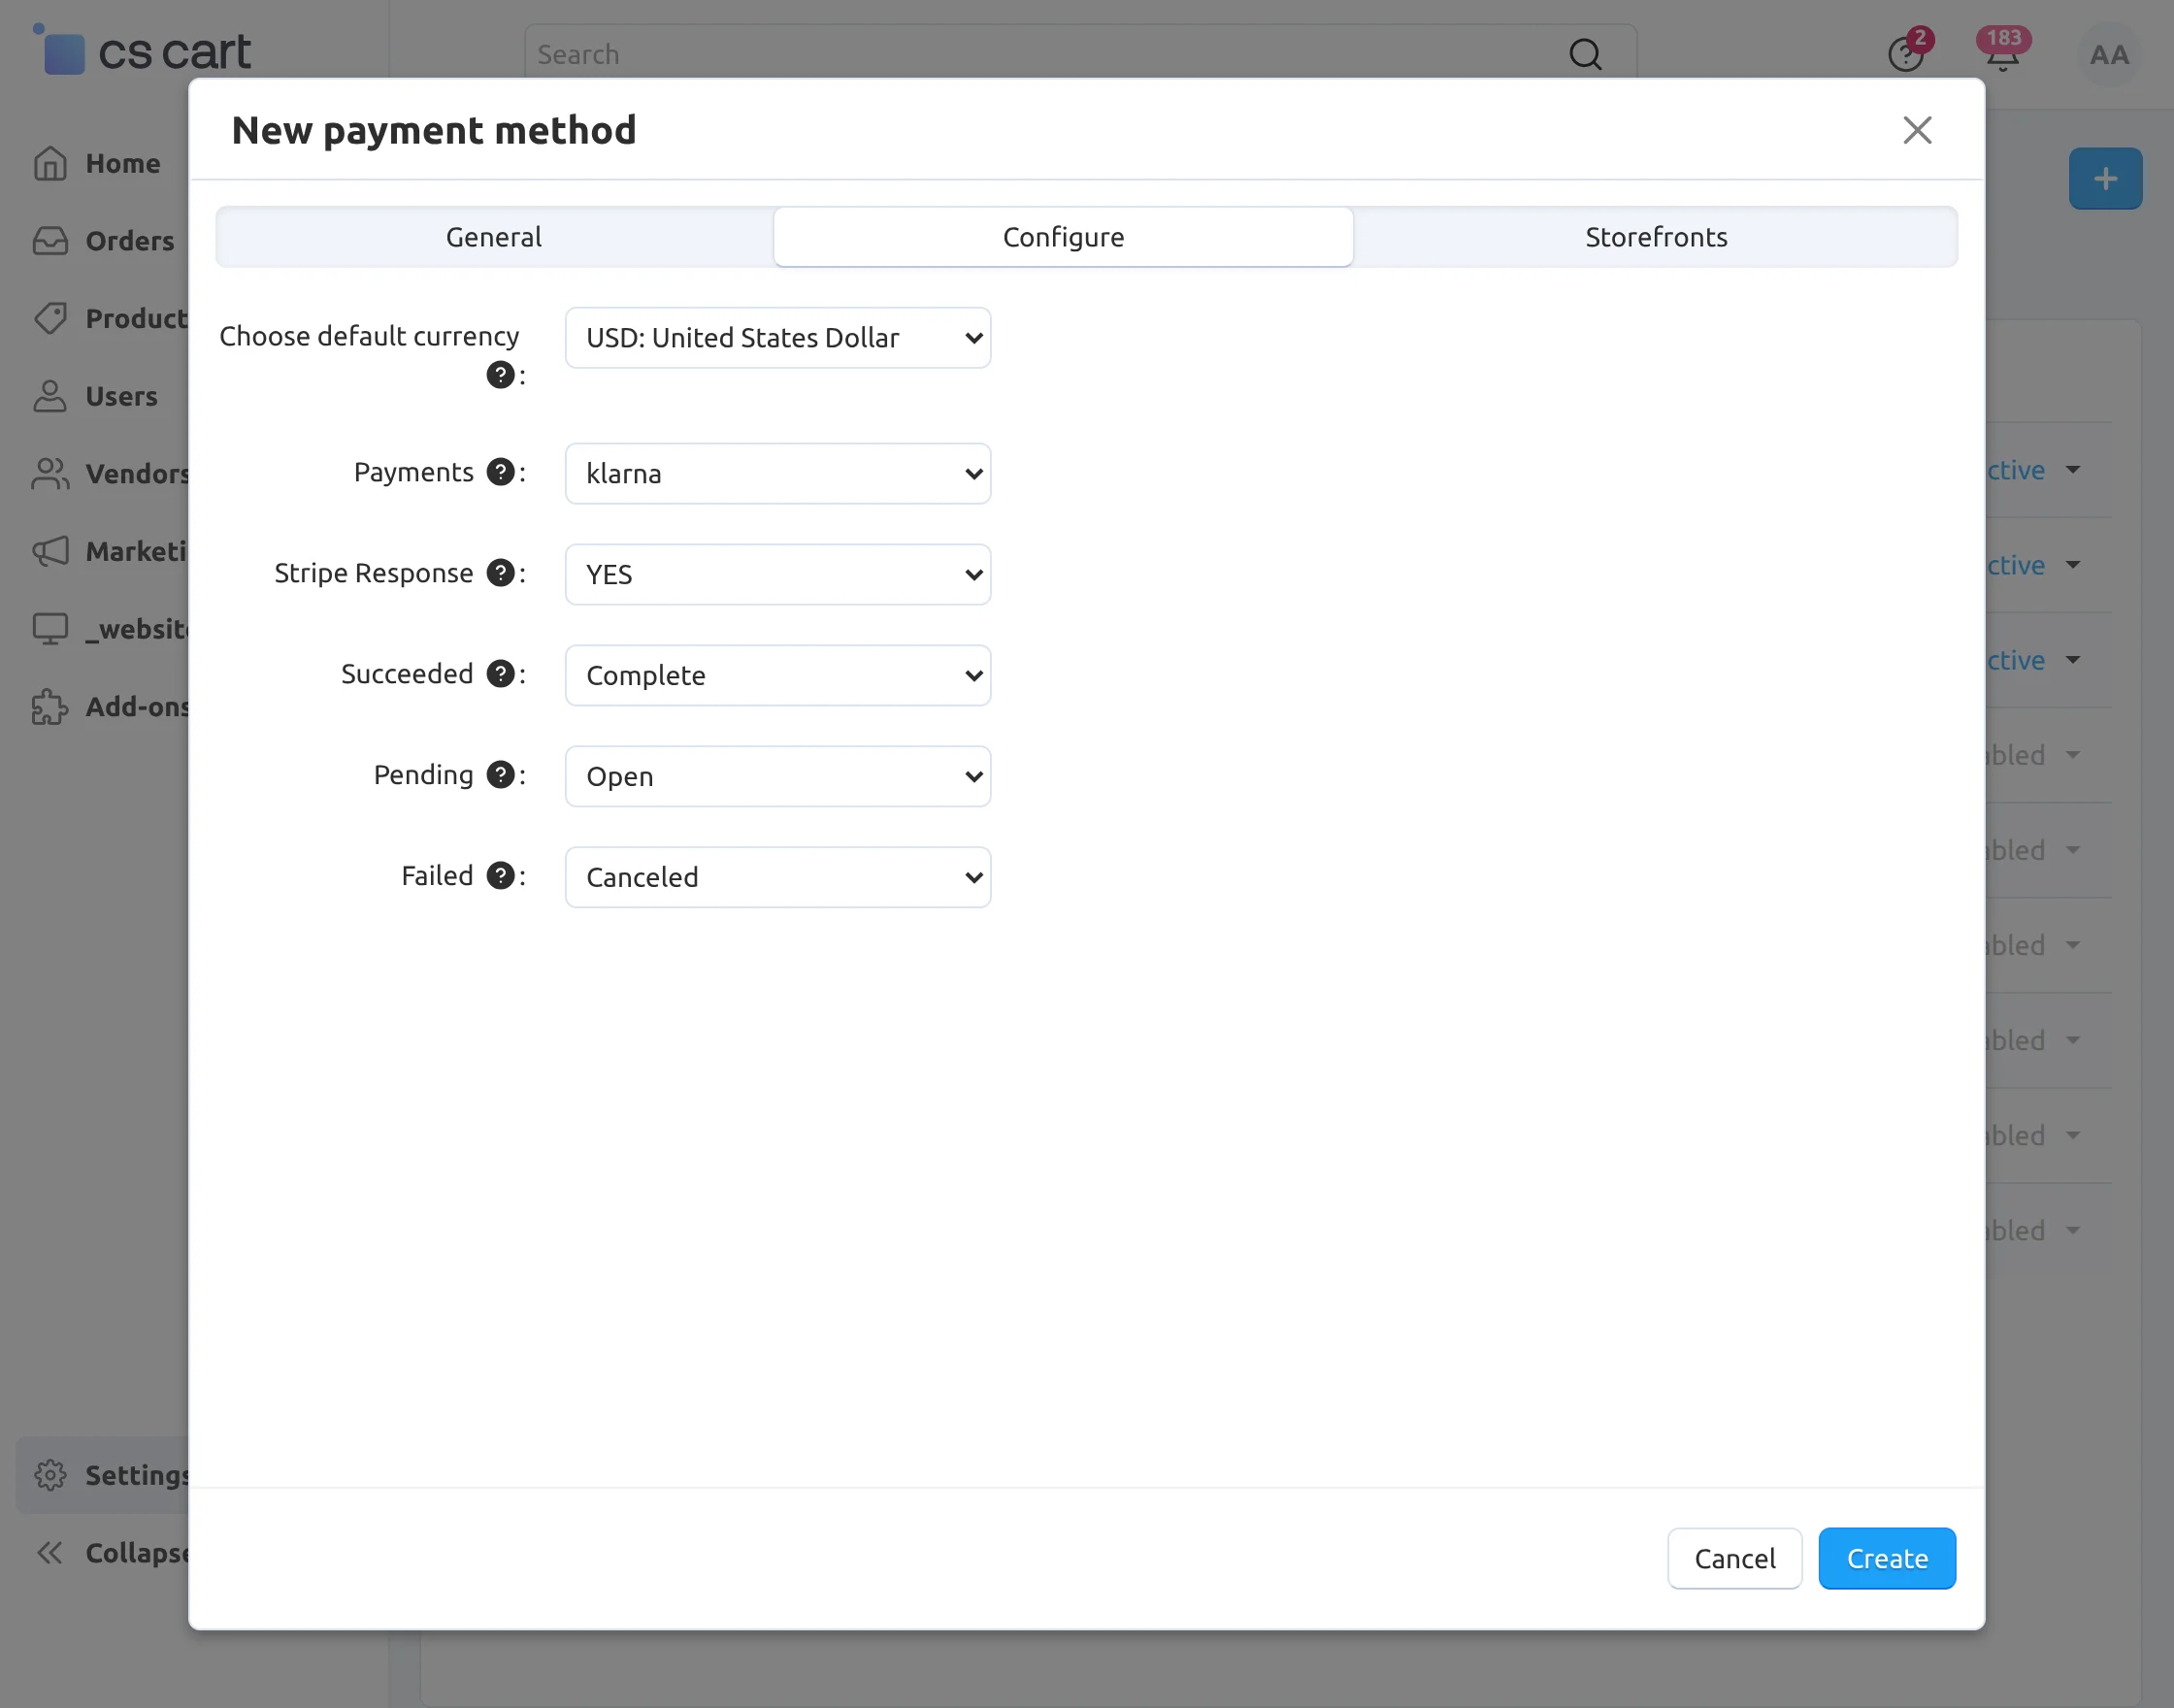
Click on “Configure” and set the parameters as shown below in the snapshot.
- Select the default currency for Stripe payment. If any user selects any non-supported stripe currency, then the default currency will get applied instead of the non-supported chosen currency.
- Set “Enable Stripe Capture” to “YES” to capture the payment.
- Select “YES” to save the Stripe response at the backend.
- Select the order status for different Stripe payment responses.
- After completing the configuration, click on the “Create” button to add the payment method.
Finally, this is how Stripe is added to your CS-Cart Store.
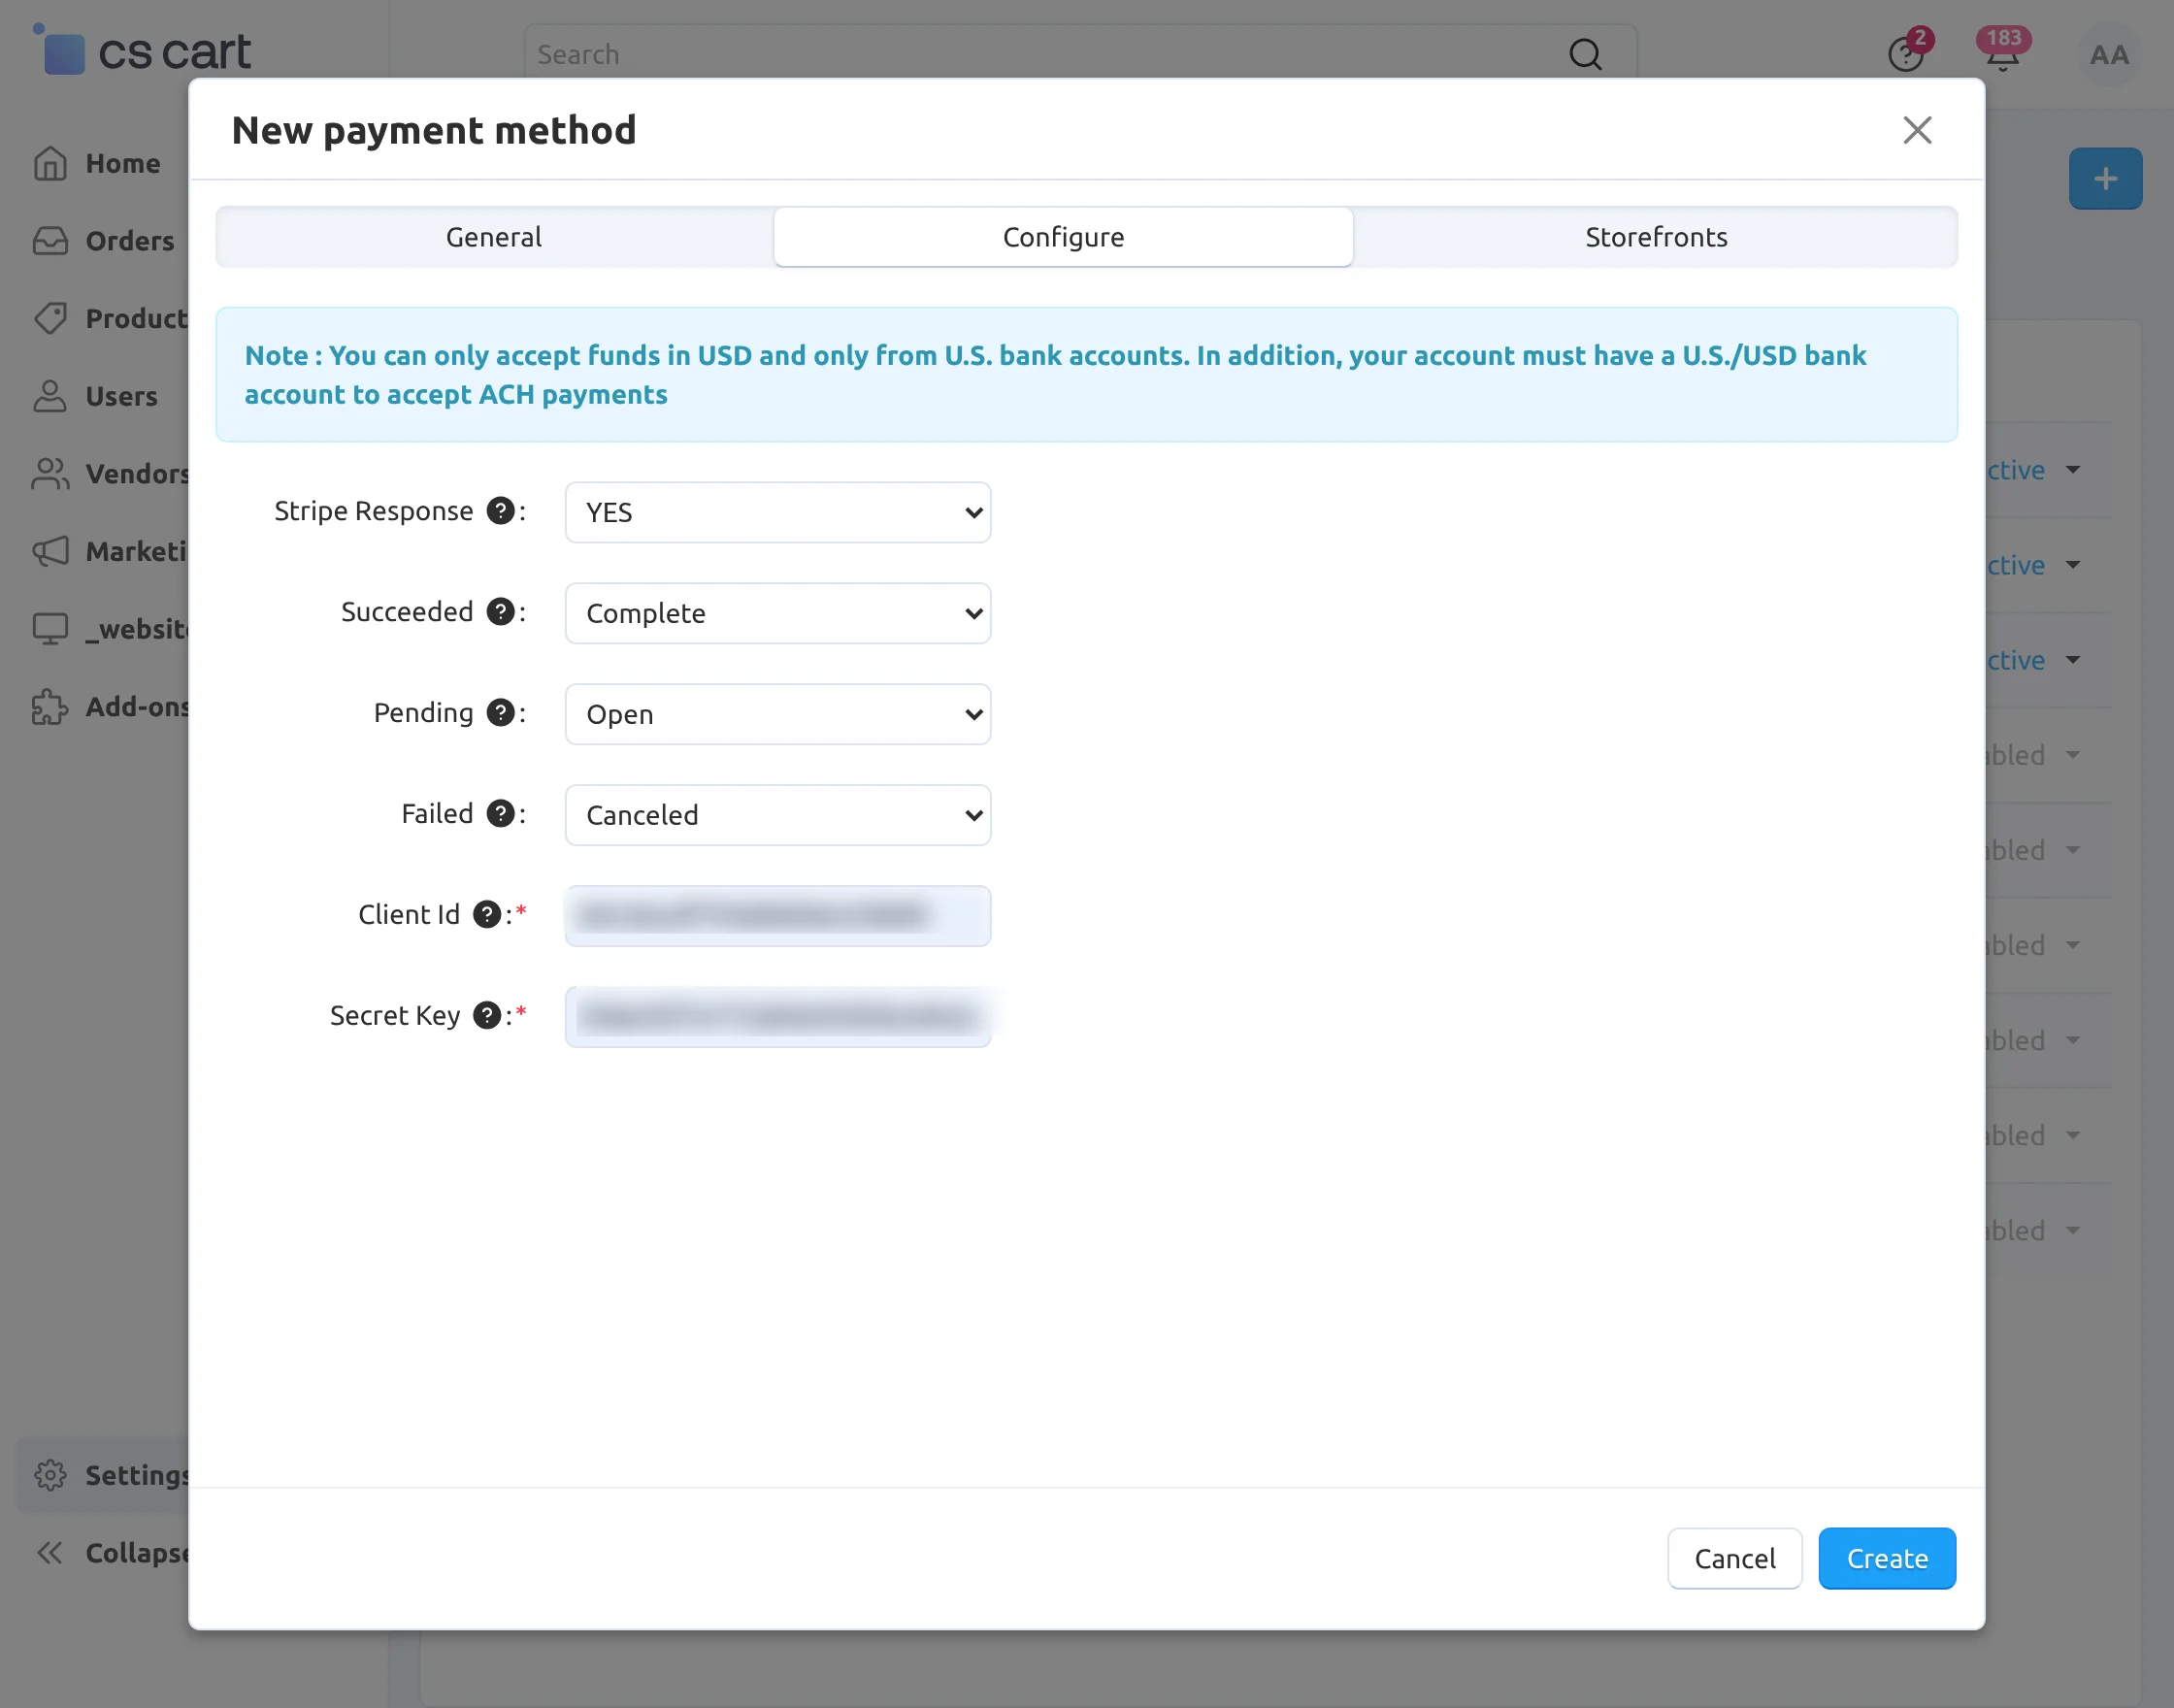
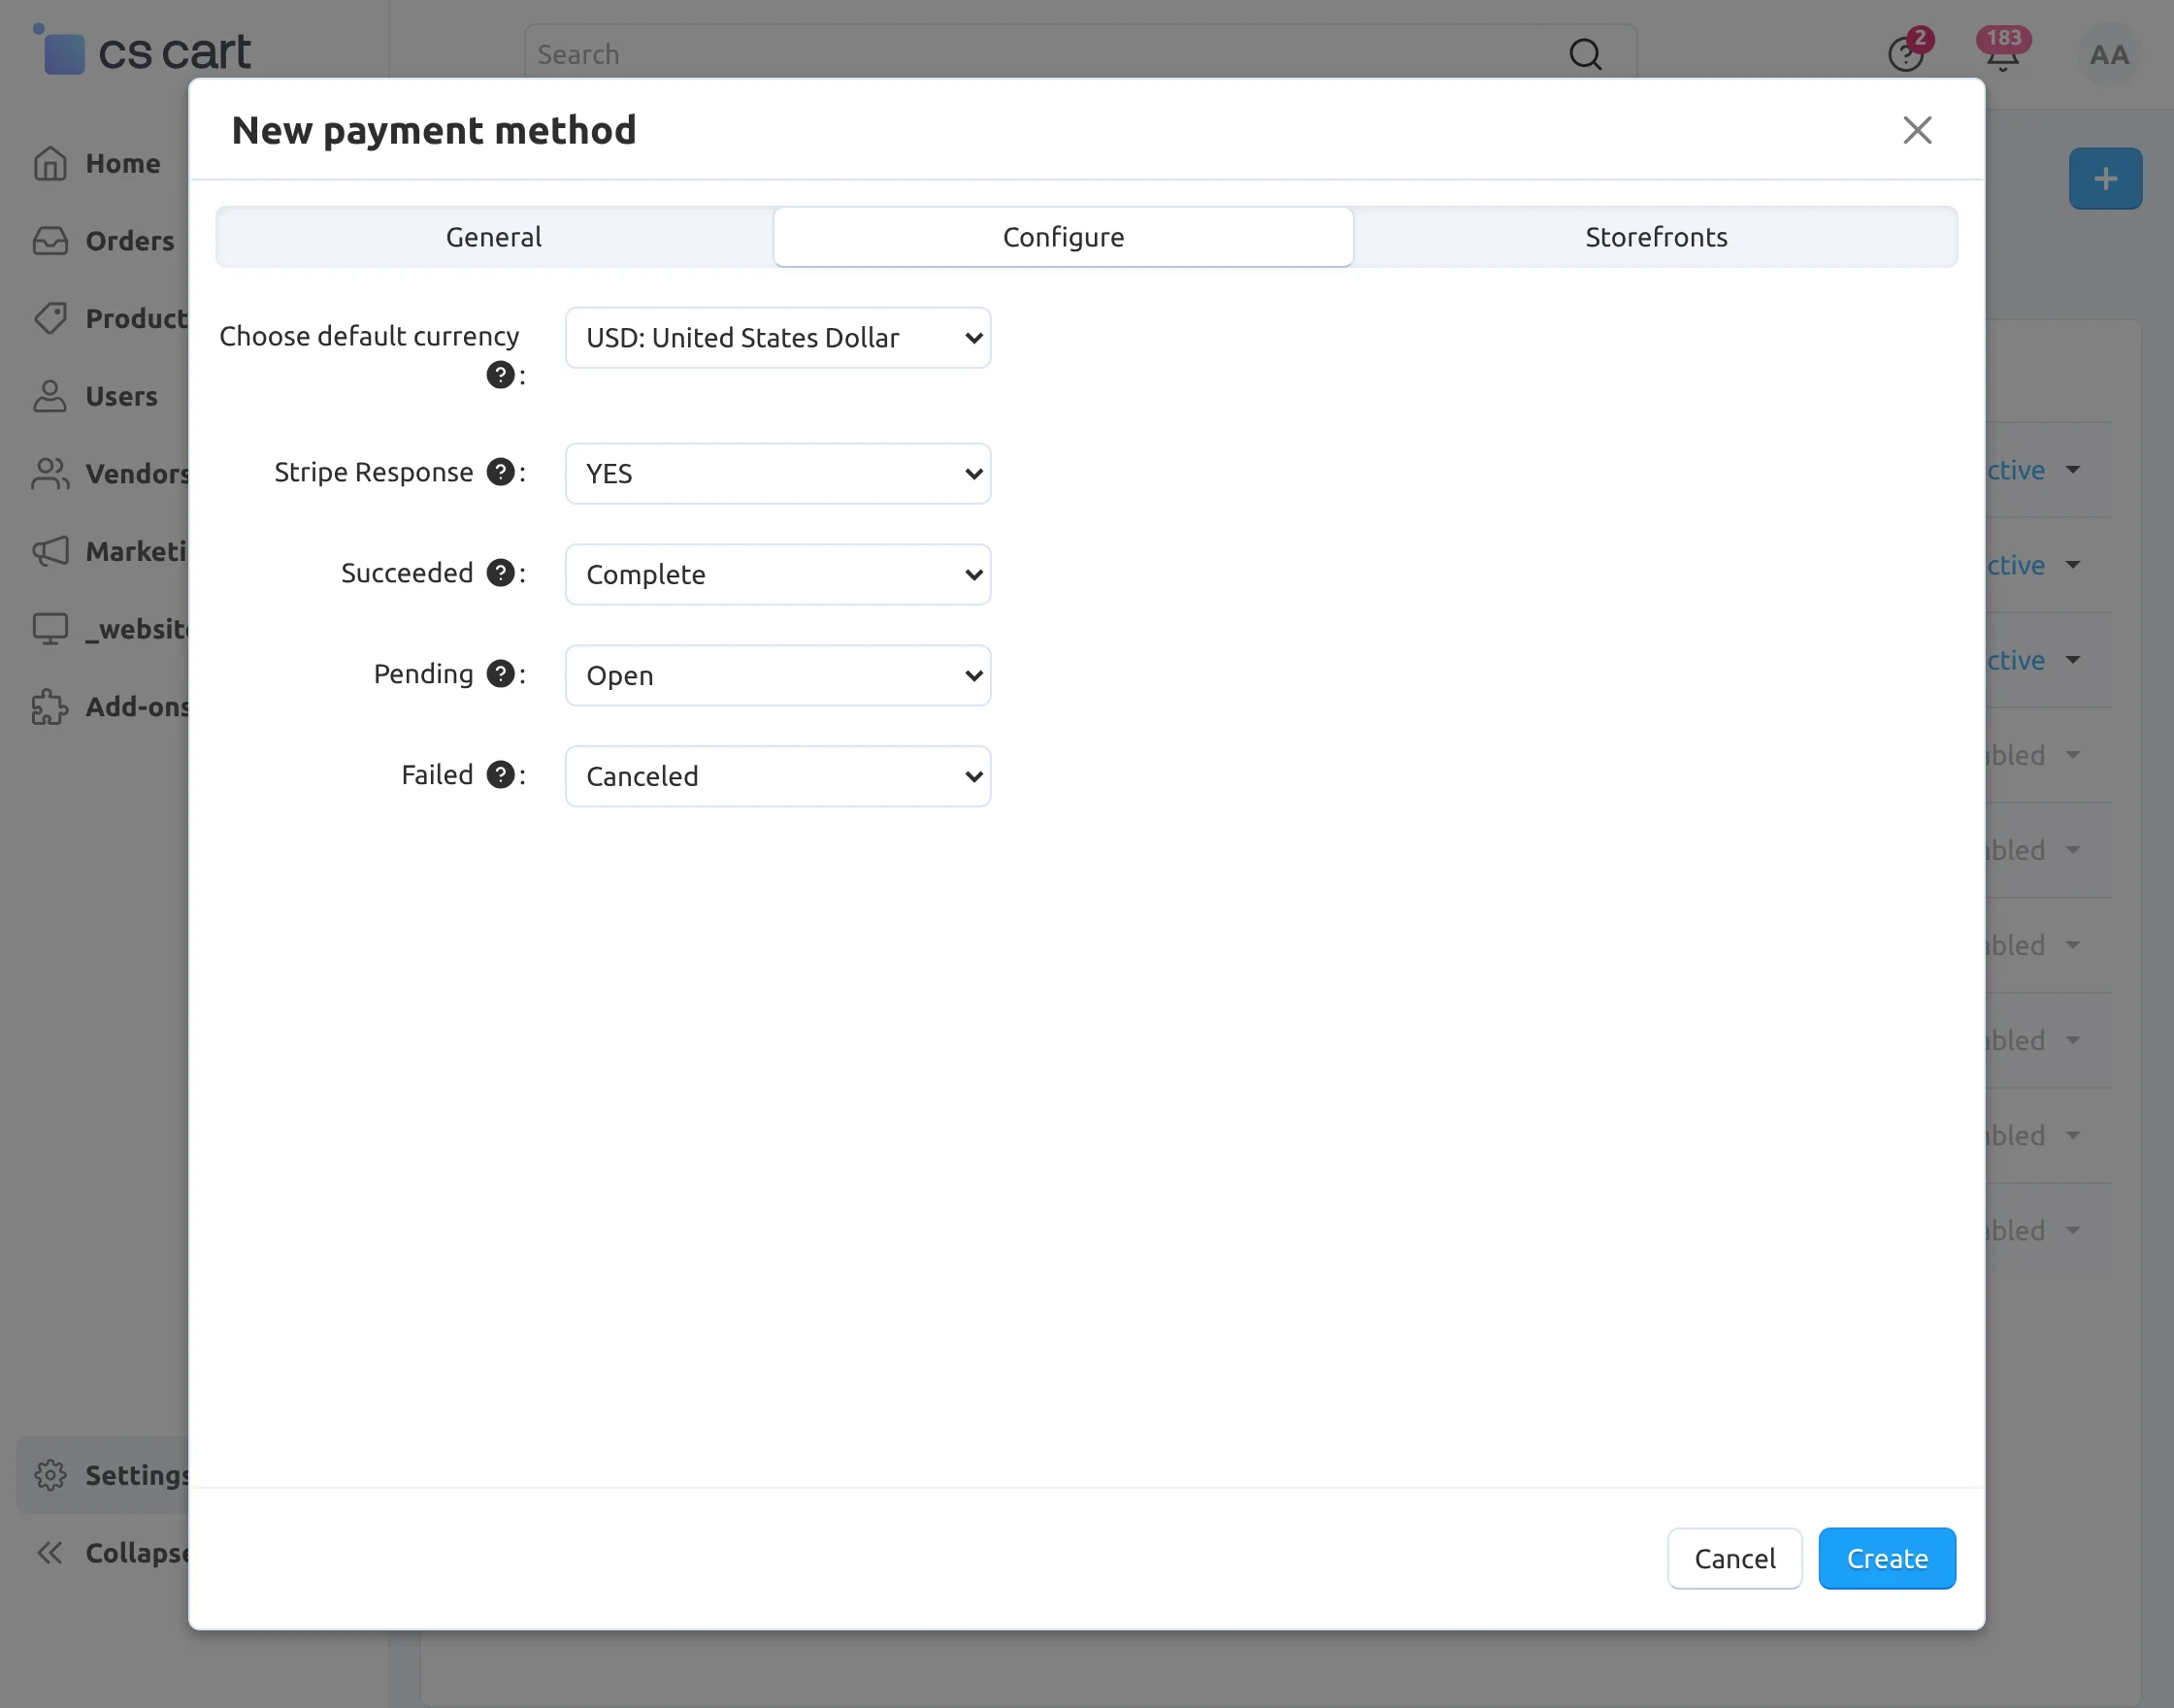
Configure Stripe Payment Gateway (ACH)

Click on “Configure” and set the parameters as shown below in the snapshot.

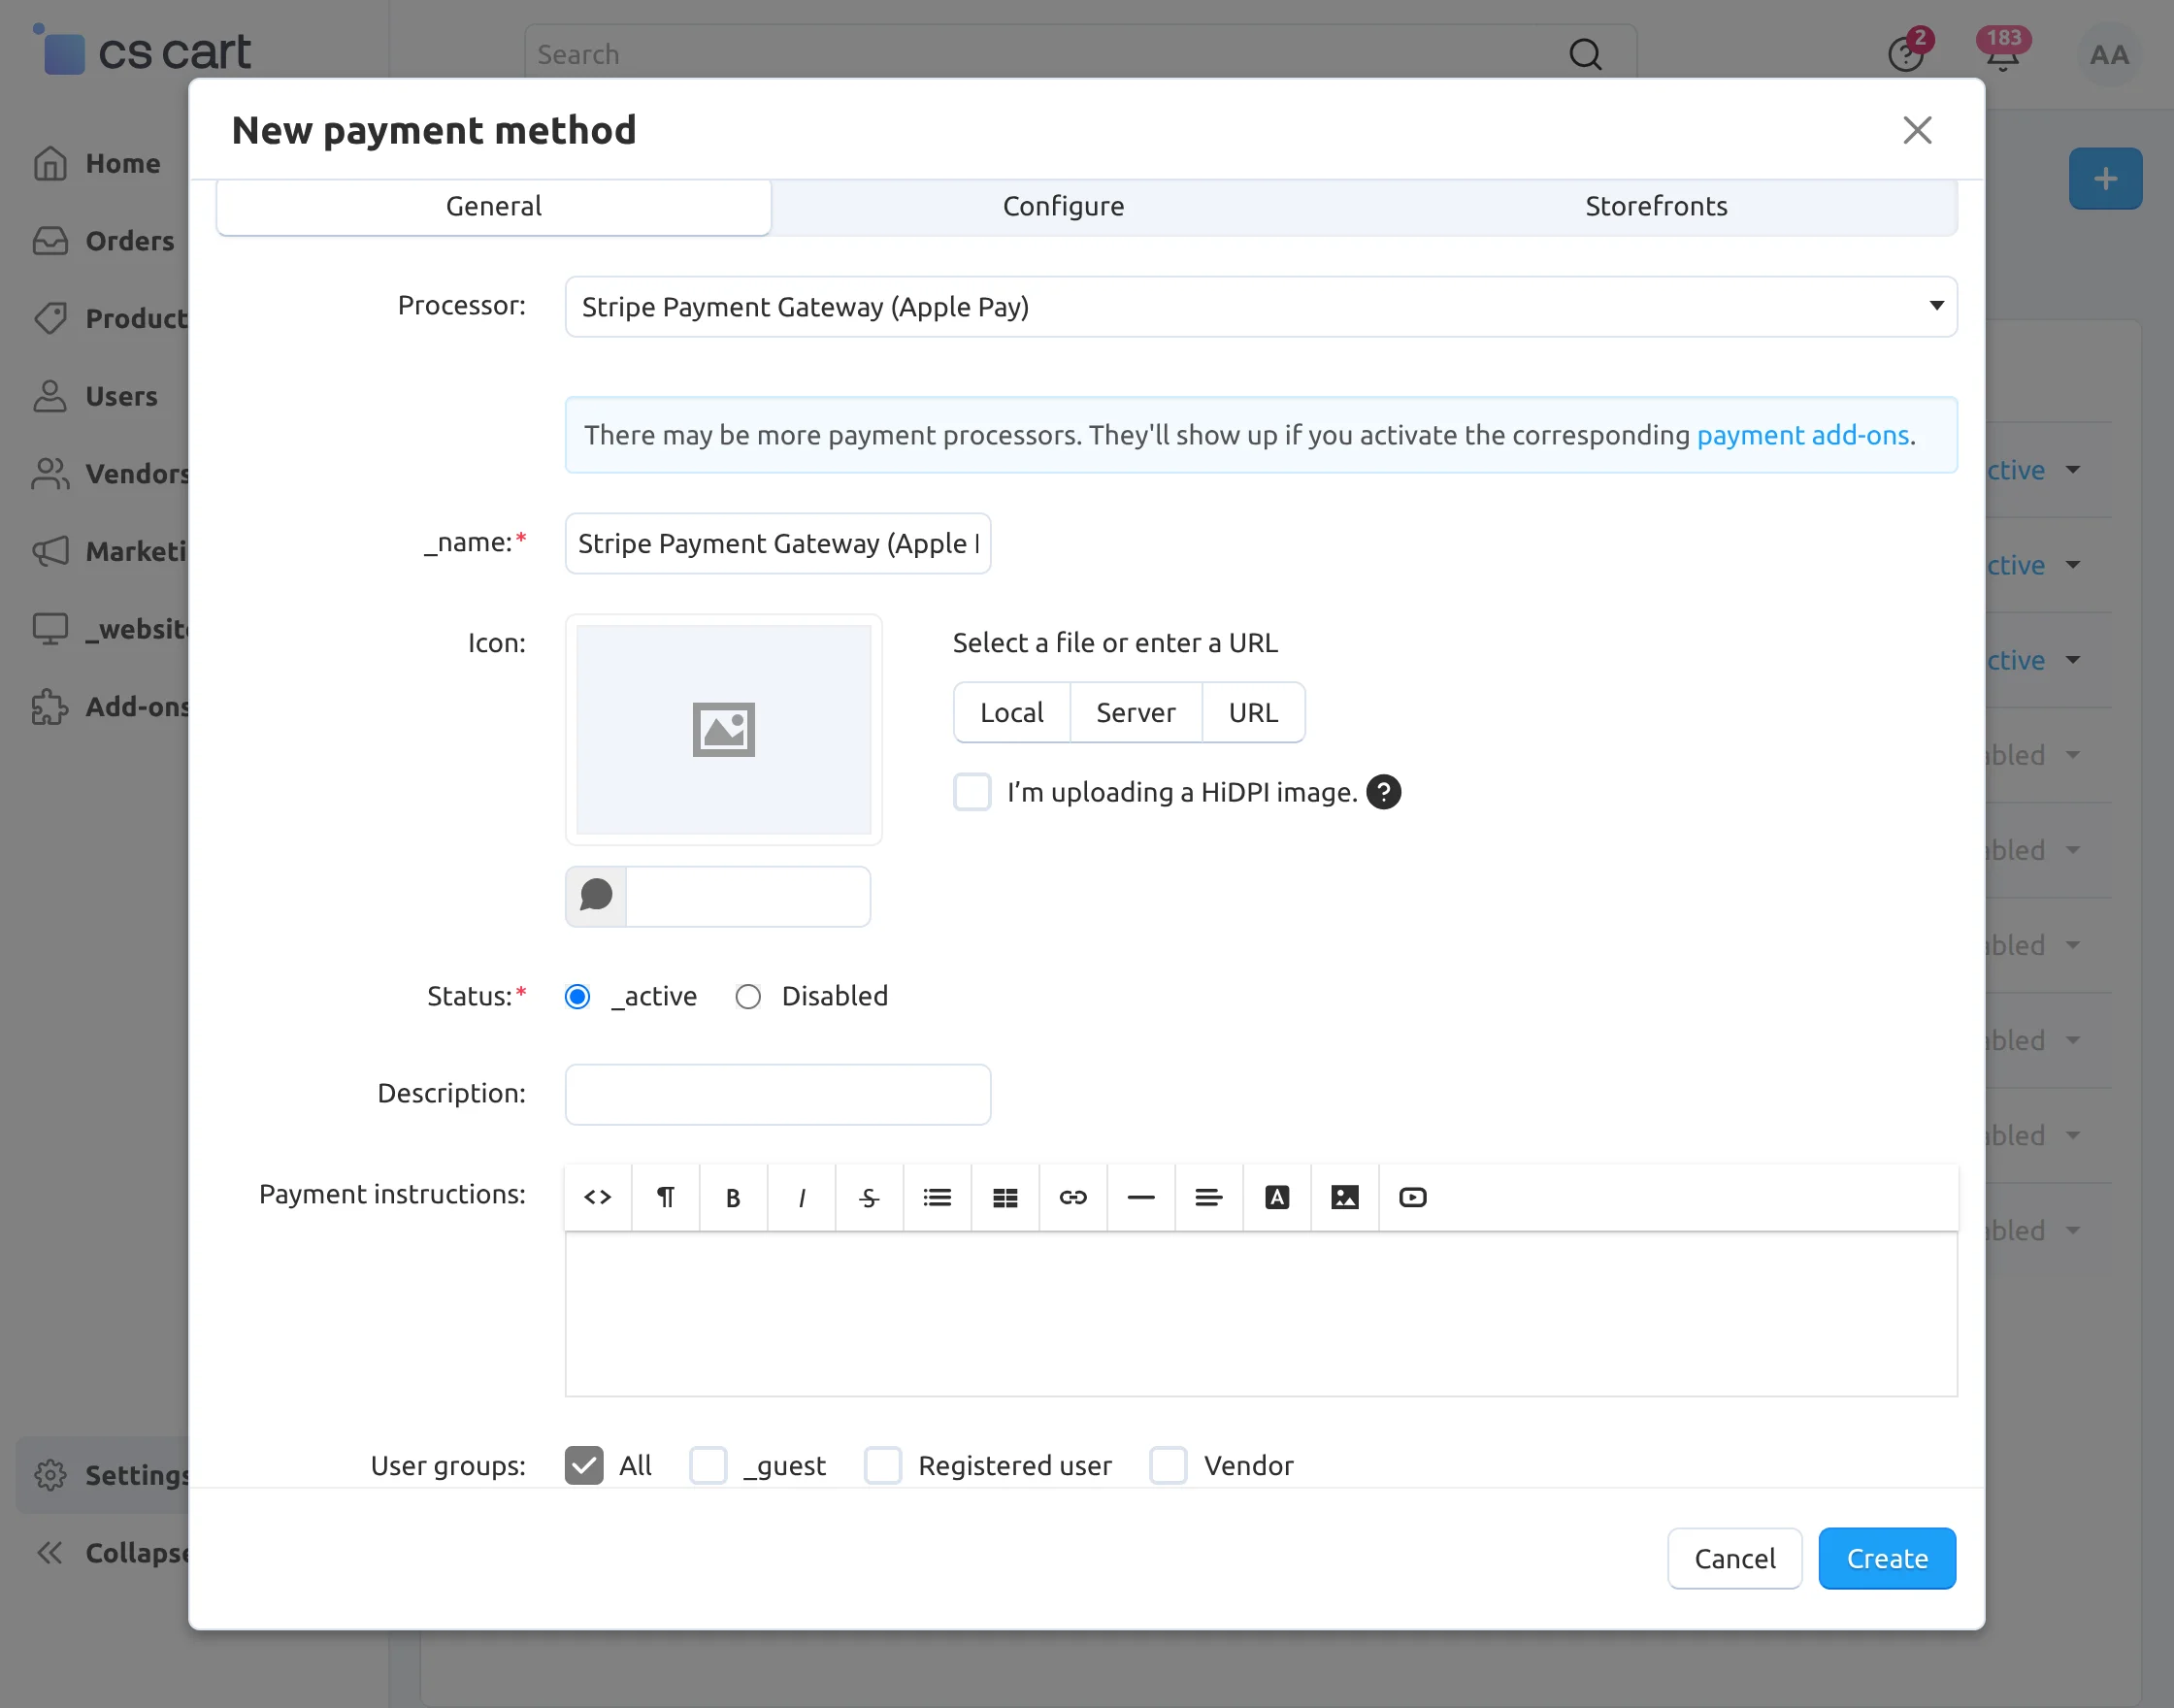
Configure Stripe Payment Gateway (Apple Pay)
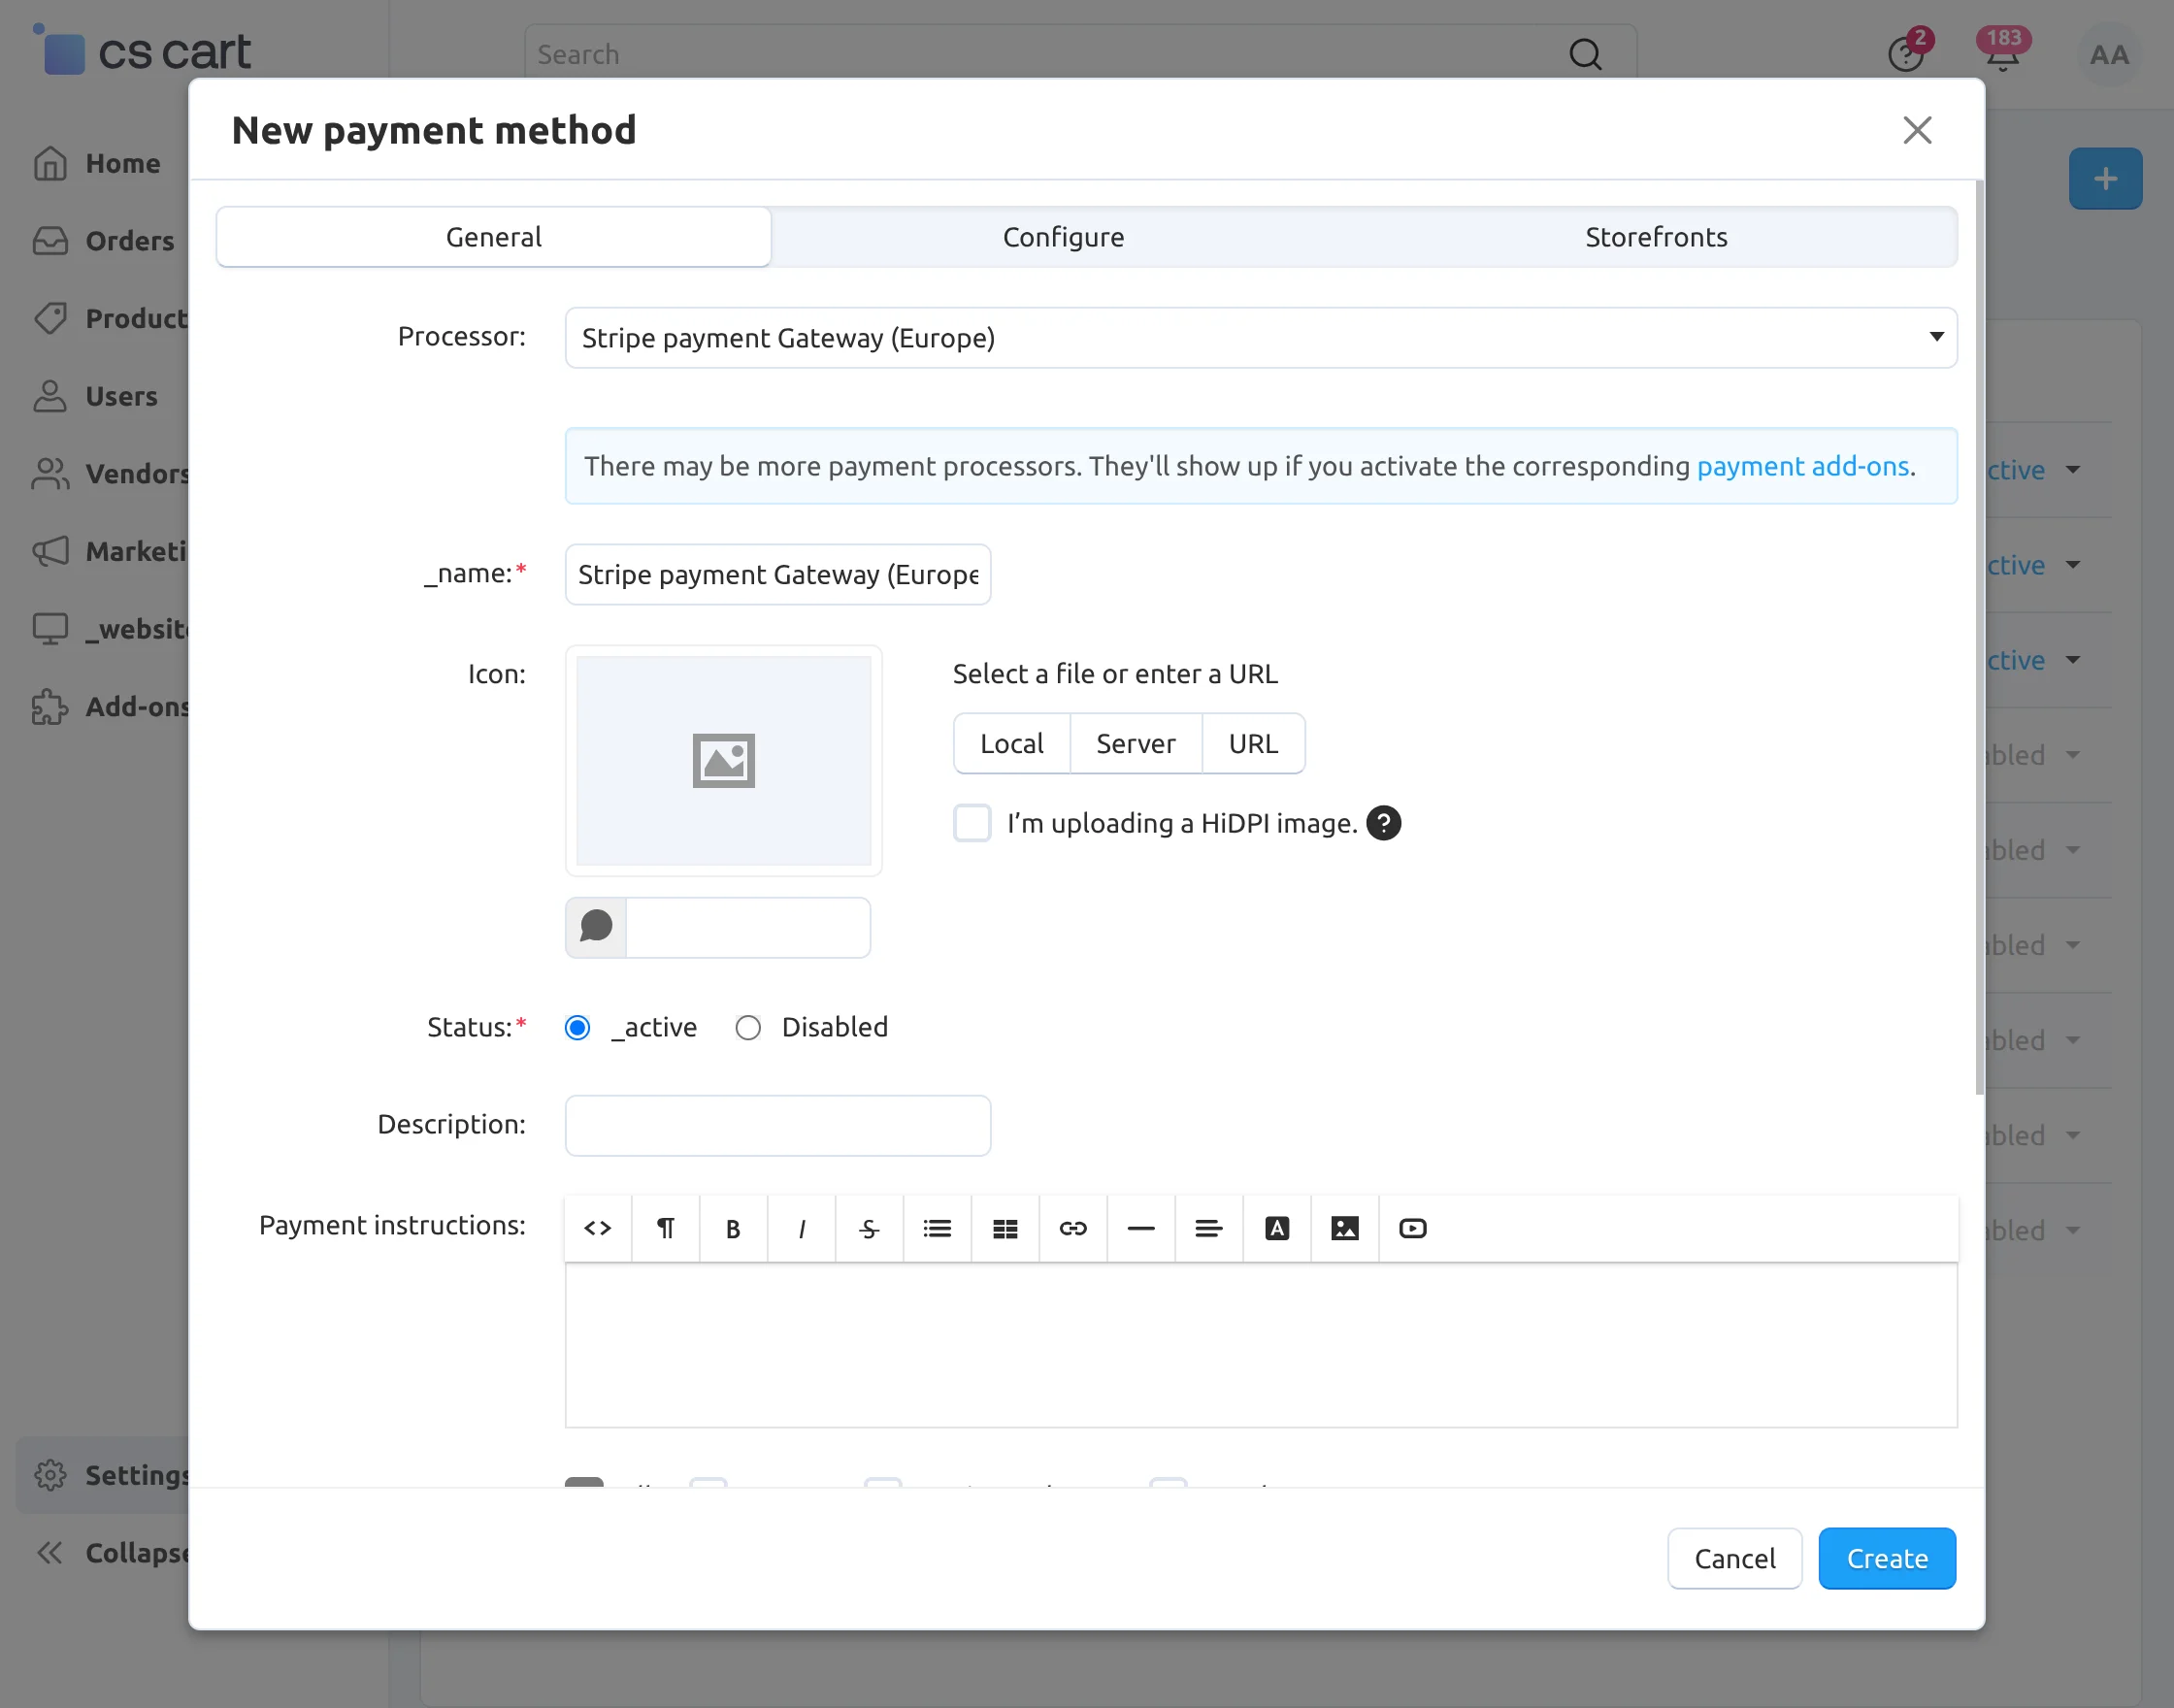
Configure Stripe payment Gateway (Europe)
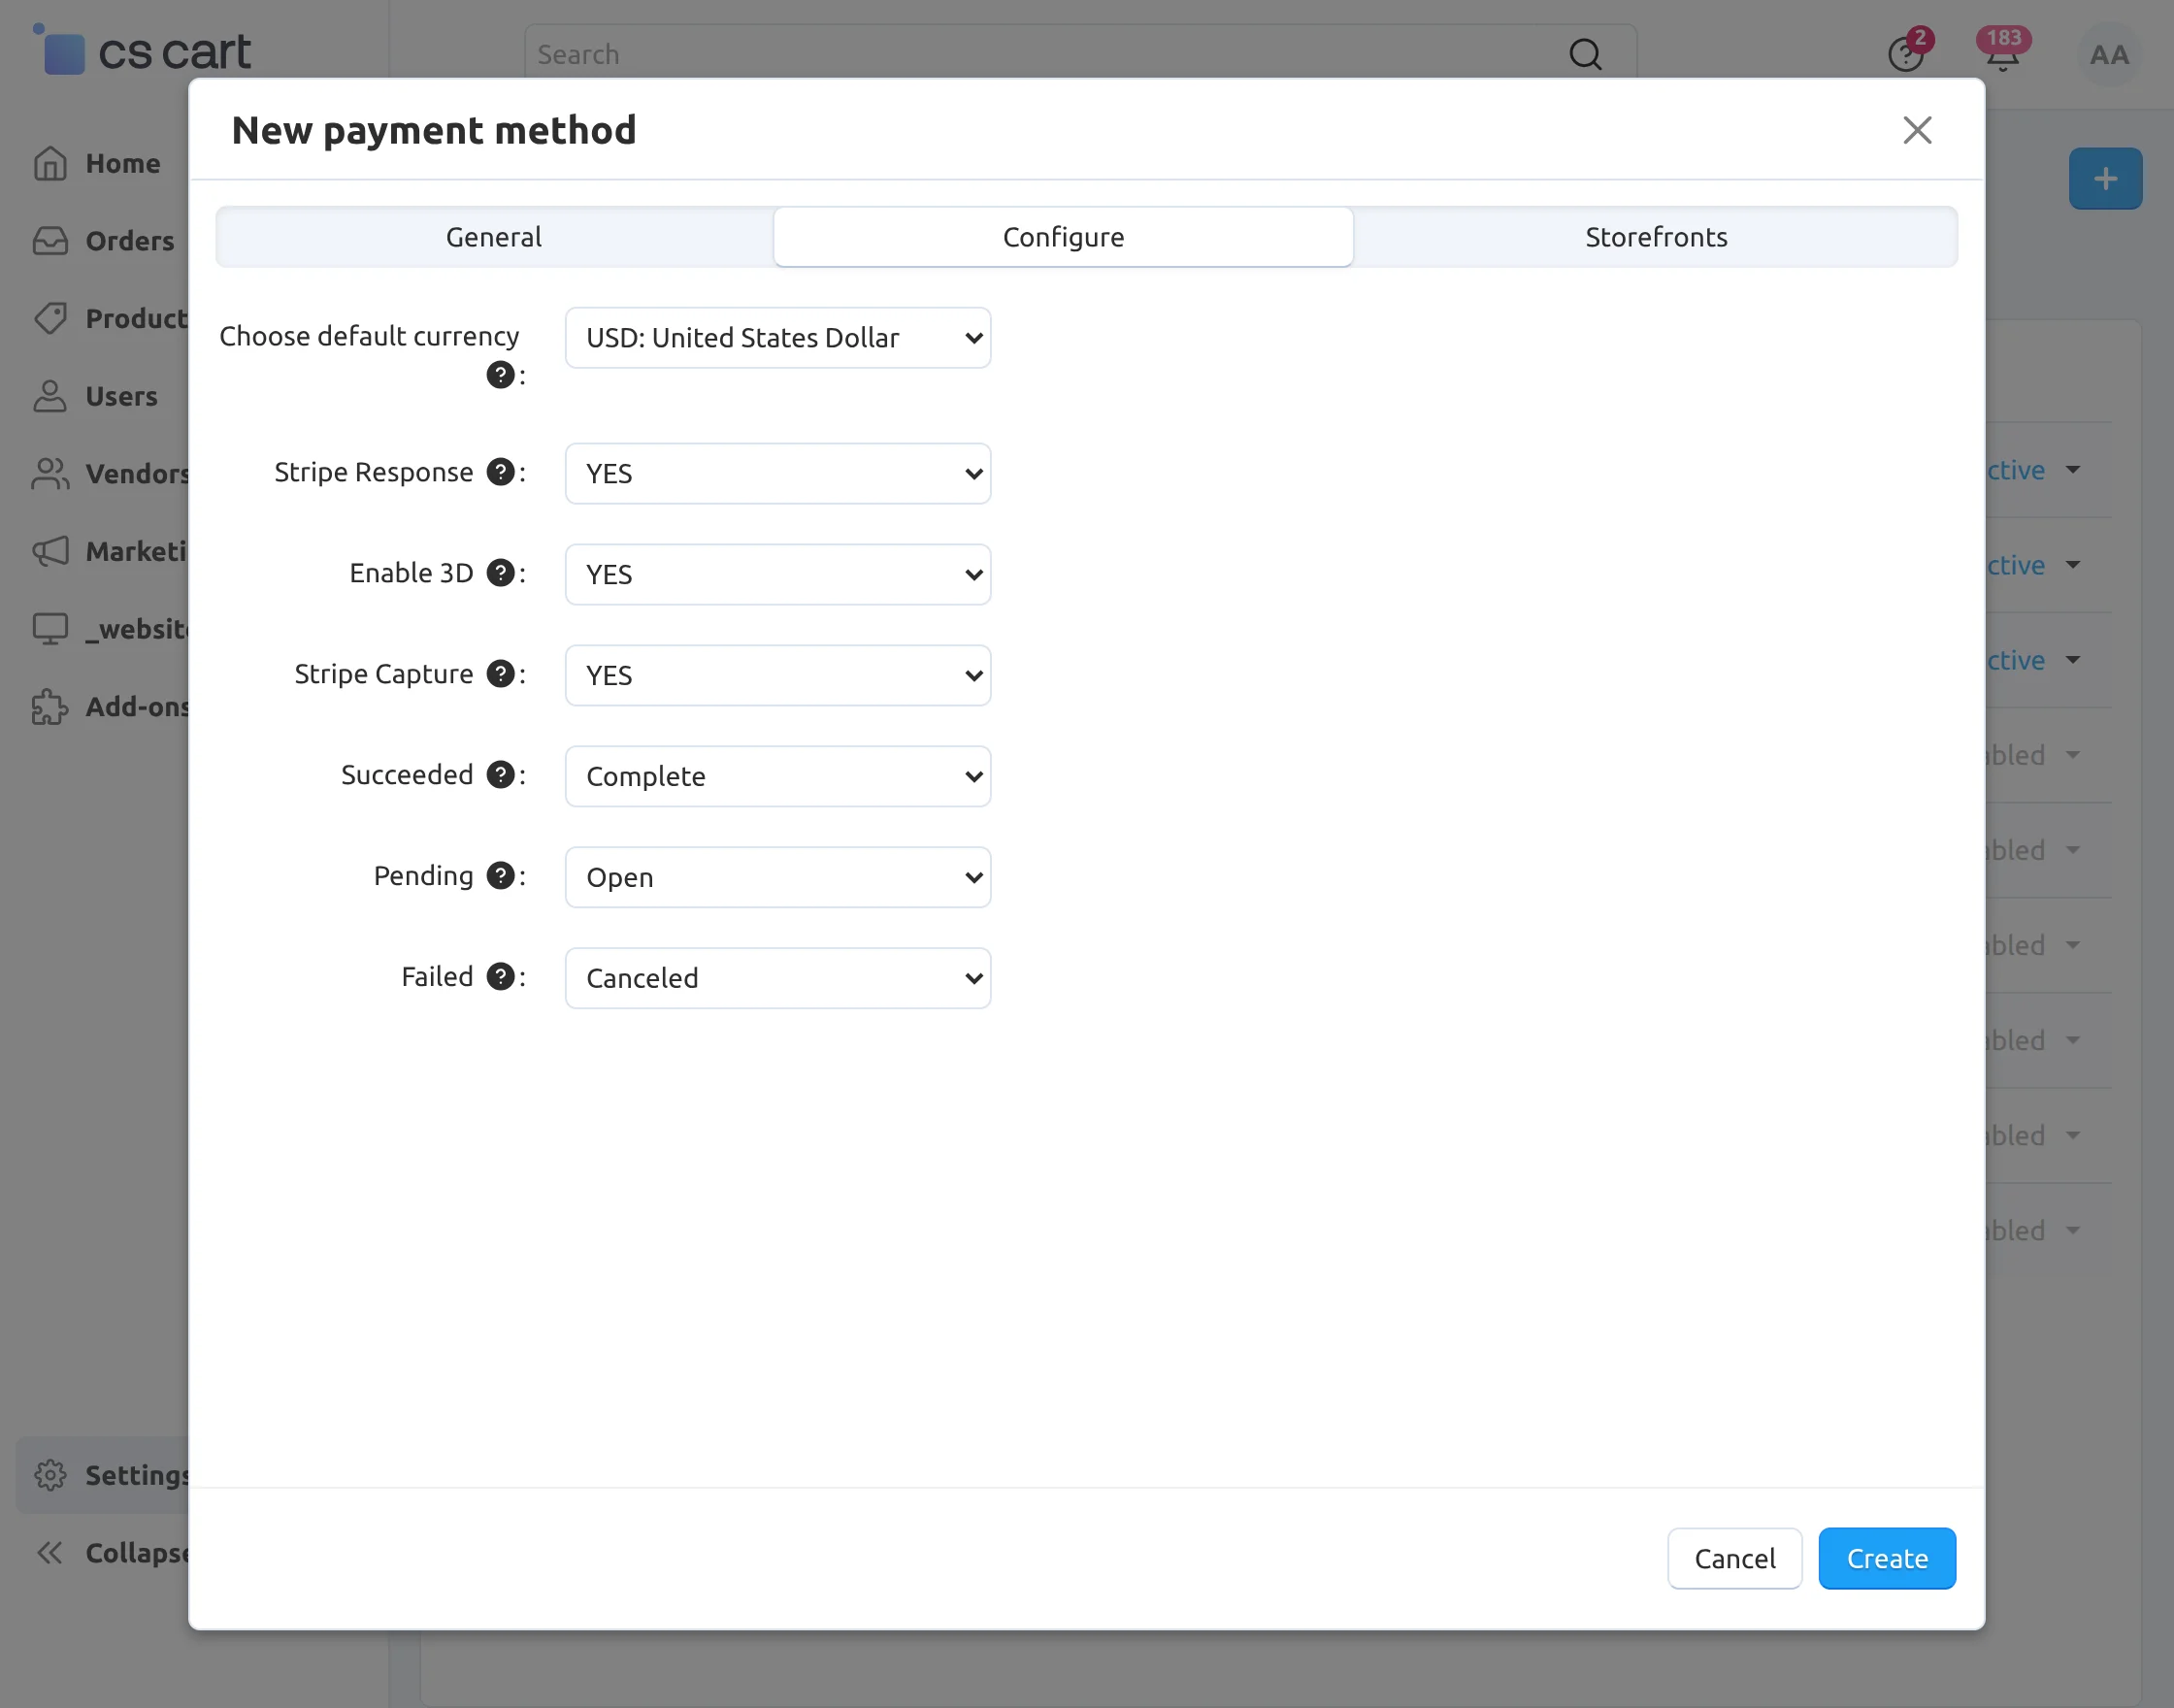
Configure Stripe Payment Gateway (Inline)

- Select the default currency for Stripe Inline payments. If a customer selects a currency that is not supported by Stripe, the default currency will be applied automatically.
- Select “Yes” to save the Stripe payment response at the backend.
- Enable or disable the 3D Secure Payment method as required.
- Select “Yes” to enable Stripe Capture for capturing payments automatically.
- Configure the order status for different Stripe payment responses.
- After completing the configuration, click on the “Create” button to add the payment method.
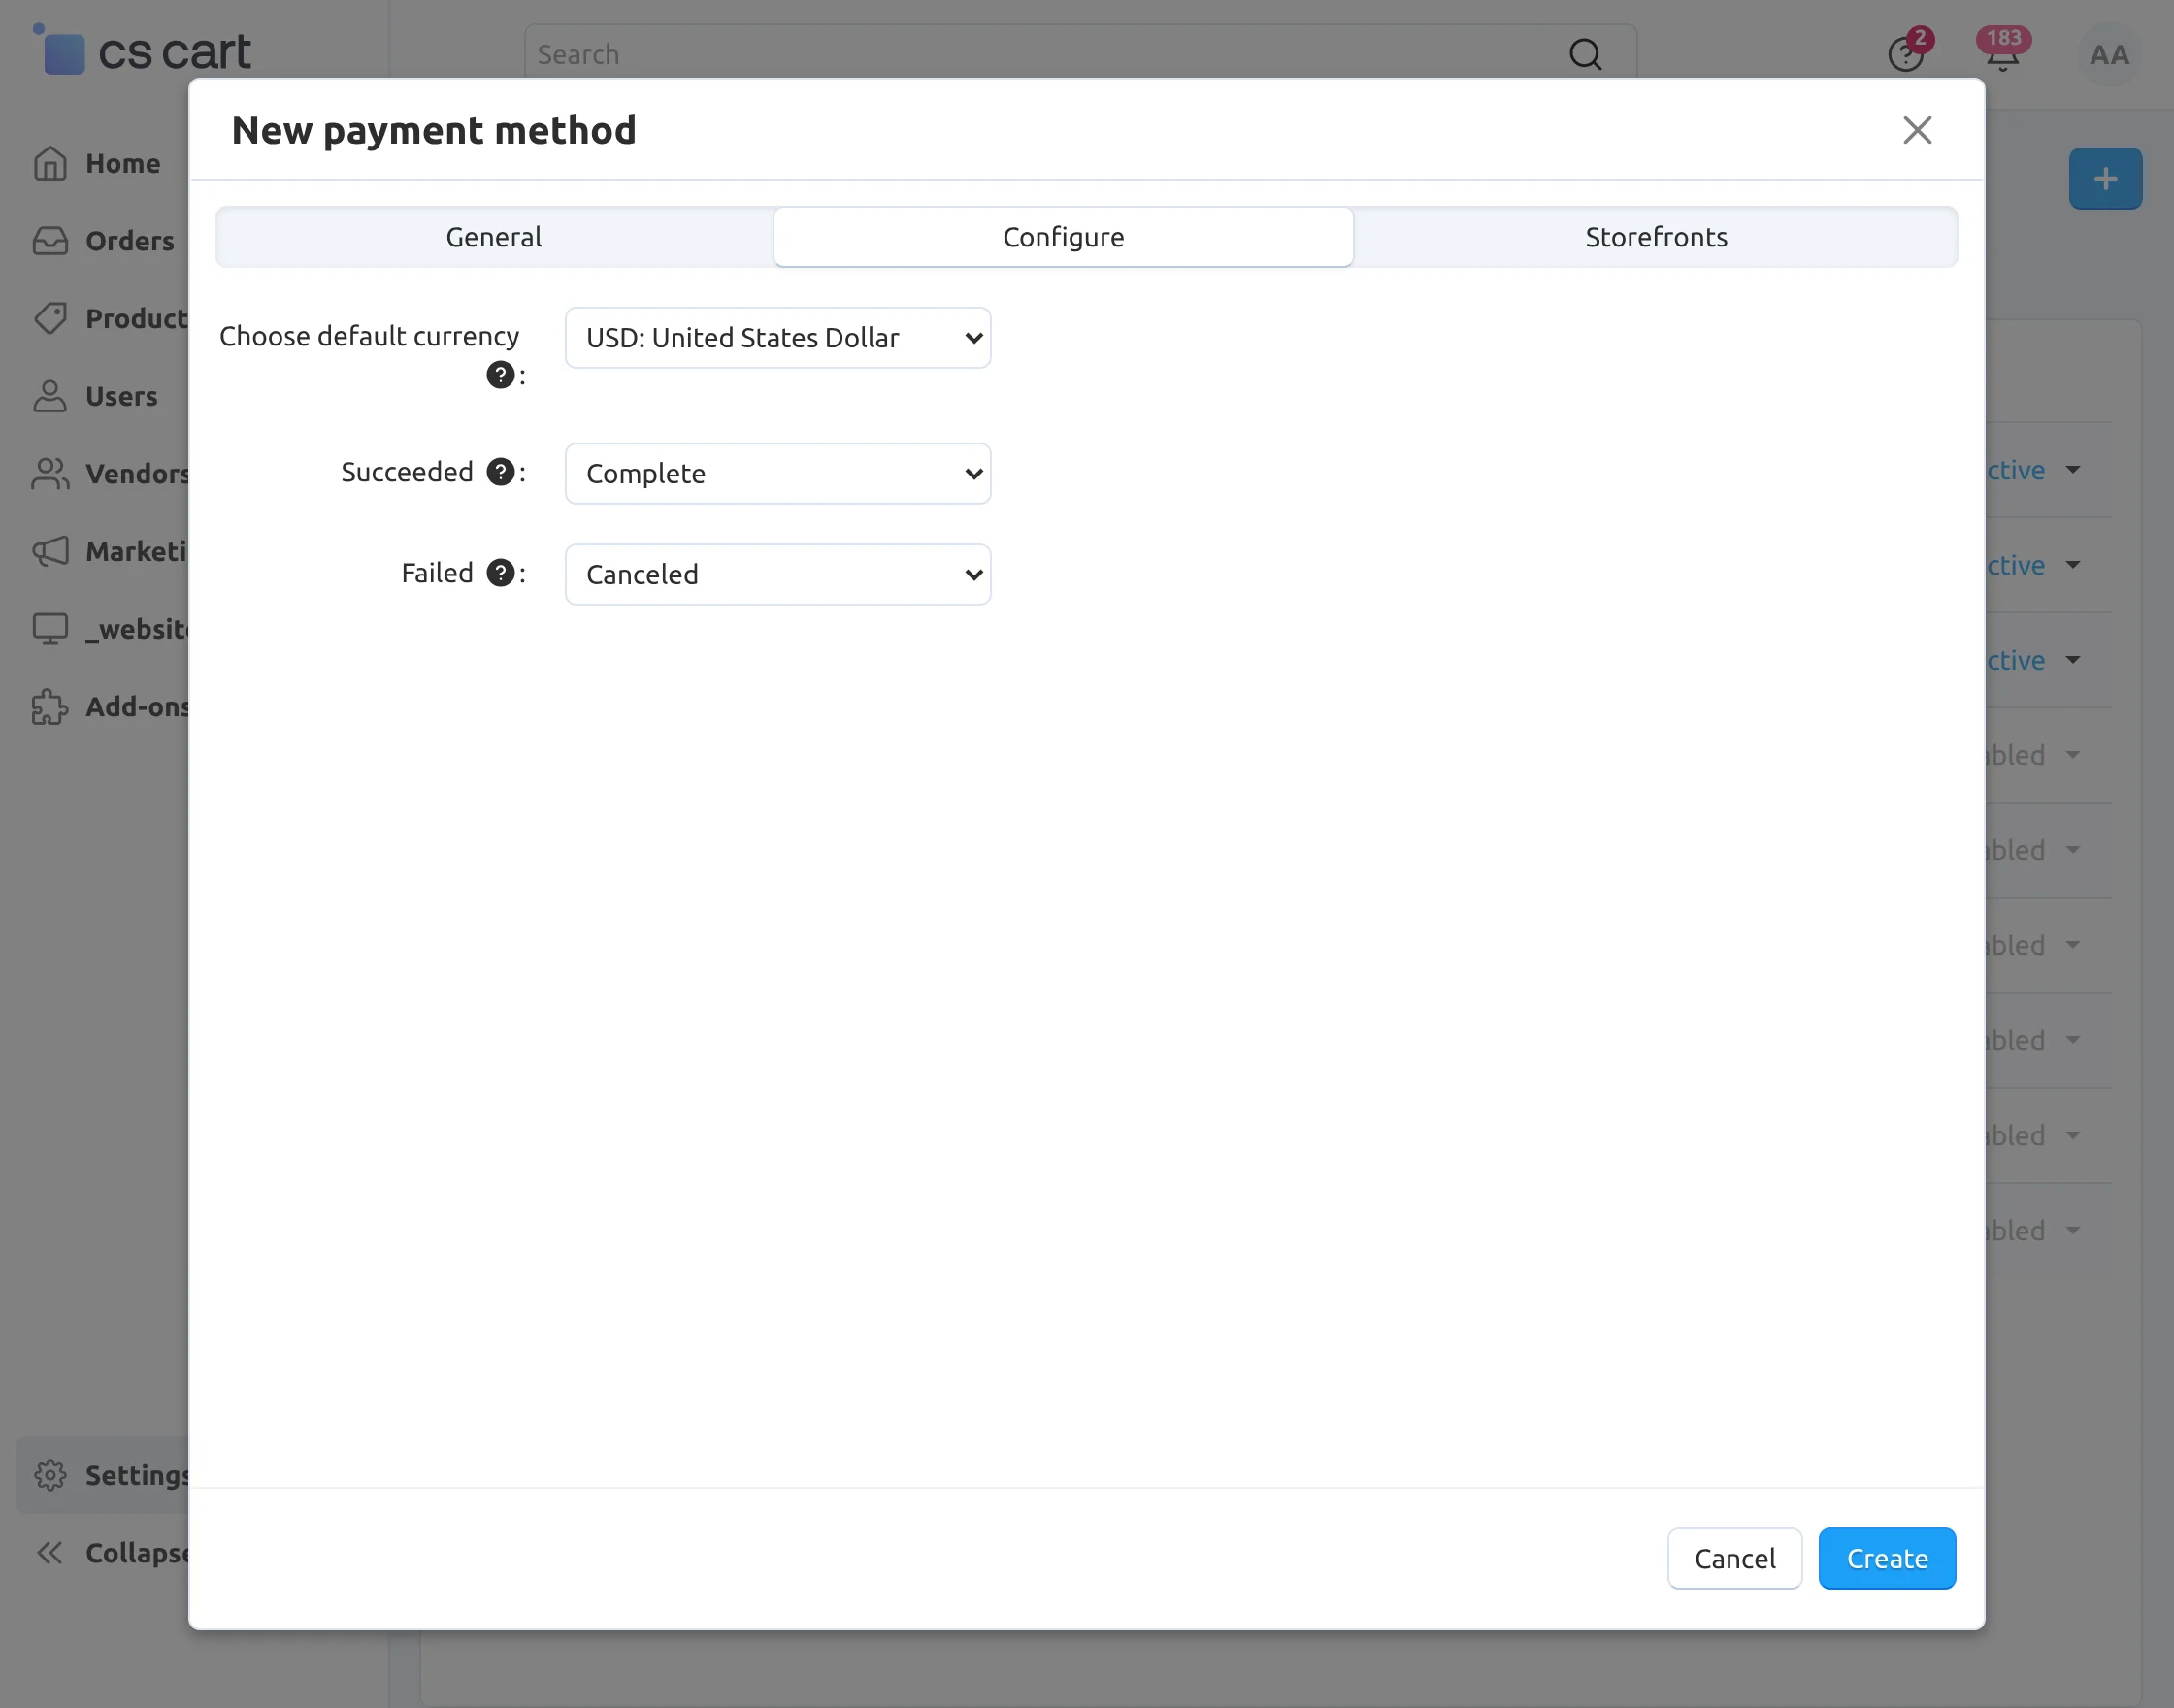
Configure Stripe payment Gateway (Payment Intent)
To use Stripe Payment Intent payments, choose “Stripe Payment Gateway (Payment Intent)” as the payment processor for the checkout page.
Click on “configure” and set the parameters as shown below in the snapshot.
- Select the default currency for Stripe Payment Intent transactions.
- Select “Yes” to save the Stripe payment response at the backend.
- Enable the Stripe Capture option to capture payments automatically.
- Configure the order status for different Stripe payment responses as required.
- After completing the configuration, click on the “Create” button to add the payment method.

Configure Stripe payment Gateway (Payment Request)

Click on “configure” and set the parameters as shown below in the snapshot.
- Select the default currency for Stripe payments. If a customer selects a currency that is not supported by Stripe, the default currency will be applied automatically.
- Set “Enable Stripe Capture” to “Yes” to automatically capture the payment.
- Select “Yes” to save the Stripe payment response at the backend.
- Configure the order status for different Stripe payment responses.
- After completing the configuration, click on the “Create” button to add the payment method.

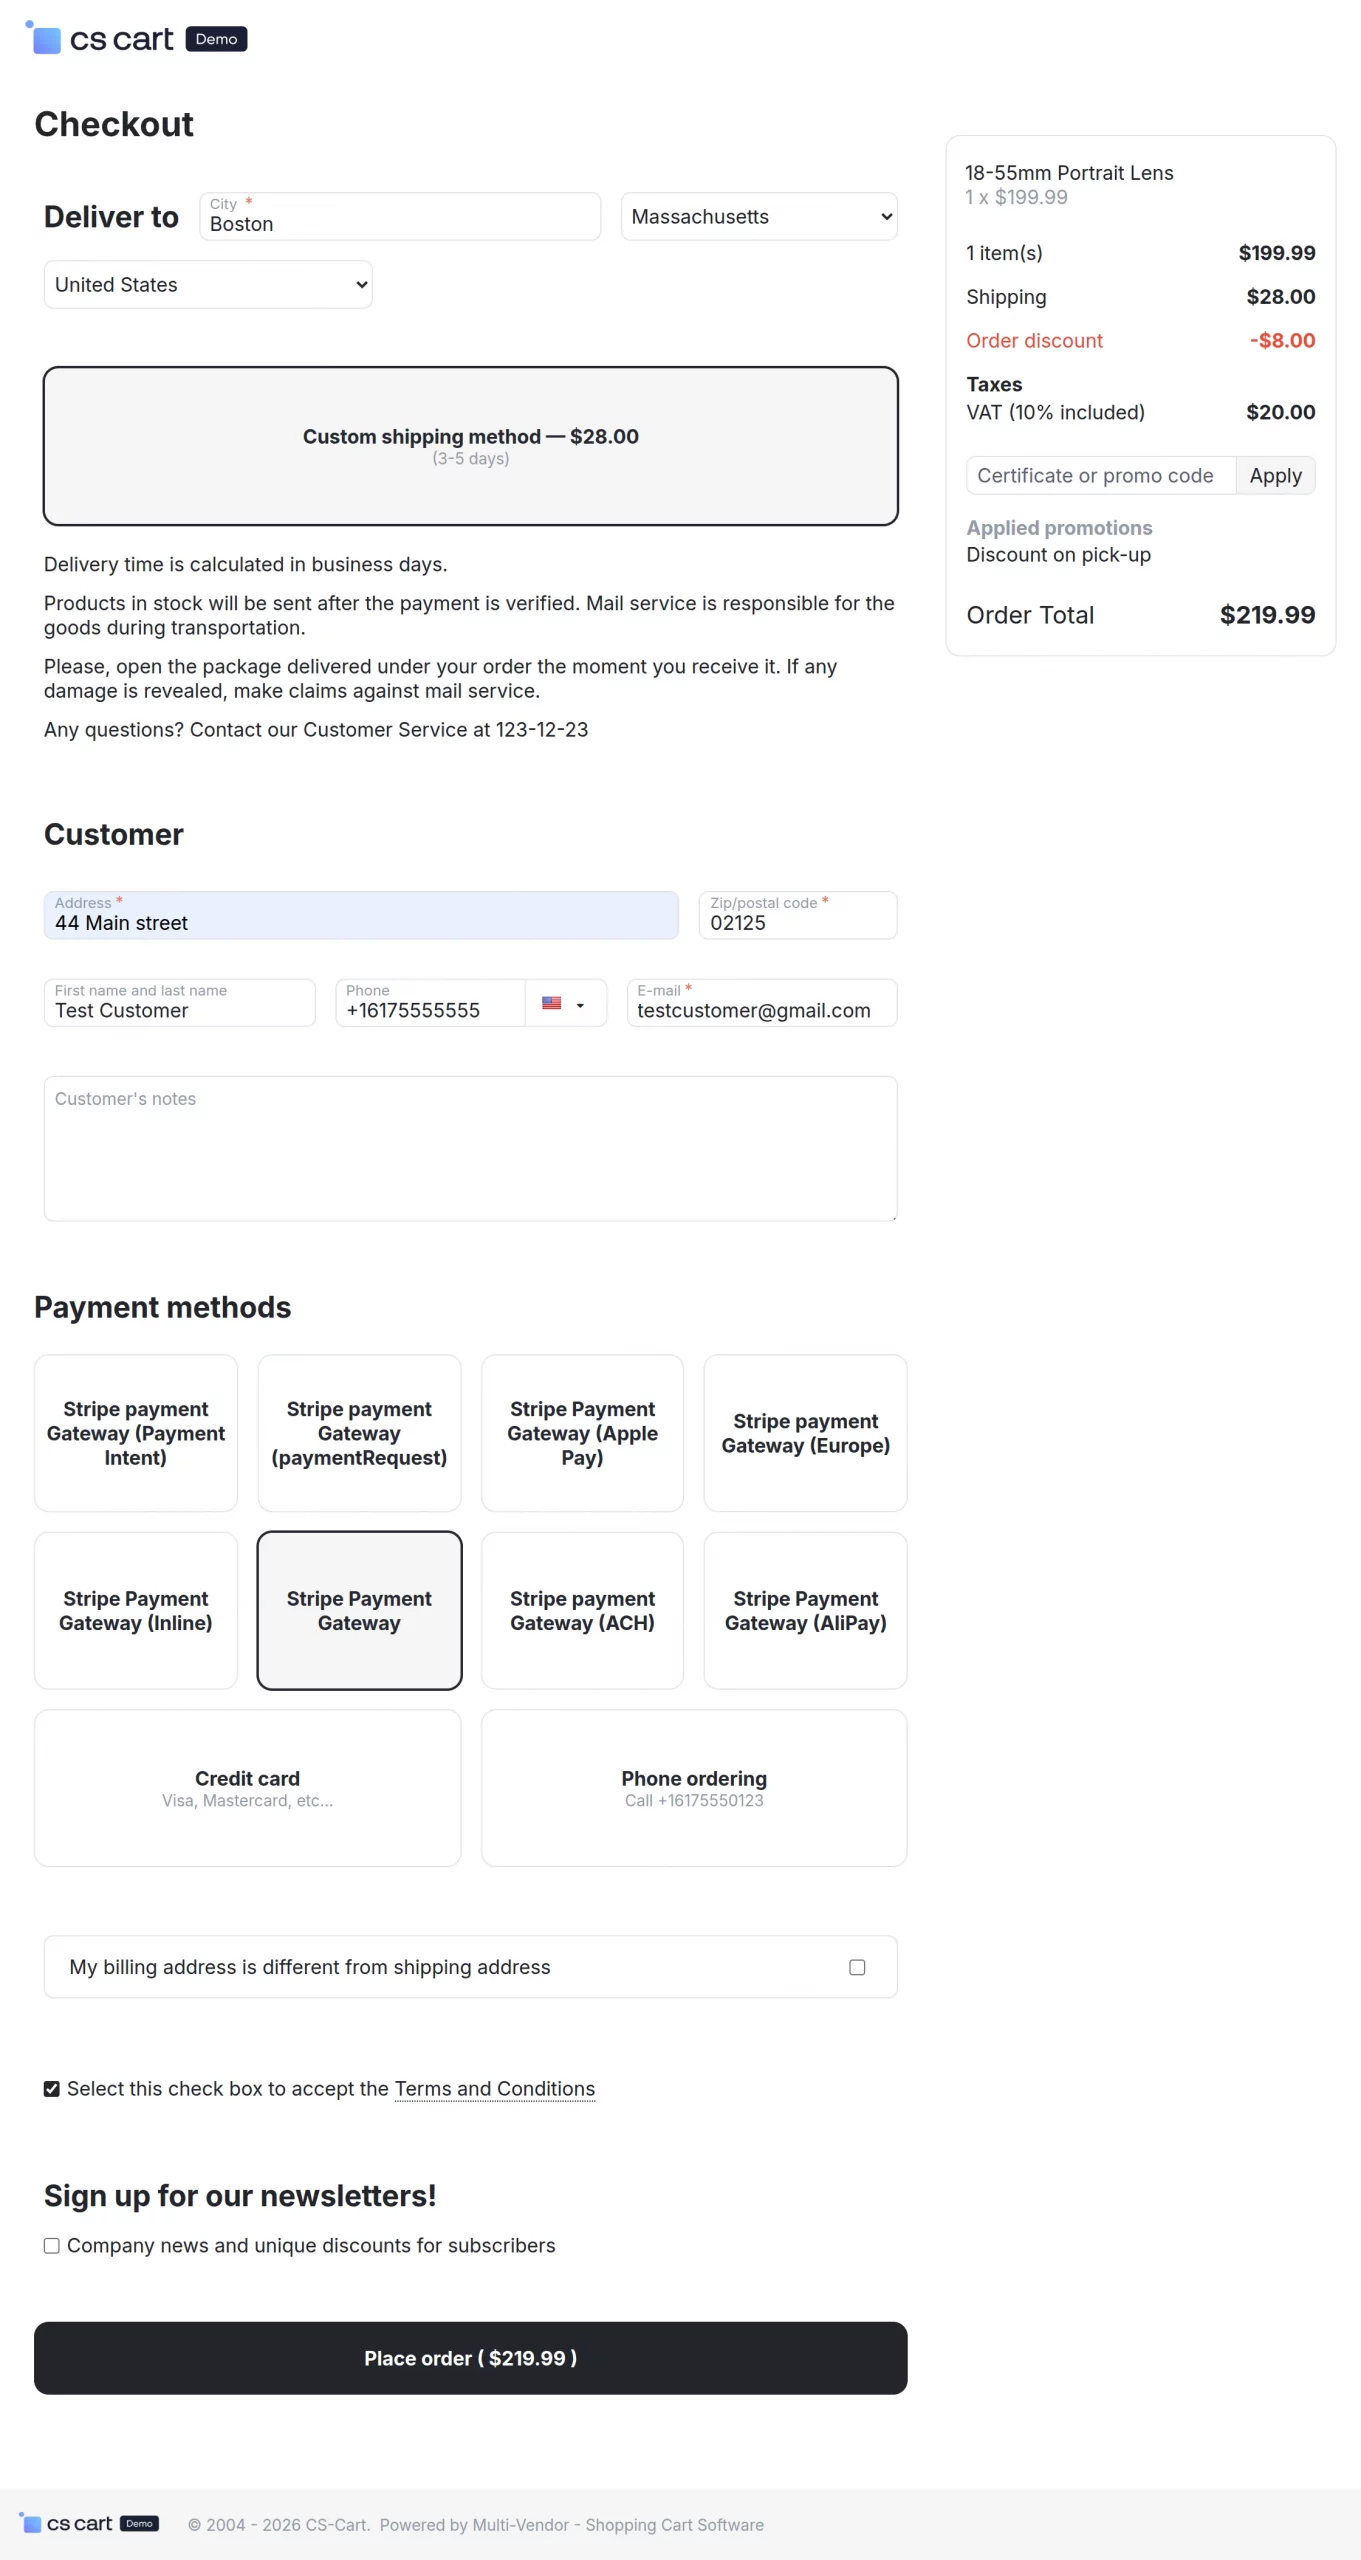
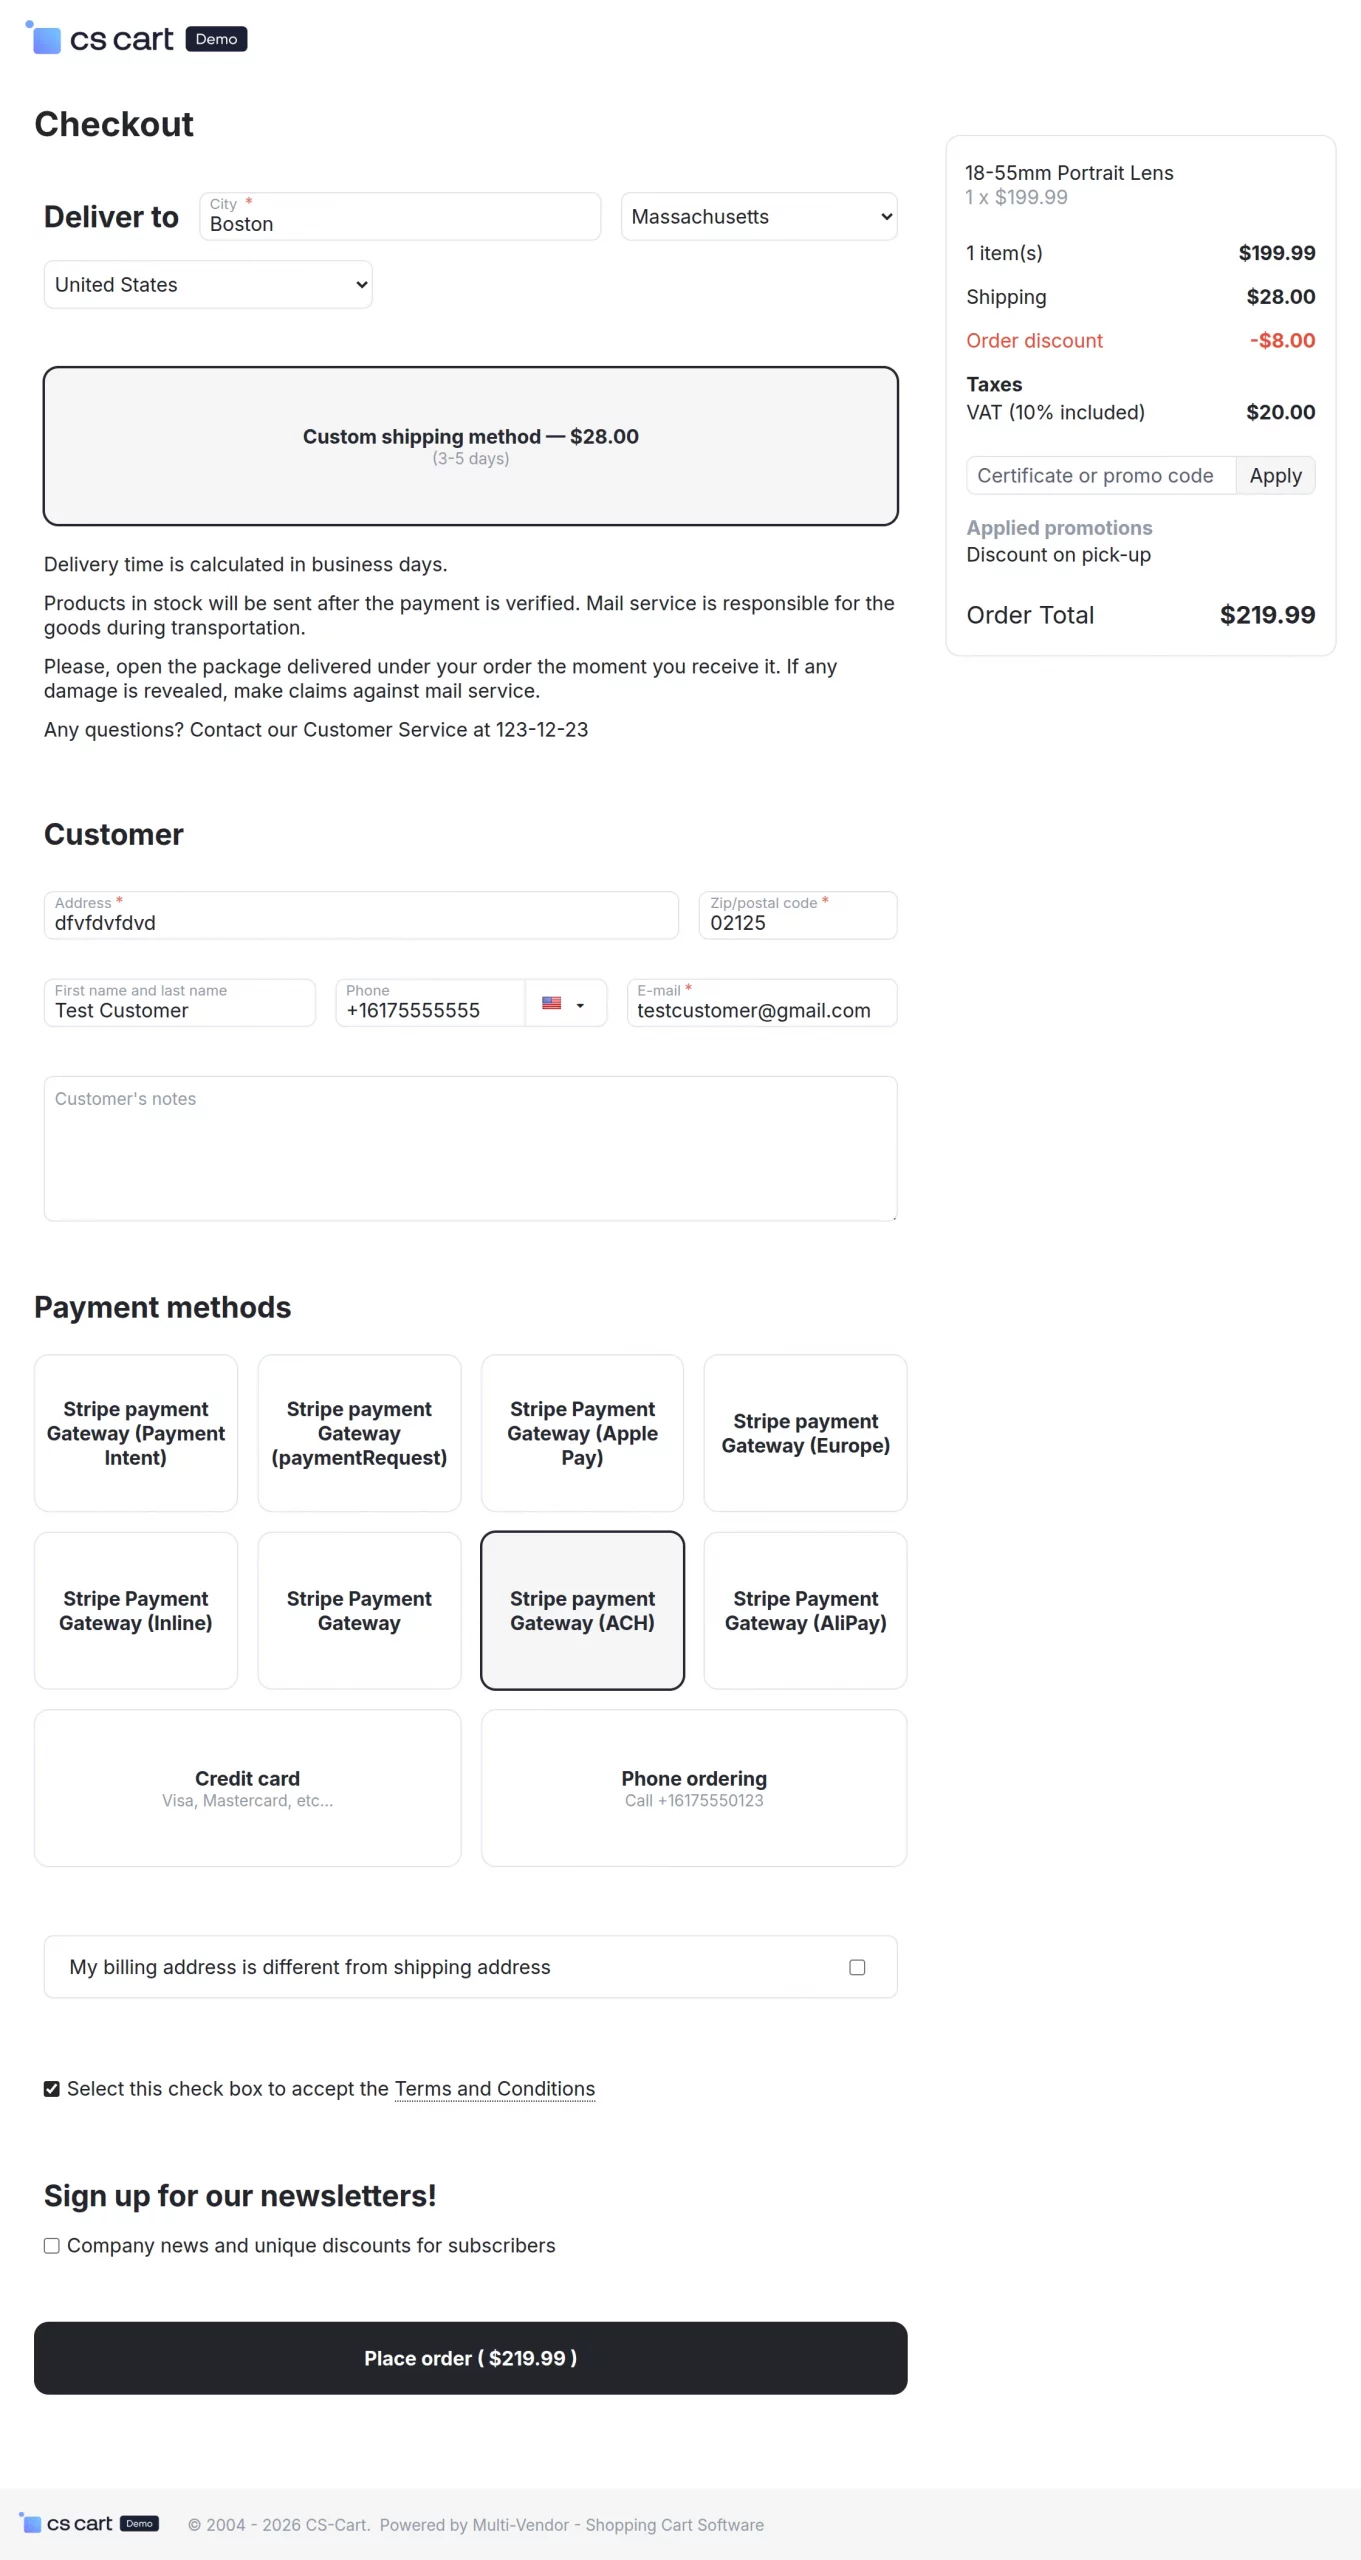
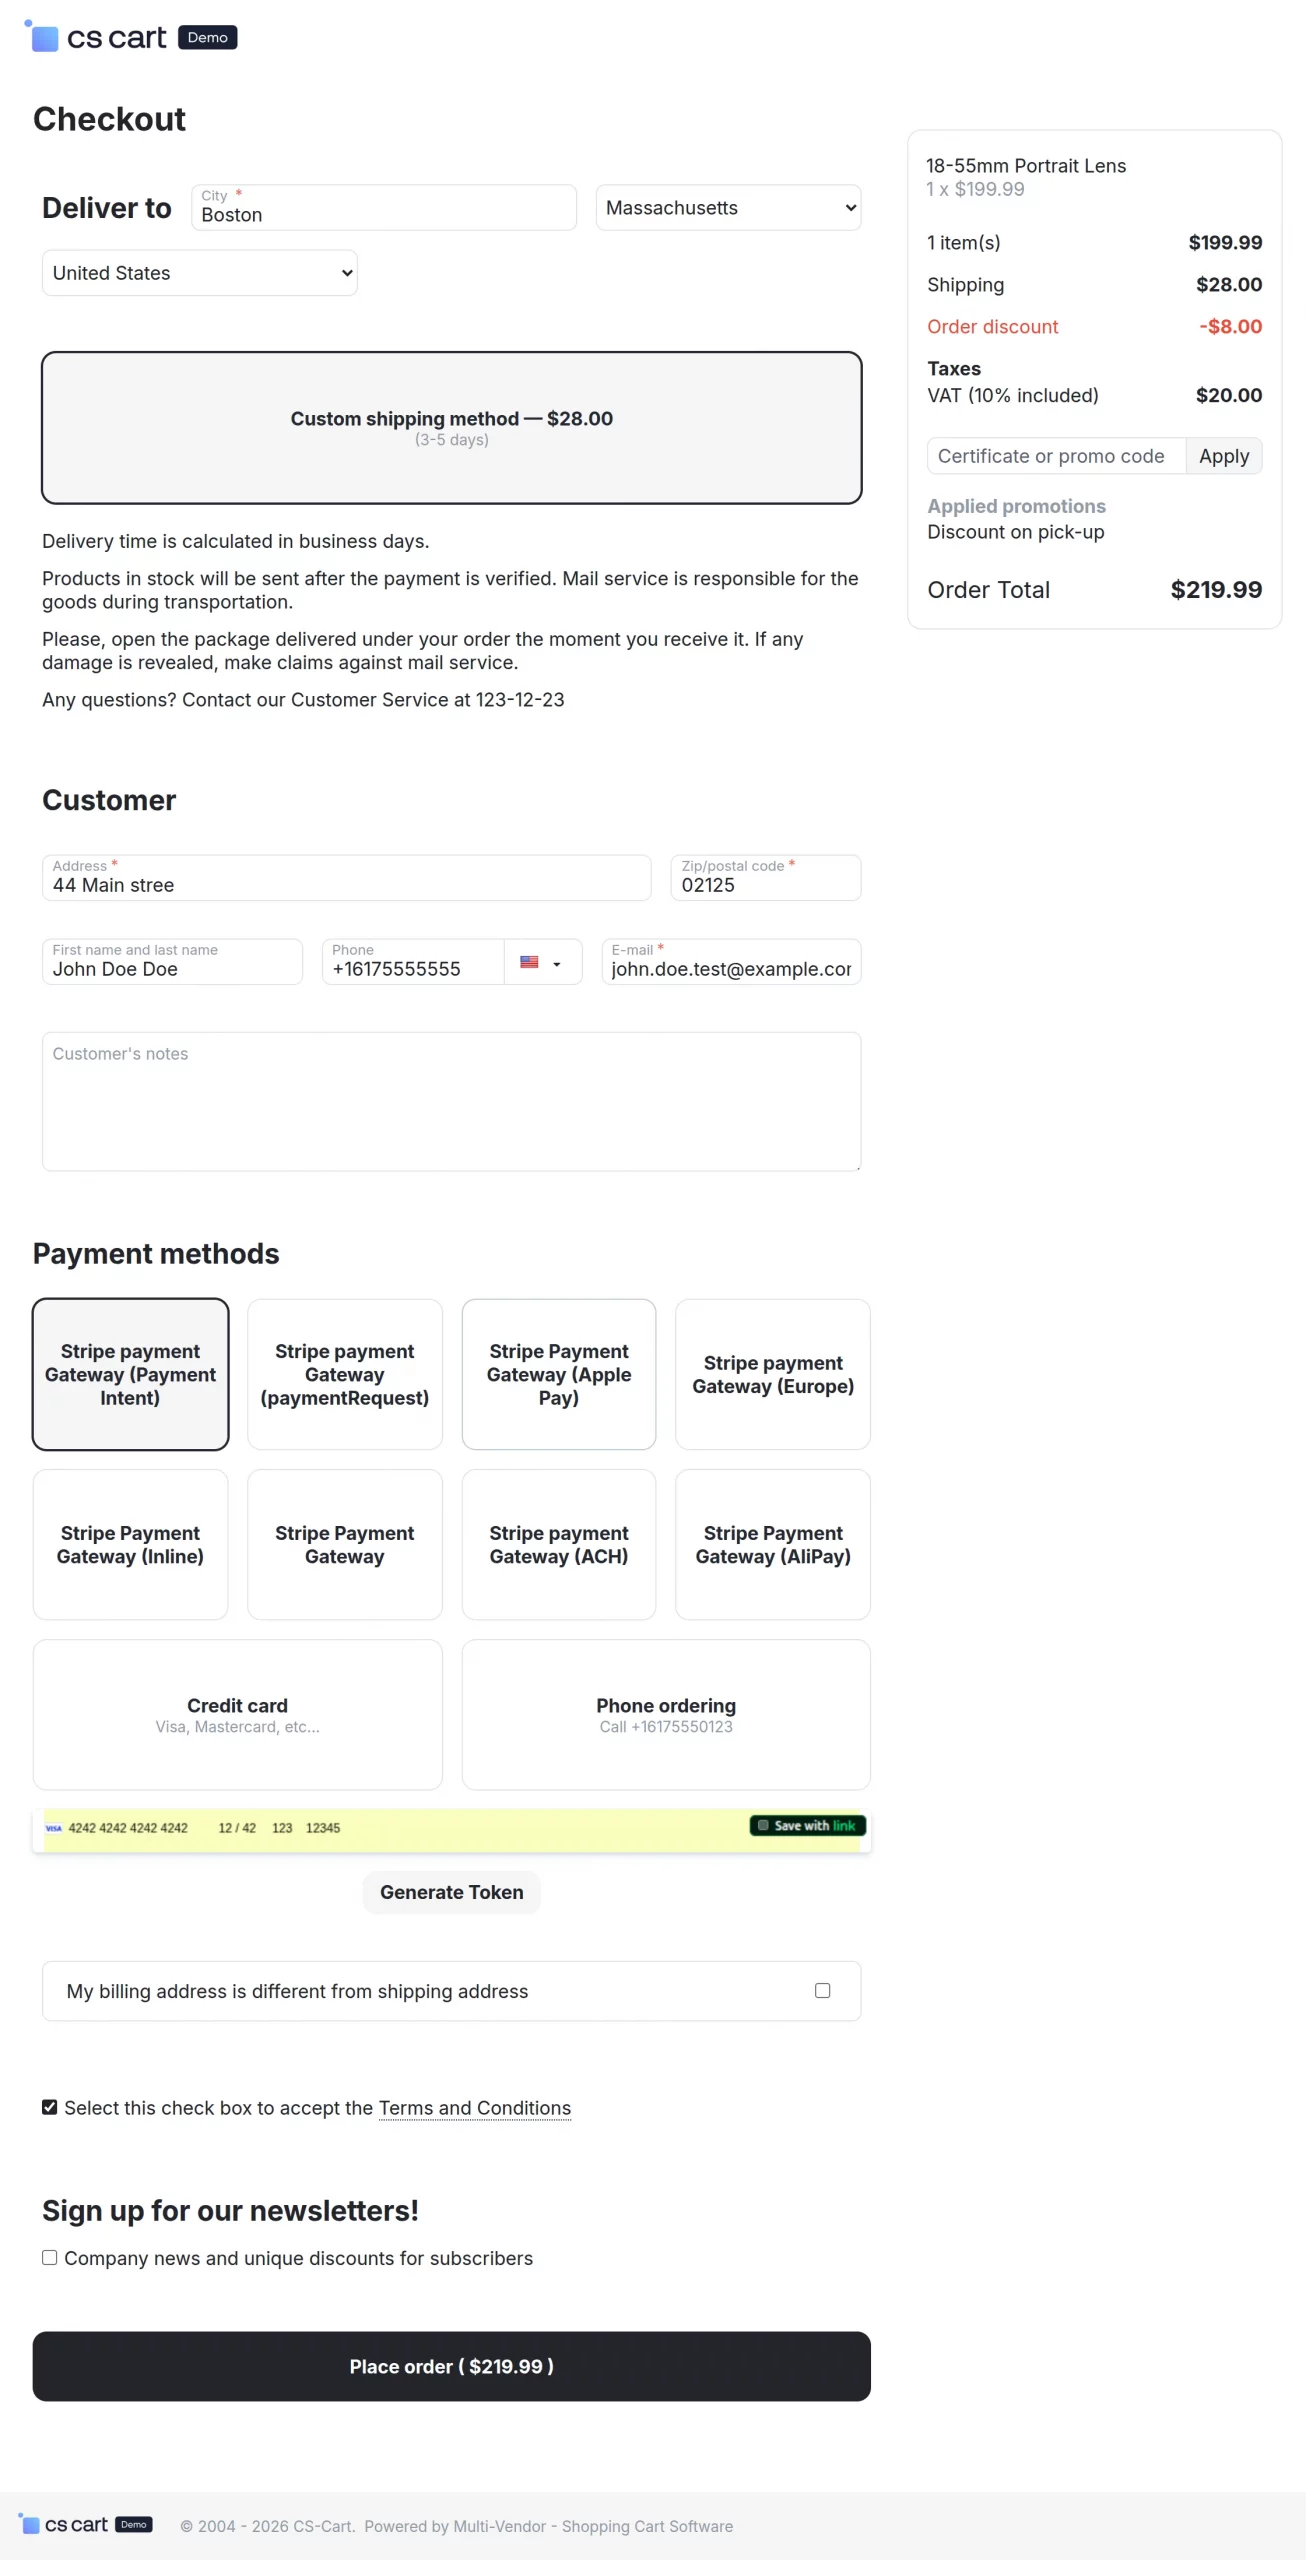
Front-End:
Payment via Stripe Payment Gateway :
After clicking on the “Place Order” button, you will be redirected to the Stripe payment gateway page. Enter the required payment details and click on the “Pay” button to complete the transaction.

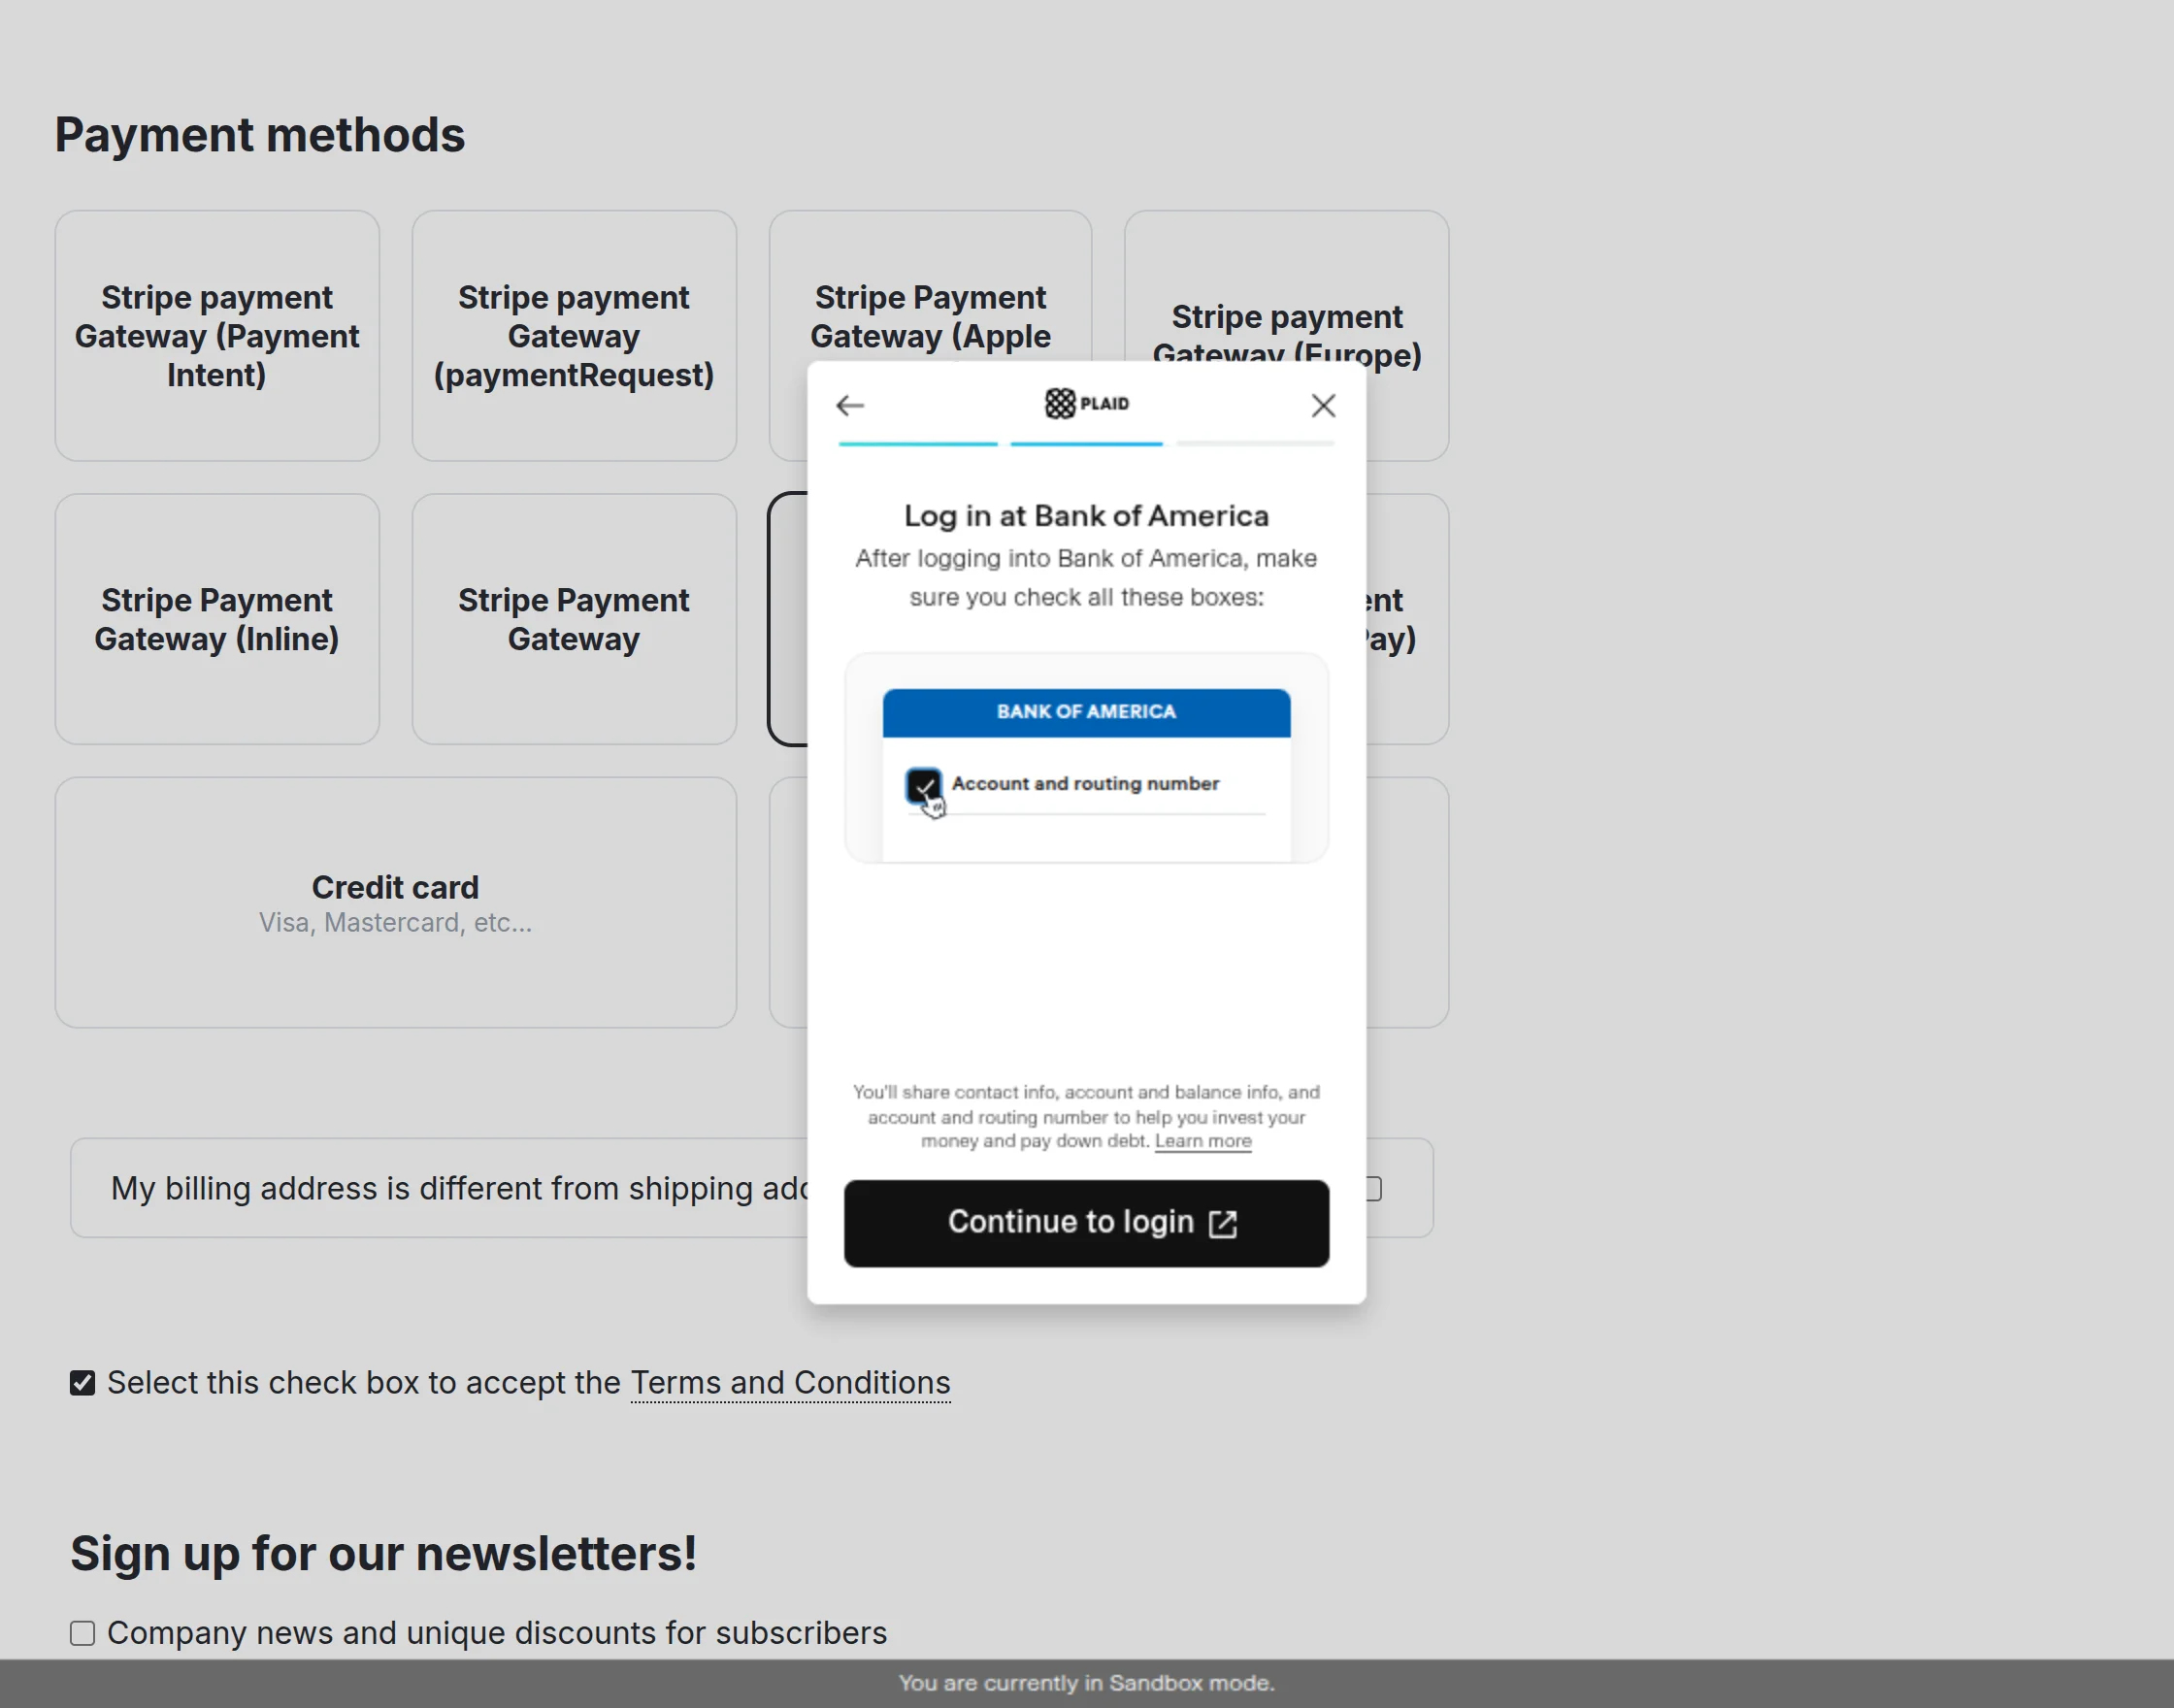
Payment via Stripe payment Gateway (ACH):
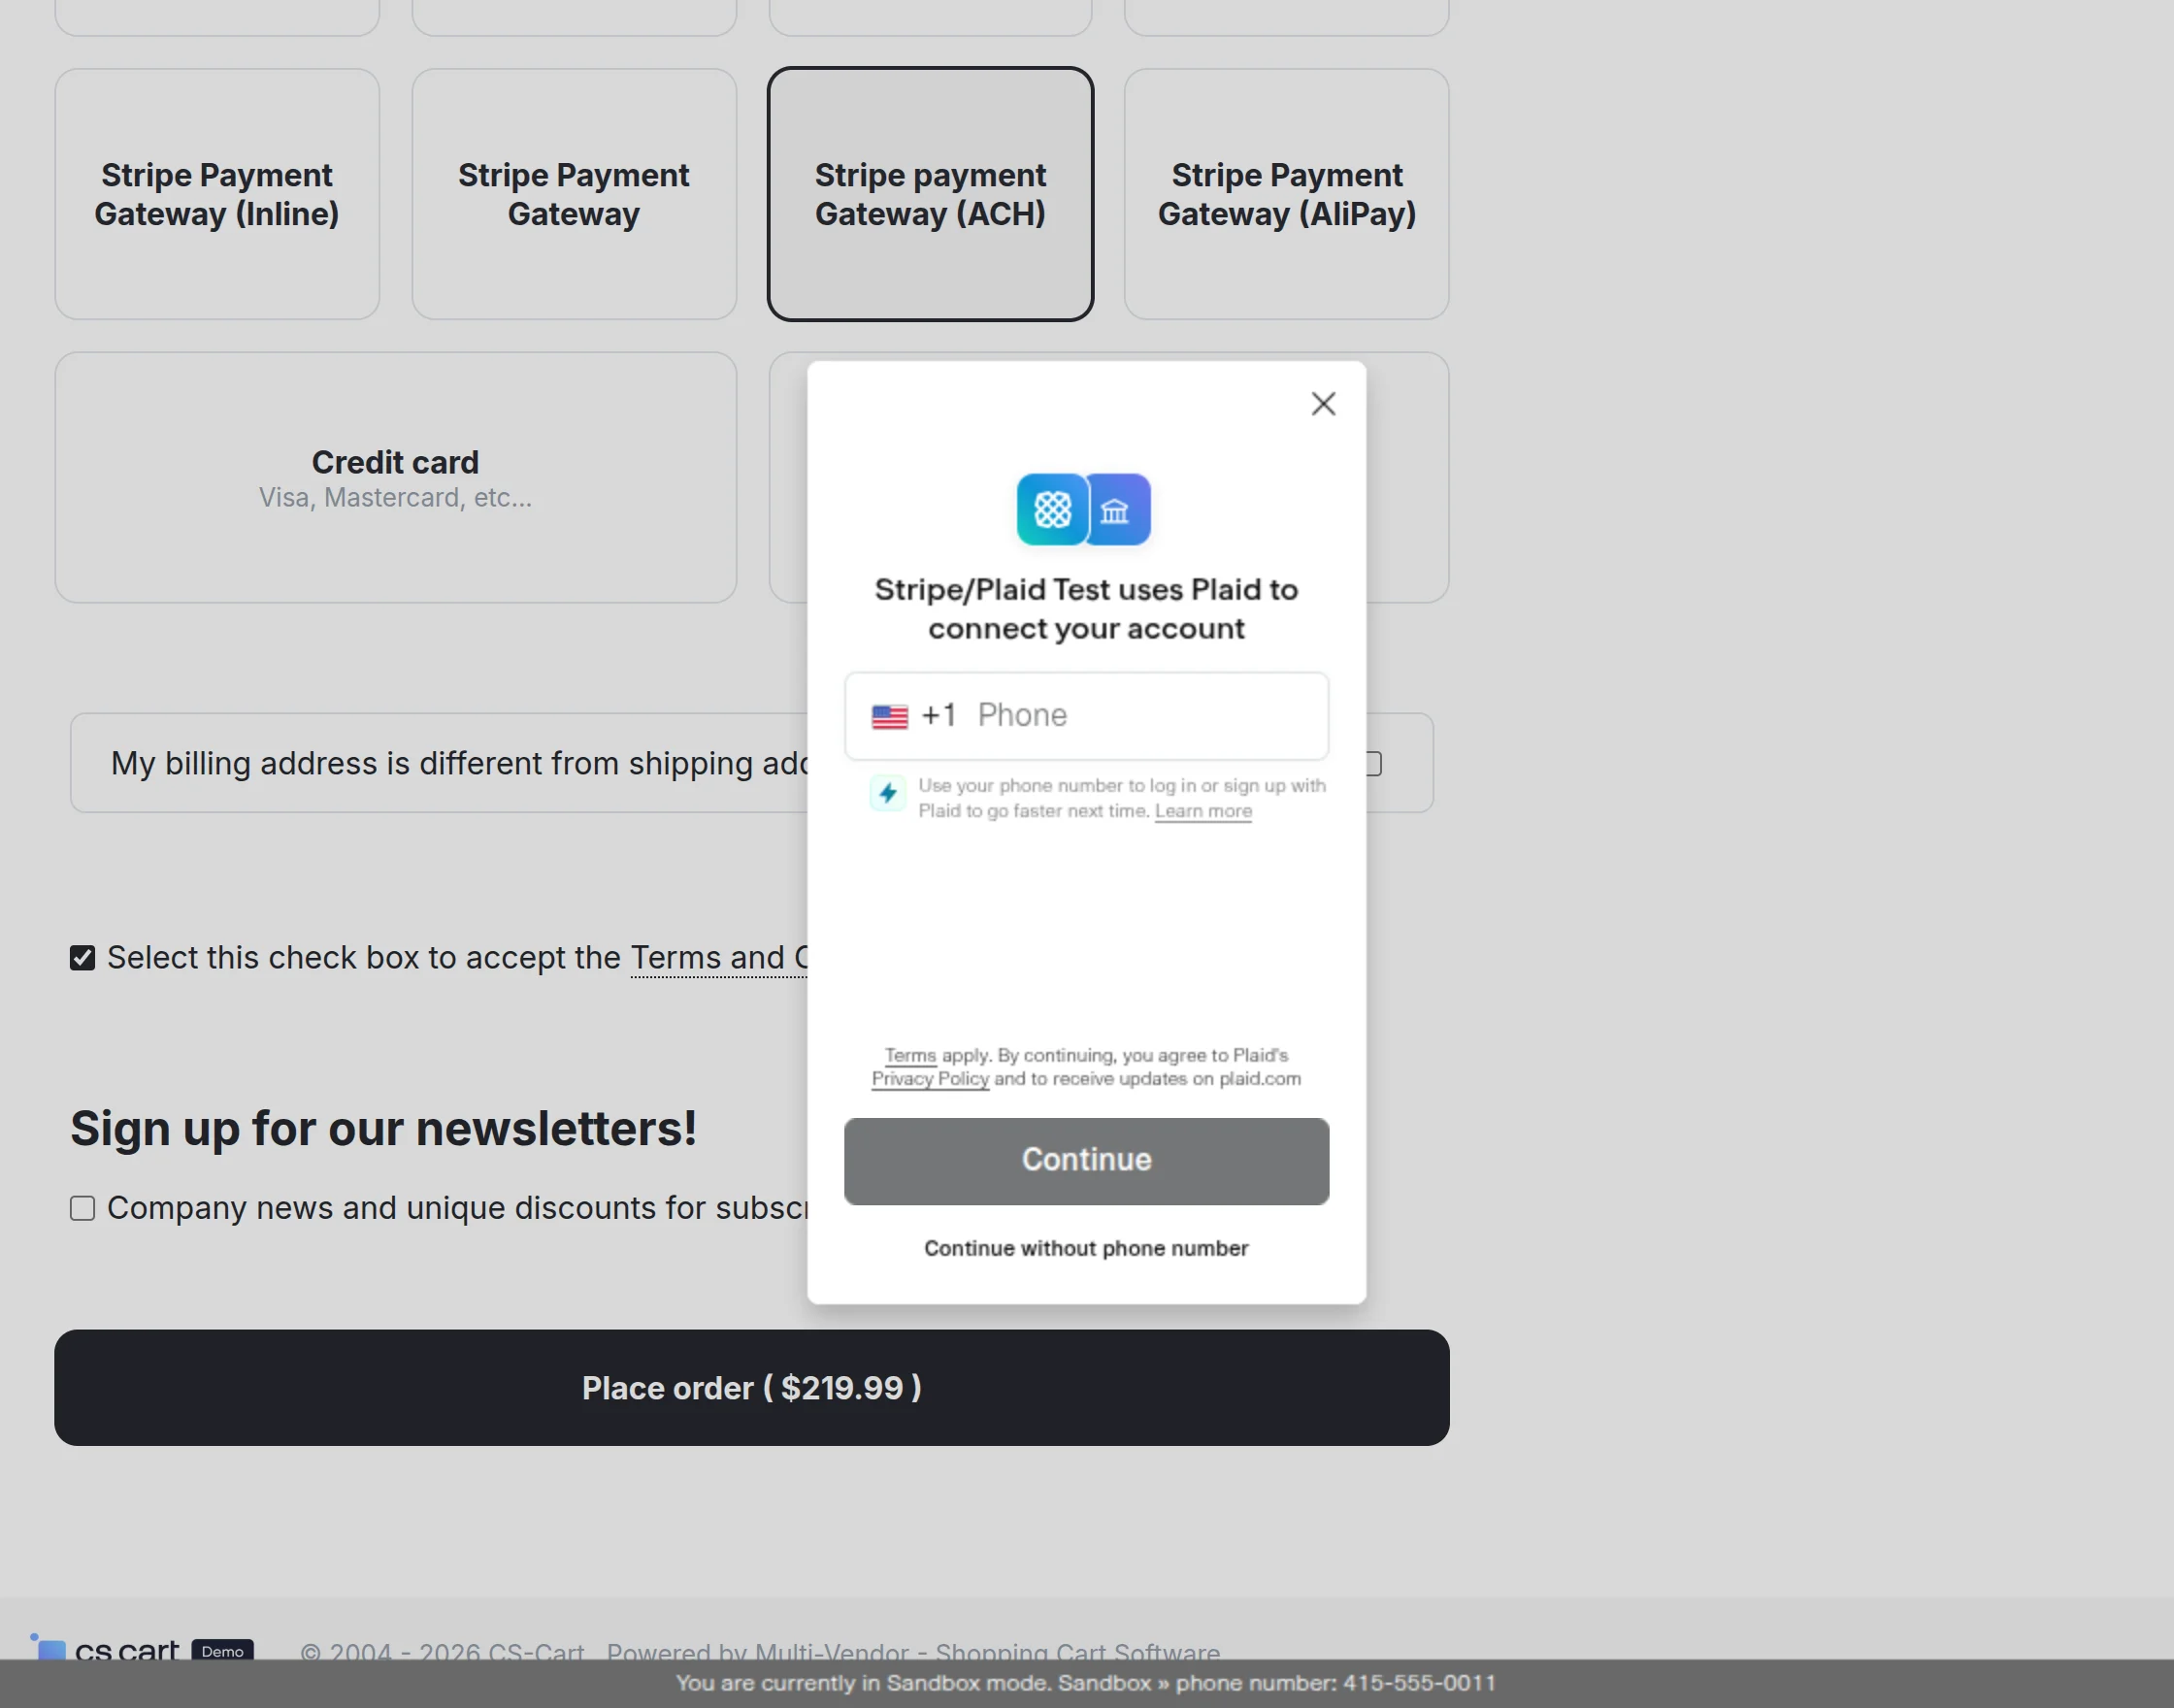
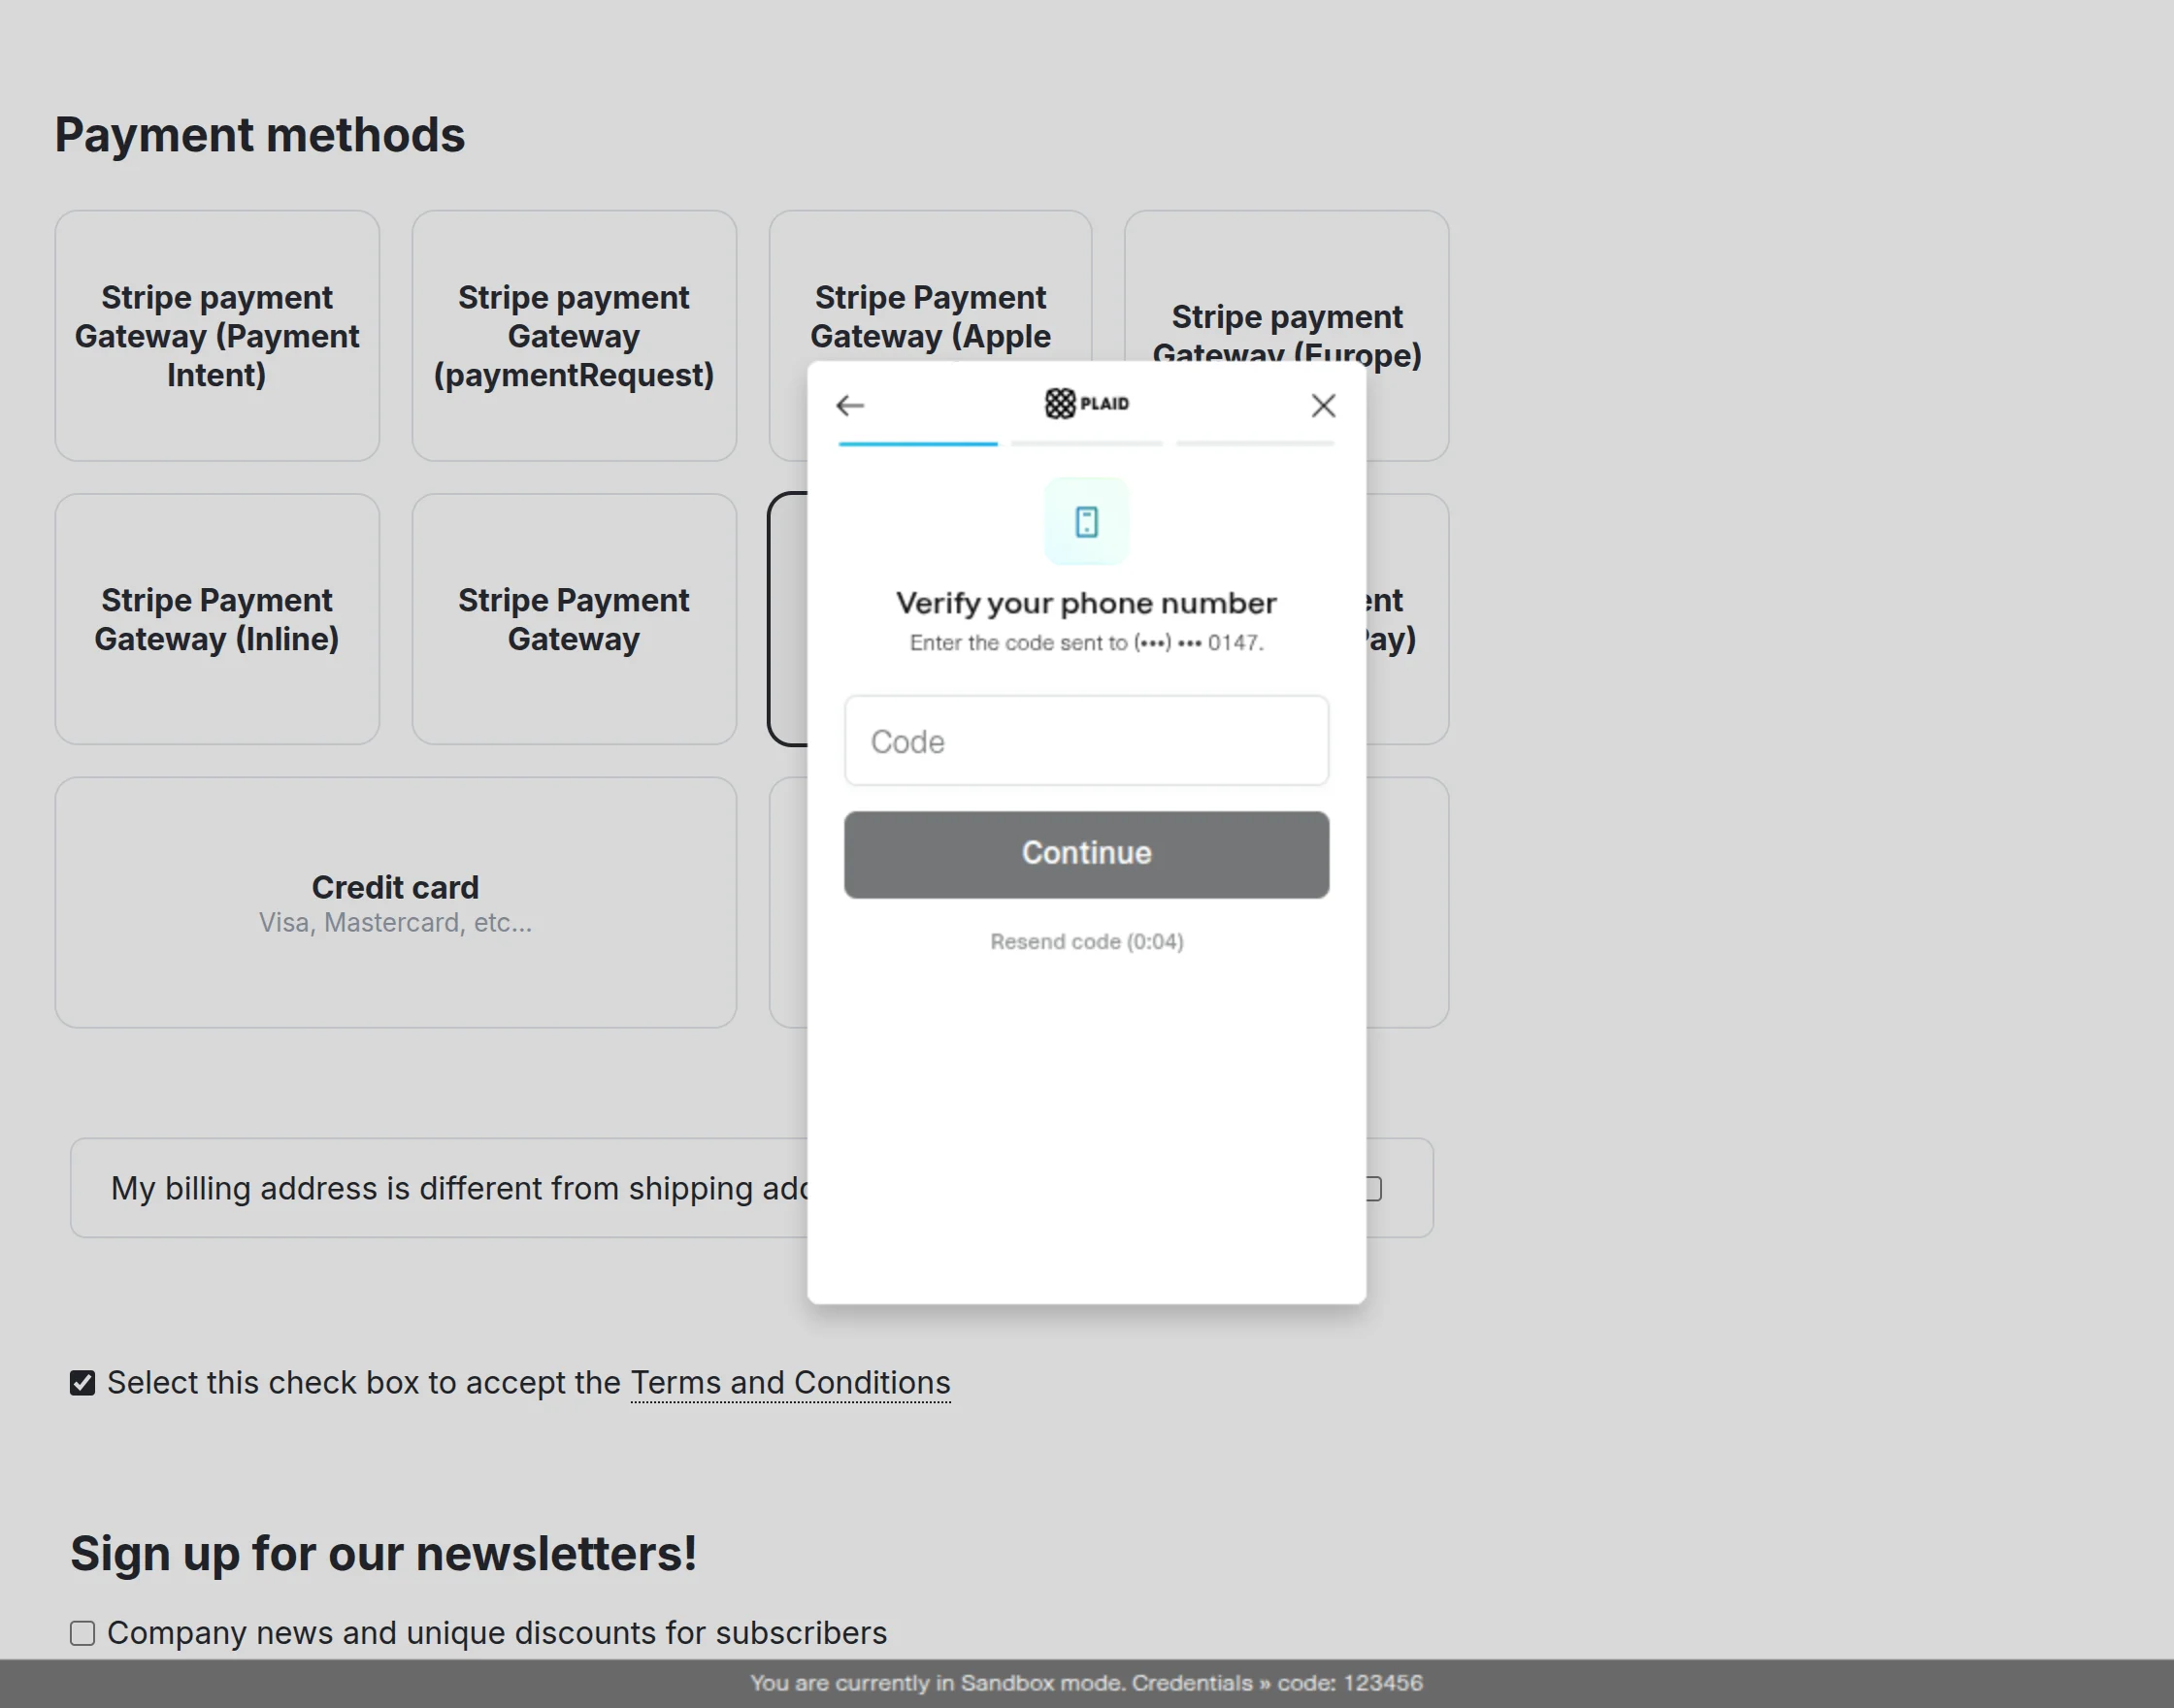
Enter the verification code sent to your registered phone number to continue the payment process.
Here, you need to select your preferred bank to proceed with the payment process.
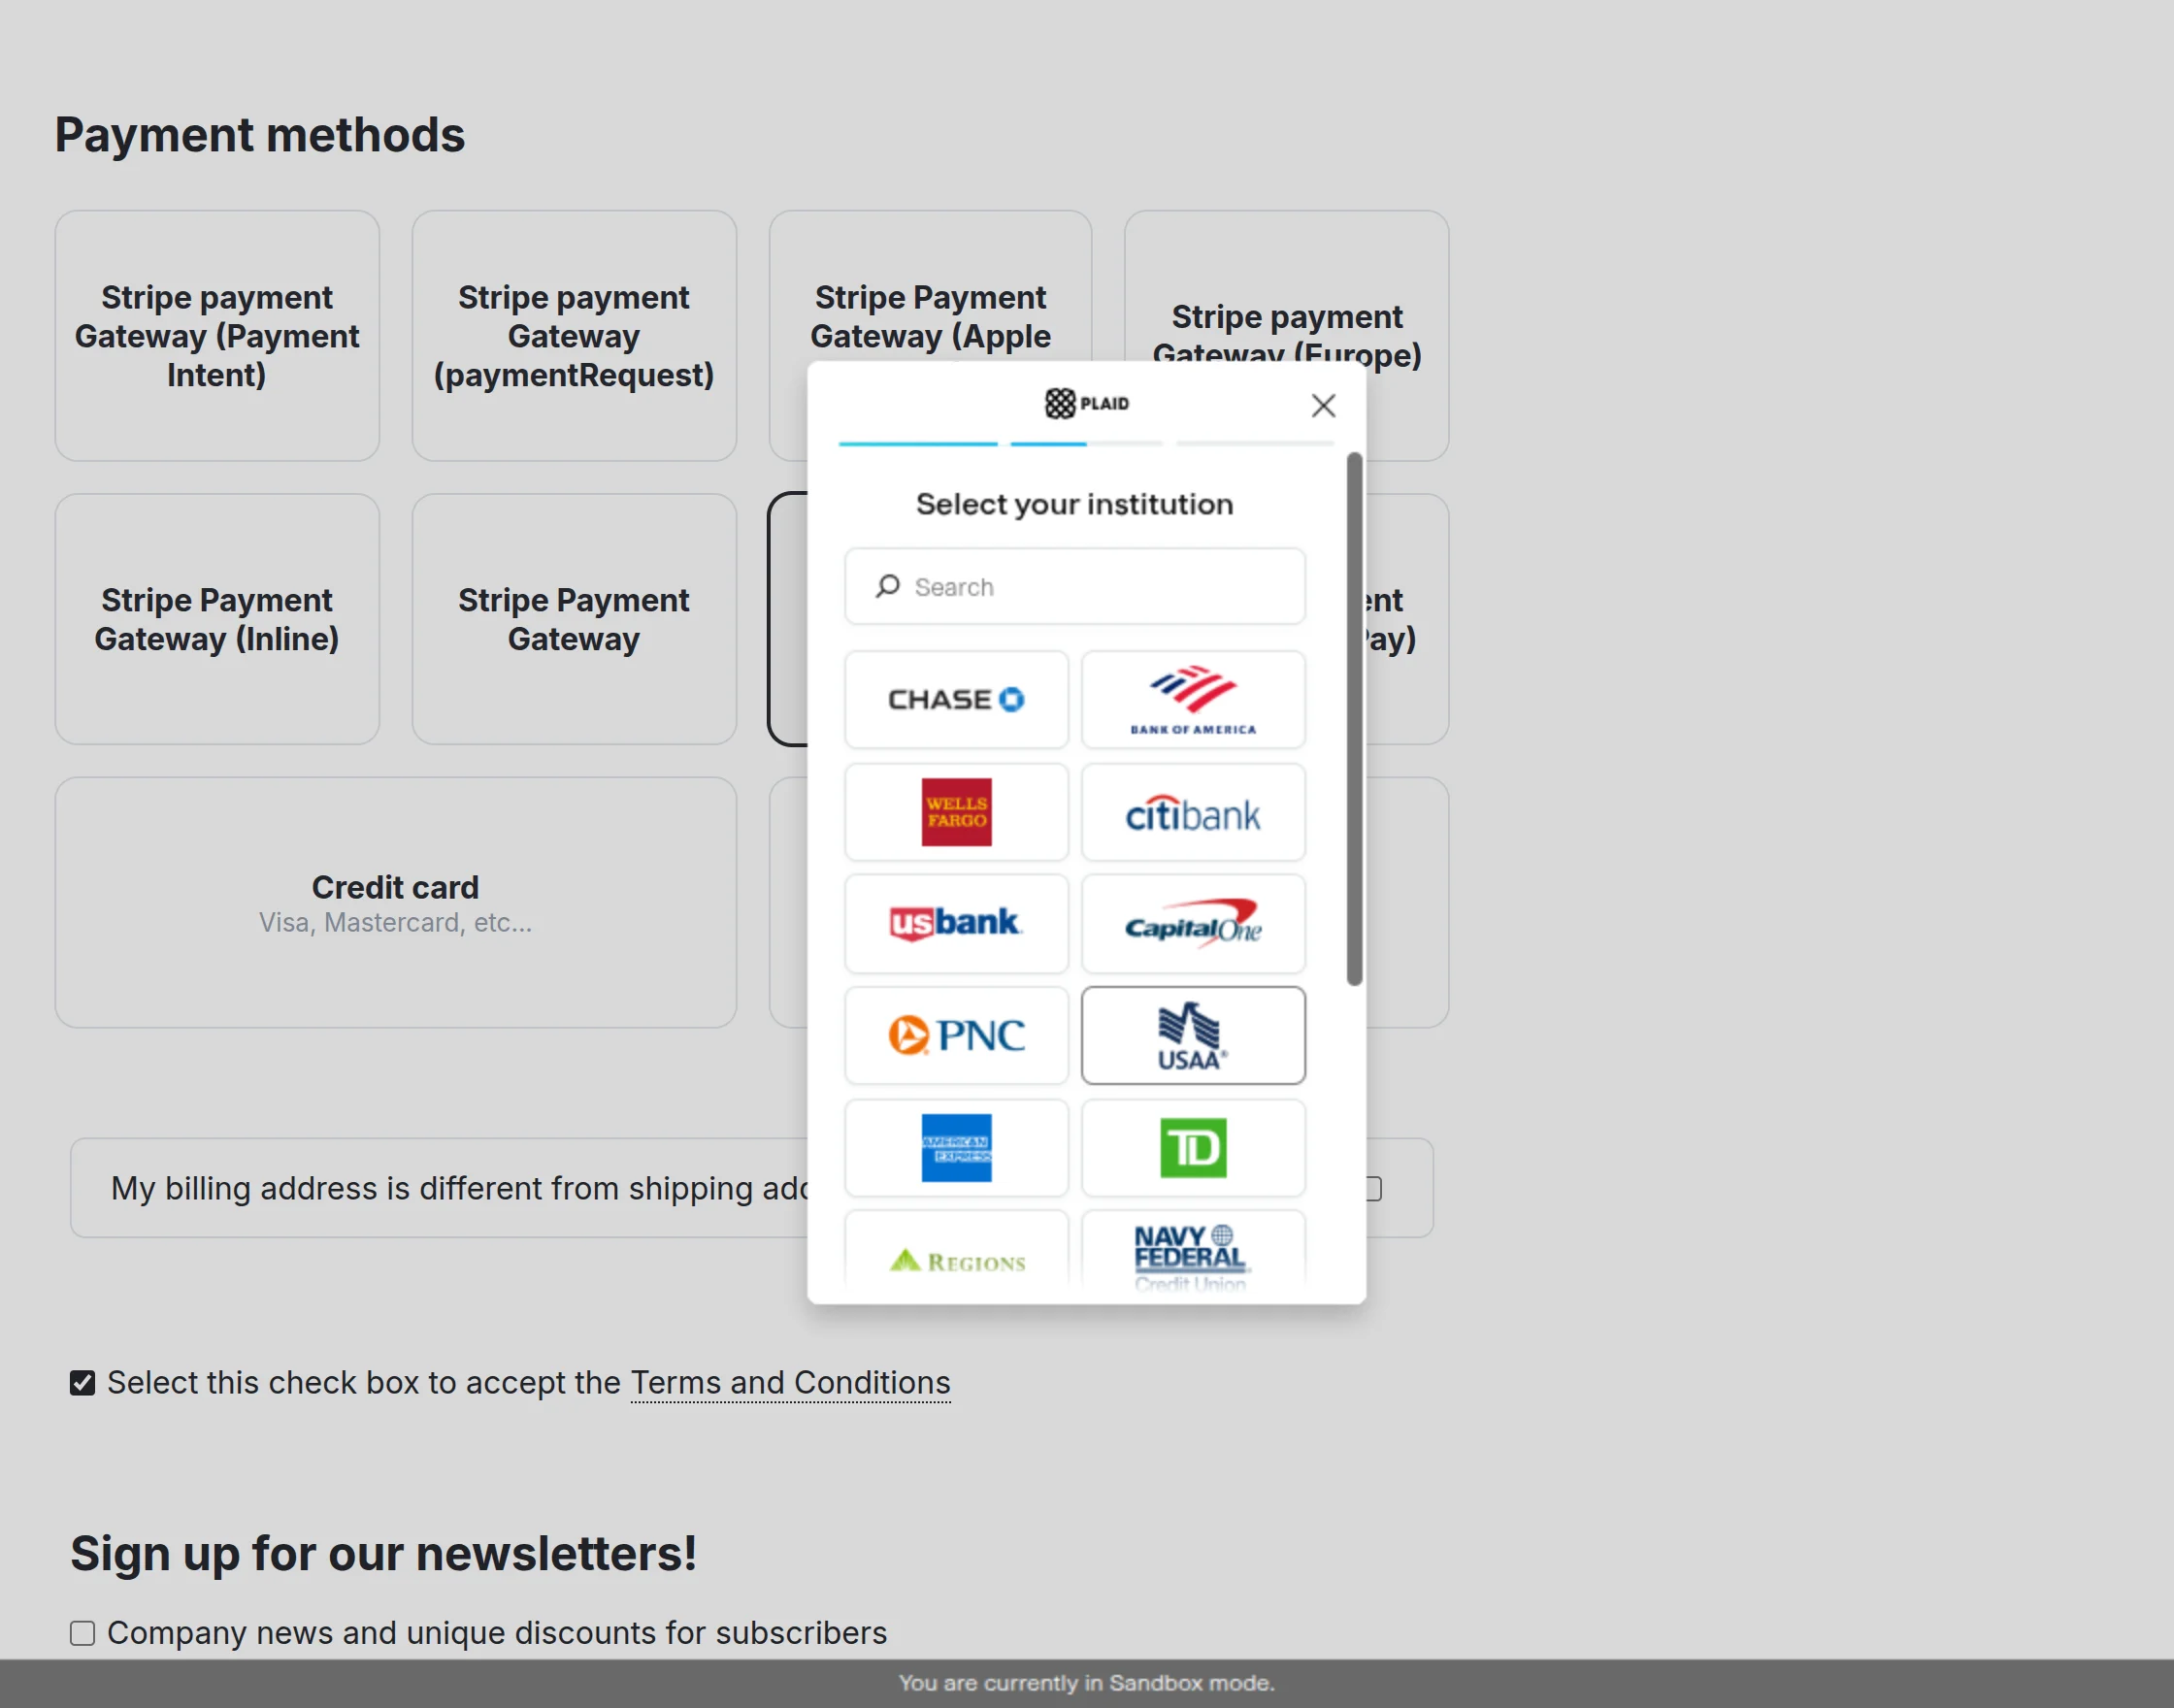
Click on the “Continue to Login” button to access your selected bank account and complete the payment using Stripe ACH.
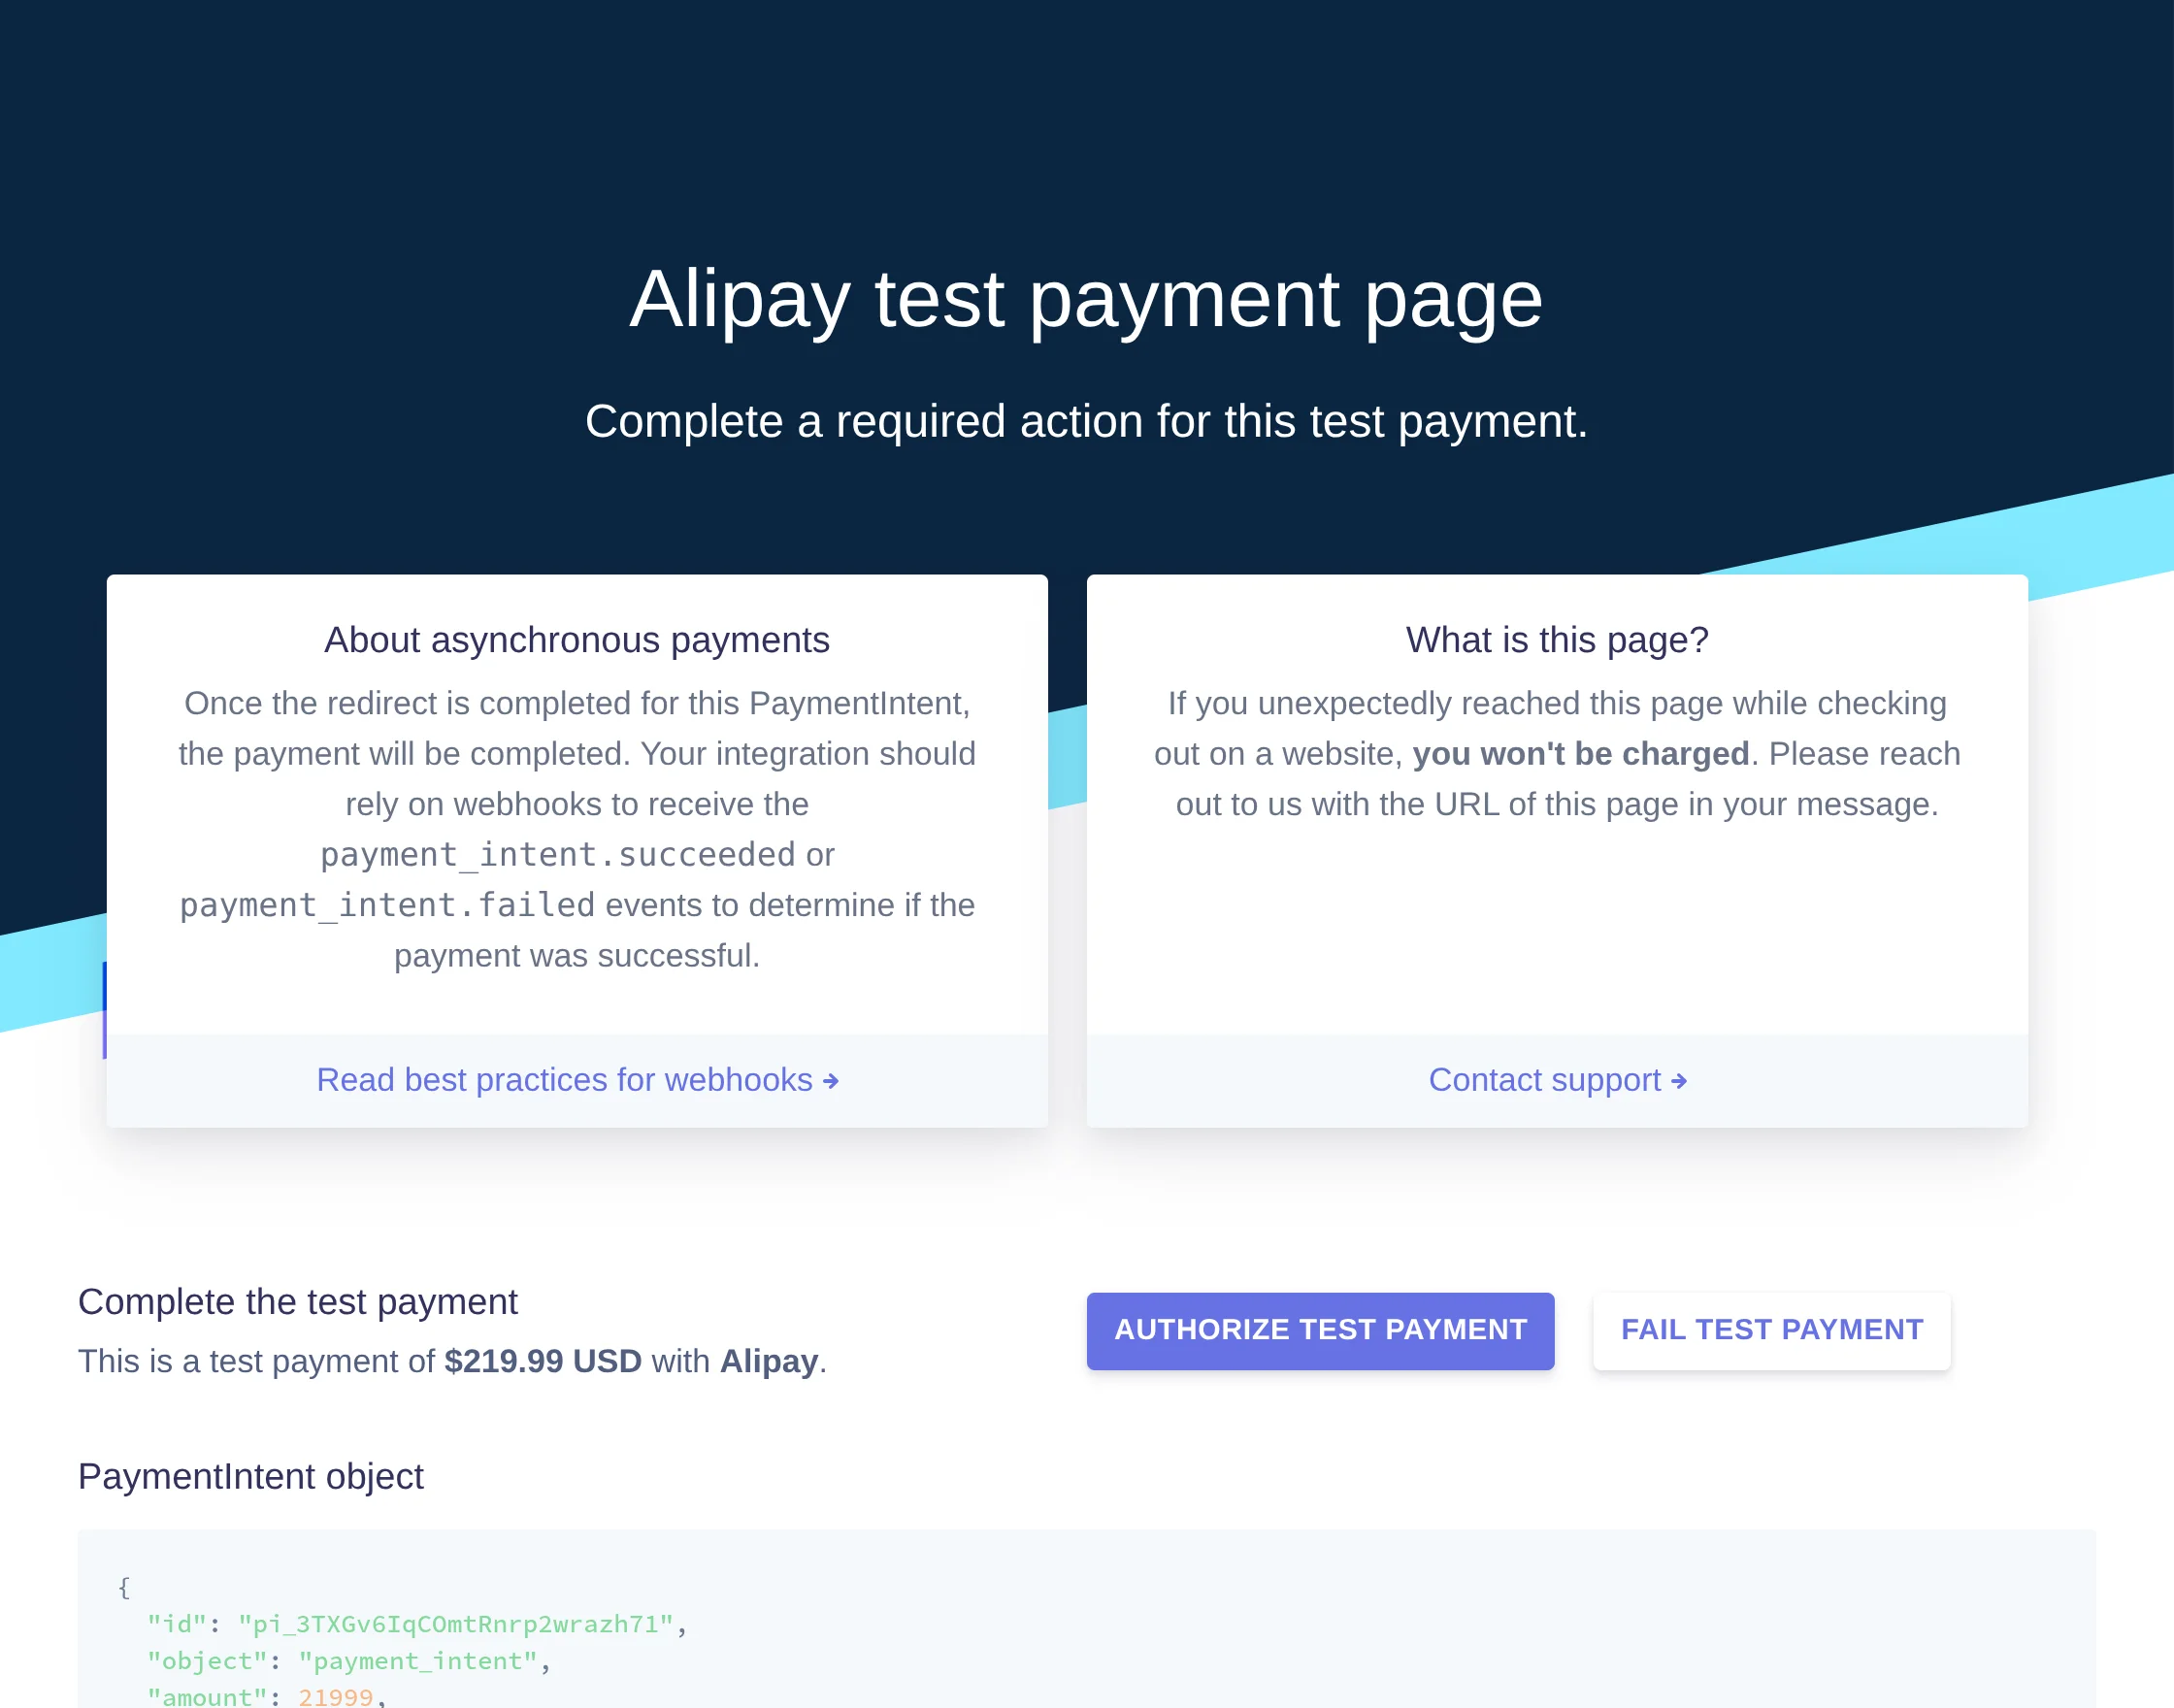
Payment via Stripe Payment Gateway (AliPay):
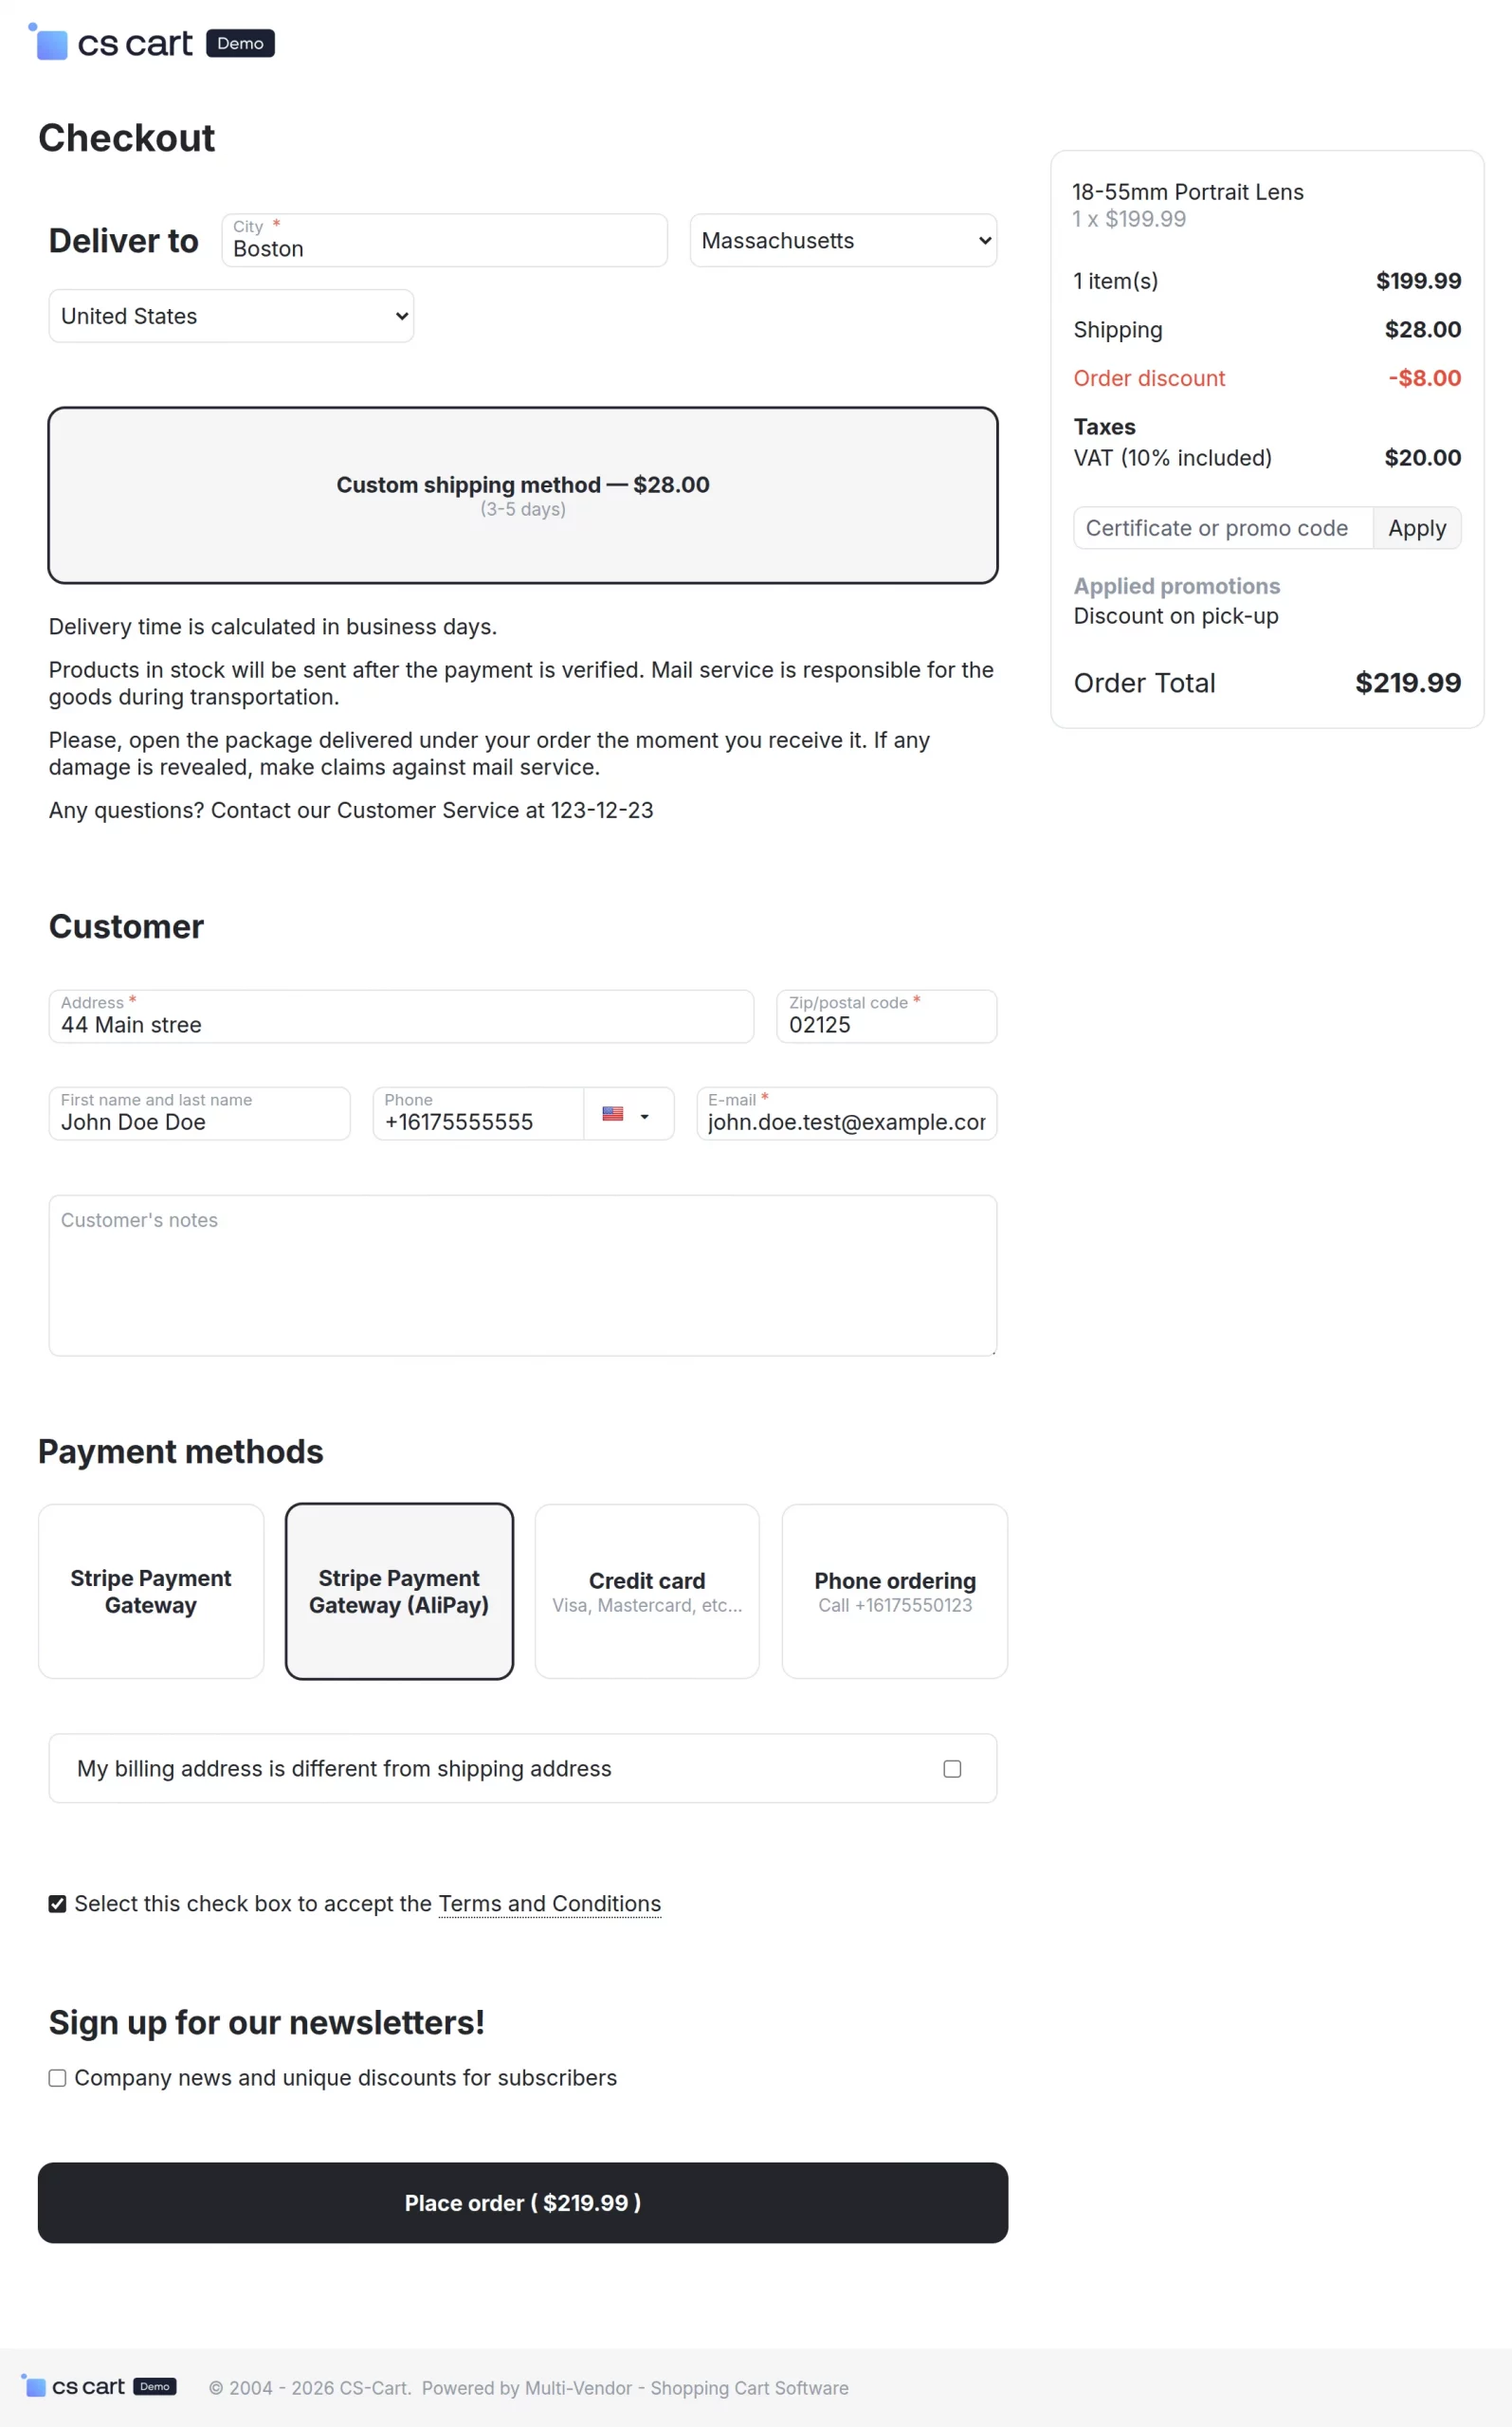
After clicking on the “Place Order” button, you will be redirected to the Stripe Alipay payment page. Click on the “Authorize Payment” button to proceed with the payment.
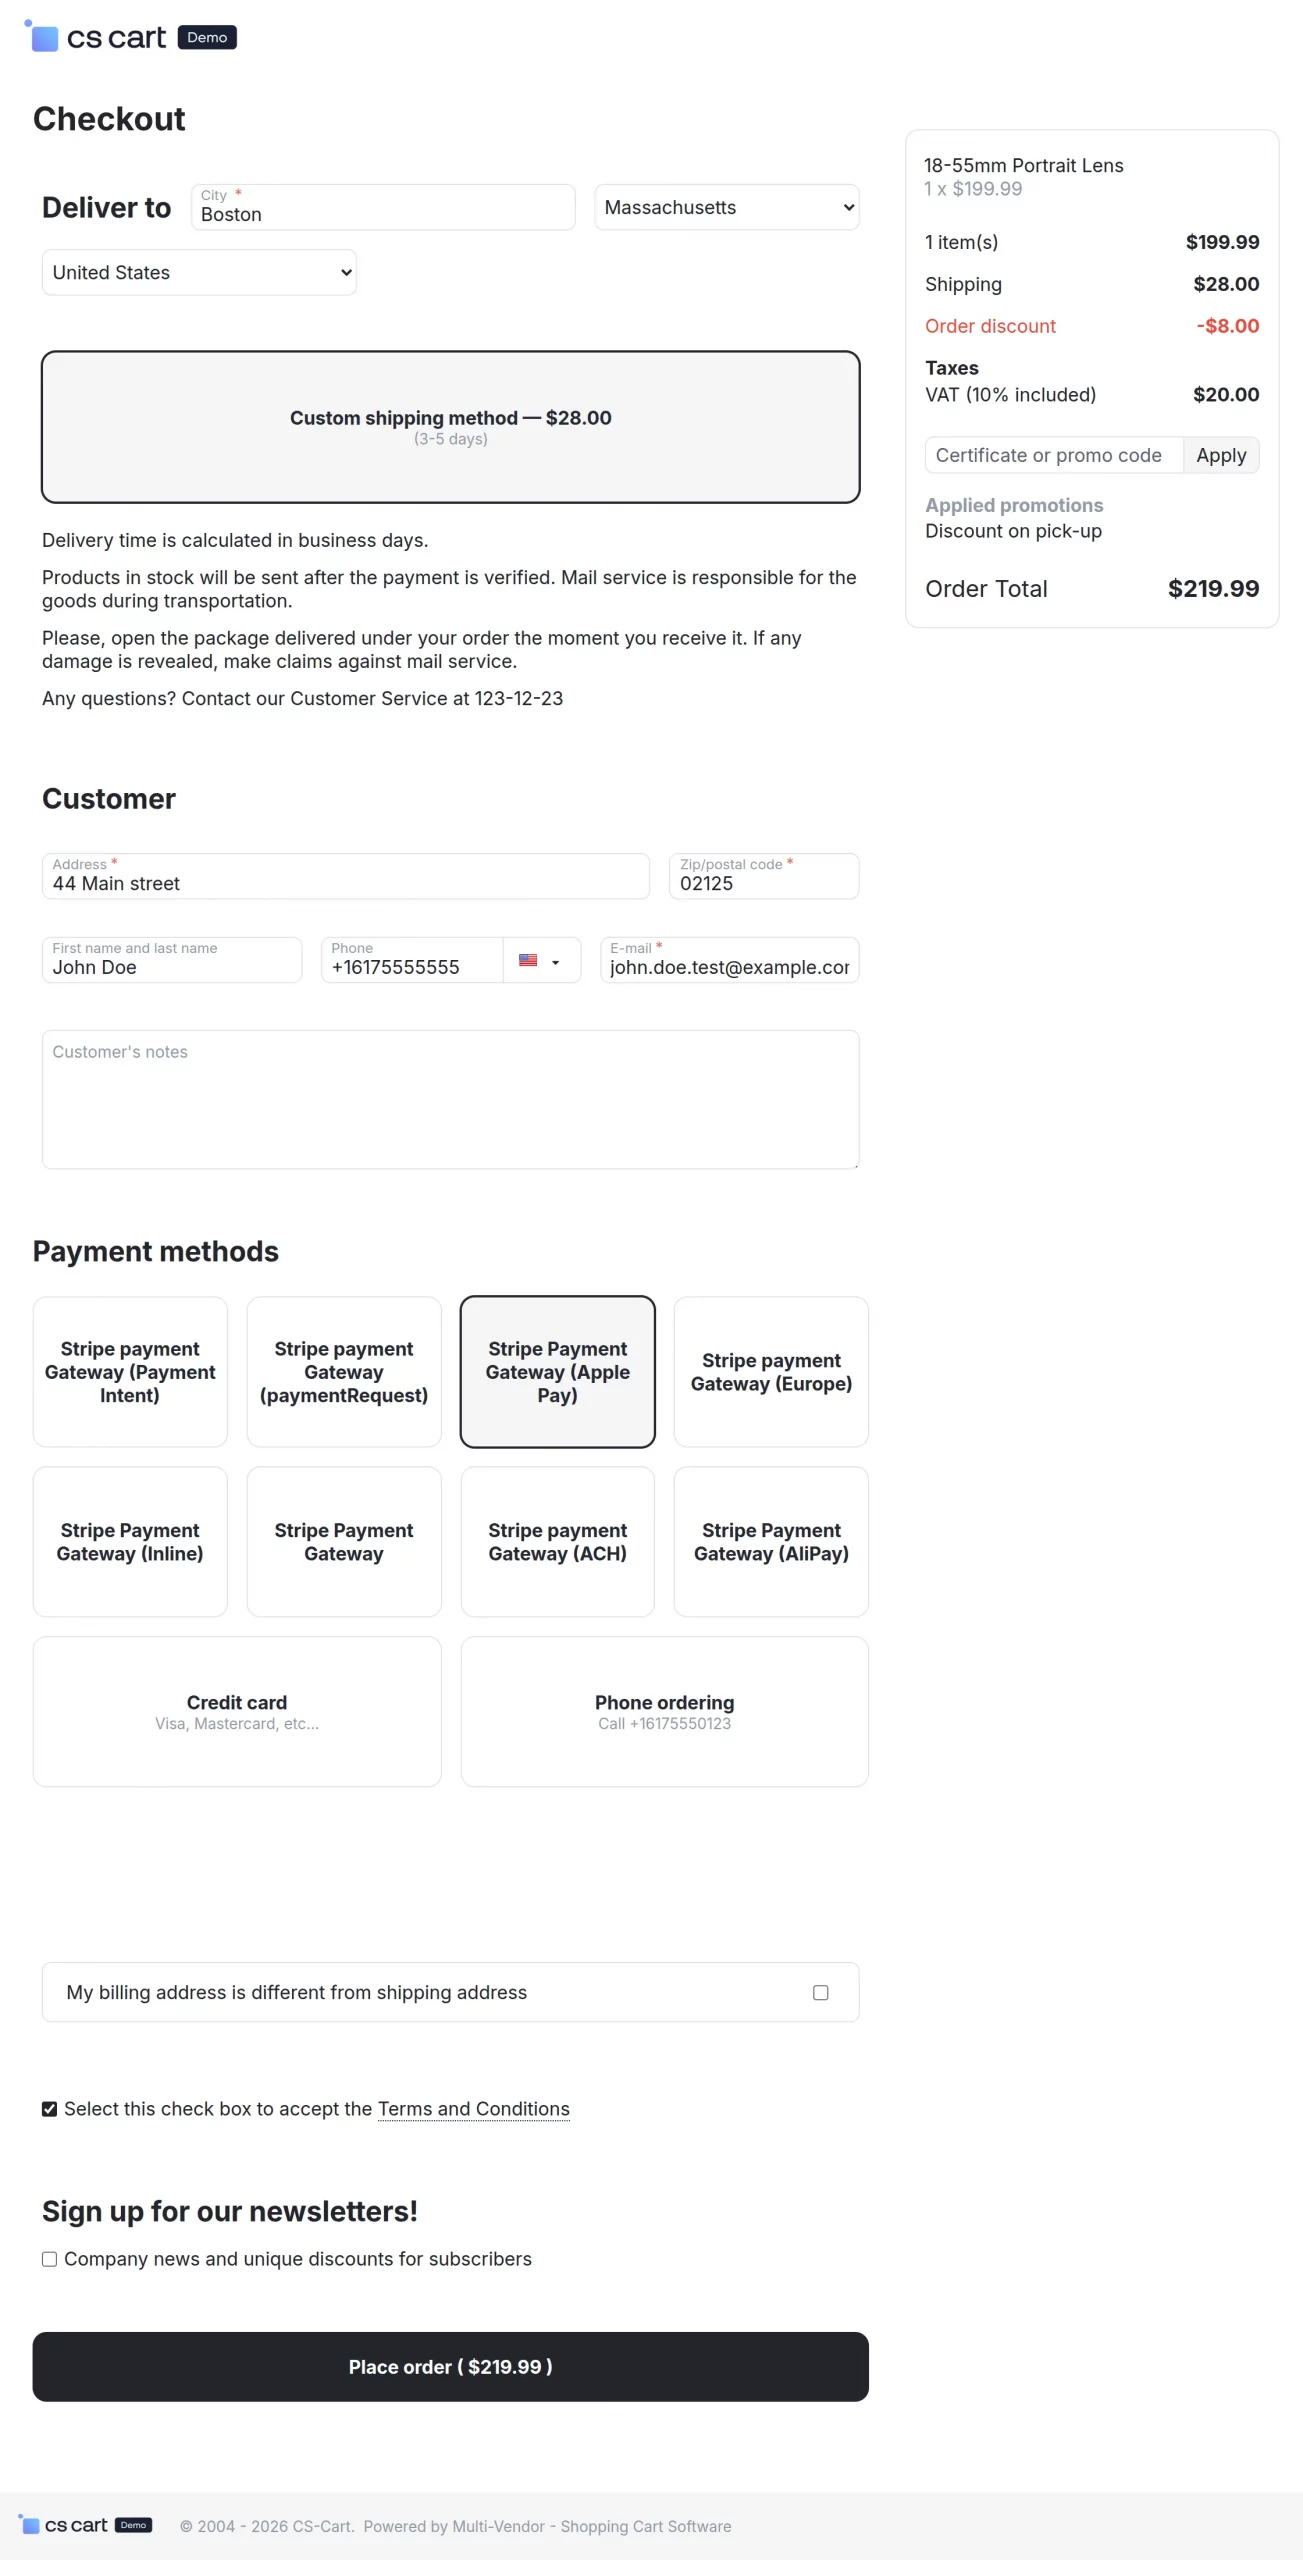
Payment via Stripe Payment Gateway (Apple Pay):
Select “Stripe Payment Gateway (Apple Pay)” as the payment method and click on the “Place Order” button to proceed with the payment.
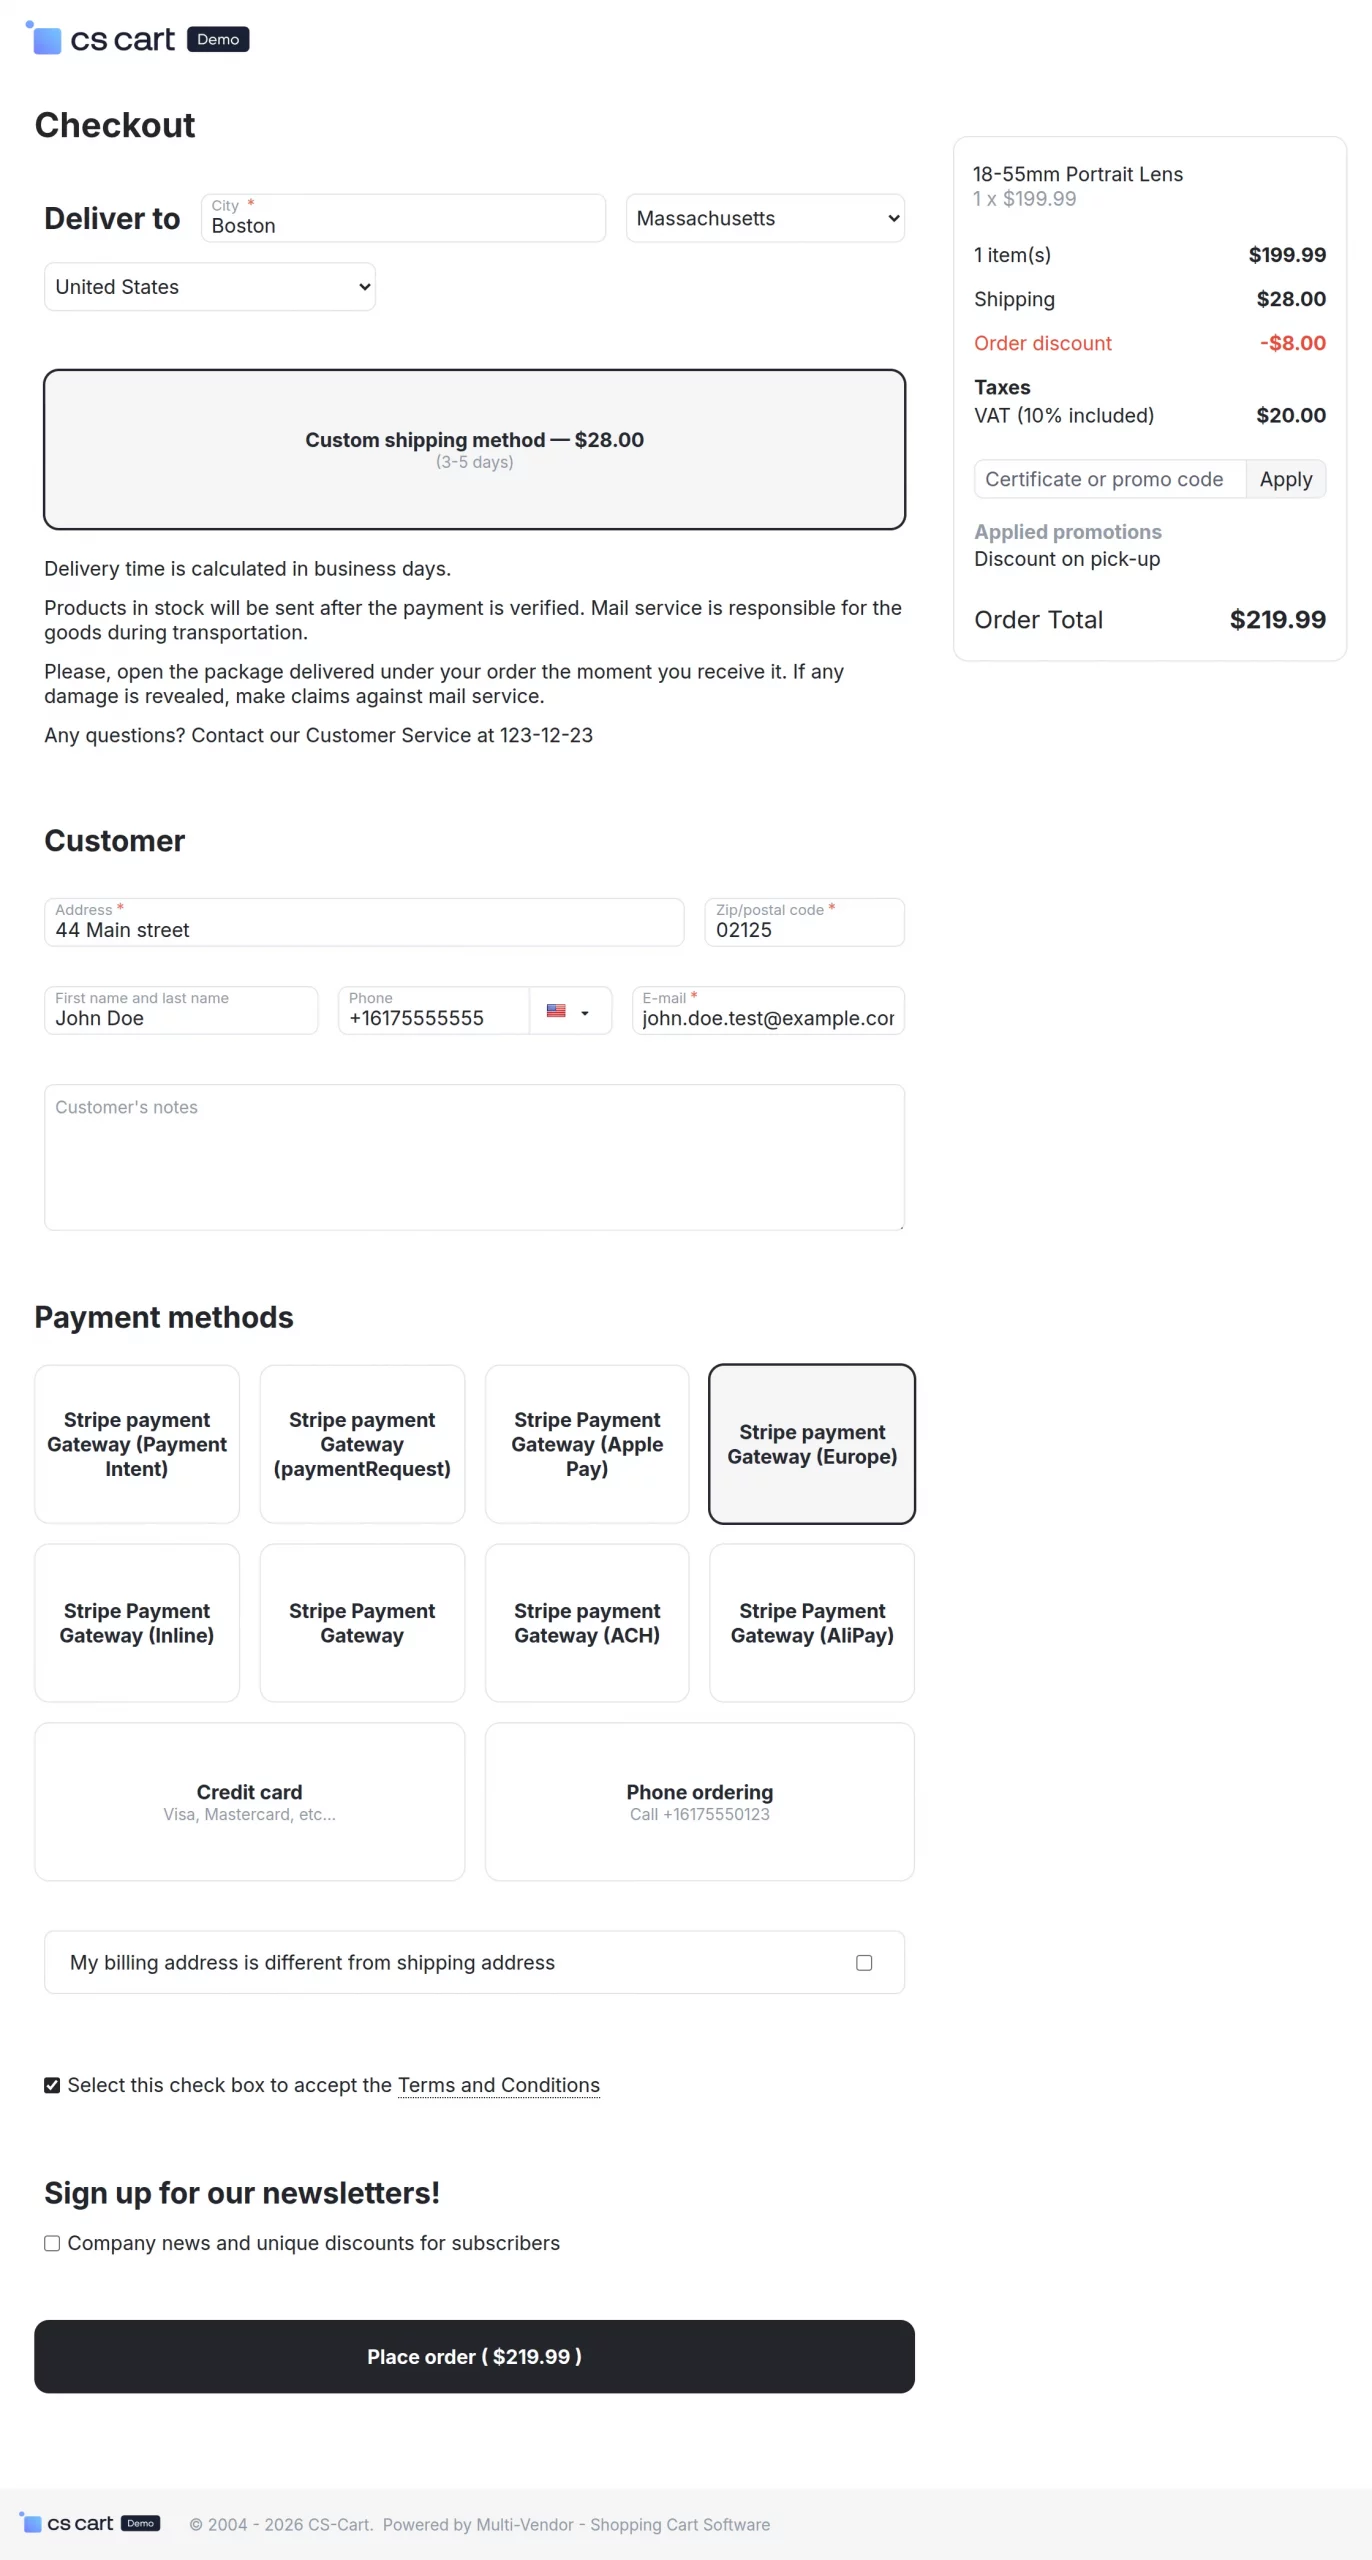
Payment via Stripe payment Gateway (Europe):
Separate payment methods need to be created for Klarna, iDEAL, and Bancontact. Customers can select the required payment option during checkout as shown in the snapshot below.
After clicking on the “Place Order” button, the customer will be redirected to the Stripe payment page to complete the payment securely.
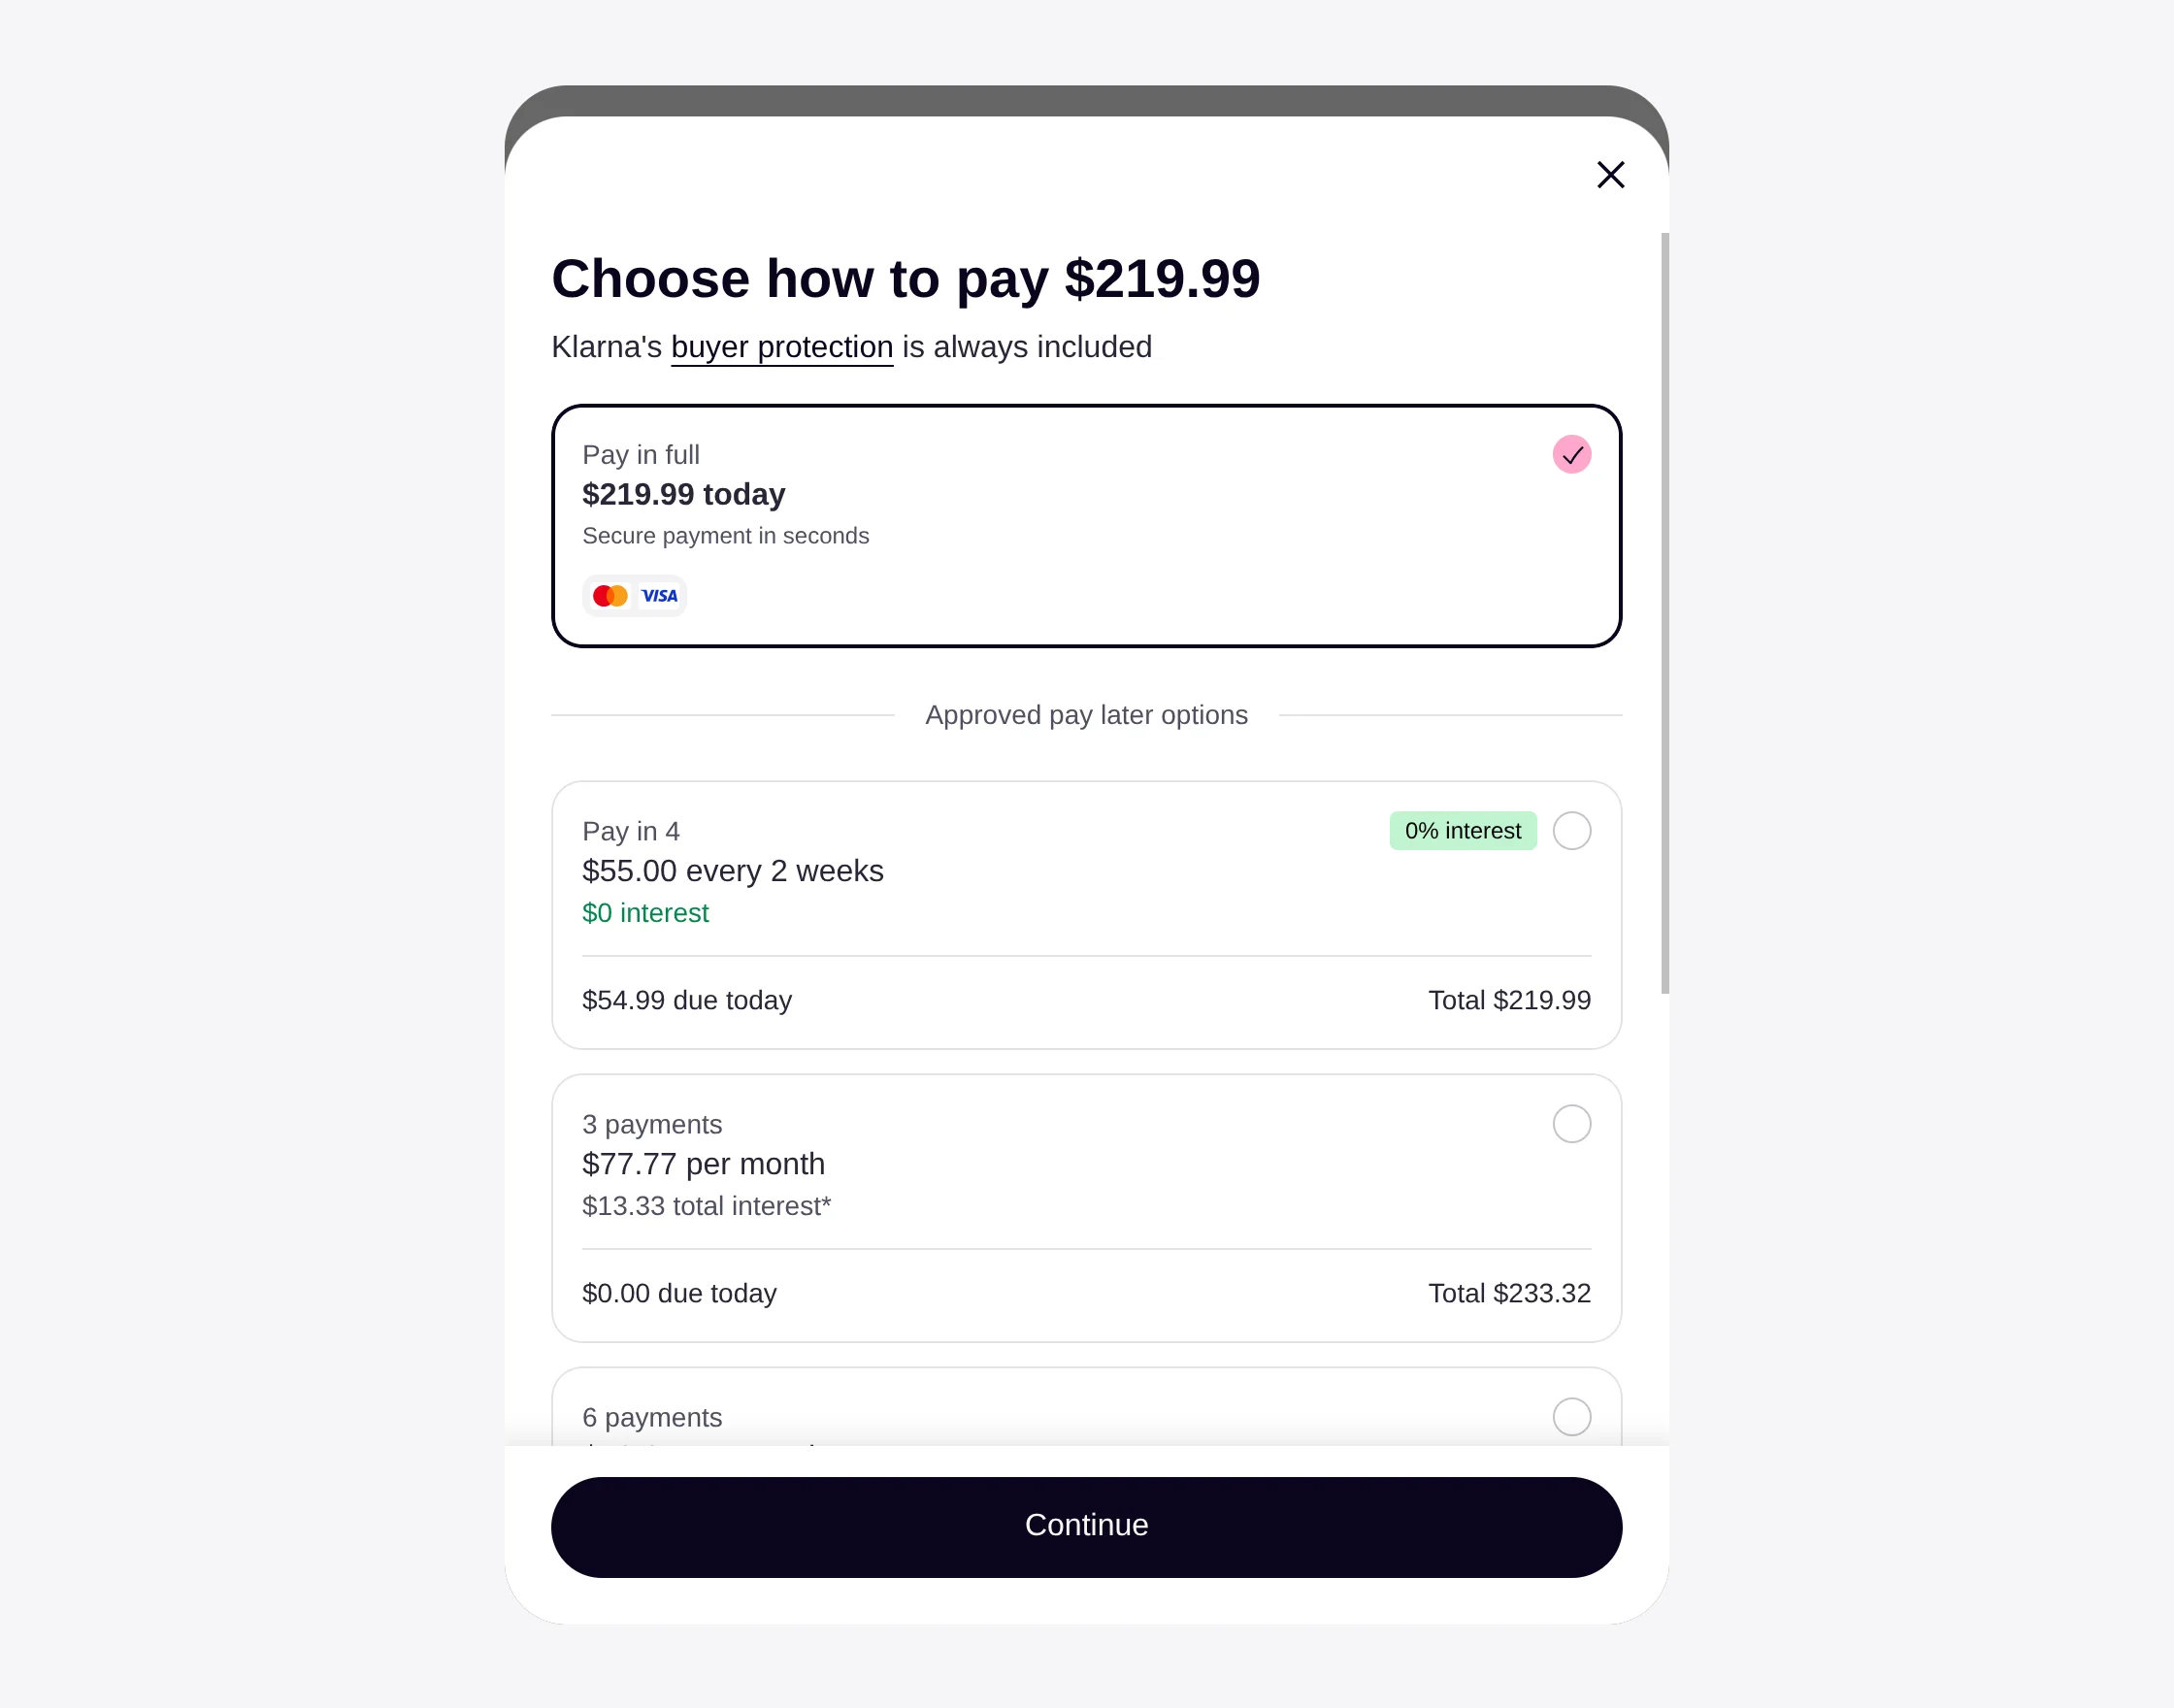
The payment type displayed in the payment details depends on the configuration selected by the admin at the backend.
Select the preferred payment method and click on the “Continue” button to proceed with the payment process.
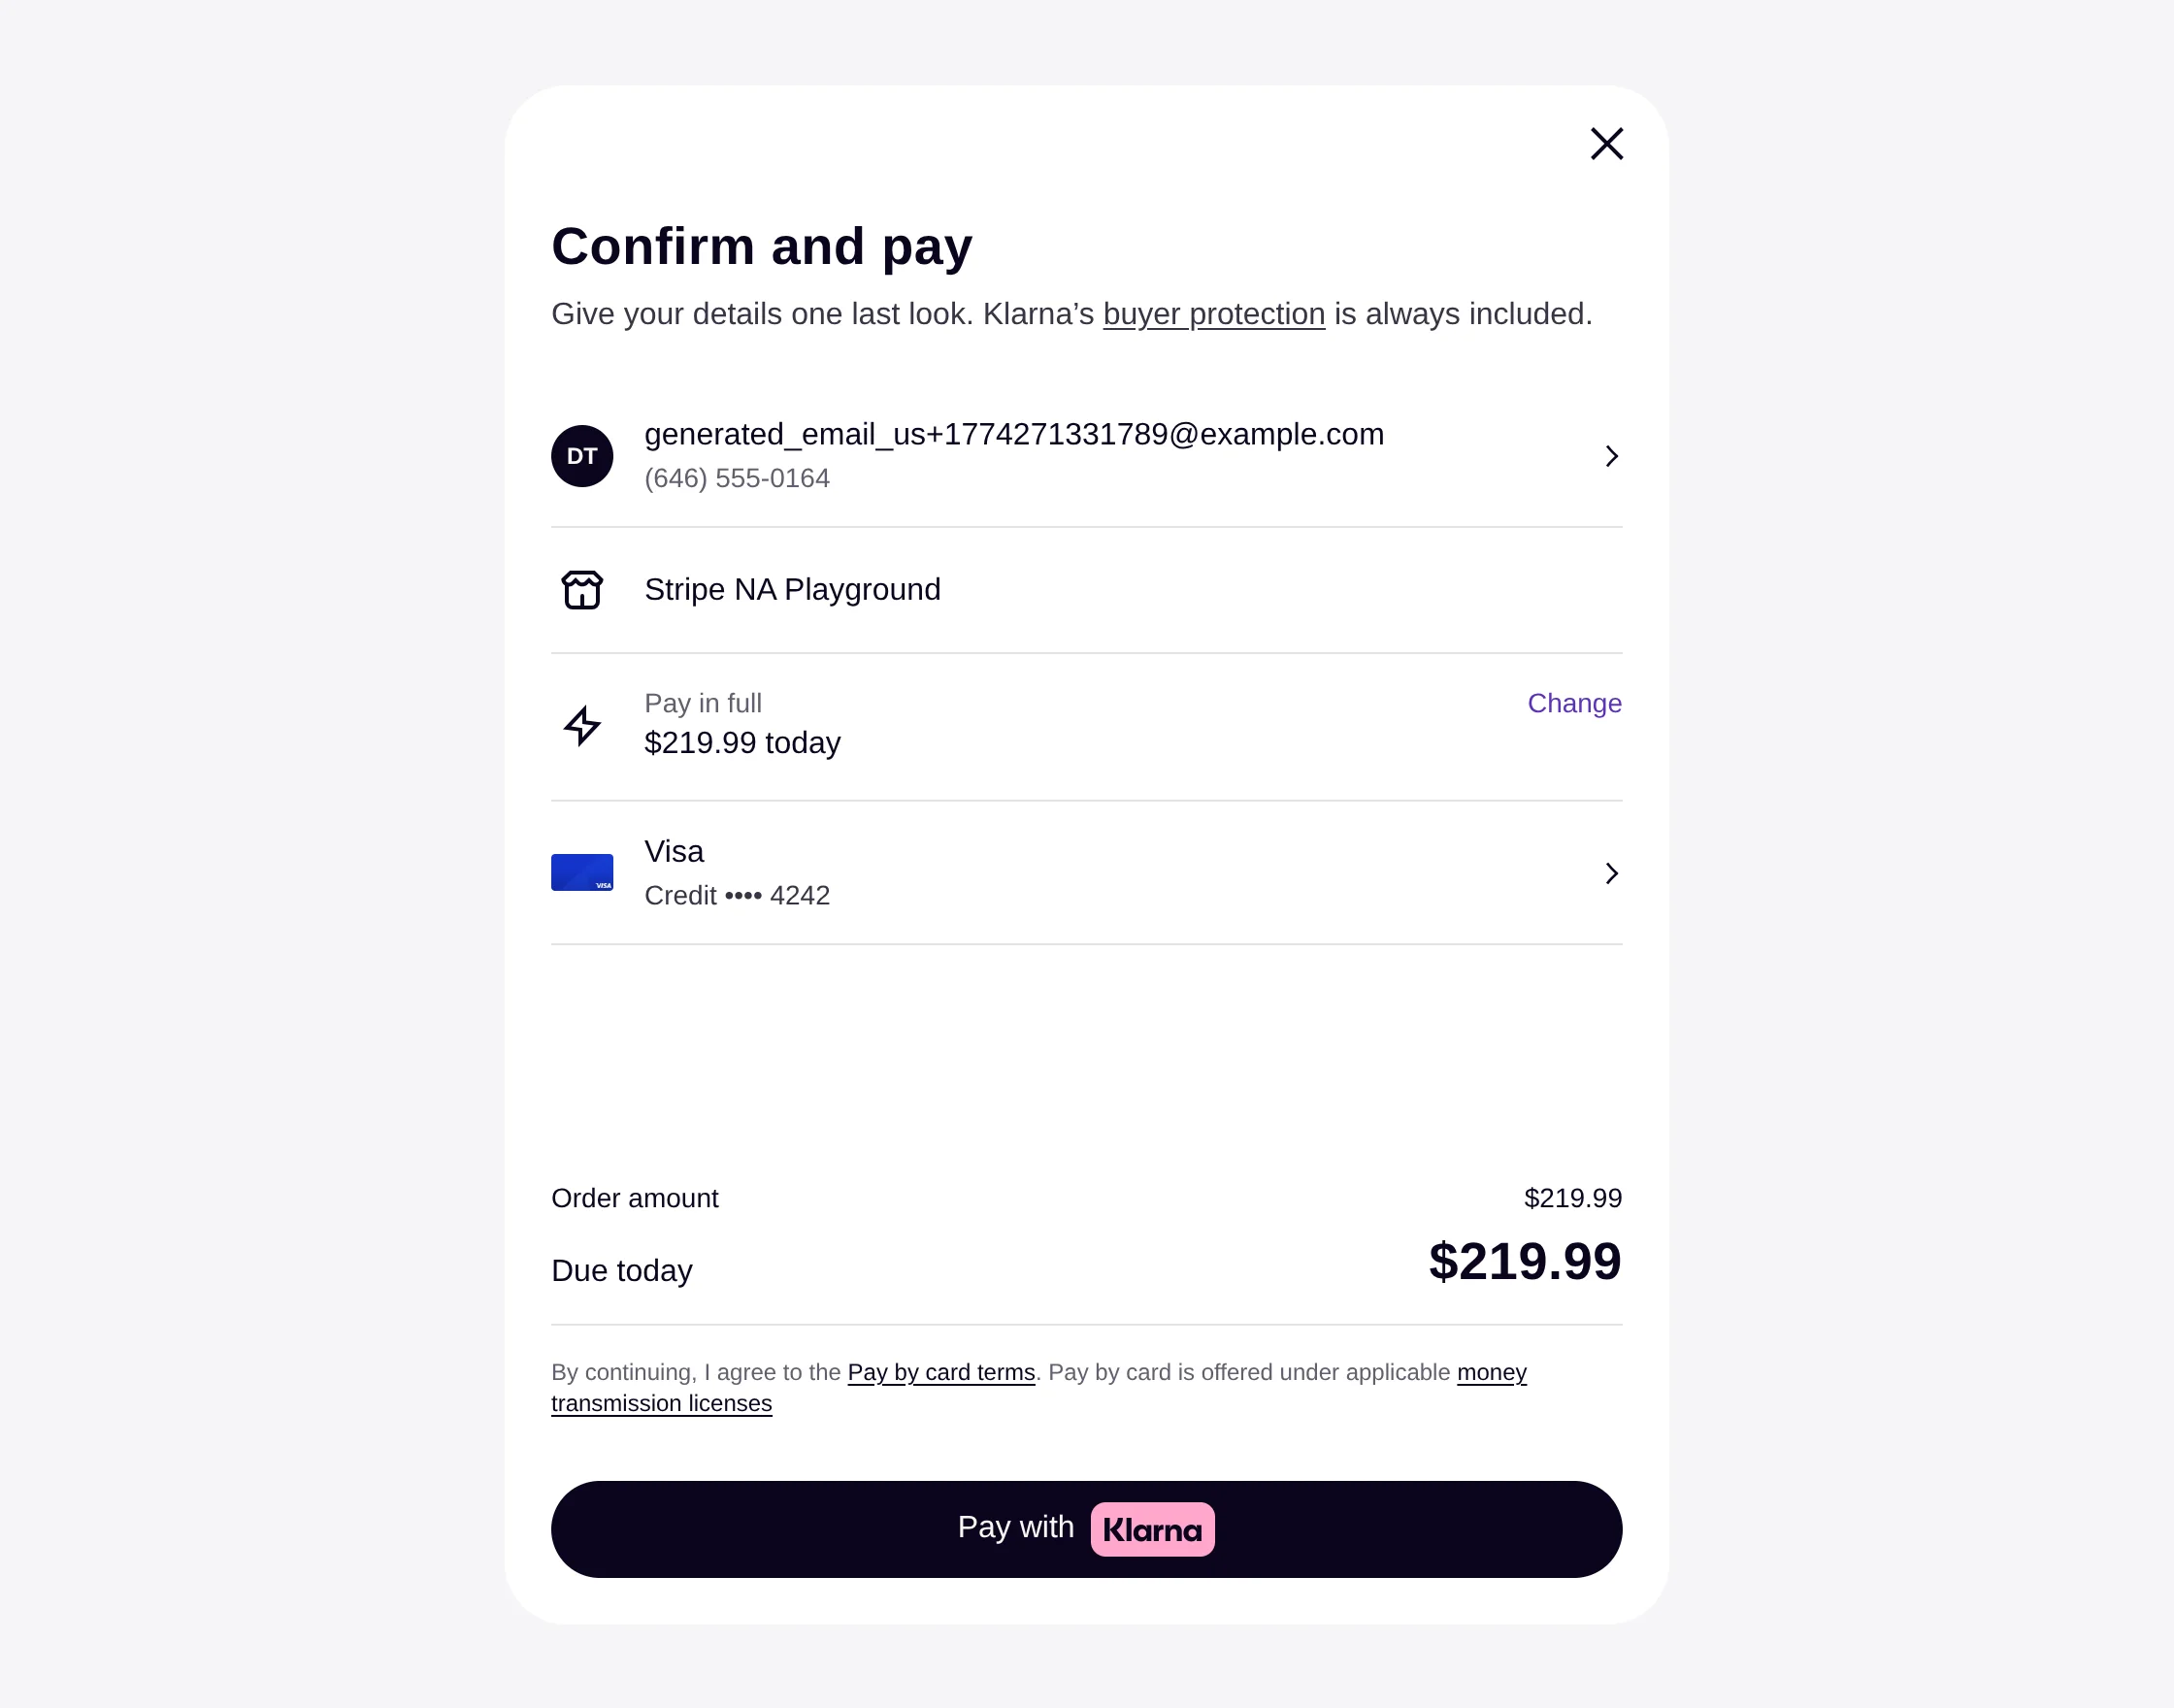
Click on the “Pay with Klarna” button to continue with the payment process.
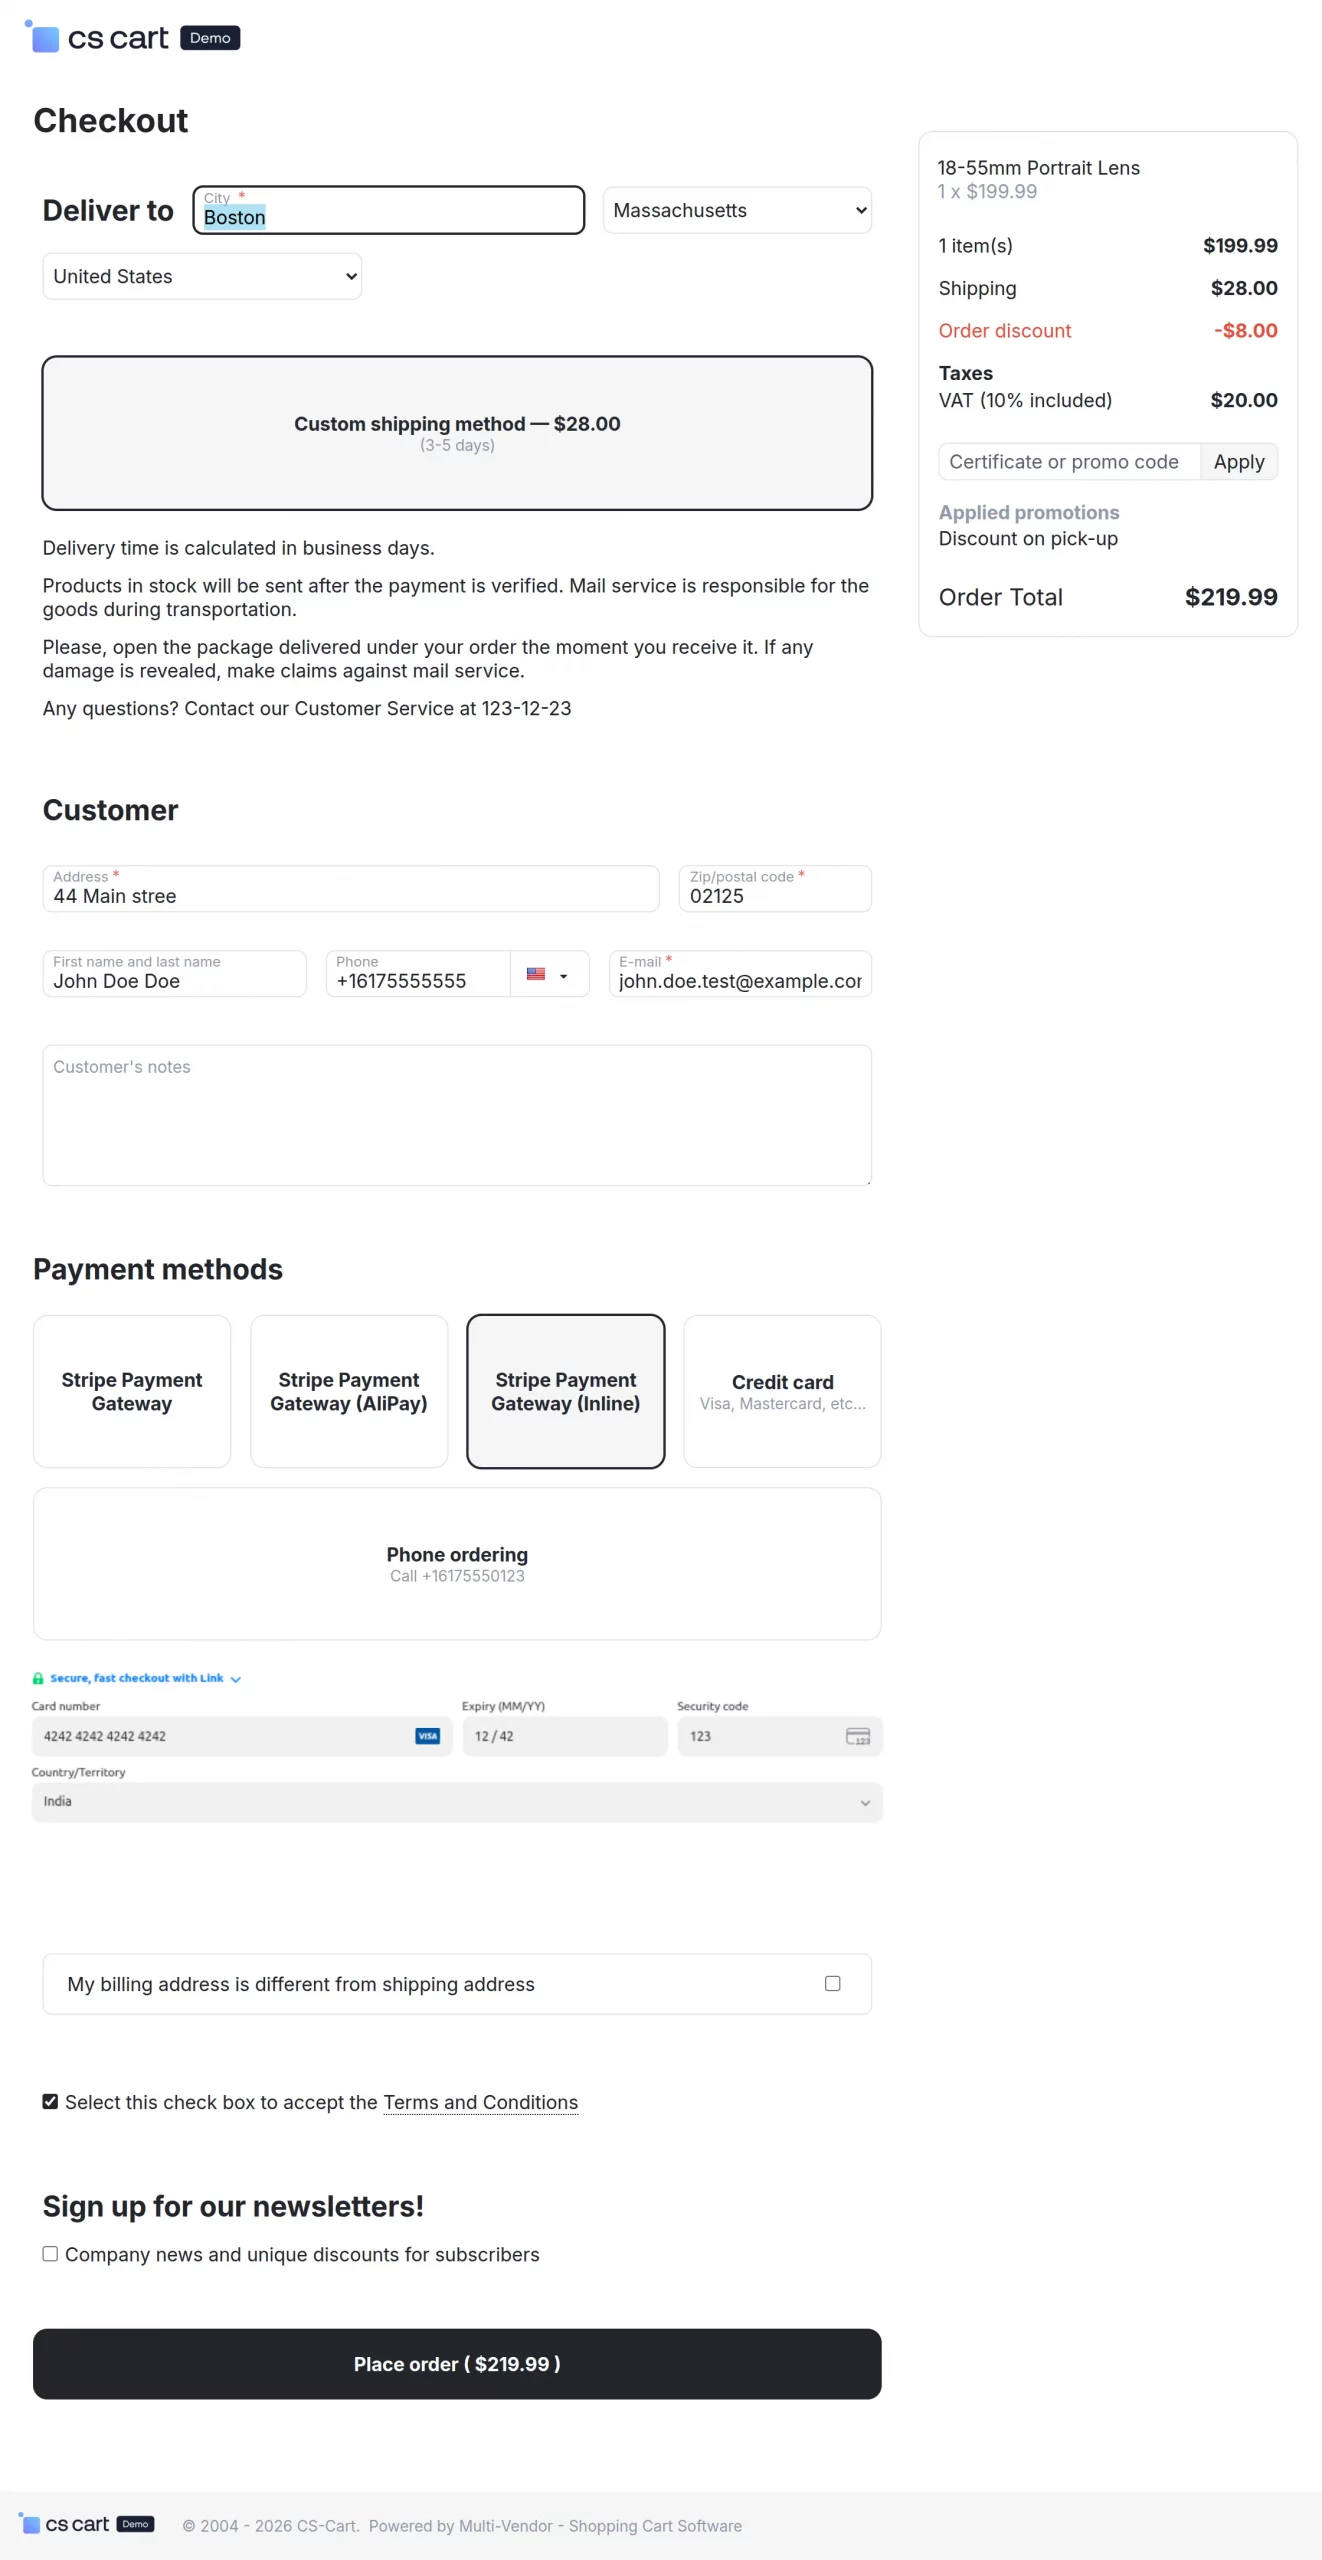
Payment via Stripe Payment Gateway (Inline):
For payment via “Stripe Inline” select the option and fill the credentials as shown below in the snapshot.
Payment via Stripe payment Gateway (Payment Intent):
Payment via Stripe payment Gateway (paymentRequest):
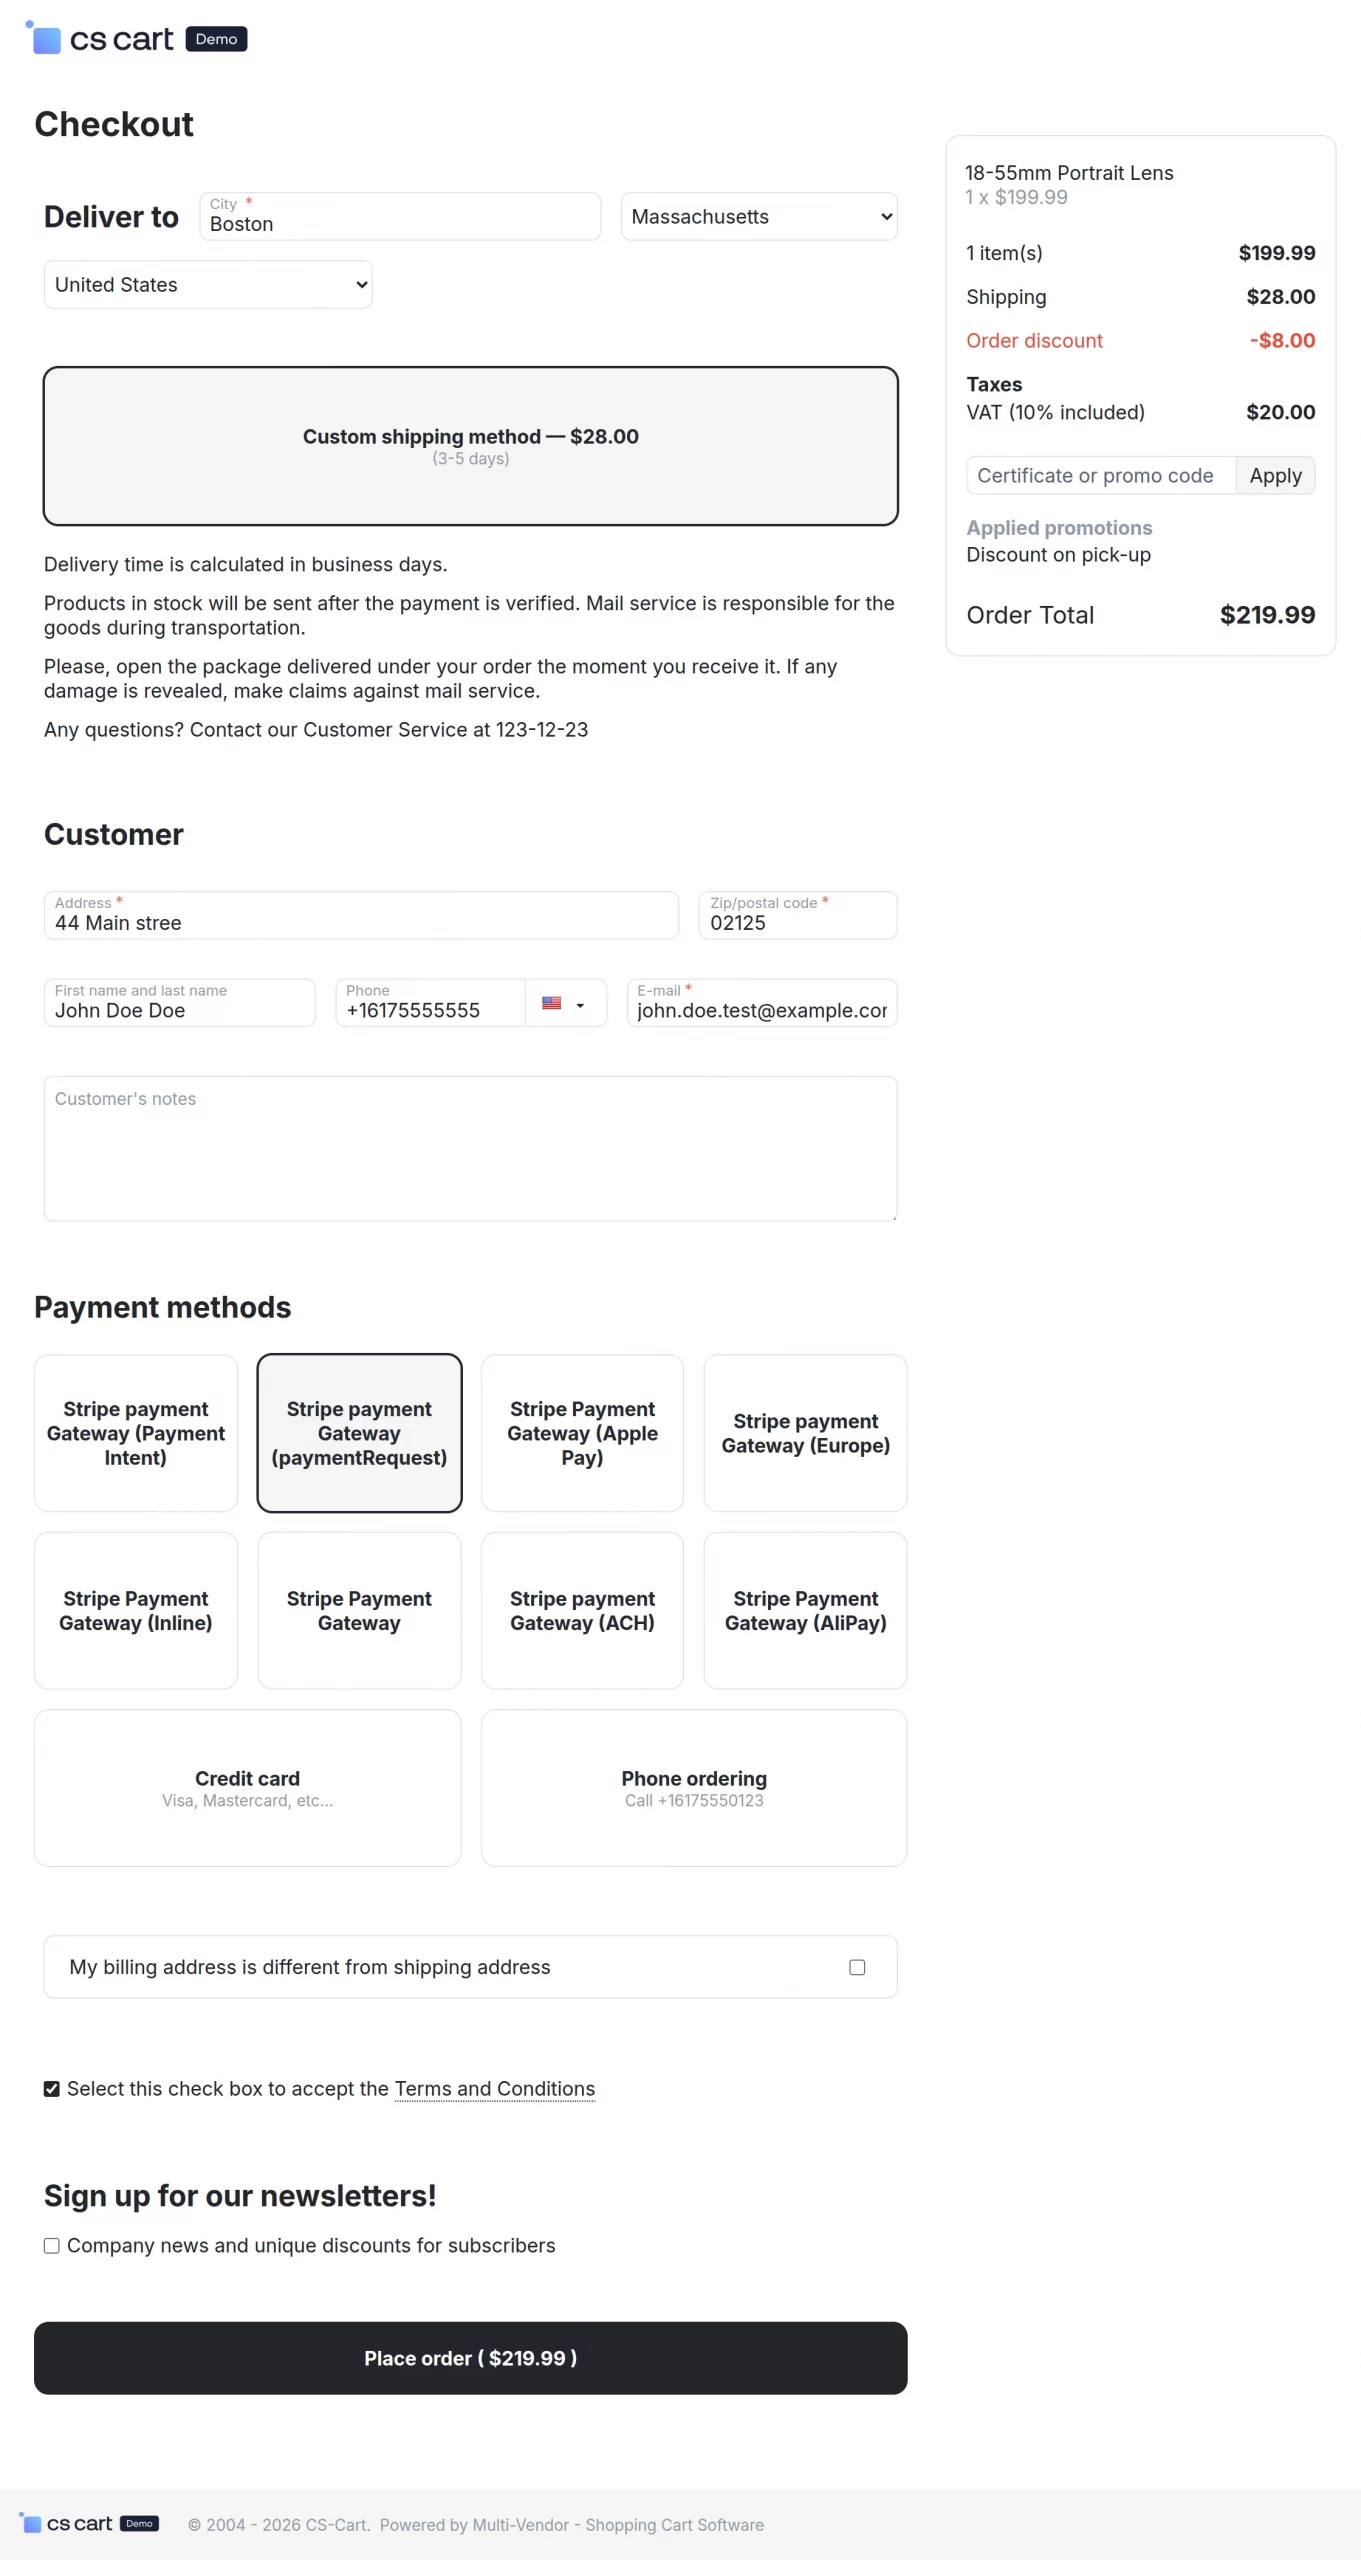
This is how payment can be made easily via various payment methods supported by Stripe.
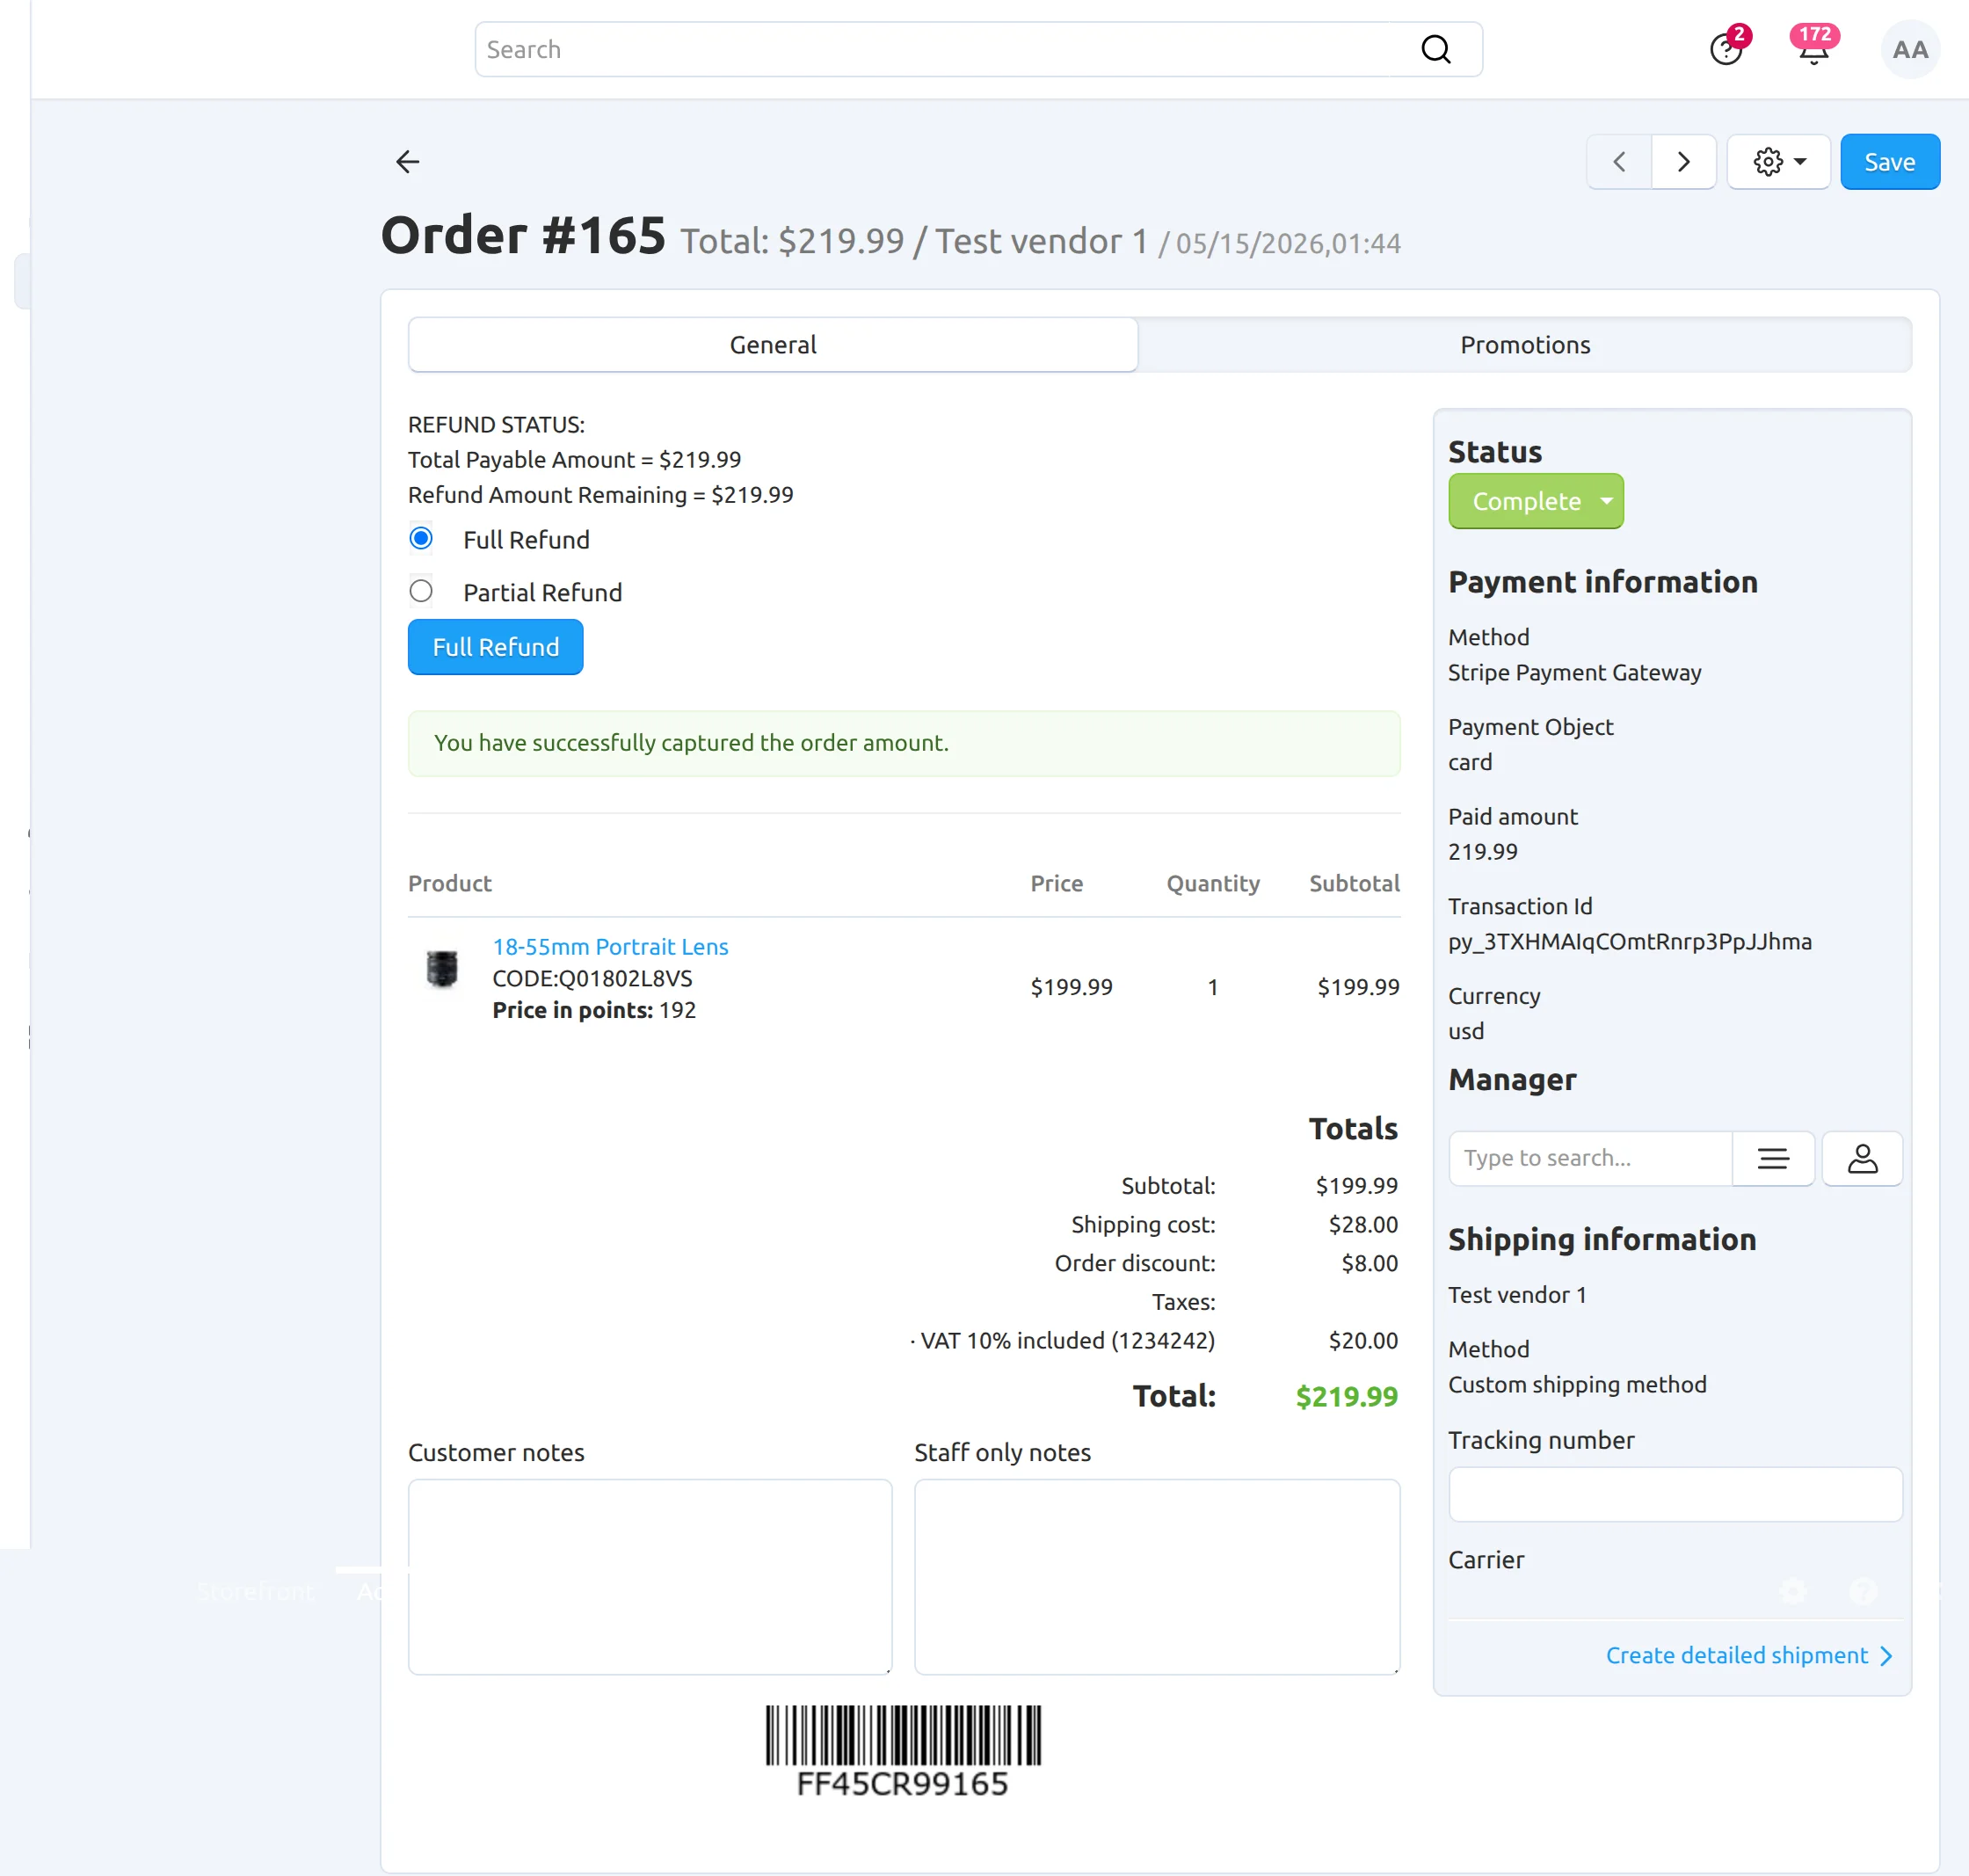
Backend View
Admin can view the orders placed through Stripe payment methods from the store backend. Let’s now check the payment response received for Stripe transactions.
Here, you can view both the Full Refund and Partial Refund options for Stripe payments.
- Full Refund: Click on the “Full Refund” button to refund the complete order amount.
- Partial Refund: Enter the refund amount as required and click on the “Partial Refund” button to process a partial refund.
How To Manage Refunds:
Go to Orders > Stripe Refund to access the Stripe Refund Log page. Here, the admin can view all Stripe refund records, including both full refunds and partial refunds for orders.
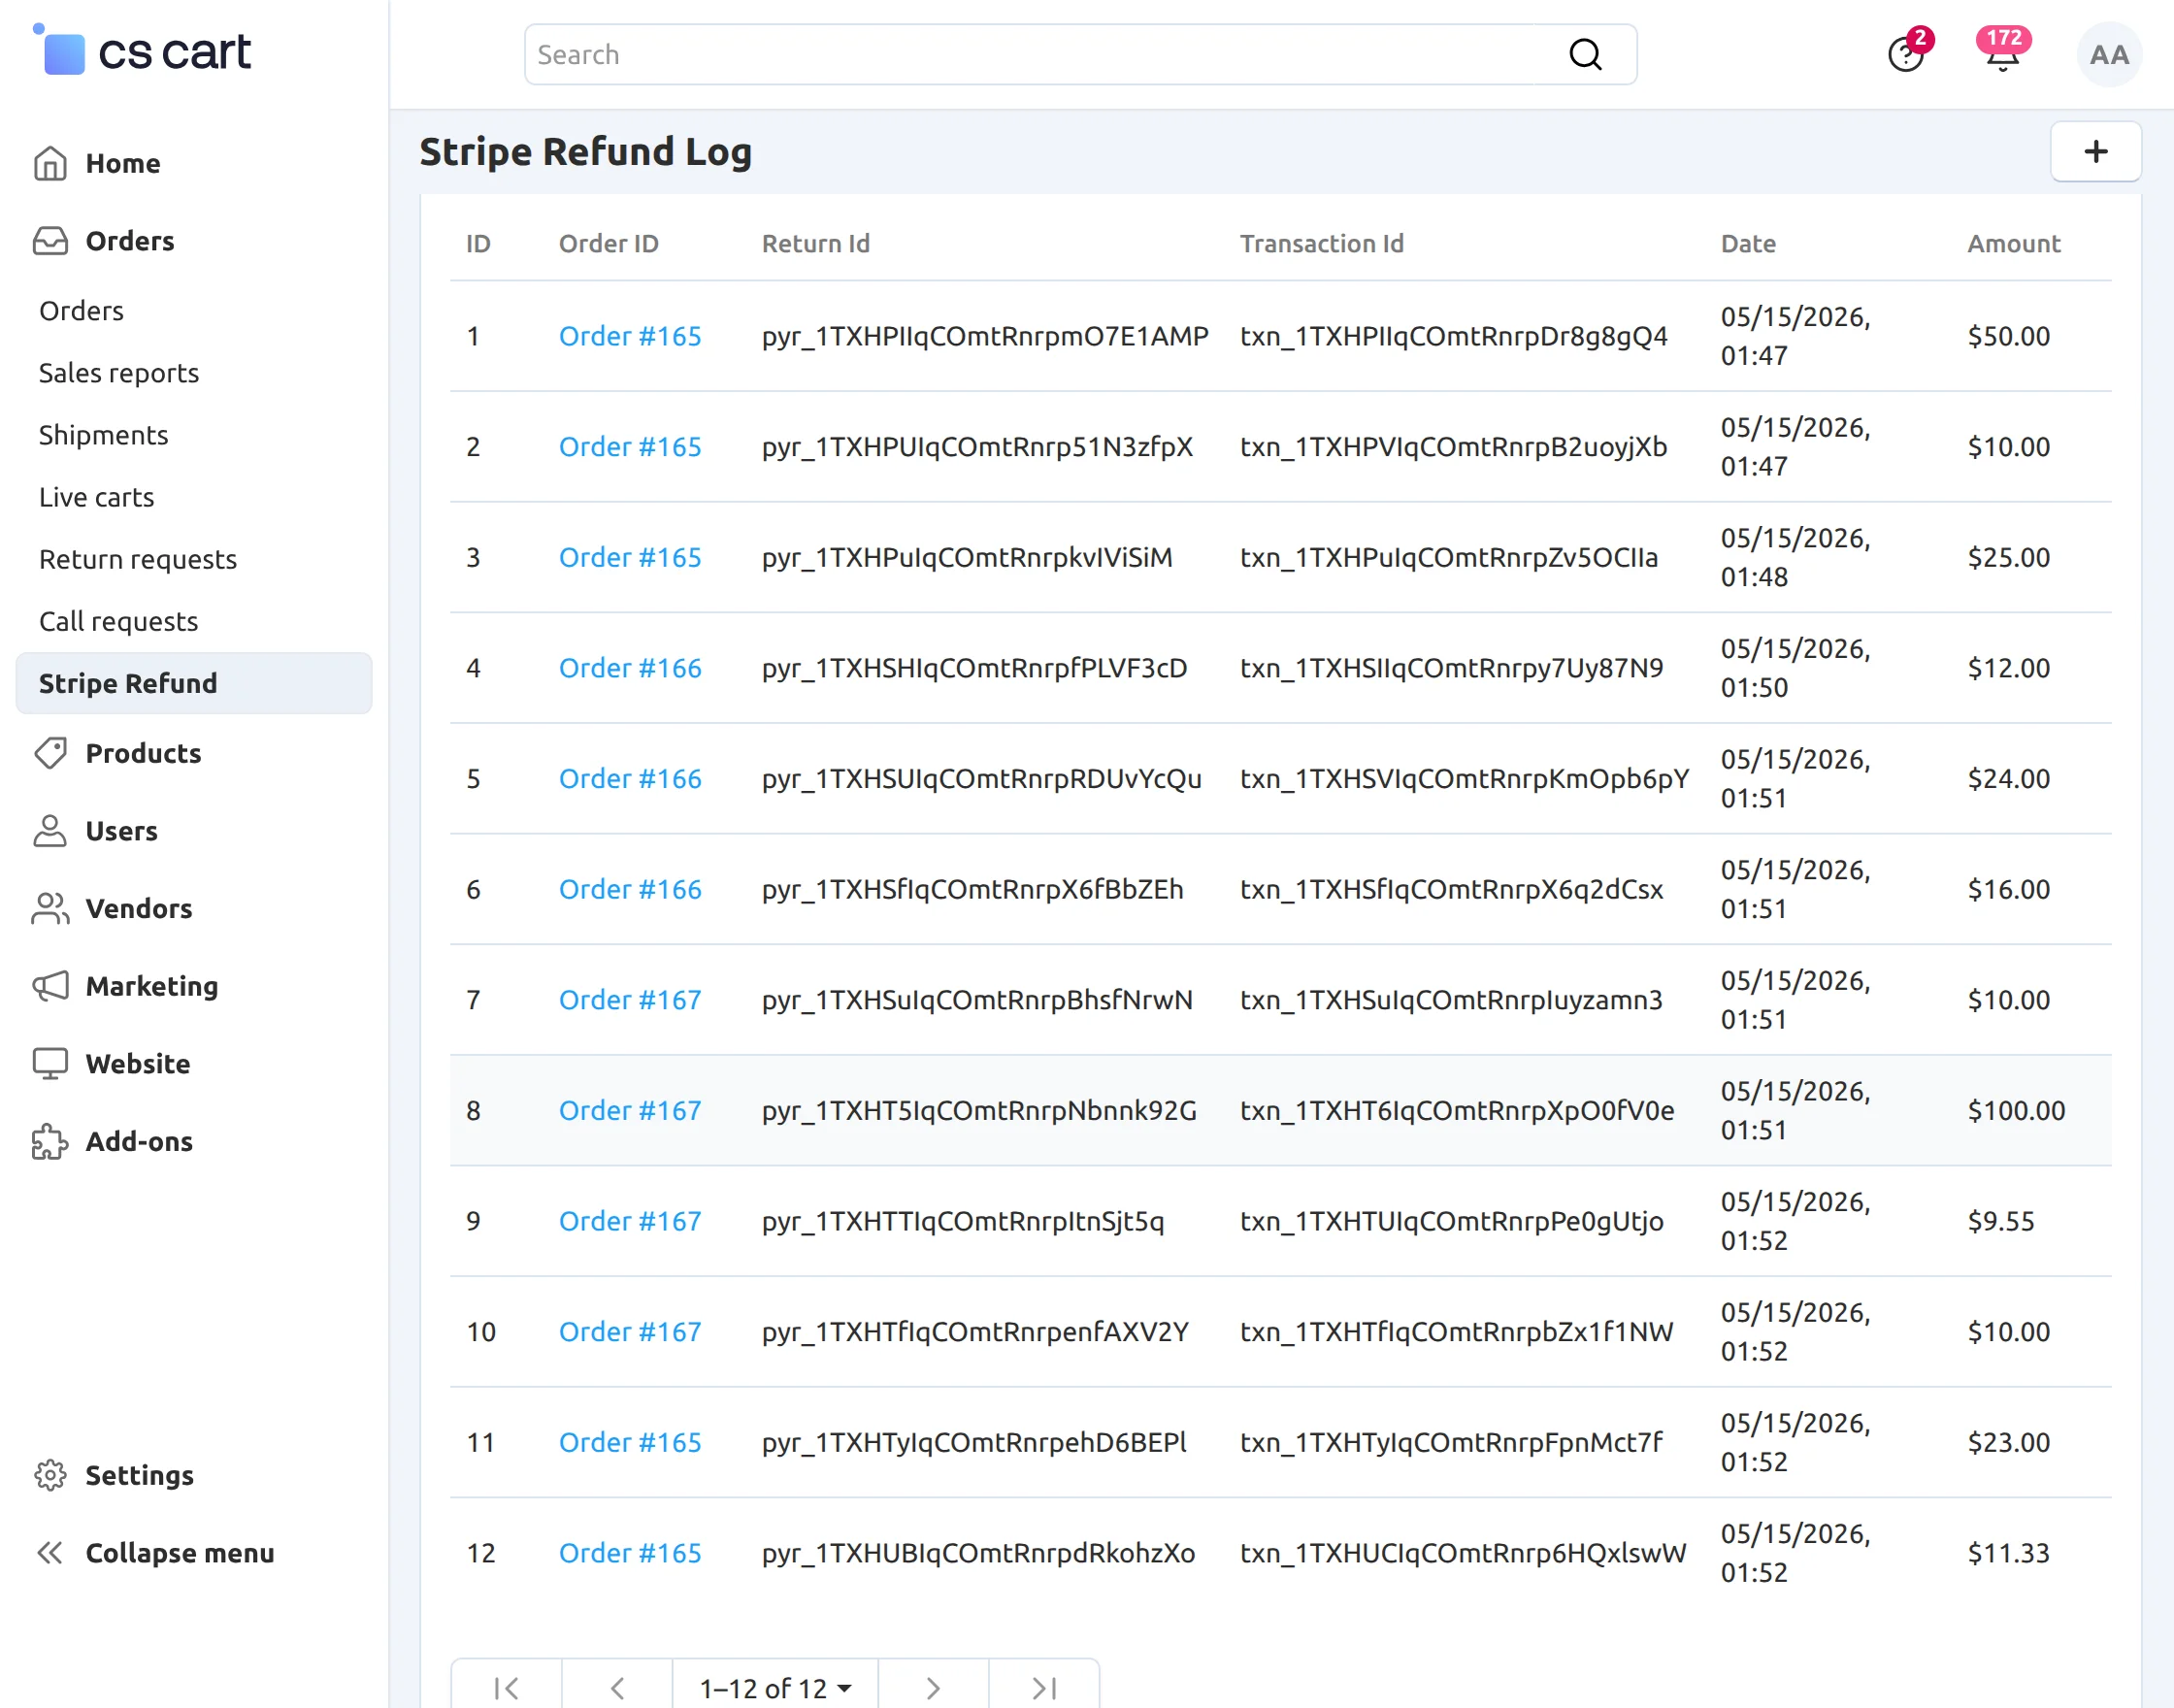
Here admin can view the refund details of orders via stripe. The concept of pagination will be applied after ten refund listing.
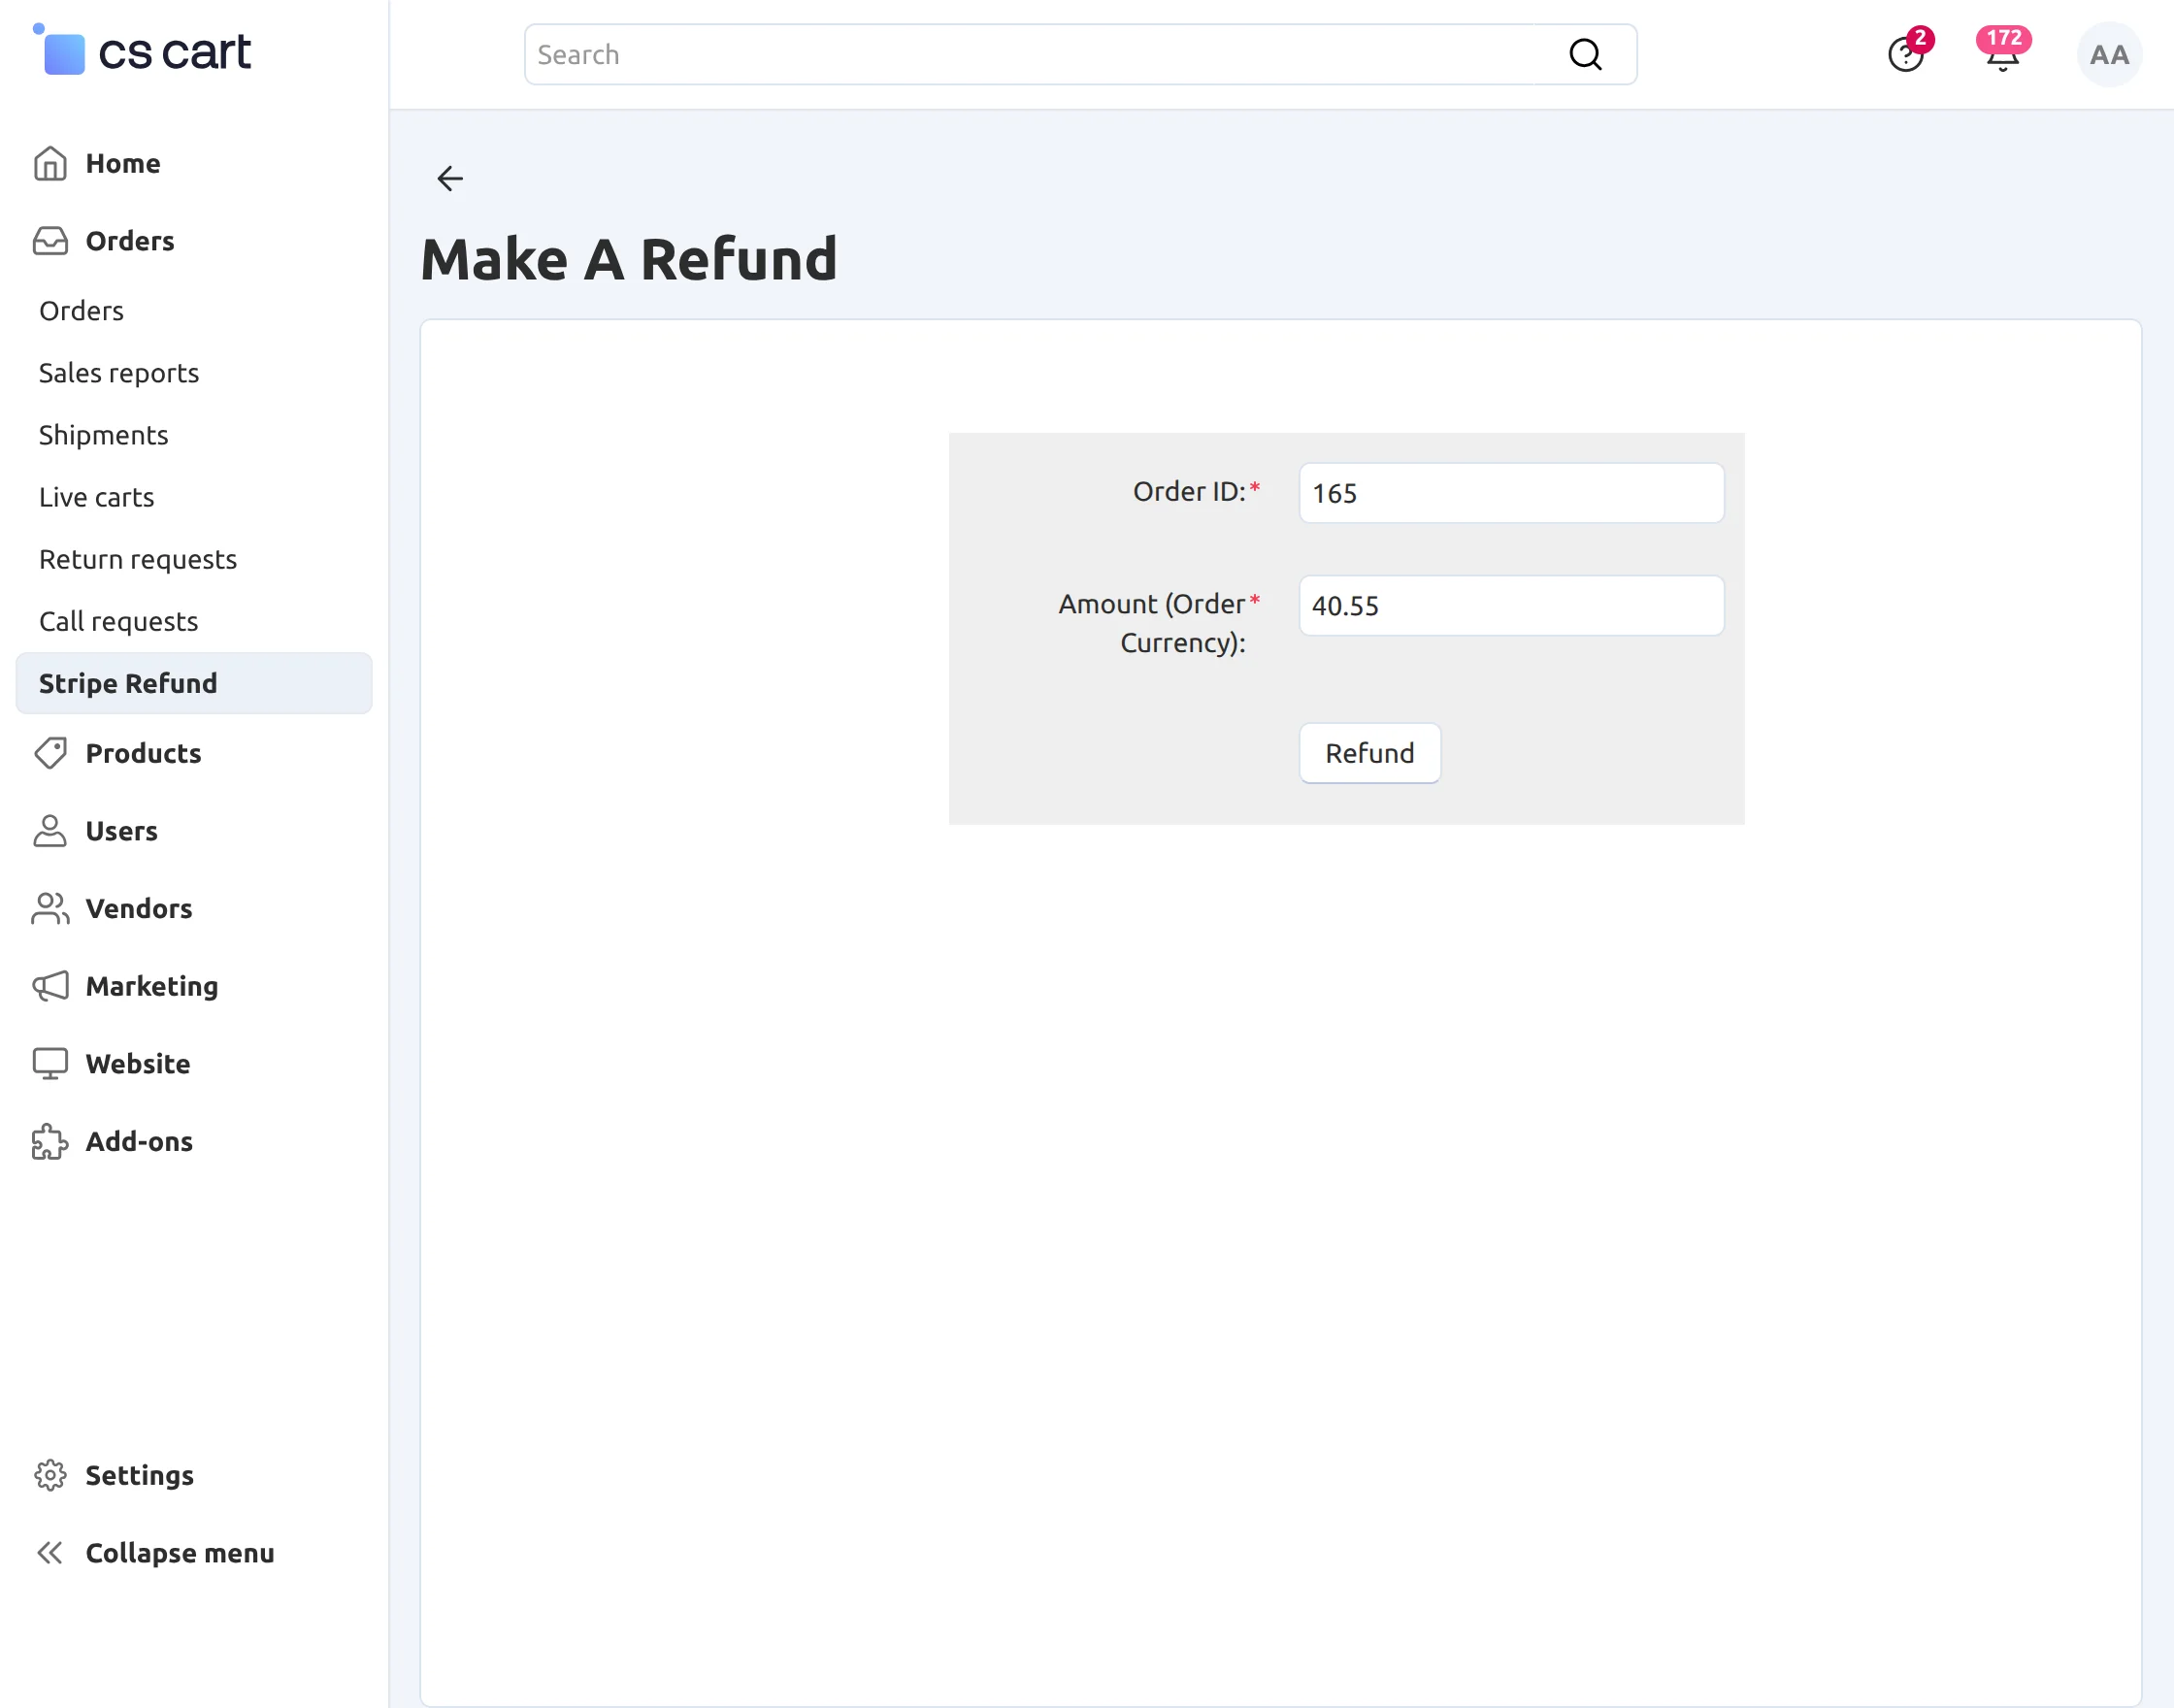
Moreover Admin can refund for any order from here as well. Click on the + button to refund.
Enter the respective Order ID and refund amount, then click on the “Refund” button to process the refund successfully.
Support
If you have any questions, suggestions, or customization requests, feel free to contact us at [email protected] or submit a ticket at webkul.uvdesk.com.
Explore our premium-quality CS Cart Extensions to enhance your store functionality.
You can also explore our CS-Cart Development Services and Quality CS-Cart add-ons.
Current Product Version - 6.1
Supported Framework Version - 4.16.x to 4.20.x

Does this addon work also with QR-code for Bancontact? Normally Bancontact work with a QR-code.