


















CS-Cart Advanced Vendor List add-on helps store admins organize and display vendor directories on their multi-vendor marketplace.
It allows customers to browse vendor names alphabetically and find sellers based on product categories and subcategories.
The add-on also shows how many vendors are available in each category, making it easier for customers to discover relevant sellers and products.
Features
- Well integrated with CS-Cart Multi-vendor.
- Provides a list of vendor/company name sorted alphabetically on the vendor menu in the quick links.
- Functionality to show the vendors’ name selling in any particular category.
- Functionality to display the count of vendors selling in particular category or subcategory.
- Admin has an option to display the vendors in particular category with no product listed at the backend.
- Functionality to set the maximum number of subcategories/vendors to be displayed by default.
- Option to compress or expand the subcategory list and vendor directory.
How To Upload And Install
- After downloading CS-Cart Advanced Vendor List add-on you’ll get one zip files, one install.txt file and a relevant User Guide manual doc.
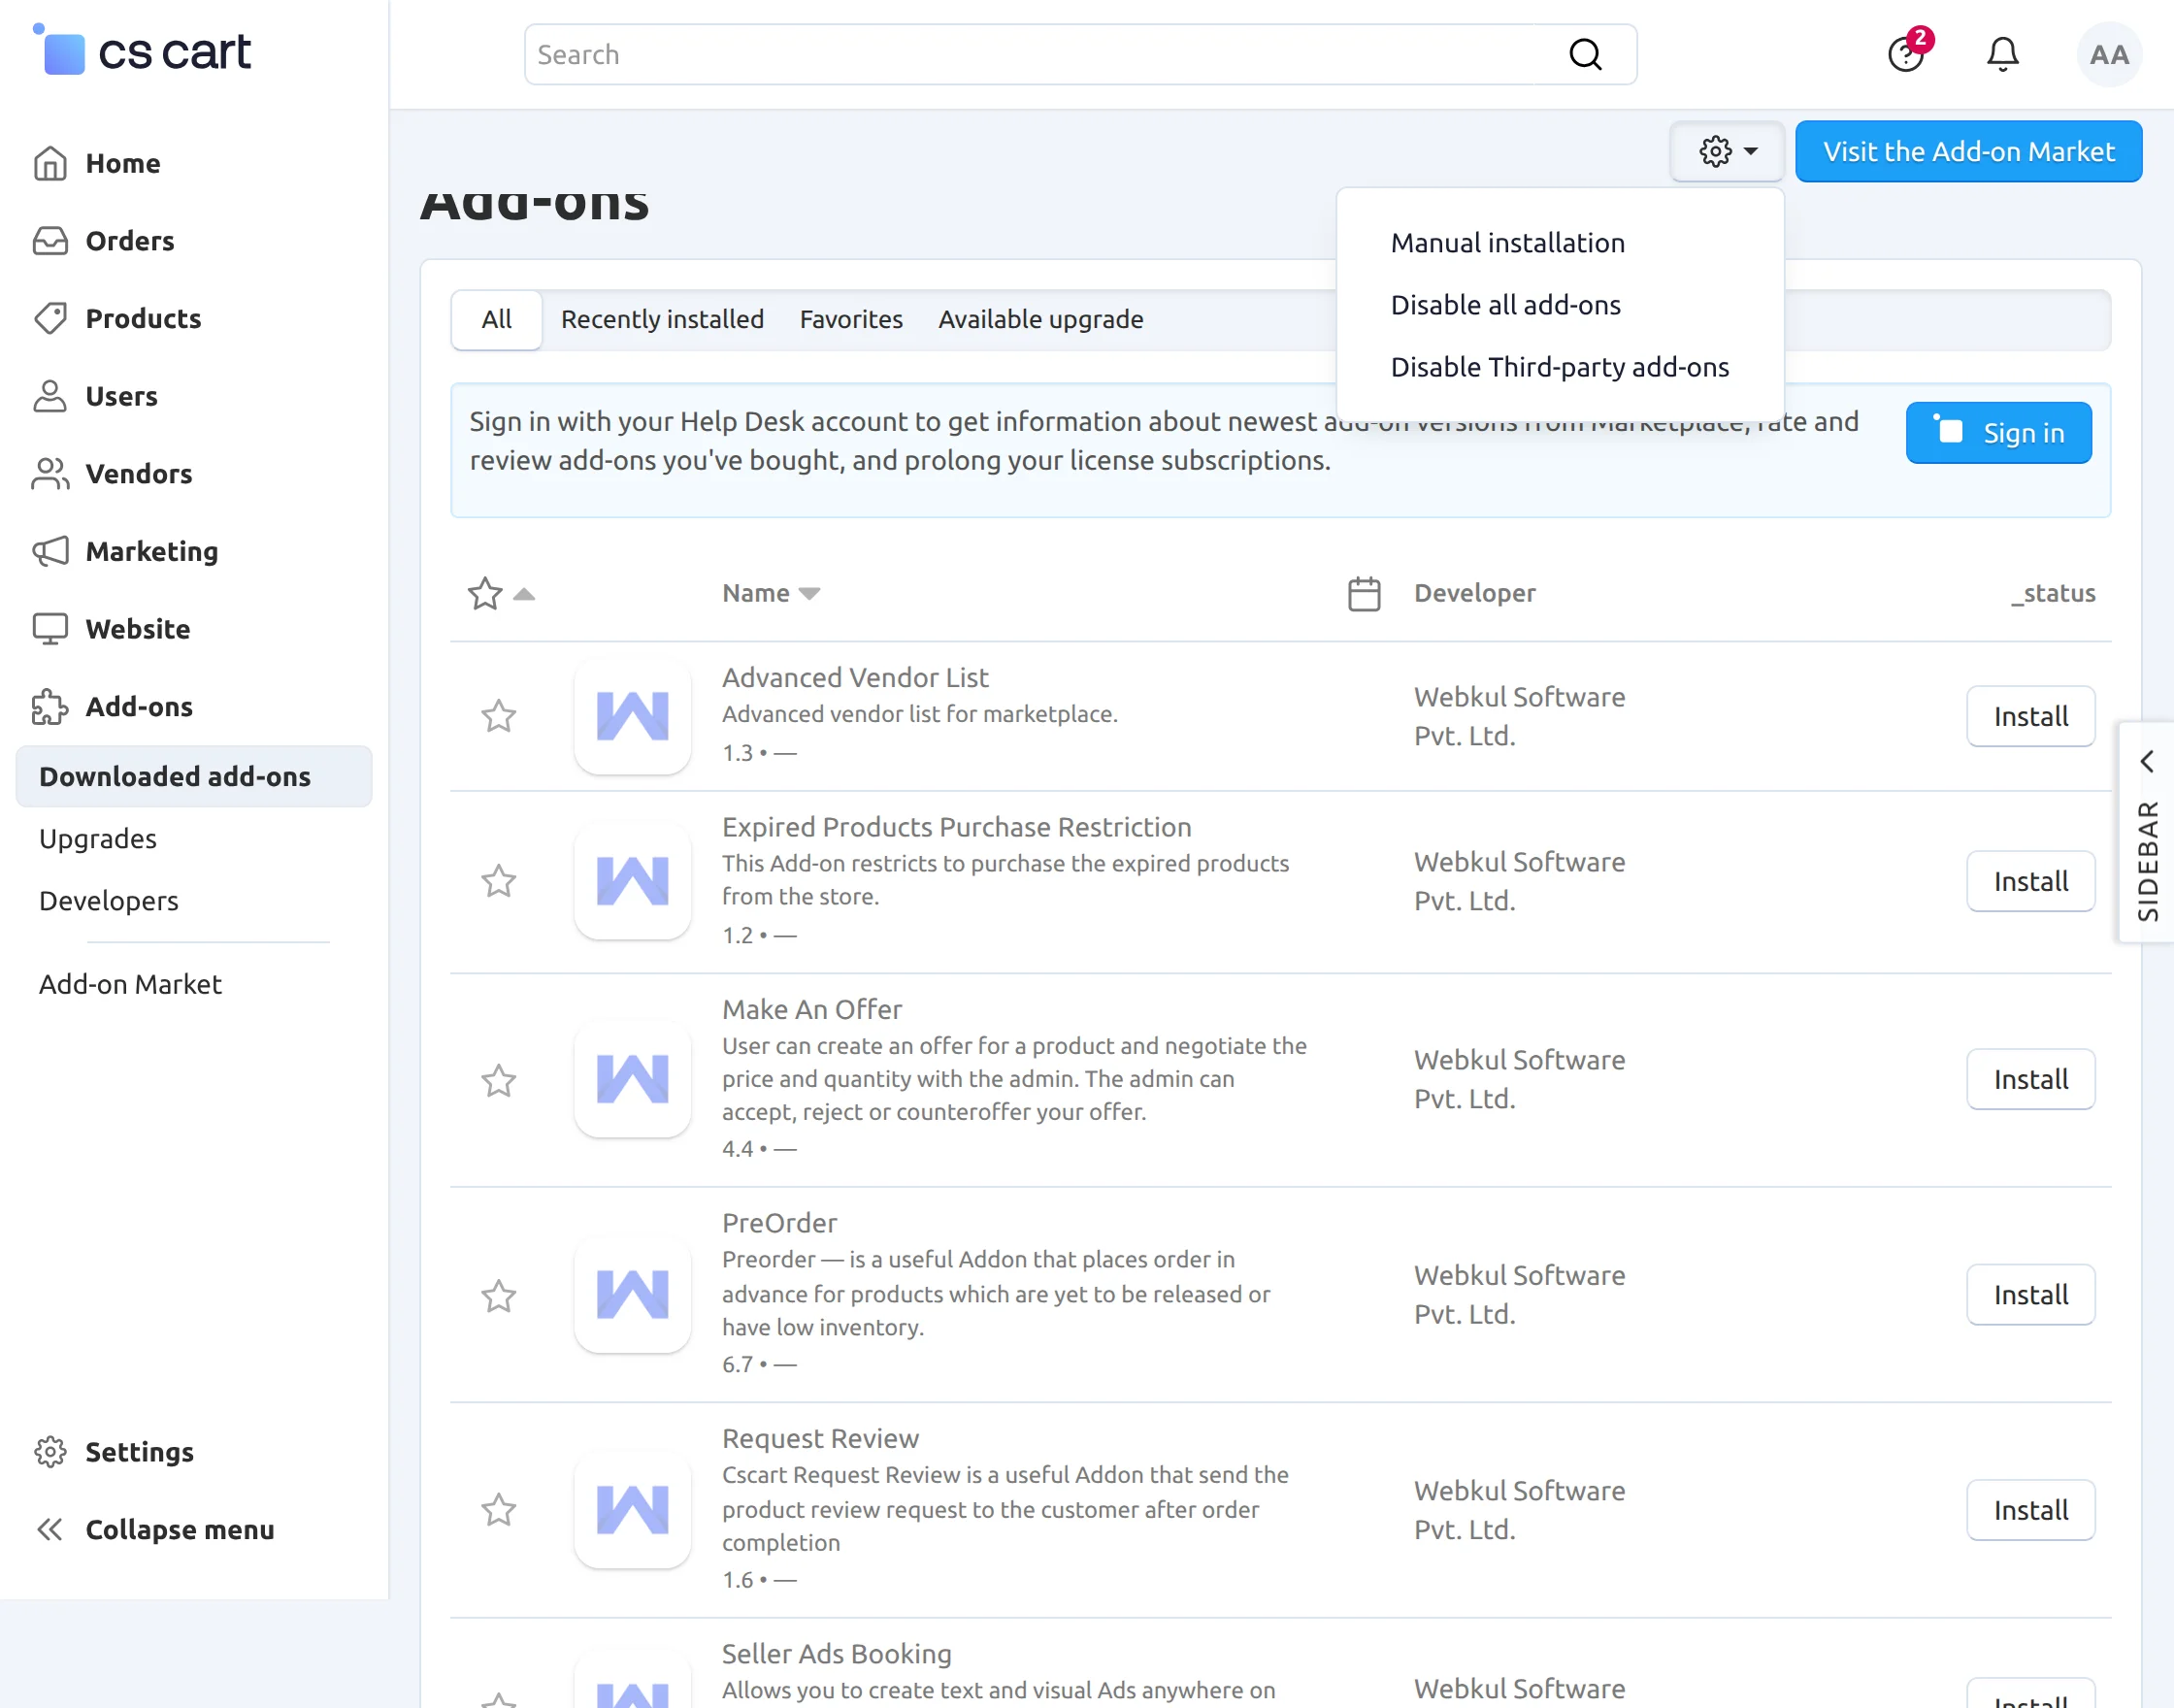
- Go to Manage Add-ons, and click on “Manual Installation” as shown below in the snapshot.
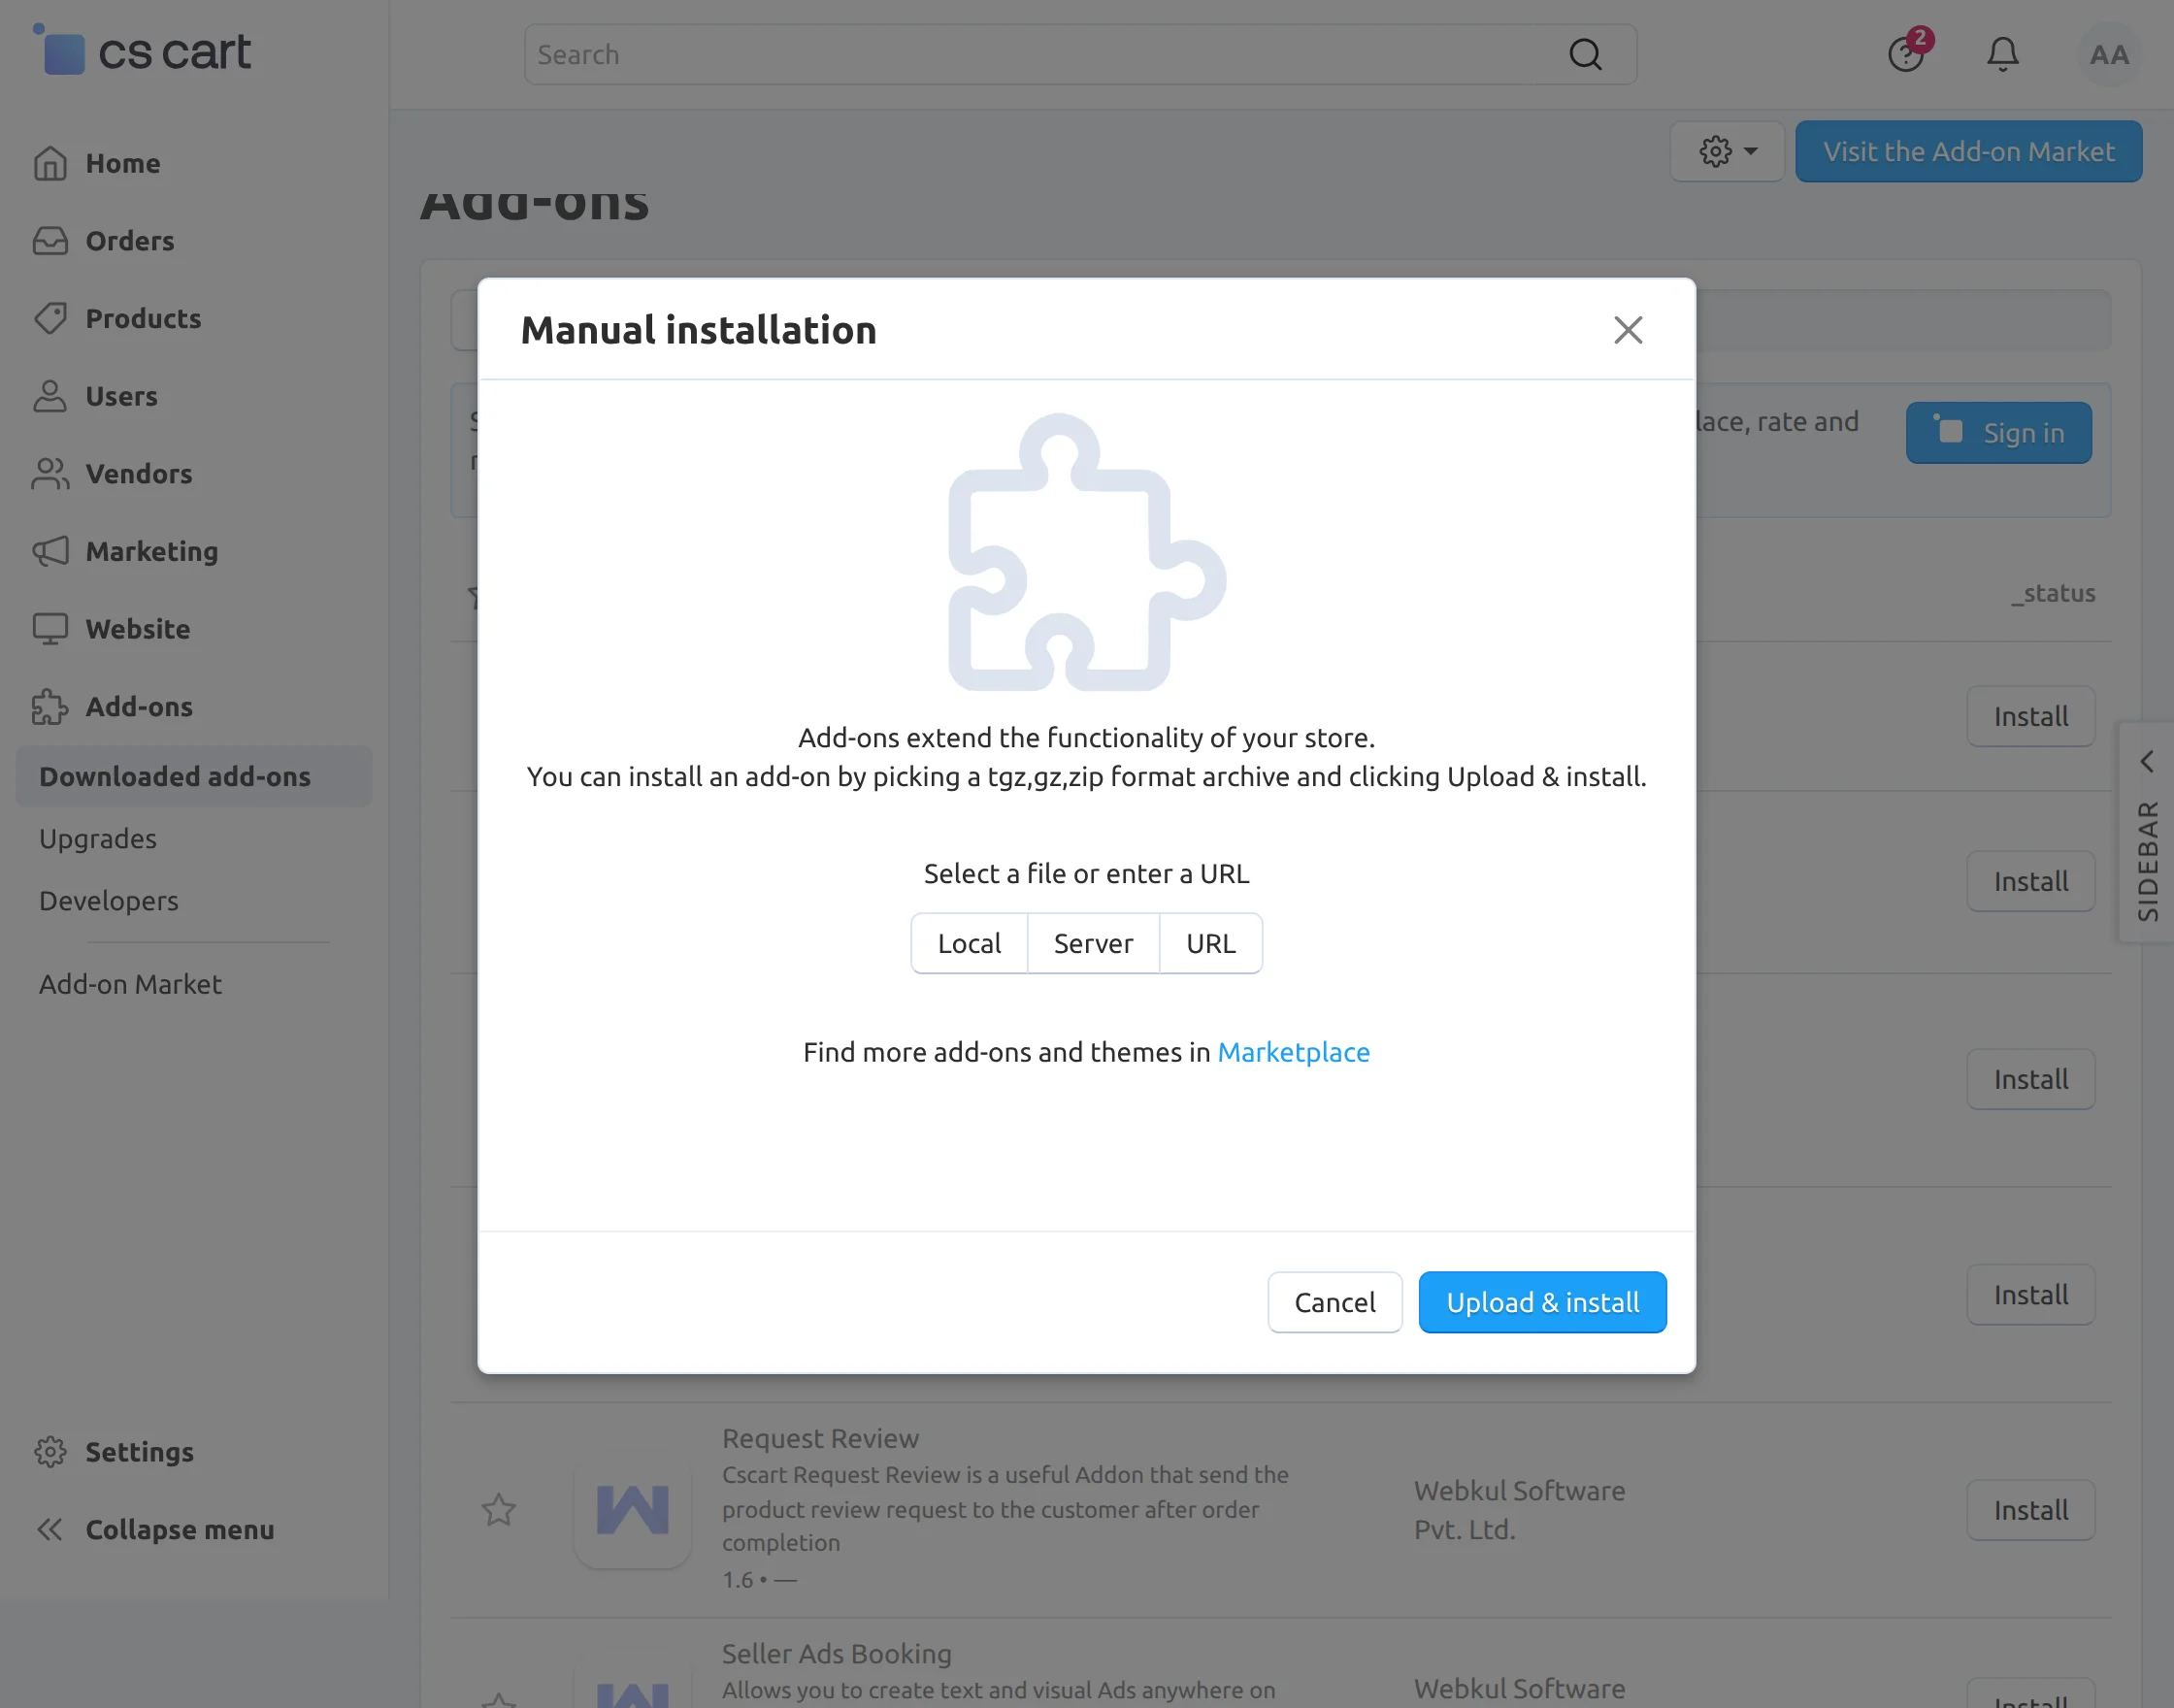
 Click on “Local” to browse the zip file and then click on “Upload & Install” as shown below in snapshot.
Add-on Configuration
After installing the add-on, you will find CS-Cart Advanced Vendor List in the list of available add-ons. We will then configure the settings. Click on “settings” to enable, disable, install, or refresh. Make sure the add-on is activated, as shown in the snapshot below.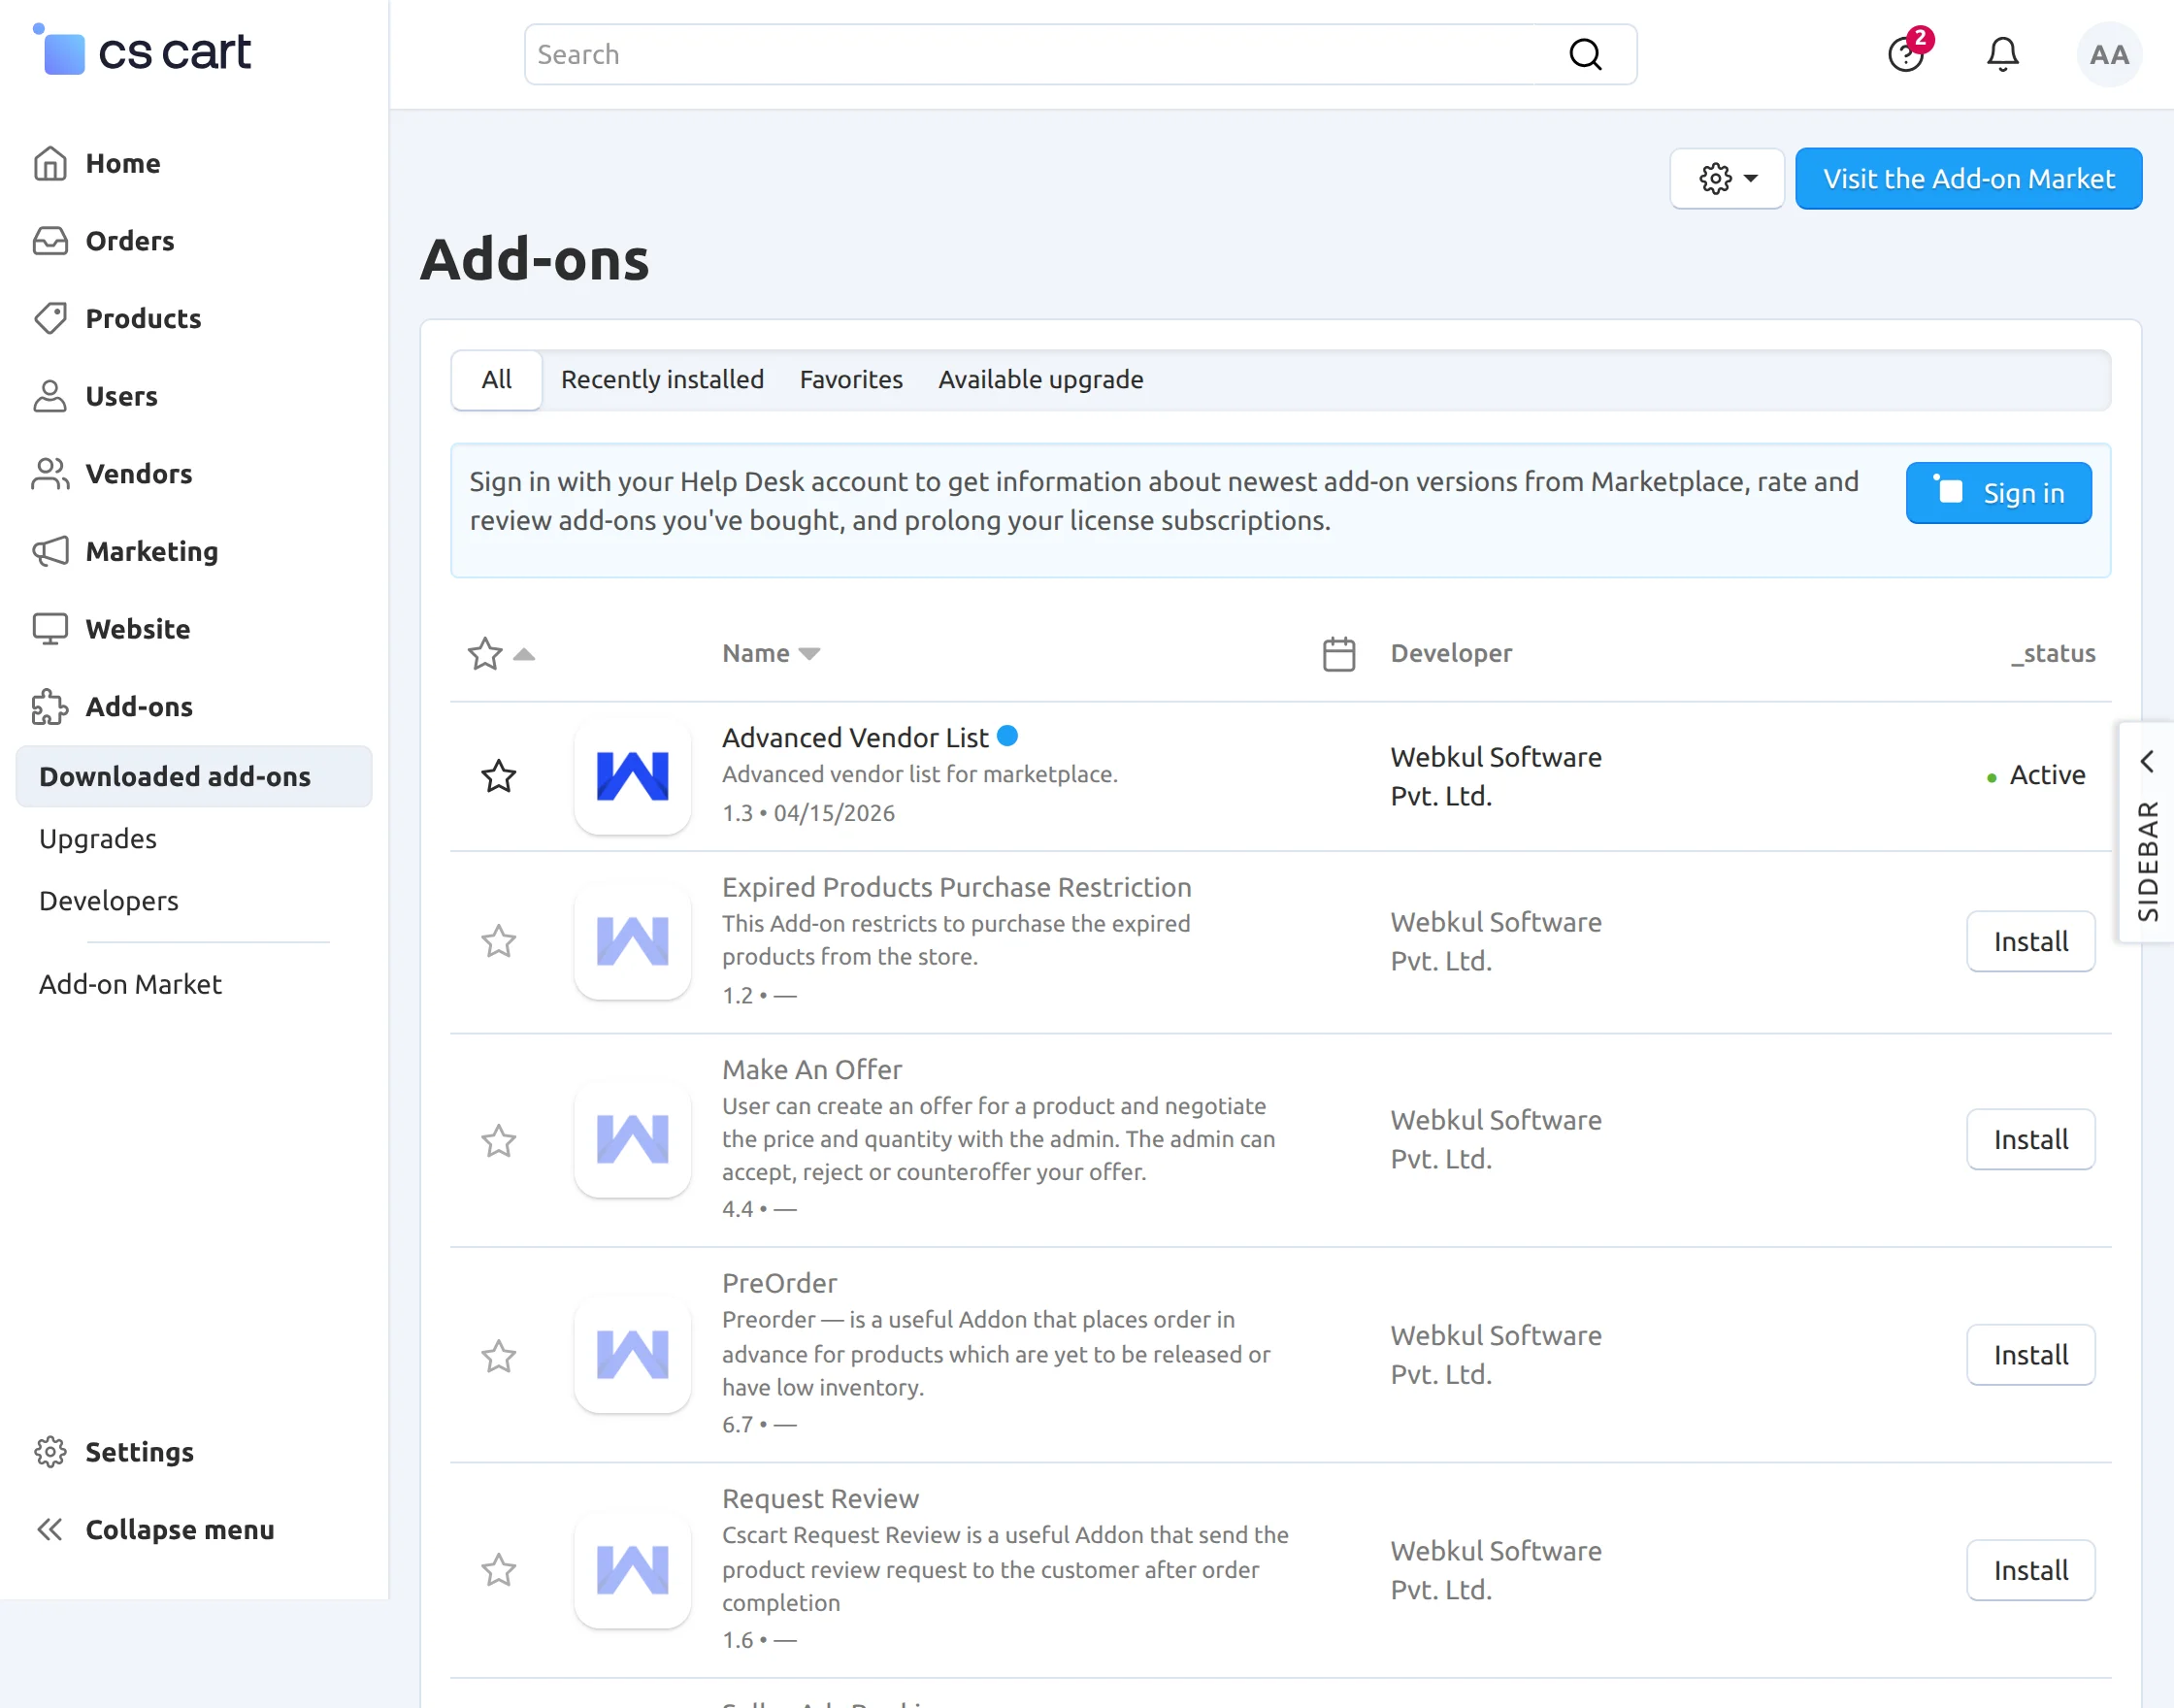 After successful add-on installation, we need to configure and manage the settings of the add-on.
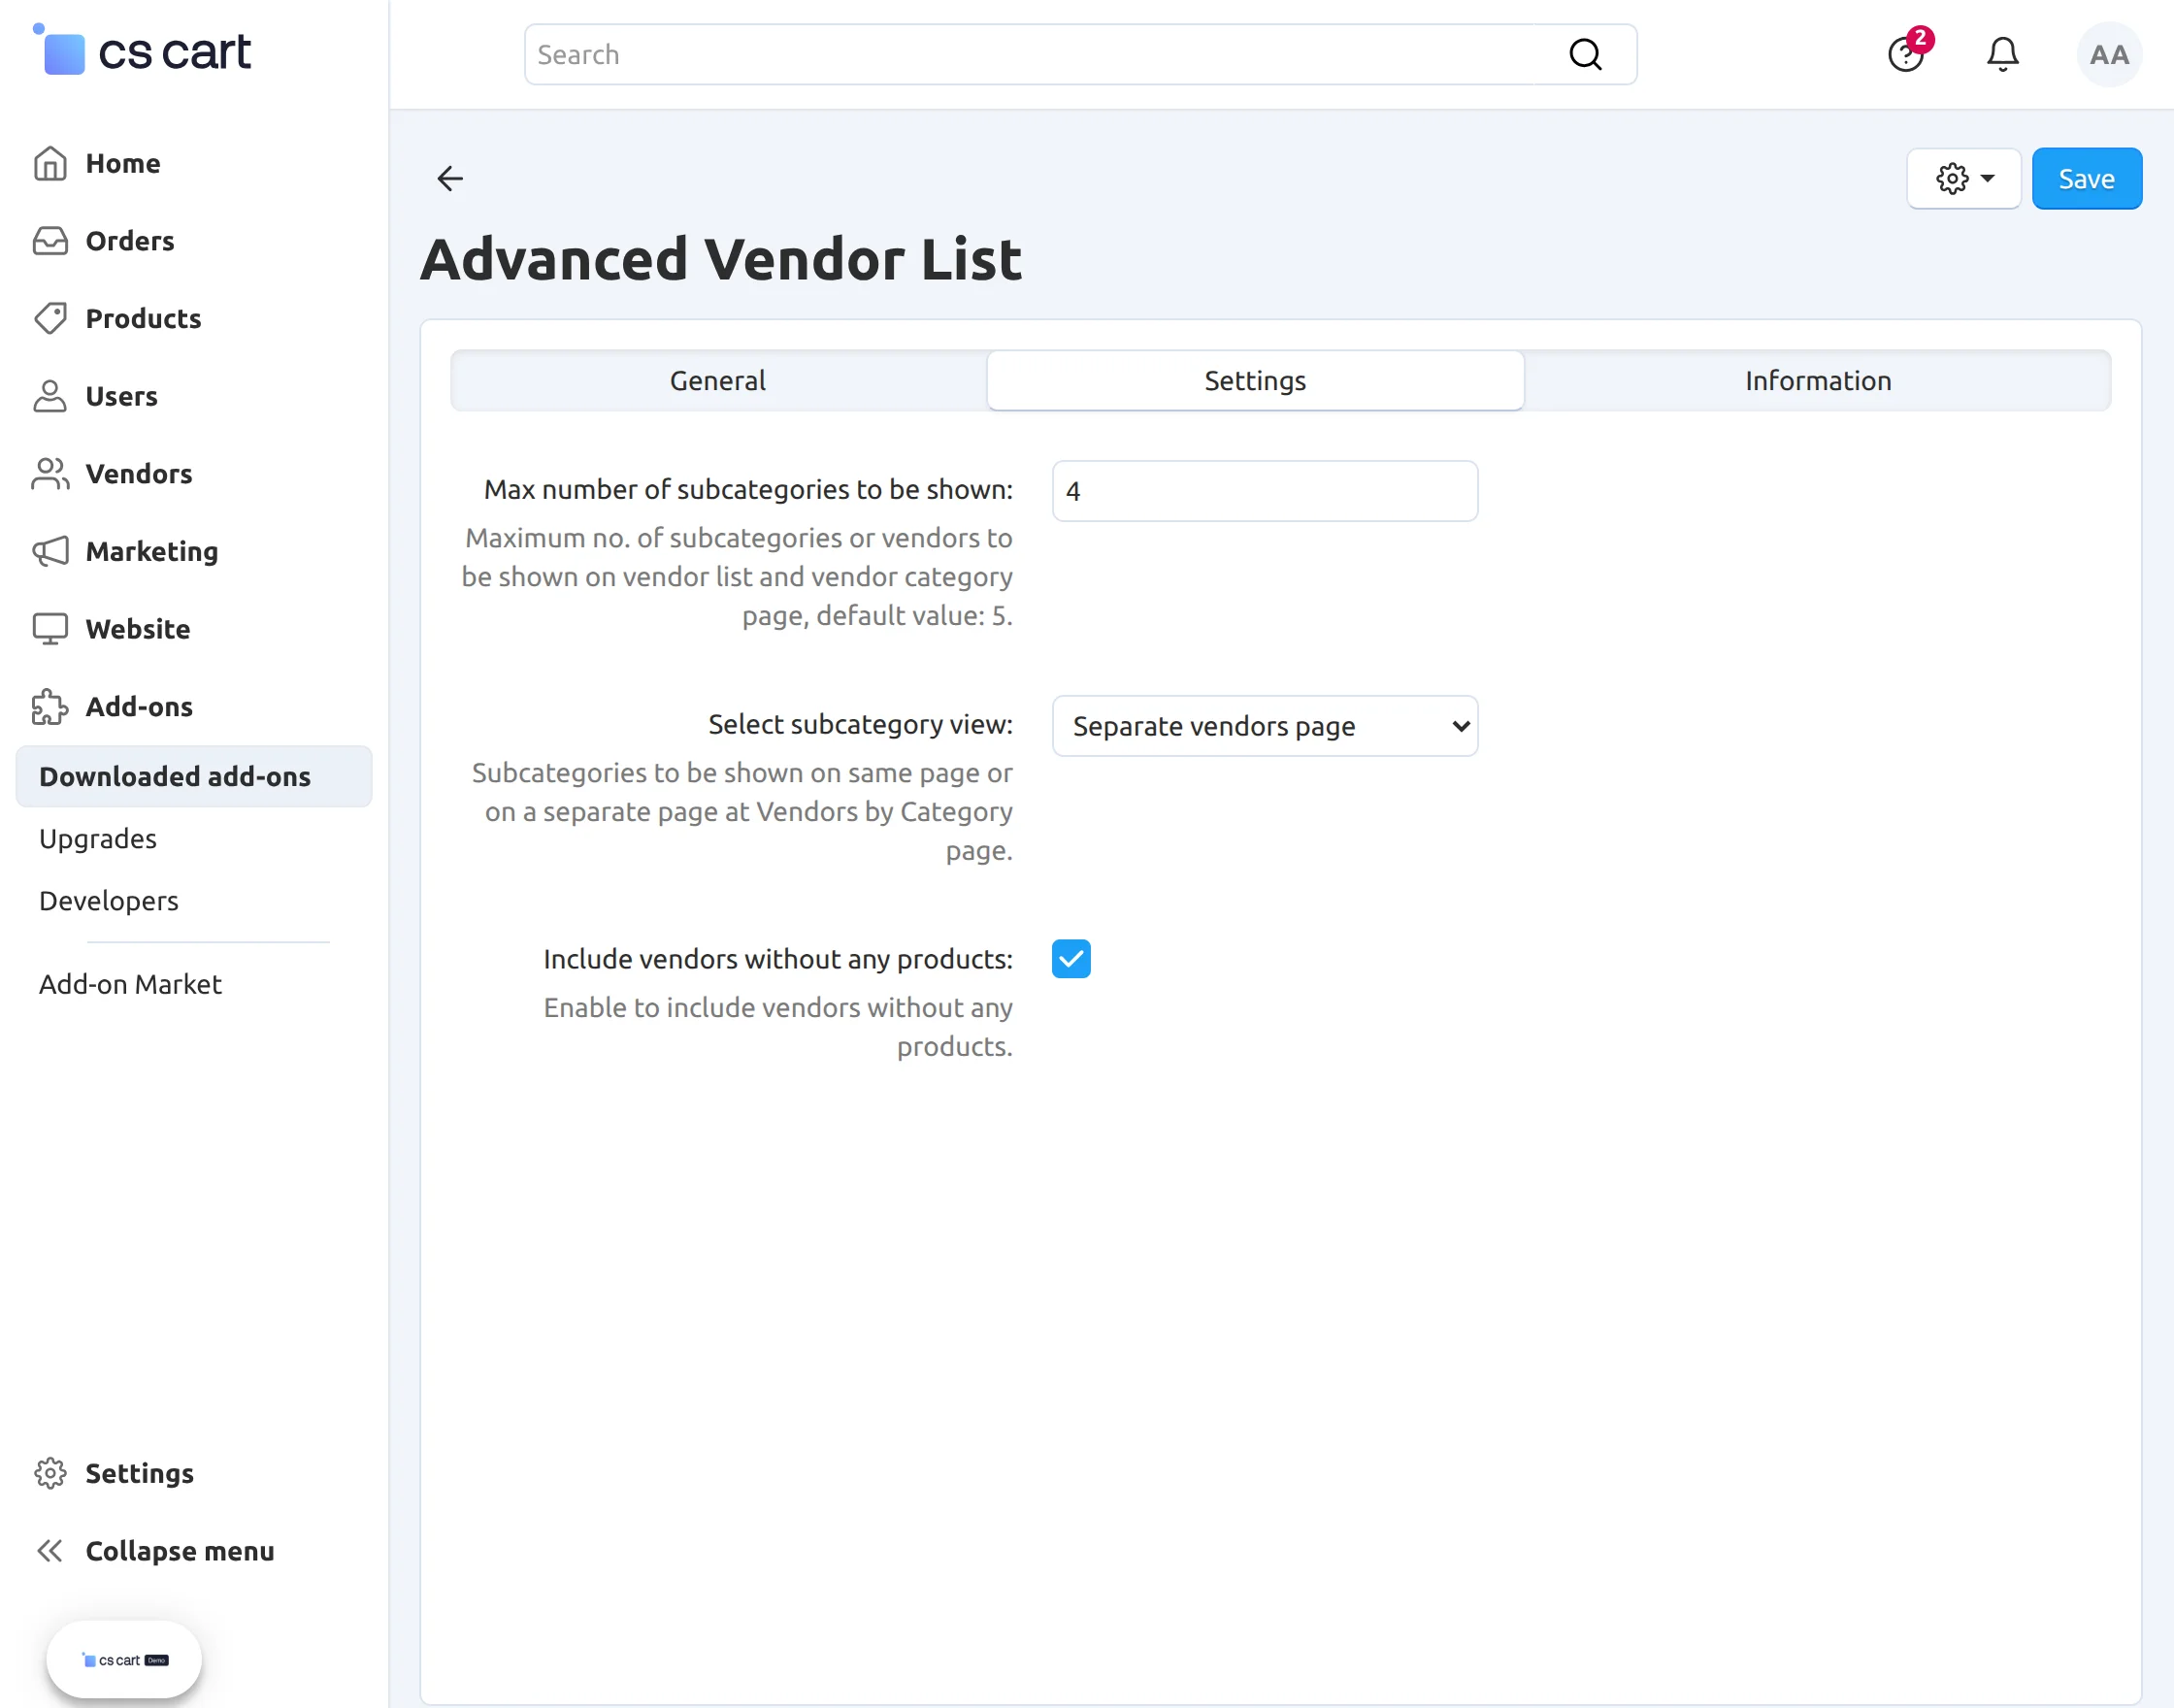
- Enter the number of subcategories/vendors to be displayed by default.
- Select the navigation scheme for the “vendor by category” page ie; view the subcategory/vendor list on the same page or navigate to the separate page.
- Check the box to include and display the vendors in particular category even if they have not listed any product in the store. (This addon is working well with vendor plan addon.)
- Save the settings.
Video Tutorial
Admin Panel Configuration
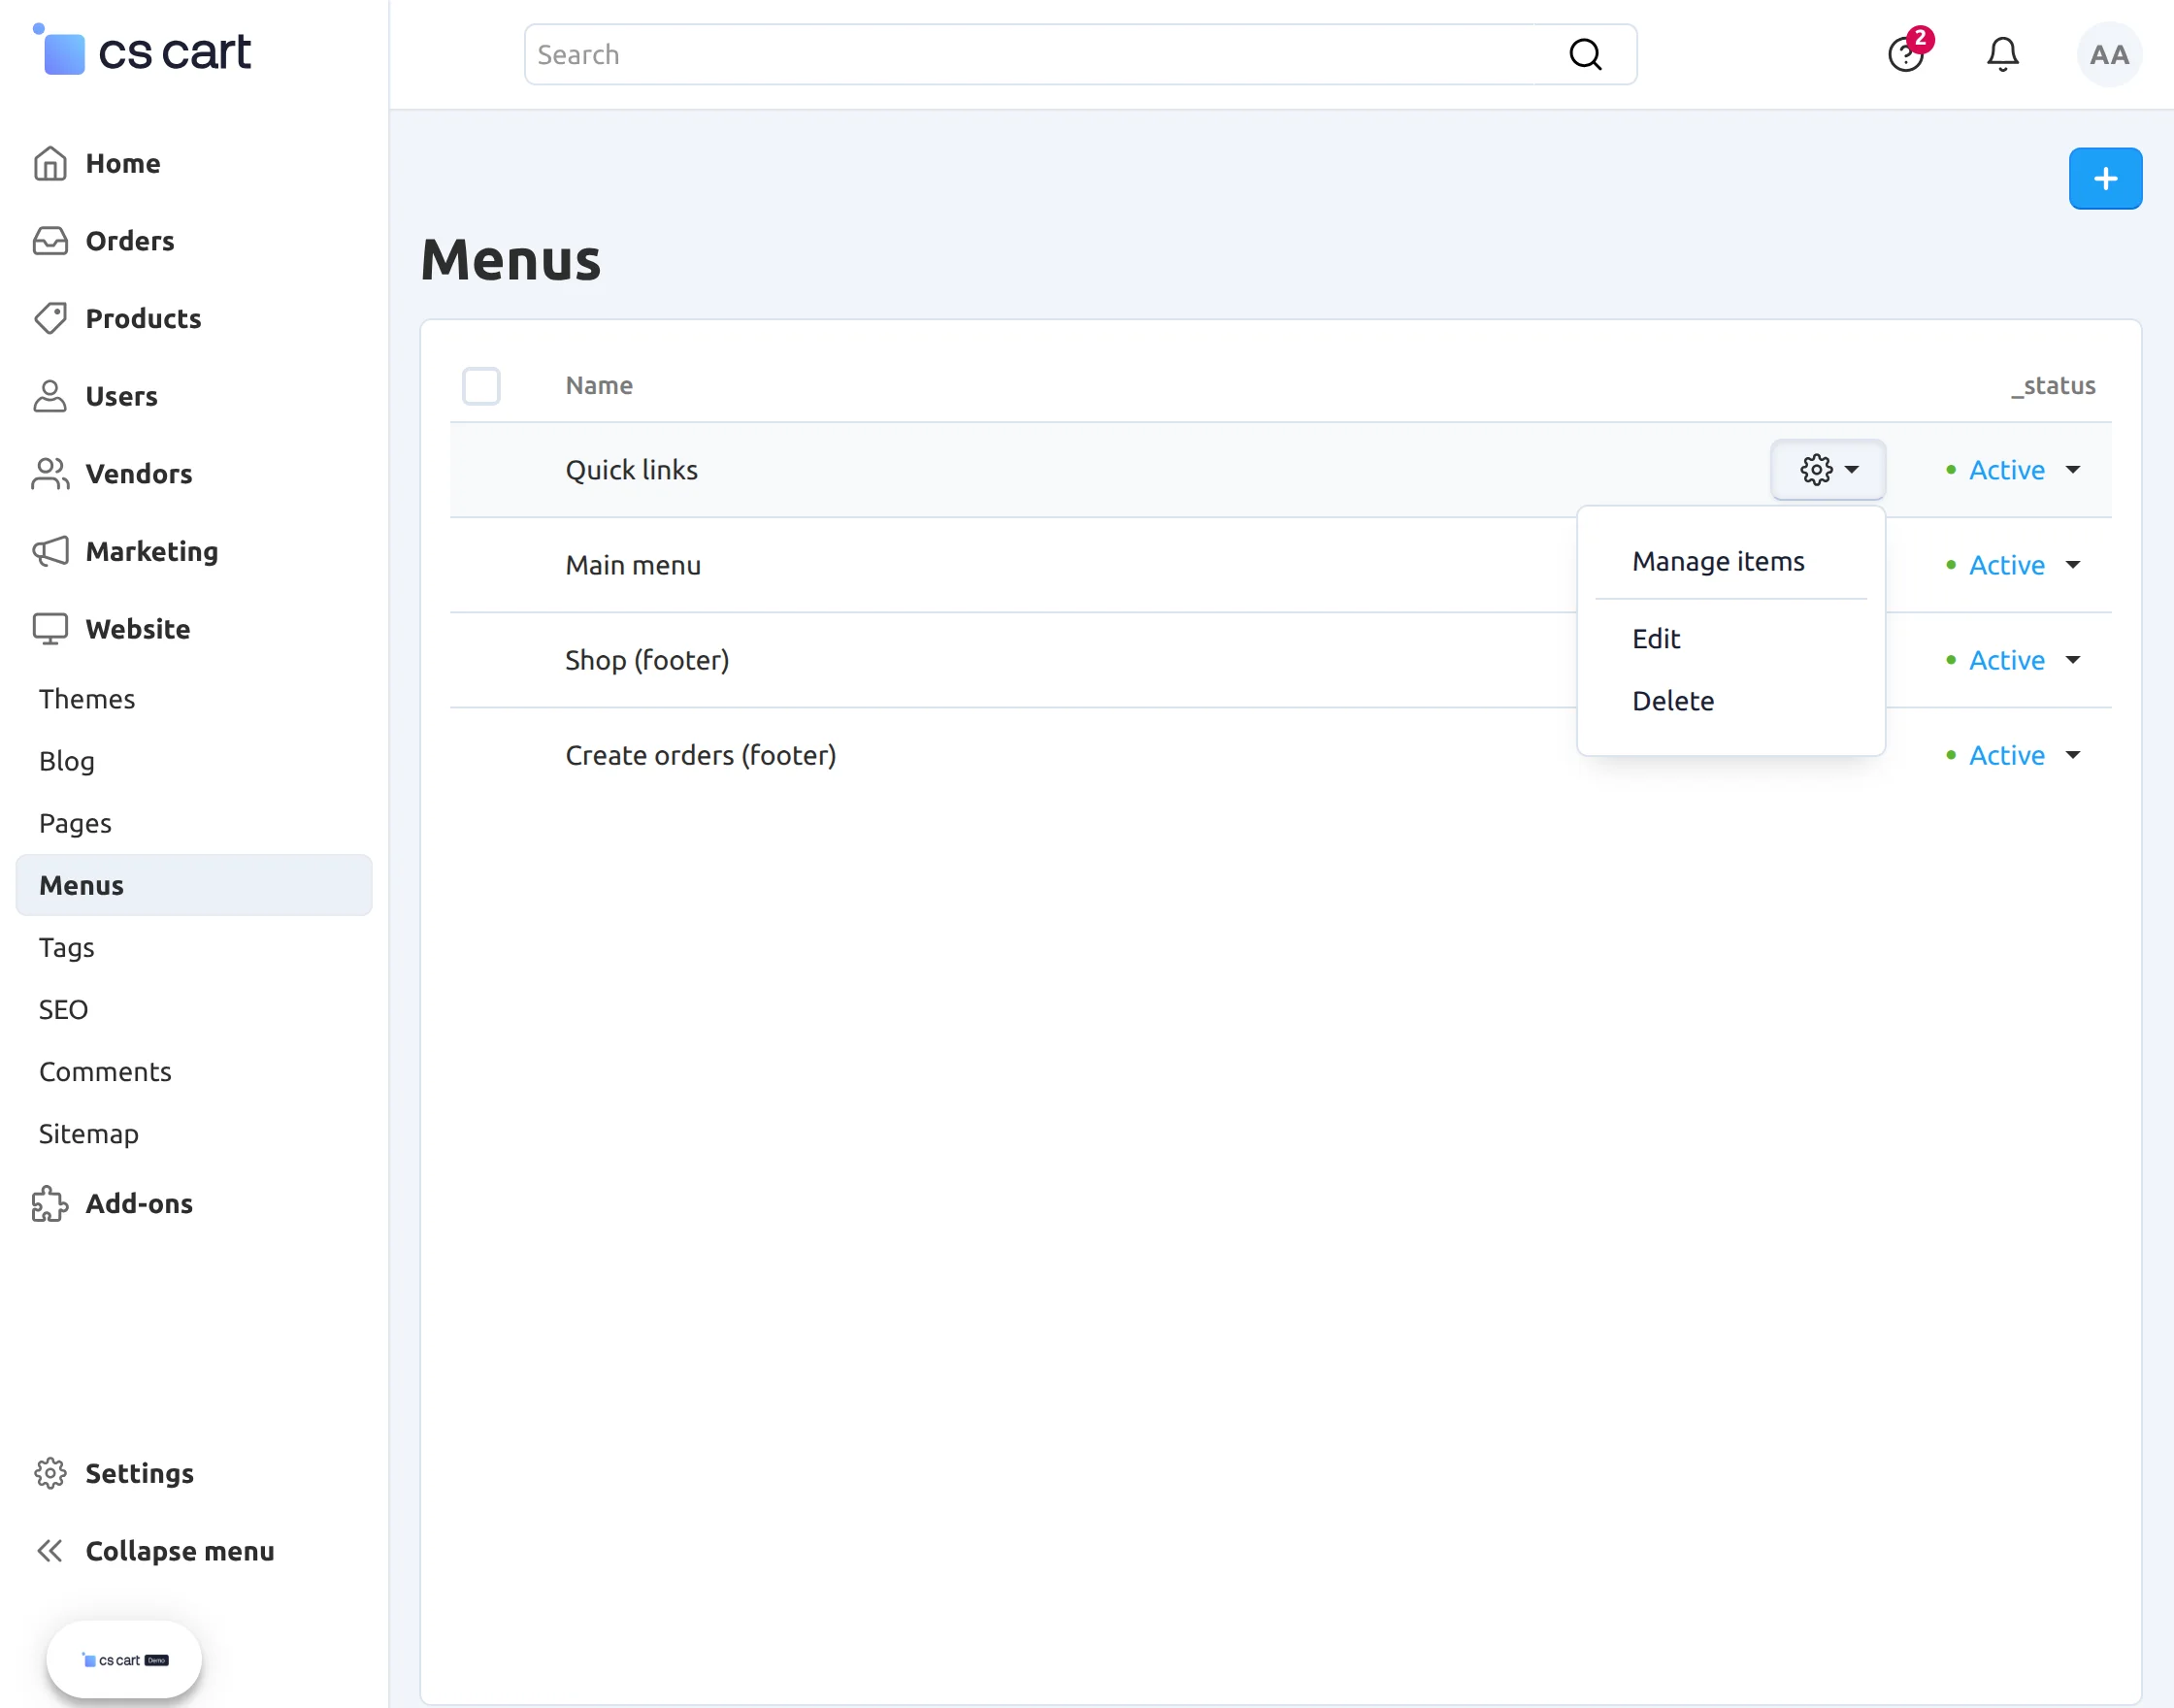 Click to manage the items in the Quick links as shown below.
Click on the +Add item button to add a new item.
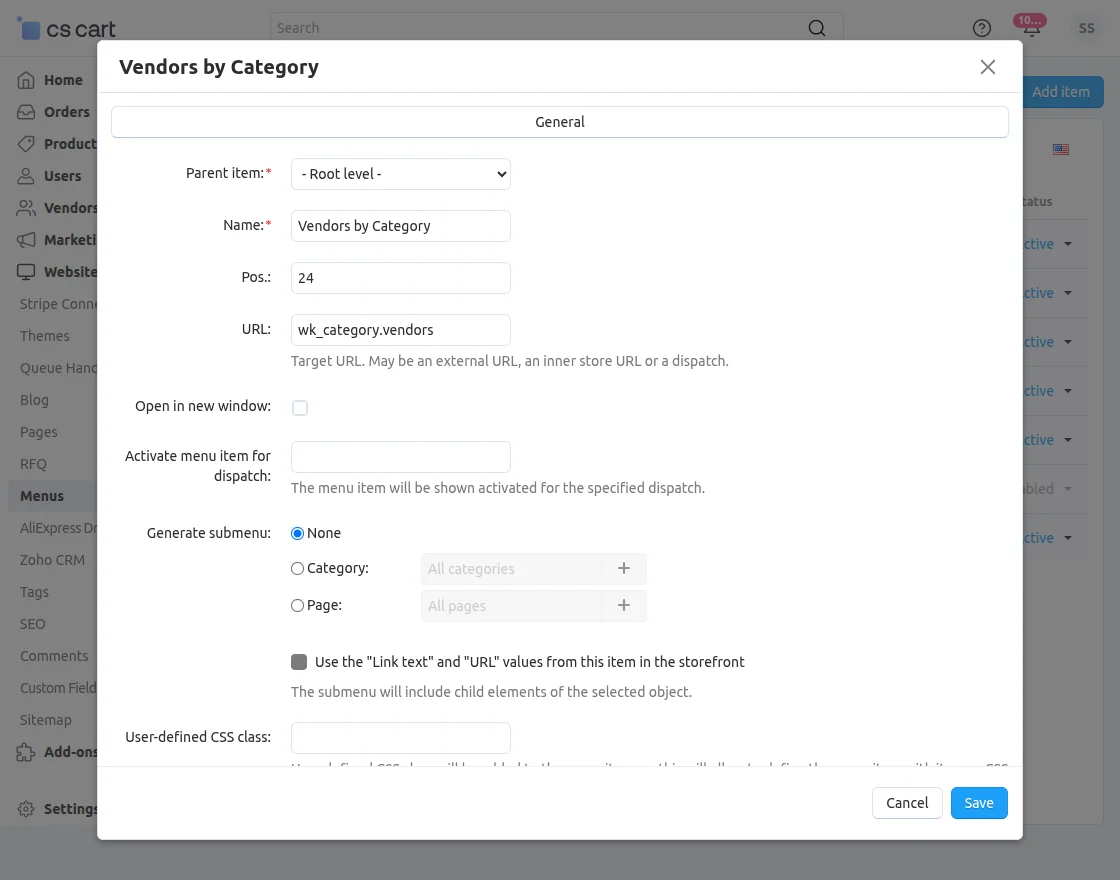
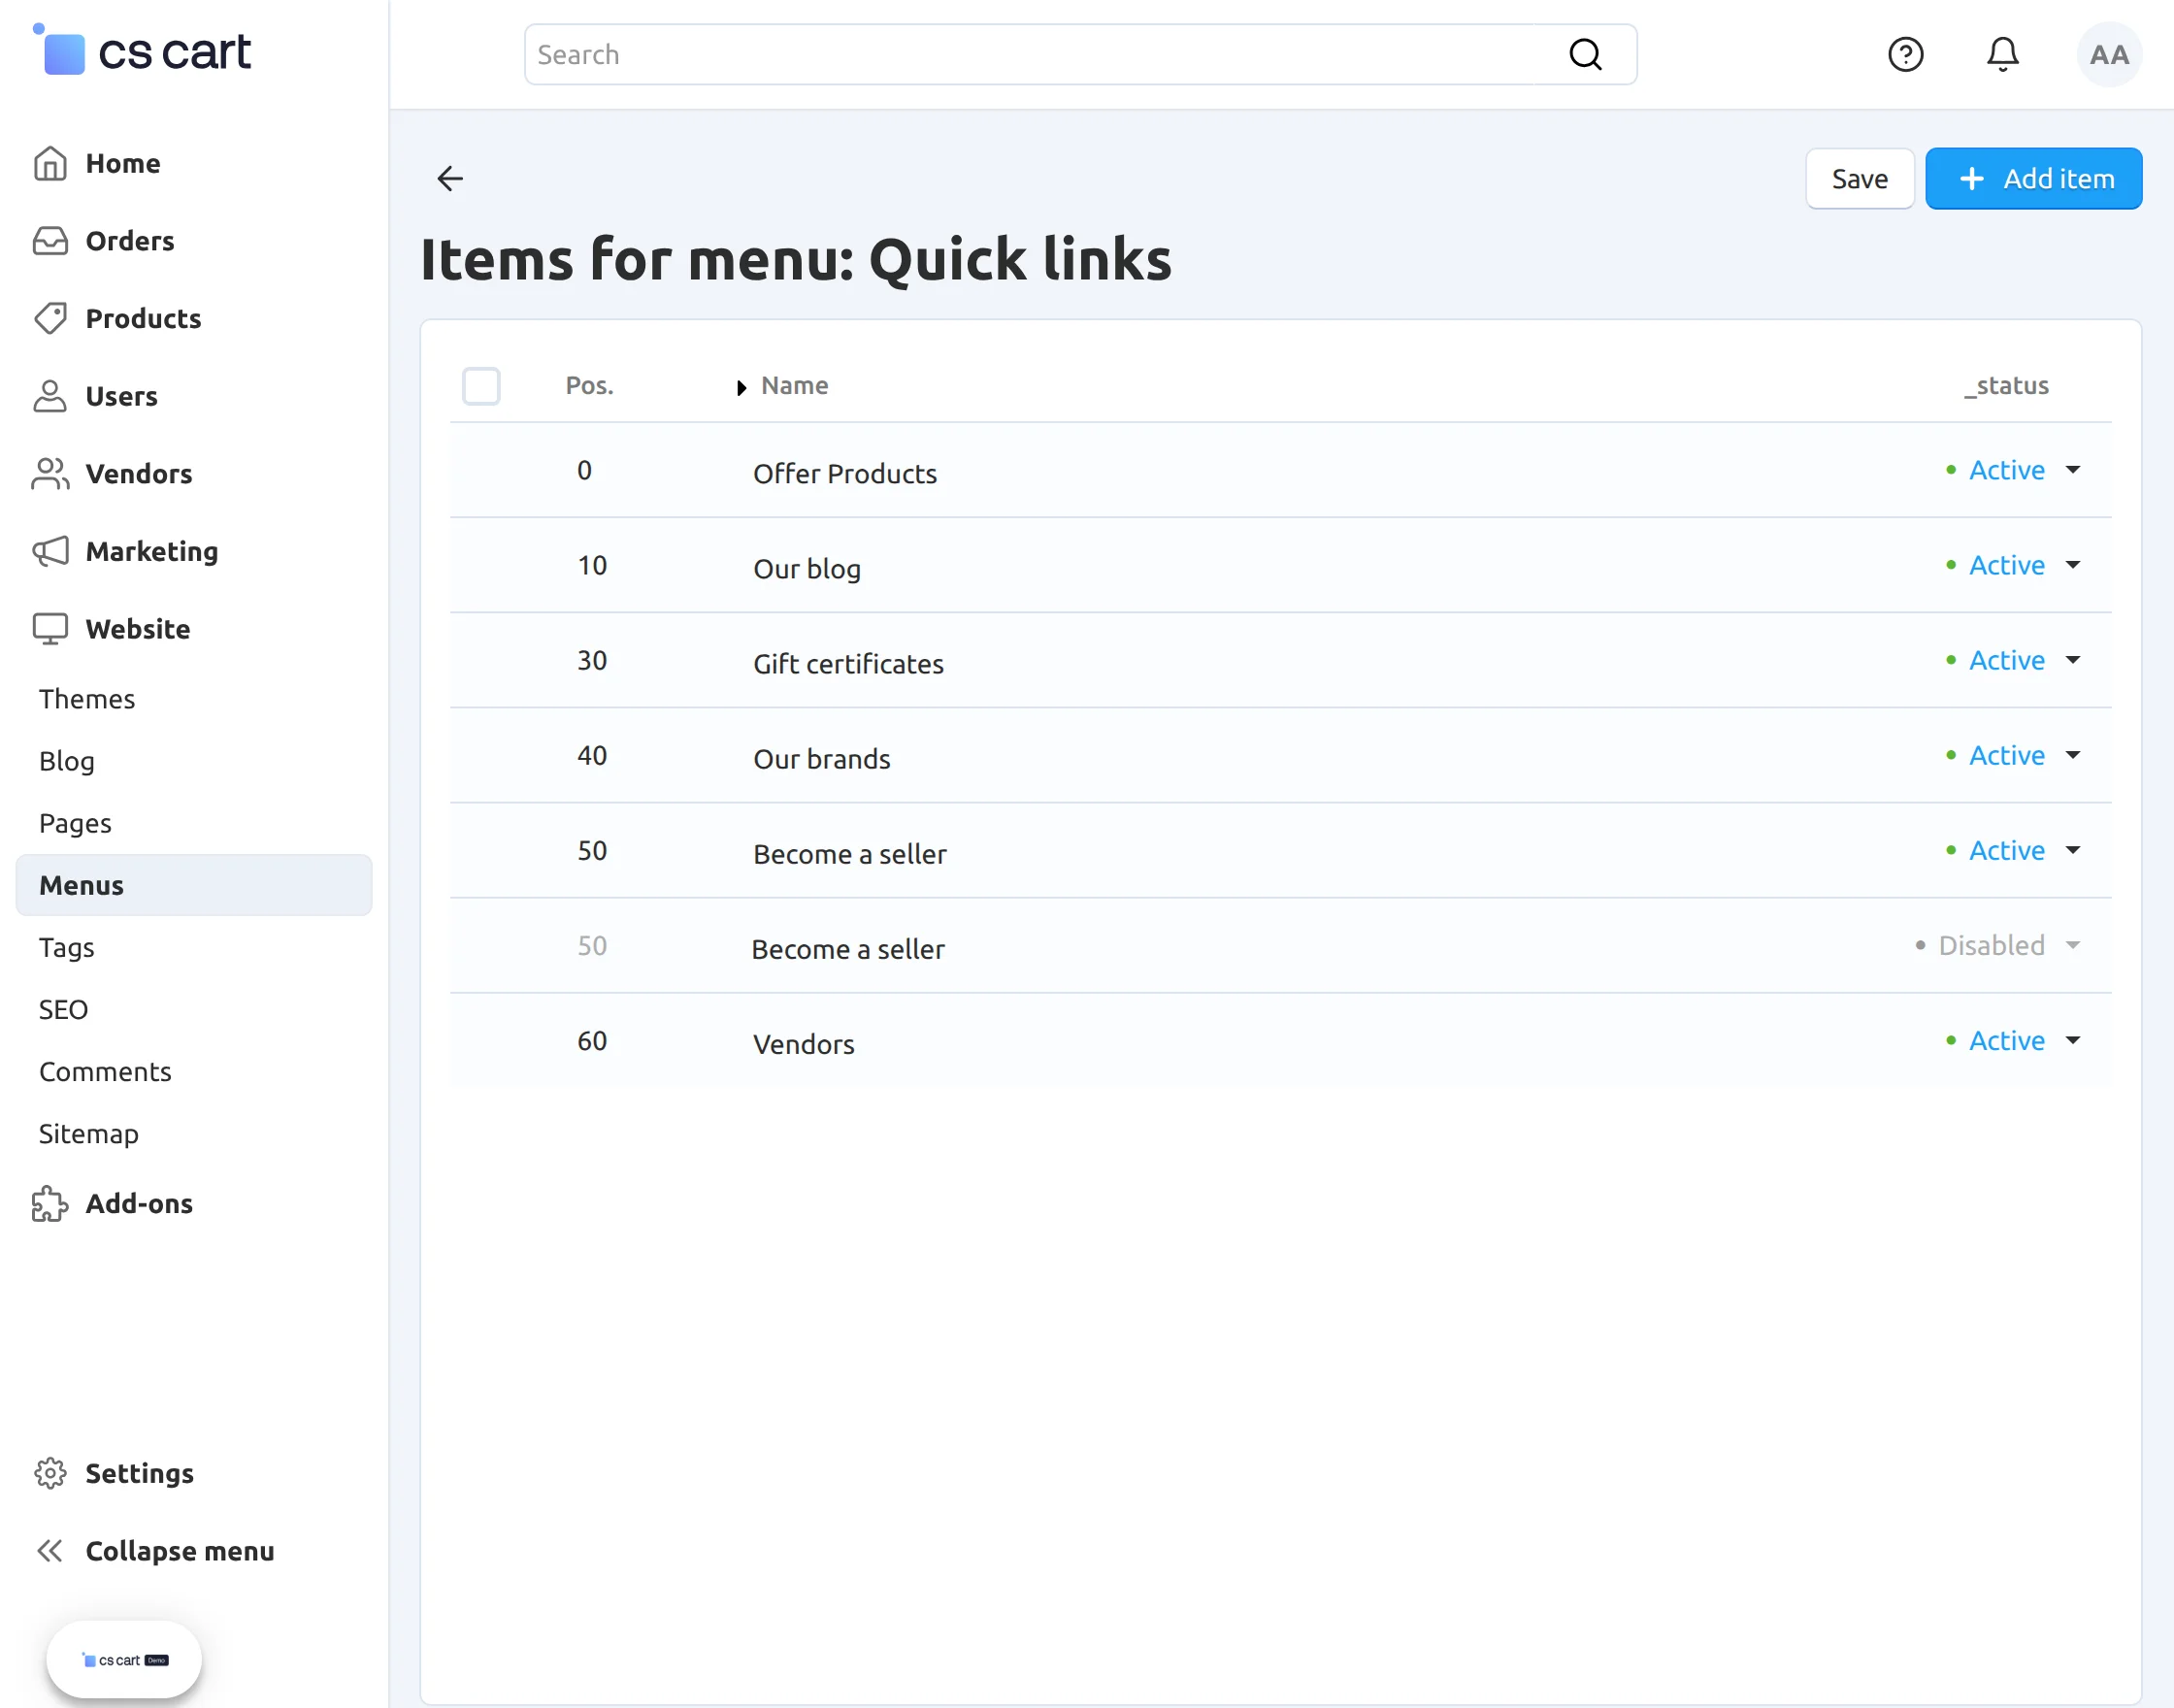 Enter the details keeping the dispatch “wk_category.vendors” .
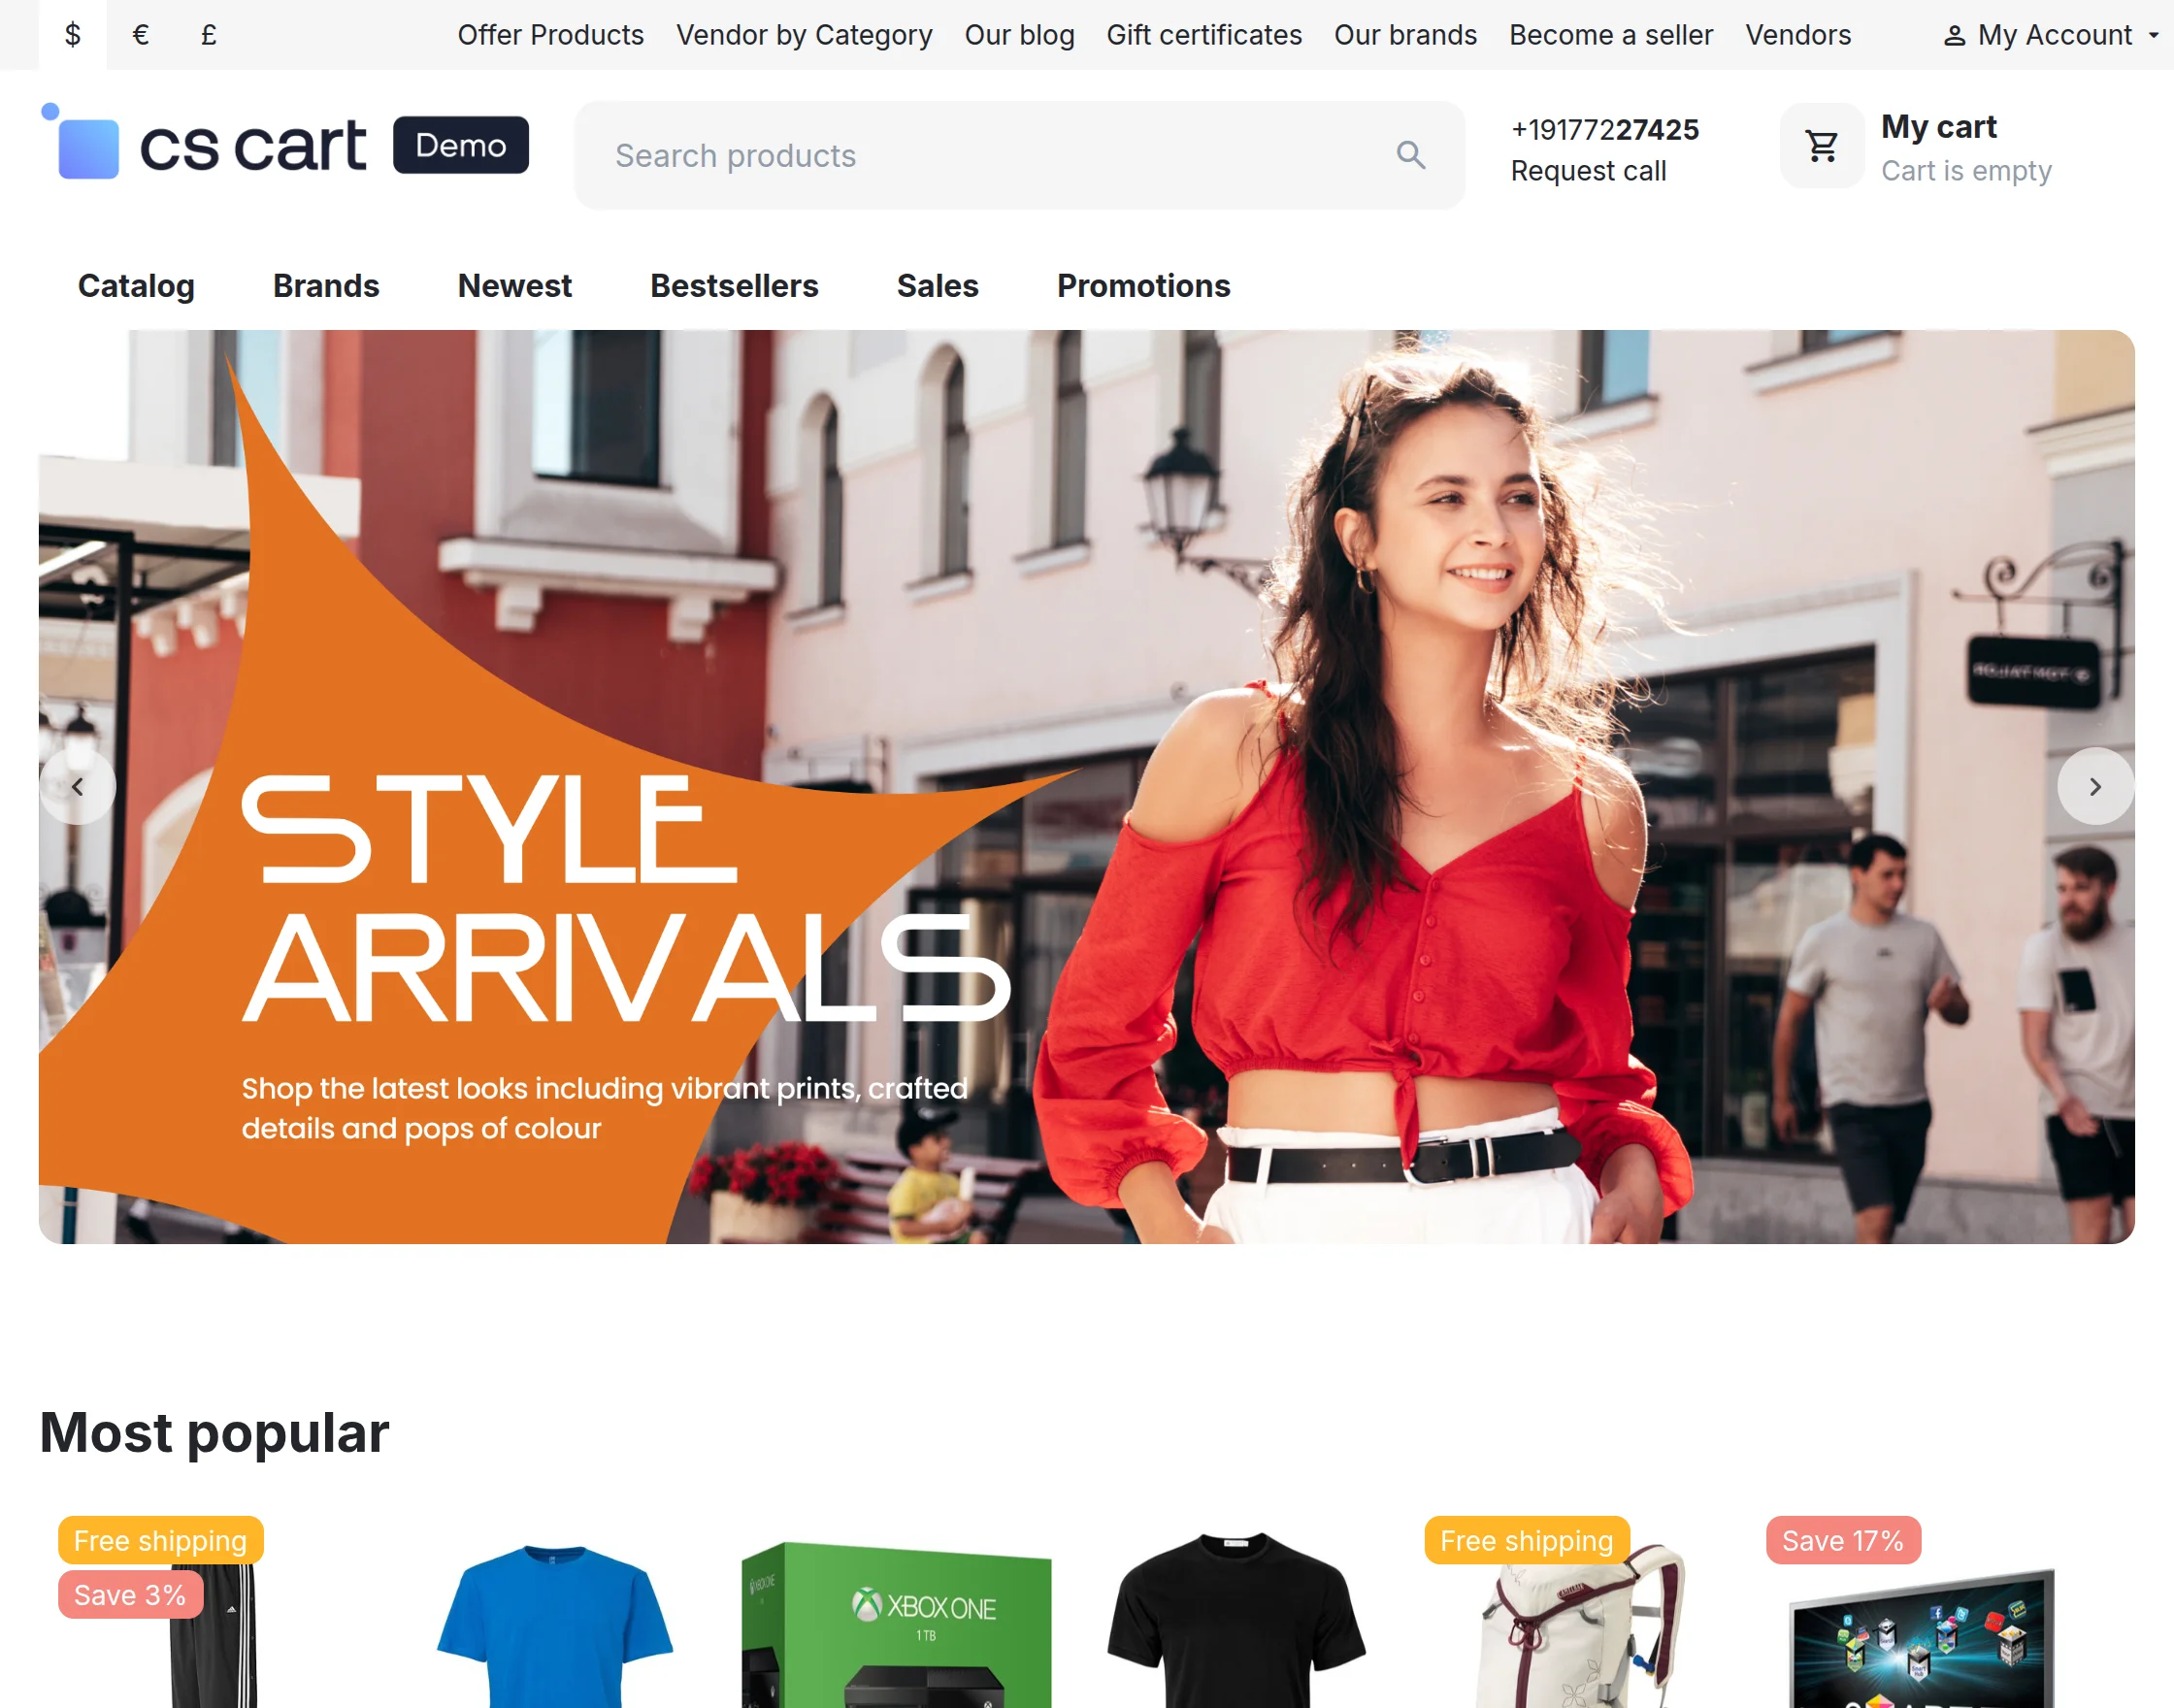
Front End View
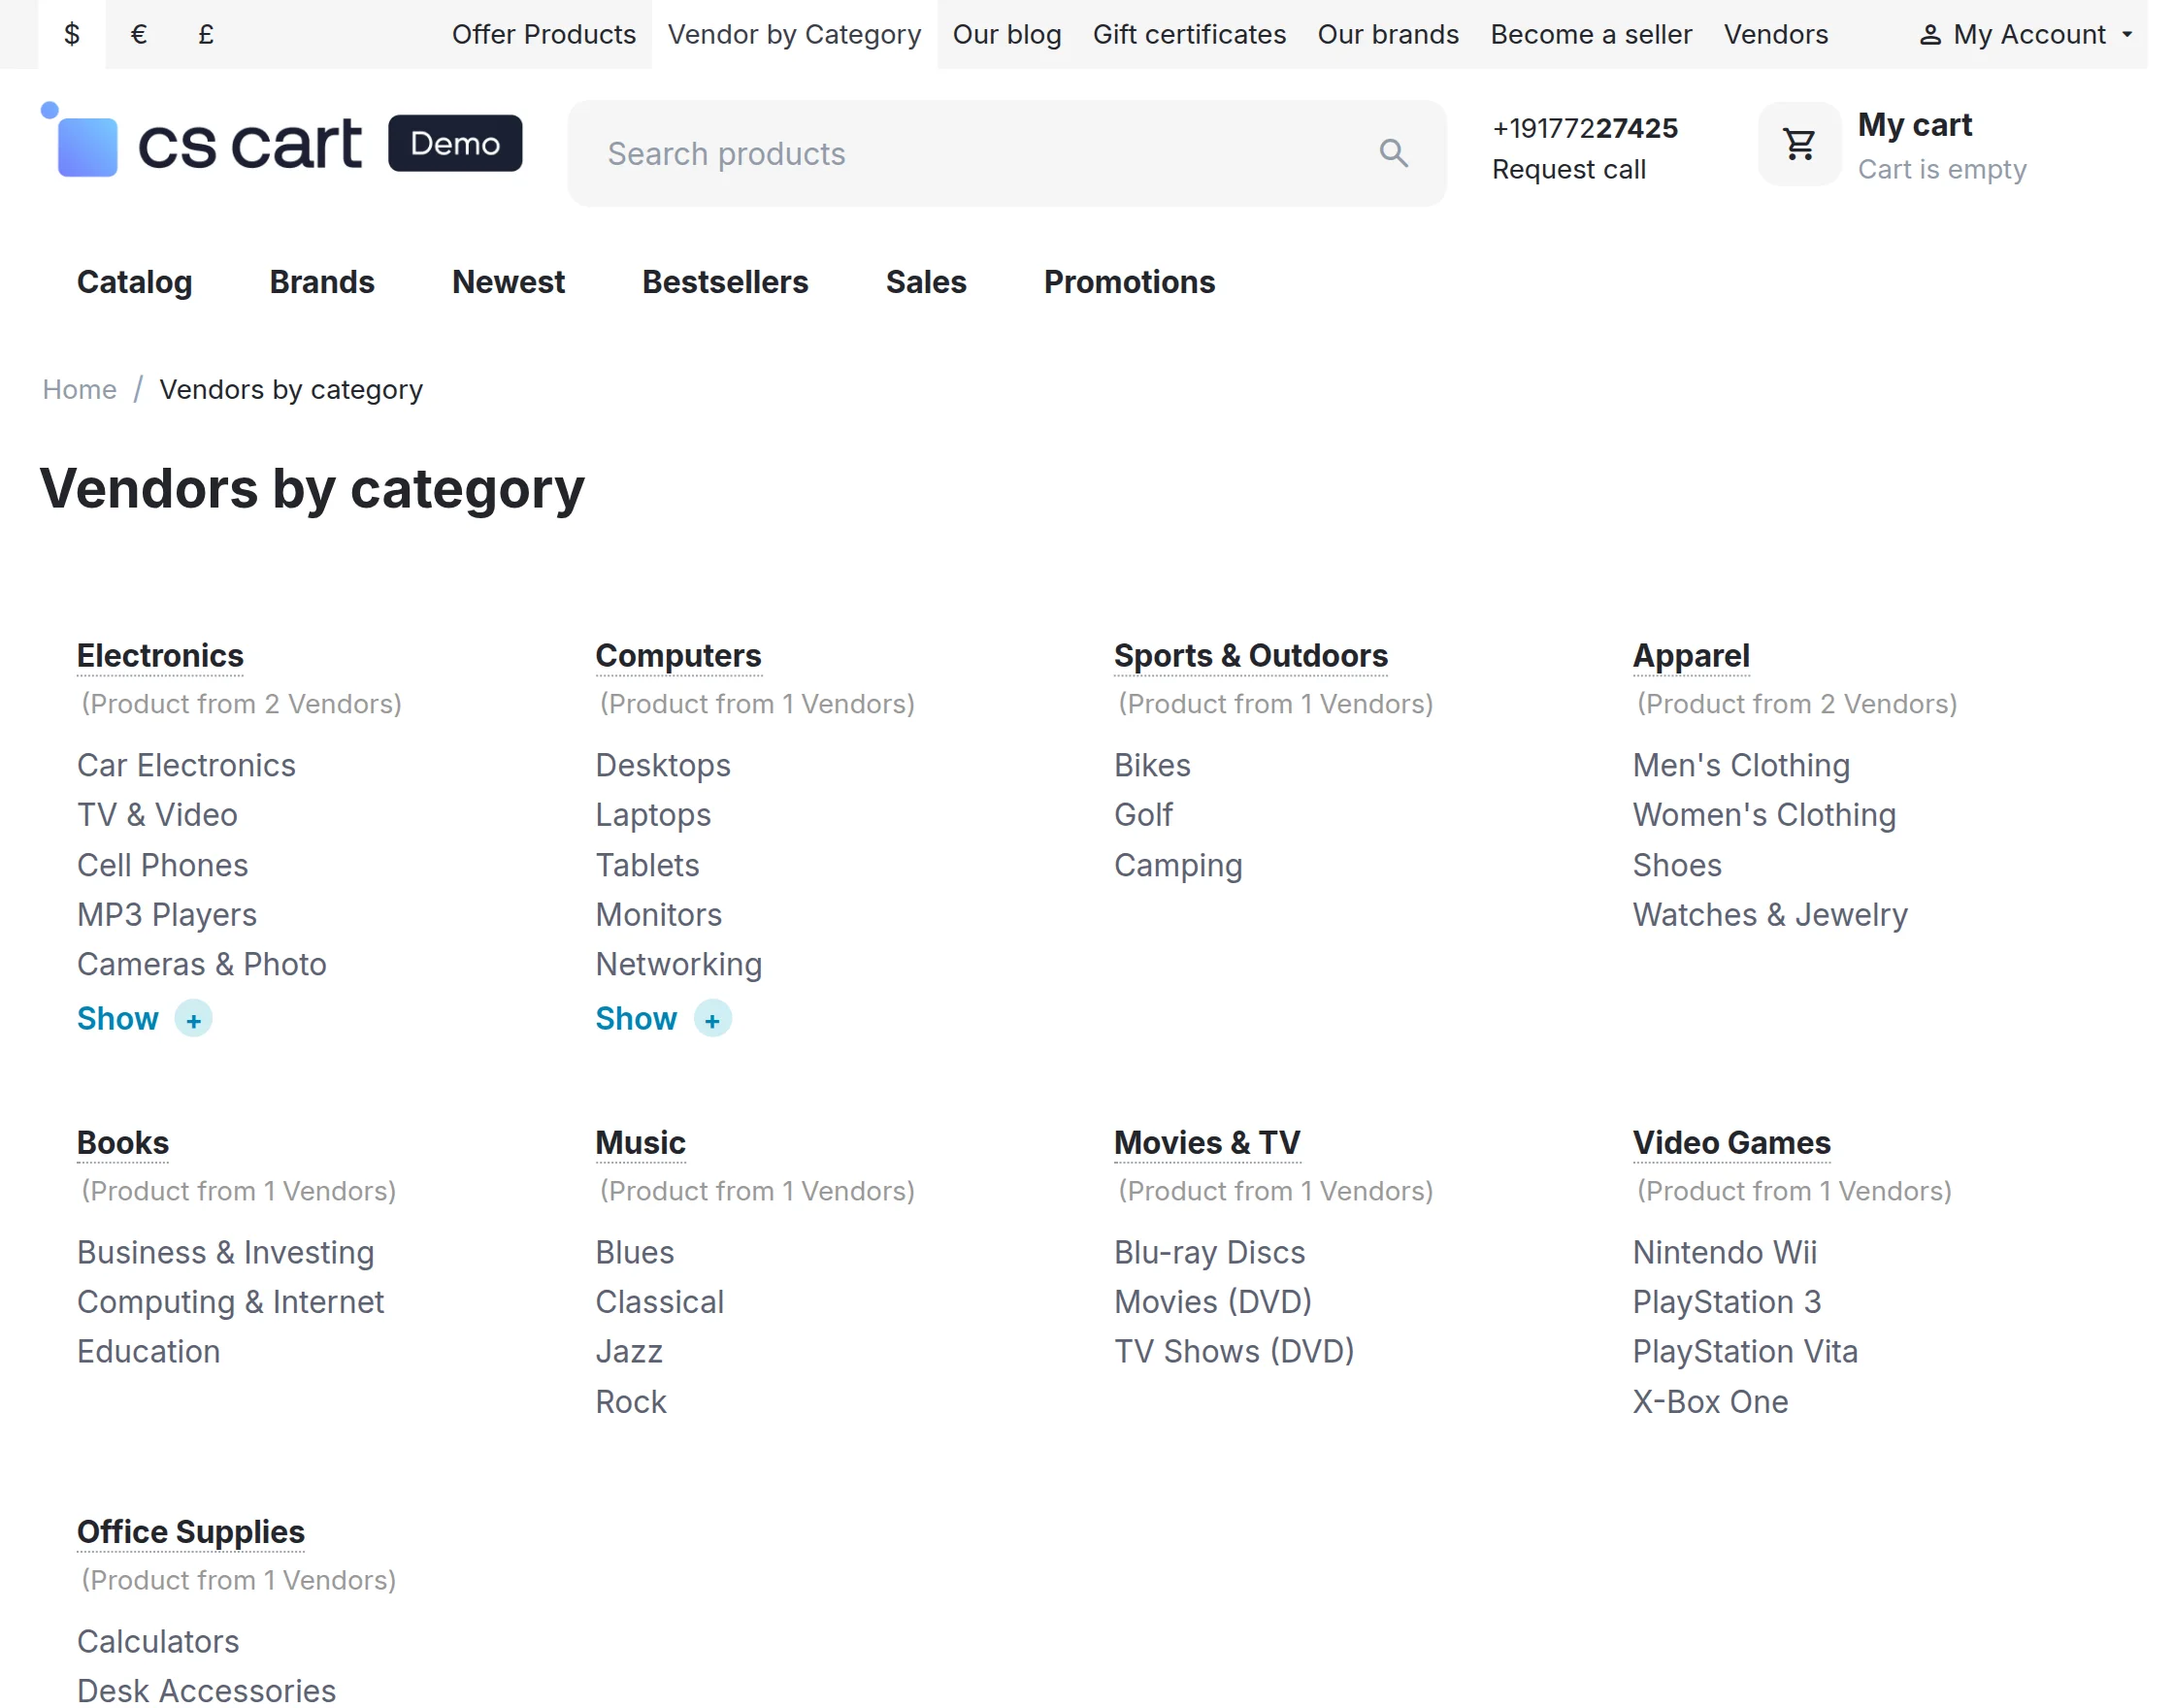
 Here’s the view of vendor directory.
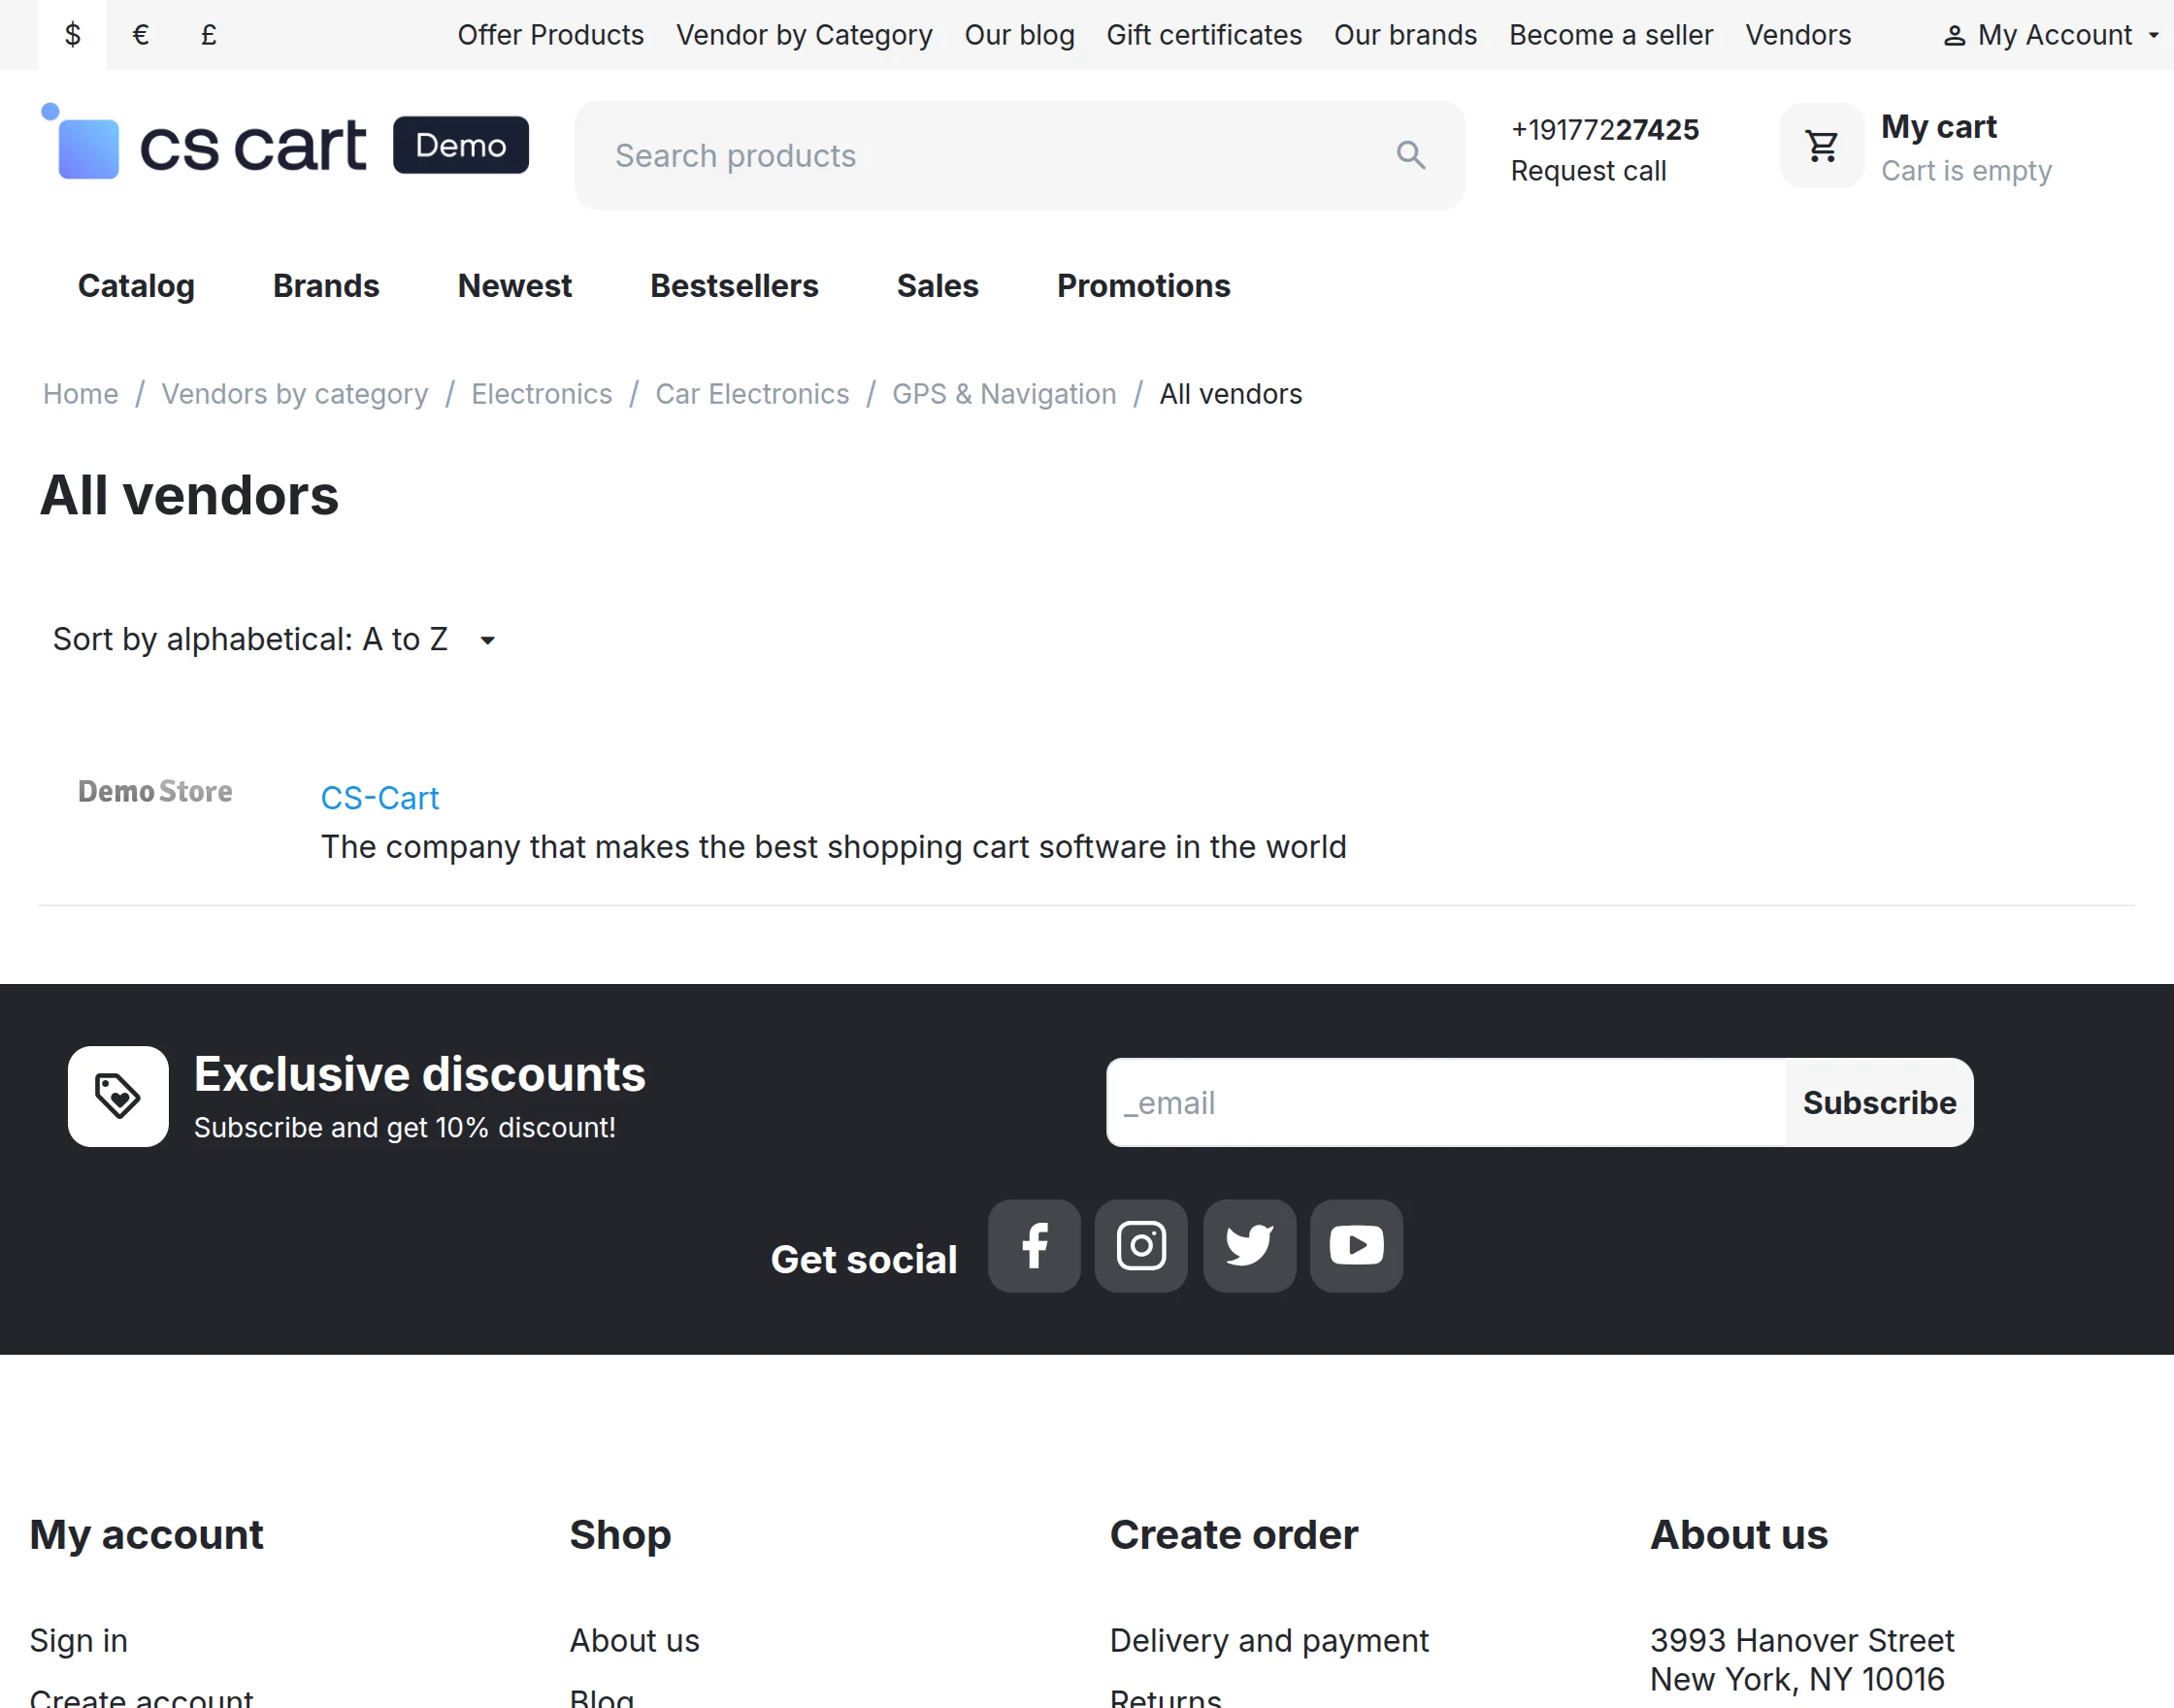
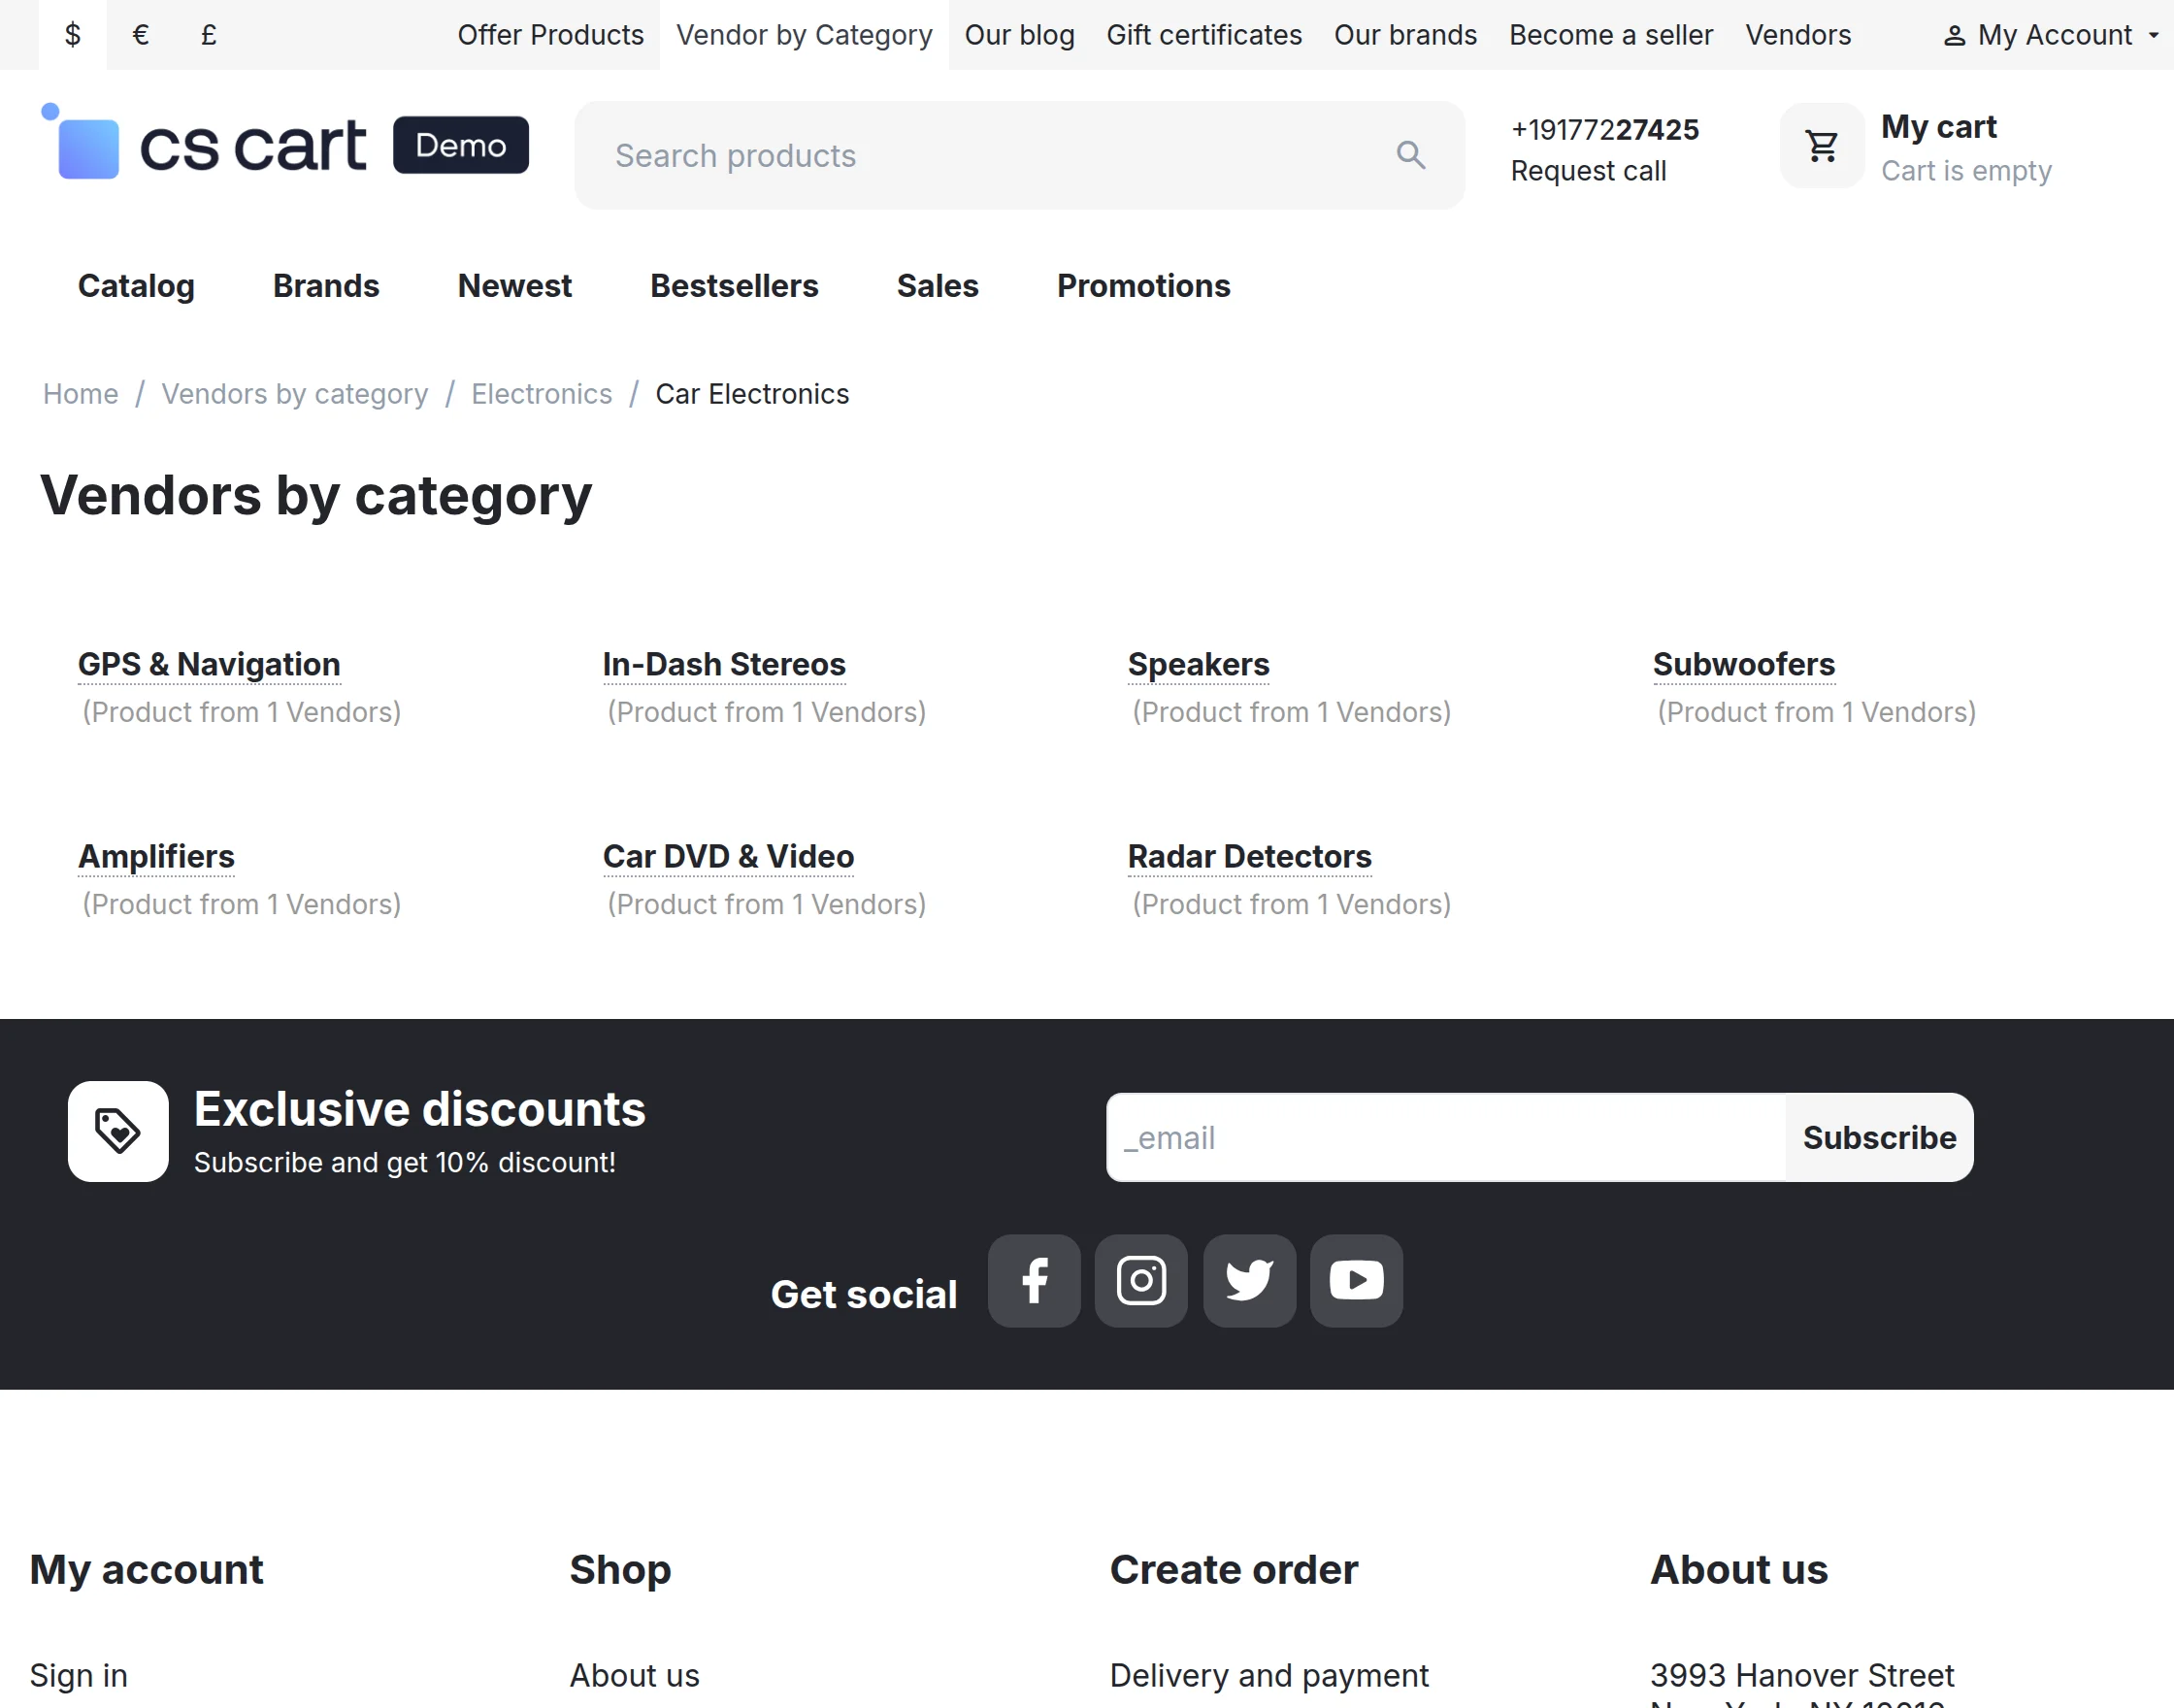 On clicking desired sub category, the visitor will get redirected to another page where all the Vendors will be listed.
Support
CS-Cart Advanced Vendor List Add-on provides an enhanced view of the vendor directory on your storefront, featuring vendor names sorted alphabetically for easier navigation.
The add-on also allows you to display the vendors selling in a particular category.
There is a separate list of all the categories, subcategories and the number of vendors selling products in each category.
So, beautify the look and feel of your storefront by installing the simple and effective add-on “CS-Cart Advanced Vendor List”.
- Well integrated with CS-Cart Multi-vendor.
- Provides a list of vendor/company name sorted alphabetically on the vendor menu in the quick links.
- Functionality to show the vendors’ name selling in any particular category.
- Functionality to display the count of vendors selling in particular category or subcategory.
- Admin has an option to display the vendors in particular category with no product listed at the backend.
- Functionality to set the maximum number of subcategories/vendors to be displayed by default.
- Option to compress or expand the subcategory list and vendor directory.
How To Upload And Install
- After downloading CS-Cart Advanced Vendor List add-on you’ll get one zip files, one install.txt file and a relevant User Guide manual doc.
- Go to Manage Add-ons, and click on “Manual Installation” as shown below in the snapshot.
Click on “Local” to browse the zip file and then click on “Upload & Install” as shown below in snapshot.
Add-on Configuration
After installing the add-on, you will find CS-Cart Advanced Vendor List in the list of available add-ons. We will then configure the settings.
Click on “settings” to enable, disable, install, or refresh.
Make sure the add-on is activated, as shown in the snapshot below.
After successful add-on installation, we need to configure and manage the settings of the add-on.
- Enter the number of subcategories/vendors to be displayed by default.
- Select the navigation scheme for the “vendor by category” page ie; view the subcategory/vendor list on the same page or navigate to the separate page.
- Check the box to include and display the vendors in particular category even if they have not listed any product in the store. (This addon is working well with vendor plan addon.)
- Save the settings.
Video Tutorial
Admin Panel Configuration
To display the vendors selling in particular category at the front end, Admin needs to add a Menu Item for listing the vendors. Here’s the detailed process for proper configuration-
Go to Website -> Menus.
Click to manage the items in the Quick links as shown below.
Click on the +Add item button to add a new item.
Enter the details keeping the dispatch “wk_category.vendors” .
Front End View
On the home page itself, there will be an option to view the vendor’s directory and vendors by category as per the menus added in the quick links.
Here’s the view of vendor directory.
On clicking desired sub category, the visitor will get redirected to another page where all the Vendors will be listed.Support
If you have any questions, suggestions, or customization requests, feel free to contact us at [email protected] or submit a ticket at webkul.uvdesk.com.
Explore our premium-quality CS Cart Extensions to enhance your store functionality.
You can also explore our CS-Cart Development Services and Quality CS-Cart add-ons.
Current Product Version - 1.3
Supported Framework Version - 4.20

Be the first to comment.