The Laravel eCommerce Marketplace Point of Sale extension connects two powerful Bagisto modules – the Marketplace (Multi-Vendor) module and the Point of Sale module.
With this Laravel eCommerce Marketplace Point of Sale extension, every seller of an online marketplace can also run their own physical store using a POS terminal of their own.
Sellers can manage outlets, POS agents, inventory, receipts, barcodes, orders, and sales reports from one dashboard.
The admin can control all the sellers’ Marketplace POS activities from a single admin panel, as every outlet, agent, order, and report is automatically linked to its respective seller.
Features Of Laravel eCommerce Marketplace Point of Sale
- Each marketplace seller gets a separate POS section inside their own seller dashboard.
- Sellers can create and manage multiple outlets (physical stores) from their dashboard.
- Sellers can add their own POS agents and assign them to their outlets.
- Sellers can create separate inventory sources for their stores.
- Sellers can generate and print barcodes for their products, one by one or in bulk.
- Sellers can create, edit, and preview their own custom receipts.
- Sellers can view all the orders placed through their outlets along with complete order details.
- Sellers get a detailed sales report for their own POS sales with filtering options.
- Every outlet, agent, receipt, order, and report created by a seller is automatically tagged to that seller.
- The admin can see and manage all the sellers’ POS data from the single POS section of the admin panel.
- Products added by an agent at the POS counter are automatically linked to that seller’s account in the marketplace.
- The admin can enable or disable the whole Marketplace POS module anytime from the configuration.
- If the module is disabled, agents belonging to sellers cannot log in to the POS until it is enabled again.
- Supports multiple languages for a worldwide audience.
Installing the Marketplace Point of Sale Extension
The customer will get a zip folder
Follow these steps to install the Bagisto Marketplace POS Extension:
1. Unzip and Merge Files
Unzip the extension zip file and merge the `packages` folders into your project root directory.
2. Update `composer.json`
Add the following line under the `psr-4` section in `composer.json`:
"Webkul\\MarketplacePos\\": "packages/Webkul/MarketplacePos/src"
3. Update `bootstrap/providers.php`
Add the following line under the `providers` section:
Webkul\MarketplacePos\Providers\MarketplacePosServiceProvider::class,
4. Run Commands
Execute the following commands from the root directory in the terminal:
composer dump-autoload
php artisan mp-pos:install
Once all the commands have been executed successfully, the installation will be completed.
Laravel eCommerce Marketplace Point of Sale Configuration
From the Admin dashboard, navigate to Configure > Marketplace POS in the left-hand menu and set the Status toggle to active.
Note: The Marketplace module should also be enabled from Configure > Marketplace, otherwise the Marketplace POS settings and the seller menu will not appear.

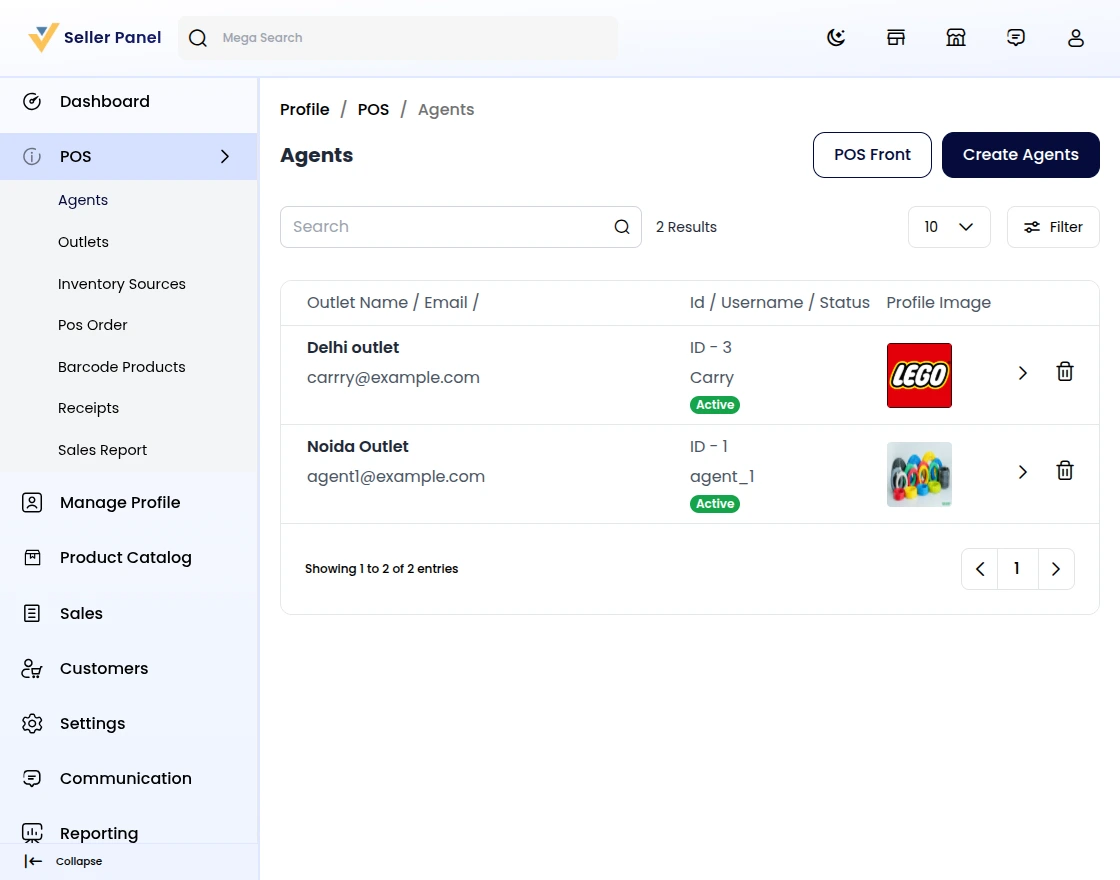
Once enabled, a new POS menu will appear in the seller dashboard. This menu contains the following sections:
- Agents – the staff members who handle billing at the counter.
- Outlets – the physical stores of the seller.
- Inventory Sources – the stock locations of the seller.
- POS Order – the list of orders placed at the seller’s counters.
- Barcode Products – the products for which barcodes can be generated.
- Receipts – the bill formats used while printing a receipt.
- Sales Report – the summary of all POS sales of the seller.
**Note:
The setup must be done in a fixed order, because each item depends on the previous one:
- Create an Inventory Source first.
- Create a Receipt template.
- Create an Outlet by selecting the inventory source and receipt.
- Create an Agent and assign them to the outlet.
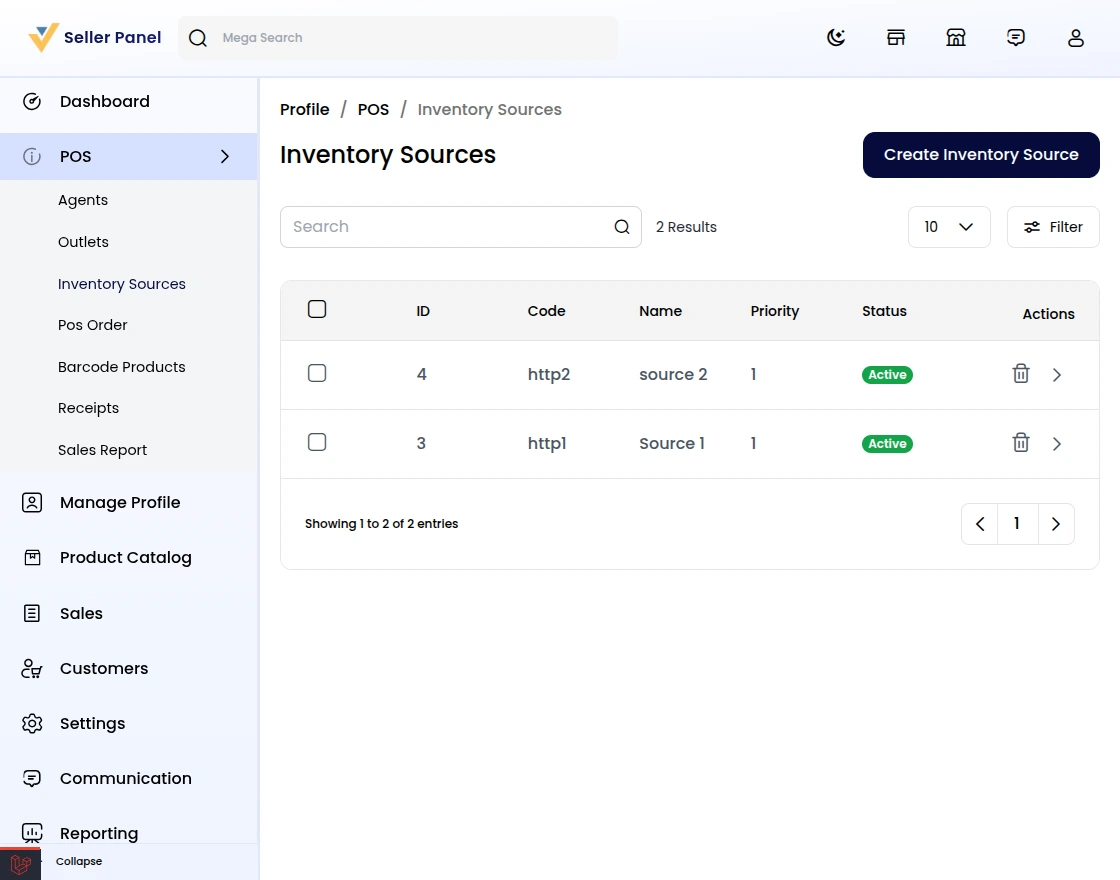
Manage Inventory Sources for the Marketplace POS
An inventory source is the stock location of the seller from where the products are sold.
The seller can create an inventory source by navigating to POS > Inventory Sources > Create Inventory Source.
Here, the seller needs to enter details like Name, Contact Name, Email, Contact Number, Country, State, City, Street, Postcode and set the Status to active.
Manage Receipts in the Marketplace POS
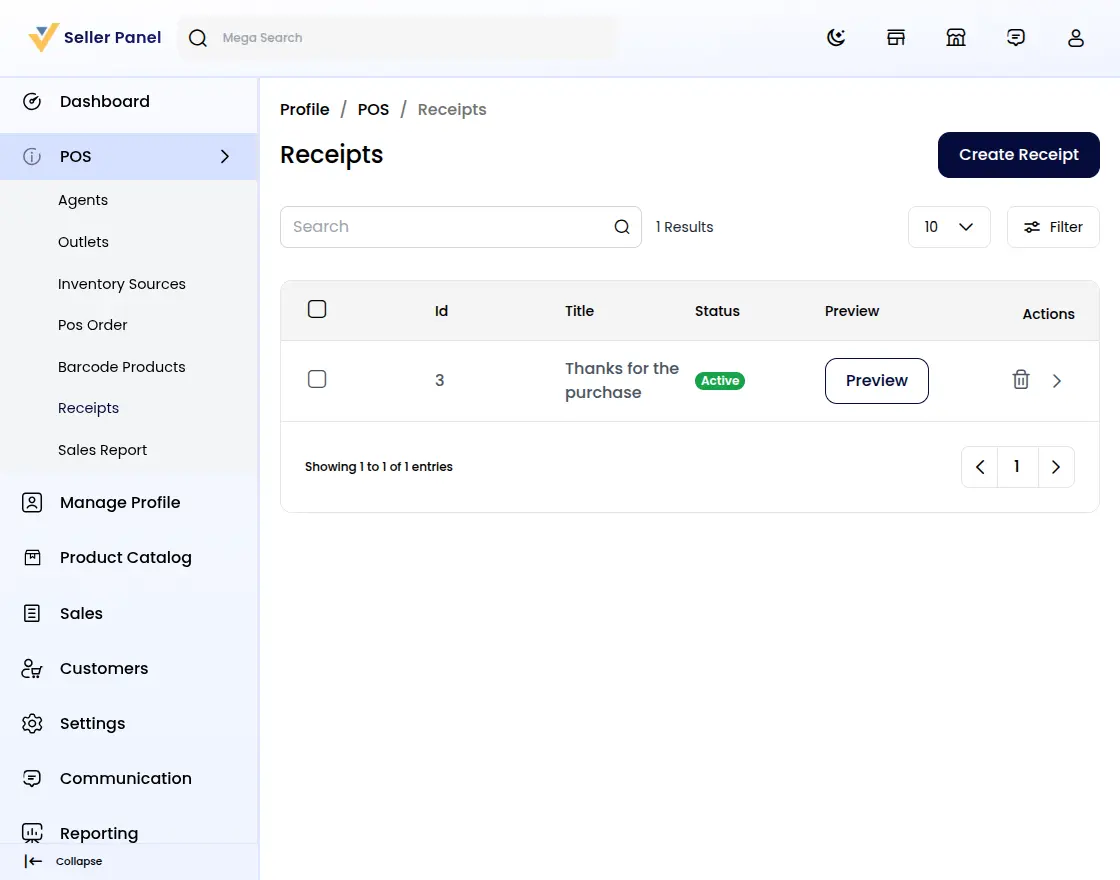
A receipt is the printed bill handed over to the customer after the purchase.
The seller can create their own receipt format by navigating to POS > Receipts > Add Receipt.
The seller can customize the printed bill with details like store name, order ID, customer name, tax, discount, total, cashier, address, and logo.
A live preview lets the seller check the bill layout before saving.
Manage Outlet for the Marketplace Point of Sale
Under the Outlets section, the seller will find the list of all their physical stores.
The seller can add a new store by clicking on the “Create Outlet” button.
Here, the seller needs to enter some details –
Name
The seller needs to enter the name of the outlet in the field.
Email & Phone
The contact email and phone number of the outlet.
Address
The address of the store along with the country, state, city, and postcode will be provided in this section.
Receipt
The seller has to select the receipt template from the drop-down, which was created earlier.
Inventory Source
The seller has to select the inventory source from the drop-down, which was created earlier.
Low Stock Quantity
Here the seller can set the minimum quantity of a product. When the stock goes below this number, the product is marked as a low-stock product.
Status
The seller can make the outlet active or inactive from the toggle button.
Lastly, hit the Save Outlet button to save the outlet configuration successfully.
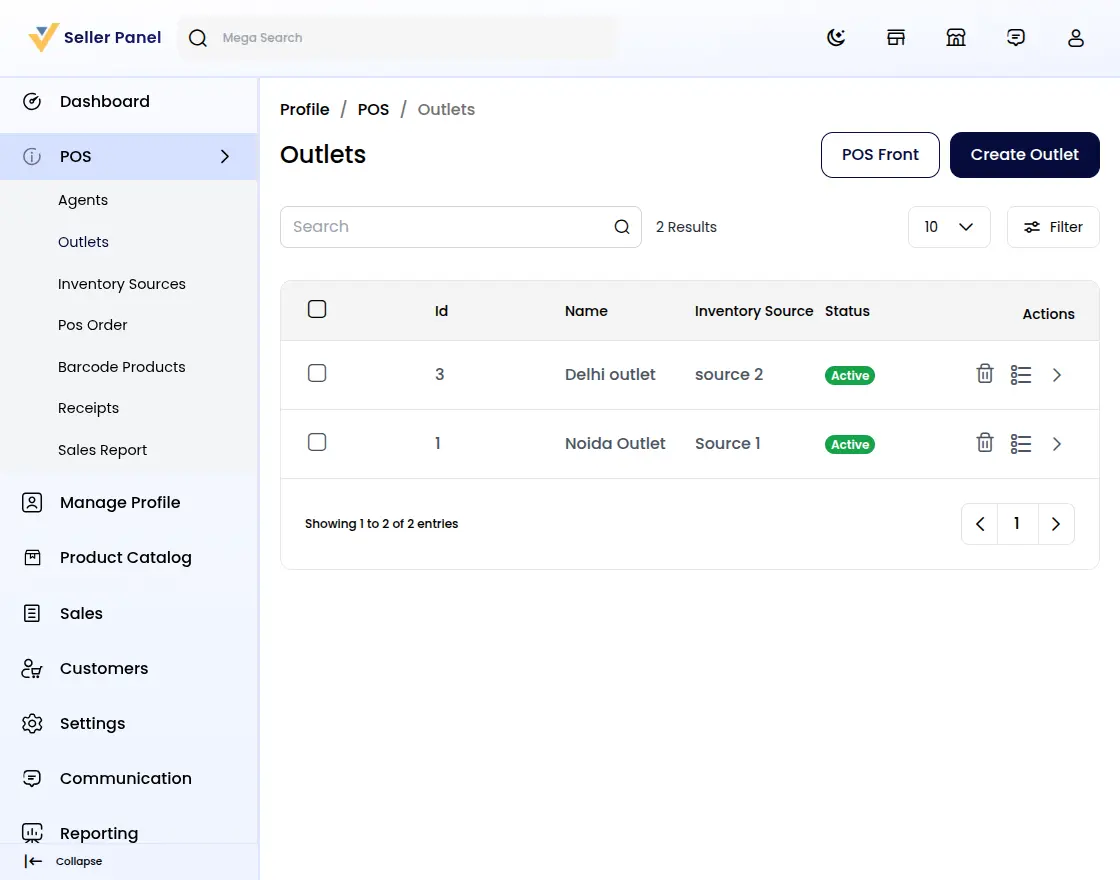
After creating the outlet, the seller can assign products to the outlet by clicking on the assign action shown in the outlet row.
Under the Assign Product tab, the seller selects their products, and only the assigned products will be displayed on the POS front end for that particular outlet.
Manage Agent for the Marketplace POS
An agent is the staff member who actually operates the POS counter and handles customer billing.
Under the Agents section, the seller will find the list of all the agents they have created.
The seller can add an agent by clicking on the “Create Agents” button.
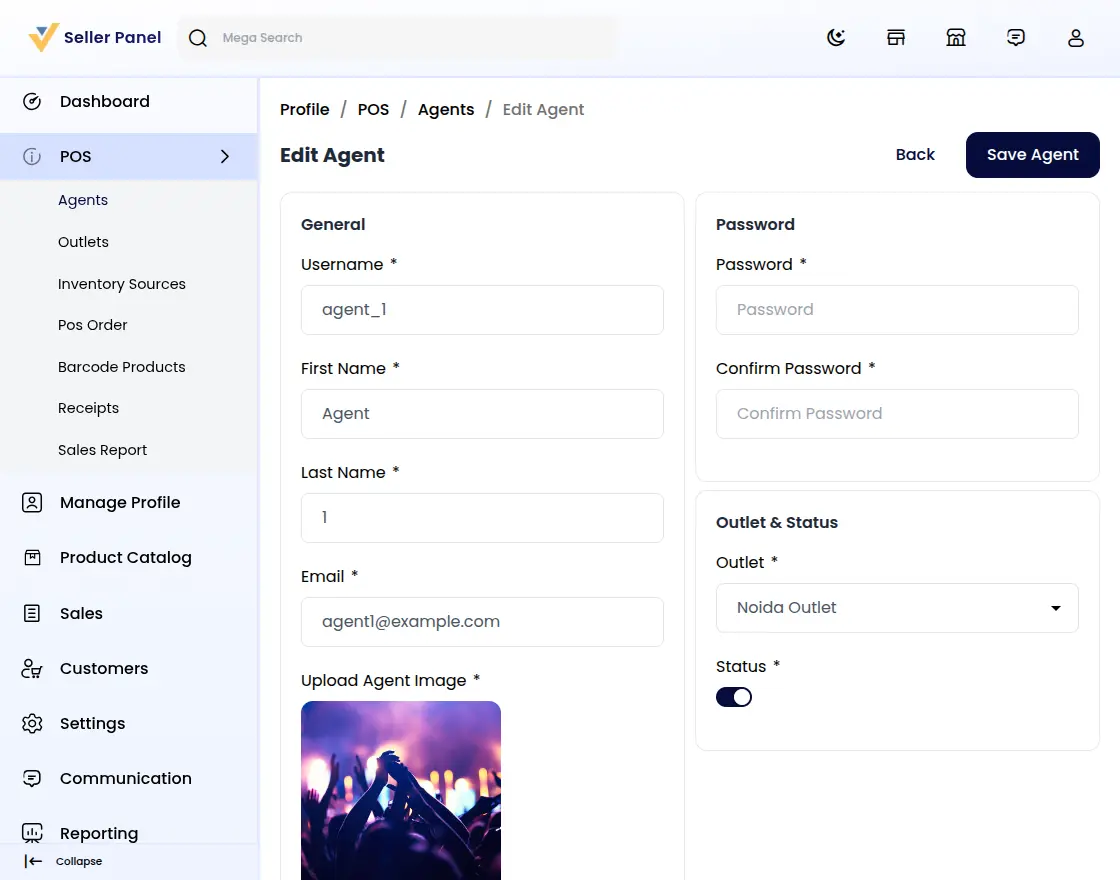
Here, the seller needs to enter the below details:
Username
The seller needs to enter the username of the agent, which the agent will use to log in to the POS.
First name & Last Name
Here the seller needs to enter the first name and last name of the agent.
The seller needs to enter the email ID of the agent.
Password
The seller can set the login password for the agent.
Add Image
Add an image to represent the agent.
Outlet
Select the outlet from the drop-down to which the agent will belong. Only the products assigned to this outlet will be visible to the agent.
Status
The seller can make the agent active or inactive from the toggle button.
Lastly, hit the Save Agent button to save the agent configuration successfully.
Access and Use the Marketplace POS Front End
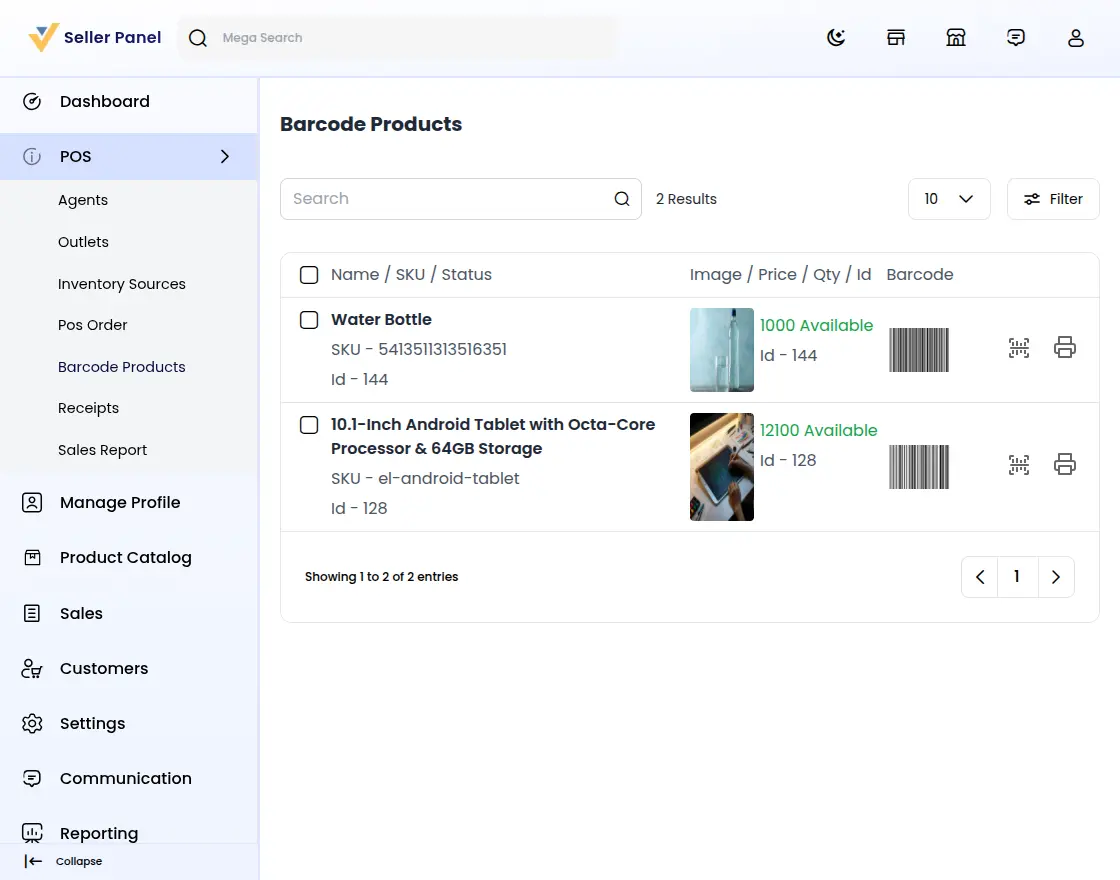
Once the seller has created an active agent, assigned the agent to an outlet, and assigned products to that outlet, the agent can start working from the POS front end.
- Open the POS front-end URL in a browser.
- Log in with the username and password created by the seller for the POS agent.
- Select the assigned outlet, if prompted. The products and inventory available to the agent will be based on that outlet.
- Add products to the cart by searching for them or scanning their barcodes.
- Review the cart, apply any permitted discount, select the payment method, and place the order.
- After checkout, provide the generated receipt to the customer. The completed order will also be available in the seller’s POS Order section and sales reports.
Barcode Products in the Marketplace POS
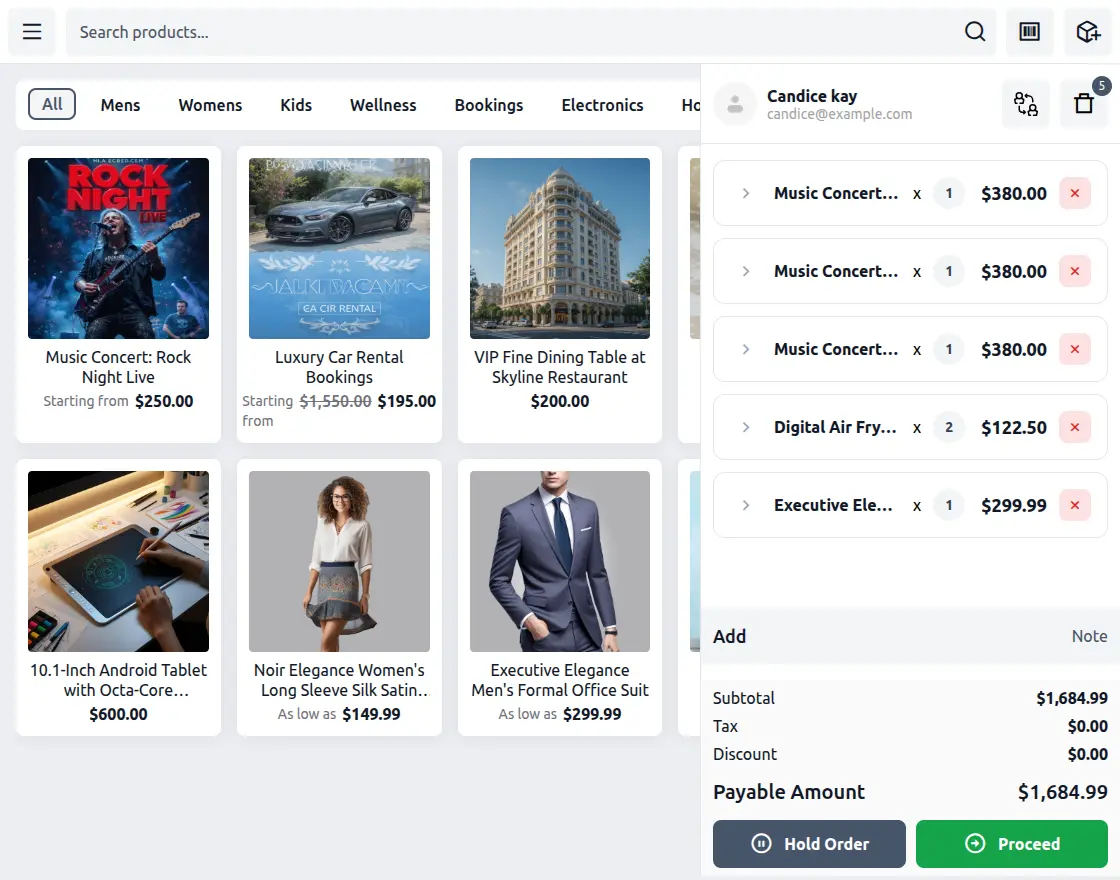
Here the seller can view all their products listed in one place.
Sellers can generate product barcodes, which POS agents can scan to quickly add products to the cart.
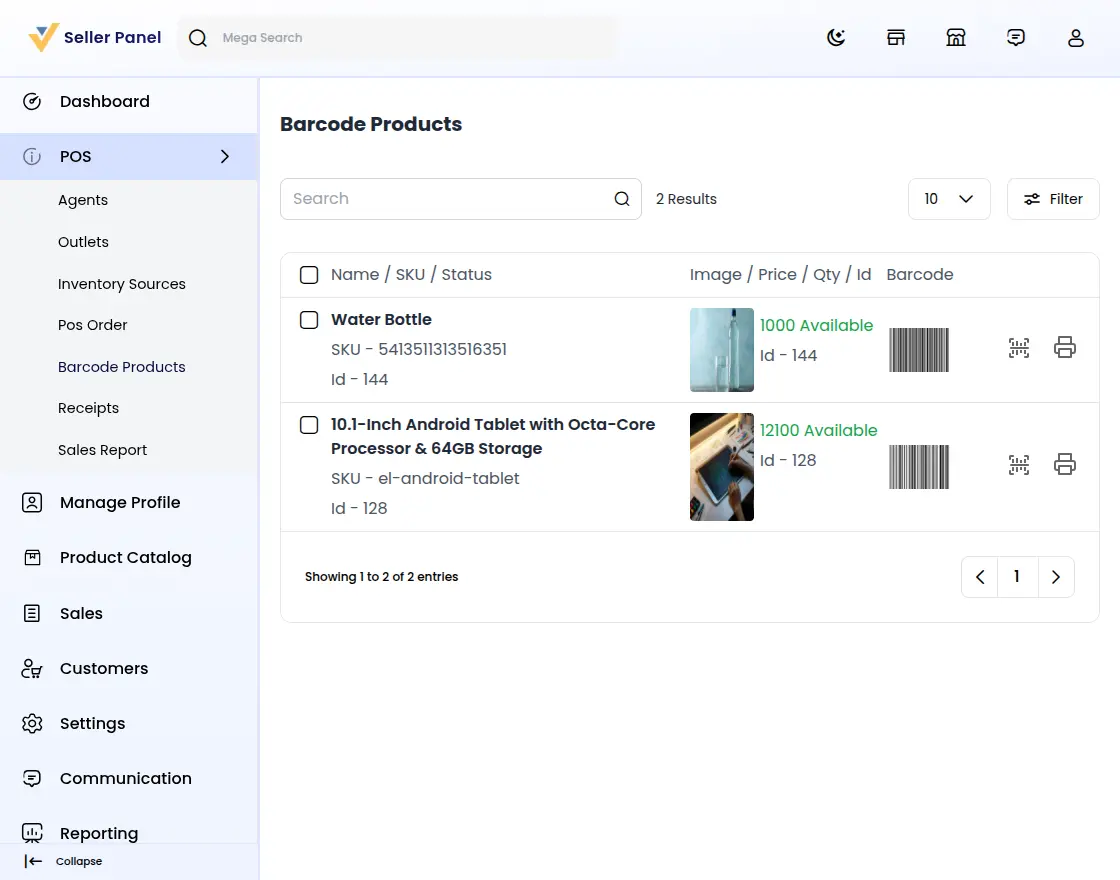
The seller can generate barcodes by selecting one or many products and choosing “Generate Barcode” from the mass action drop-down, then clicking the submit button.
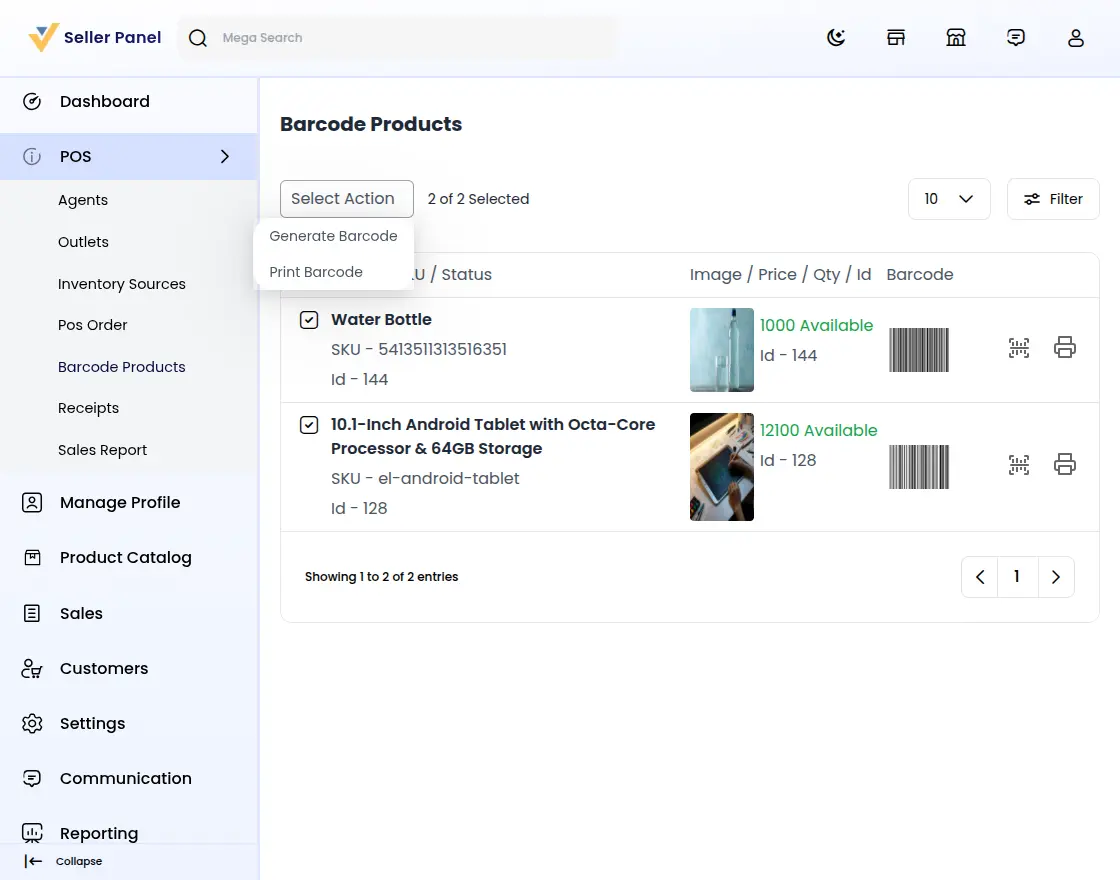
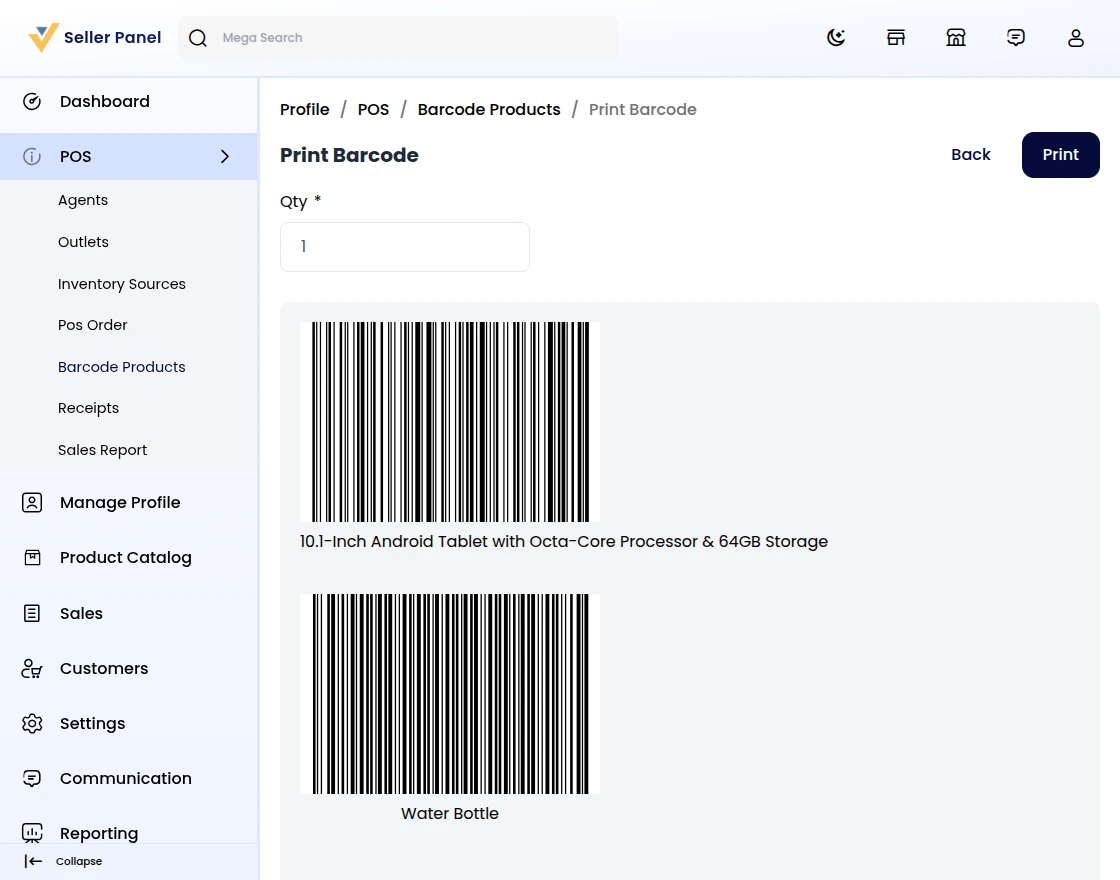
Sellers can print barcode labels by selecting products and choosing “Print Barcode” from the mass action menu.
They can select the required quantity, and a printable barcode sheet will be generated.
POS Orders in the Marketplace Point of Sale
Under the POS Order section, the seller can view all the orders placed through their outlets in one list.
By clicking on any order, the seller can check the complete order information such as the items purchased, payment method, billing details, and totals.

Sales Report for the Marketplace POS
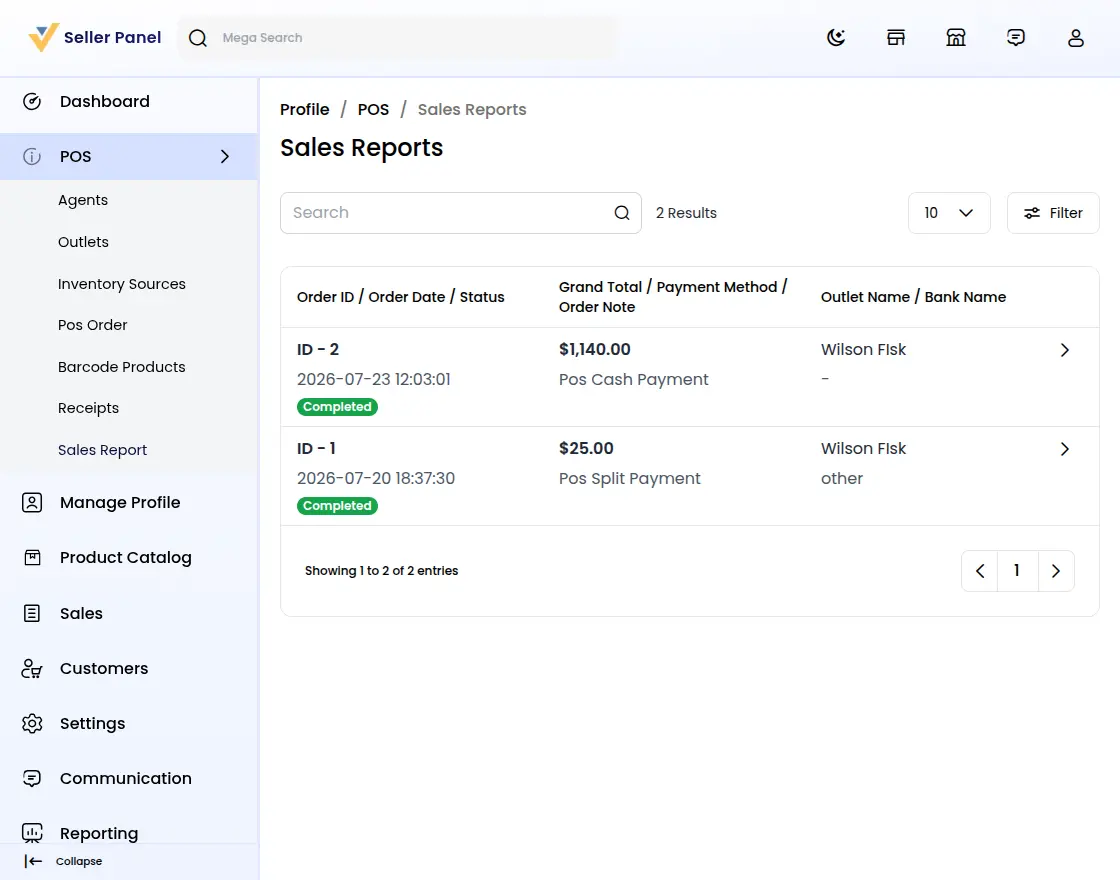
This section allows the seller to check the detailed sales report of their POS sales.
The seller can easily filter the sales report based on dates, outlets, and payment methods to know exactly how much business was done through each counter.
Admin Panel – Manage All Sellers’ Marketplace POS From One Place
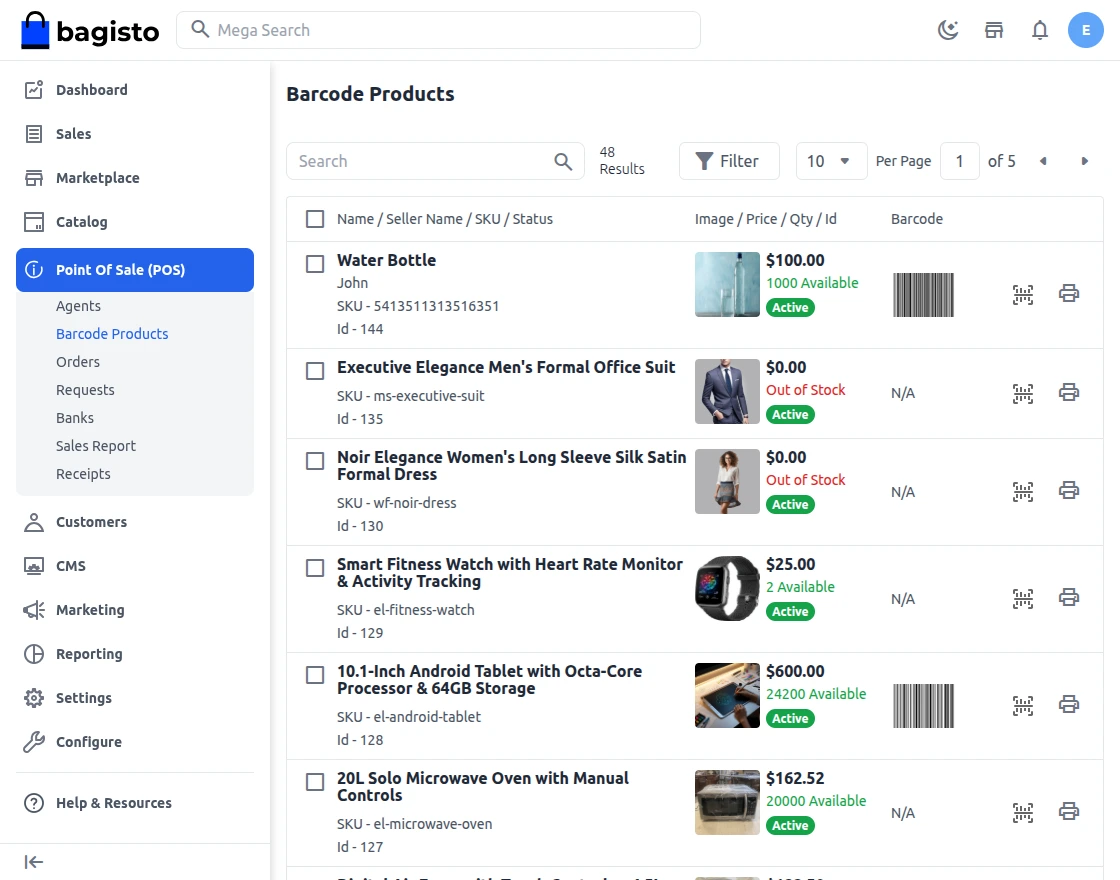
The admin does not need to visit each seller’s dashboard separately.
All seller POS data—agents, outlets, receipts, barcodes, orders, and reports—appears in the admin panel, tagged with the seller’s name.
This way, the admin gets a complete overview of the POS activities of the whole marketplace from a single screen.
Automatic Seller Tagging in the Marketplace POS
Whenever a customer purchases something at a seller’s counter, the order is automatically tagged to that seller.
If a POS agent creates a new product from the POS terminal, it is automatically linked to the seller’s marketplace account.
The product then appears in the seller’s product list without any extra work.
That’s all for the Laravel eCommerce Marketplace Point of Sale extension — still, have any issues feel free to add a ticket.
Also, let us know your views on making the Marketplace Point of Sale module better https://bagisto.uvdesk.com/en/
Current Product Version - v2.4.x
Supported Framework Version - v2.4.x

Be the first to comment.