Introduction
ERPNext Website Product Brand helps you organize products by brand and showcase them on your website. It allows you to create dedicated brand pages, assign brands to products, and make brand-based browsing easier for customers.
ERPNext Website Product Brand adds brand management features, including brand logos, banners, descriptions, and SEO settings. This helps businesses highlight their product brands and improve the shopping experience.
Features
- Create and manage product brands with logos, banners, descriptions, and SEO information
- Assign brands to products and keep products organized by brand
- Publish dedicated brand pages with brand details and related products
- Allow customers to browse and filter products based on brands
- ERPNext Website Product Brand displays all published brands on a dedicated brand listing page
- Add brand links on product pages for quick navigation to brand pages
- Showcase featured brands on the homepage using configurable brand blocks
- Track brand performance through reports, dashboard charts, and number cards
Insatallation
1. After purchasing the app from the Webkul store, you will receive a
link to download the module ZIP file.
2. Extract the downloaded ZIP file, and you will see a folder named
‘wk_product_brand’.
3. Set up the module in your Git repository.
4. If the app is hosted on GitHub, fetch it using the command:
- bench get-app –branch main
- https://github.com/your-account/erpnext_product_brand.git
- (Replace “main” with your branch name and replace the “HTTPs URL” with your HTTPS clone URL.)
5. Install the app on your site using the command:
- bench –site <your-site_name> install-app erpnext_product_brand
6. Finally, run the “bench migrate” command to complete the installation.
Workflow
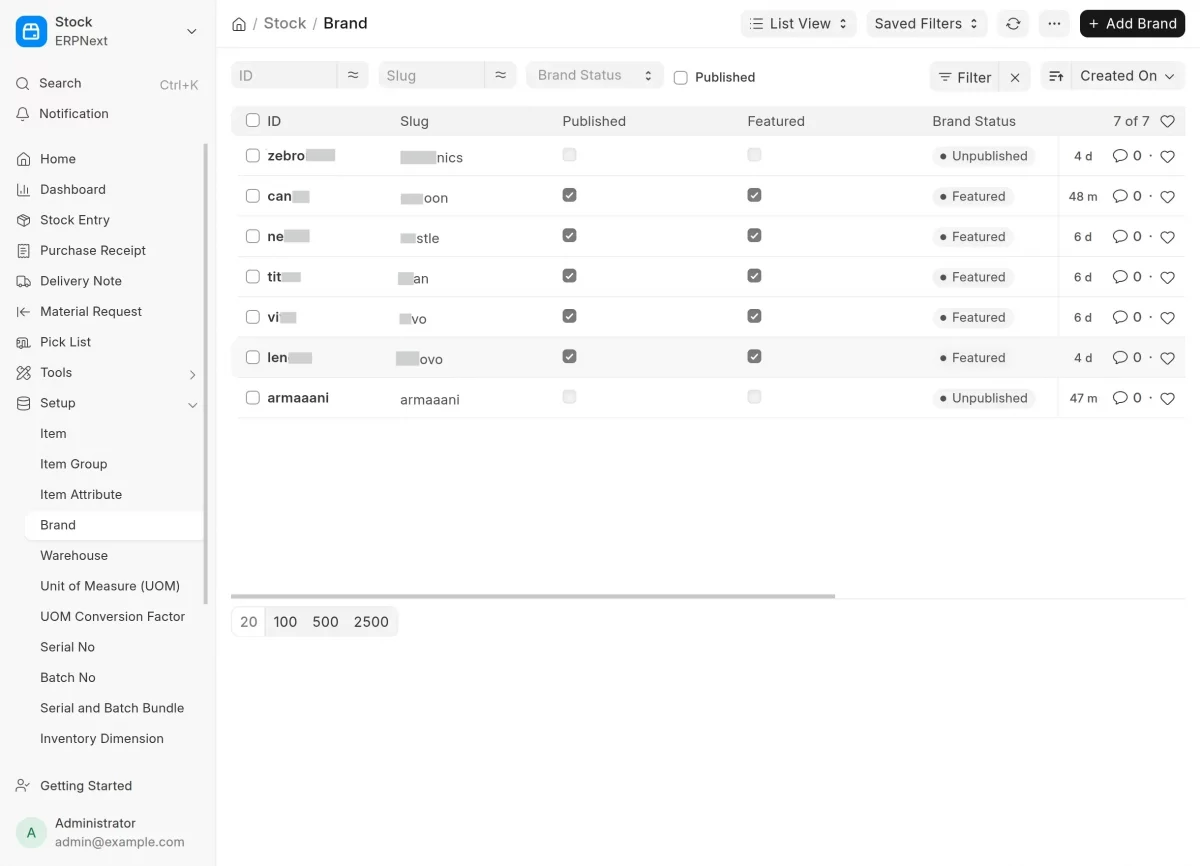
1. First, access the ERPNext Website Product Brand module by clicking on the Stock icon from the home page.
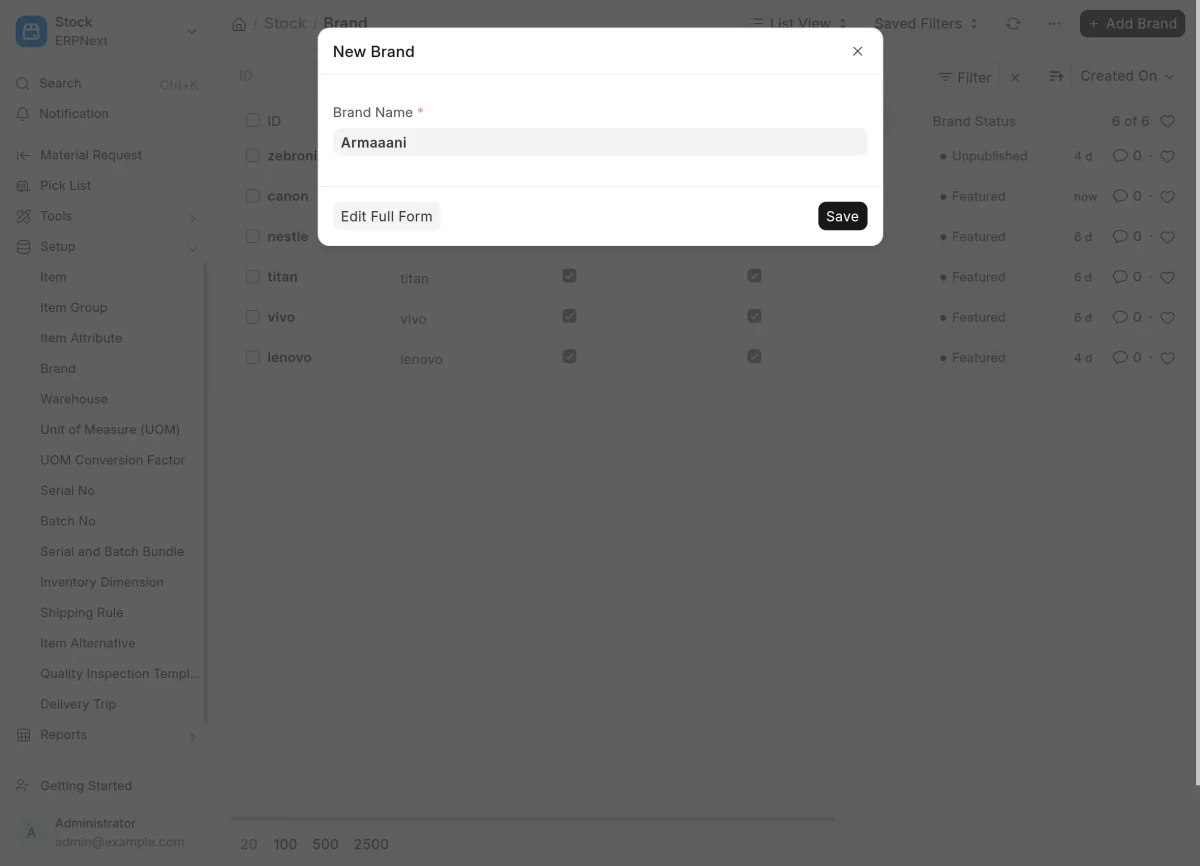
2. After that, click on Brand section to view all the product brands that have been created.
You can also create a new product brand by clicking on Add Product Brand in the top-right corner of the page.

Create Product Brand
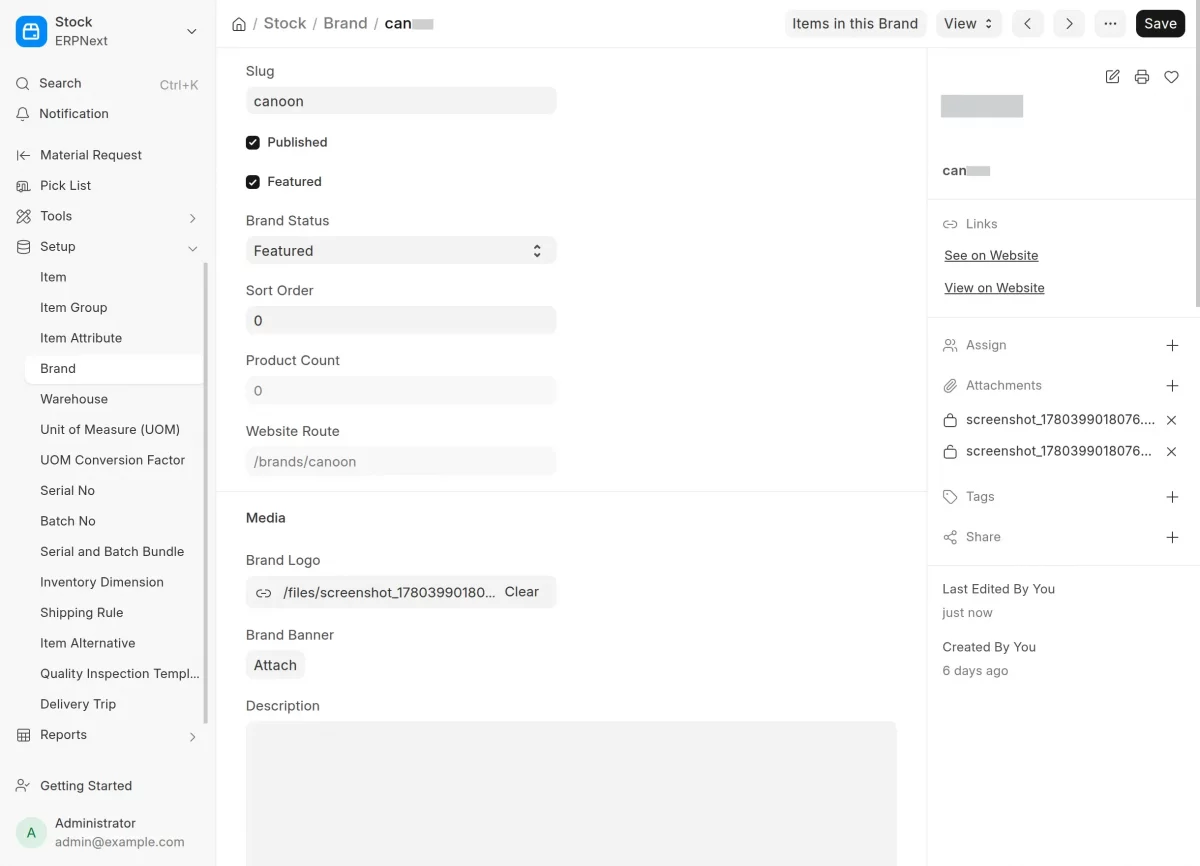
3. After clicking on Add Product Brand, a new form will appear where you can enter the name of the brand you want to create.
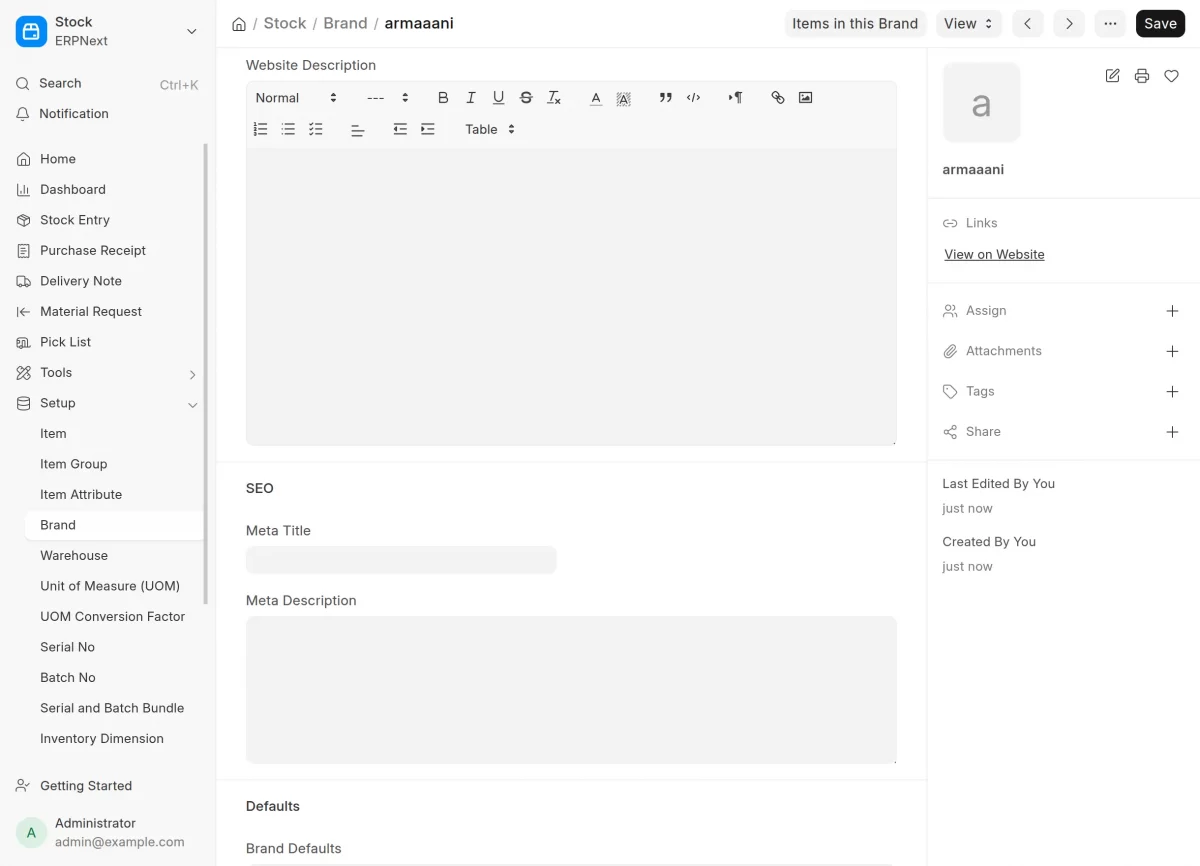
Fill in the required fields such as Brand Name, Slug, Brand Status, Brand Logo, Brand Banner, Description, Website Description, and SEO information including Meta Title and Meta Description.
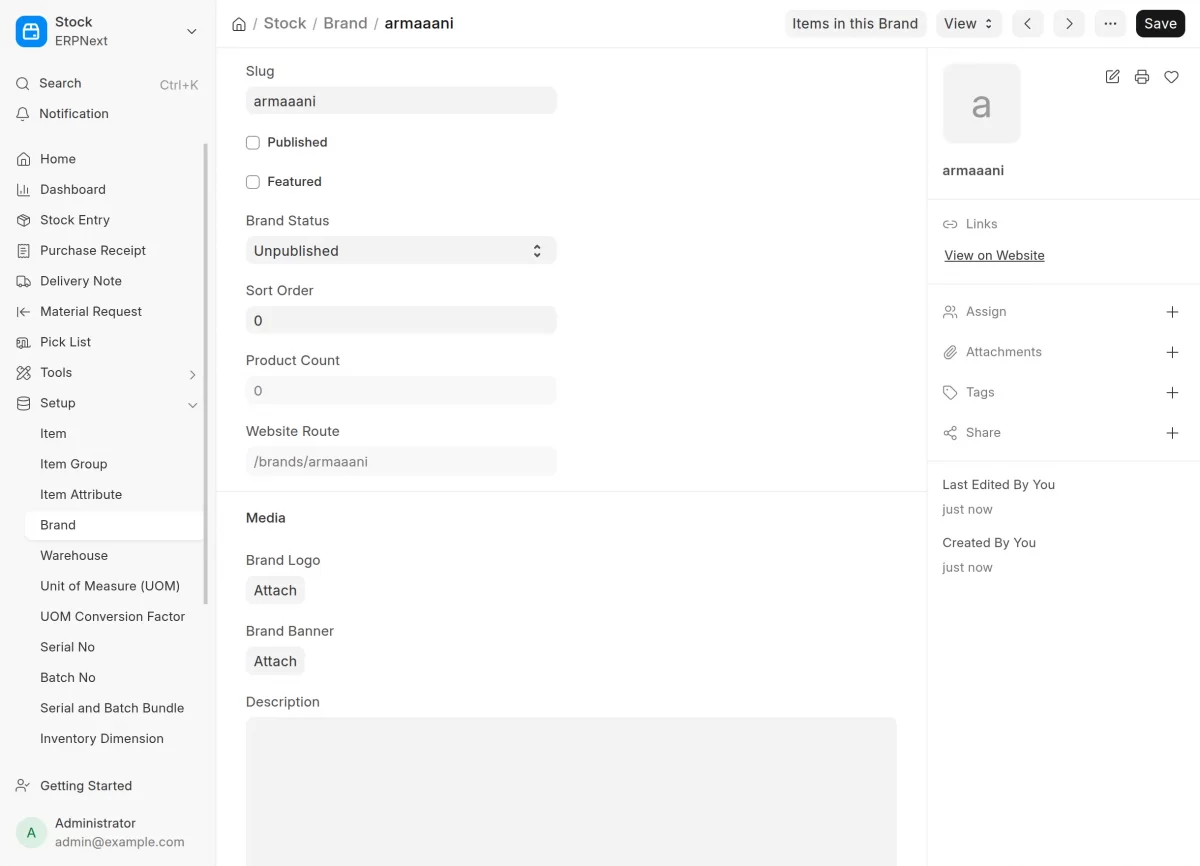
4. If you have already created a brand, you can select it from the Brand list and click on it to view and manage all the information related to that brand.
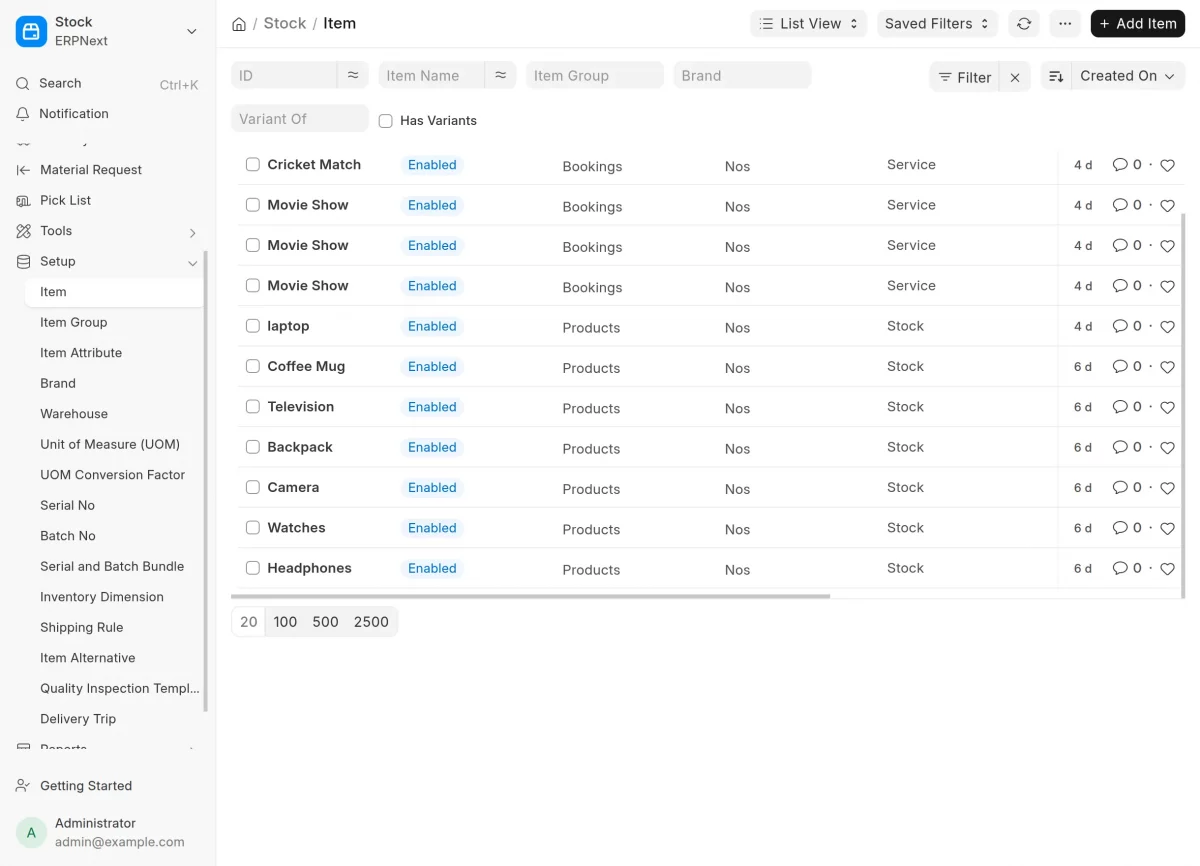
5. Next, click on Items from the main dashboard to view all your products. Here, you can click on any item to view its details and manage the associated information.
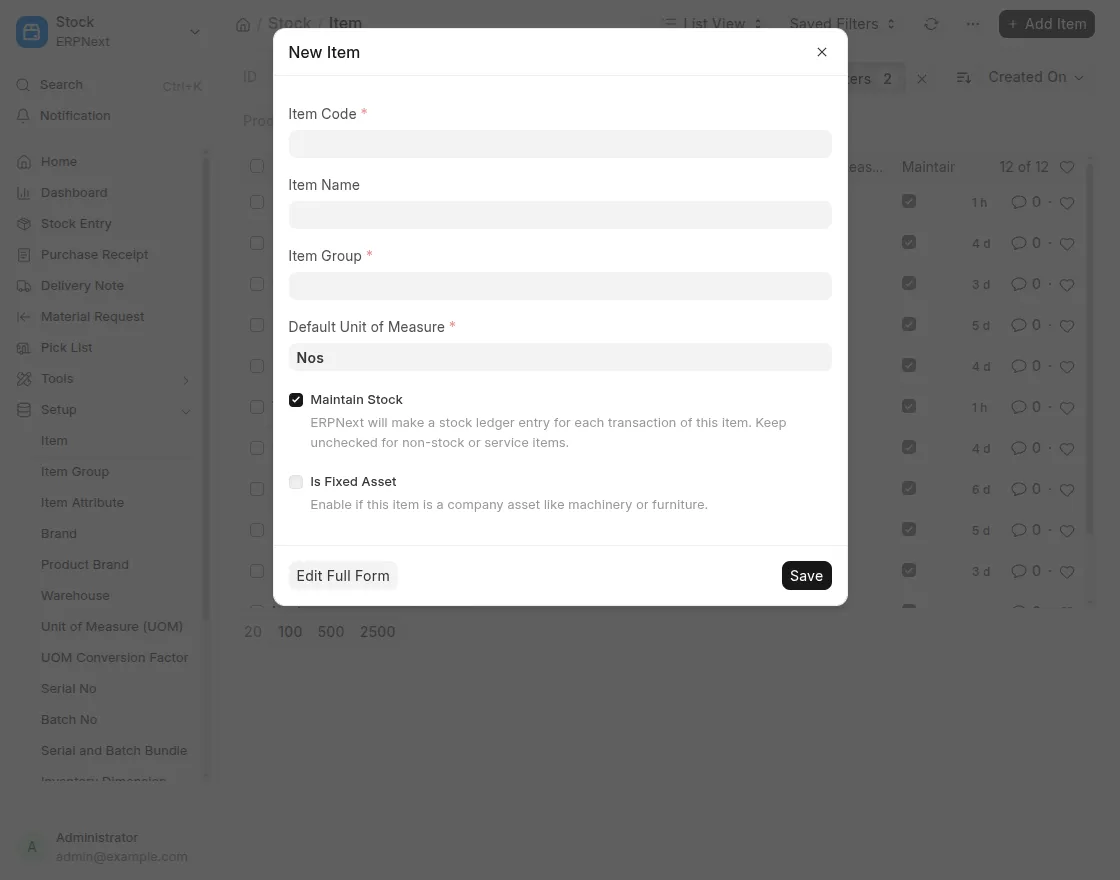
6. After clicking on Add Item, a new form will appear where you need to fill in the required details such as Item Code, Item Name, Item Group, and Default Unit of Measure.
Once all the required information is entered, click Save to create the item successfully.
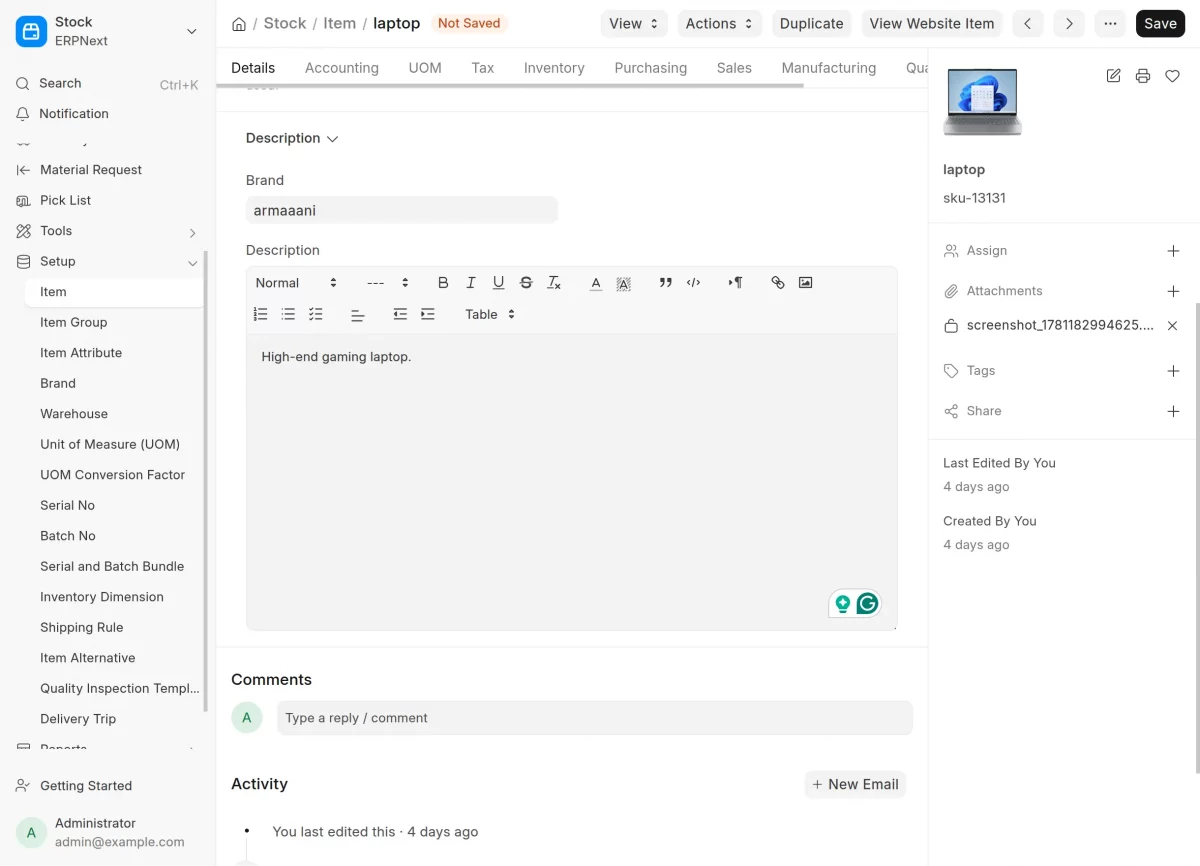
7. After adding the item successfully, open the item record to complete its details. Then, fill in the Brand and Item Description fields.
Once all the required information is added, click Save to update the item.
Website Items
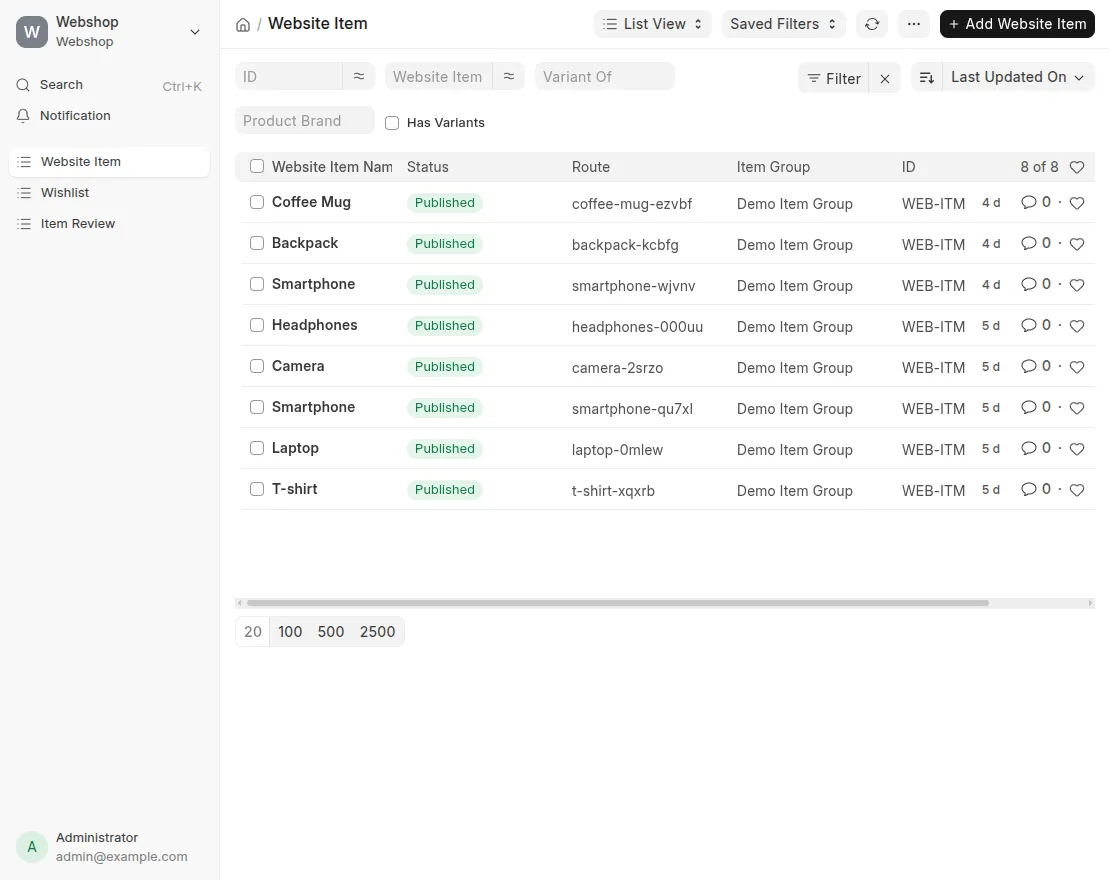
8. Now, click on Website Item from the main dashboard to access the list of website items.
From this list, you can select any website item to view its details.
To create a new website item, click on Add Website Item in the top-right corner of the page.(same)
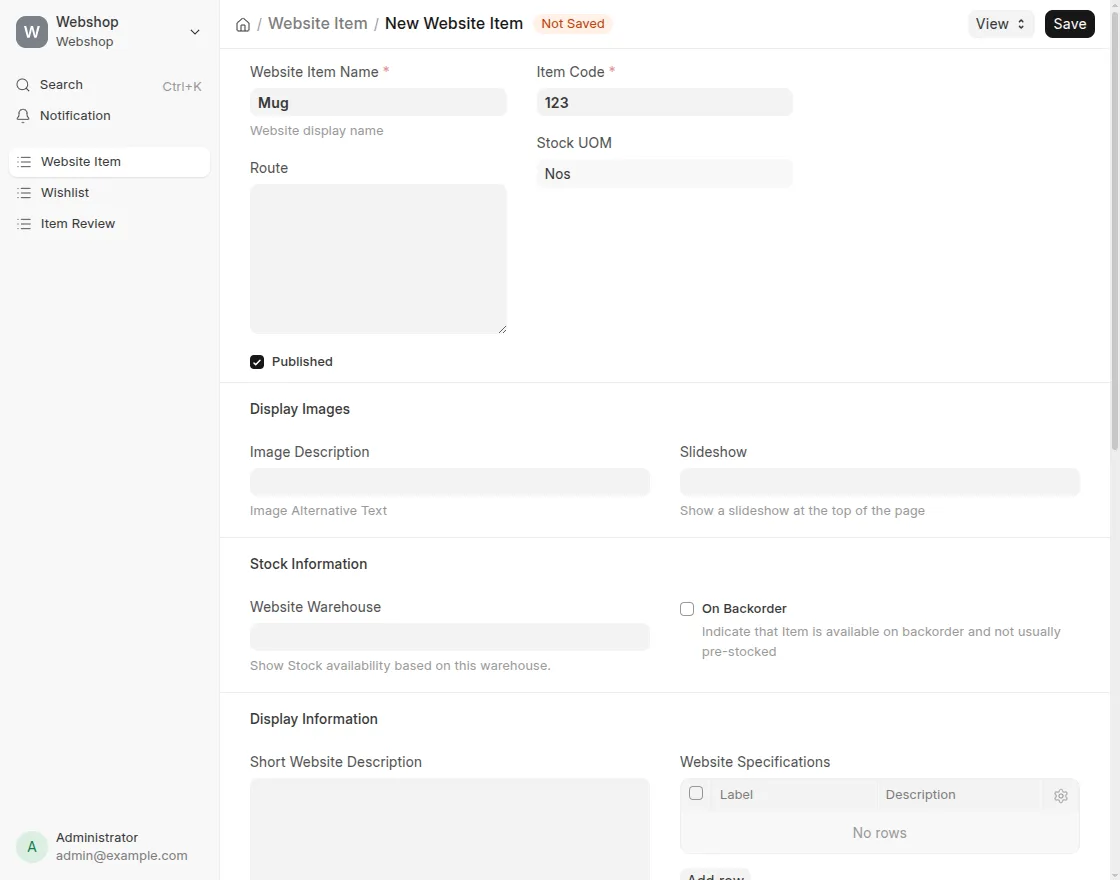
9. To create a new Website Item, fill in the required details such as Item Name and Code, Display Images, Stock and Display Information, and Website Description.
You can also configure additional settings such as Display Additional Information, Recommended Items, and etc.
Then click Save to create the Website Item successfully.

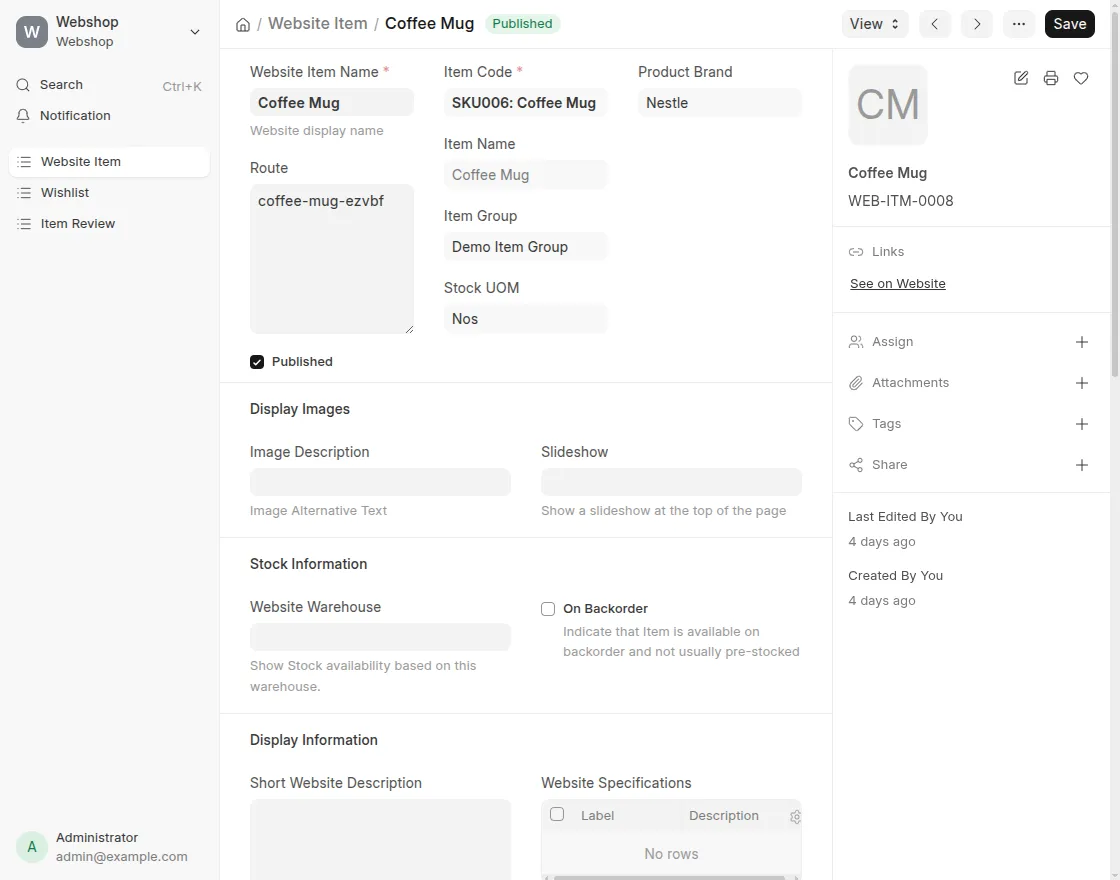
10. To view an existing Website Item, select any item from the Website Item list and open it to access all its details and information.
From here, you can also update and manage the item information as required.
Webshop After Applying Brand-Related Information
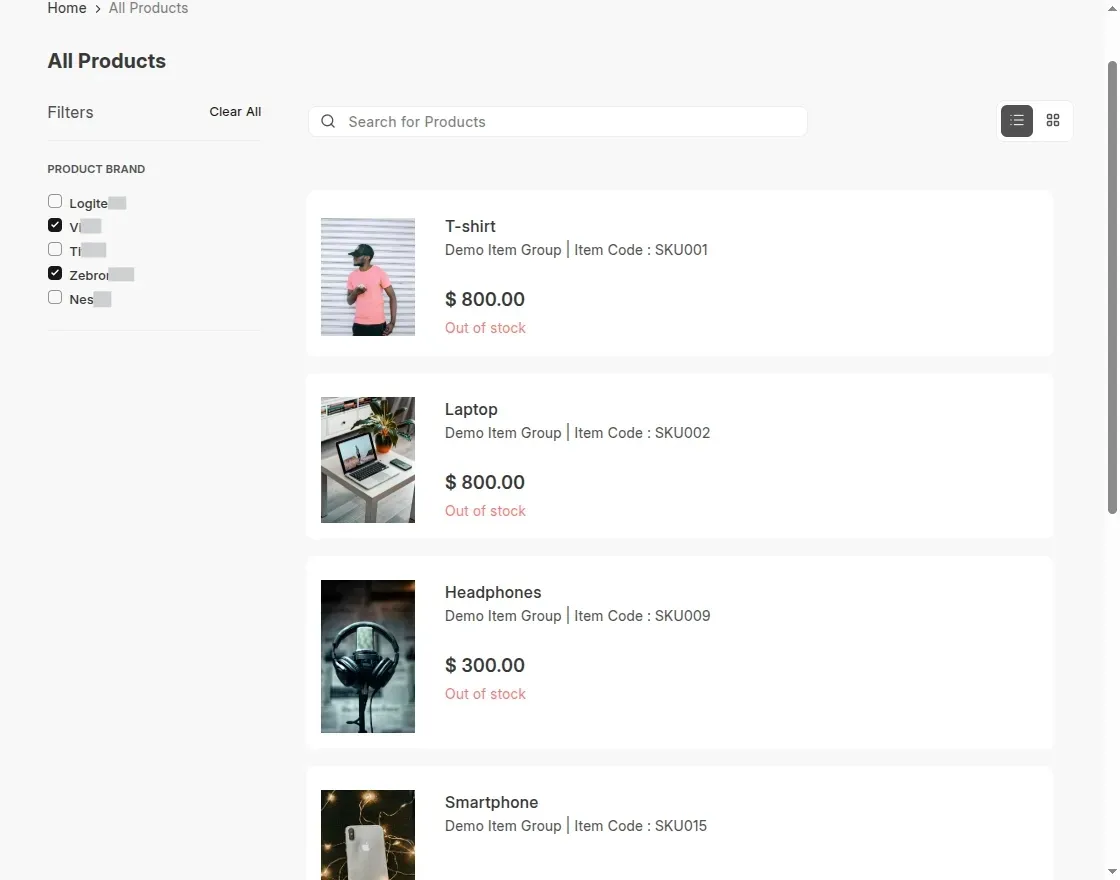
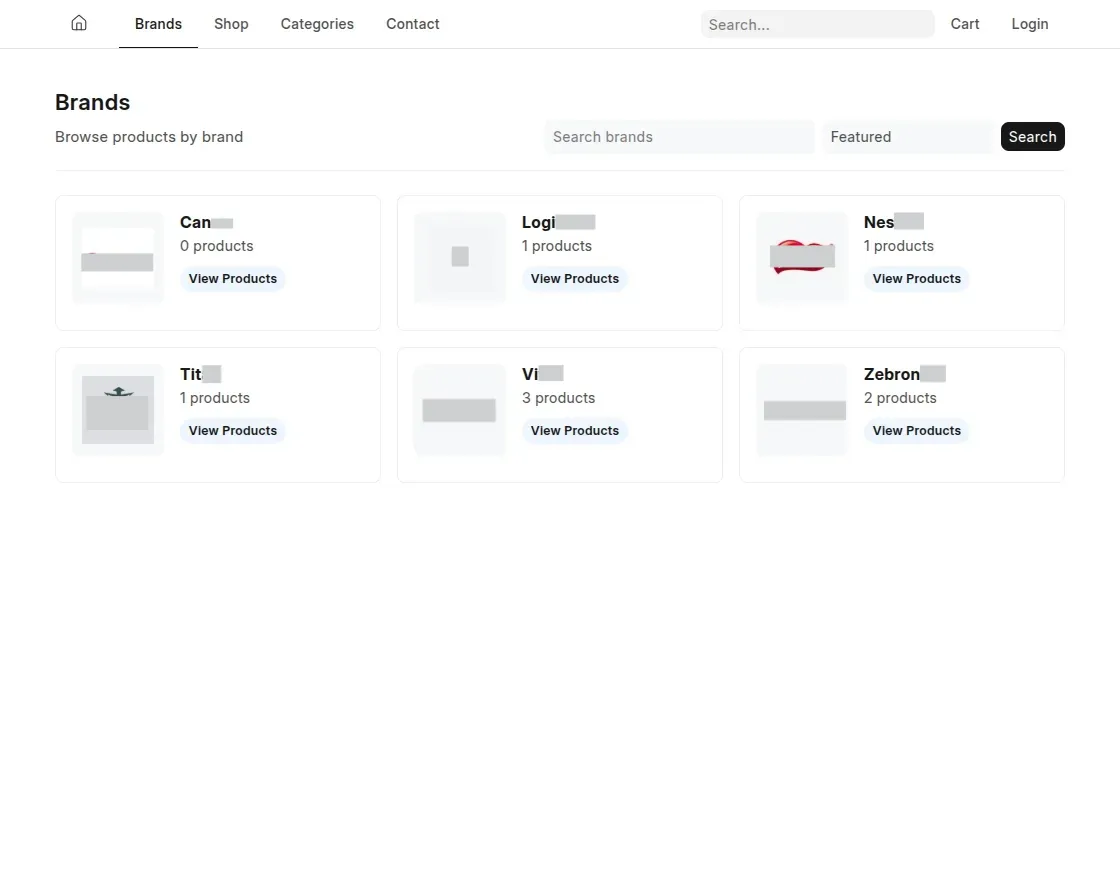
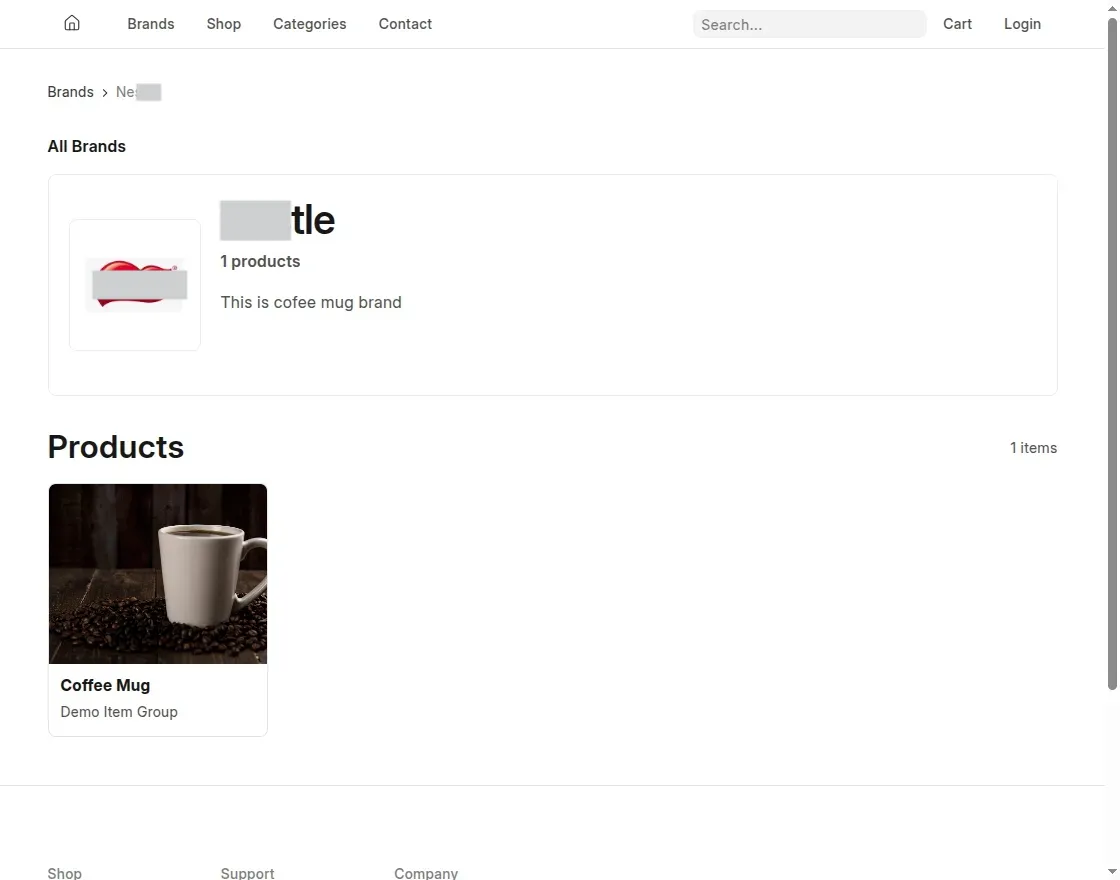
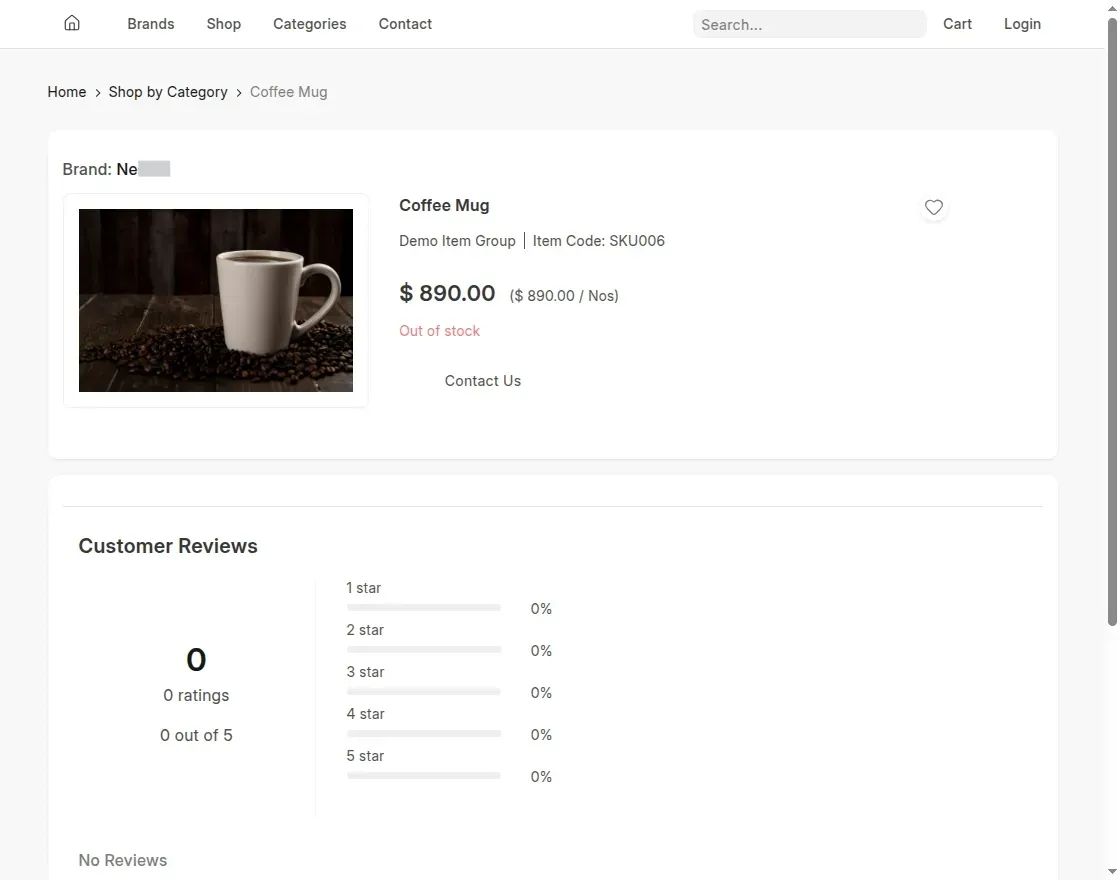
11. View the changes on website after all the configuration and brand creation: –
- Product-based filtering
- Dedicated brand page
- Brand page
- Product page
Need Help?
Hope you find guide helpful! Please feel free to share your feedback in the comments below.
If you still have any issues/queries, please create a ticket at the UV Desk.
I hope this helps. In case of any further queries, contact us at our support mail.
Thanks for paying attention!!
Current Product Version - 0.0.1
Supported Framework Version - ERPNext V16

Be the first to comment.