Magento 2 Multi Vendor Tax Manager Marketplace Add-on allows the seller to manage the tax from their end.
Using this Multi Vendor Tax Manager module sellers can add new tax rates, tax classes, and tax rules. With the help of this module, sellers can add tax according to their needs.
Please Note – This Multi Vendor Tax Manager module is an add-on to the Magento 2 Marketplace Module. To use this module you must have installed the first Magento 2 Marketplace Module.
Check the workflow of the tax manager at the storefront in the video mentioned below. –
Features
- The admin can enable/disable the tax manager from the seller panel.
- The admin can create tax rules for sellers.
- Amin can create a product tax class for sellers.
- The admin can set customer tax class for sellers to create tax rules.
- The admin can see the tax amount on the seller products order in a separate grid.
- The sellers can create tax rules, product tax classes, and tax rates of his own.
- Product tax classes created by the seller will be used on product creation form.
- The seller can also filter any of the already created tax rules using the various available filters. Such as name, customer tax class, product tax class, tax rate, priority, sub-total only, and sort order.
- Sellers can also filter any of the already created tax rates using the various available filters. Such as tax identifier, country, state/region, zip/post-code, and rate.
- Admin adds Tax Rate for the seller, which will be notified to the seller via e-Mail.
- the admin deletes the Tax Rule for the seller, which will be notified to the seller via e-Mail.
- The admin adds product tax class for the seller, which will be notified to the seller via e-Mail.
- The seller will get an e-mail notification whenever the admin updates the tax rate for the seller.
- This extension is compatible with the Hyva Theme.
- This extension supports GraphQL.
Installation
Customers will get a zip folder and they have to extract the contents of this zip folder on their system.
The extracted folder has an src folder, inside the src folder you have the app folder. You need to transfer this app folder into the Magento 2 root directory on the server as shown below.

Thus, after the successful installation, you have to run these commands in the Magento 2 root directory:
php bin/magento setup:upgrade
php bin/magento setup:di:compile
php bin/magento setup:static-content:deploy
php bin/magento indexer:reindex
php bin/magento cache:flush
Thus, in this way, the admin can install the module.
Configuration For Multi-lingual Support
For multilingual support, the admin will navigate through Store->Configuration->General ->Locale Options.
And select the locale as German (the language into which admin want to translate his store content).

Module – Translation
If a user wants to translate their module from English to German. Then they need to follow the path app/code/Webkul/MpSellerTaxManager/i18n.
In their unzipped folder and will get a CSV file with name “en_US.csv”. Now they will rename that CSV as “de_DE.csv”. And translate all right side content after the comma in the German language.
Thus, after editing the CSV, save it and then upload it to the path app/code/Webkul/MpSellerTaxManager/i18n.
Where they have installed Magento 2 on the server. The module will get translated into the German Language. It supports both RTL and LTR languages.


The user can edit the CSV like the image below.

Module – Configuration
Thus, after the successful installation of Magento 2 Multi Vendor Tax Manager, you will find the configuration settings under ->Stores->Configuration->Seller Tax Manager.
Here admin can enable or disable the module can set the allowed Customer Tax class for the Seller.
Marketplace Seller Tax Email:
- Tax Rate Added Mail to Seller – When the admin add Tax Rate for the seller then the seller get notified via email.
- Tax Rule Deleted Mail to Seller – When the admin delete Tax Rule for the seller then the seller get notified via email.
- Product Tax Class Added Mail to Seller –When the admin add product Tax class for the seller then the seller get notified via email.
- Tax Rate Update Mail To Seller – The seller will get e-mail notification whenever the admin update tax rate for seller.

Management – Vendor End
Thus, after the successful installation of Magento 2 Multi Vendor Tax Manager. The sellers can find the Tax Manager tab under Marketplace menu as shown below in the screenshot.

Tax Rates
The seller can add new tax rates by clicking on the Add New Tax Rate. However, from here, the seller can also filter any of the already created tax rates.
Using the various available filters like – Tax Identifier, Country, State/Region, Zip/Post-Code, and Rate.
Thus, after clicking the add new tax rate button, another page will open up where the seller can define the tax rates. After entering all the values the seller will save the tax rate.
Here seller can select the zip Range from and to for the states if the checkbox option Zip/Post Is Range is checked.

Zip/ Post-Code Field – In this field, you can enter the expression that will work as explained below.
Enter “*” that matches any zip code, ” xyz* ” that matches any zip code that begins with ” xyz “, and ” *xyz ” that matches any zip code that ends with an ” xyz “.
Eg: If you want to select zip codes starting with 190 just write 190*.
To select zip codes ending with 190 just write *190 and for selecting all the zip codes write ” * ” as shown below in the screenshot.

Edit Tax Rate
To edit a tax rate just click on the tax rate to edit it as shown below.
thus, after clicking on the tax rate you can see the edit tax rate page where you can make changes to the tax rate and then click save to save the changes as shown below.

Tax Rules
Sellers can add a new Tax Rule by clicking Add New Tax Rule.
Here, they can also filter existing rules by Name, Customer Tax Class, Product Tax Class, Tax Rate, Priority, Sub‑Total Only, and Sort Order.
Thus, after clicking on the Add New Tax Rule button, another page will open where the seller can create new tax rules as shown below.

Add New Tax Rate
Sellers can also click the Add New Tax Rate button on the same page to add a new tax rate. Thus, after clicking the add new tax rate button, new Tax Rate Creation form will open up as shown below.

To edit a Tax Rule just click anywhere on the tax rule as shown below.
After clicking on the tax rule to edit, another page will open up where the seller can edit the tax rule. After an edit, you can click save button as shown below.

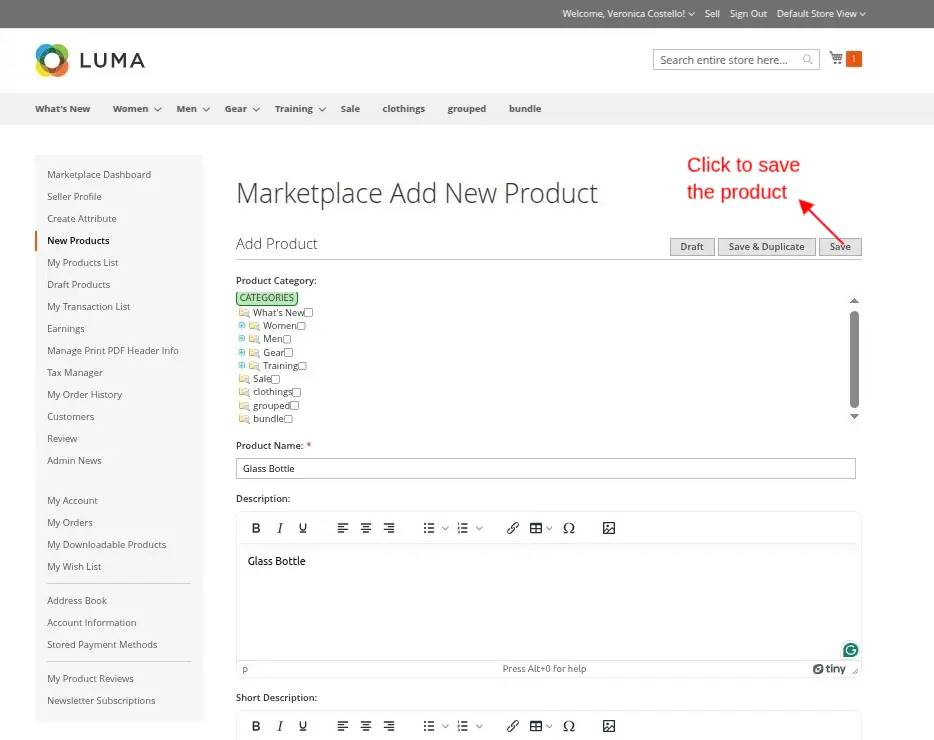
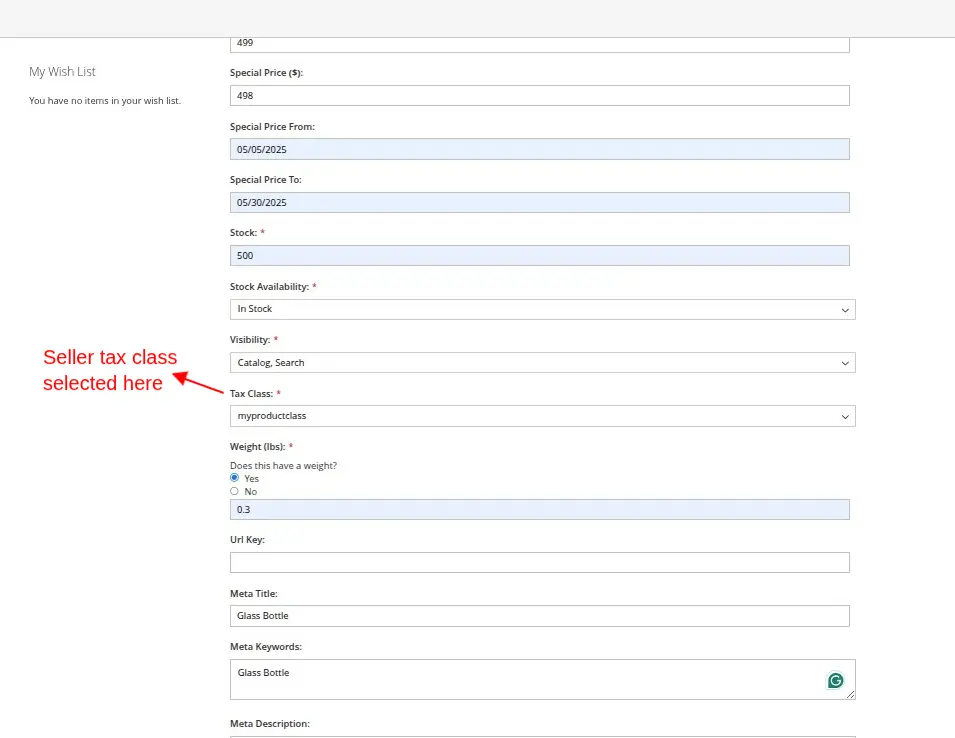
Now the seller can select the product Tax class created above while adding a new product under the Tax Class option on the add new product page as shown below.
- When buyer will place an order for seller product, he can see the Tax Amount under checkout page which has been added by the seller as shown below in the screenshot.

Management – Admin End
After installing the extension, go to Marketplace Management in the admin panel. You’ll see two new menu items: Order Tax Details and Seller Tax Rules, as shown in the screenshot.

Magento 2 Multi-Vendor Tax Manager -Order Tax Details
Admin can see the Seller Order Tax Details for all the sellers of the marketplace under this section.
The admin can see all the details that include – Seller, order, and product details along with the tax amount.

Multi Vendor Tax Manager – Seller Tax Rules
The admin can edit seller tax rules and add new tax rates, add new product class for the selected seller.
Tax Rates and Product Classes already created by the seller will be shown and admin can delete the already created rules and classes also. After that click the save button to save the changes made.

The Admin can also Create Seller-wise – New Tax Rules for the sellers in his marketplace by clicking the Add New Tax Rule button as shown below.

Here, the admin can select the seller from the drop-down selection, soon after Tax Rates and Product Tax Classes of the selected seller show up automatically.
Admin can edit or delete any of the Tax rates and Product classes and create new tax rates & product Classes for the seller as shown below.
Email Notification
The seller will get an email notification when Admin will add the tax rate for the seller.

Seller will get an email notification when the admin will update the tax rate for the seller.

The seller will be notified via email when the admin will add a new product tax class for the seller.

The seller will be notified via email when the admin deletes the tax rule.

*Note – If the admin will assign the product to the seller then the admin has to select a product tax class otherwise tax is not applicable to the seller’s product.
The admin can select the seller tax class for products and assign the product to the seller under Catalog -> Products

Afterward, The admin can assign the product to the seller as seen in the screenshot given below.

Magento 2 Multi-Vendor Tax Manager – Order placed
The customer can see tax details as well as additional instructions in the order view section of their My Account section after the order is successfully placed as seen in the screenshot given below.

Apart from this, the admin can also see the tax details and other additional information related to the order under the Sales -> Order -> Order view as seen in the screenshot given below.

Thus, that is all for the Marketplace Multi Vendor Tax Manager For Magento 2. Still, have any issues feel free to add a ticket and let us know your views to make the module better at HelpDesk Support.
Current Product Version - 5.0.5
Supported Framework Version - Magento 2.0.x, 2.1.x, 2.2.x,2.3.x, 2.4.x

Be the first to comment.