WordPress WooCommerce Web Push Notification Plugin allows the admin to send browser push notification messages to its existing users.
Web push notifications are clickable messages that are sent by a website to its subscriber’s browsers.
They work very similarly to mobile app push notifications. (notifications sent by a mobile app that land in your notification tray).
Except that they work on websites instead of apps and can be accessed on all devices (desktop, mobile, tablet, etc).
Also, the Web push notification is an important channel for E-commerce since it gives websites the power of instant communication to the subscriber.
And that too on all devices, whether it is desktop mobile, or tablet.
Note: Compatible with Mozilla Firefox and Google Chrome web browsers and SSL certification is required for the website.
We provide a production version of the plugin. If you want a development version then you can get it at an additional cost. Please contact [email protected] for it.
Support
Dear Customers, if you have a question/query, please raise a ticket at webkul.uvdesk.com. We will do our best to answer as quickly as it is possible.
Don’t give us a low rate without contacting support on the issue you’ve faced with. We are always happy to help you.
Features
- There is no monthly subscription required to notify customers.
- No limitation on the number of subscribing users.
- Admin can remove any subscribed user.
- A custom icon and redirect URL is added with the push notification.
Installation
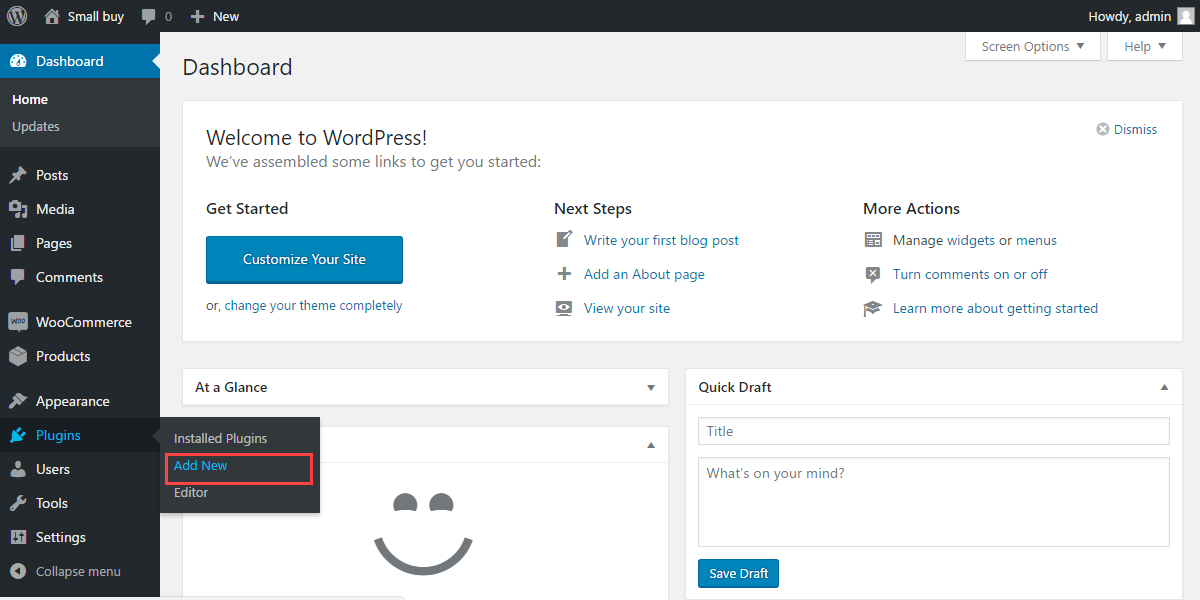
The user will get a zip file. Which he has to upload in the “Add New” menu option in the WordPress admin panel.
For this login to WordPress Admin Panel. Under the Dashboard hover your mouse over the “Plugins” menu option which brings out a Sub-Menu and then select the “Add New” option.
After this, you will see an option on the top of your page that is “Upload Plugin”, click the option to upload the zip file.

After clicking on the “Upload Plugin” option, below that you will see a button “Choose File” click on the button to browse for the zip file as per the snapshot below.

Now browse the file, and click the “Install Now” button to install the plugin as per the snapshot.

Now when the plugin is installed correctly, you will see the success message and an option to activate the plugin. Click on “Activate Plugin” to activate the installed plugin.

Thus, in this way, you can install the module.
Module Translation
To know how to translate the module, you can click here.
Creating Firebase Project Credentials
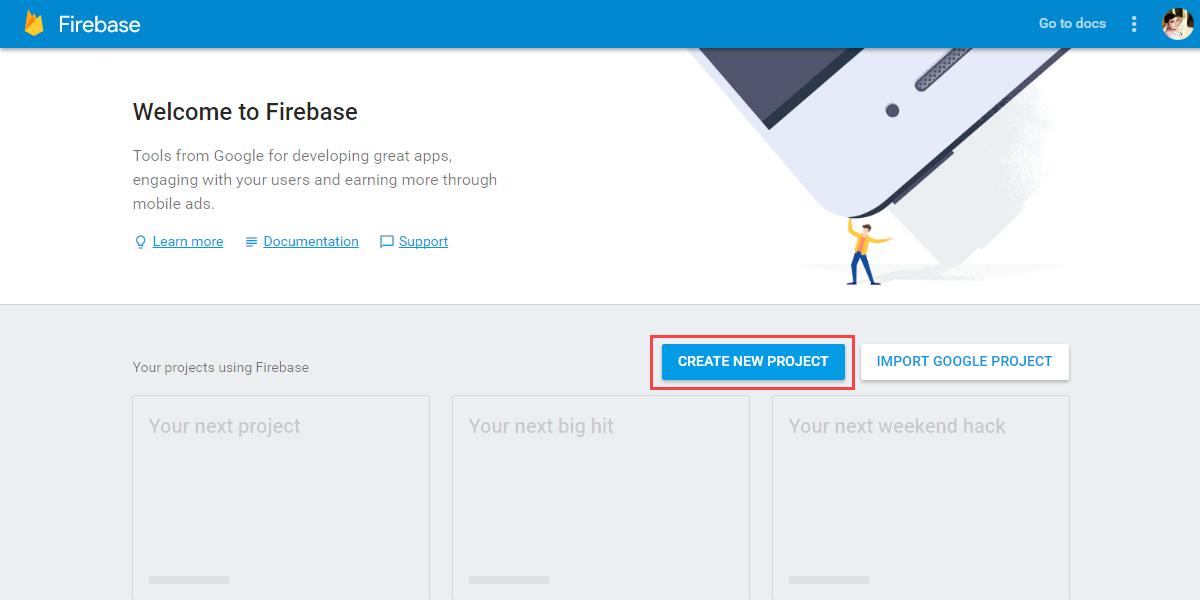
To use this plugin, you must have Firebase Project Credentials. Firebase Project Credentials are required to configure this plugin. Please click here to create a new project with your Gmail account.
1. After opening the Firebase page. Please click the “CREATE NEW PROJECT” button as shown in the below screenshot.
2. A small pop-up window will appear with the name Create a project. Here you have to enter your Project Name and then select your Country/Region.

3. Once the details are filled click the “CREATE PROJECT” button.
4. After creating your new project click the Settings menu icon. And then select the “Project Settings” option. A new Settings page will open as displayed below.

5. After entering the Settings page, you will find your Project ID and Web API Key. Copy and save your Project ID and Web API Key as displayed below.

6. Now, click the “CLOUD MESSAGING” tab. From here you will find your Project Credentials. Copy and save your Server Key and Sender ID as displayed below.

From here you will find all the details and credentials to configure WordPress Woocommerce Web Push Notification plugin.
Configuration
Admin can configure this plugin with the help of collected credentials under “WooCommerce Push Notification-> Configuration”.
Here, the admin needs to enable the status of the plugin and then enter all the credentials that are collected from Firebase as per the below image.
After that admin can configure auto notification options under “WooCommerce Push Notifications > Options.” 
Here admin can select check boxes as per the requirement.
Can check “A new product is published” to auto-notify subscribers of every new product.
Check “A new blog is published” to auto-notify subscribers of every new blog.
“A new blog is published” to auto-notify subscribers for every new page.
Admin-end Workflow
The admin can create a new notification under “WooCommerce Push Notification-> New notification” as per the below image.

Also, the admin can view a list of all subscribers under “WooCommerce Push Notifications > Subscribers” as in the below image.

Admin can view notification history under “WooCommerce Push Notifications > Notification History” as in the below image.

For any support and services required for the plugin, the admin can check the Support & Services section.
Services:

Support:

Subscriber-end Workflow
When a new user visits the website for the first time, then he/she can subscribe for notifications through a pop-up message on top of their browser window.
Moreover, this pop-up message will ask users to show notifications from your website. The users will have to click either the Allow or Block option.
A user can also change the permissions of notifications as per the below image.

Also, the user gets notified of the new notifications on the website as shown in the below image.

Thus, that’s all for the WordPress WooCommerce Web Push Notification Plugin. Still, have any issues feel free to add a ticket. And let us know your views to make the plugin better at webkul.uvdesk.com
Current Product Version - 1.1.1
Supported Framework Version - WooCommerce 7.3.x, WooCommerce 4.7.x, WooCommerce 4.6.x, WooCommerce 4.5.x, WooCommerce 4.4.x, WooCommerce 4.3.x, WooCommerce 4.2.x

2 comments
Thank you for your precious response. For further discussions or queries, you can mail us at [email protected].
Regards.