How Does It Work?
Wix Multivendor Marketplace is a software application that would convert your normal store into a Marketplace.
Not only the store admin but sellers can associate with the eCommerce store and sell their products.
As a store admin, you have backend access and control on products, sellers, and sellers’ products.
It also gives an option that, without the admin’s approval seller’s product would not be visible at the front end.
An admin can create seller plans that the seller has to purchase at the time of registration.
After that, a seller can start selling his products.
And the admin will get the commission from each seller based on the seller’s plans.
To install the app follow the following steps –
- Go to your Wix store, then click on Apps >> Manage Apps as shown.
- Now, click on Get More Apps.

- Now, you’ll be redirected to the app market page from where you need to search for “Multi Vendor Marketplace“.
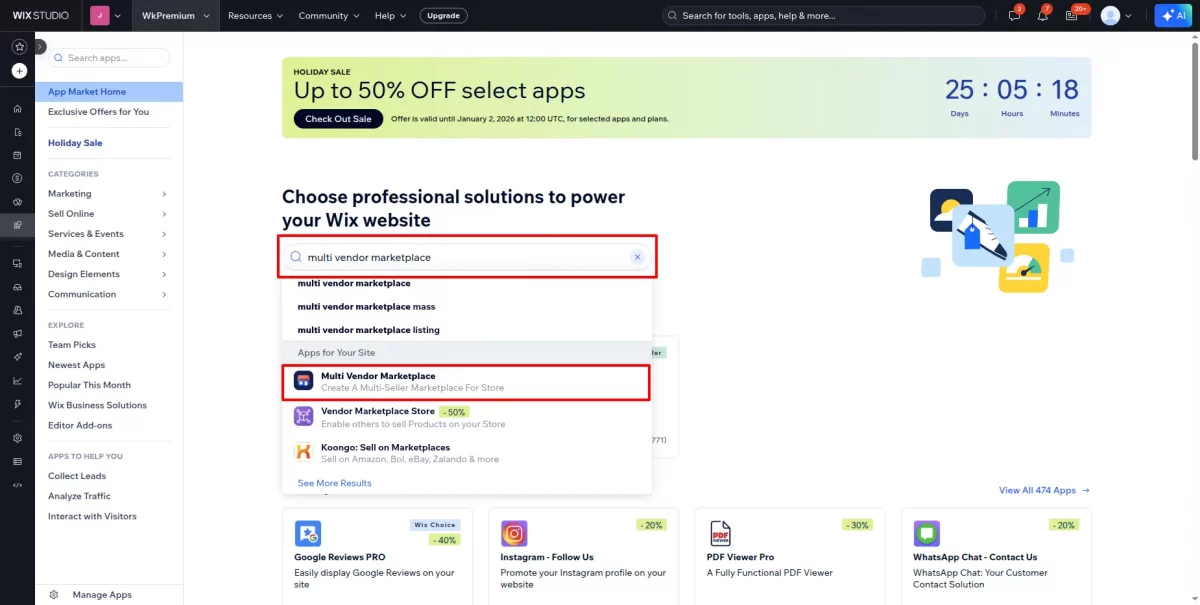
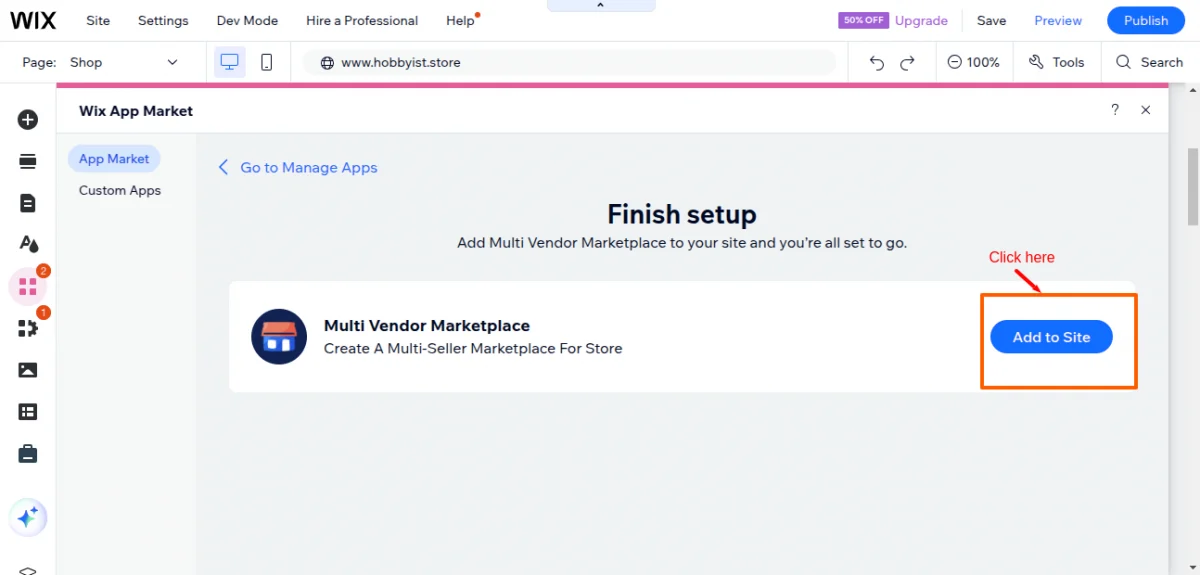
- Click on Add to site button to add the app to your site as below.

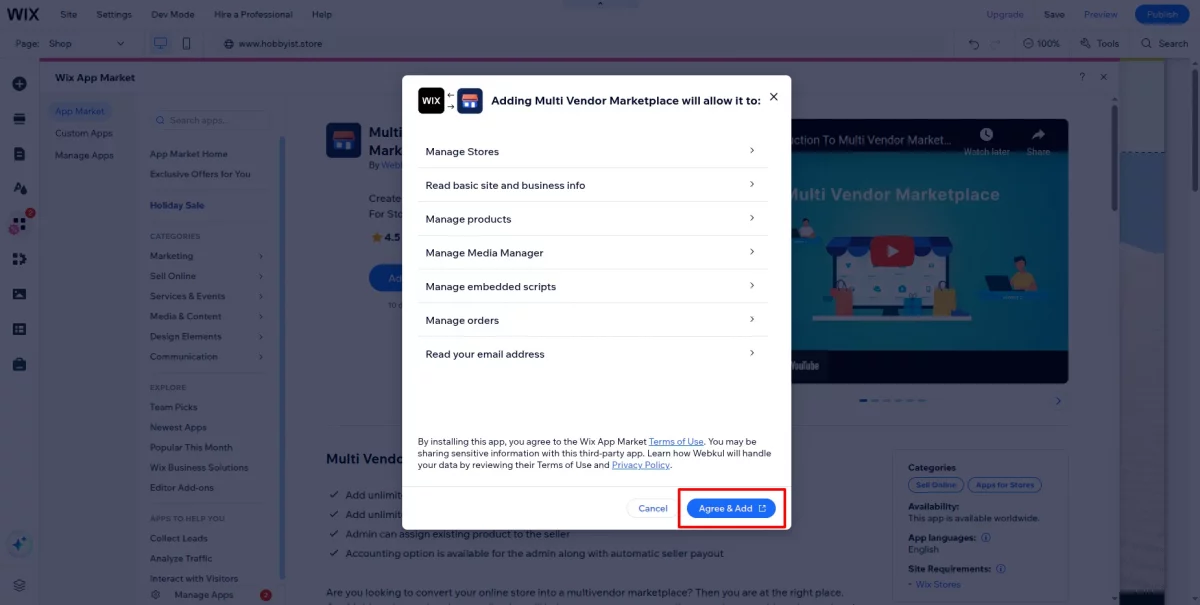
- Click on the “Agree & Add” button.
- Click on the “Add to Site” button again to add the app to your site, as shown below.
- Then, to save the changes, click on publish.

- Note: If you are not redirected to the ‘Finish Setup’ page, please go to App → Manage App and click on ‘Complete Setup’ to finish setting up the app.

- Click on the ” Add to Site” button to add the app to your site, as shown below.
- Then, to save the changes, click on publish.

Plans available for Wix MultiVendor App –
The app has two types of plans which are as follows
1. Yearly Plans

2. Monthly Plans

After the last step of adding the app to the site, the app will get installed on your site.
App Subscription :
In order to Subscribe to the app, you need to go to the Wix Dashboard then Apps >> Manage Apps.
In front of the app, you will see the option to upgrade your subscription, click on the upgrade button, and you are done.

Note: If third-party cookies are blocked, the application will not work. Therefore, please ensure that third-party cookies are enabled to use the application.
Now you need to follow the instructions below –
Admin Panel
1. Dashboard:
This is the dashboard of Wix Multi-Vendor Marketplace.
Here the admin can see all the orders, sales, and monthly avg. sales, commission, and all the other details related to the sellers of the marketplace.

2. My Company:
There are two sections in this field:
Company Profile:
An admin can view information about the company or store here, such as the name, store hash, Storefront URL, email address, etc.

Company Settings:
In this section, you can view various settings of the store.
You can also change the settings as per your need from your Wix store end and then click on the sync button to synchronize settings to your marketplace.

3. Transactions:
Once a store owner (admin) has opted for the plan and completed the payment, the invoice will be generated.
And in this section, an admin can view the “list of transactions” that will be done for using the multi-vendor marketplace app.

4. Settings :
Setup Instructions :
From the setup instructions, you need to follow the steps that are mentioned here on this page to add the seller registration and seller login page to the website front view.

Once the code will be added according to the instructions the links will be visible to the storefront.
Where the sellers can register/login themselves, the example for seller login has been shown as follows –

The seller registration page will look like this –

The seller login page will look like this –

From the seller registration page, the sellers can select a plan and can register themselves once they will submit the registration form.
Admin will review the profile of the seller and approve it.

Once the profile will get approved by the admin, the seller will get the email with the user name and password to log in.

And then from the login page, the seller can log in.
Note – The payment for the plan will be deducted from the seller’s order amount according to the selected plan by the sellers.
So in this case whenever the orders will come for the seller so before the final payout to the seller through PayPal.
The seller’s plan charge and the admin’s commission will get deducted, And then the remaining payment will get transferred to the seller.
General :
- In general settings, the admin needs to set the details of the Paypal for the payout system i.e., Client id, Secret Key, and also needs to set the mode of the payment as a sandbox or live.
- Admin can enable auto-payment to the seller option so that the payments will be transferred automatically to the seller’s PayPal account for their orders.
Note – The auto payout works on behalf of order status only.
So while setting up the payout system admin needs to set an order status on which the admin wants to transfer the payment automatically to the sellers.
As soon as the admin will change the order status to the particular status from the order section of Wix end the payment will get transferred to the sellers automatically.
After all the settings, click on save to save the settings.

In the second case, if the admin does not wants to automatically transfer the amount.
Then the admin needs to select “No”, and in that case, the admin needs to transfer the account from the manage seller commission section by clicking Pay Now Button as shown in the below screenshots –
Screenshot for the second case –

How to get the client ID and secret key –
To get these credentials, go to your PayPal account dashboard. Now click on My Apps & credentials, here you will get the client ID and secret key for both sandbox and live mode as shown below –

To create the credentials, click on Create the app as shown below and enter the required details.


Seller Setting :
The admin can set the settings for the seller end as per the need –

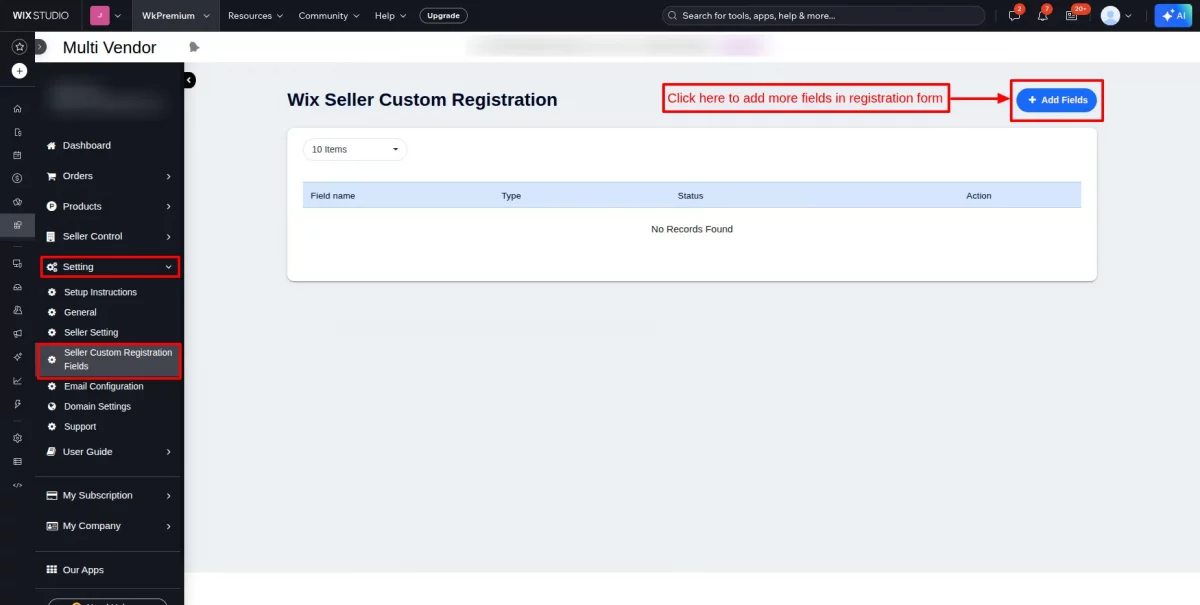
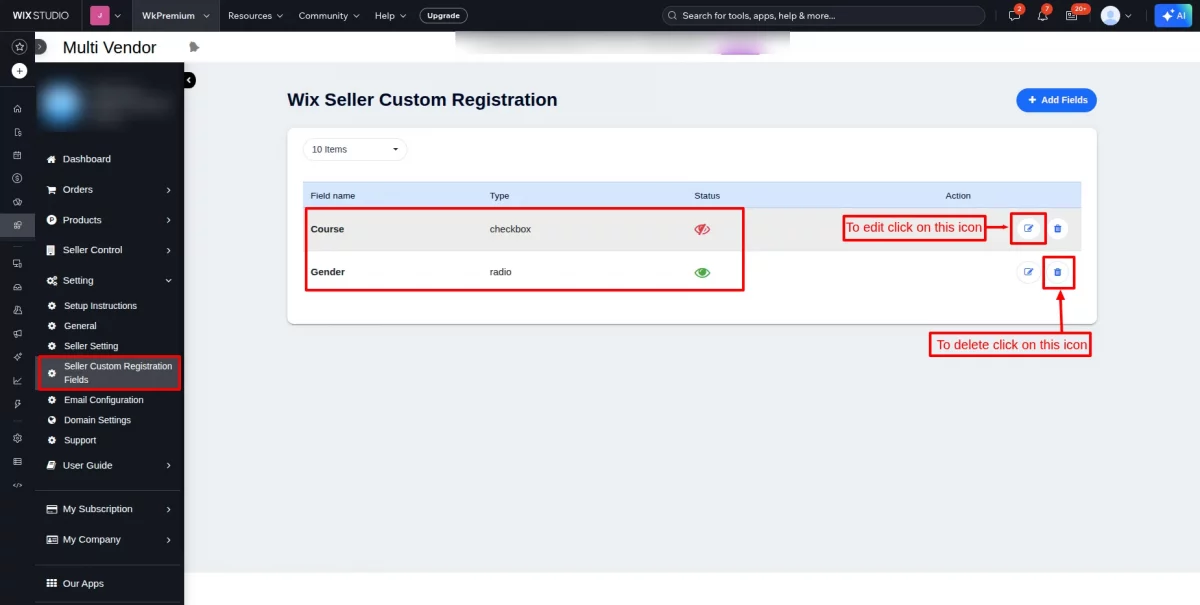
Seller Custom Registration Fields :
Setting << Seller Custom Registration Fields:
Click on “Add fields” to add more fields in the registration form.
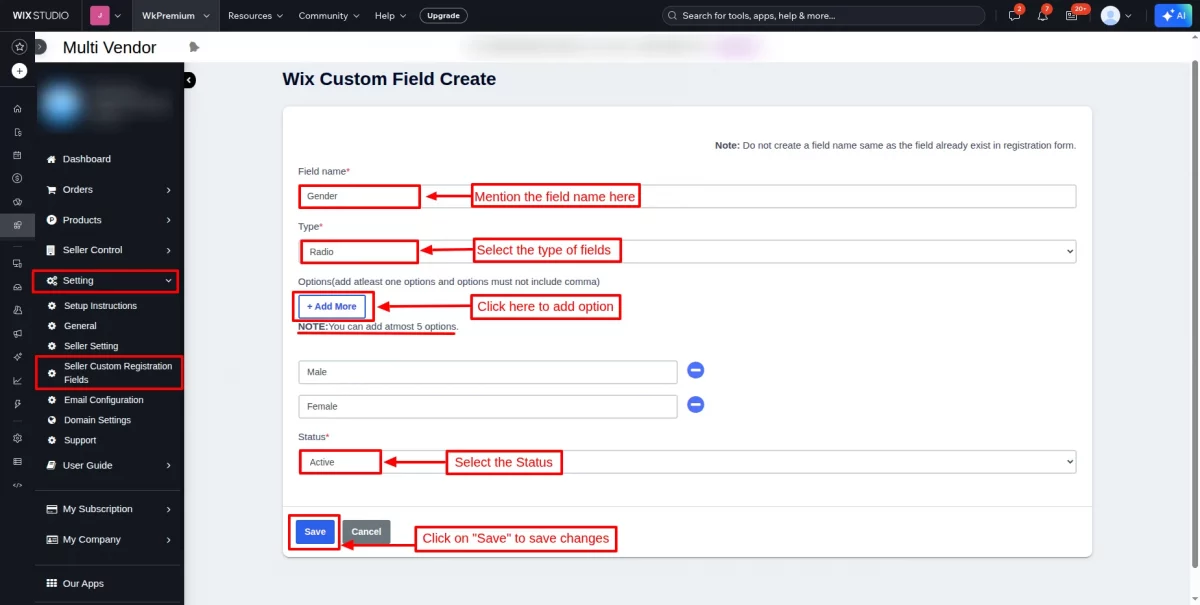
Fill in the required details and click on “Save” to save the changes.
Add fields that look like this, as shown in the screenshot below, active fields with a green eye icon and disabled with a red icon.
Click on the edit icon to edit the fields, and click on the delete icon to delete the fields.
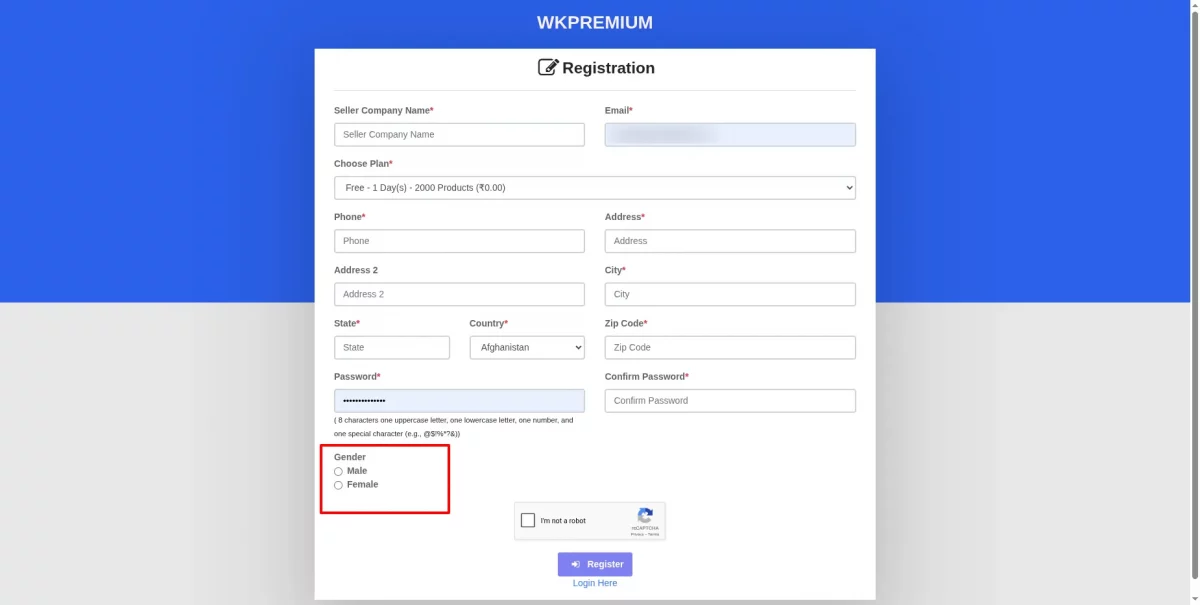
Add fields on storefront:
Email Configuration :
To know how to configure email settings, please visit the user guide and follow the required steps.
Note – The above settings are for Gmail, in case you are using any other email service then contact your email service provider for the following details.

Domain Settings
The functionality of “Domain Mapping” is provided to the admin as per the plan opted.
Note: The Domain mapping feature is only available in the Pro plan and the domain mapping feature is only used for seller registration and seller login URLs.
Imp. Point- Also, you need to provide Webkul with the Wildcard SSL Certificate and the SSL Key of the subdomain that you want to use.
So that an entry can be created by Webkul on the server end of that subdomain.
Once the entry is created by Webkul on the server end for the provided SSL Certificate, the next step will be to map your subdomain with https://wix.webkul.com .
It means you need to create a new cname on DNS.
As shown below,
First, you need to go to the Settings >> Domains

Now click on Manage DNS records

Go to the CNAME section and add a record as shown

When you will add a record you need to add the entries as follows
Host name: test.example.com (your chosen domain)
Value: wix.webkul.com
TTL: 1 Hour
After that, you need to go to the MultiVendor app and then click on Settings >> Domain Mapping to enter the subdomain here –

5. Seller Control:
Seller Companies:
An admin can view the seller’s details like the seller’s name, email Id, seller’s status, and active date. Admin can also update the status of a seller as per need.

An admin can also add a seller from the backend panel by clicking the plus icon. Further, to add a seller you have to fill in the details of a seller and click save.

Seller Plan:
From this section the admin can create different plans based on the number of products sellers can upload and the percentage of commission the admin wants to get from the sellers.
To create a plan click on the plus icon and fill out the details about the plan.

Enter the details required to create a seller plan –


Accounting:
From the accounting section, in the case of manual payment to the seller, an admin can create a “Payout” to send the amount (after deducting his commission) to the seller for the sale of his product.
After completing “Payout” an admin can change the status to “Approved”. Here you can find total sales, commission, total payout, and total withdrawal.
Note – The payout is only created if the admin is paying manually to the sellers because if the admin creates a payout.
If the vendor creates a withdrawal and the admin approves it then the application will consider that payout to the seller has been made manually by the admin, not through the application
So it will reflect the remaining payment only.
The accounting section manages the details of transactions done between the admin and seller. In summary, the admin can view the overall accounting between the admin and the seller.
- Total Sale: This is the total amount of the sale done on the admin’s store.
- Commission: This is the total approved amount of the commission, that admin gets from sellers.
- Total payout: This is the total amount an admin can transfer to a seller, after deducting his own commission.
- Total Withdraw: This is the total amount that a seller requests an admin to pay after an order is completed.

Seller Commission:
In Seller Control >> Seller Commission, the admin will find all the seller commissions.
Which Admin needs to pay to the seller in the seller commission tab, the admin needs to click on the pay now button to pay the seller through Paypal as shown below –
If the admin wants to enable the automatic payout system to pay the sellers then the admin can enable auto-payment to the seller option.
So that the payments will be transferred automatically to the seller’s PayPal account for their orders.
Note – The seller commission will be created after deducting the admin’s commission and the seller plan fee.
And the seller commission will include approved and payment failed entries only from accounting.

Payout Transactions:
The payout transactions include all the transactions made for the seller’s payout.

6. Product:
An admin can add products to his store by clicking plus icon. Further, he can synchronize already existing products and search products through name, price, SKU, and status of products.


Admin/Sellers can apply fixed/percentage discounts on their products.

Product assigned to the seller:
An admin will now be able to allocate a product to a seller directly.
By pressing the “Assign seller” button, an admin can assign a product to a seller. Then, from the dropdown, choose the seller to whom the product you want to be allocated and click assign.


That particular product will get assigned to that seller.
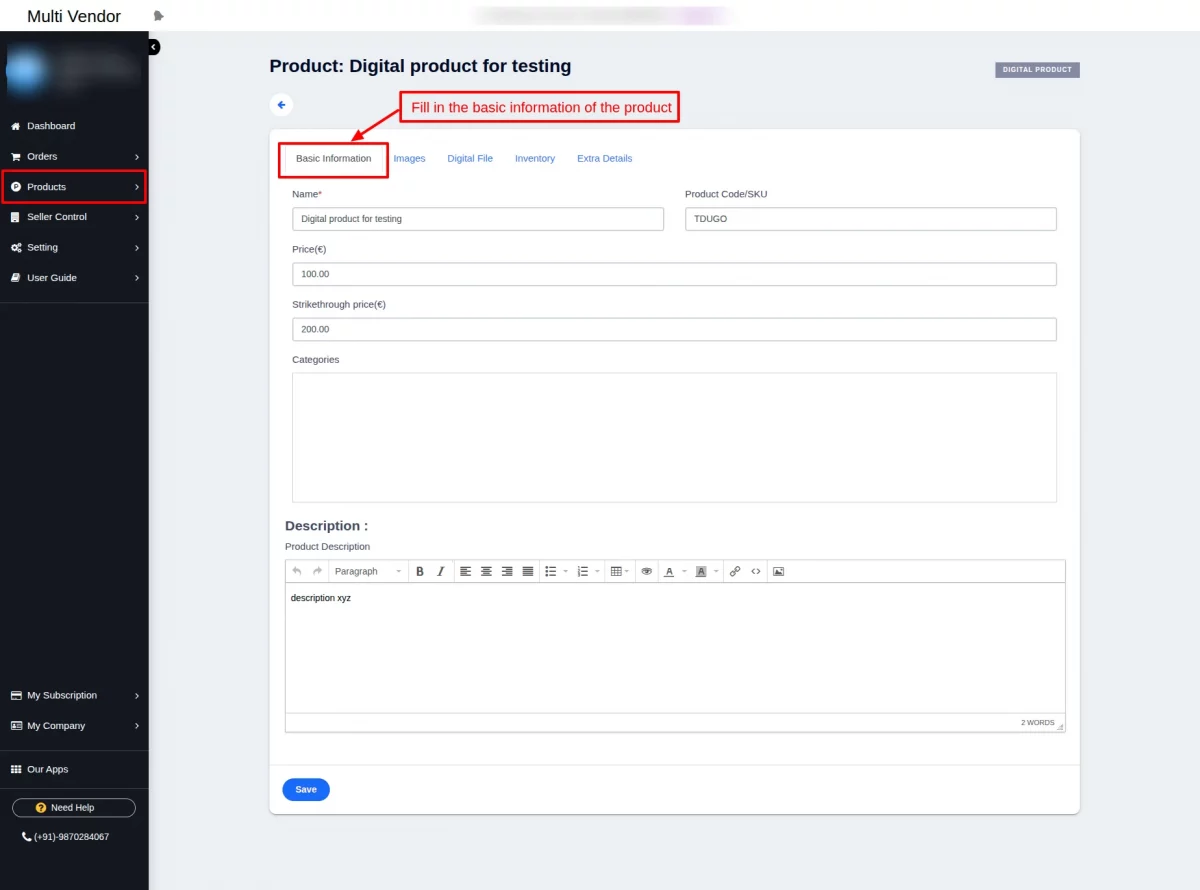
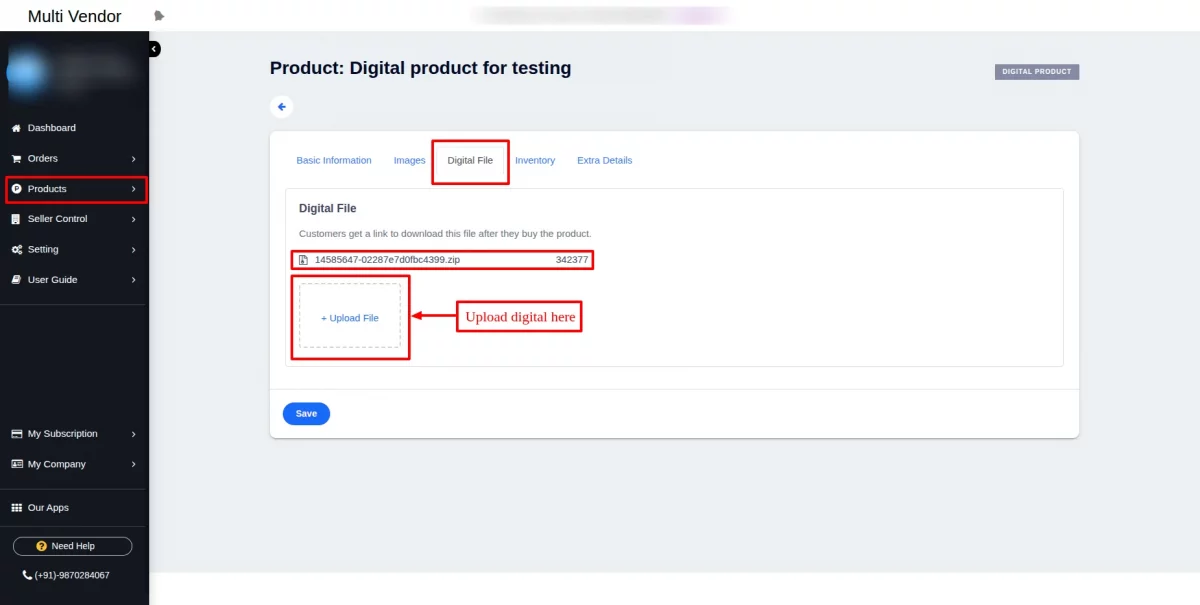
Digital Products:
An admin can add digital products to their store by clicking the plus icon and from the dropdown select Digital Product.
Further, they can synchronize already existing products and search for products by name, price, SKU, and status of products.
Note: Kindly ensure that, for adding digital products, your Wix store is compatible with the V3 catalog.

Fill in all the required information about the product.
Easily drag and drop images of the products.
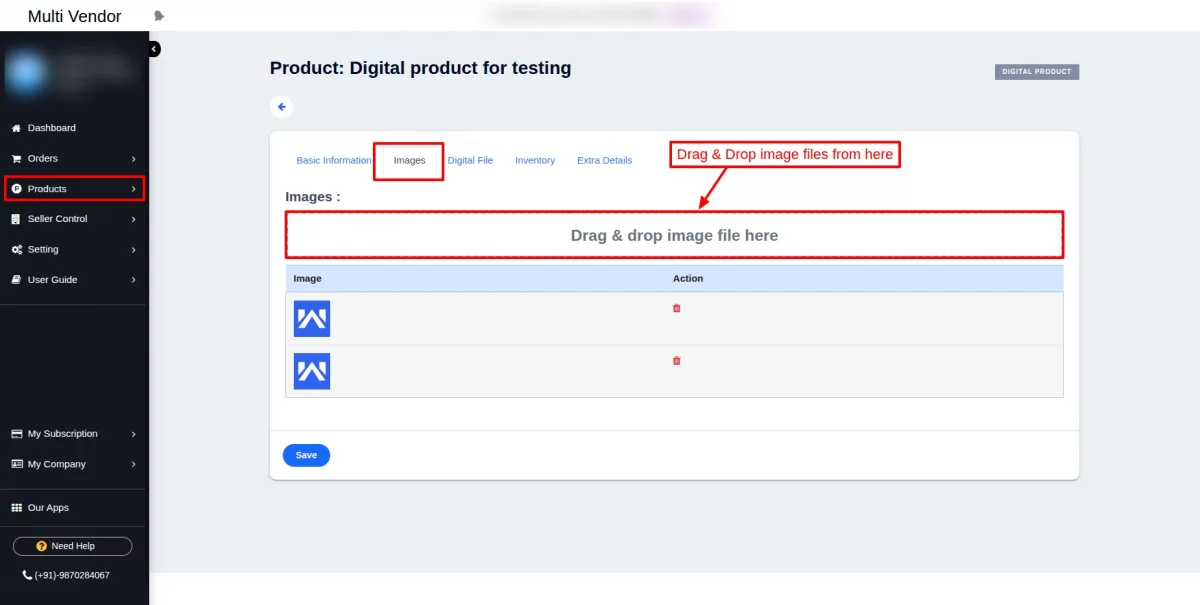
Click on “Upload File” to upload the digital file of the products.
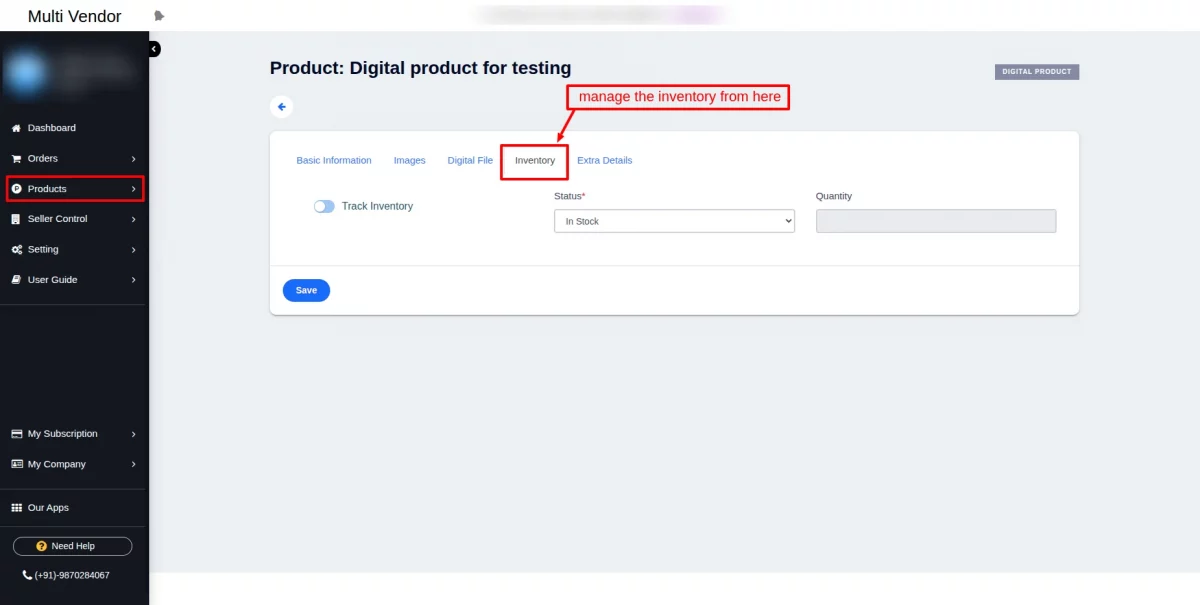
Manage the inventory of the product using the inventory section.
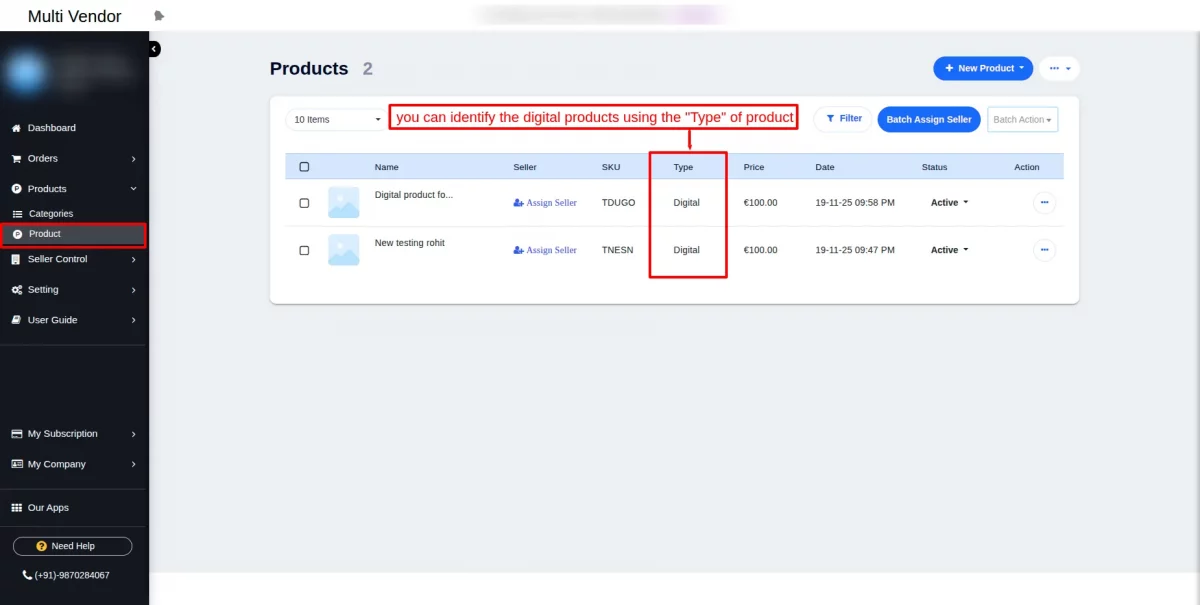
You can easily identify the type of products from “Type” as shown in the screenshot below:
7. Categories :
Admin needs to create the categories on the Wix end and sync the categories to the Multivendor app end.
To sync categories, go to Products >> Click on Categories >> Click on the green button to sync the categories.

After syncing the categories, if the admin wants to allow sellers to upload the products on some selected categories, then kindly follow the steps below:-
Click on Setting >> Click on Seller settings >> Select the categories in seller-allowed categories.

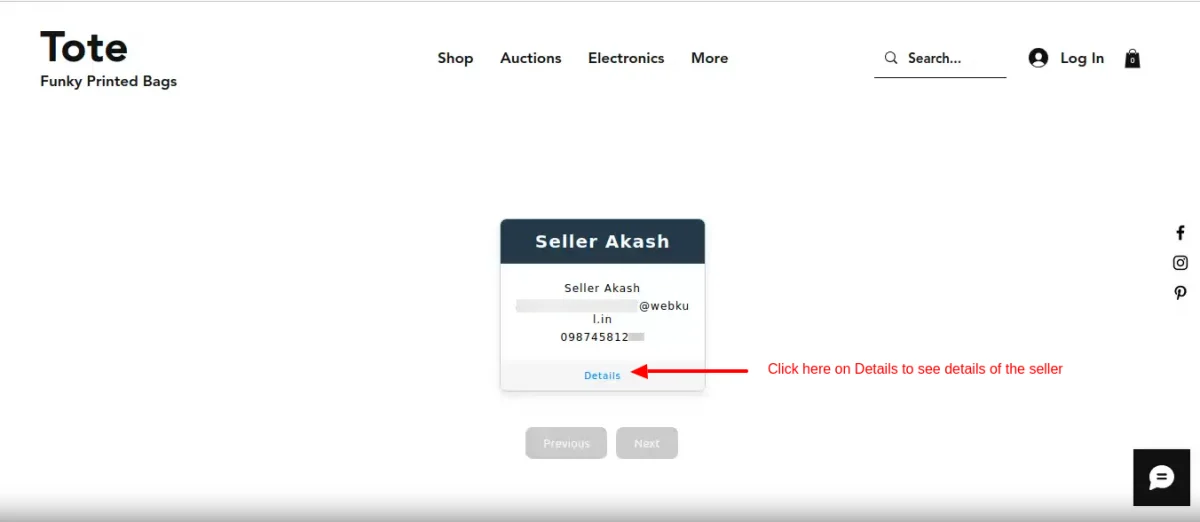
Seller Profile on Storefront –
To embed the seller profile on your storefront, you have to follow the below steps –
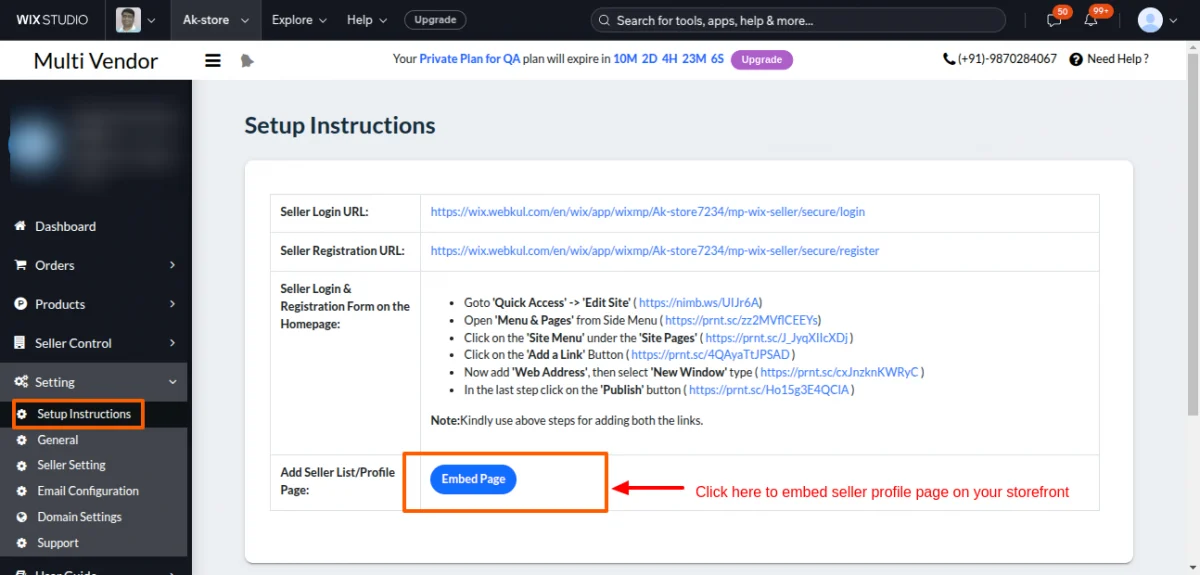
Once you click on it, it will add a seller page on your storefront and ask you to install the multivendor app on your storefront.
Now you will be able to see below, click on Done to finish setup.
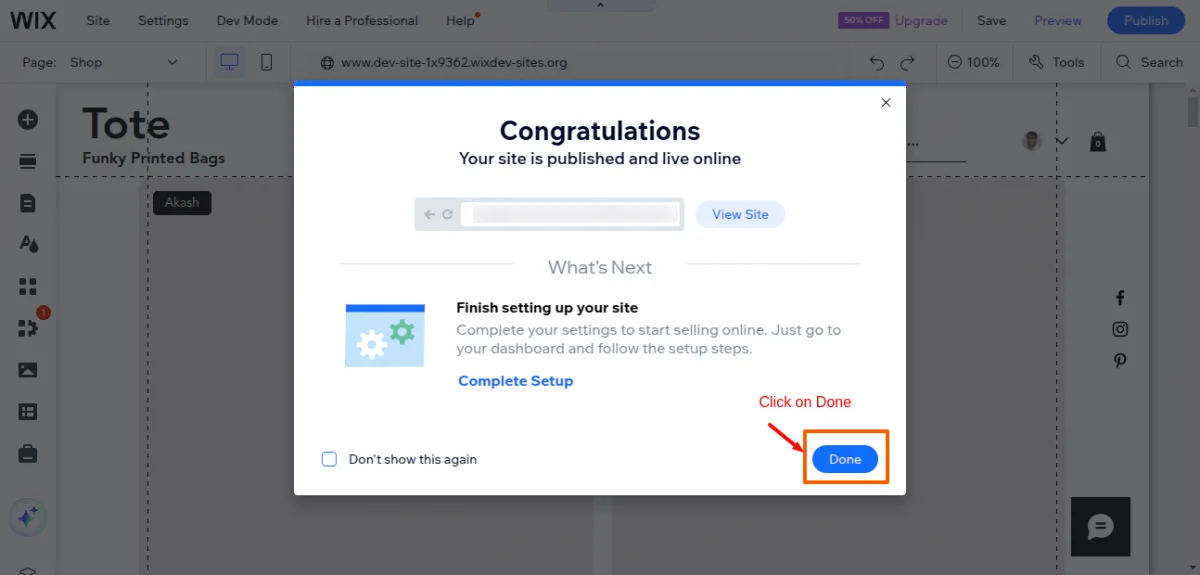
Once done, you will be able to seller page on your storefront.
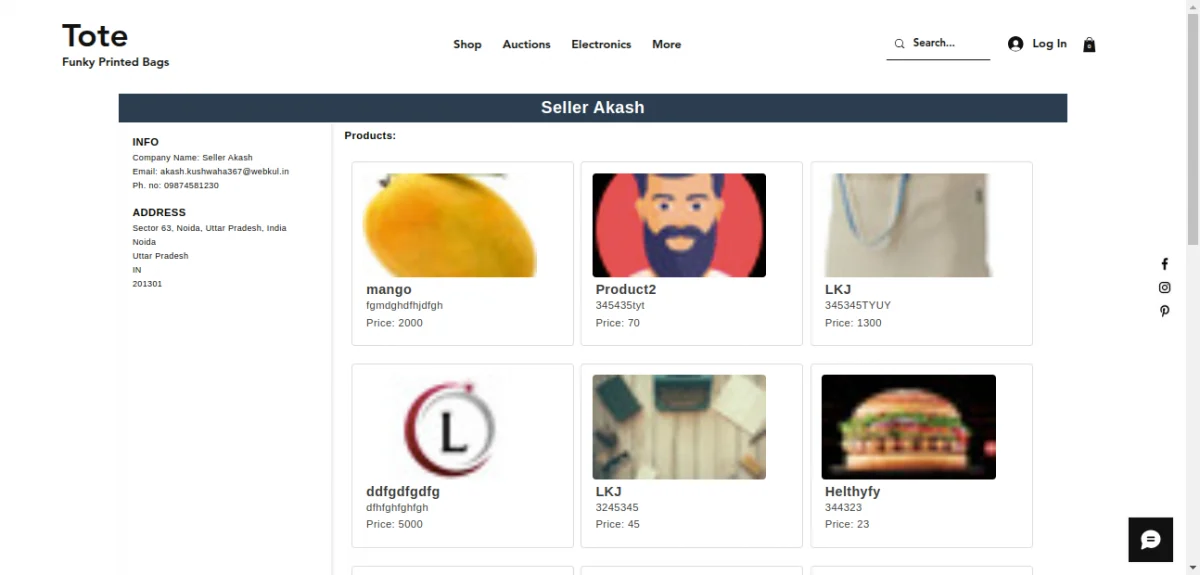
The seller profile includes seller info, address details, as well as products of a particular seller.
8. Orders:
The order section covers the view of all the orders associated with the sellers.

Functionality at the seller’s end
Dashboard:
This is the dashboard of a seller. After a successful login, a seller can view his dashboard.

Products:
It includes the list of products of a particular seller. A seller can also add a product by clicking the plus icon. One can also search for a product by using the filter.
There are two cases, the admin can also add a product from their end and assign it to sellers. Or sellers can also add the product from their panels.

Order:
In the order section, a seller can view all his orders.

Accounting:
A seller can manage the accounts of his store.
And, can create a “Withdraw” for the admin and can view his “Payout”.
He can find the total sales, total commission, total payout, and total withdrawal. So, the following are the fields of the seller’s accounting.
- ID: This is the transaction Id of a seller.
- Status: This reflects the status of the transaction, i.e, “Approved”, “Declined”, “Payment Initiated”, “Payment Cancel”, or “Complete”.
- Type: This is the transaction type, whether it is a “Withdraw”, “Payout”, or “Order placement”.
- Seller: This reflects the name of a seller.
- Reference: It shows the reference to the transaction.
- Commission: This part covers the commission of the admin.
- Transaction Amount: It shows the amount within a particular transaction.
- Date: This is the date and time of a particular transaction.

Note – When the admin will pay the sellers, then the status of accounting will be reflected as payment initiated.
Then, based on the transaction, the payment status will get changed further to “Payment Cancelled or Complete.”
Settings:
In settings, the vendor can add the email address of their PayPal account on which they want to receive their amount from the admin, as shown –

Please note that the app is not compatible with the mobile device.
WEBKUL SUPPORT
I hope this blog will help you to understand the complete process involved in the Wix Multi-Vendor Marketplace application.
If in case you have any queries, please generate a ticket https://webkul.uvdesk.com
For More Development on Wix, contact us.

6 comments
We have created a ticket on your behalf and our team will soon revert to your queries over it.
Thanks.
We have created a ticket on your behalf and our team will soon revert to your queries over it.
Thanks.
Hi Evan,
We have given the option to add a separate seller profile page where all of your sellers profile will be shown to your customers and customers can go to individual seller profile, open and can seller seller’s information, products etc.
This is the new update in the app, and has also been updated on the user guide.