INTRODUCTION
Manage CRM efficiently with ClickUp Odoo Connector!
ClickUp is one of the finest CRM solutions present in the market. It allows you to manage your sales pipeline effectively and efficiently.
But the question is, how can you make it even more effective and efficient?
ClickUp Odoo Connector is the solution for you, which makes ClickUp more efficient and effective.
The module allows you to integrate Odoo with the ClickUp CRM system. Further, the module enables you to quickly import or export data from ClickUp to Odoo.
This module assists you in establishing a connection between your ClickUp Customer Relationship Management System and Odoo.
Moreover, you can manage all ClickUp data like company, contact, product, user, deal or lead, etc. from the CRM system. However, Odoo will be the central location for managing backend settings.
NOTE: ClickUp Odoo Connector Module works in conjunction with the following module:
First, you must install this module in your system for the ClickUp Odoo Connector module to work correctly.
FEATURES
- Connect Odoo with multiple ClickUp solutions.
- Run cron to evaluate the feeds in the scheduled time.
- The corn automatically deletes the synchronization history after the scheduled time.
- Import all the connections data with a single import button.
- Moreover, select the ClickUp Channel id and Object (you want to import).
- Export all the connections data with a single export button.
- Select the ClickUp connection id and the records (you want to export).
- Further, the module stores feed data in text form.
- The feed gets automatically deleted when the related record is created in Odoo.
- A donut chart allows you to analyze the data of all the connections.
- Select the data type from the dropdown.
- Moreover, connection data cards direct you to the dashboard of the ClickUp connection.
- Clickable tabs that redirect you to the respective mappings.
- The line graph directs you to the dashboard of the ClickUp connection.
- Clickable tabs redirect you to the respective mappings.
INSTALLATION
- Once you purchase the App from Webkul store, you will receive the link to download the zip file of the module.
- Extract the file on your system after the download finishes. You will be able to see a folder named- ‘odoo_clickup_connect.’
- Copy and paste this folder inside your Odoo Add-Ons path.
- Now, open the Odoo App and click on the Settings menu. Here, click on Activate the Developer Mode.
- Then, open the Apps menu and click on ‘Update Modules List.’
- In the search bar, remove all the filters and search ‘odoo_clickup_connect.’
- You will be able to see the module in the search result. Click on ‘Install’ to install it.
WORKFLOW
CONFIGURATION
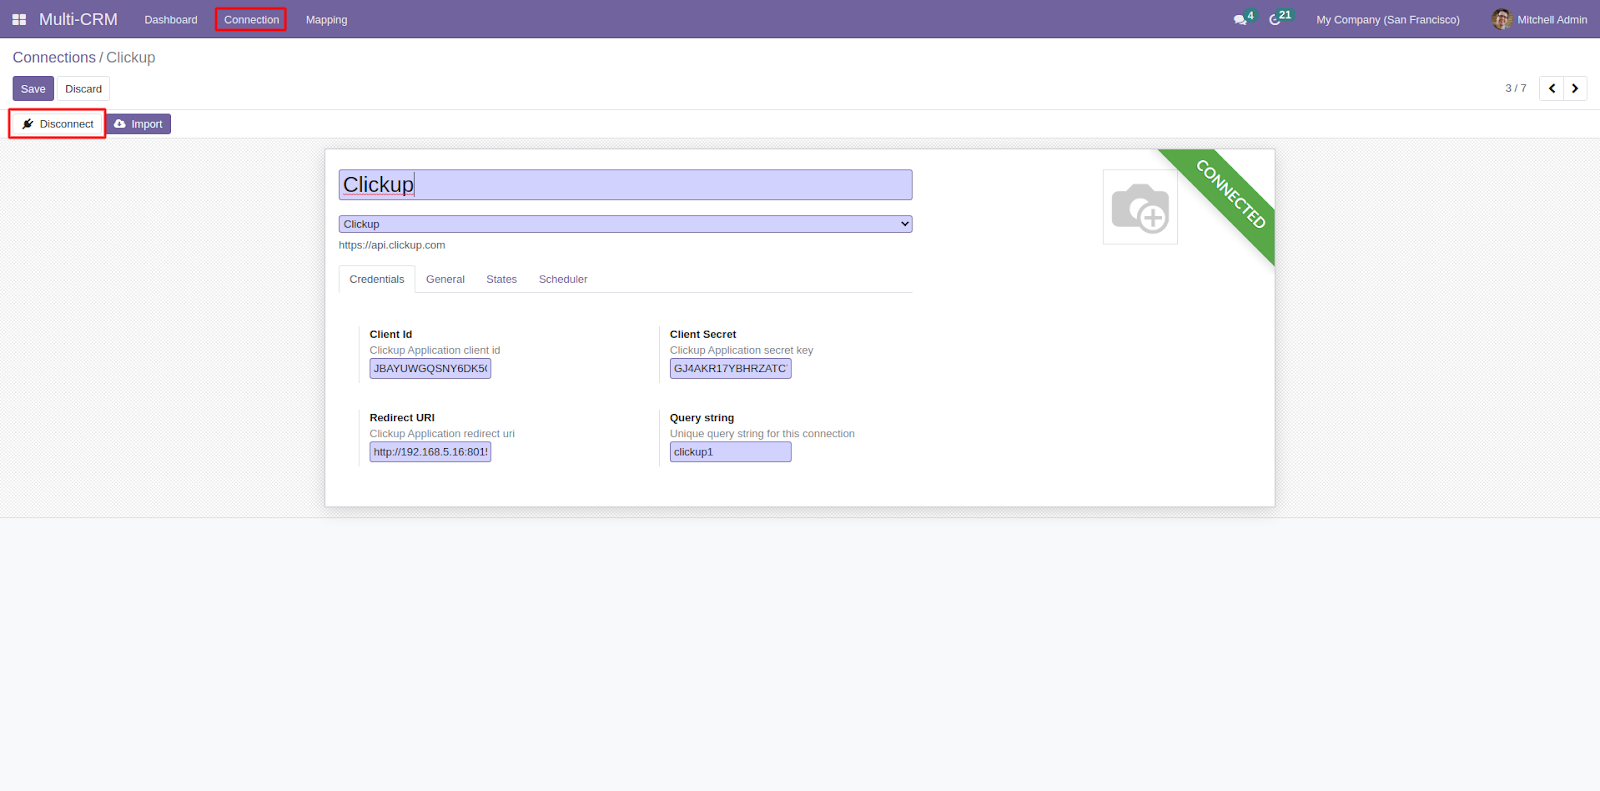
1. Firstly, Log in to the Odoo backend, go to ‘Multi-CRM> Connection> Create,’ and enter the name. In the ‘Credentials’ tab, enter the ‘Client Id, Client Secret, Redirect URL, and Query String.’
2. Next, in the ‘General’ tab, configure the details as per requirement. In this tab, fill in the details regarding auto-evaluation, data limit for auto-evaluate, etc.

3. After that, move to the ‘Scheduler’ tab, choose and tick the box next to the data you want to auto-import via cron. Then, click the ‘Save’ button.

4. Once configured, click the ‘Import’ button, select the Object you need to import and click the ‘Import’ button.

5. Now, open contacts, companies, leads, or users, and select the one you want to export. Select the records, click the ‘Action’ button and locate the ‘Export’ option.
This will open a pop-up, where you have to choose a connection and check the other details. Once done, click the ‘Export’ button.

6. On the Multi-CRM dashboard, you can view all the mapped data stats in a ‘Line graph and pie chart.’ Also, you can filter data accordingly with the ‘Dropdown’ present on top of the line graph.

7. Now, click the ‘Mapping’ menu to see all the mapping options and select the desired one to view all the mapped data.
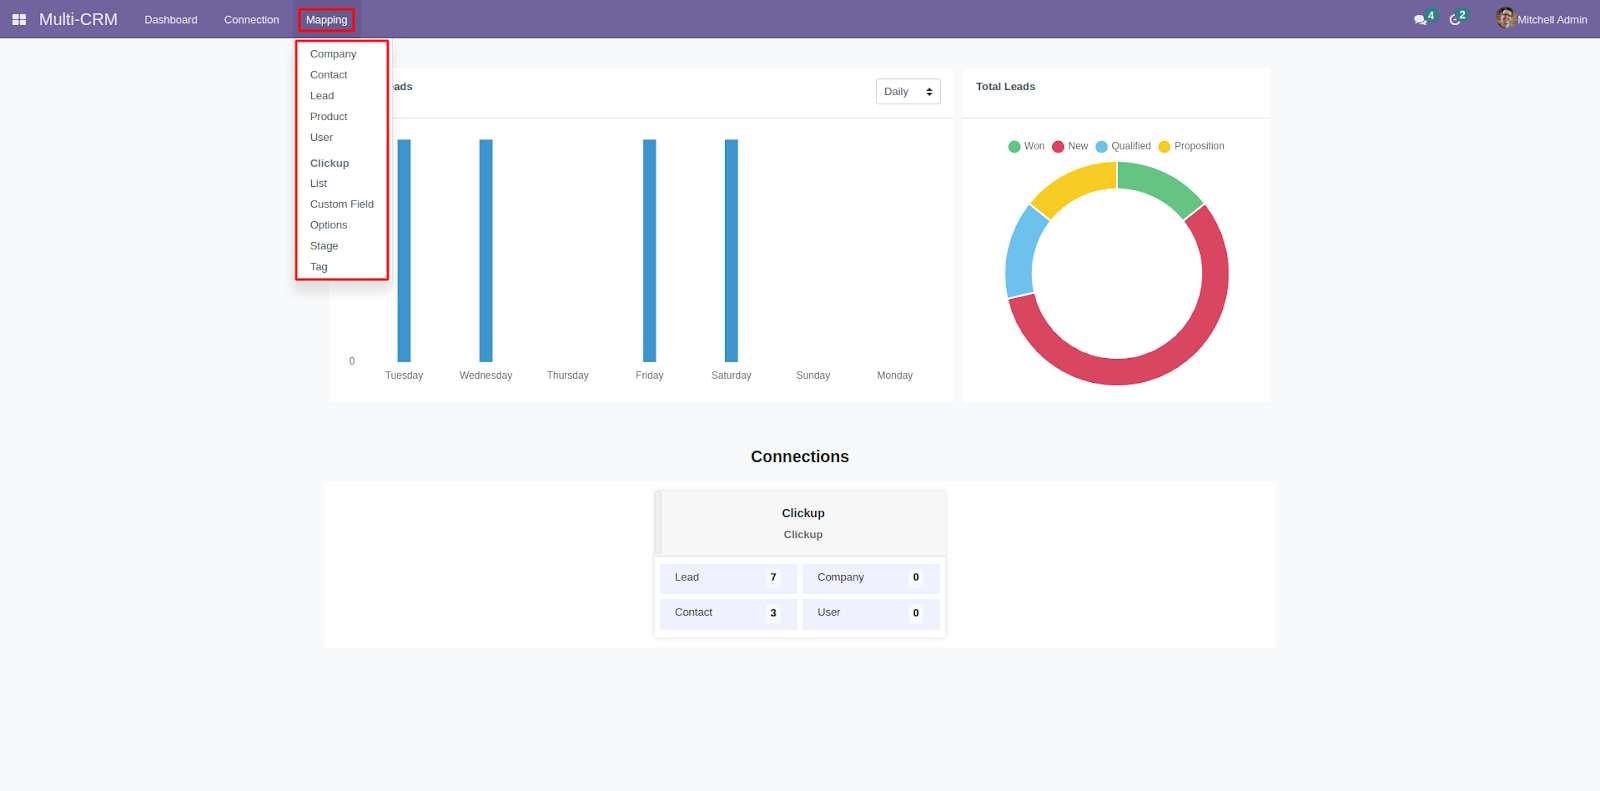
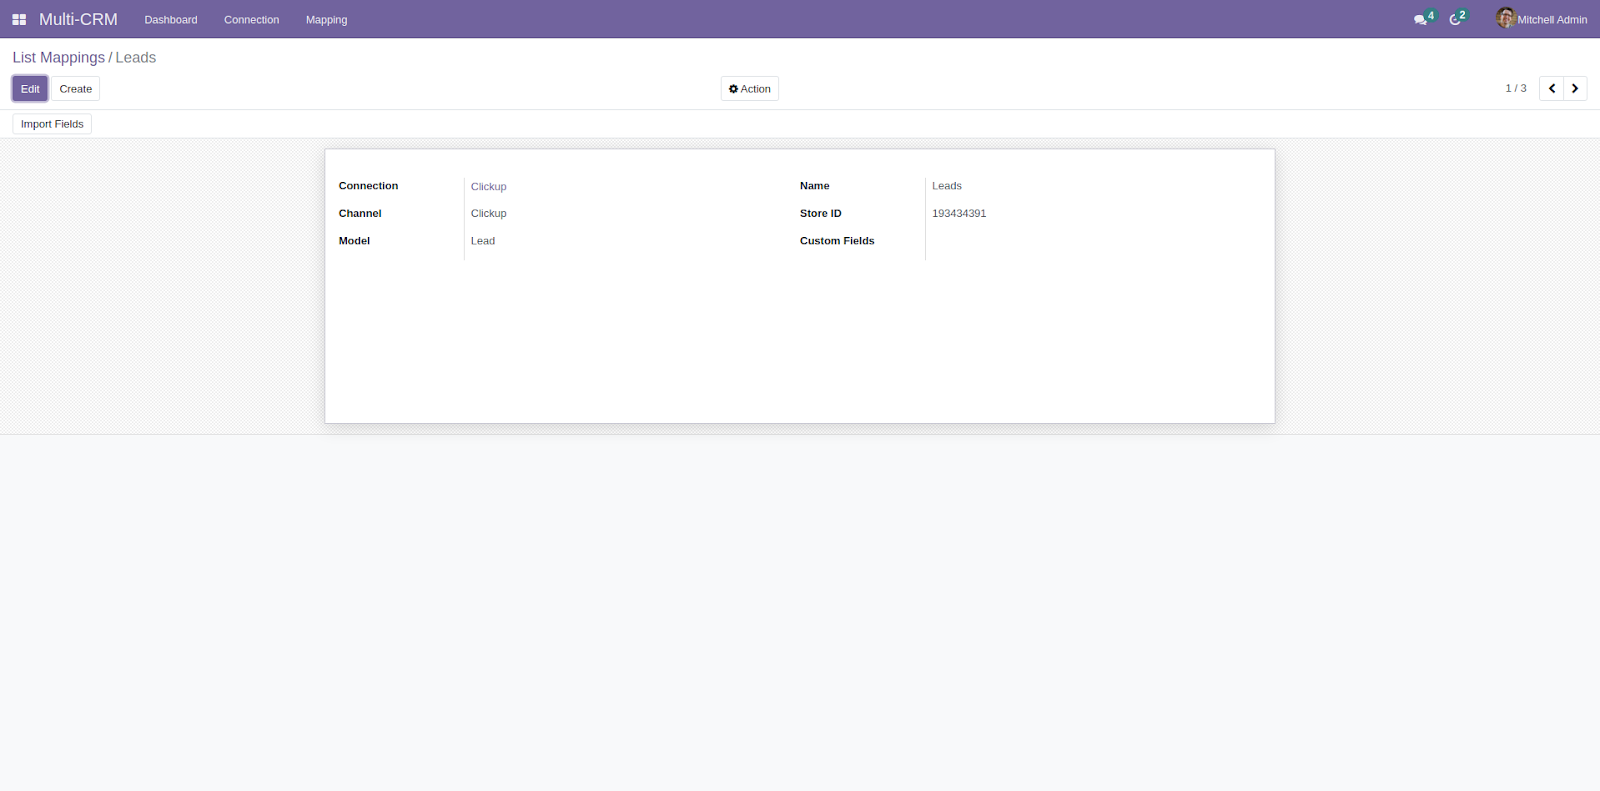
8. On the mapping page, you can view the list of all the mapping along with their store Id.

8.1. You can view all mapping details by clicking any of them on the list page.

9. From the mapping of the ClickUp options, you can view their details. Click an option to view the list of the mappings.

9.1. Also, you can view the details of the mappings by clicking and opening them.
OTHER ODOO MODULES
- Odoo Bridge For Magento
- Opencart Odoo Connector
- Odoo Bridge For Prestashop
- Odoo Akeneo Connector
- Shopify Odoo Connector
- Odoo SAAS Bridge For Magento
NEED HELP?
Hope you find the guide helpful! Please feel free to share your feedback in the comments below.
If you still have any issues/queries regarding the module, please raise a ticket at https://webkul.uvdesk.com/en/customer/create-ticket/.
Also, please explore our Odoo development services & an extensive range of quality Odoo Apps.
For any doubt, contact us at [email protected].
Thanks for paying attention!!
Current Product Version - 0.1.4
Supported Framework Version - Odoo V19, V18, V17

Be the first to comment.