With Multivendor Marketplace for Shopify, you can convert your e-commerce store to a Marketplace where many sellers/vendors are registered and upload their products. Let’s have a look at the Seller Guide for this app.
In the app, the sellers/vendors need to either create an account on the store on their own or the admin/store owner can add them and create their account.
This is a basic Seller guide for the Sellers on your Marketplace.
There are certain steps that the seller needs to follow :
- Sign up/Login to the Seller Account.
- If the Seller has signup then wait for account approval from the Admin.
- Once approved, the seller can start uploading the products.
- Products also need to be approved by the Admin.
- Once approved, the products will be available on the Shopify Store.
- The seller needs to add the payment details to which he wish to receive the order payments.
- The seller can contact the Admin in case of an issue.
Seller Login/Sign up:
Note: Google Recaptcha will be mandatory for Seller Signup after 24th September 2022.
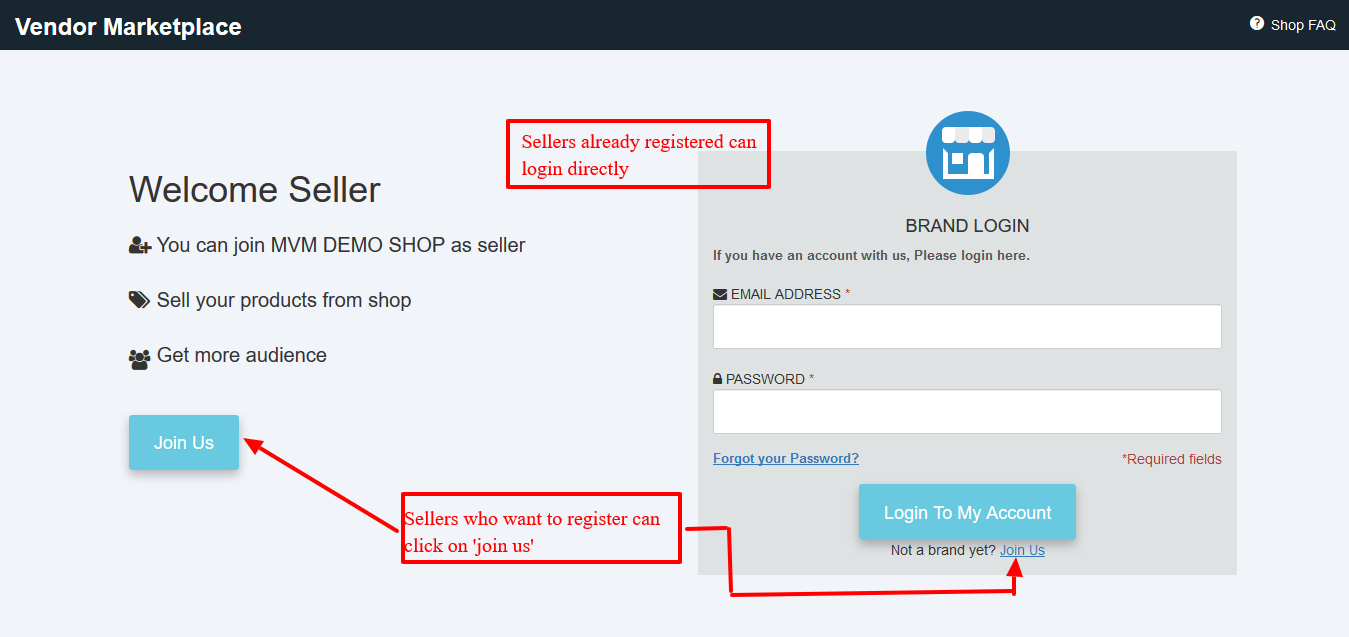
The seller/vendor needs to sign up on the store or log in to access the account.
The seller will be provided a URL from the admin, which you can use to signup/login. Or sellers can do it from the link on the admin Shopify store.
This the signup/login page for the seller.

To start adding products to the store, the seller needs to register/log in.
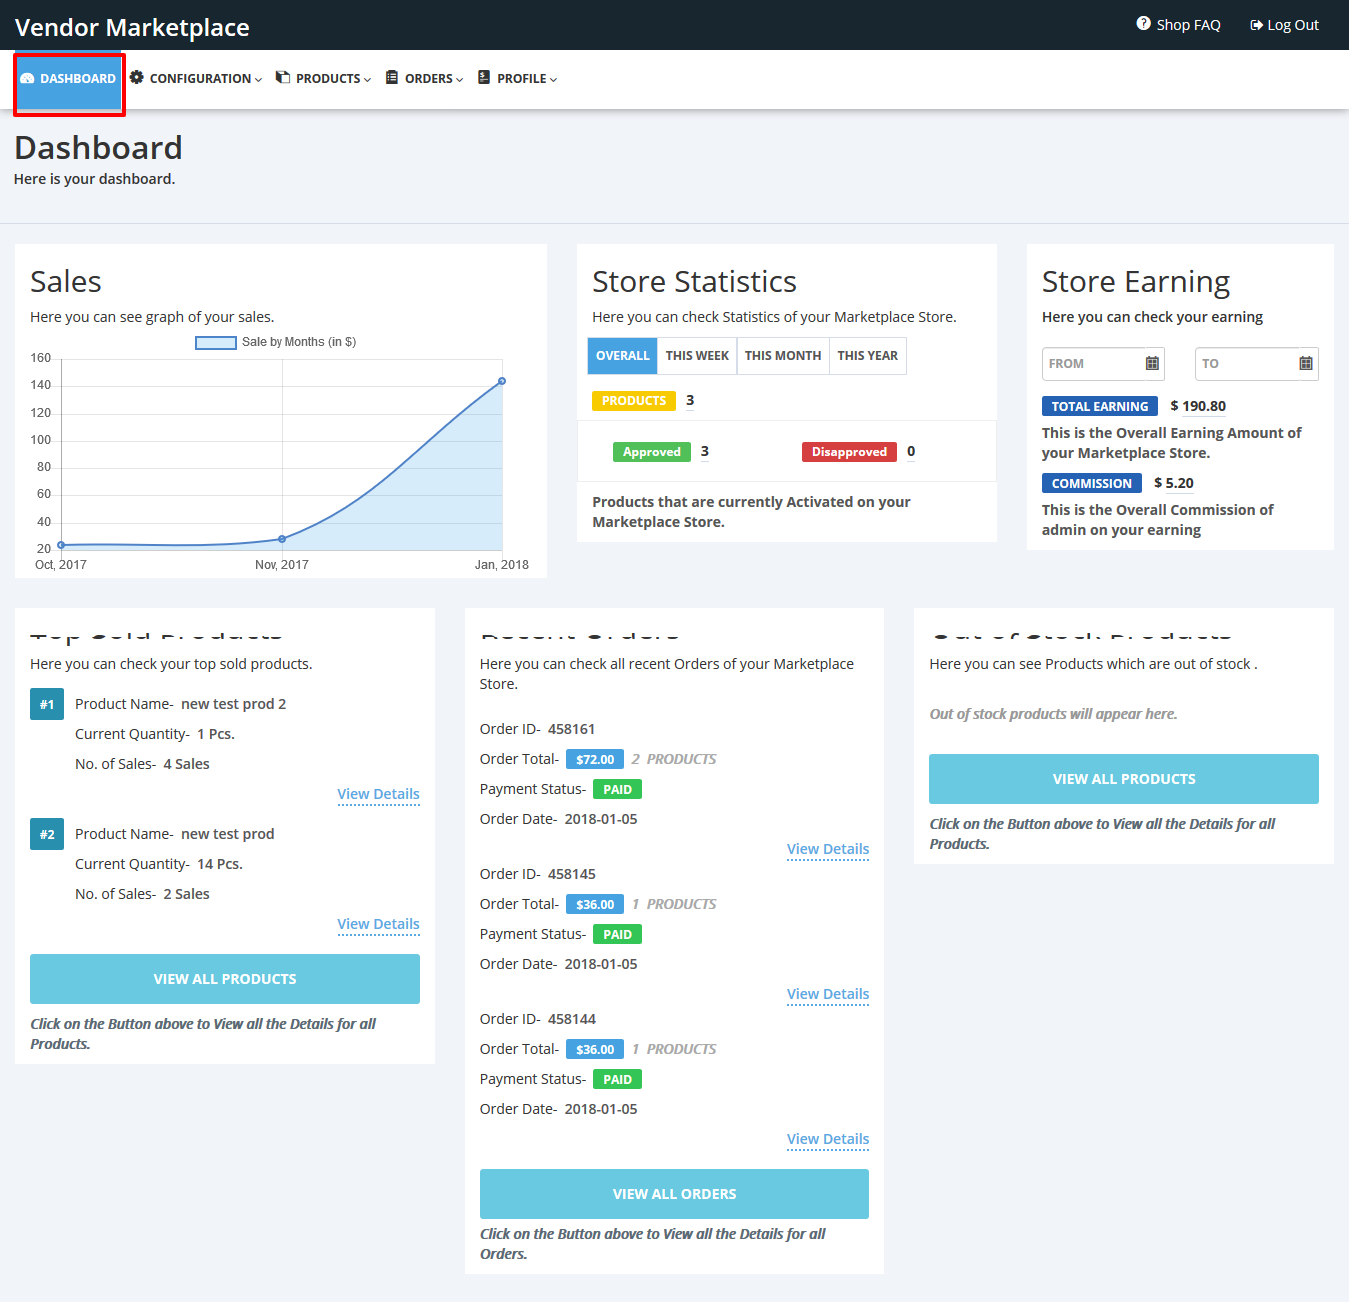
seller dashboard
This is the view of the seller dashboard once the seller has successfully logged in.

The seller can have an idea of the products, orders, commission (admin share in the order), etc by just looking at the dashboard.
configuration
The Seller can manage the invoice and all the other configuration (if enabled from the admin).
Here is the screenshot of the invoice configuration that will be sent from the seller to the customer.

This way seller can manage the invoice.
Products
Under this menu- products >> product listing, all the product-related information will be there and the product can be edited, viewed and deleted from here :

Further, from the “bulk edit” option in the above screenshot, the seller can bulk edit the products and can add the products via CSV file to the app
This is the “add product” form :

This way you can add the product.
In case you have selected “digital product” to be added then the form will differ as you have to upload the file and also specify the number of allowed downloads and the expiry days (if any)
This way a new product is added.
We have another menu here: Products > Smart Collections: A list of all the automated/smart collections made at Shopify end.

orders
A seller can view and can manage all the order from the “orders” menu under order listing :

The order listing page will list all the orders placed for the seller and the seller can fulfill the order by viewing the order from the order view page.
Moreover, from the order view, the seller can enter the tracking number for the order and can also print the invoice for that particular order.

Under the order menu, the submenu “payment received”, this section shows the payment due and the total payment received by the seller.
Orders > Payment Received: A list of all the payments received by the seller with payment status:

Orders > Commission Listing: A list of all the admin commissions on his orders:

Profile
Sellers can manage their accounts from the “my account” submenu under the Profile menu. With my account page, the seller profile page pic, banner image, and all the personal information can be managed :

Under the “Payment Details” submenu, a seller can add the details of the payment mode by which he wishes to receive his earning from the store owner:

The feedback submenu will show all the feedback received by the seller from the customer from the seller profile page.

Multivendor Marketplace: Seller Guide Demo
Further, check out: https://multivendor-marketplace-5.myshopify.com/
Support
Moreover, if you have any questions/issues, please raise a ticket at http://webkul.uvdesk.com or send an email at [email protected].
Be the first to comment.