With so many tasks to perform it can be quiet difficult to remember each and every task.
But with Prestashop Sticky Notes you don’t have to face this problem anymore. This module allows you to add sticky notes for orders and categories from anywhere in the back office.
You can even set the reminders for the sticky notes which reminds you of upcoming tasks so that you won’t miss it.
Note: Prestashop Sticky Notes is compatible with multi-store feature of PrestaShop.
Features of Prestashop Sticky Notes
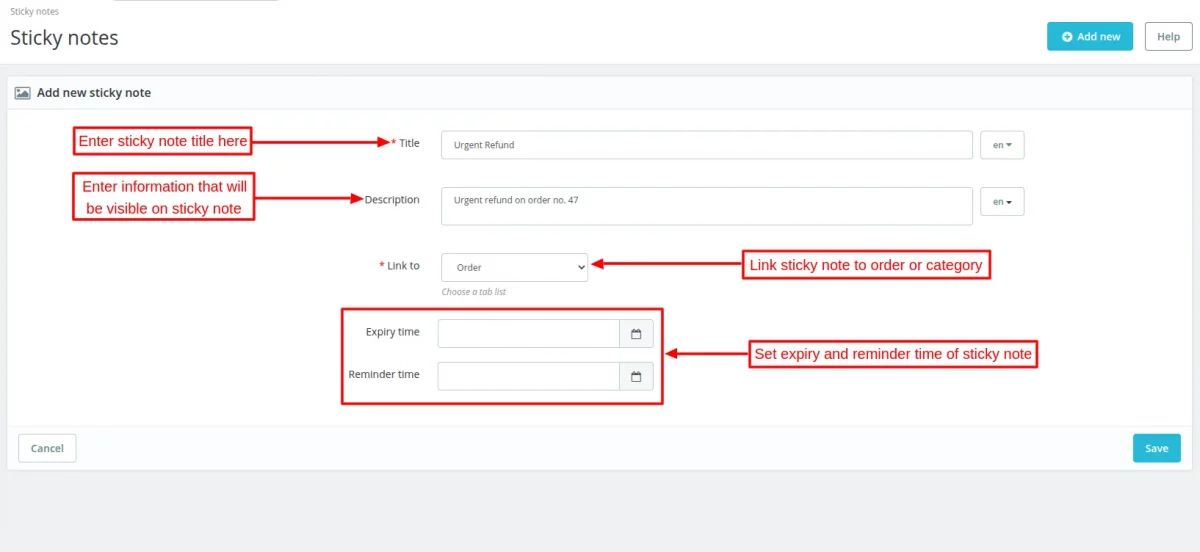
- Create sticky notes for orders and categories from anywhere in the back office.
- A new column “Sticky Note” added on the ‘orders’ and ‘Categories page’.
- Set the reminder and expiry time for sticky notes.
- Set the background color of sticky notes.
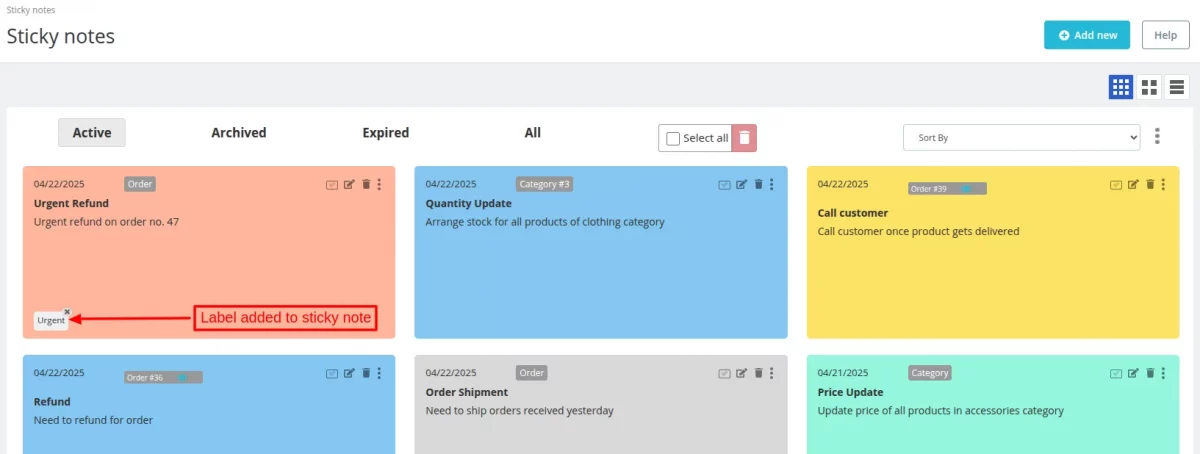
- Create the label and add it to the sticky note so that you will be able to identify the necessary information you have added to a sticky note among so many sticky notes.
- Sort sticky notes date wise, order wise, category wise, or alphabetically.
- Improves the usability of the back office.
How to Install Prestashop Sticky Notes
- Firstly, go to the module manager in the back office and click on ‘upload a module’.
- After that, drag and drop the module file or select the file from the system.
- In this way, the module installation will be successful.


Workflow of the module
After the installation of the module, a sticky note icon gets available on every page of back office by clicking on which admin can add sticky notes for orders and categories.
A new column ‘Sticky note’ gets added under ‘orders’ from where admin can add sticky notes for every order.
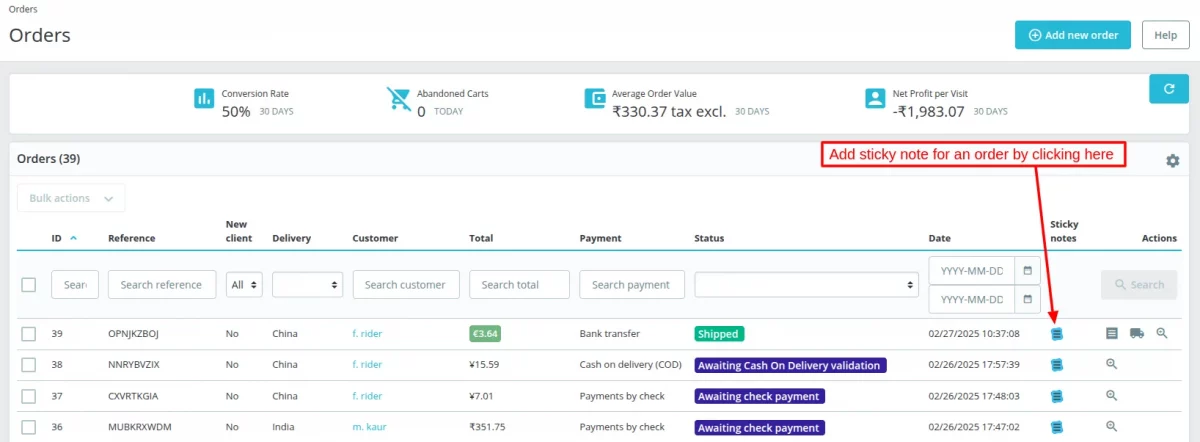
When admin clicks on a sticky note icon, a pop-up appears on the screen from where admin can create a note.

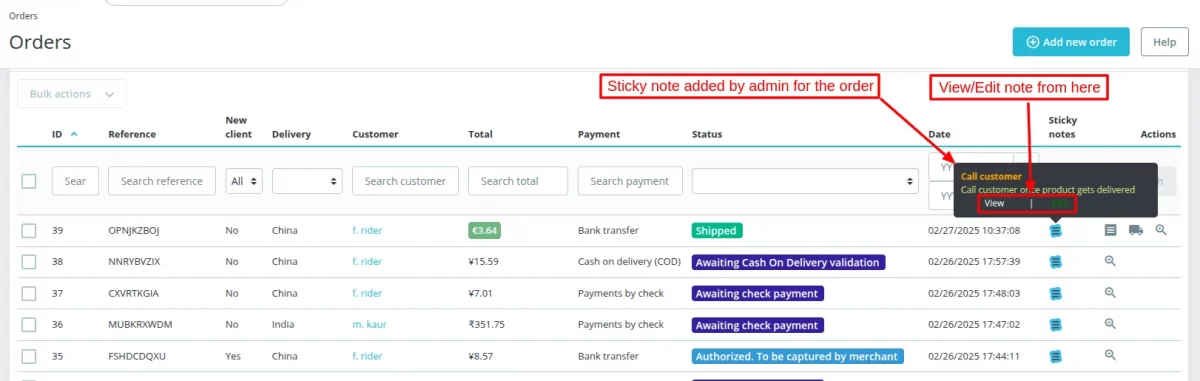
Once admin clicks on ‘Create Note’ button, then a sticky note for the particular order will be visible whenever admin hovers the mouse on the icon mentioned along with that particular order.
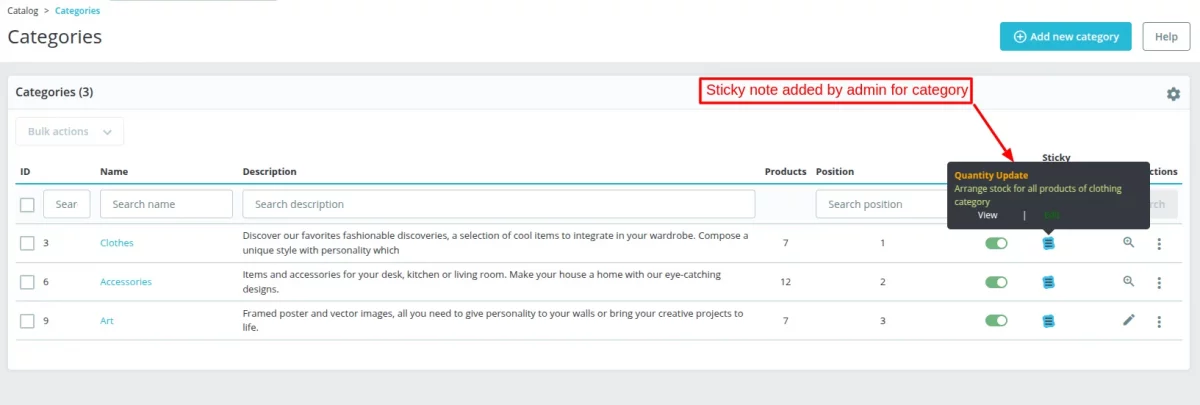
Admin can also create sticky notes for each and every category under ‘Categories’ tab.

Once admin has added the sticky note for the category, then the sticky note will be visible when admin hovers the mouse on the ‘sticky note’ icon mentioned with the particular category.
Adding Sticky Notes
Admin can view and manage all the notes added for the orders and categories under ‘Sticky Notes’ tab.
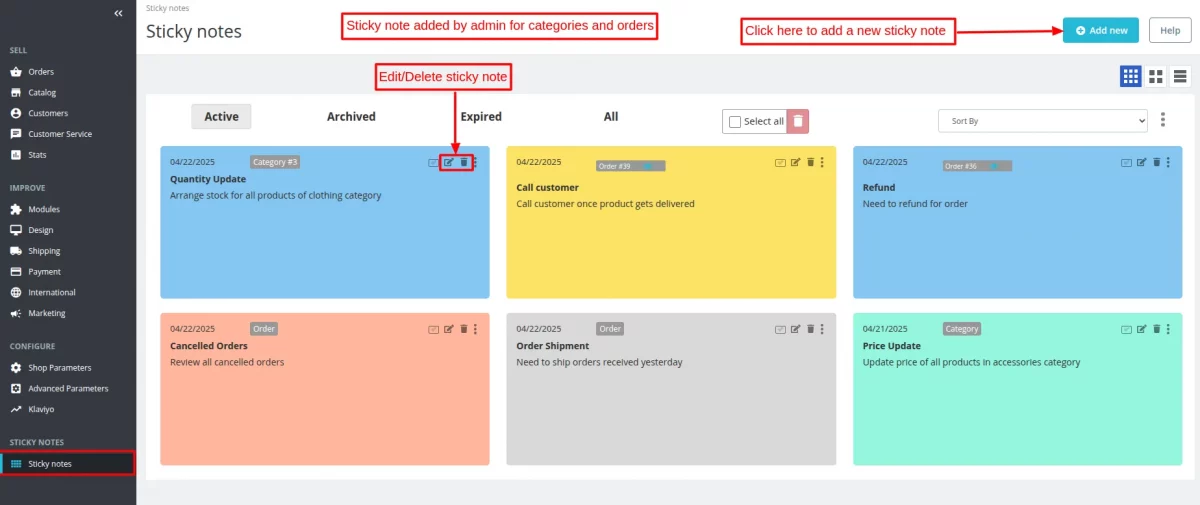
Admin can add a new sticky note by clicking on “Add new” button.
Under “Sticky Notes”, admin can:
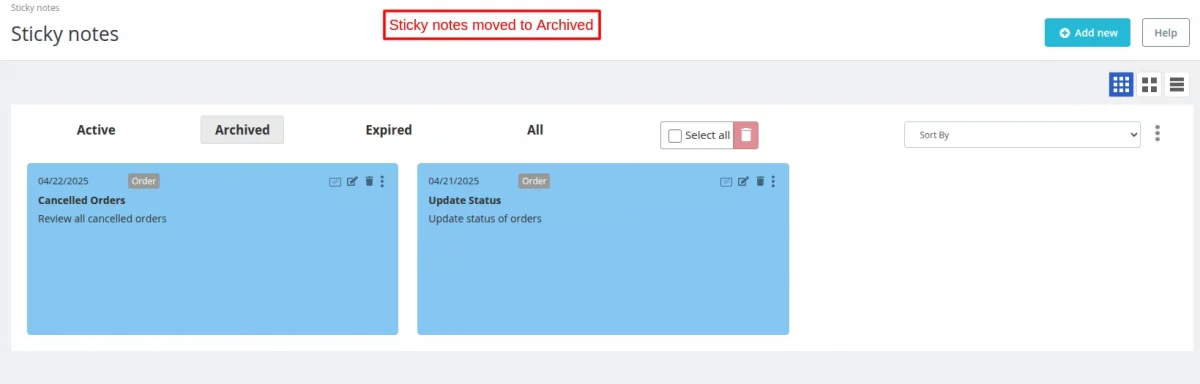
- Move sticky notes into ‘Archive’ section.
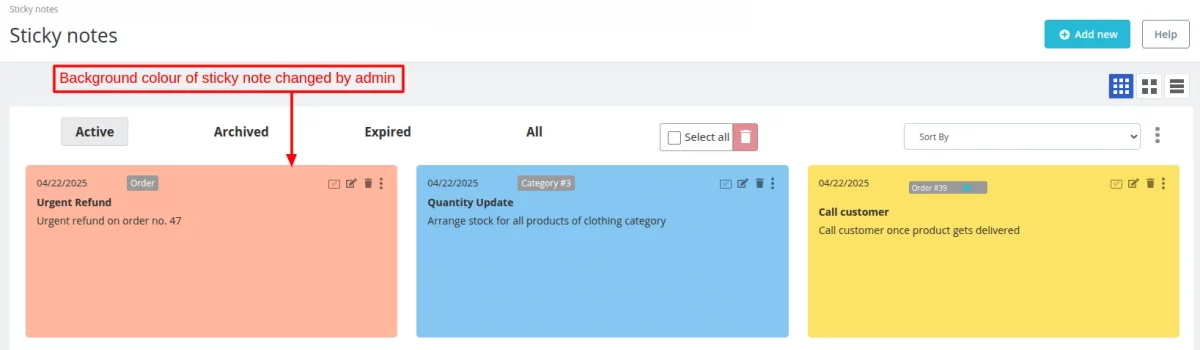
- Set the background color of sticky notes.
- Create the label and add it to the sticky notes
- Set the reminder and expiry time of sticky notes.
- Edit/delete the sticky notes.
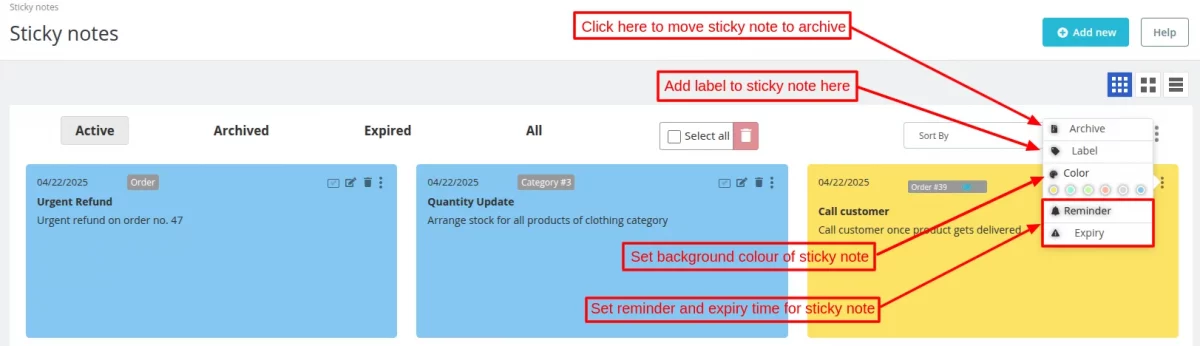
By clicking on ‘Archive’ tab, admin can move the sticky notes displaying the priority tasks that need to be done on orders and categories to the ‘Archive’ section.
Admin can set the background color of sticky note by selecting a color under ‘Color’ tab.
Set reminders for sticky notes
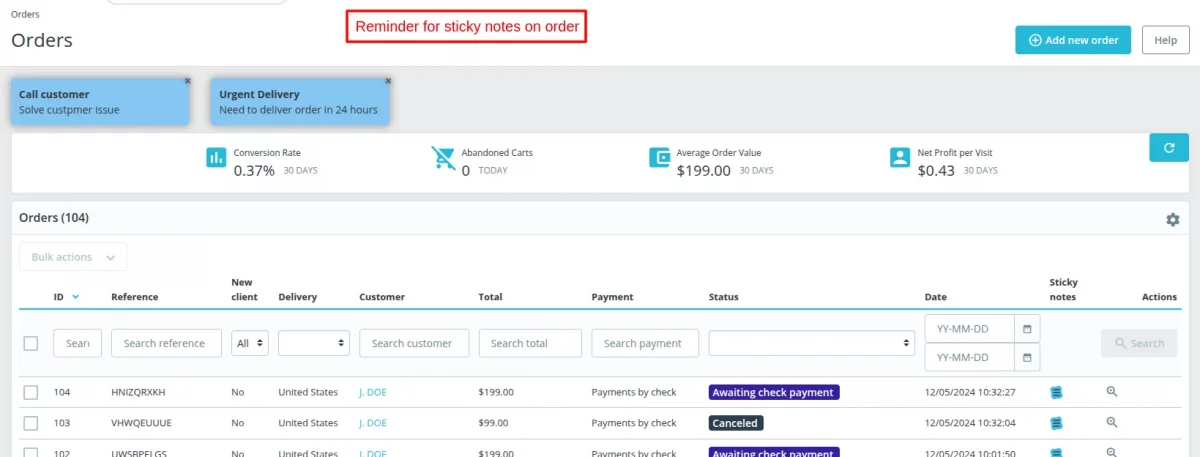
Orders and categories sticky notes will be displayed on the respective pages on the time set by admin so that it did not miss the urgent tasks related to orders and categories.
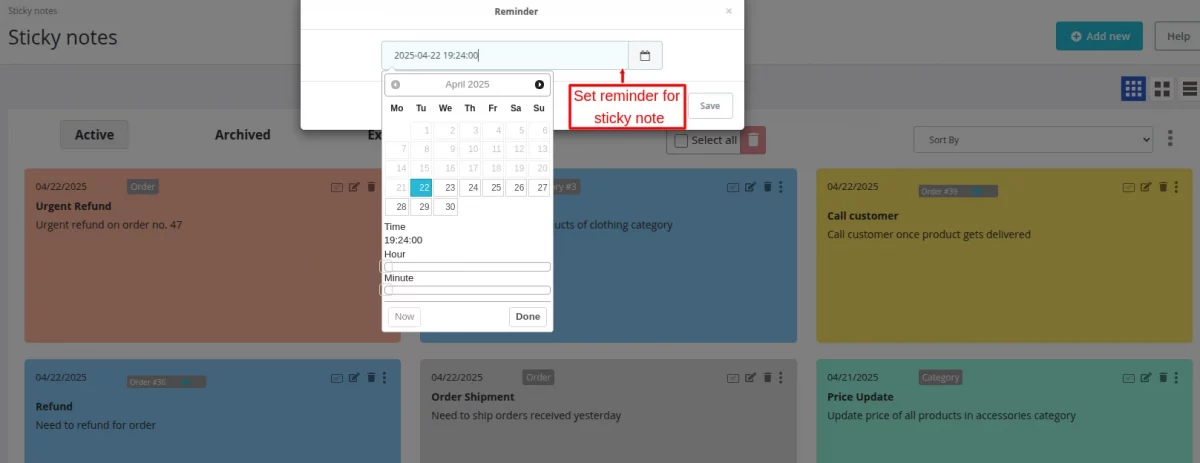
Once you have set the reminder for order sticky notes, then it will visible on the ‘orders’ page on the date and time you have set.
Similarly, admin can set the reminders for category sticky notes and it will be visible on the ‘Categories’ page.
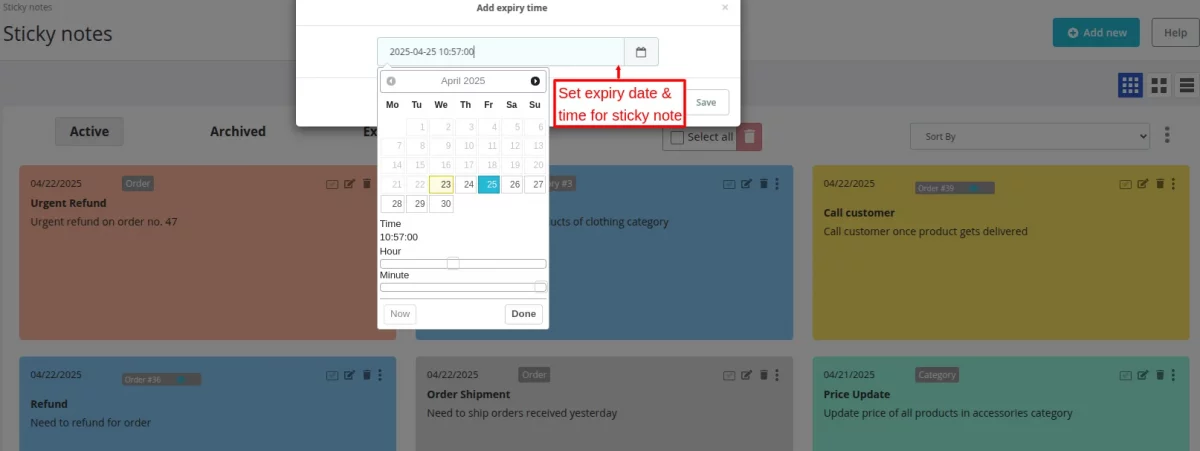
Set expiry time for sticky notes
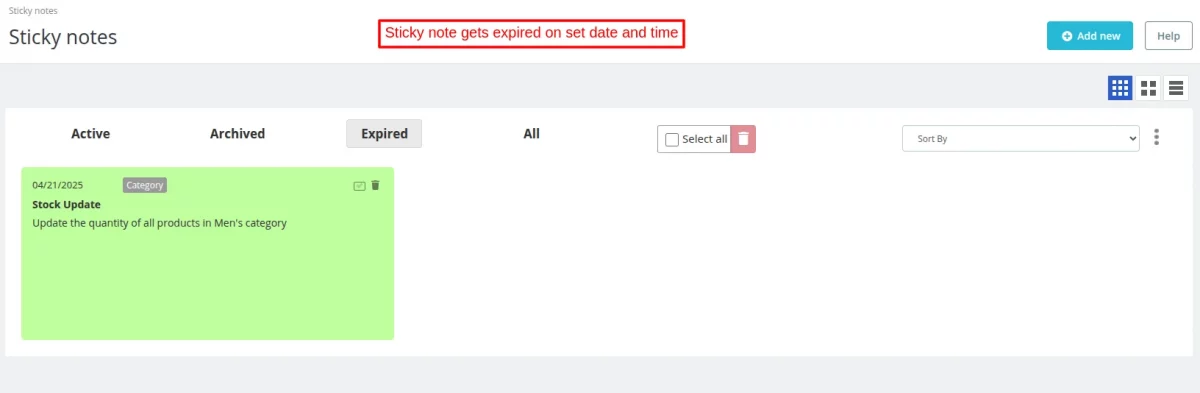
Set expiry time for the sticky notes so that once you have completed the tasks mentioned in the sticky notes, those sticky notes will automatically get expired on the date & time you have set.
Once the sticky notes get expired, then admin won’t be able to perform any action on the sticky notes and can only delete it.
Creating and Adding Label
If admin has created too many sticky notes and unable to identify the priority of the task(s) mentioned on the notes.
Then by adding the label on a sticky note will help admin in recognizing the task(s) preference.
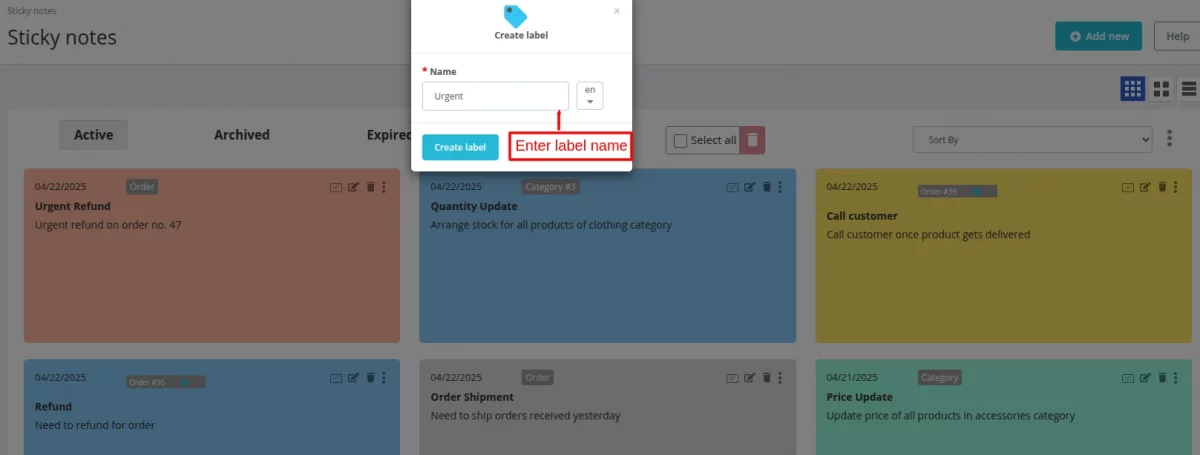
Admin can create a label by clicking on ‘Label’ tab as shown below:
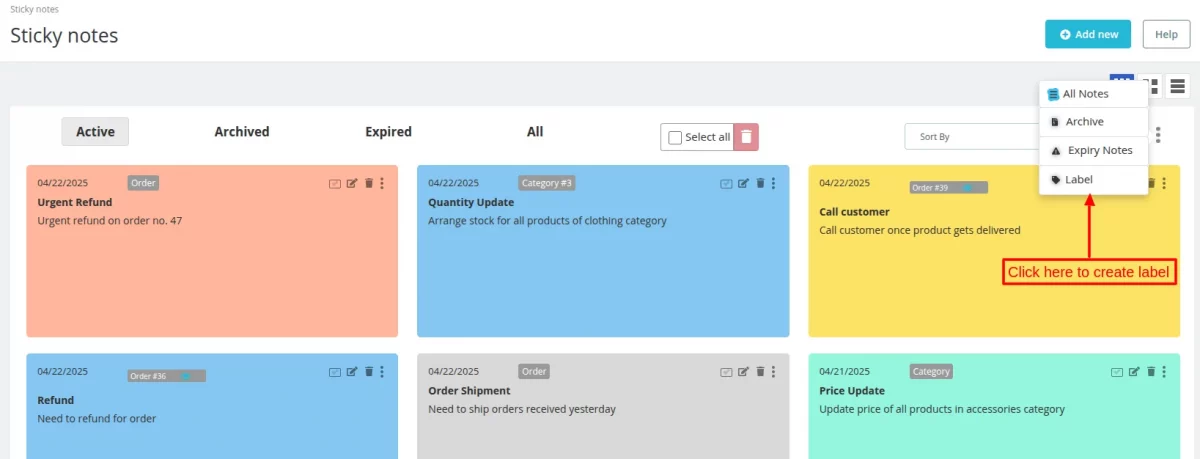
When admin clicks on ‘Label’ tab, a pop-up appears on the screen where admin has to enter the label’s name and click on ‘CREATE LABEL’ button.
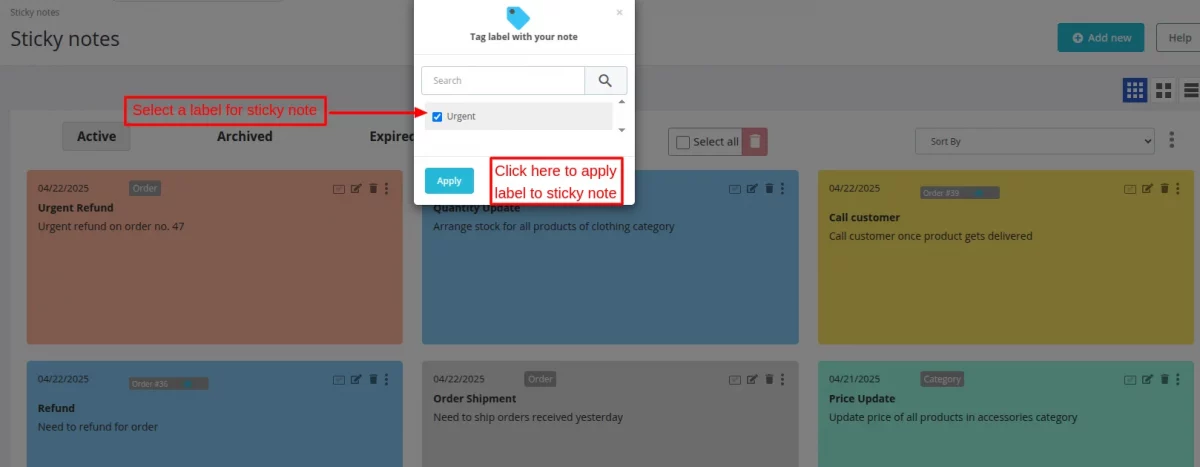
When admin clicks on ‘Label’ tab, a pop-up appears on the screen where admin has to select a label and apply it to a sticky note as shown below:
‘Sort By’ Function
In “Prestashop Sticky Notes”, admin can view the sticky notes:
- Date wise
- Alphabetically
- Only Orders stick notes
- Only categories sticky notes

Support
For any kind of technical assistance or query, please raise a ticket or send us a mail at [email protected]
Also, please explore our Prestashop development services and vast range of quality Prestashop addons.
Current Product Version - 4.1.1
Supported Framework Version - 9.x.x, 8.x.x, 1.7.x.x

Be the first to comment.