Choosing the right theme for your store is important to run your website. A good theme gives your website a distinct look and feels that sends out a positive impression to your users. A well-structured theme also helps your website rank well on major search engines.
Prestashop Responsive Chroniker Theme does exactly the same. It allows you to change basic features on your layout and enhances the overall user experience of your store.
Features
- Fully responsive prestashop theme.
- Admin can add/remove items from the website homepage.
- Admin can add item title and description in multi language as well.
- Admin can easily edit added item.
- Completely redesigned homepage.
- Three types of product view options available on the category page i.e. grid view, list view and table view.
- Newly improvised filters option on the category page.
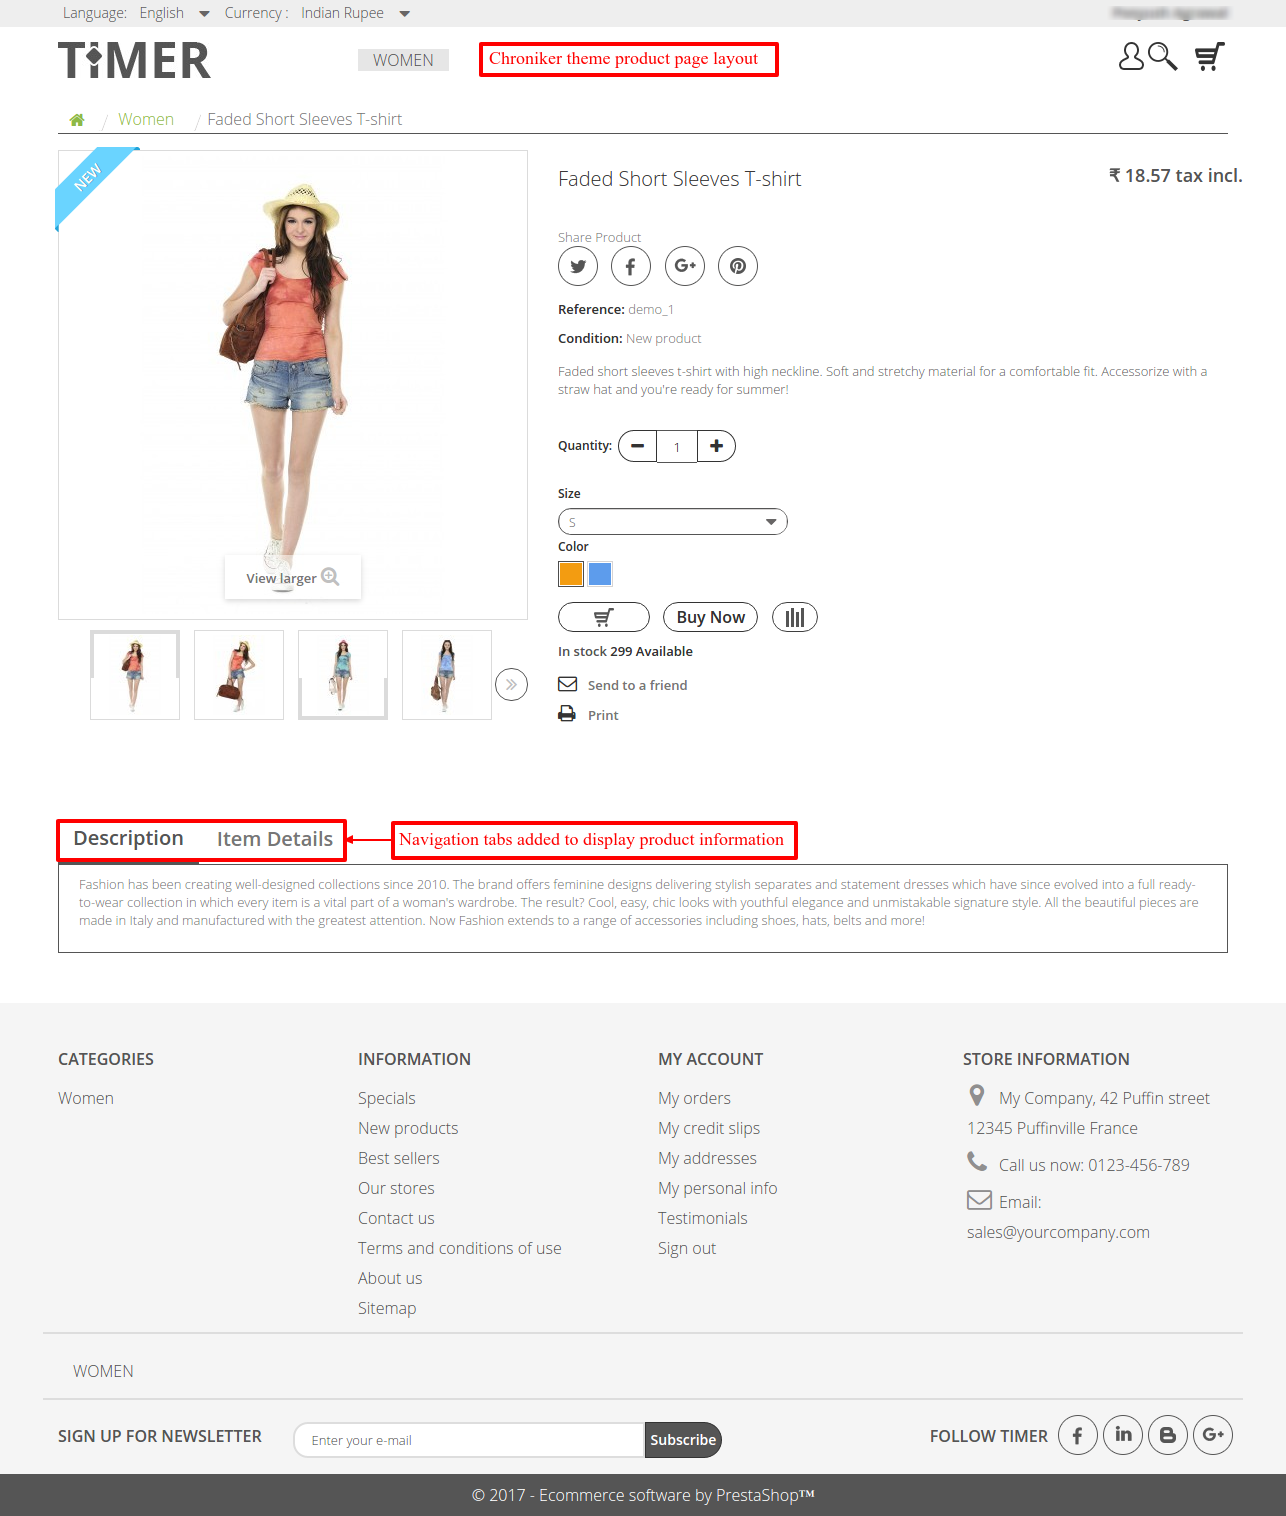
- New navigation tabs to display product information on the product page.
- New Blog and Testimonial section on the Homepage.
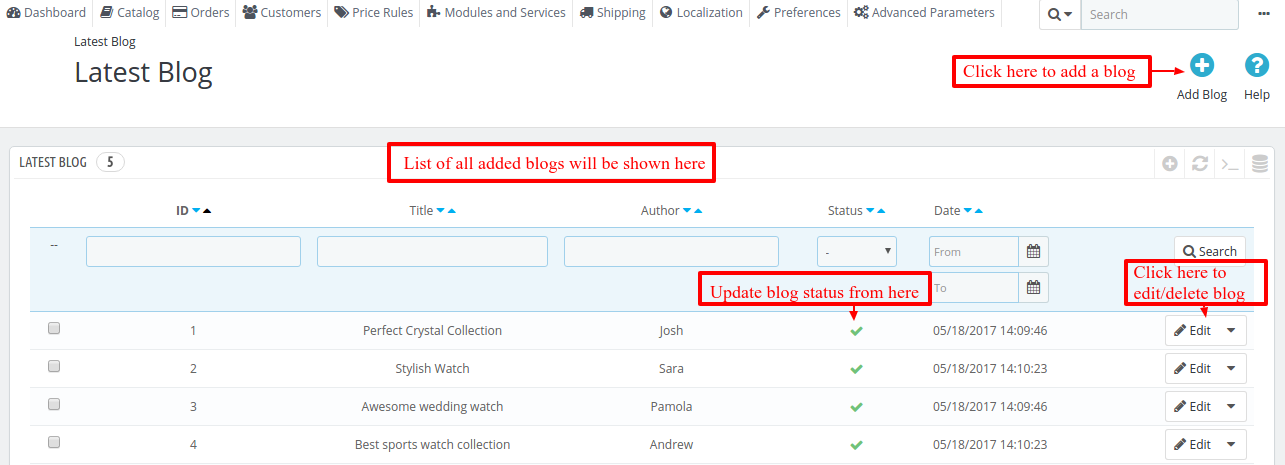
- Admin can add/edit/delete blogs for the homepage.
- Both admin can customers can write testimonials, to be displayed on the website home page.
- A new mid banner is available on the home page.
installation
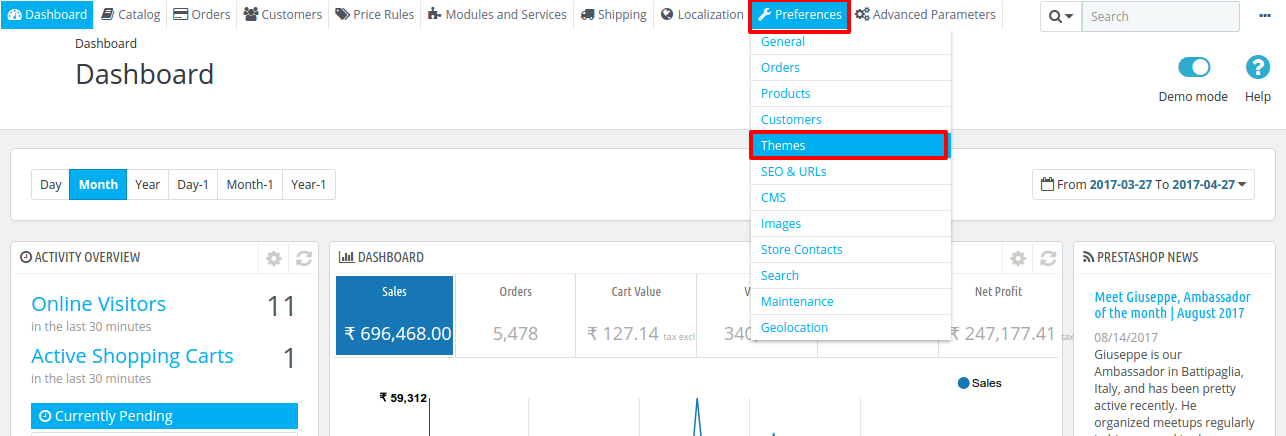
- Go to Back Office > Preferences > Themes
2. Add new theme > Upload the theme > Save
3. Theme will be uploaded. Click use this theme to install the theme.
Theme will be successfully installed.
Theme Configurator
Once the theme is installed, search for Chroniker Theme configurator and click on configure.
Admin can add items on the homepage from here. Admin can add title, image for the item as well as its description from here. Title and description can be written in multi language as well. Click on save to create an item. Admin can also easily edit or delete an item from here.
To edit an item, click the edit button. It will display all the details saved for the item. Now admin can change the item details and images and save to apply the necessary changes.
Front End
Now that the live configurator is configured, lets take a look at the theme on the Front end.
On the website homepage the items will be displayed as added by the admin in the back office. Also a mid banner, testimonials and blog section is added on the home page as configured by the admin.
On the category page, visitors will now see a changed filter menu. Also the product views can be changed to grid, list and table.
Category Page : Grid View
Category Page : List View
Category Page : Table View
Apart from the layout, new navigation tabs have been added to display the product information.
Blog & Testimonial
The Chroniker theme comes with the blog and Testimonial feature. Admin can add Blogs, Testimonials on the Homepage of their store from the back office. Two new tabs are added in the back office Latest Blog and Manage Testimonials.
Admin can add blogs on the Home page using this feature. Admin can create, edit blogs as per his needs.
Click on Add Blog to create a blog. Enter all the information for the blog and click on save to create the blog.
Admin can easily edit any blog form the edit option.
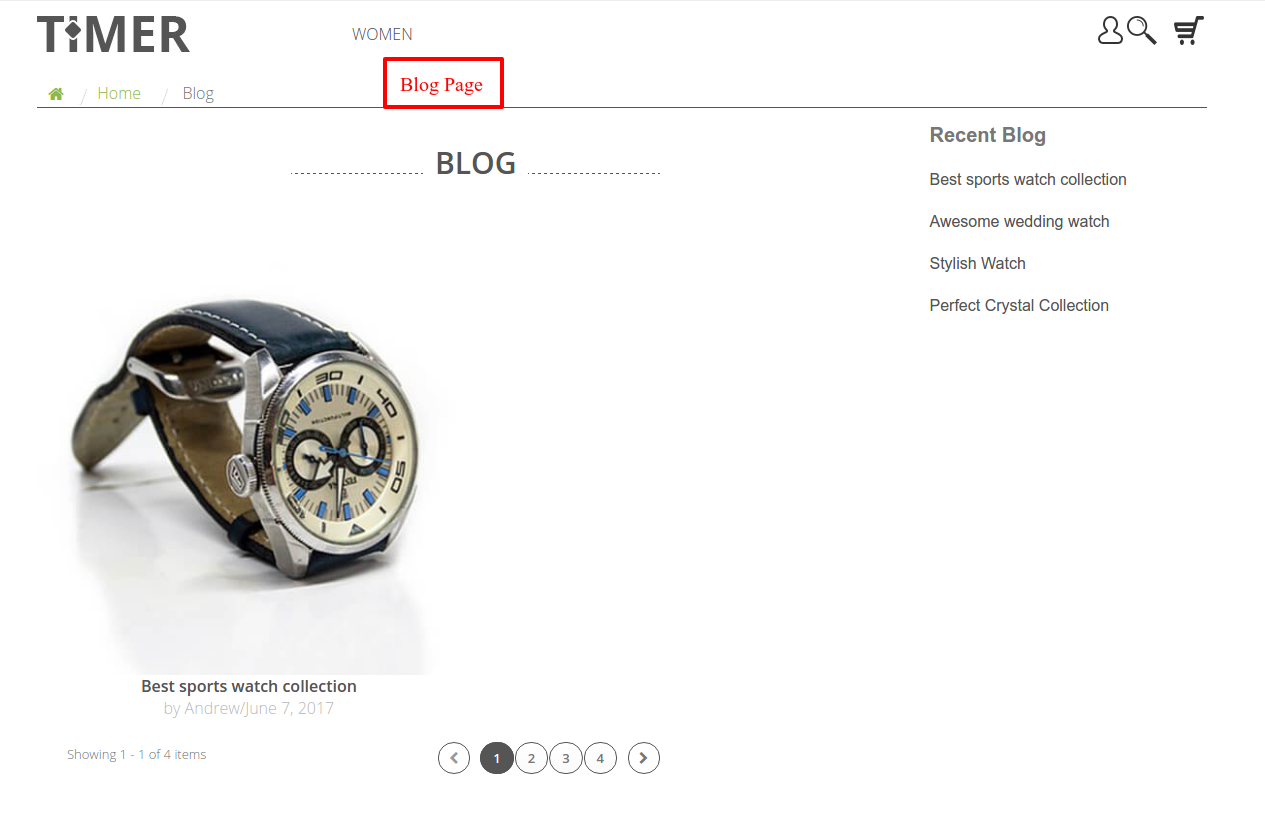
 On the Front end a new Blog section will be available.
Users can view the blogs from here.
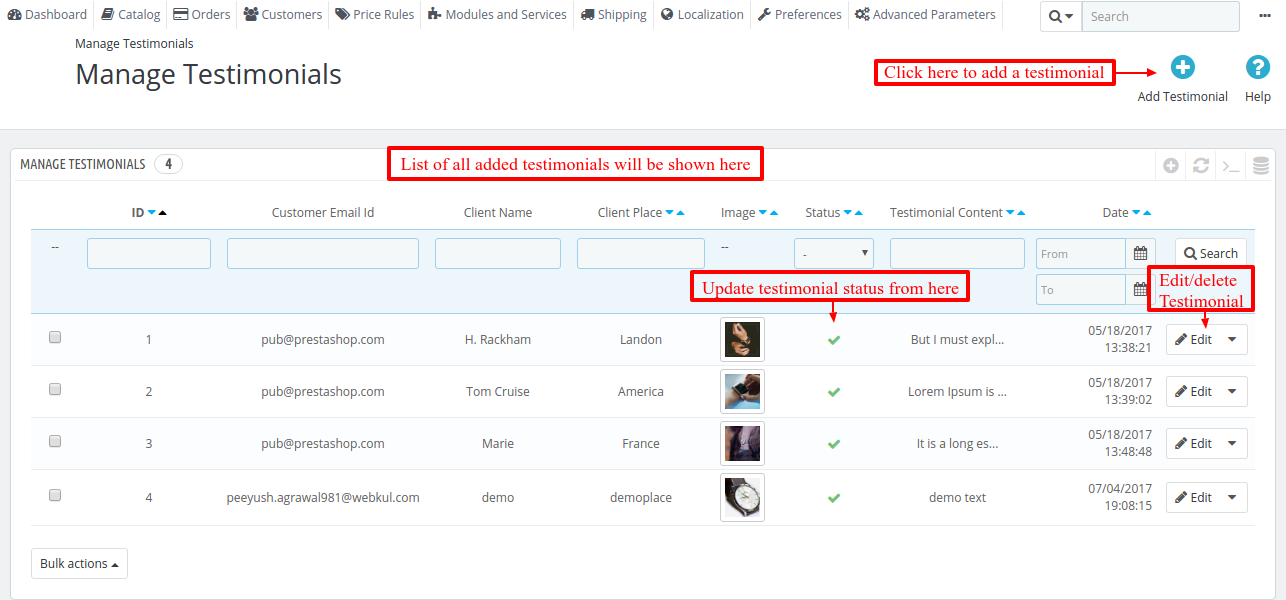
Both Admin and customers can add Testimonials on the Store. Admin can add Testimonials from the back office.
Admin can view the list of testimonials, update status, edit and delete any testimonial as well.
Admin can easily edit or delete any testimonial. 
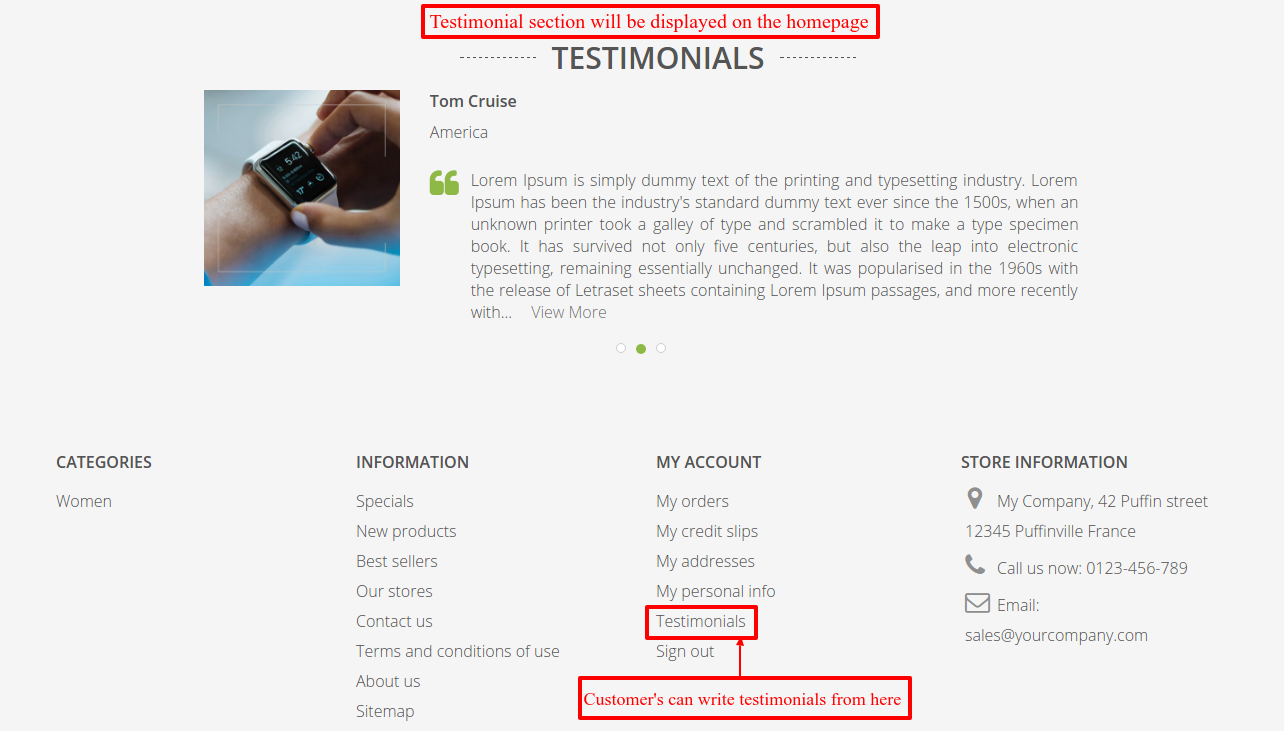
Testimonial section will be displayed on the Homepage.
Customers can also write testimonials from the front end.
A list of customers testimonials will be shown with their status. All the customer testimonials go to the admin for approval first.
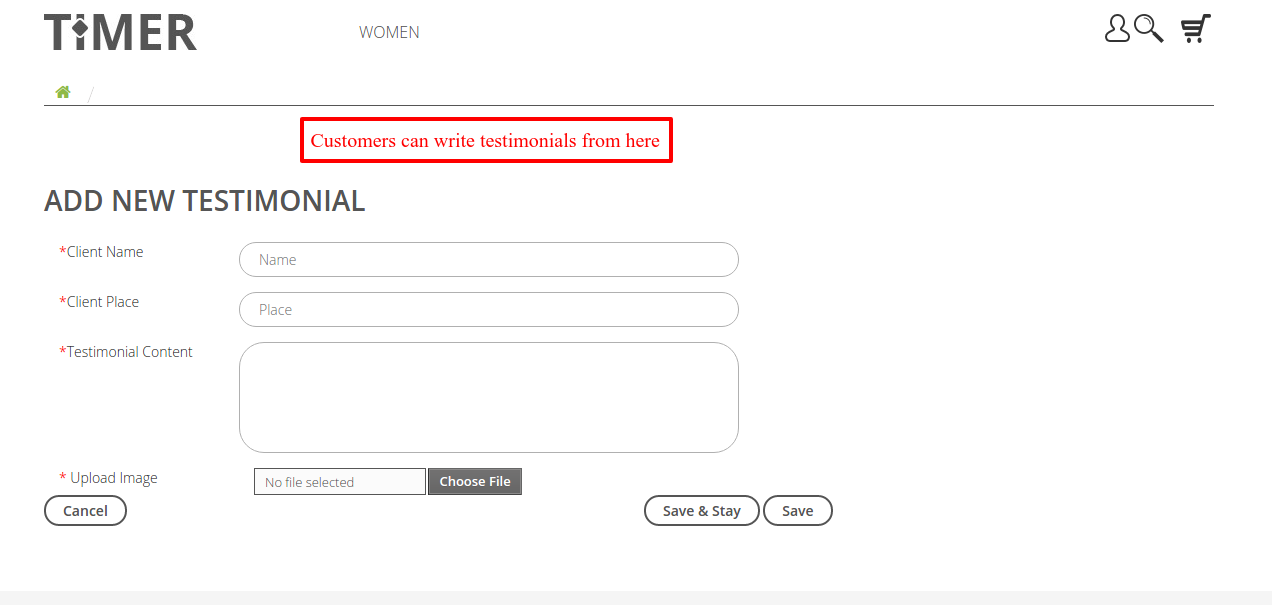 So this is how Blog and Testimonials can be added on the store homepage.
Mid Banner
A new exciting feature mid banner has been added in this Chroniker theme. This mid banner can be configured from the back office.
Fill in the required information and image for the mid banner and click on save to apply.
Once applied, mid banner will be displayed to the user on the homepage.
This is how Prestashop Responsive Chroniker theme can change the look of your website and make it more attractive for your visitors.
Support
For any kind of technical assistance, just raise a ticket at : http://webkul.uvdesk.com and for any doubt contact us at [email protected]
Current Product Version - 1.0.0
Supported Framework Version - 1.6.x.x








Be the first to comment.