OpenCart Bulk Upload: Uploading products one at a time can be an extremely tedious task, and also a time-consuming task.
If a user wants to edit a product that is to be done manually.
It will take lots of time and will be a hassle causing process.
The user might end up making mistakes such as uploading the product twice or not uploading some products.
Through the Opencart Bulk Upload module, the admin can add/ upload multiple products in a single click.
This saves time and also there are fewer chances of making mistakes.
The admin can upload the products using CSV, XML, or XLS files. It also allows the admin to export the products in bulk using the CSV, XLS, and XML files.
Opencart Bulk Upload eases things in a way that enhances the efficiency of the user as it saves a huge time which a user may waste while uploading products manually.
Note:
1. zip archive extension needs to be installed on the server.
2. This module supports all templates and themes including the Journal theme.
3. Opencart Bulk Upload module supports the Multi-Store feature of default Opencart.
4. To use this module, the PHP version must be lower than the 7.3.
Features
- The admin enables the Keyword and on updating a product, the SEO comprises of SEO+Product Id.
- Also, on enabling the Keyword and adding a new product, the SEO will contain the SEO provided and four random characters.
- The admin can disable the keyword and an error will display and the product skips.
- Admin can upload bulk files under Uploads.
- Using the CSV, XML, or XLS files, the admin can upload the products in bulk.
- The admin can upload a zip file for the images.
- Admin can get the ID data of various options like – Product, Catalog, Manufacturer, Filter, Download, Stock Status, etc.
- Under the Bulk option, the admin can export all the products.
- On choosing the Selection option, the admin will have to tick mark the checkbox for the products, which he needs to export.
- Under Data Flow Profile, the database is mapped between the file that needs to be uploaded and Opencart Database.
- The customers can view the bulk products in the frontend.
Installation
Upload Files
First, extract the downloaded zip file. After that, open the correct Opencart Version Folder. According to Opencart Version installed in your system.
Then, upload admin, demo, and system to the Opencart root directory.
Extension Installer
The admin needs to install the Opencart Bulk Upload module by uploading the massupload.ocmod.zip file through Extension>Extension Installer.

Refresh Modifications
The user can navigate through Extensions > Modifications. Now click the Refresh button as visible in the below screenshot.
Edit User Groups
After that, go to System > Users > Usergroups. And then edit ‘Administrator’. Click Select All for both Access Permission and Modify Permission and Save it.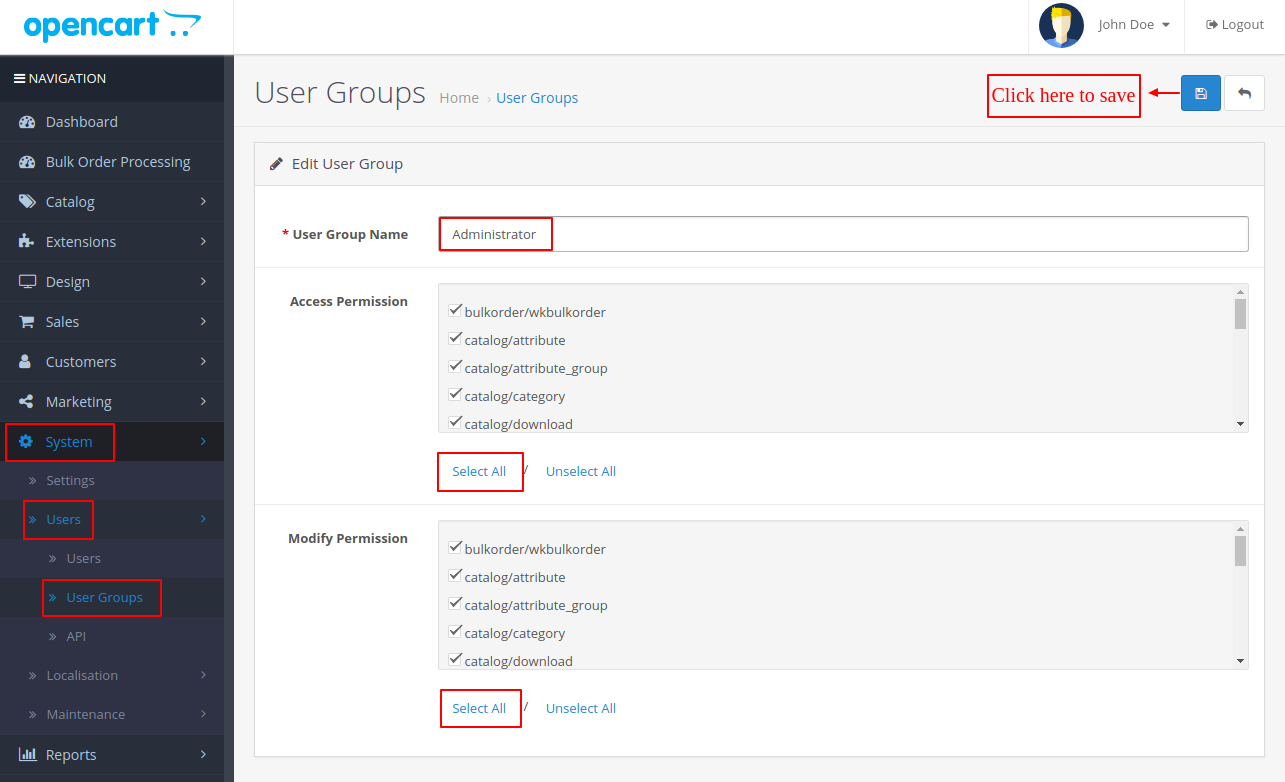
Install
Now navigate to Extensions > Modules. Find Product Mass Upload from the list. Click the Install button as visible in the screenshot below.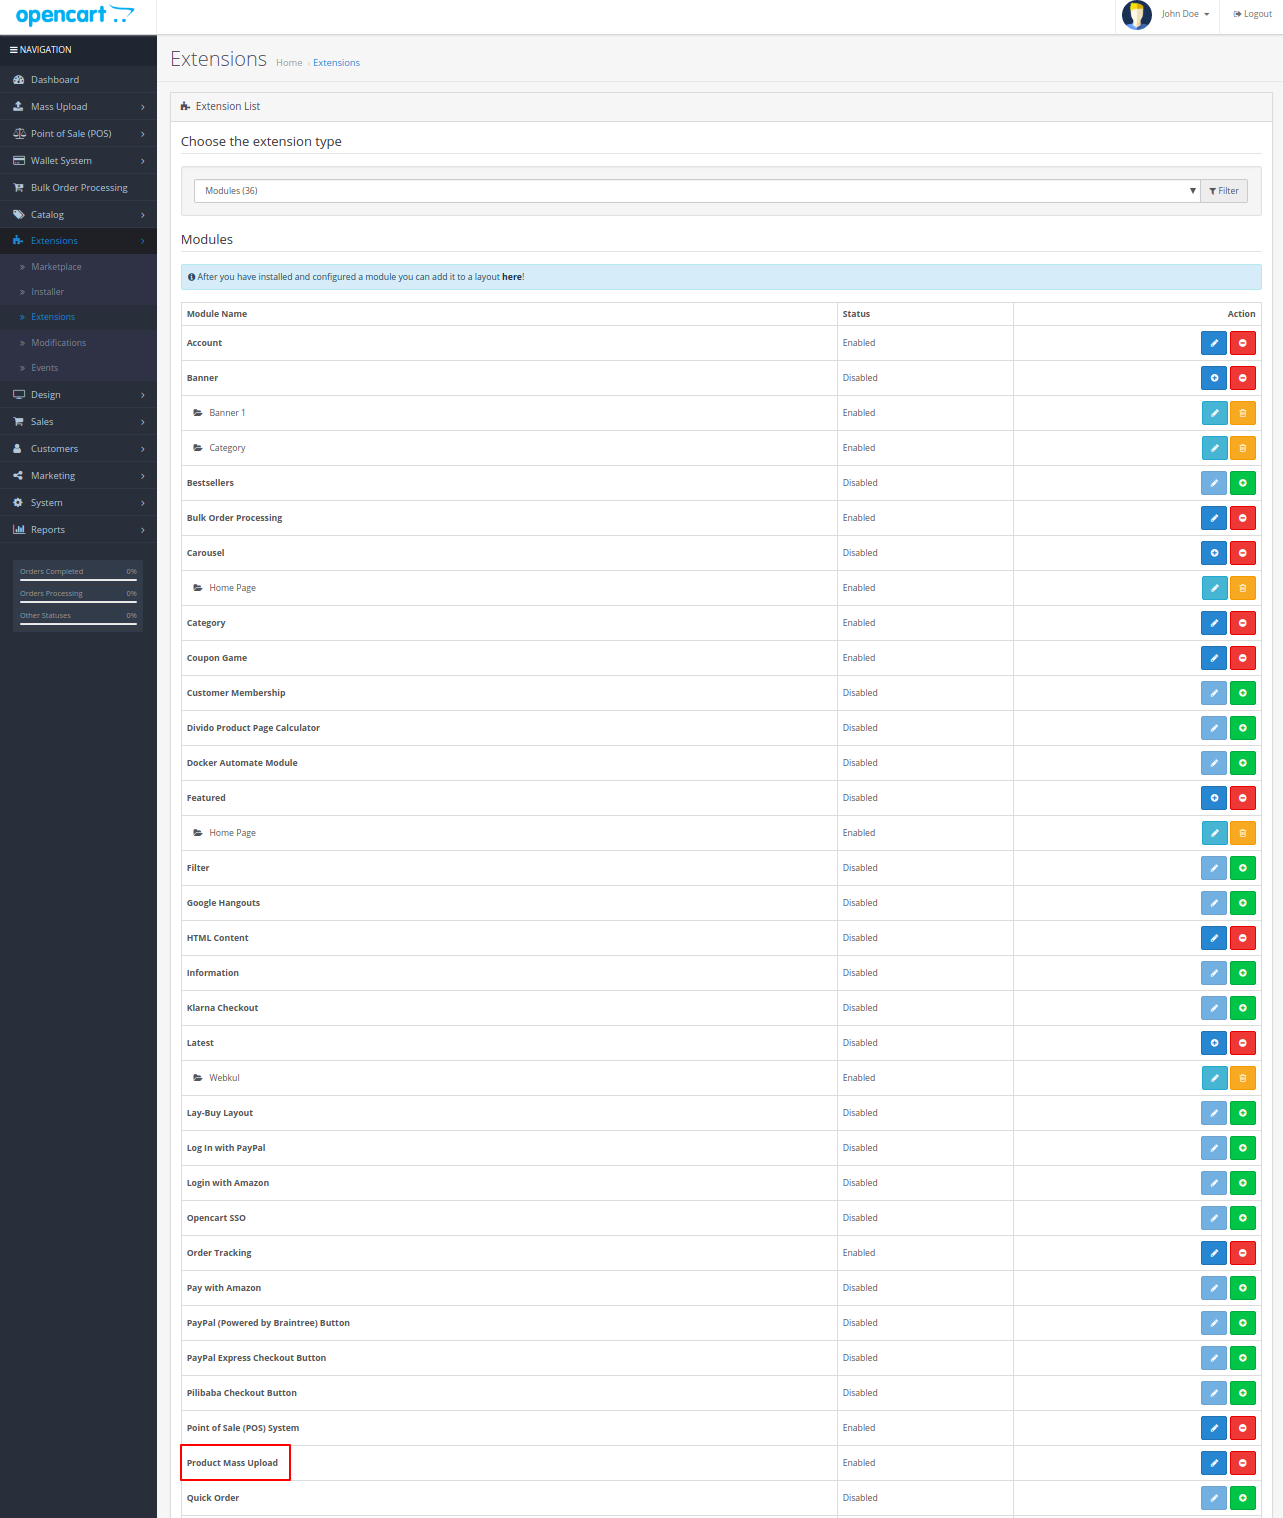
Module Configuration
After the successful installation of the Opencart Bulk Upload, the admin can navigate through the Extension > Extensions > Modules as shown in the image. 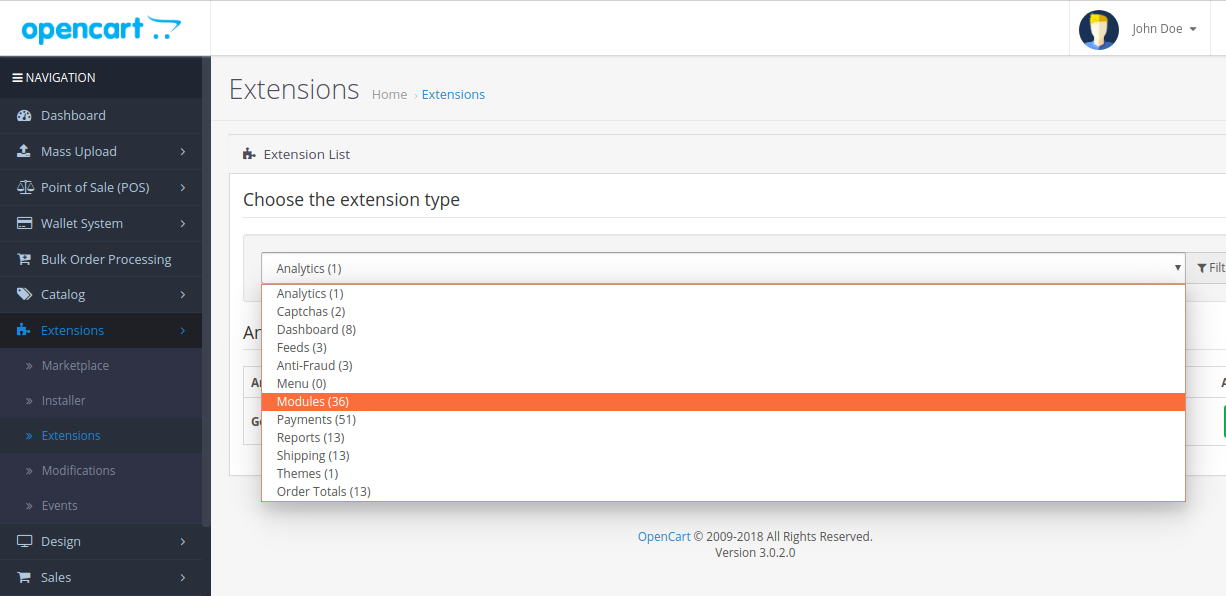
On clicking the Modules option, the admin can view the list of modules and select Product Mass Upload from the list.
The admin can Edit the Product Mass Upload and configure the settings of the modules as shown. 
The admin can configure the Product Mass Upload module as follows:
Status- The admin can configure the module status as Enabled or Disabled.
Keyword- The keyword may be set as Enabled or Disabled.
Case 1: If the Keyword option is set as Enabled.
- If the admin updates the product, the SEO will comprise of SEO+Product Id.
- On adding a new product, the SEO will contain the SEO provided and four random characters.
Case 2: If the Keyword option is set as Disabled.
- An error is shown and the product skips.
Admin End Workflow- Uploads
Once the admin sets the configurations for Opencart Bulk Upload in the admin panel, the Mass Upload tab is visible as a dashboard icon in the admin panel.
Thereafter, the admin can configure the settings for Mass Upload on the basis of two icons- Uploads and Data Flow Profile.
General Tab:
The admin will have to configure the settings of the General tab as shown in the image below:

The admin will set the configurations for the “General” tab as follows-
- Data Flow Profile- The admin can select the ‘Data Flow Profile’ from the dropdown list.
- File Type- The File Type can be chosen as XML, XLS, and CSV.
- Update new Products or Replace Old Ones- The admin can choose either- Add New Products Only or Update Old Products.
- Upload Zip File- The admin needs to click on the Upload button in order to upload the XML/XLS/CSV file.
By clicking on the “Next” button, the user can import the products and a success message will display for the user.
Image Tab:
The admin can upload the images under the Image tab as shown in the image:

The admin will set the configurations for the “Image” tab as follows-
- Upload Images(Zip): The admin can upload the zip file.
Get Id:
The admin can Get the Ids for various fields like Products, Catalog, Manufacturer, Filter, Download, Stock Status, etc.
The admin will set the configurations for the “Get Id” tab as follows-
- Select: The admin can select an option from the given list and click on the search box to display the IDs of the respective option.
- Search: The admin will have to simply click on the search box and the Ids for the option in which the admin selects to display in the box.
For example- In the given image the admin selects the Category option against the Select option.
On clicking the Search Box, the Id’s for the options display. The admin can type and name and the id’s for that specific name will display in the Search Box.
Export:
The admin can easily upload the products under the Export tab as shown in the image.
The admin will set the configurations for the “Export” tab as follows-

- Mail: The admin will have to select the mail option from the list.
- Backup File Type: The admin will choose either CSV, XML or XLS form the given list of options.
- Select Download Type: Against Select Download Type, the admin will have to choose either Bulk or Selection.
On choosing Bulk, the admin can export all the products.
On choosing Selection, the admin can tick mark the checkbox for the products, which he needs to export.
Once the admin has chosen the products, on clicking the Export button, the admin can export the products.
After exporting the products, the admin can find the files in the email.
Information:
The admin can find additional information about the module under the Information tab as shown in the image below.
Data Flow Profile
The admin can navigate through Mass Upload > Data Flow Profile in order to create or edit the Data Flow Profile as shown in the image.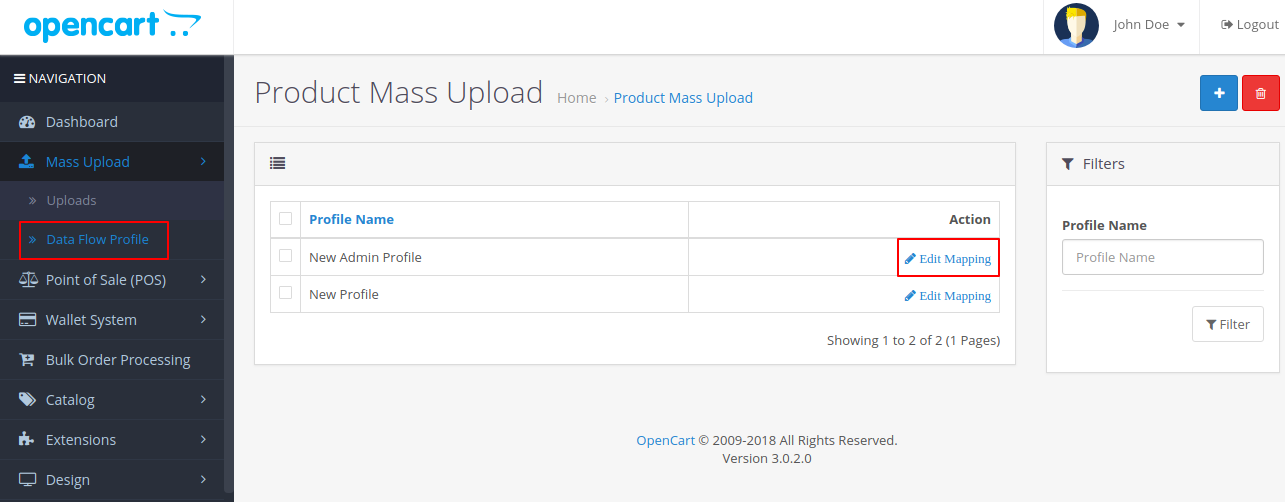
The admin can create a new Data Flow Profile on clicking the “Plus Sign”.
The ‘Profile Name’ details are added by the admin. Under ‘Profile information’, the admin adds the name of Database and name of the files.
This will help in mapping the database between the file that needs to be uploaded and Opencart Database.
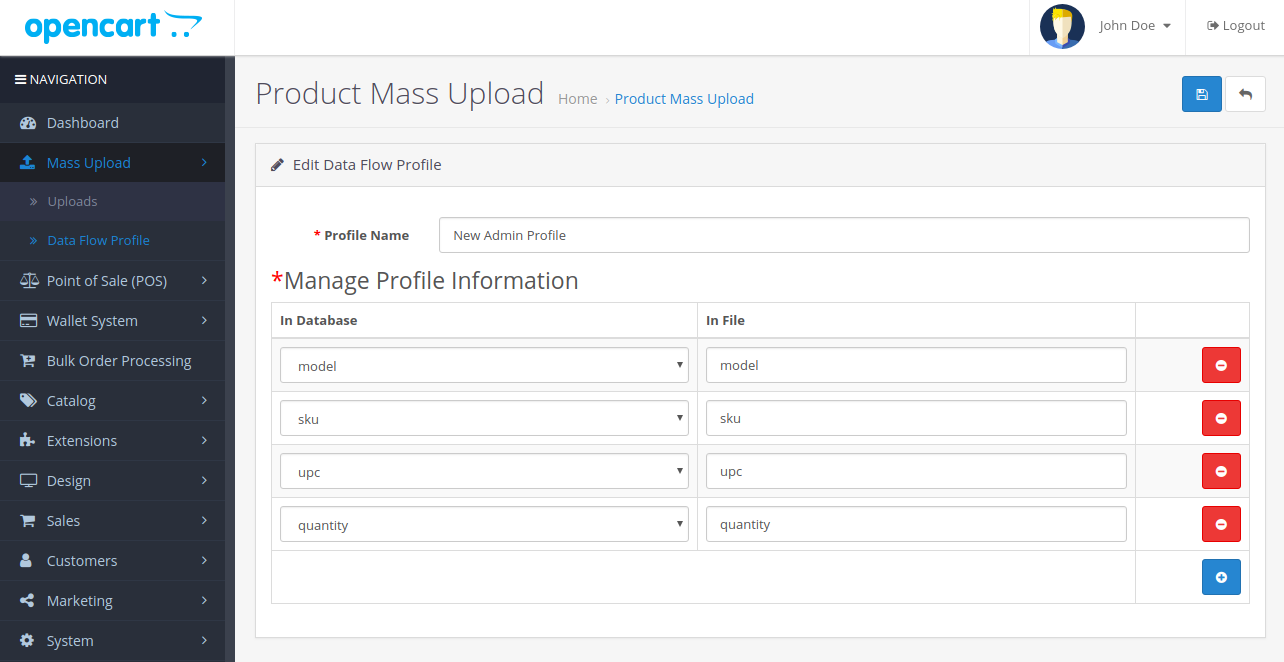
Once the mapping of the fields is done, the admin can save the details.
A success message, “Data Flow Profile Successfully Updated” displays as soon as the admin saves the details.  The admin can navigate through Catalog > Products in the admin panel and view the products which are uploaded in bulk, under Product List as shown in the image below.
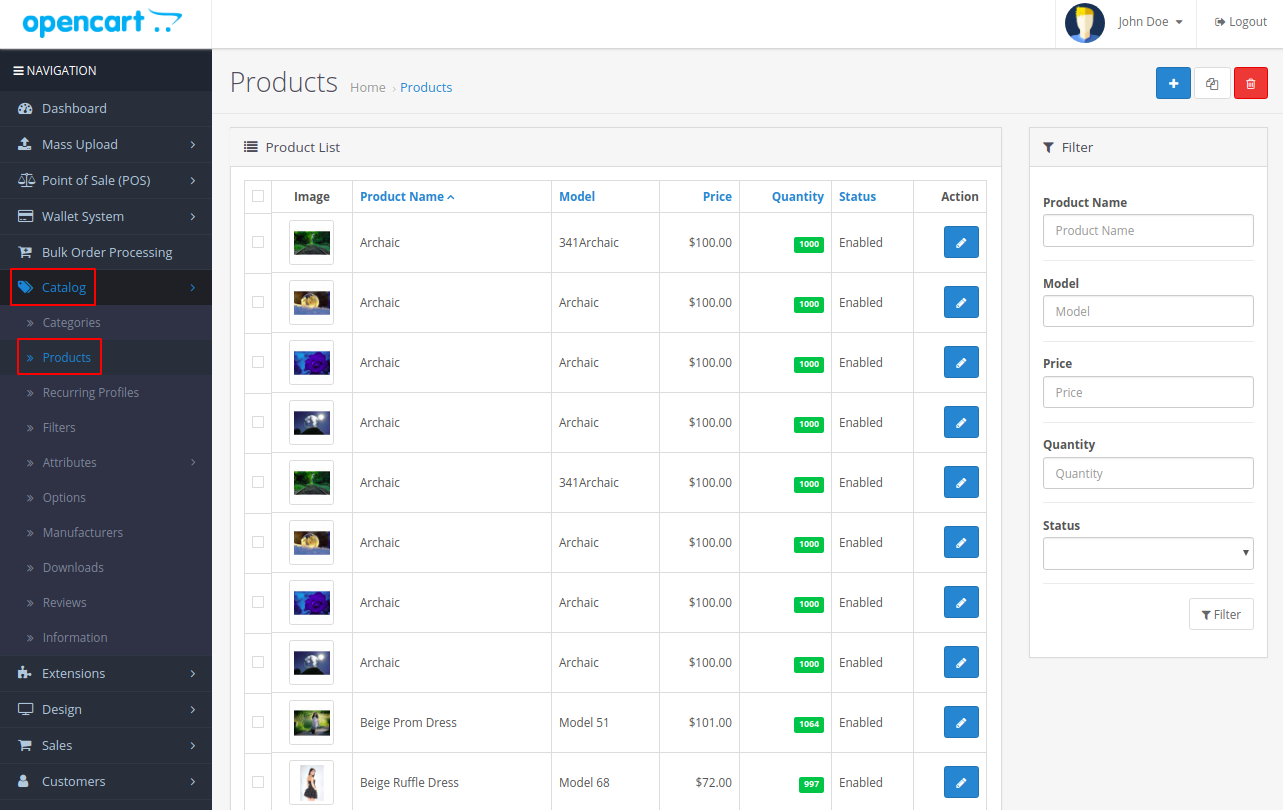
That’s all for the Opencart Bulk Upload extension. If you still have any issues, feel free to add a ticket and let us know your views on our Webkul Support System.
You may also check our top-quality Opencart Extension.
Current Product Version - 2.1.1.0
Supported Framework Version - 3.x.x.x

Please send me a sample CSV file for bulk product upload.