INTRODUCTION
Odoo website quick order, expand your business with bulk selling.
Odoo Website Quick Order- Customers want quick access and ordering when they want to buy products in bulk, especially B2B users. It will save customers time.
Customers can quickly access it and order required products in bulk easily. Also, they can create a list to re-order the same product(s).
Odoo Website Quick Order solves this problem. The module offers customers a listicle view of the product by which they can add the required quantity of the product to the wishlist.
You can also check: Odoo Website Custom Options
FEATURES
- Promote quick orders and boost sales.
- Helps in placing bulk orders from the website.
- A separate page on the website for B2B customers.
- Listicle view for easy navigation and access.
- Search bar to look for a product by the name or initials.
- Auto-save the bulk order list even when the user logs out.
- Customers can add, view, edit, and delete shopping lists. Further, they can remove products as well.
- Customers can re-order the entire list whenever they want.
Note:- With Odoo Website Advance Search, customers can filter results quickly and get relevant results. Customers can filter products, blogs, etc. on the website. Also, advanced search shows accurate results instantly to customers, so the bounce rate declines.
INSTALLATION
- Once you purchase the App from the Webkul store, you will receive the link to download the zip file of the module.
- Extract the file on your system after the download finishes. You will be able to see a folder named- ‘quick_order’.
- Copy and paste this folder inside your Odoo Add-Ons path.
- Now, open the Odoo App and click on the Settings menu. Here, click on Activate the Developer Mode.
- Then, open the Apps menu and click on ‘Update Modules List’.
- In the search bar, remove all the filters and search ‘quick_order’.
- You will be able to see the module in the search result. Click on ‘Install’ to install it.
Before moving further, explore our Odoo development services & an extensive range of quality Odoo Apps.
WORKFLOW
Backend Configuration of Odoo Website Quick Order
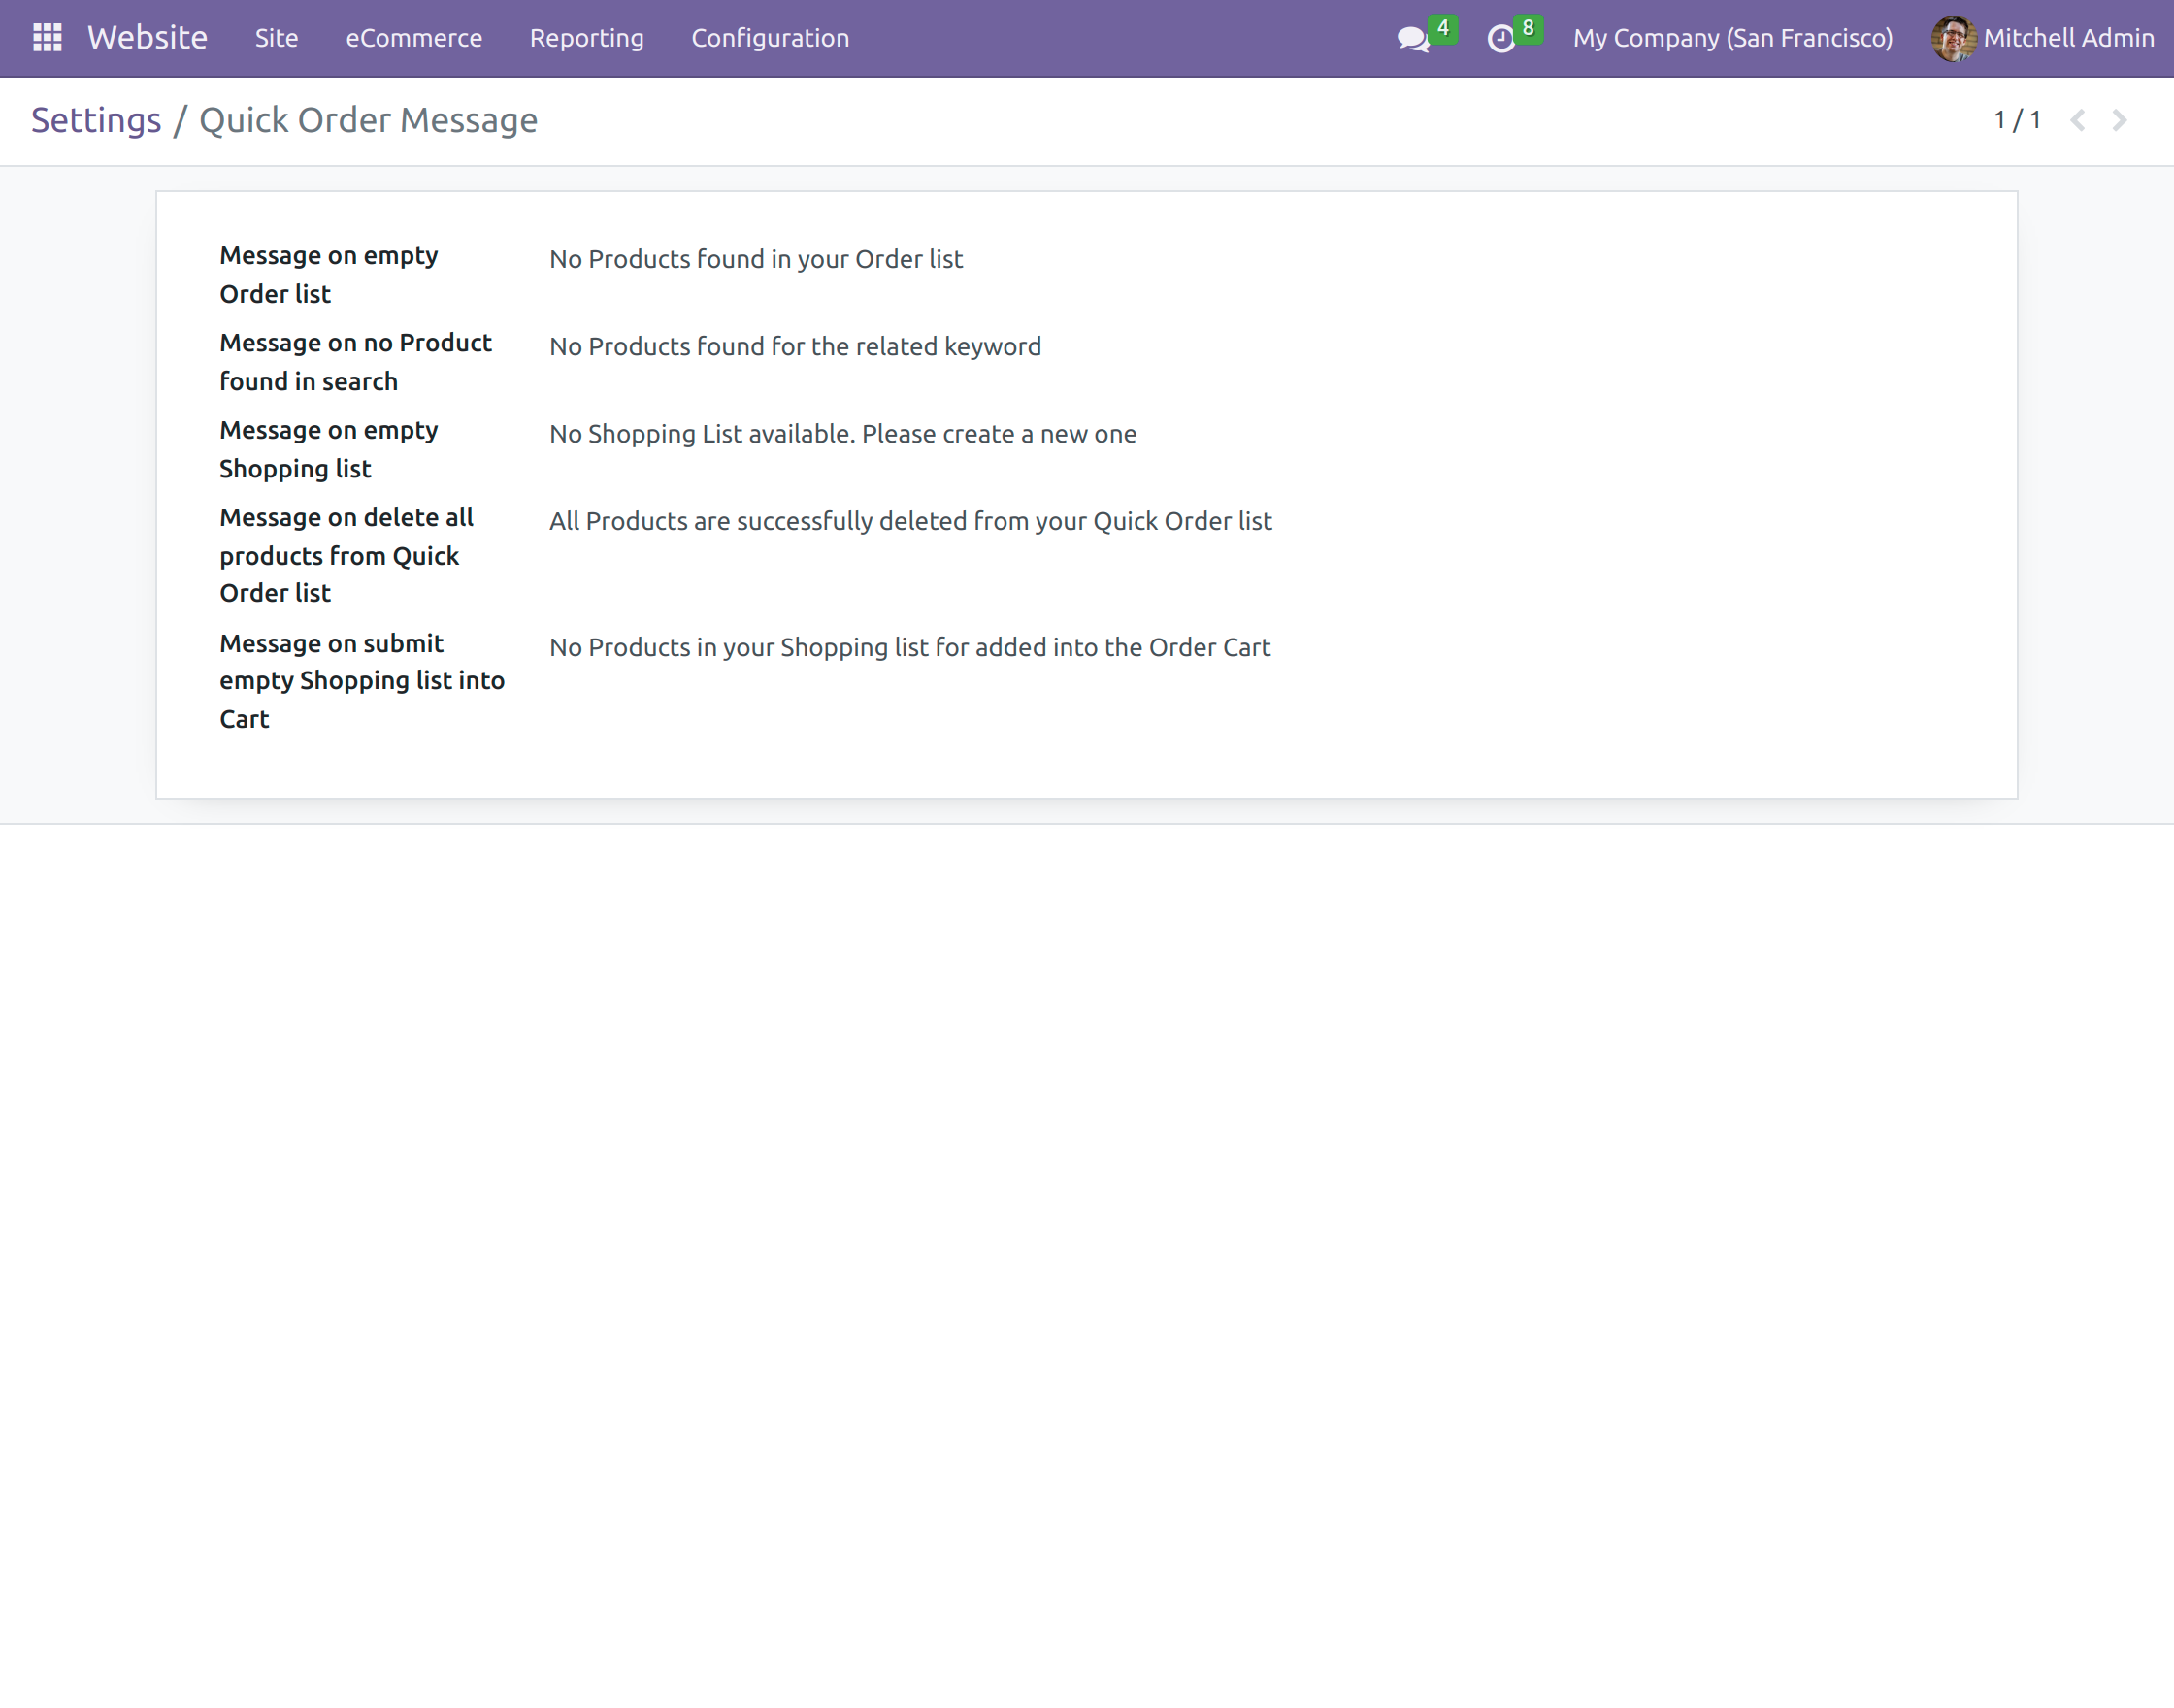
1. Go to the Settings >> Website >> Quick Order >> Quick Order Messages.

2. Admin can set quick order messages for an empty order list, product found in search, empty shopping list, delete all products from quick order list, and submit empty shopping list into cart.
- By activating the developer mode, Admins can create Quick orders from the backend by navigating to ‘eCommerce>Quick Orders’.
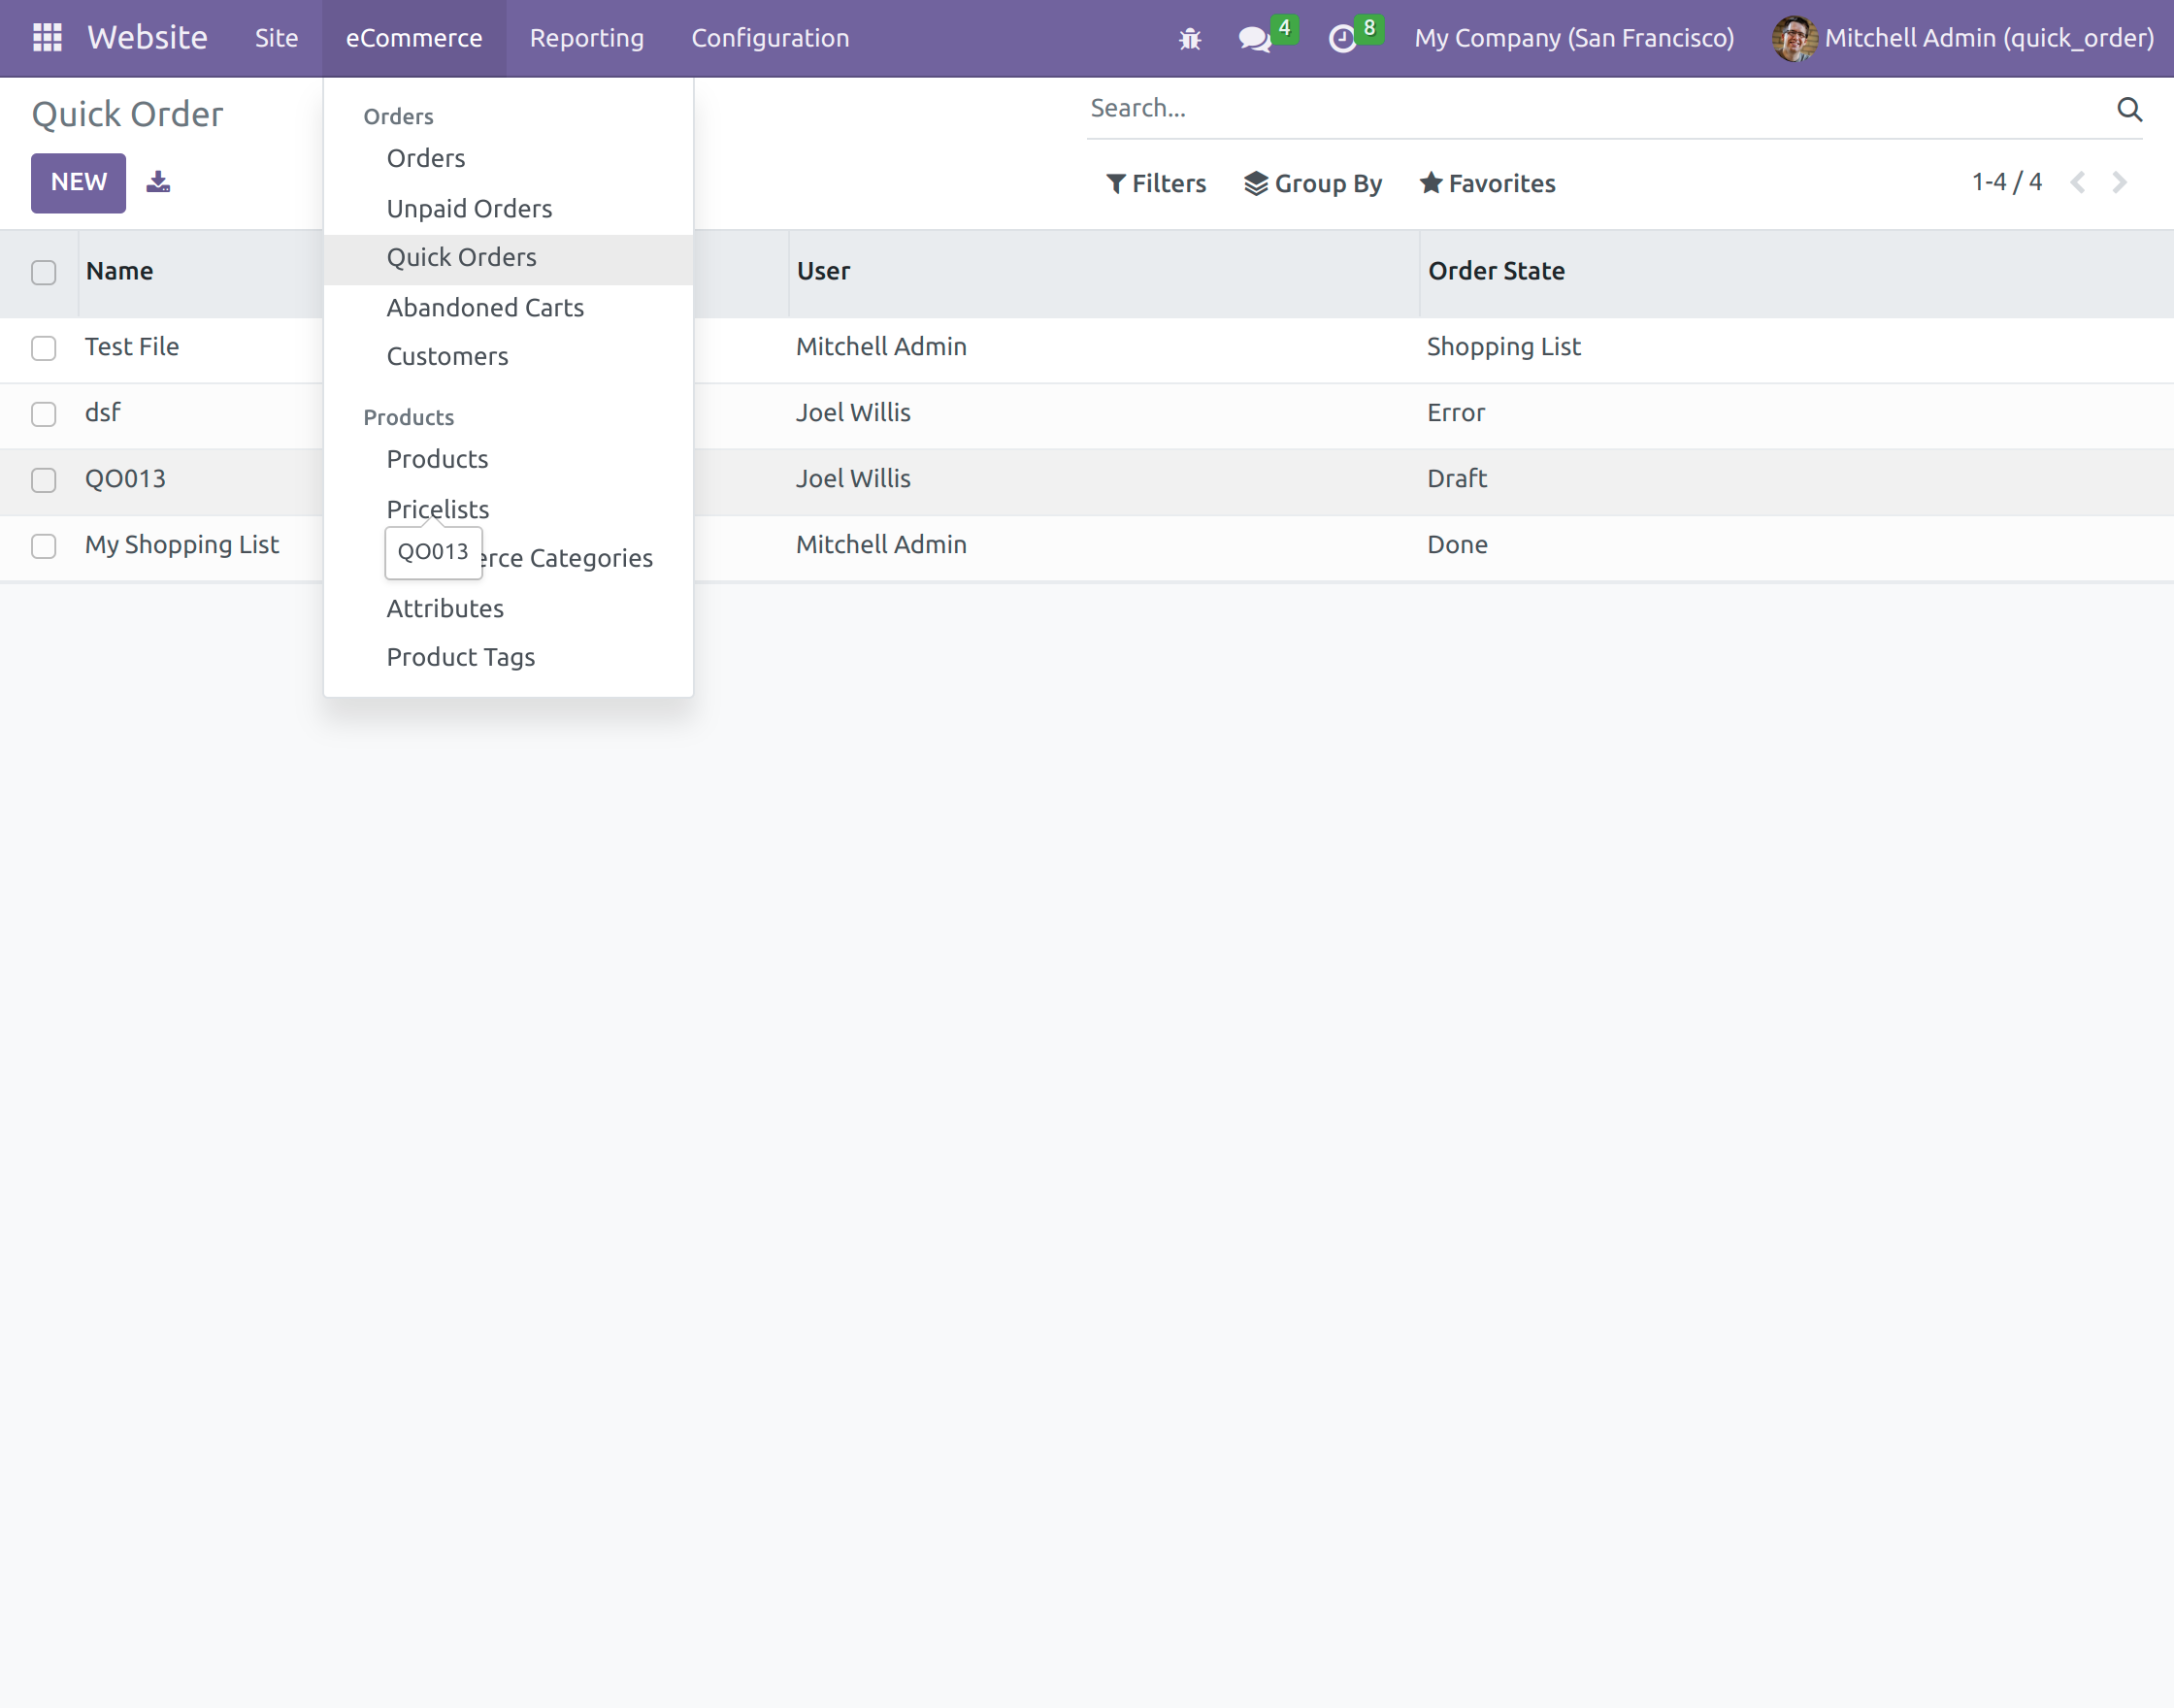
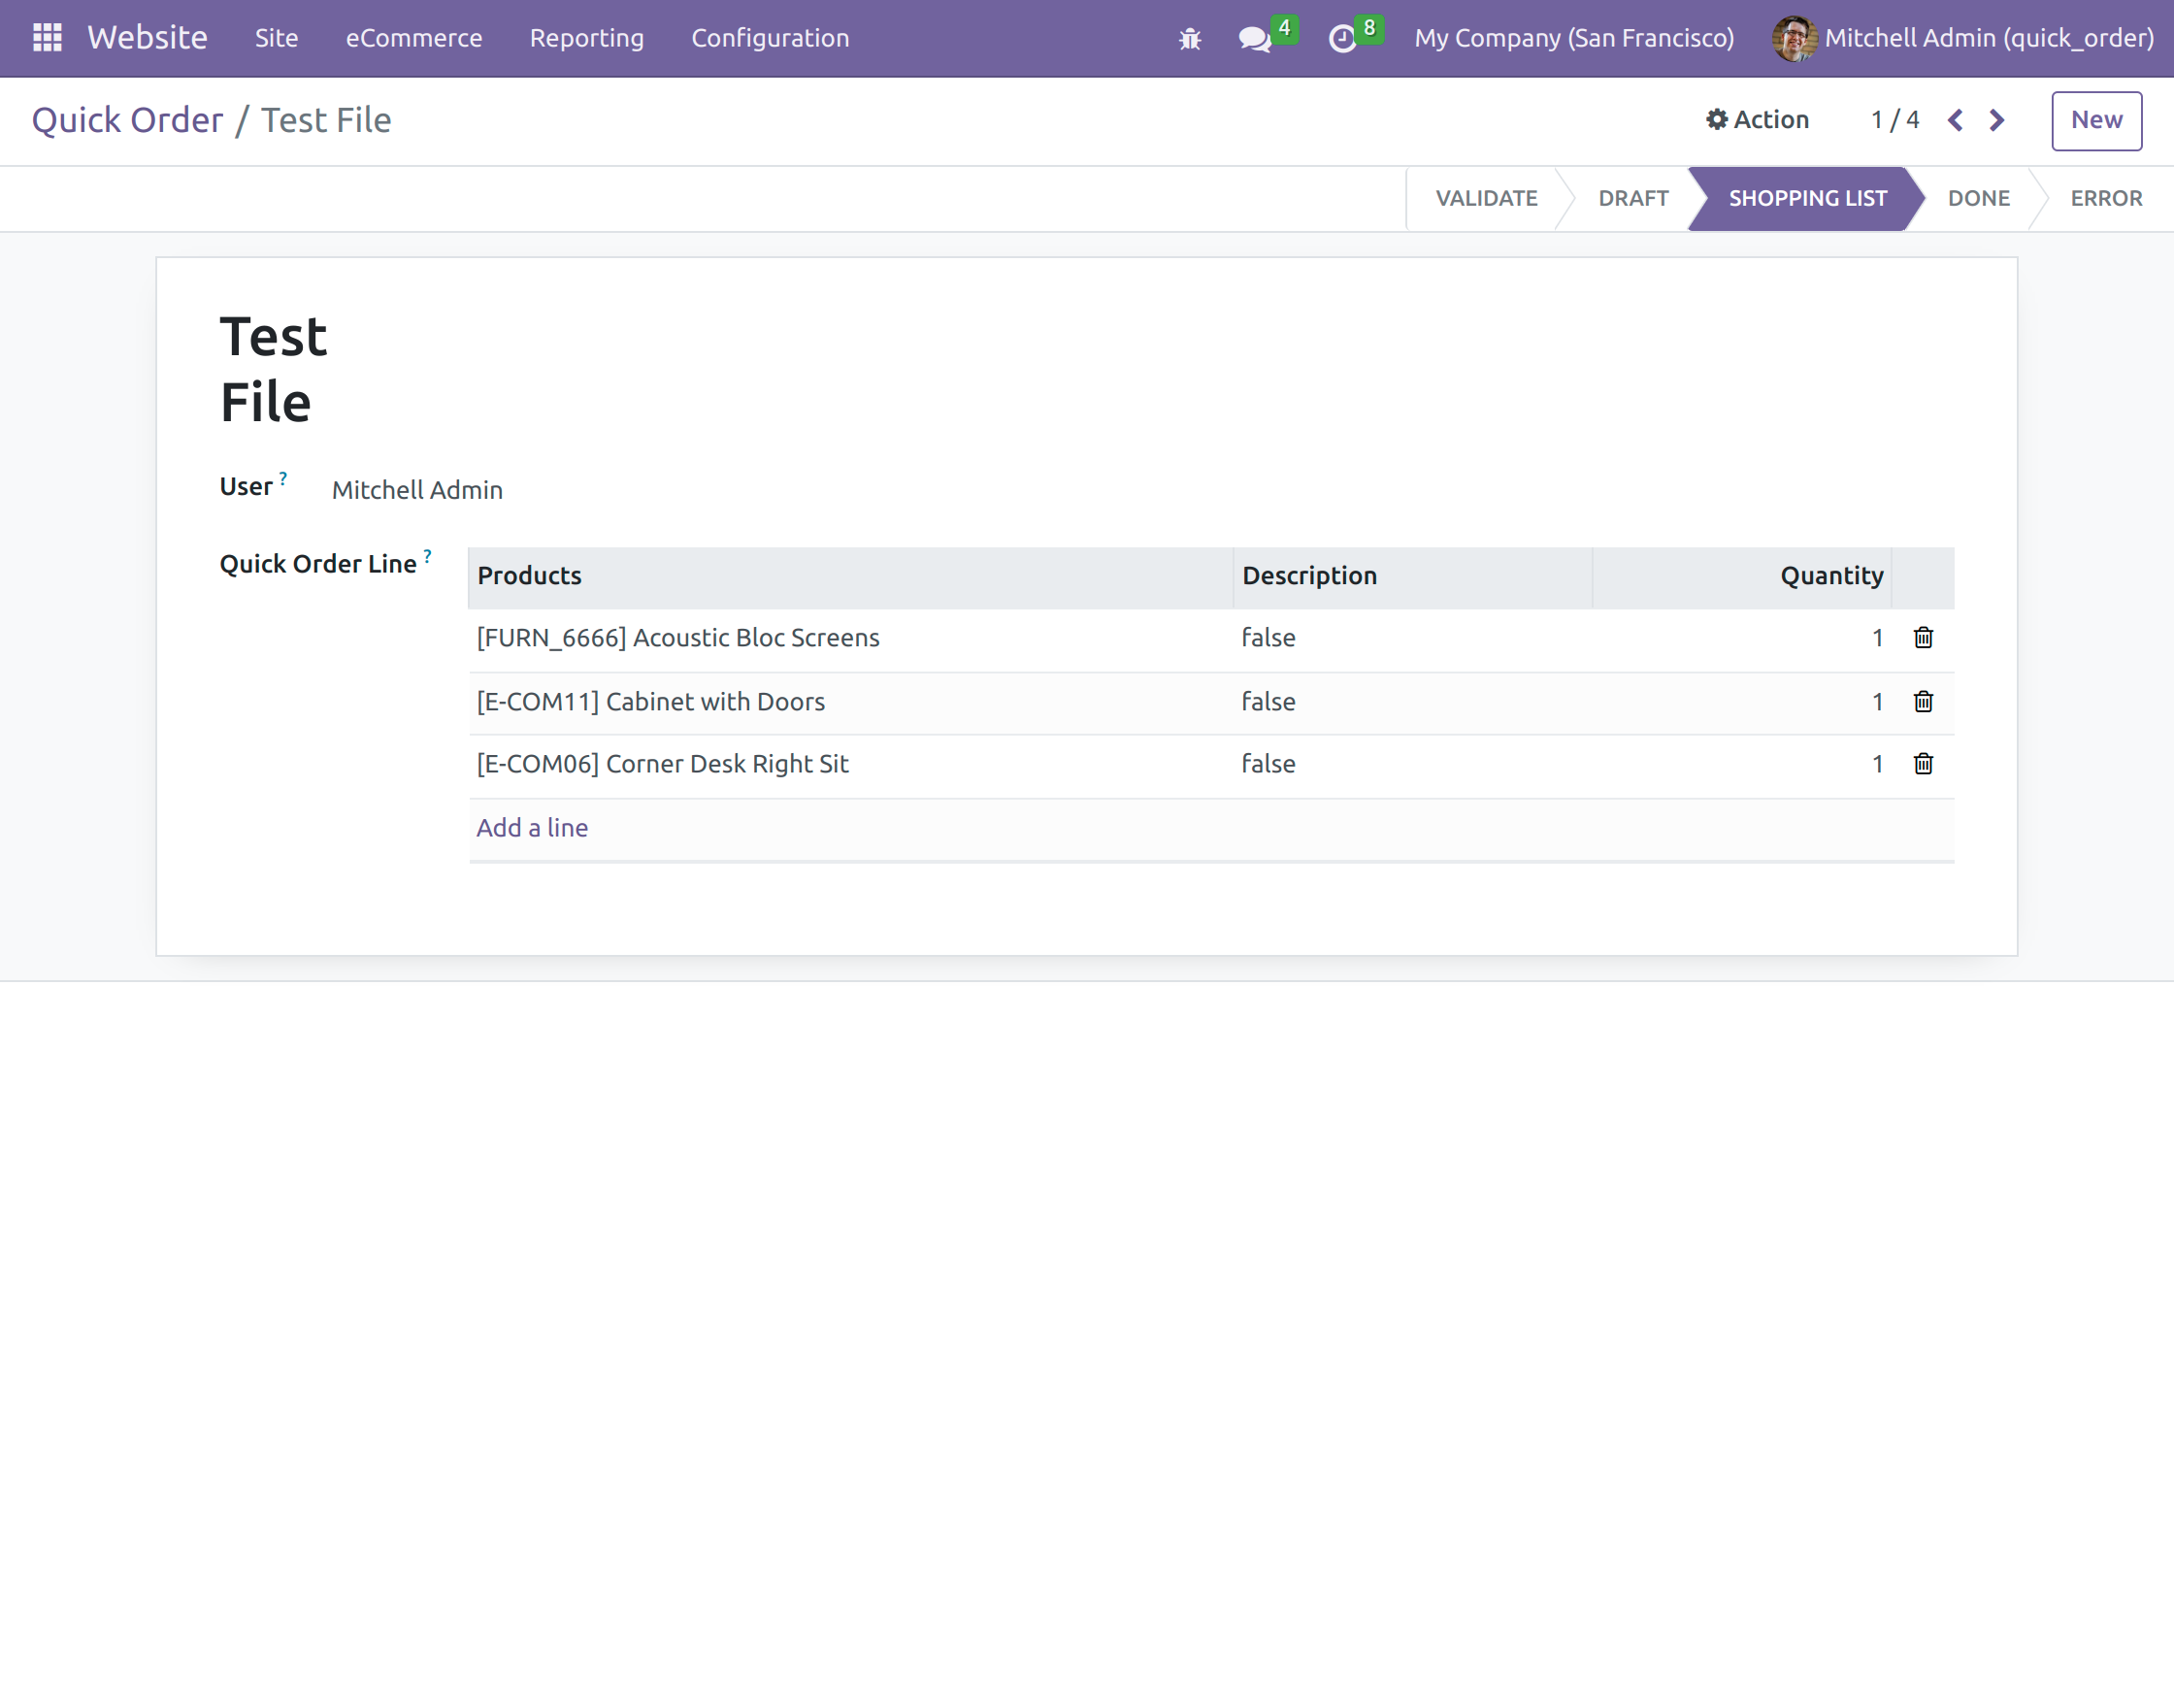
- Created Quick orders on the backend can be viewed by clicking on individual quick order.
Frontend Configuration of Odoo Website Quick Order
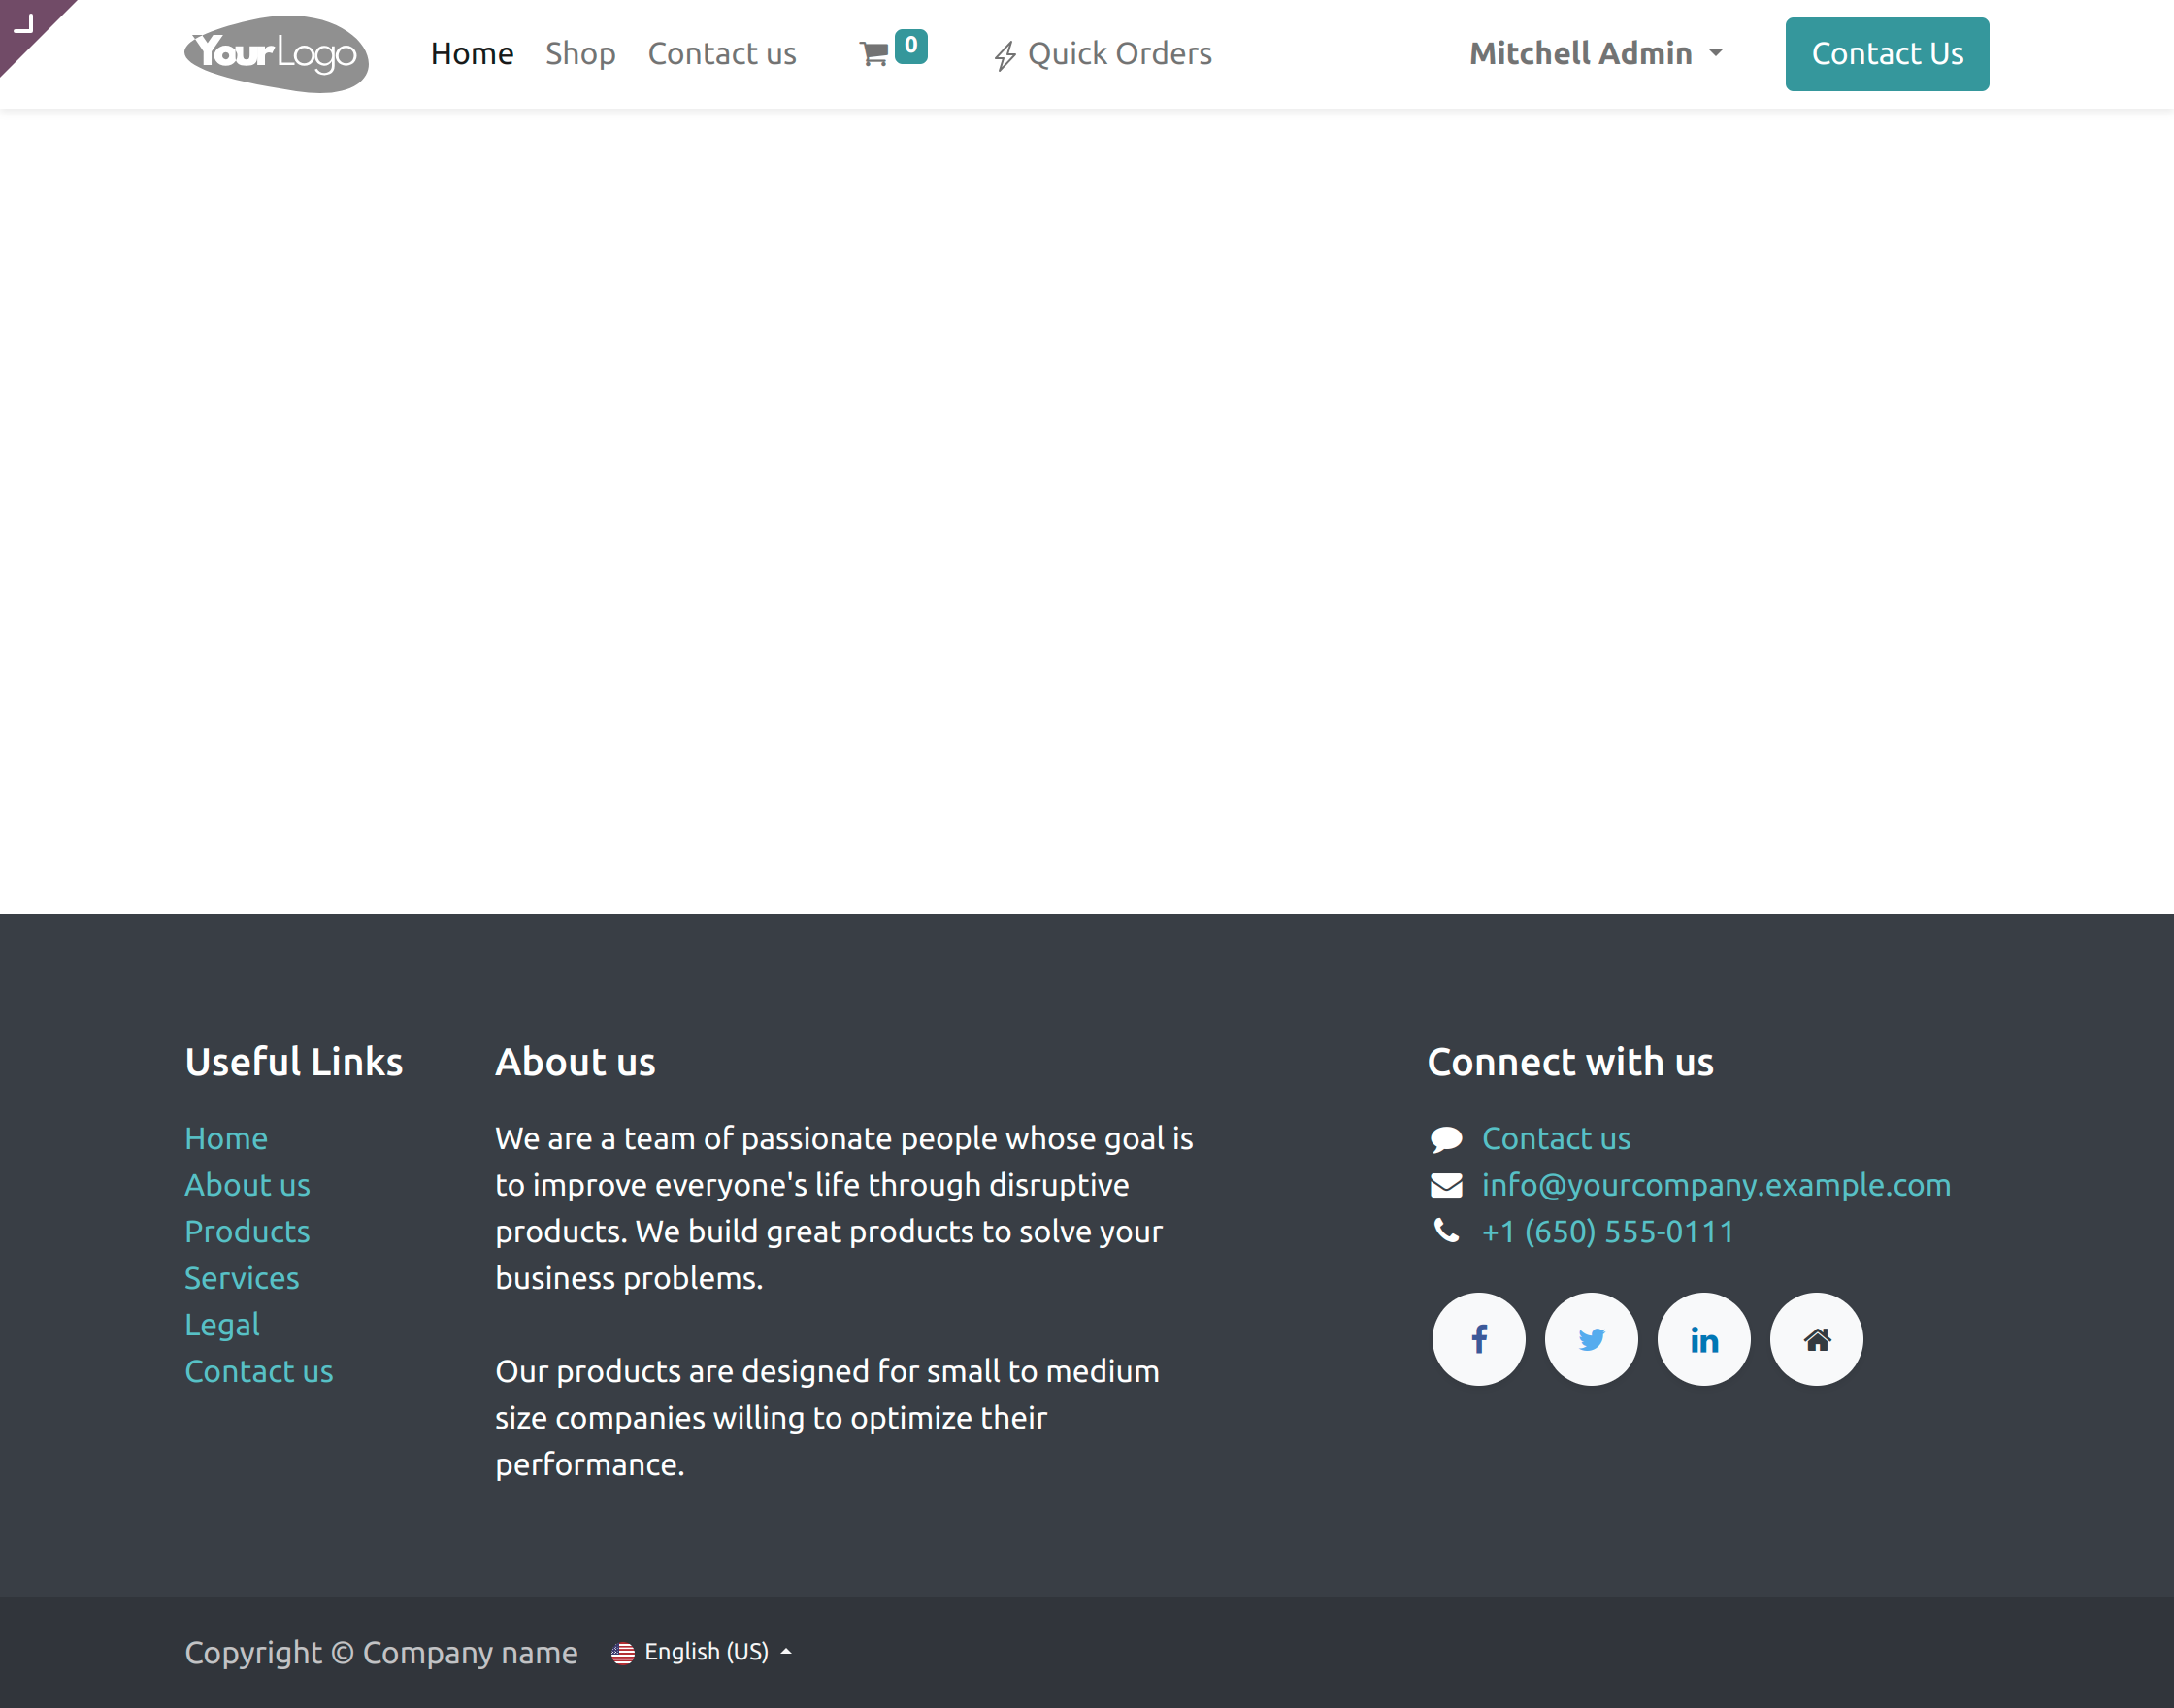
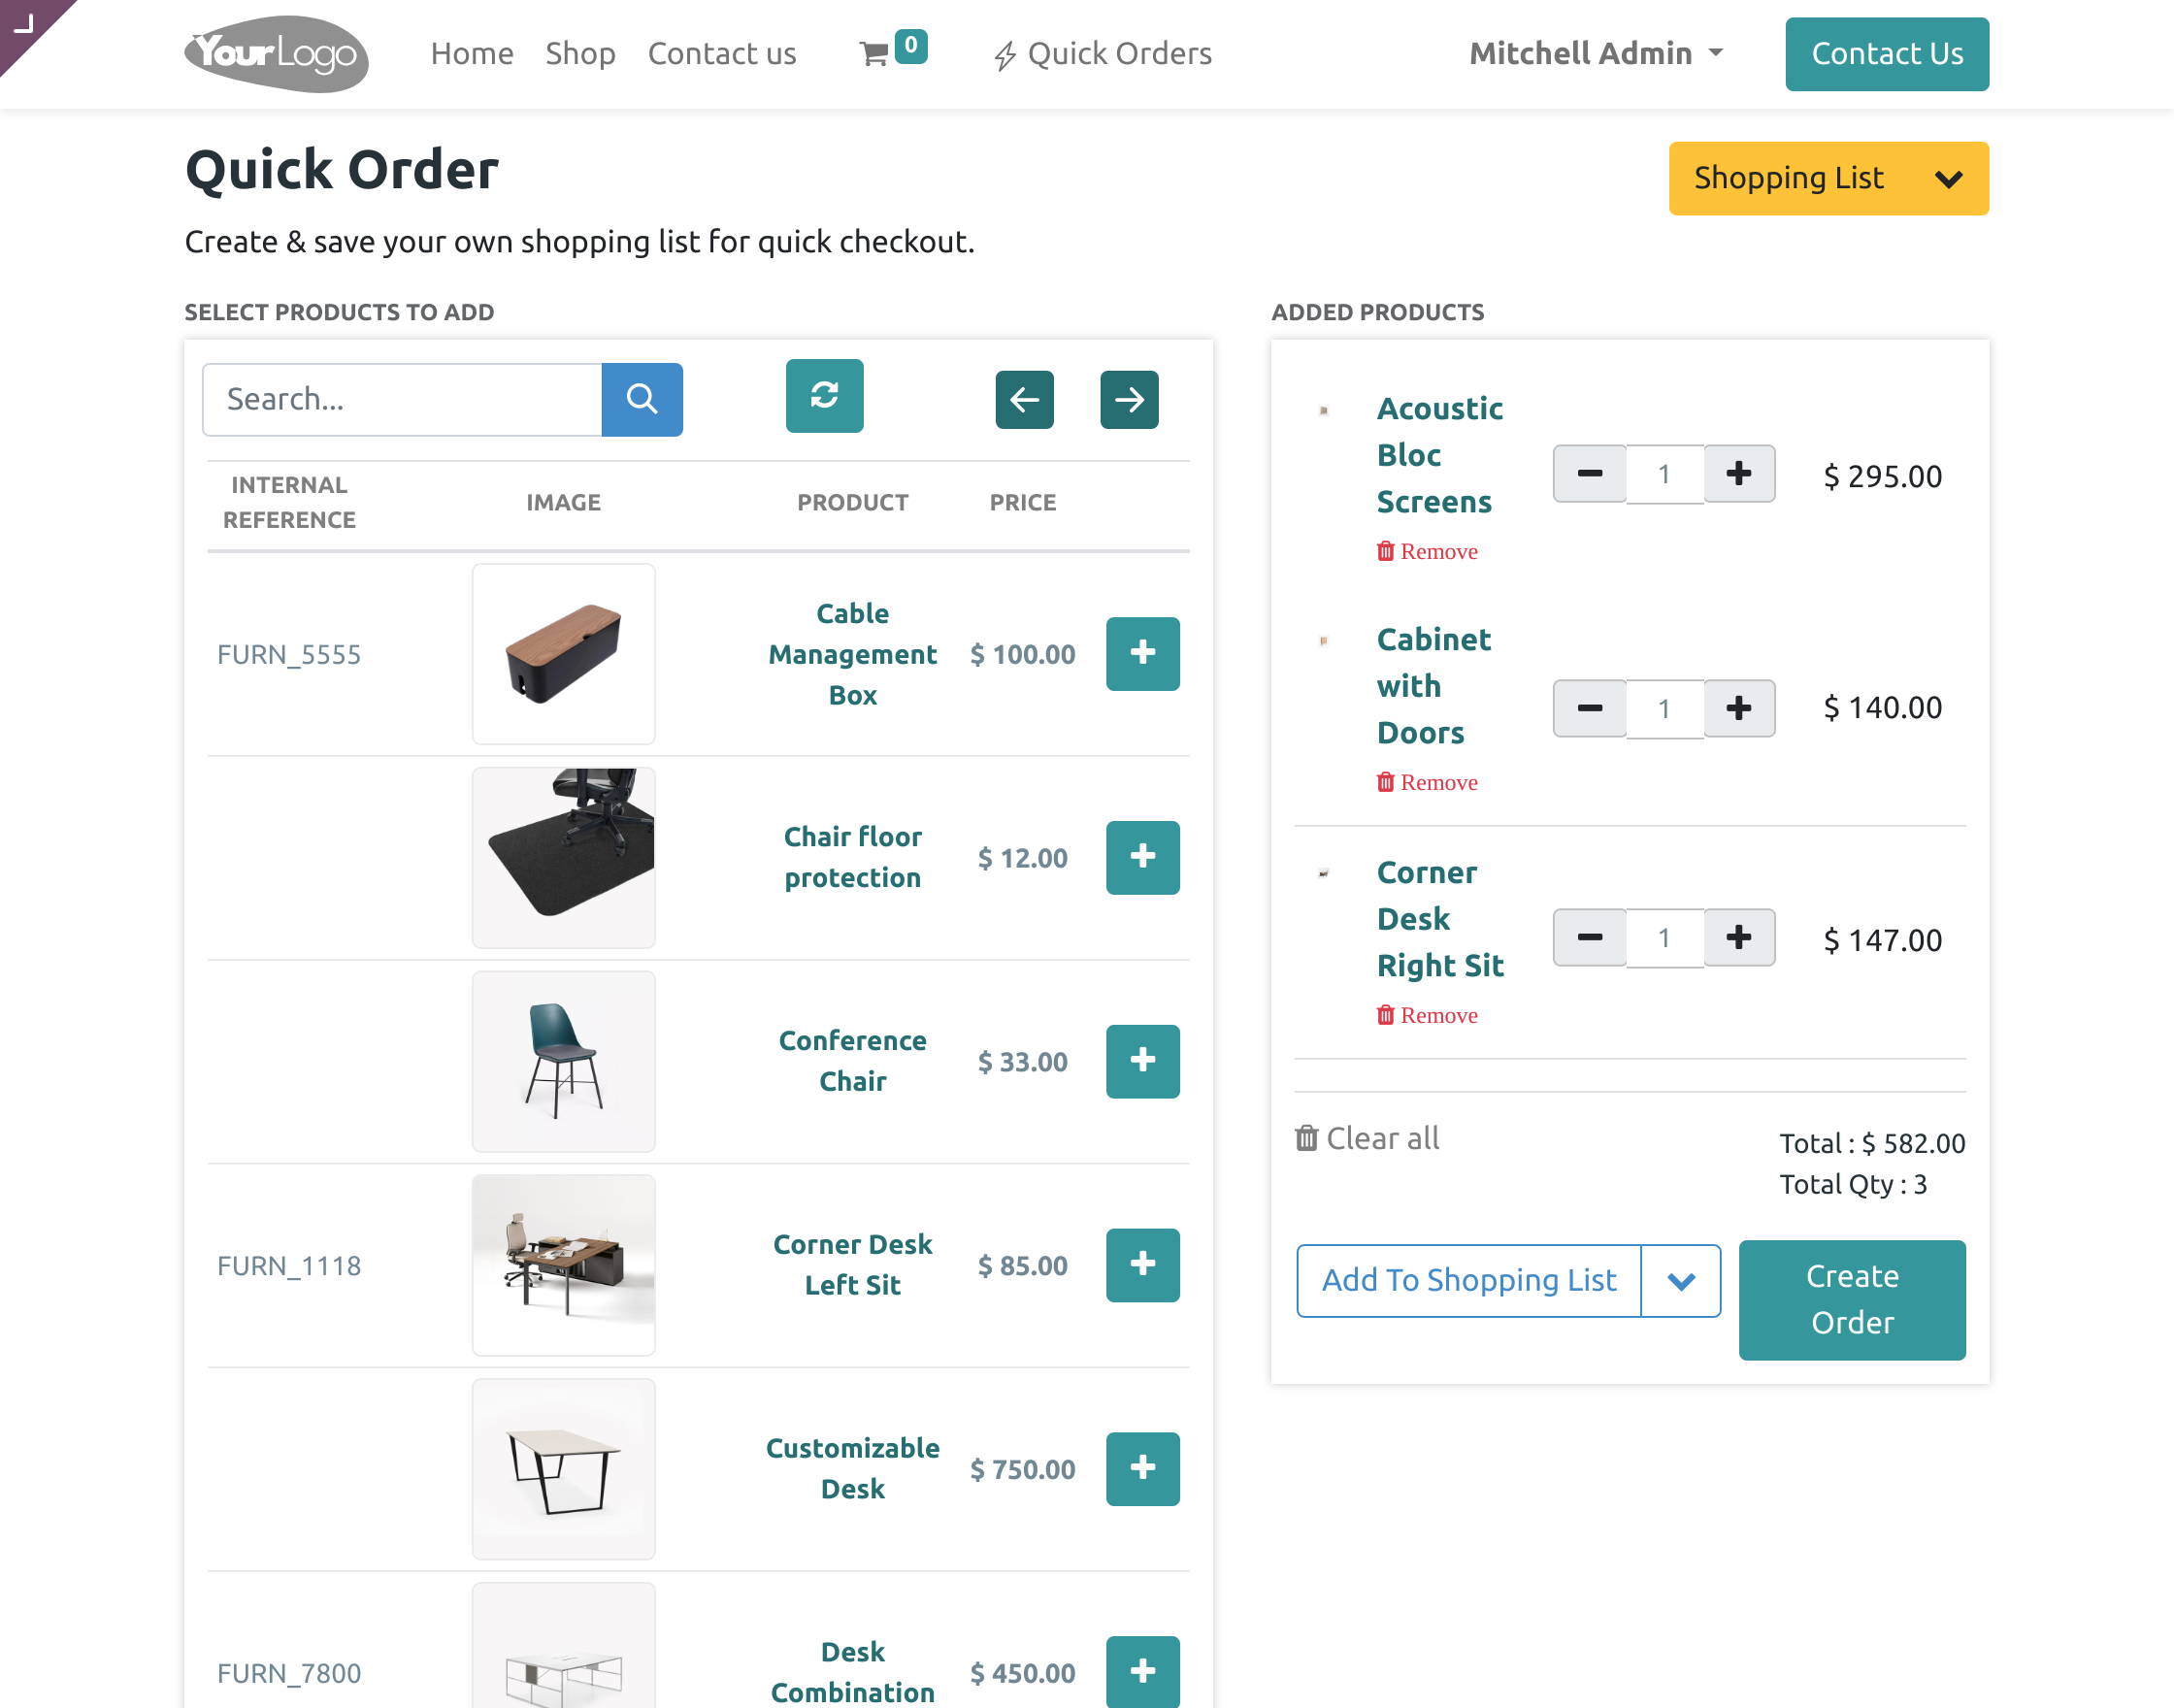
1. Go to your website, log in as a customer and click the ‘Quick Orders’ option on the top navigation bar.
2. On the newly opened page, you will get a listicle view of all the products. Click on the ‘Search Bar’ to search for a product. Also, you can click on the ‘Plus’ button to add that particular product to the shopping list.

3. After clicking the ‘Plus’ button, the product will appear on the right side of the page. And you can add the desired quantity from the ‘Plus or Minus’ button. Similarly, remove the product through the ‘Remove’ option.
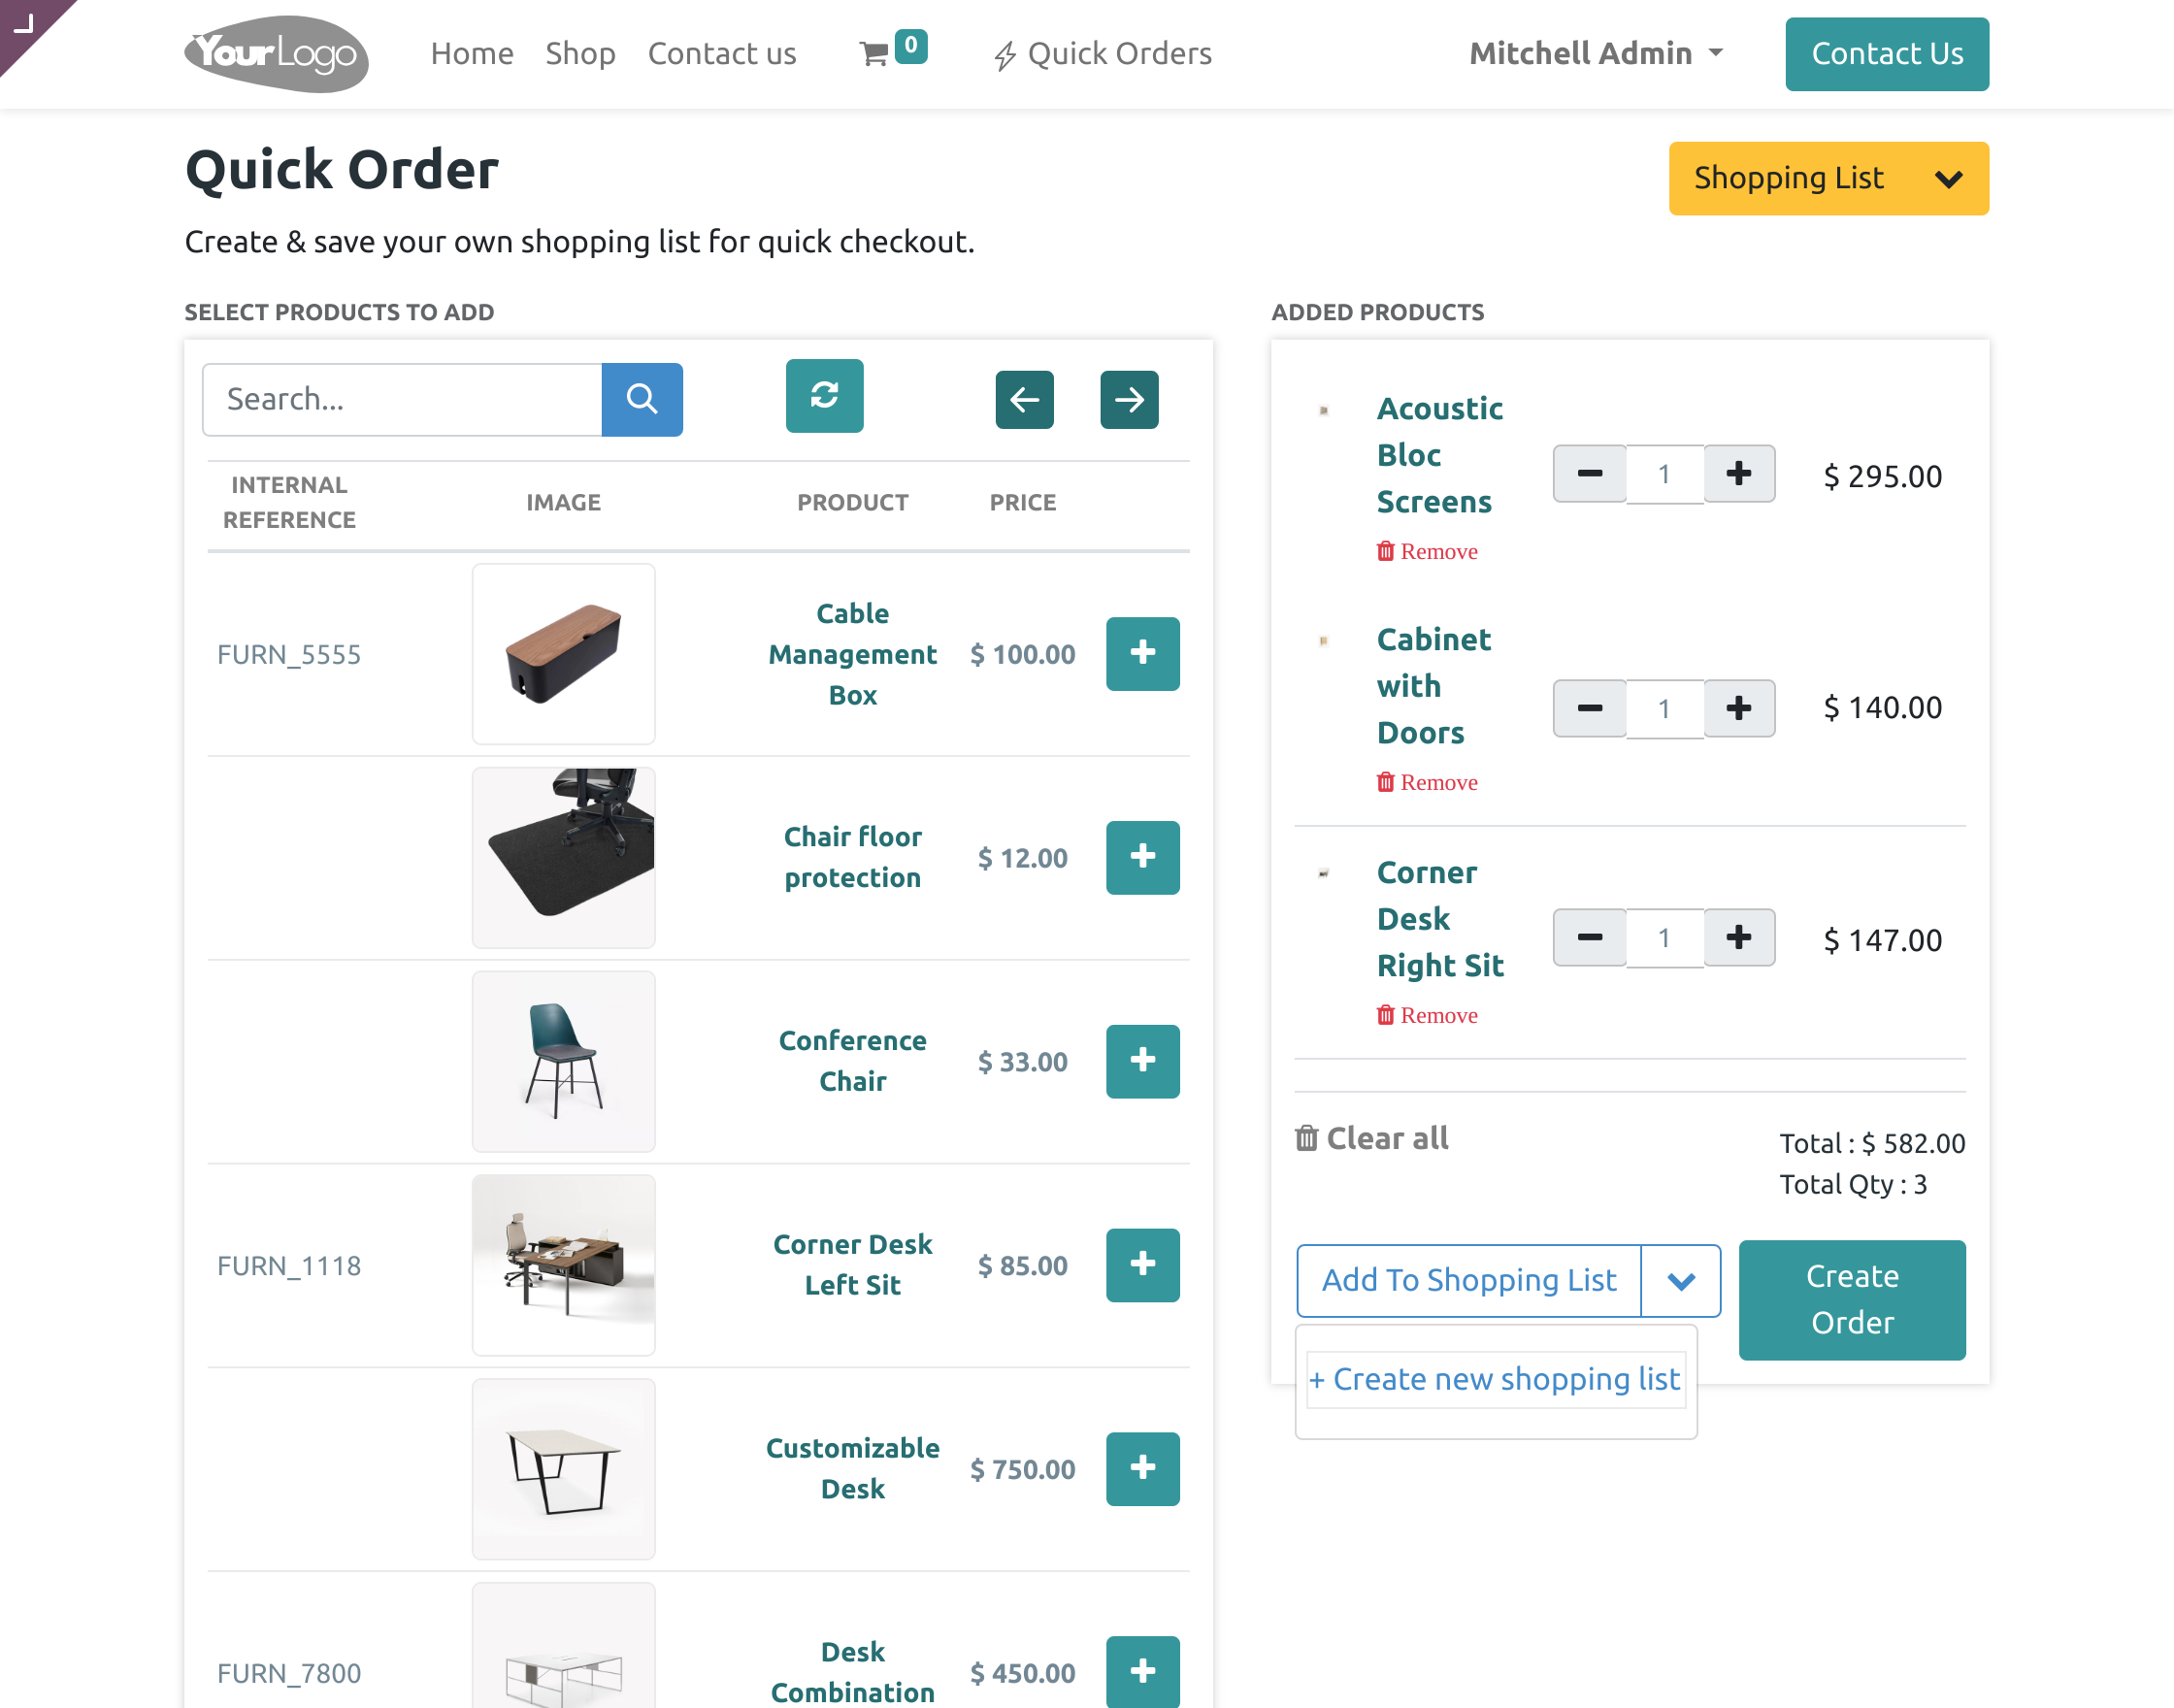
4. When done adding all the products click the ‘Add to Shopping List’ dropdown and ‘Create New Shopping List’ option.
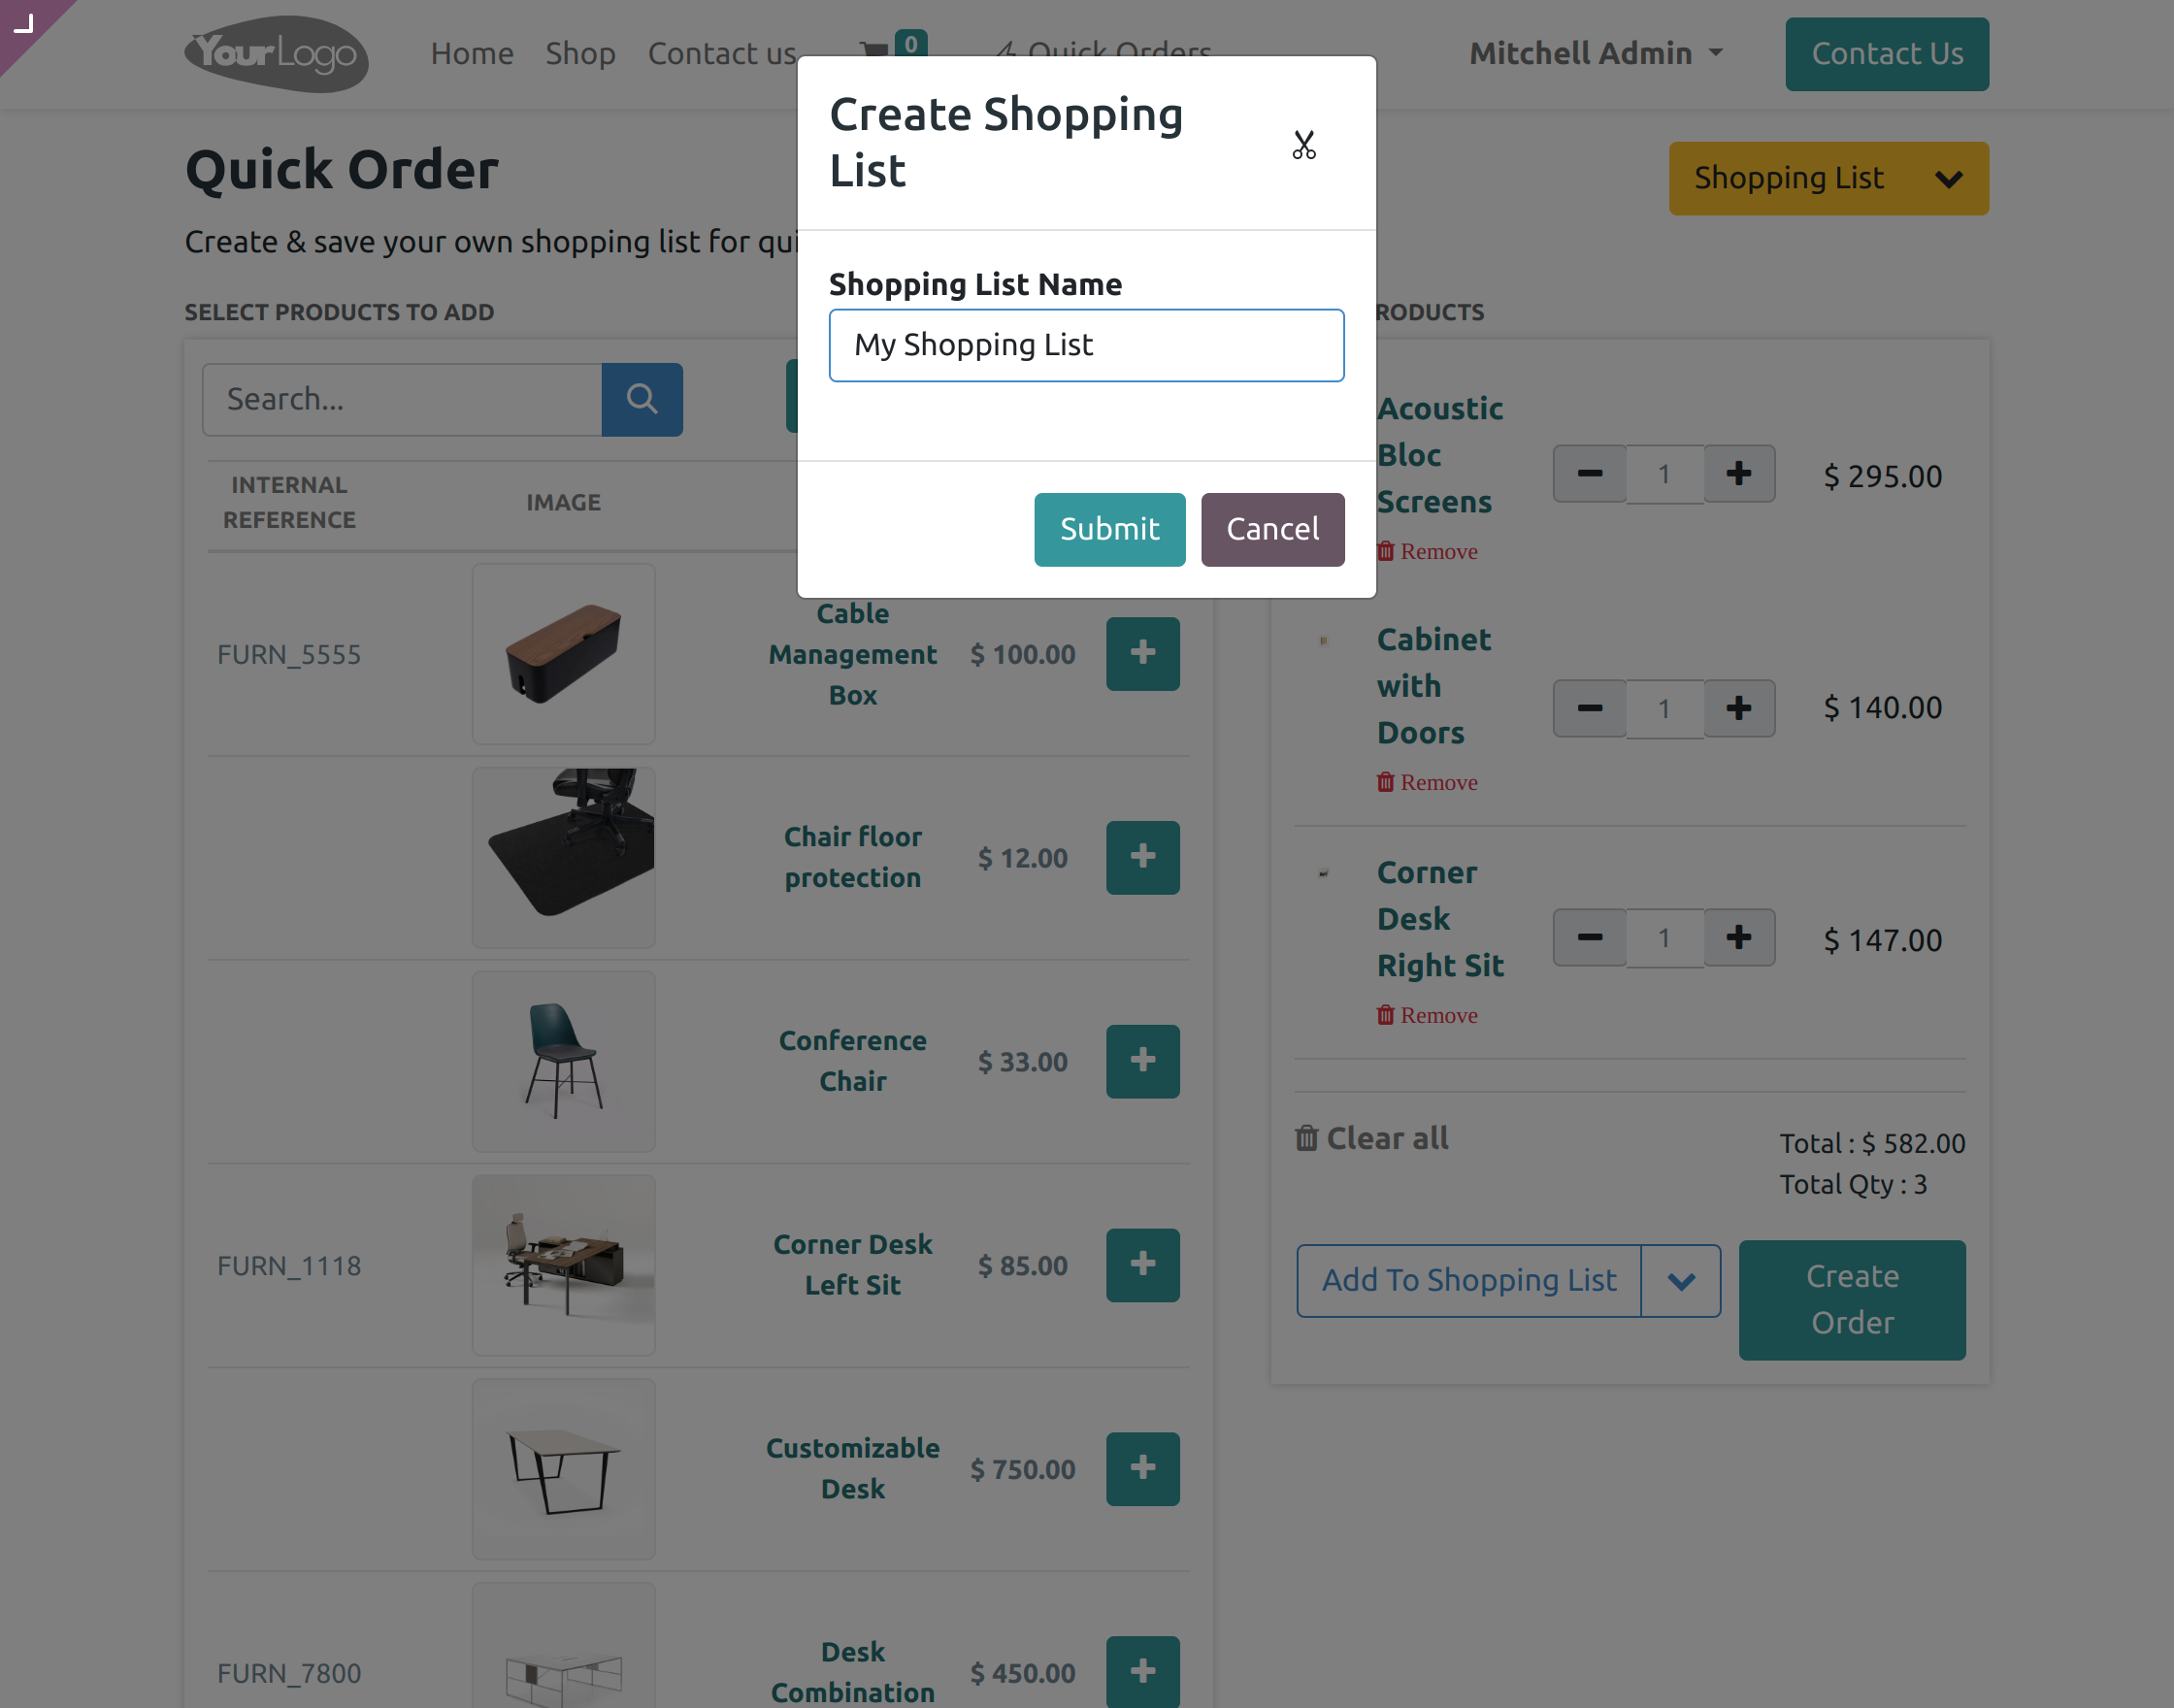
5. In the popup box, fill in the name of the shopping list and click the ‘Submit’ button to create a shopping list.
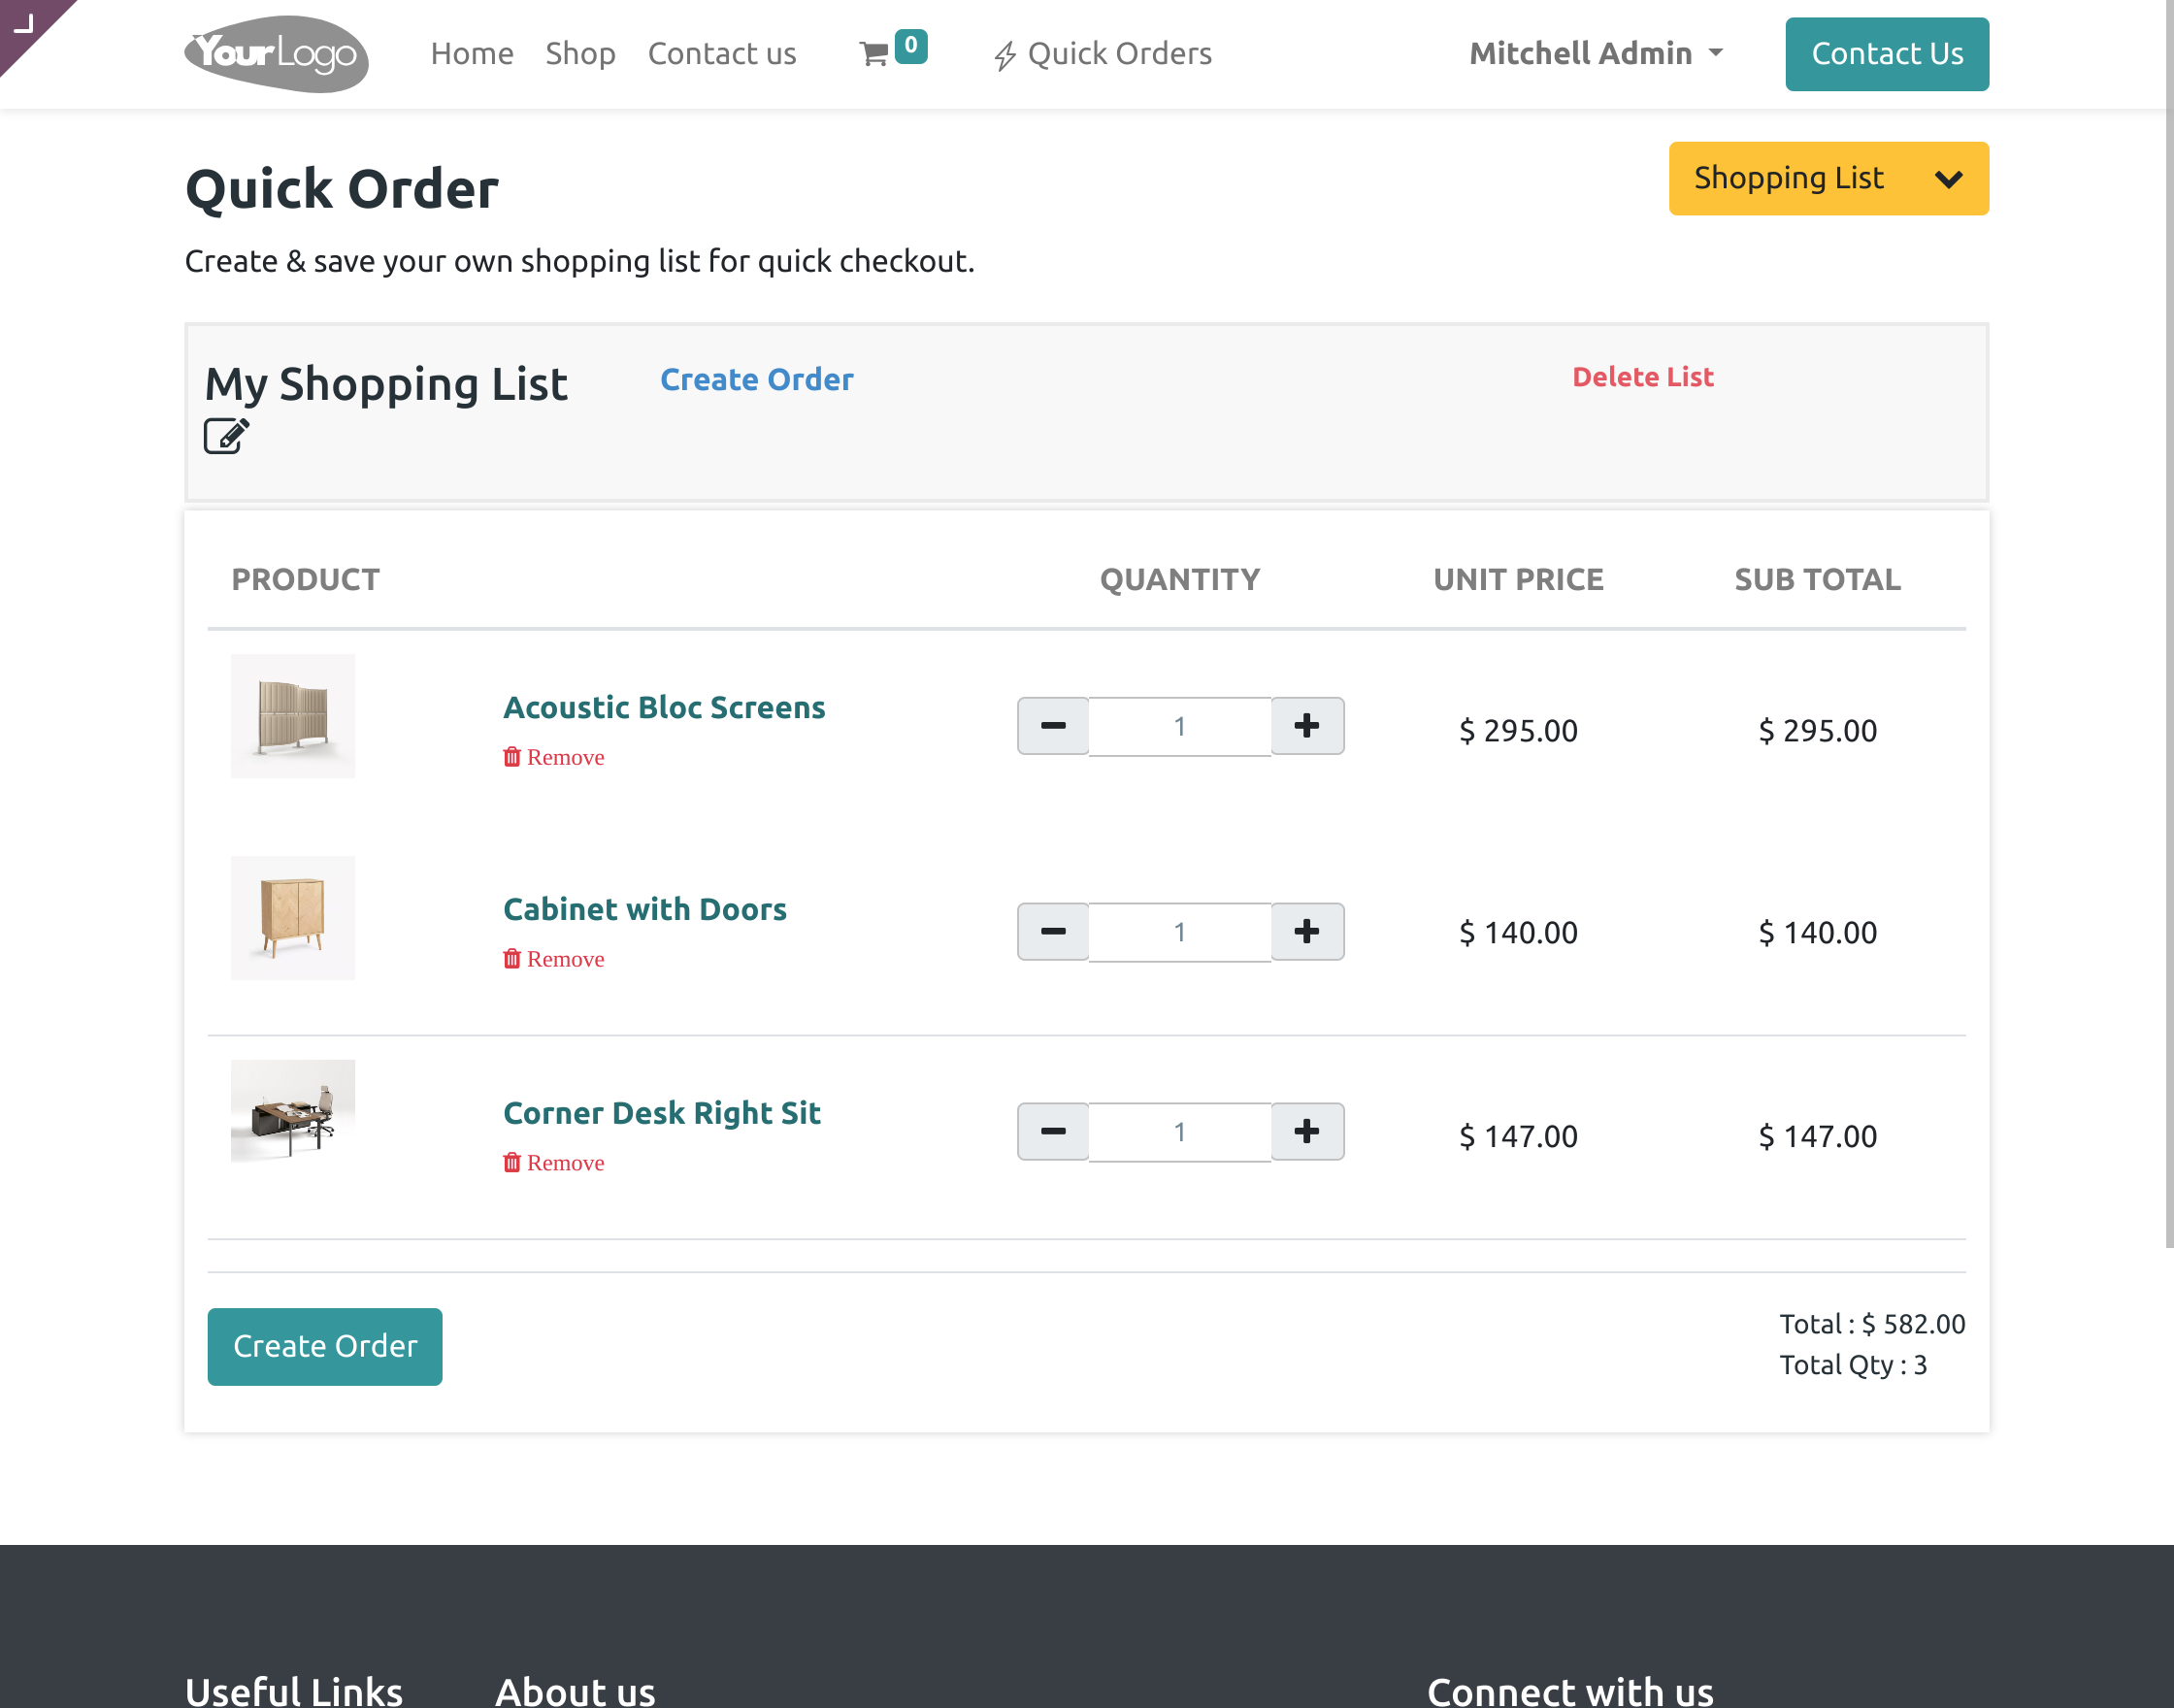
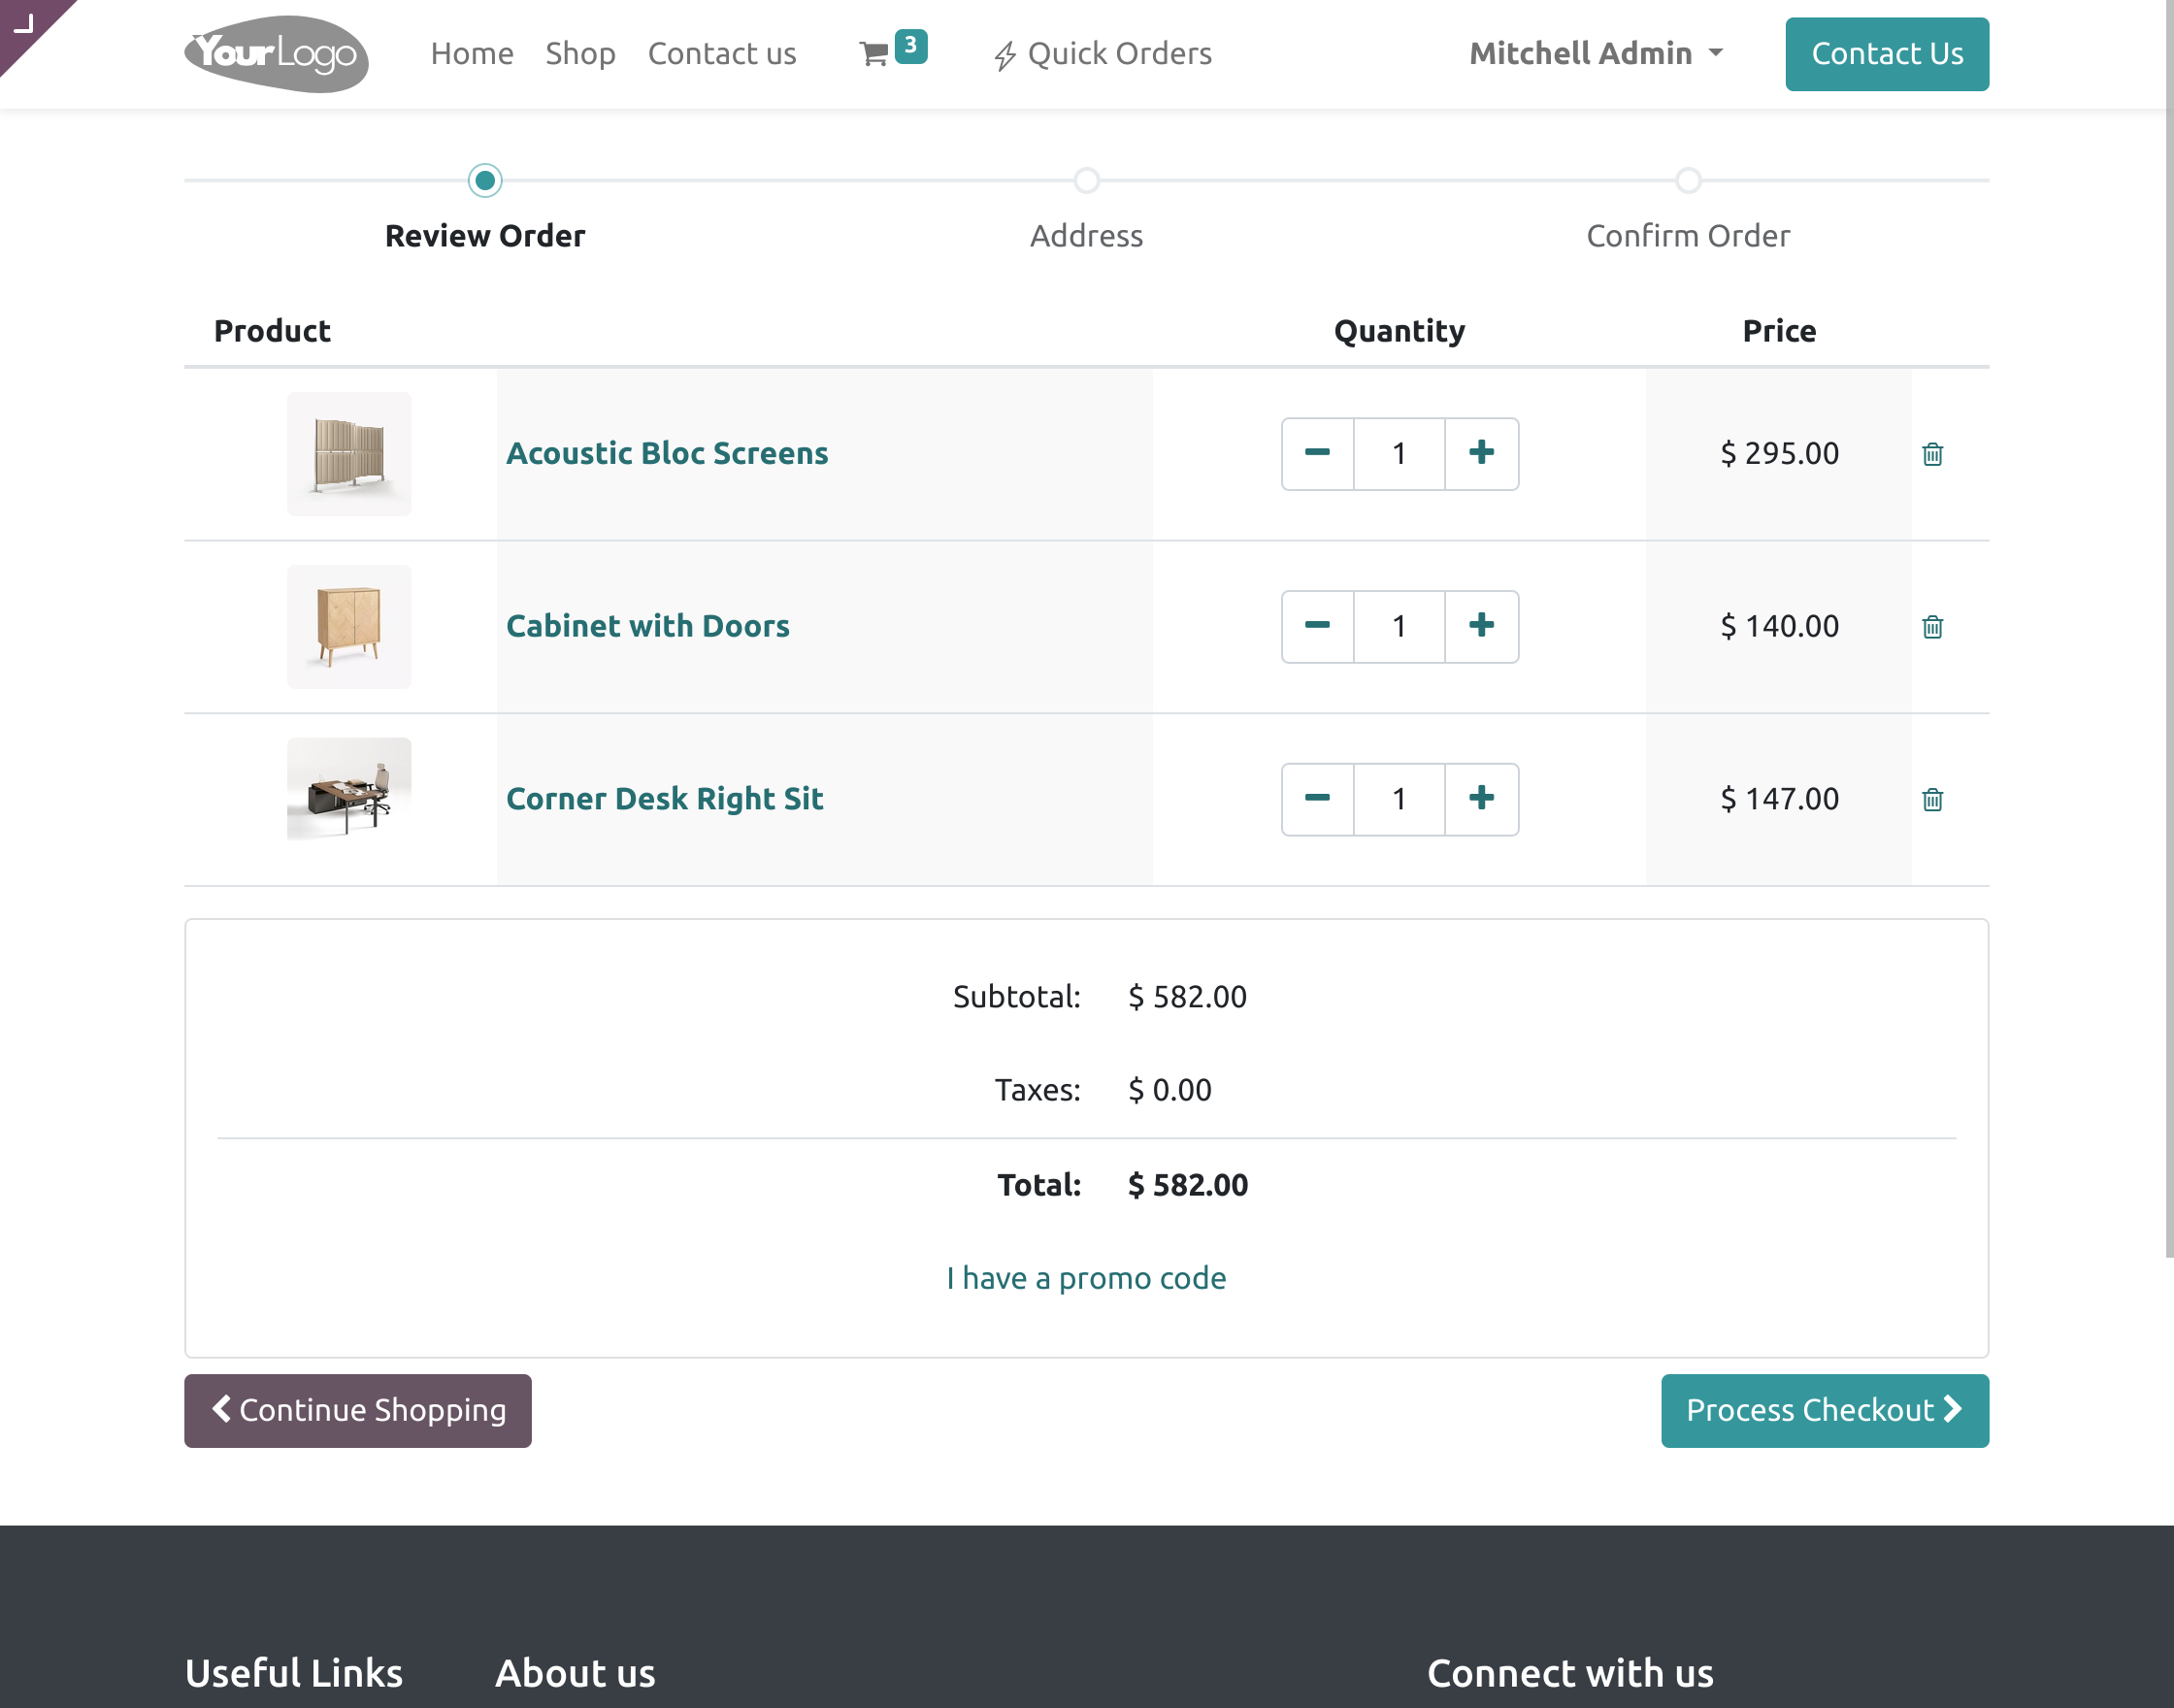
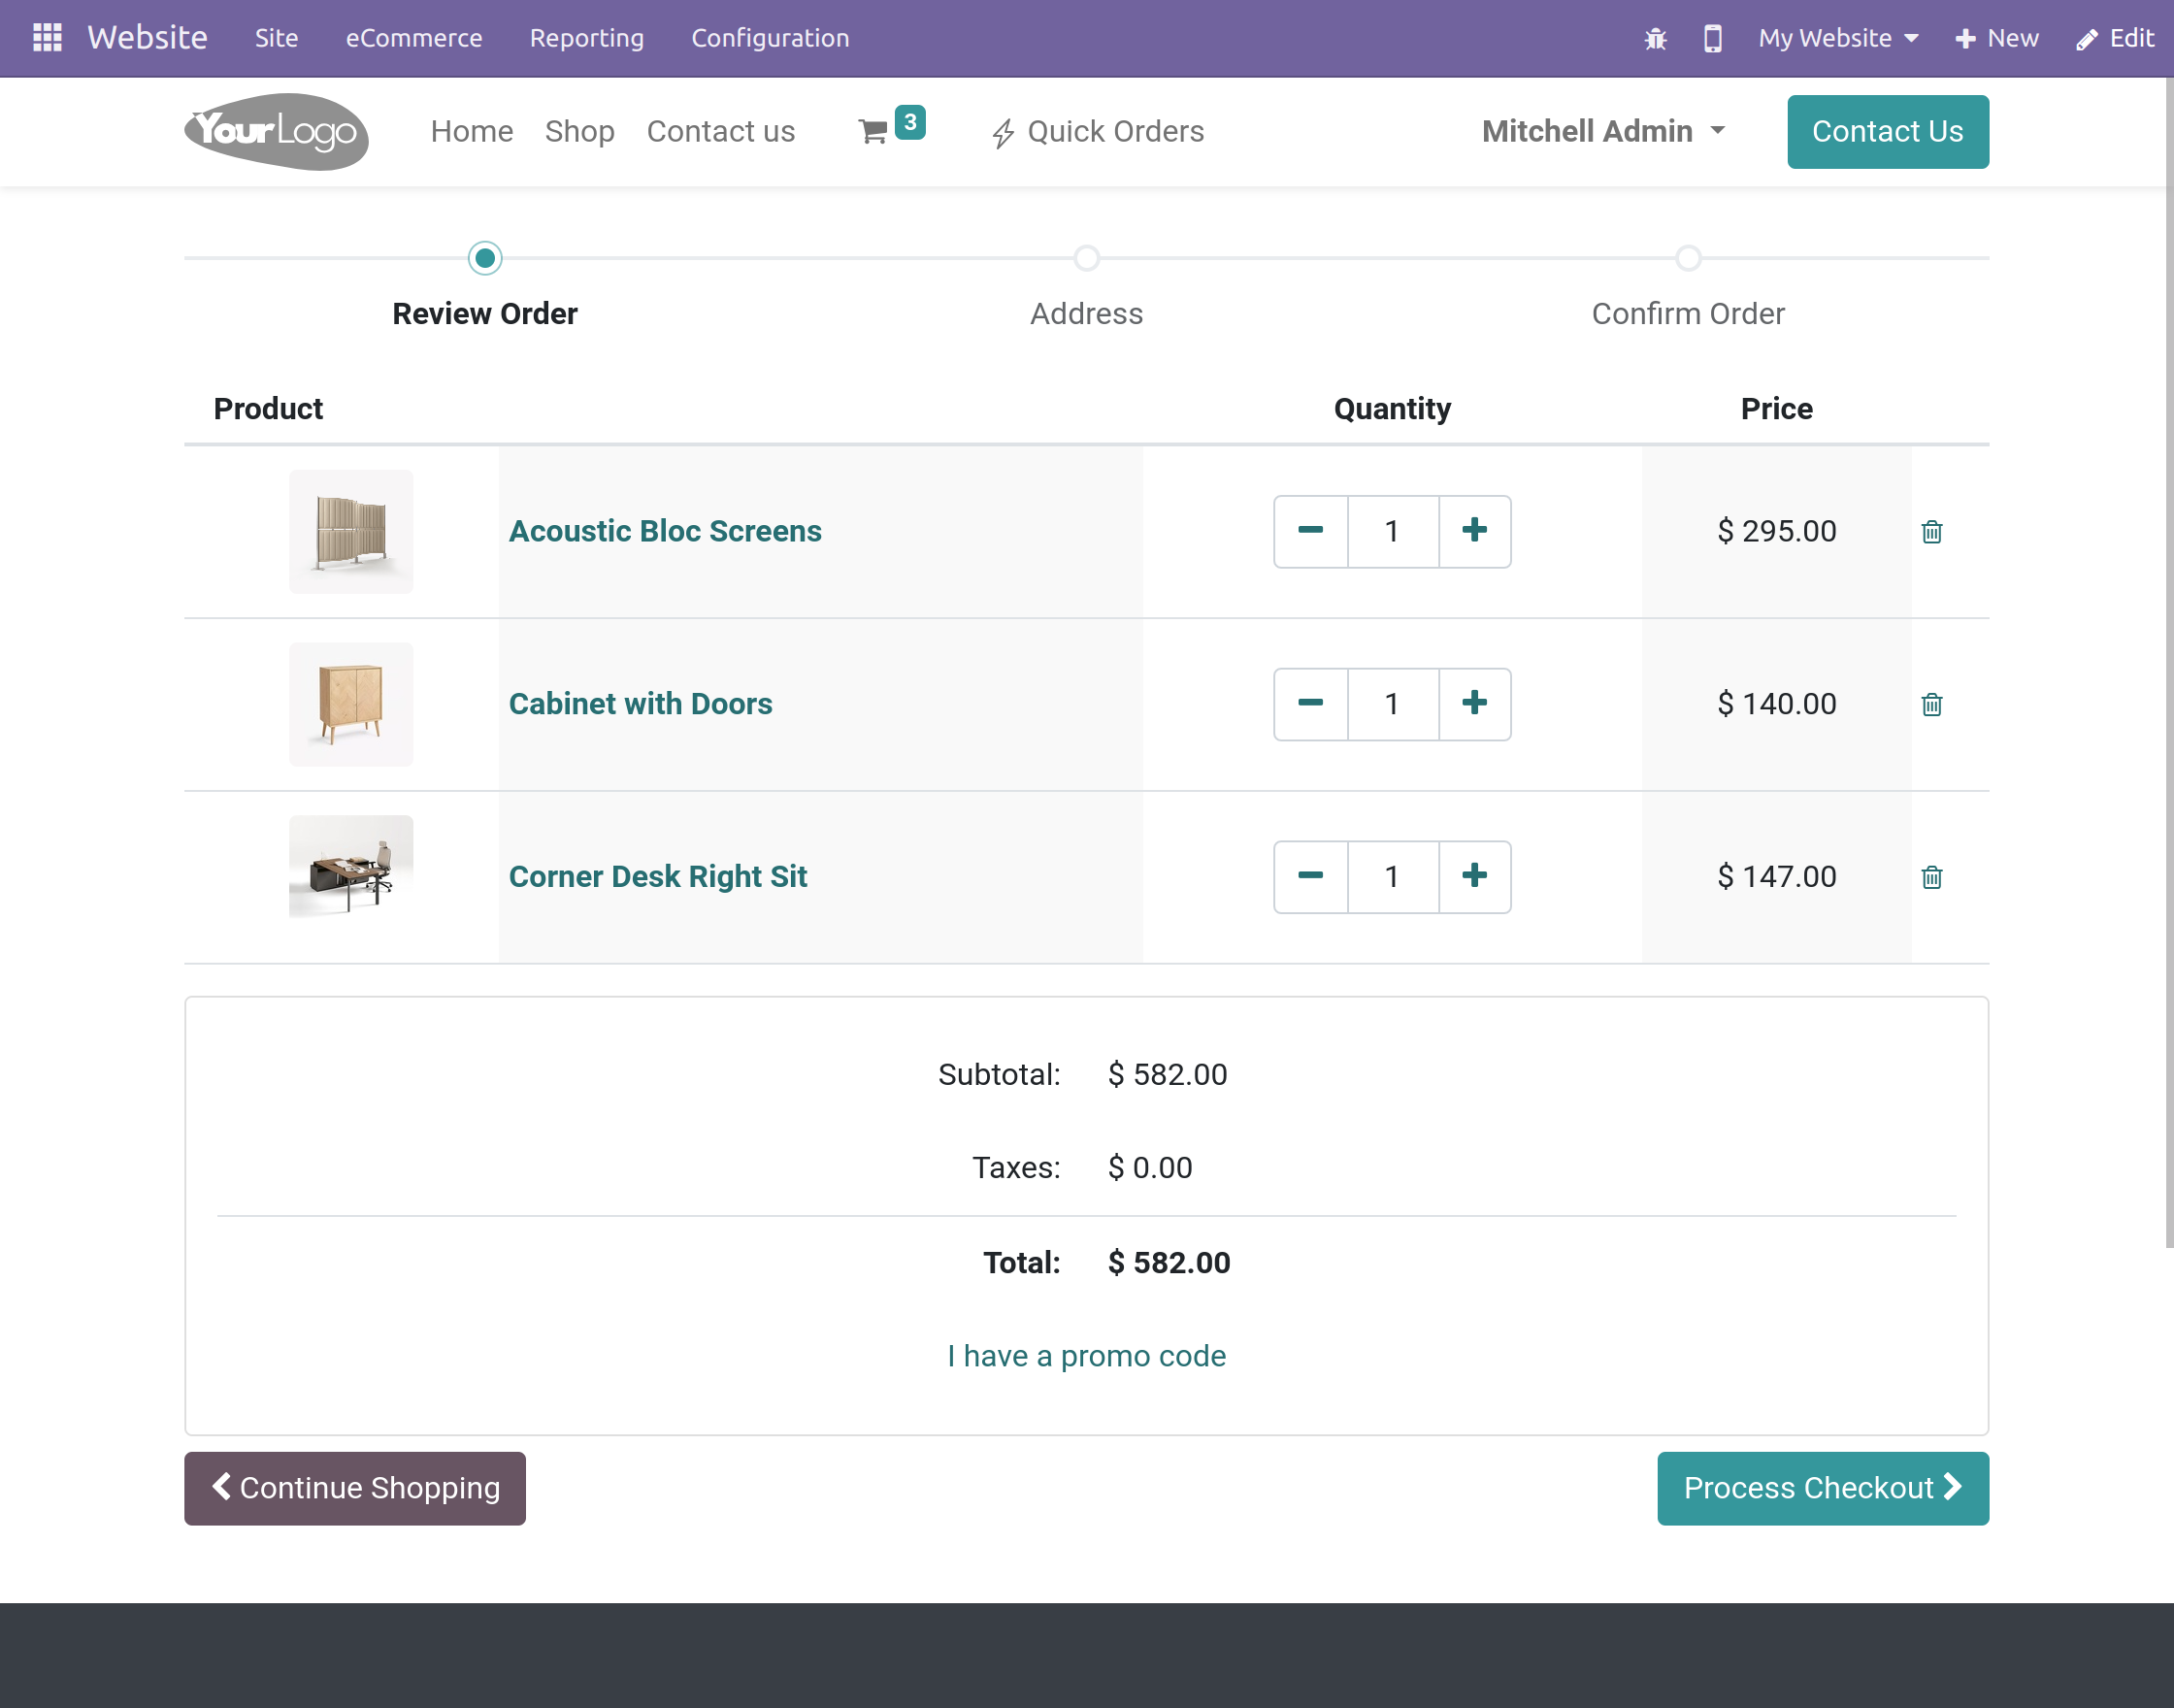
6. On the next page, re-check your order and make changes as required and choose any of the following, either ‘Create Order’ or ‘Delete List’.
7. Clicking ‘Create Order’ will redirect you to the next page. Here, you have to verify the order and then click ‘Process Checkout’ after verifying.
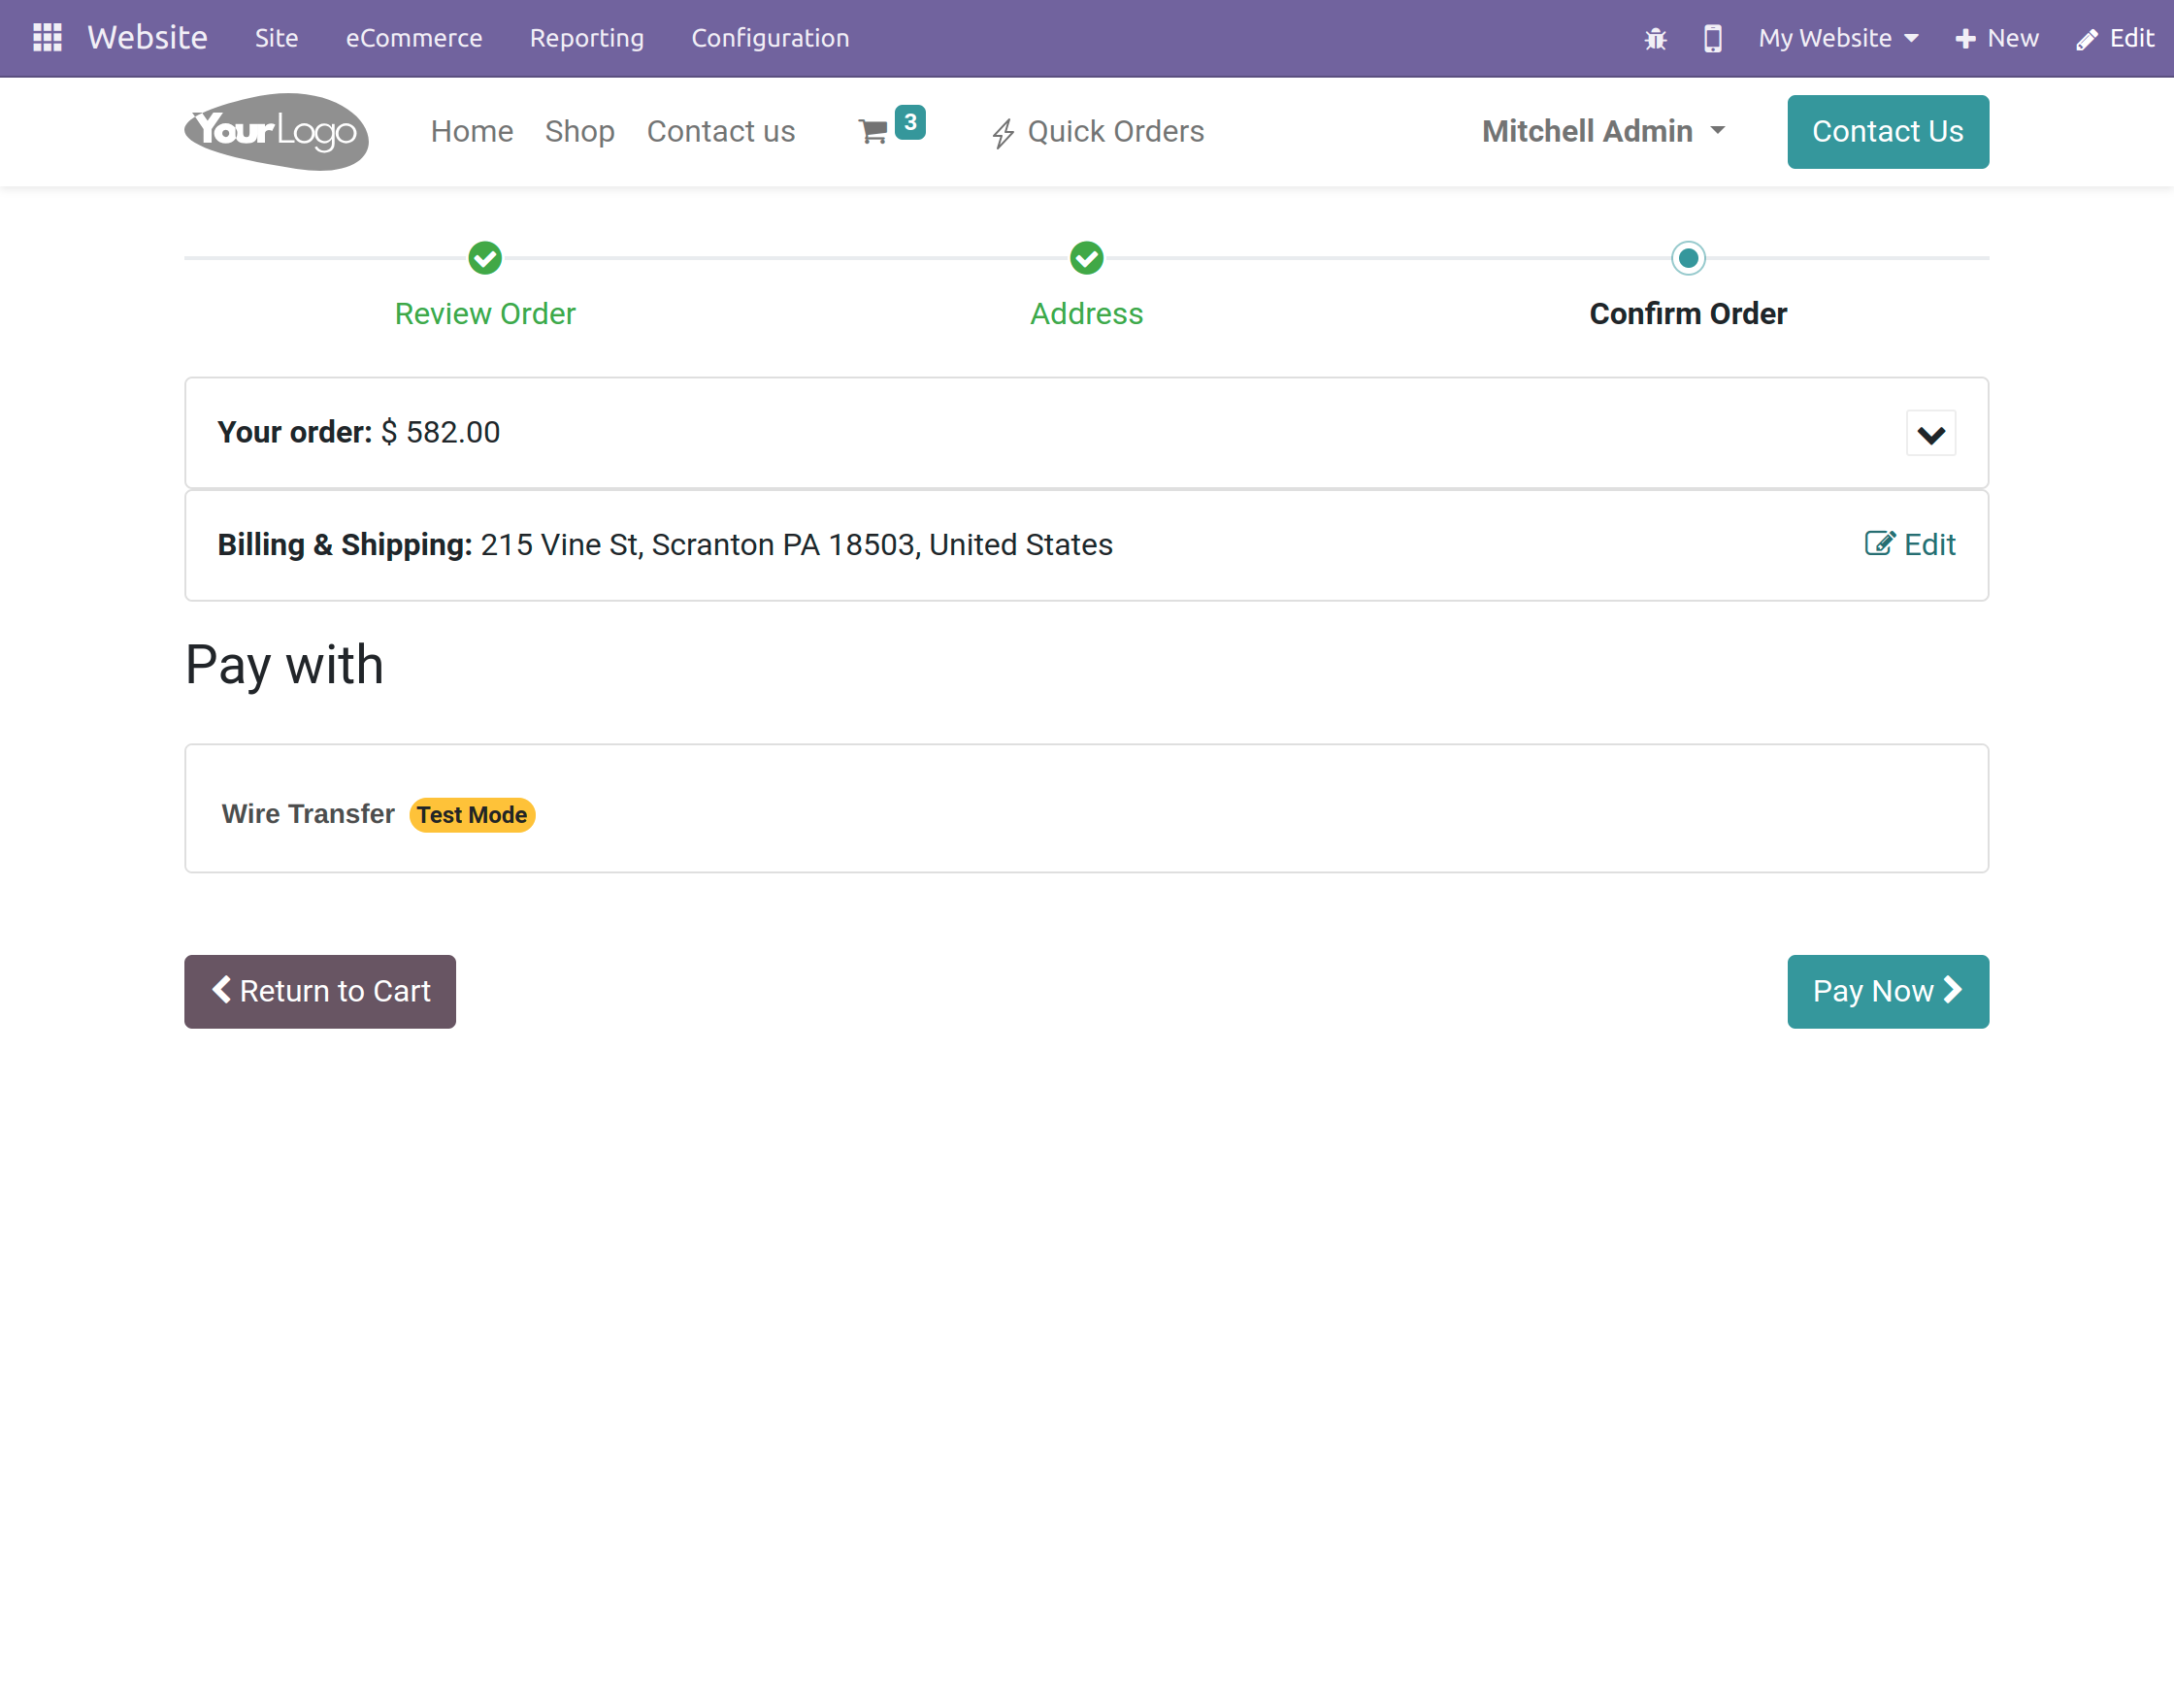
8. Now click the ‘Pay Now’ option on the next page and make the payment.
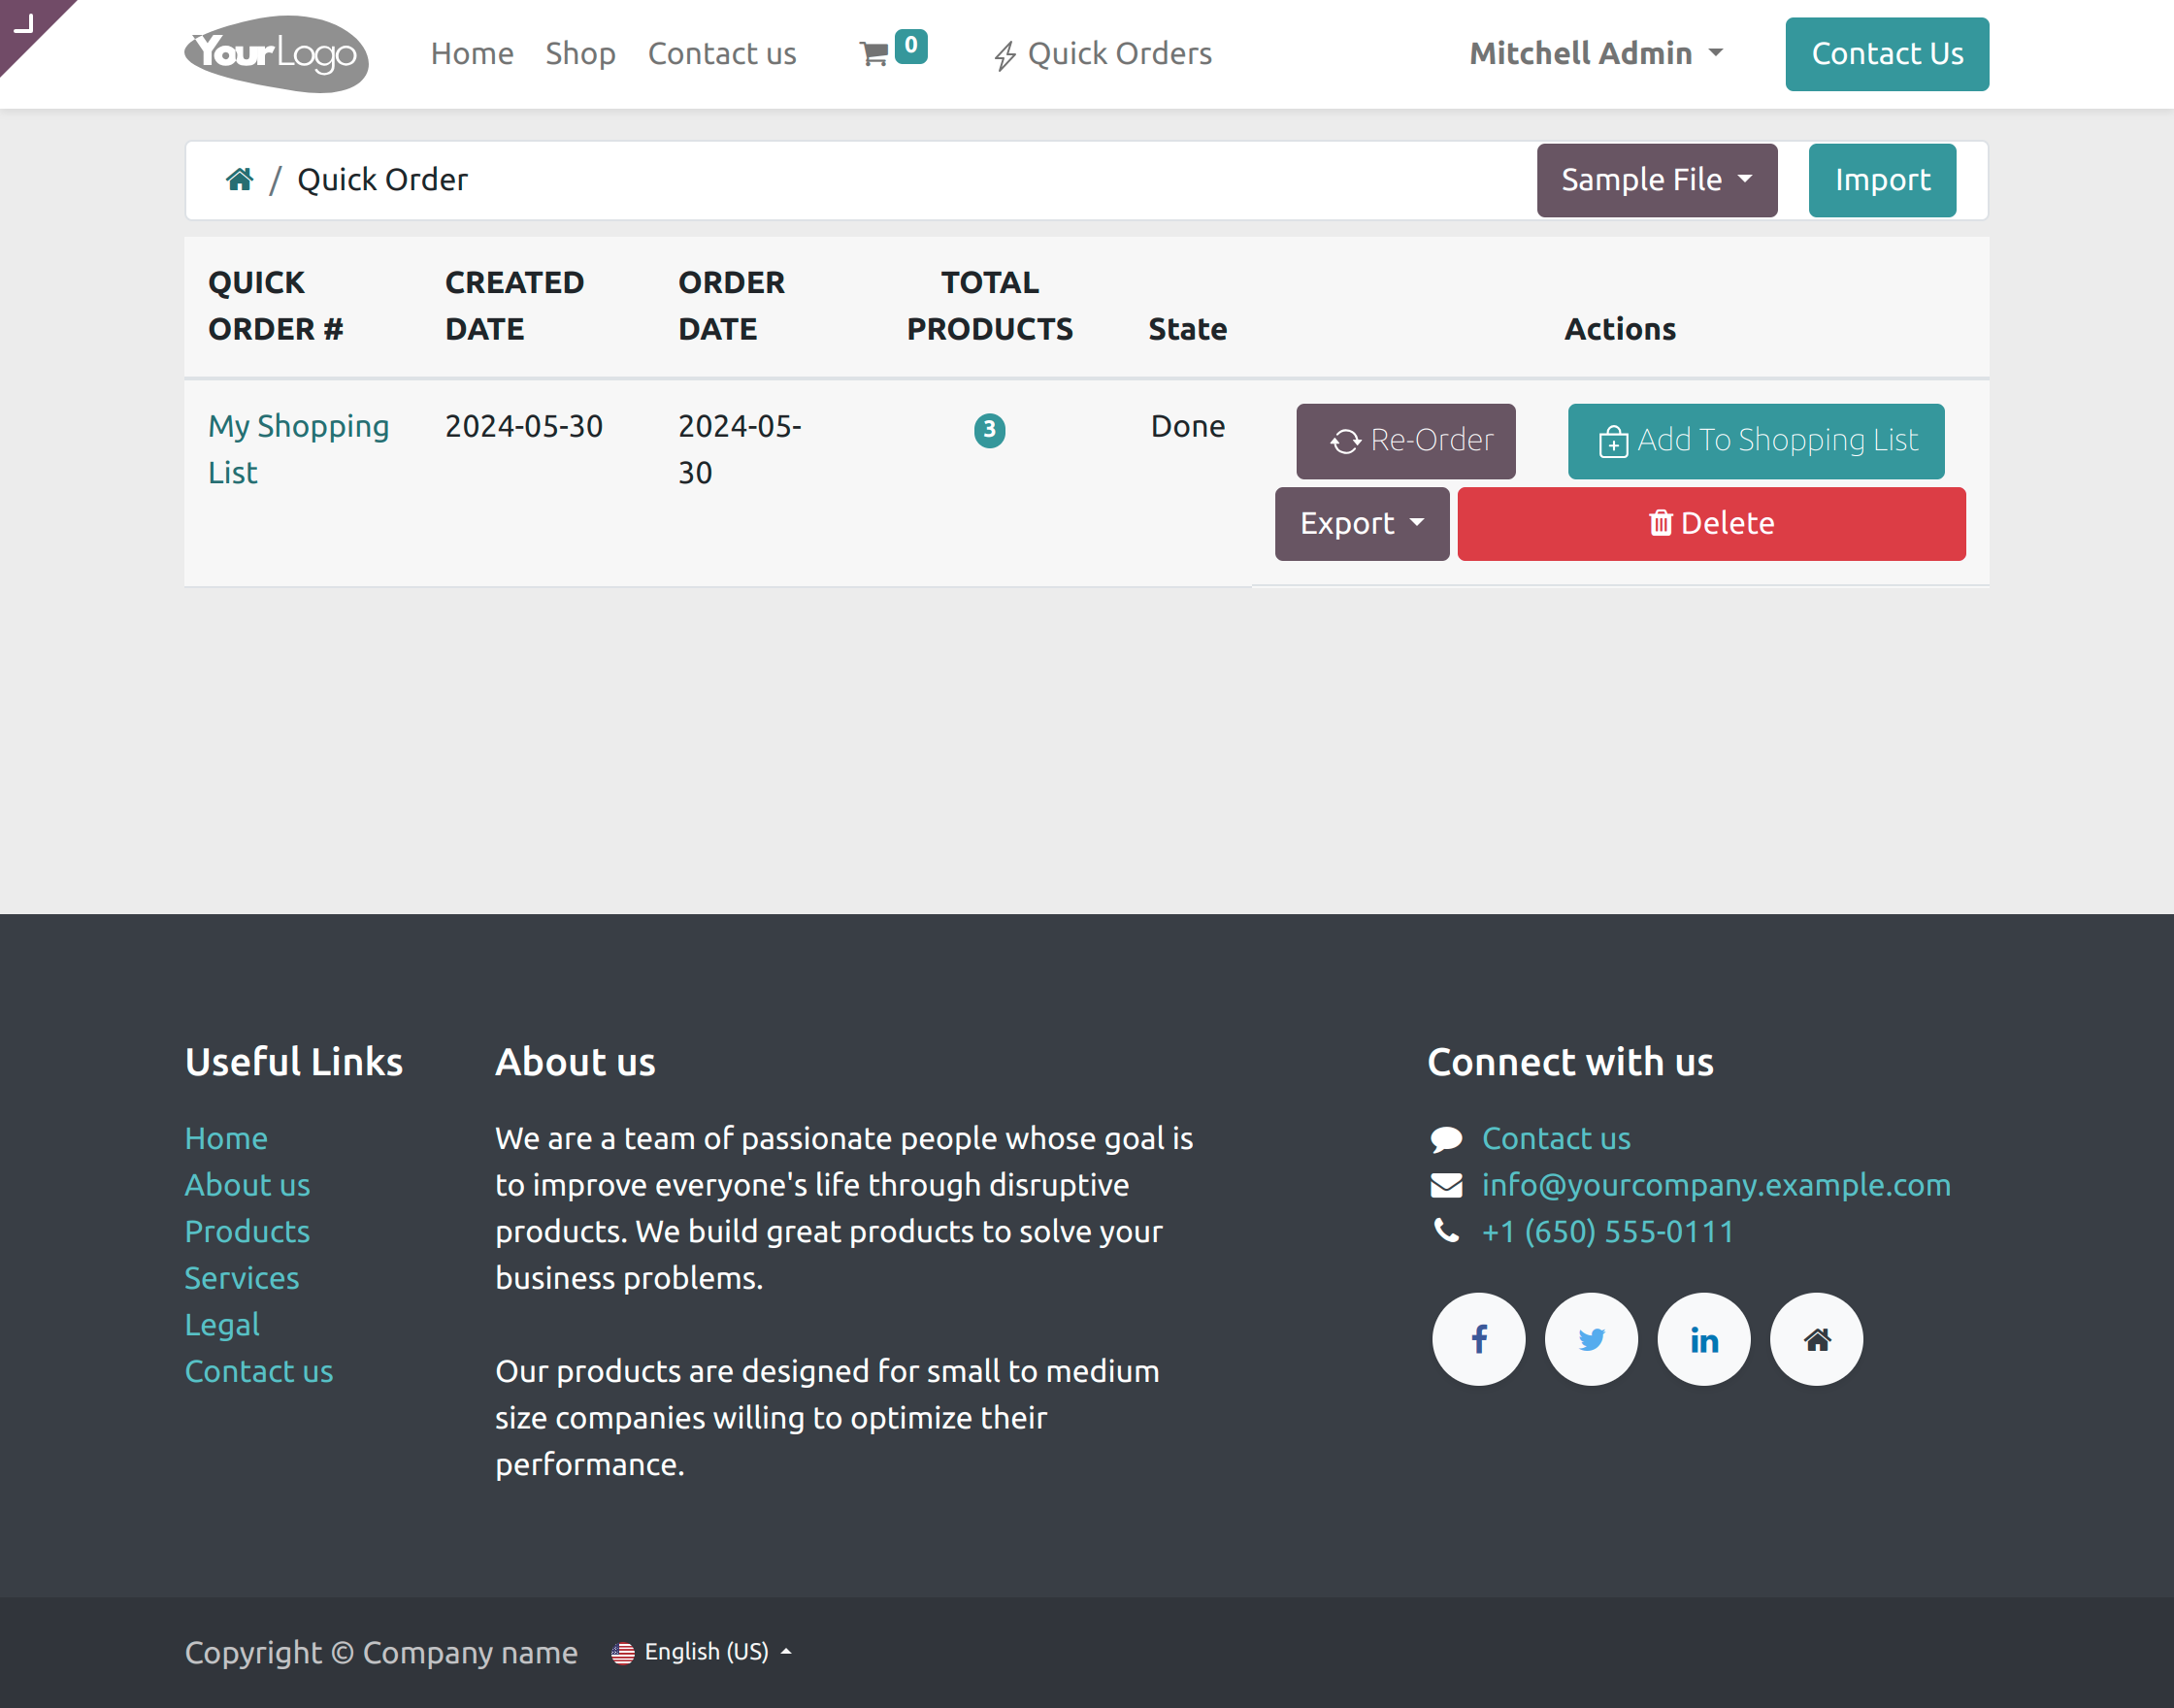
9. Customers can re-order the entire list whenever you want. By clicking on the re-order button as shown. below.
- Customers can download the sample files in both .csv and .xlsx formats.
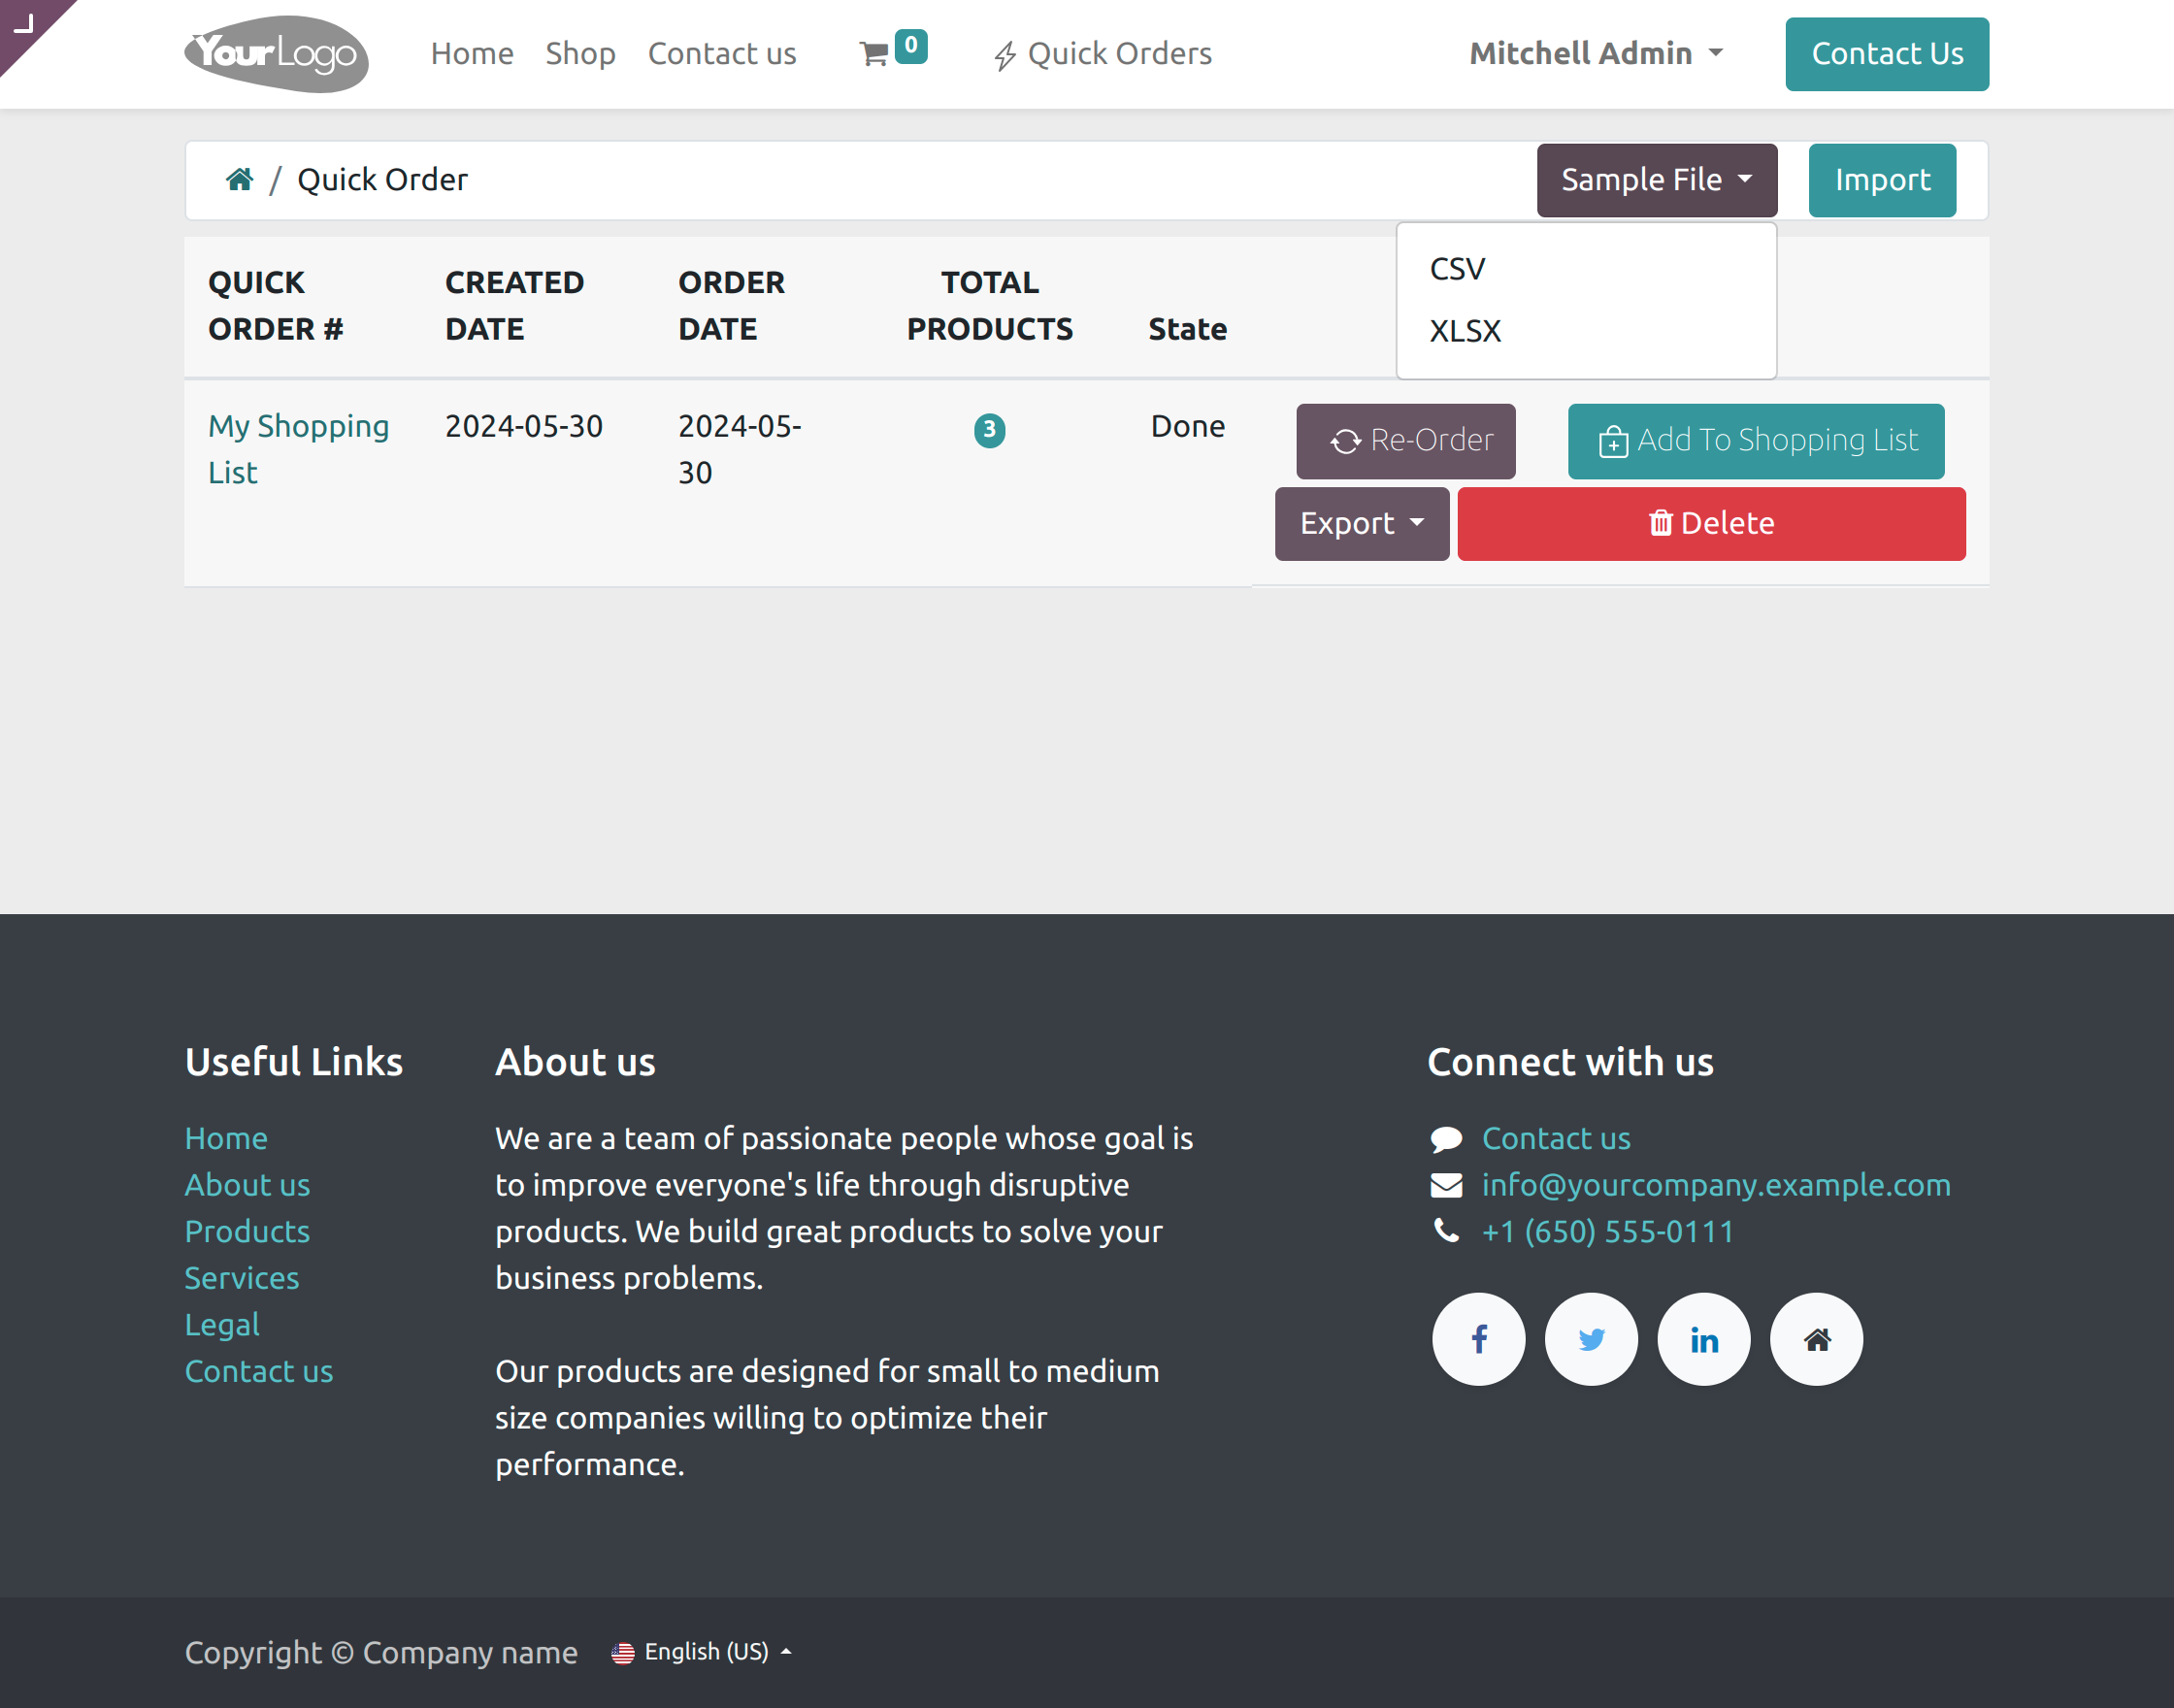
- Next, click ‘Import File’ on the right, enter the name, choose .xlsx or .csv format, and upload your file.

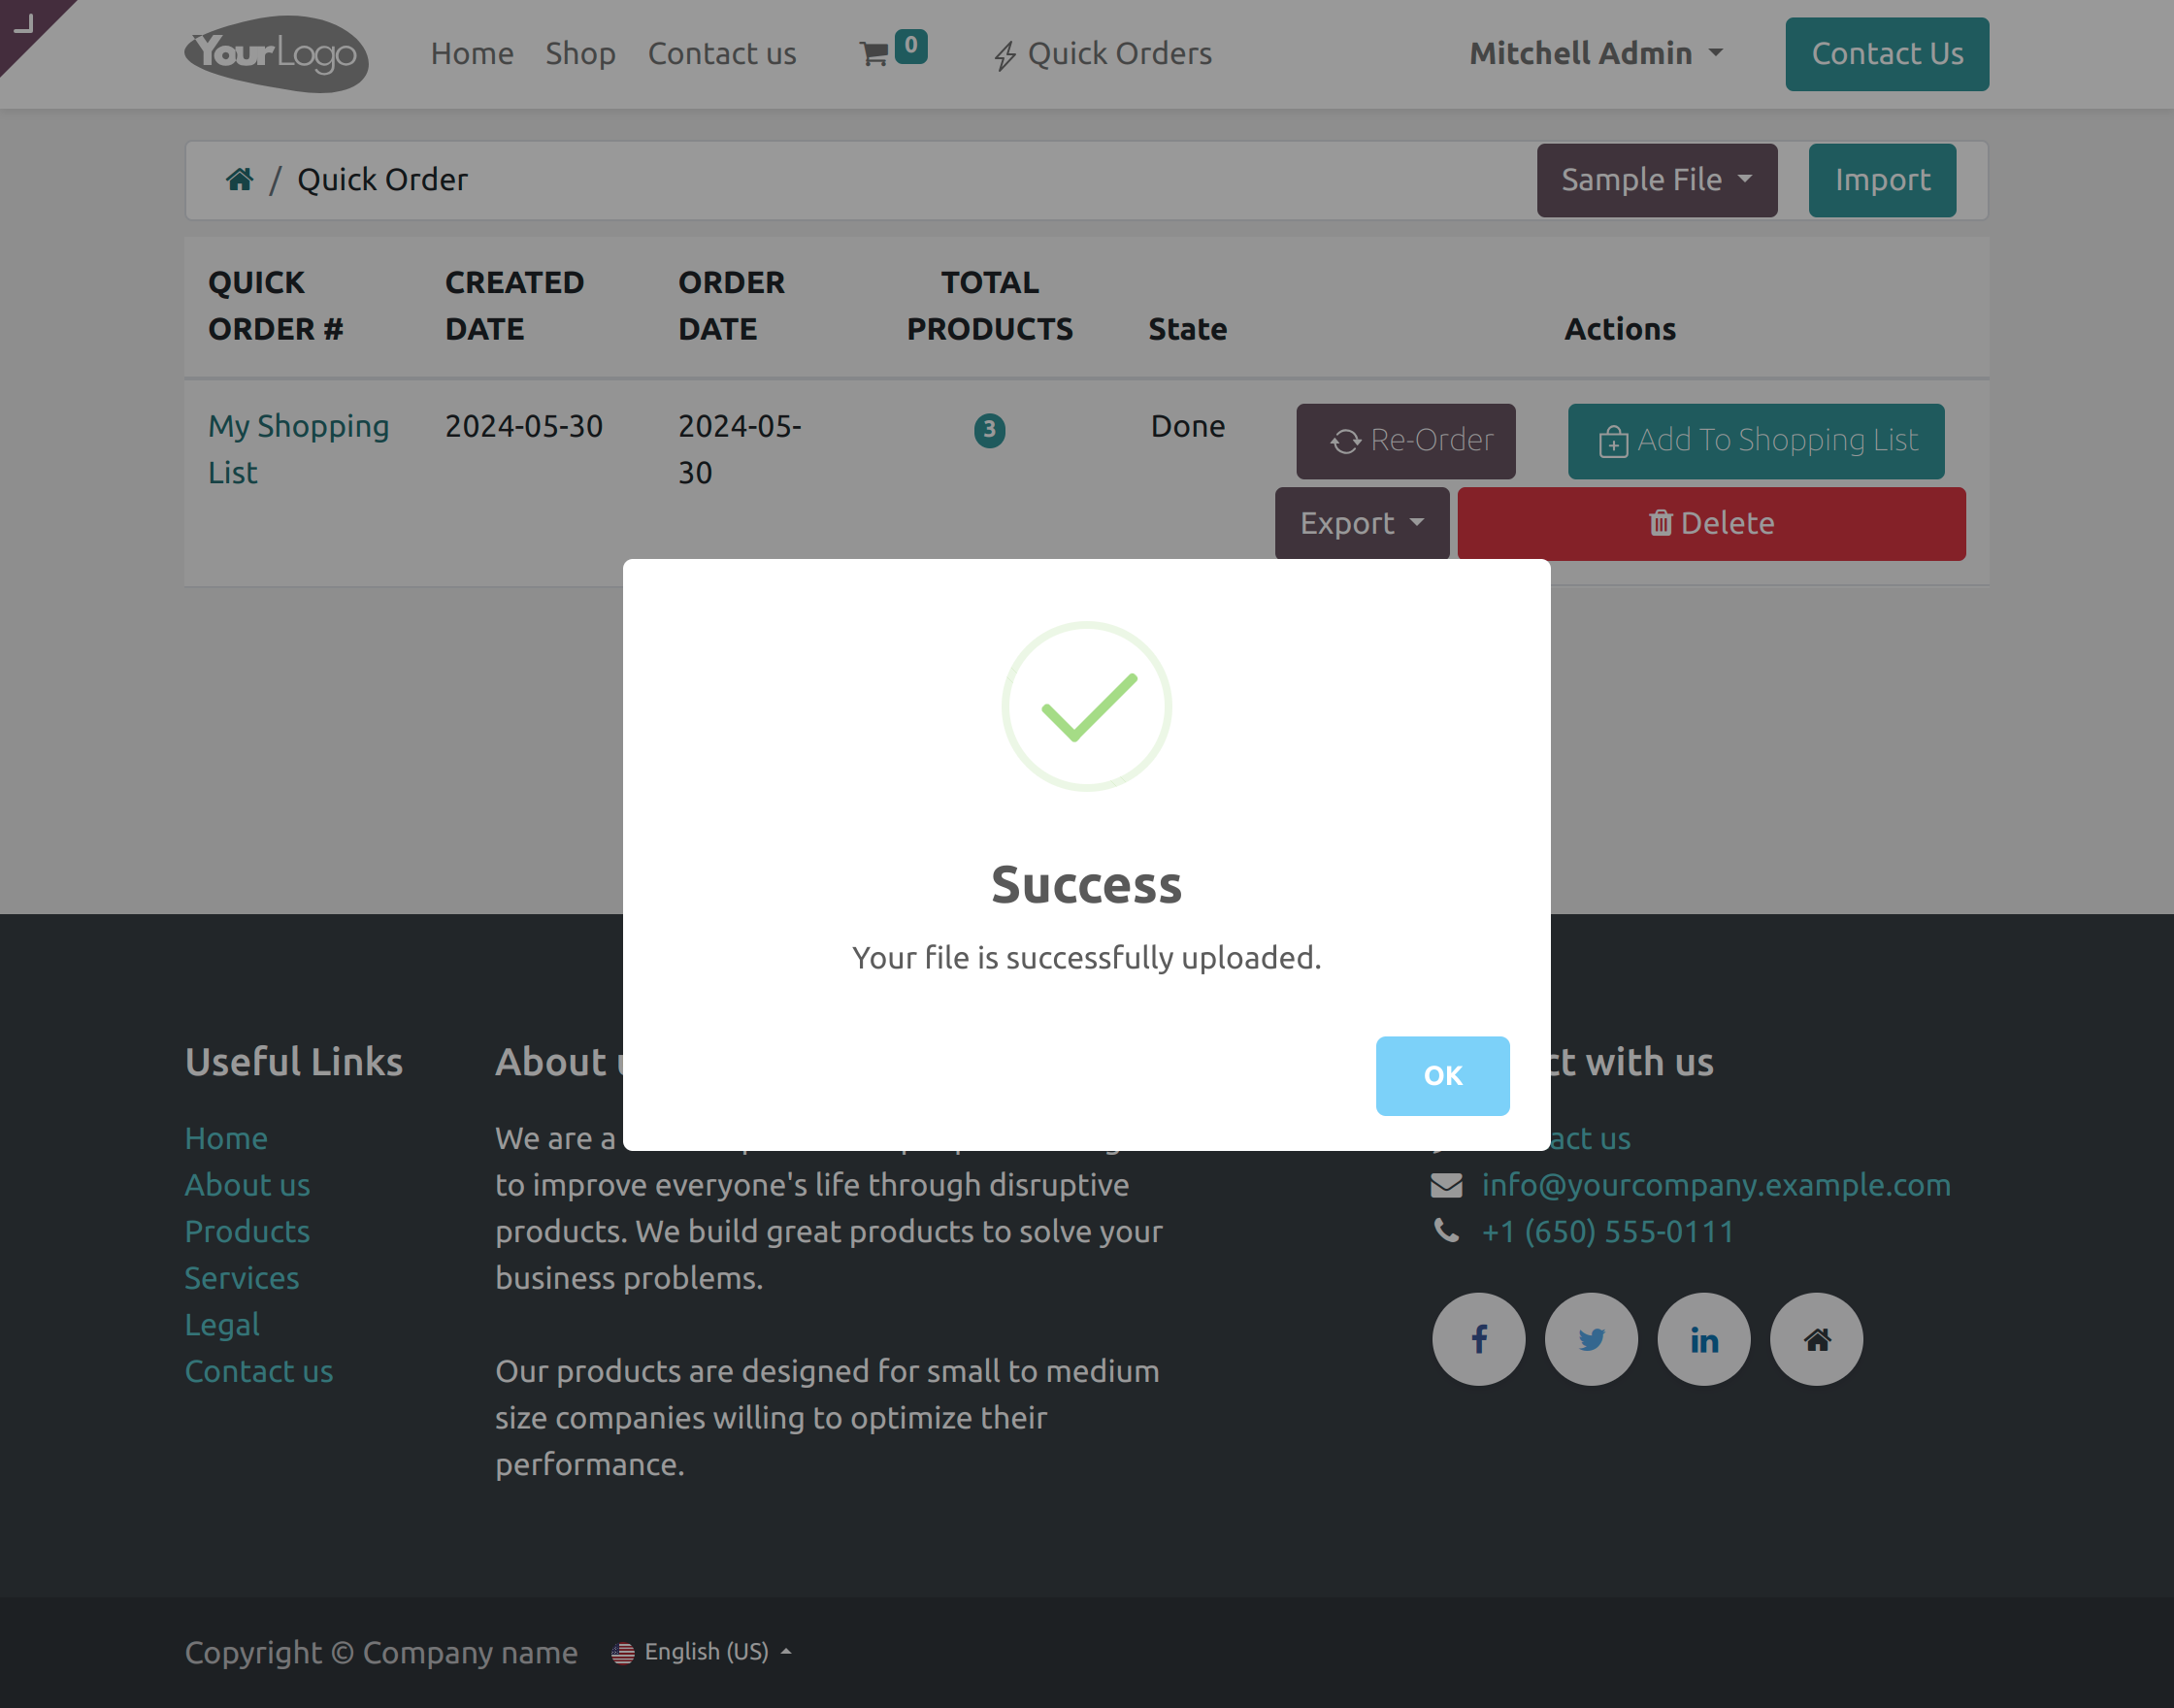
- After importing the file, A pop will appear confirming that ‘Your file is successfully uploaded’.
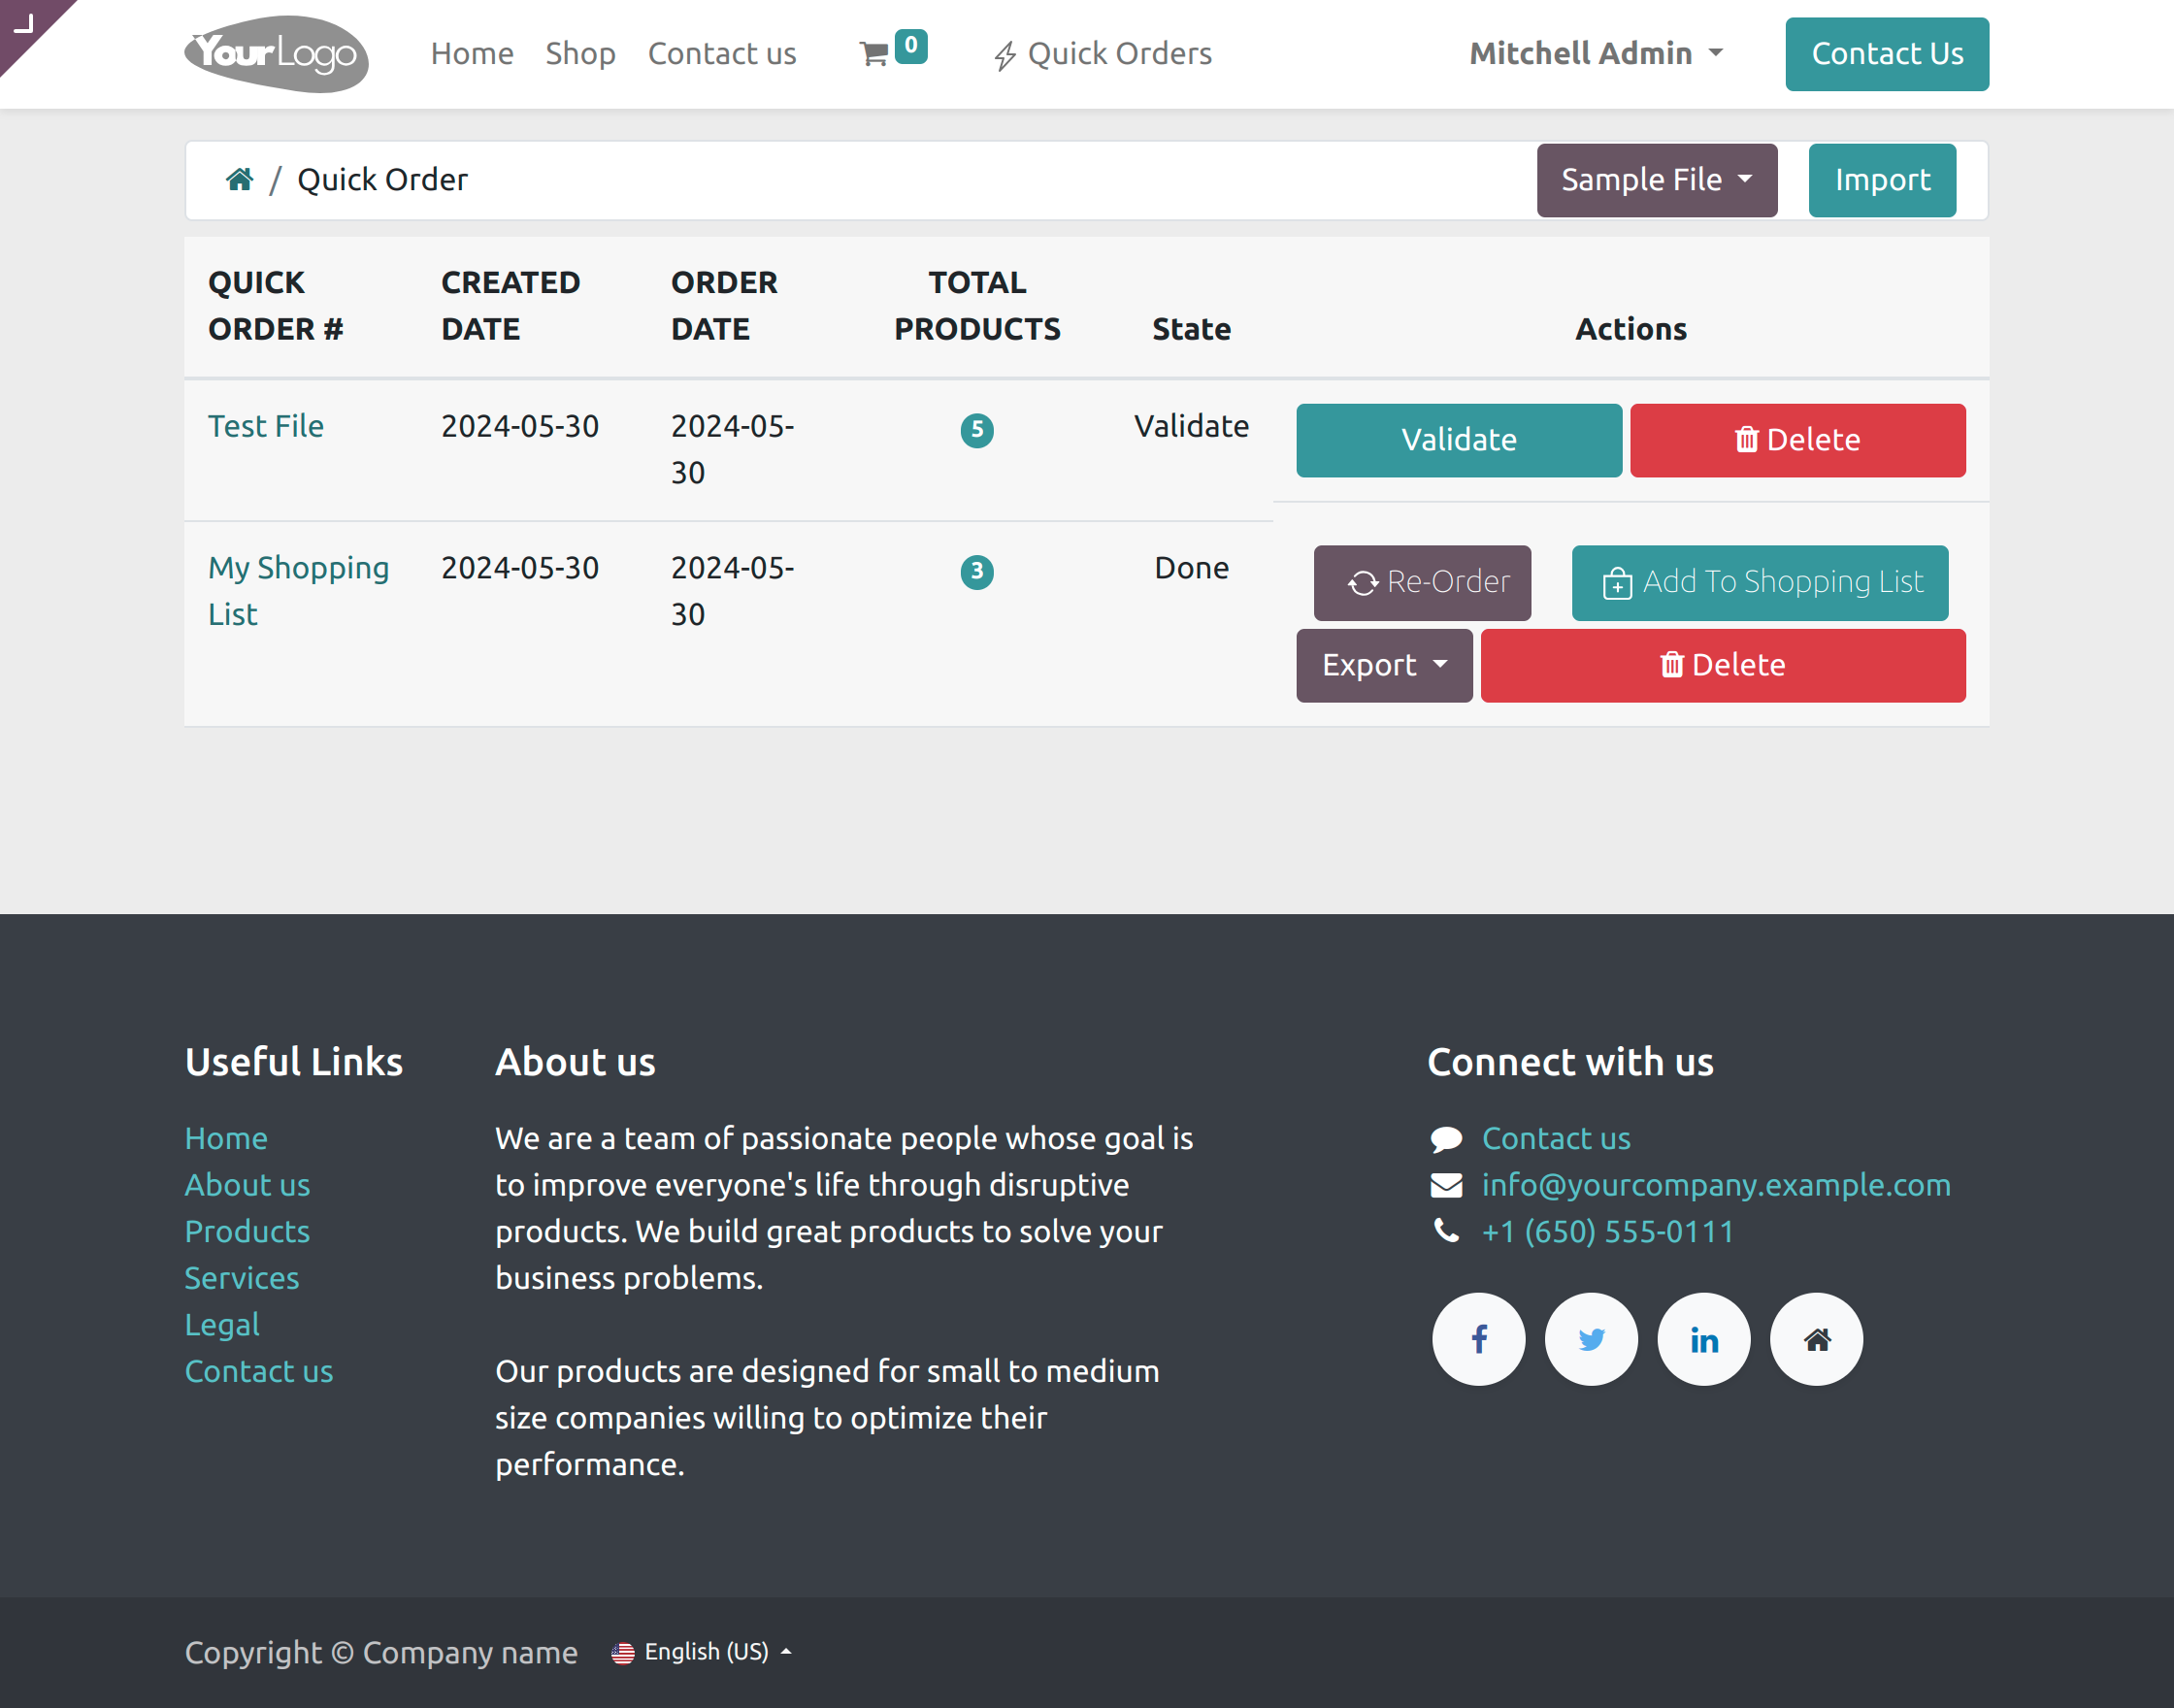
- After the file is imported, A quick order line will be created. Click on the ‘Validate’ to confirm the quick order line.
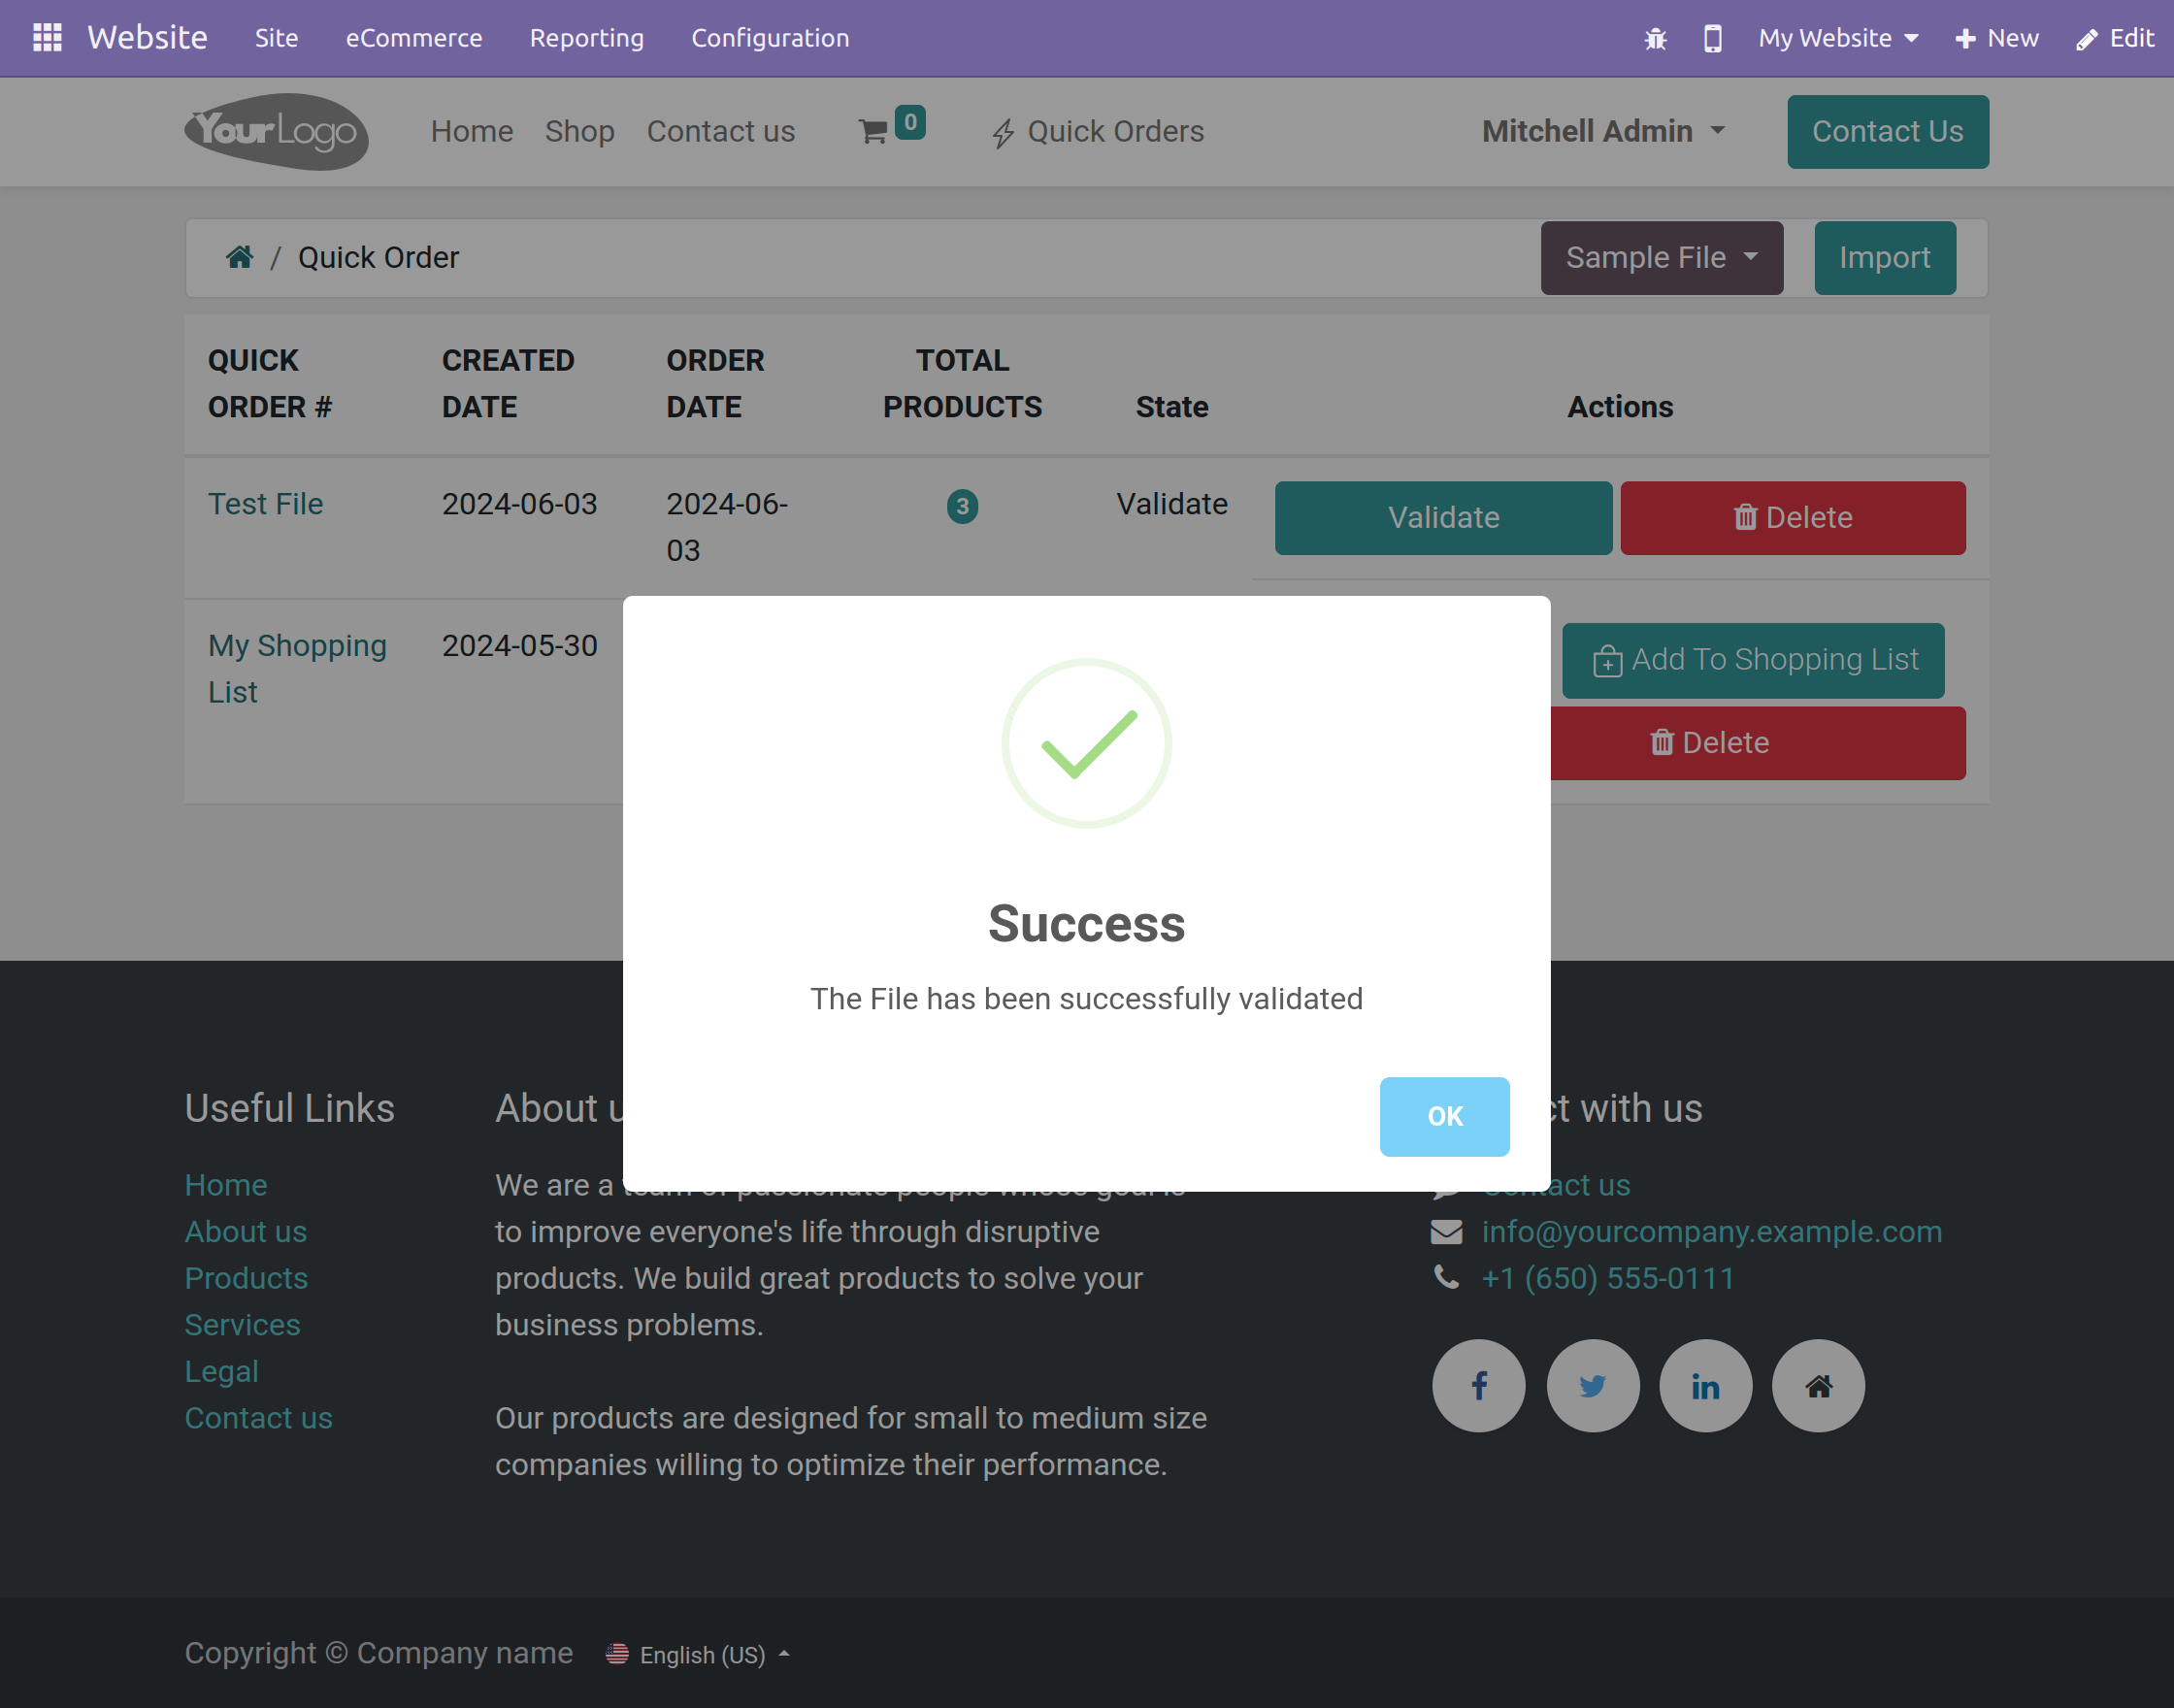
- After validating the quick order line, A pop up will appear indicating that the file has been successfully validated.
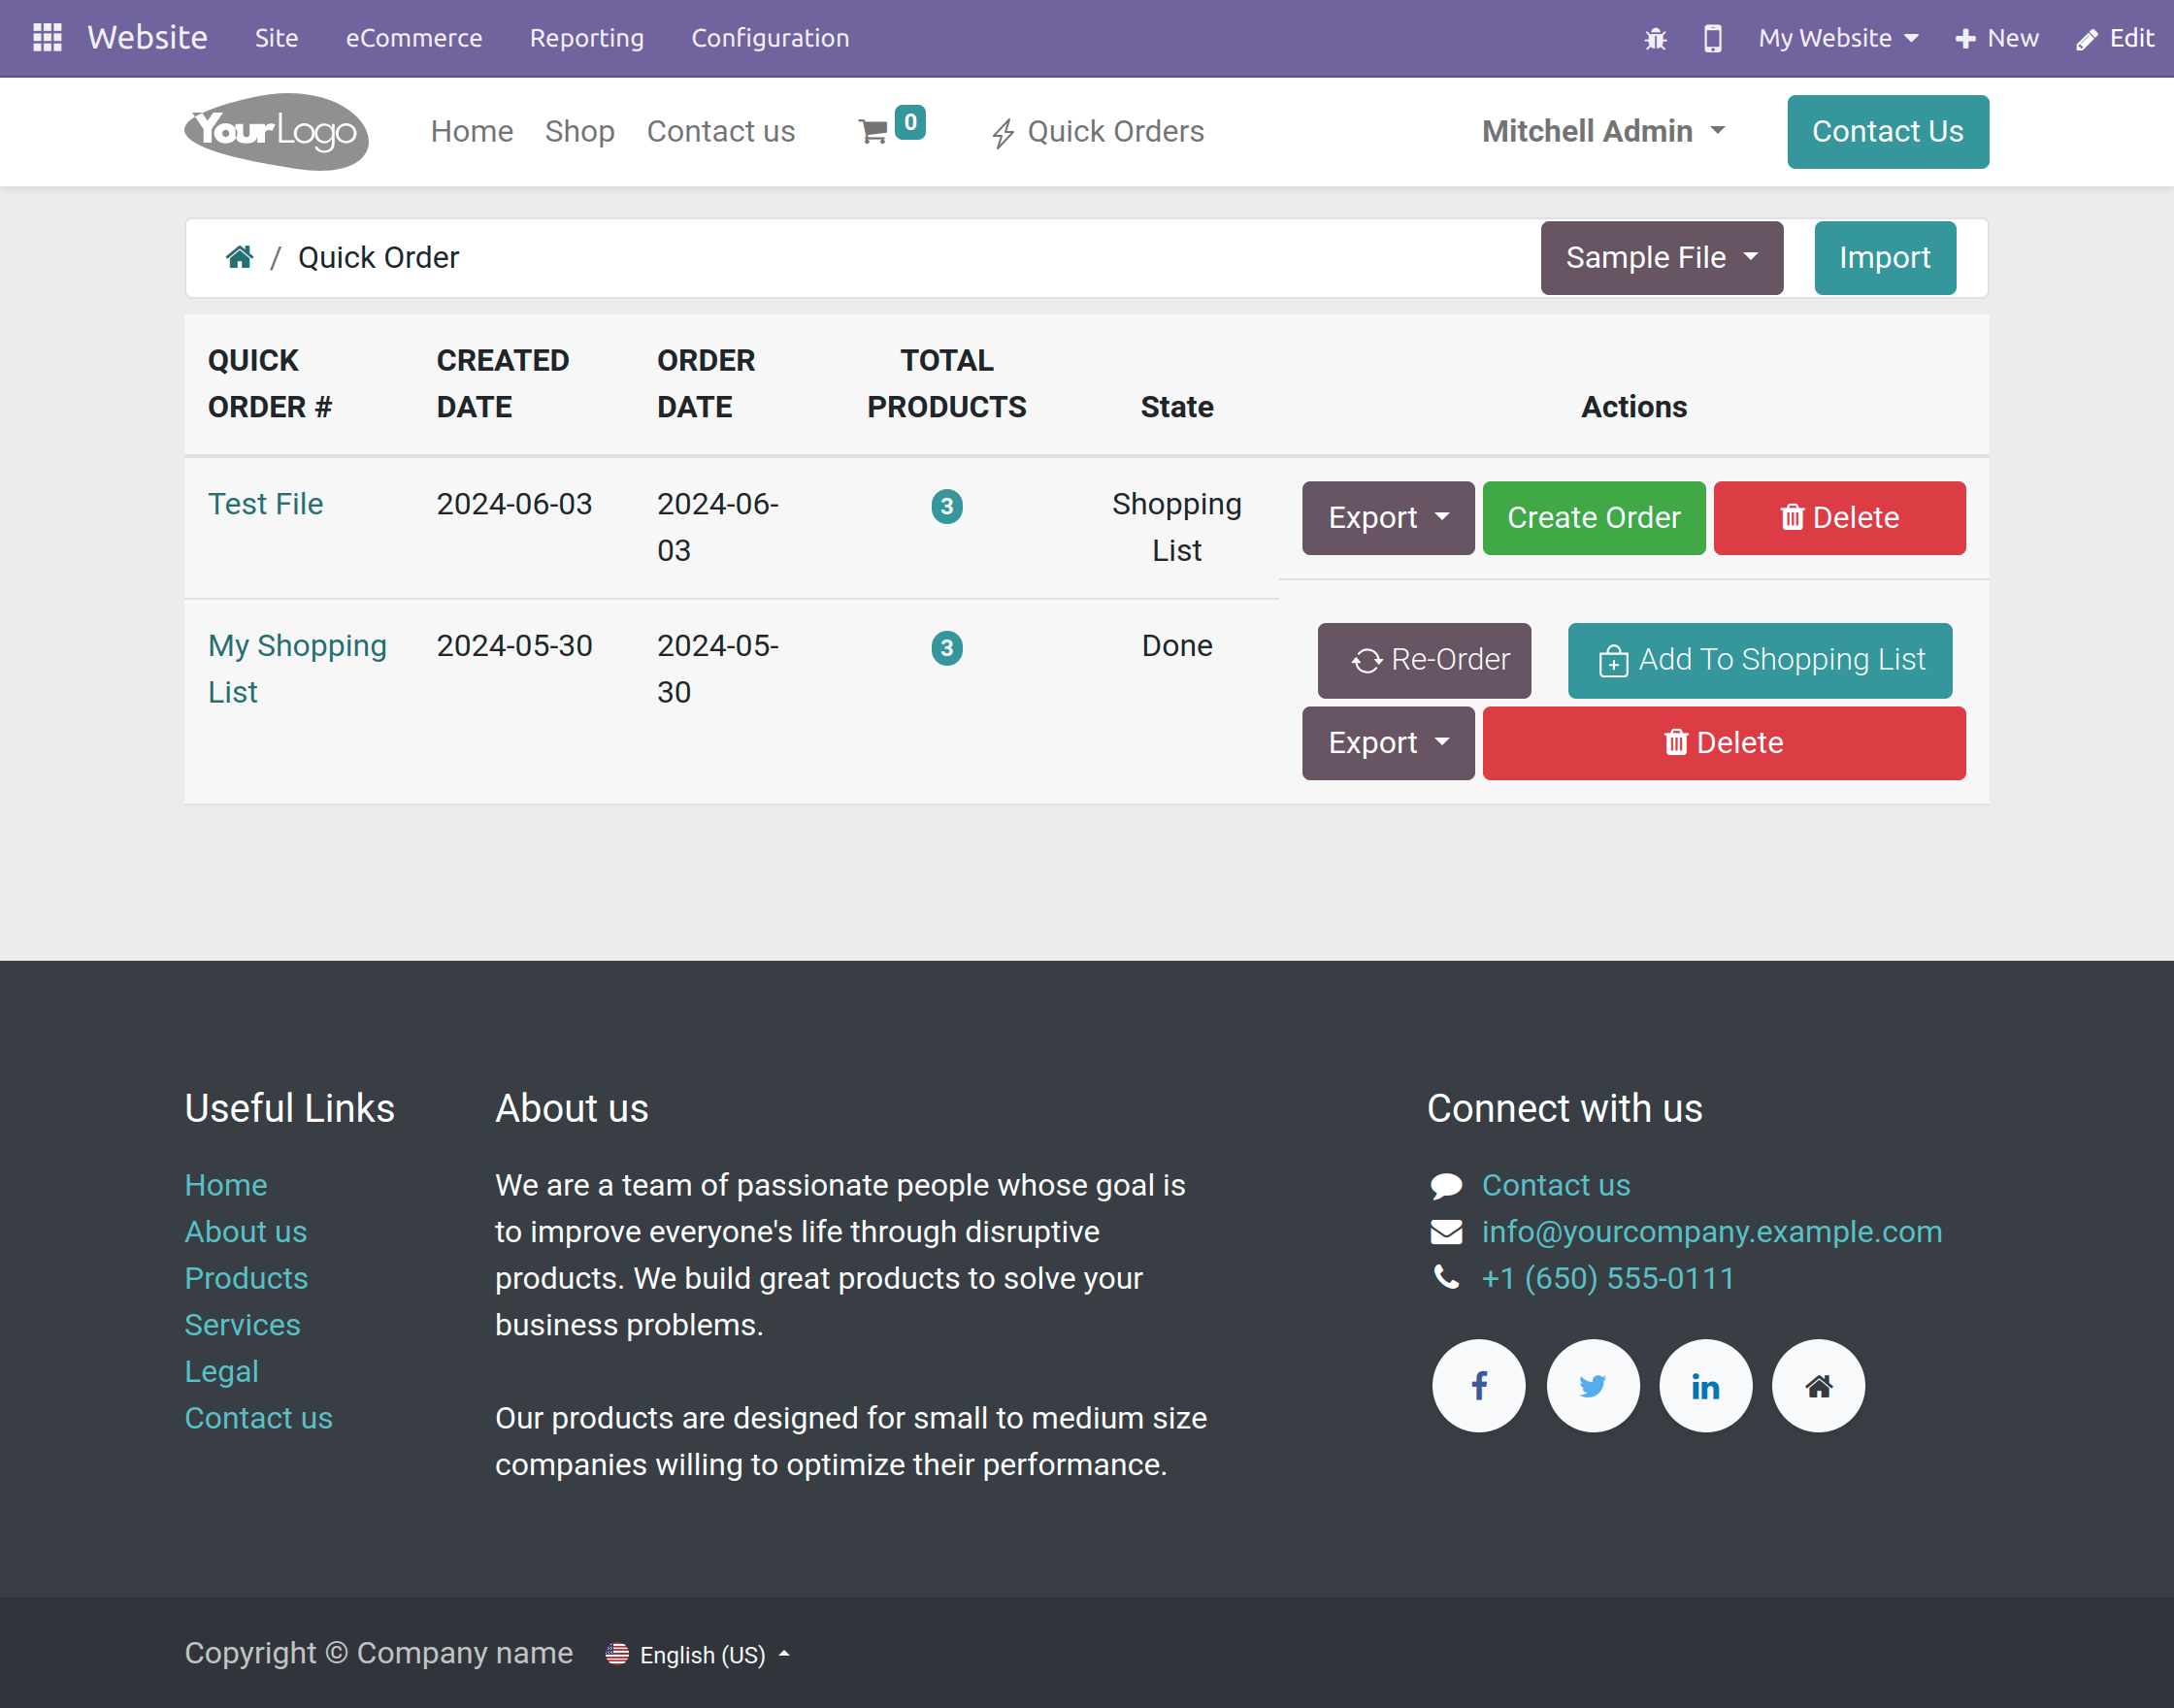
- Once the file is validated, The customer can click on Create Order to add all the products from the file to the cart.
- The products will be added to the cart, And the customers can proceed to checkout from there.
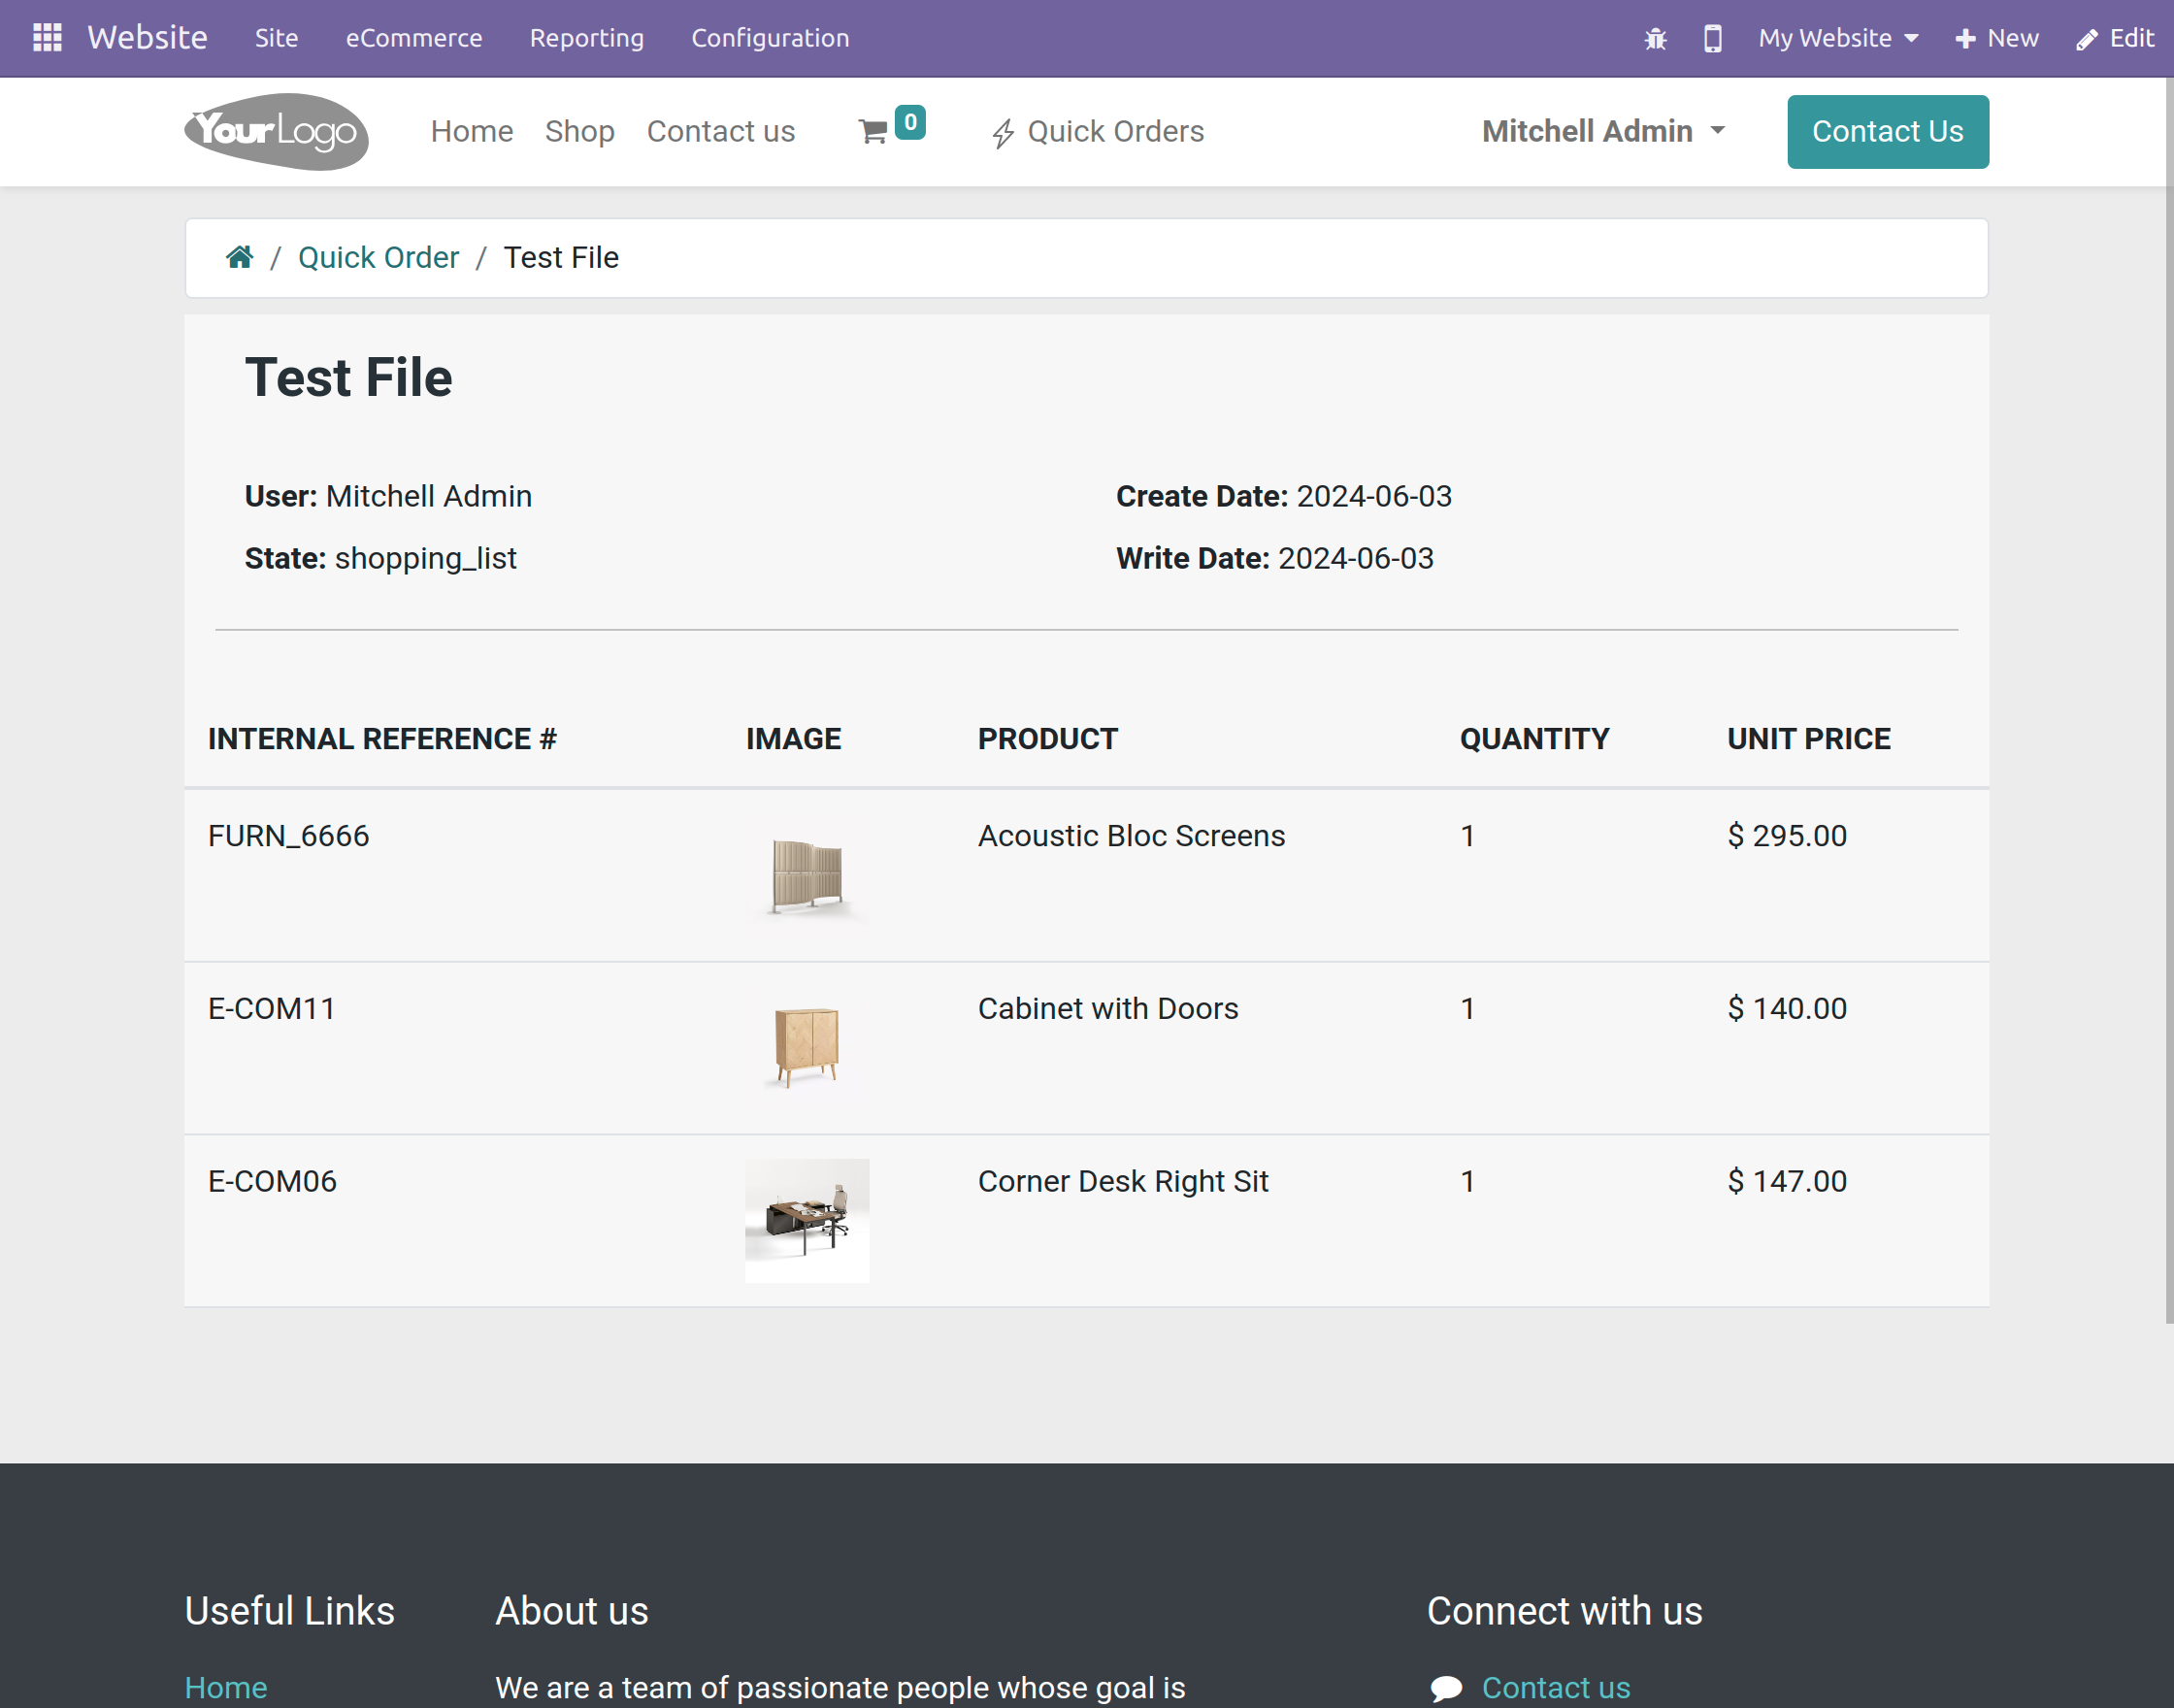
- The products added to the cart can be viewed from the Quick order lines by clicking on the Quick Order created.
NEED HELP?
Hope you find the guide helpful! Please feel free to share your feedback in the comments below.
If you still have any issues/queries regarding the module then please raise a ticket at UV Desk.
For any doubt contact us at support mail.
Thanks for paying attention!!
Current Product Version - 1.2.4
Supported Framework Version - V17, V16, V15

Be the first to comment.