INTRODUCTION
Odoo Rental Sale Management helps businesses manage rental products, rental pricing, deposits, bookings, contracts, pickups, returns, and renewals from Odoo.
The module supports different rental units such as minutes, hours, days, weeks, months, and years. Businesses can define separate rental rates according to the required rental period.
Odoo Rental Sale Management also manages Security Deposits, rental agreements, Late Return Charges, grace periods, blocked rental days, and the complete Rental Lifecycle.
FEATURES
- Configure rental rates for different rental time units.
- Set a Security Deposit for individual rental products.
- Create rental bookings with pickup and return dates.
- Configure grace periods and Late Return Charges.
- Block selected weekdays for rental pickup and return.
- Track Rental Orders and Rental Contracts in Odoo.
- Renew expired Rental Contracts when required.
- Process rental pickup through outgoing stock transfers.
- Complete product returns through incoming stock transfers.
INSTALLATION
- Once you purchase the App from Webkul store, you will receive the link to download the zip file of the module.
- Extract the file on your system after the download finishes. You will be able to see a folder named- ‘odoo_sale_rental.’
- Copy and paste this folder inside your Odoo apps path.
- Now, open the Odoo App and click on the Settings menu. Here, click on Activate the Developer Mode.
- Then, open the Apps menu and click on ‘Update Modules List.’
- In the search bar, remove all the filters and search ‘odoo_sale_rental.’
- You will be able to see the module in the search result. Click on ‘Install’ to install it.
WORKFLOW
Rental Configuration
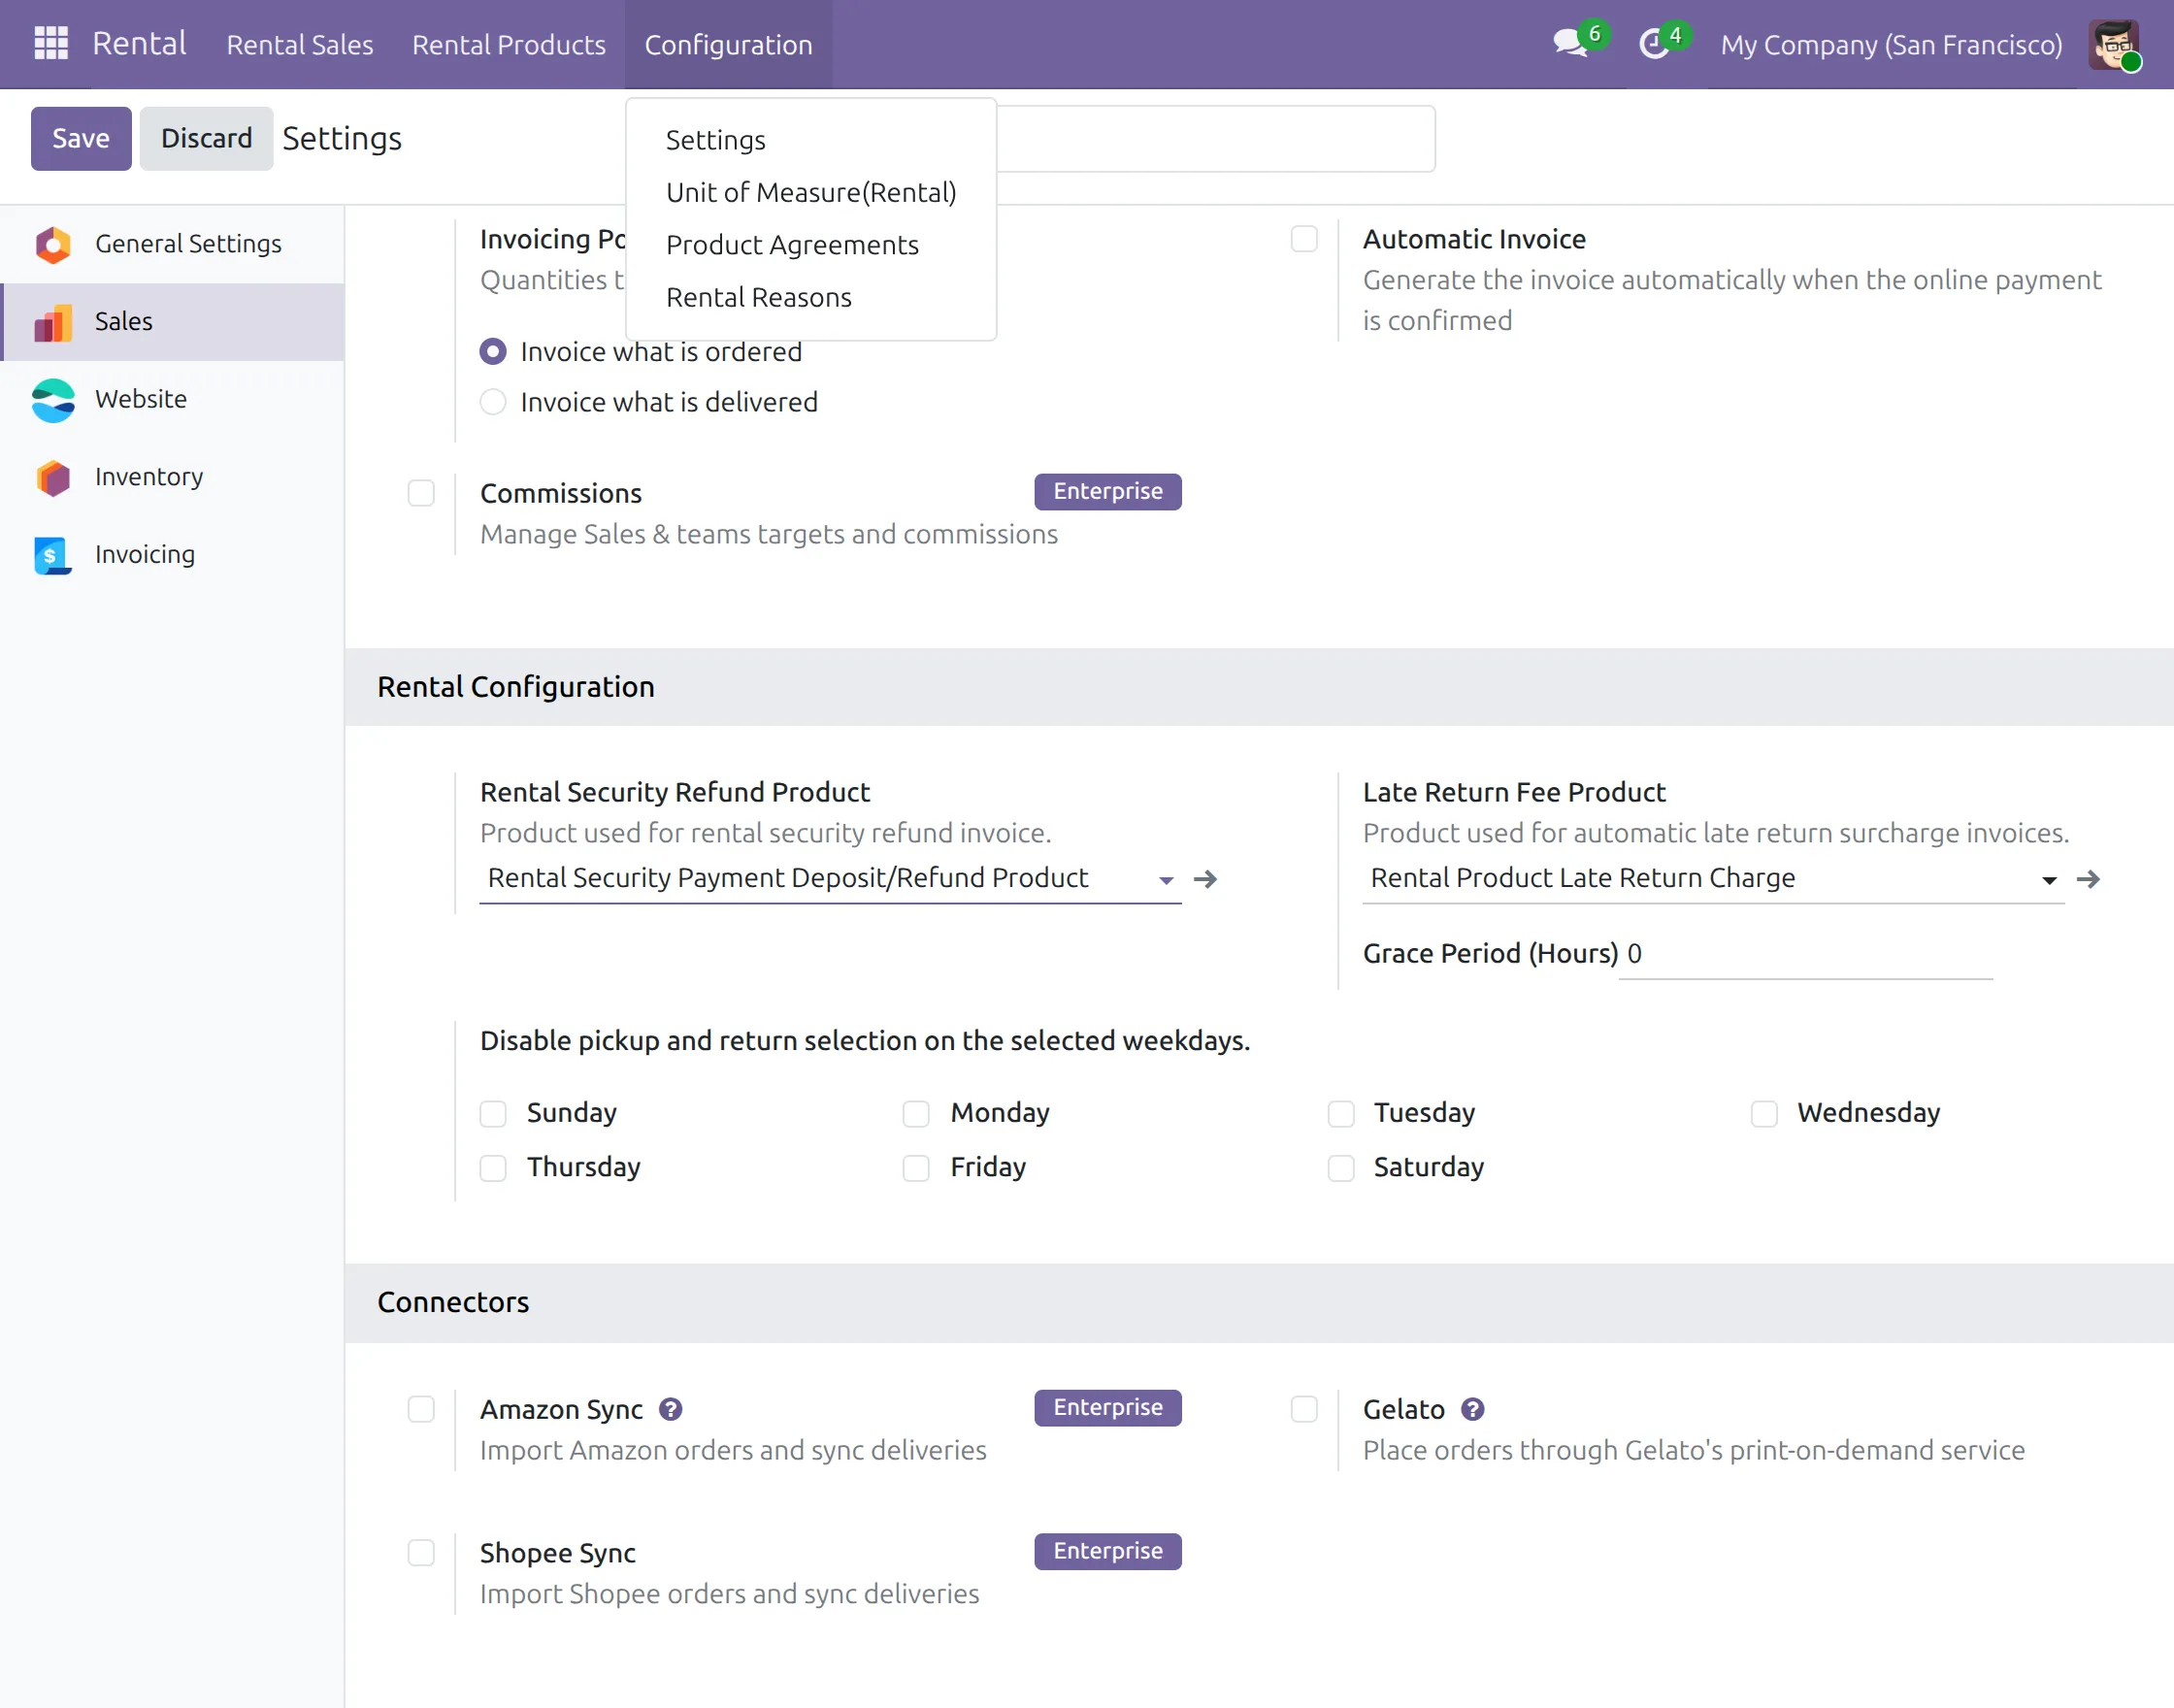
1. After installing Odoo Rental Sale Management, open the Rental app and go to Configuration >> Settings.
Under Rental Configuration, select the Security Deposit refund product and Late Return Fee product. You can also define the grace period and block selected weekdays for rental pickup and return.
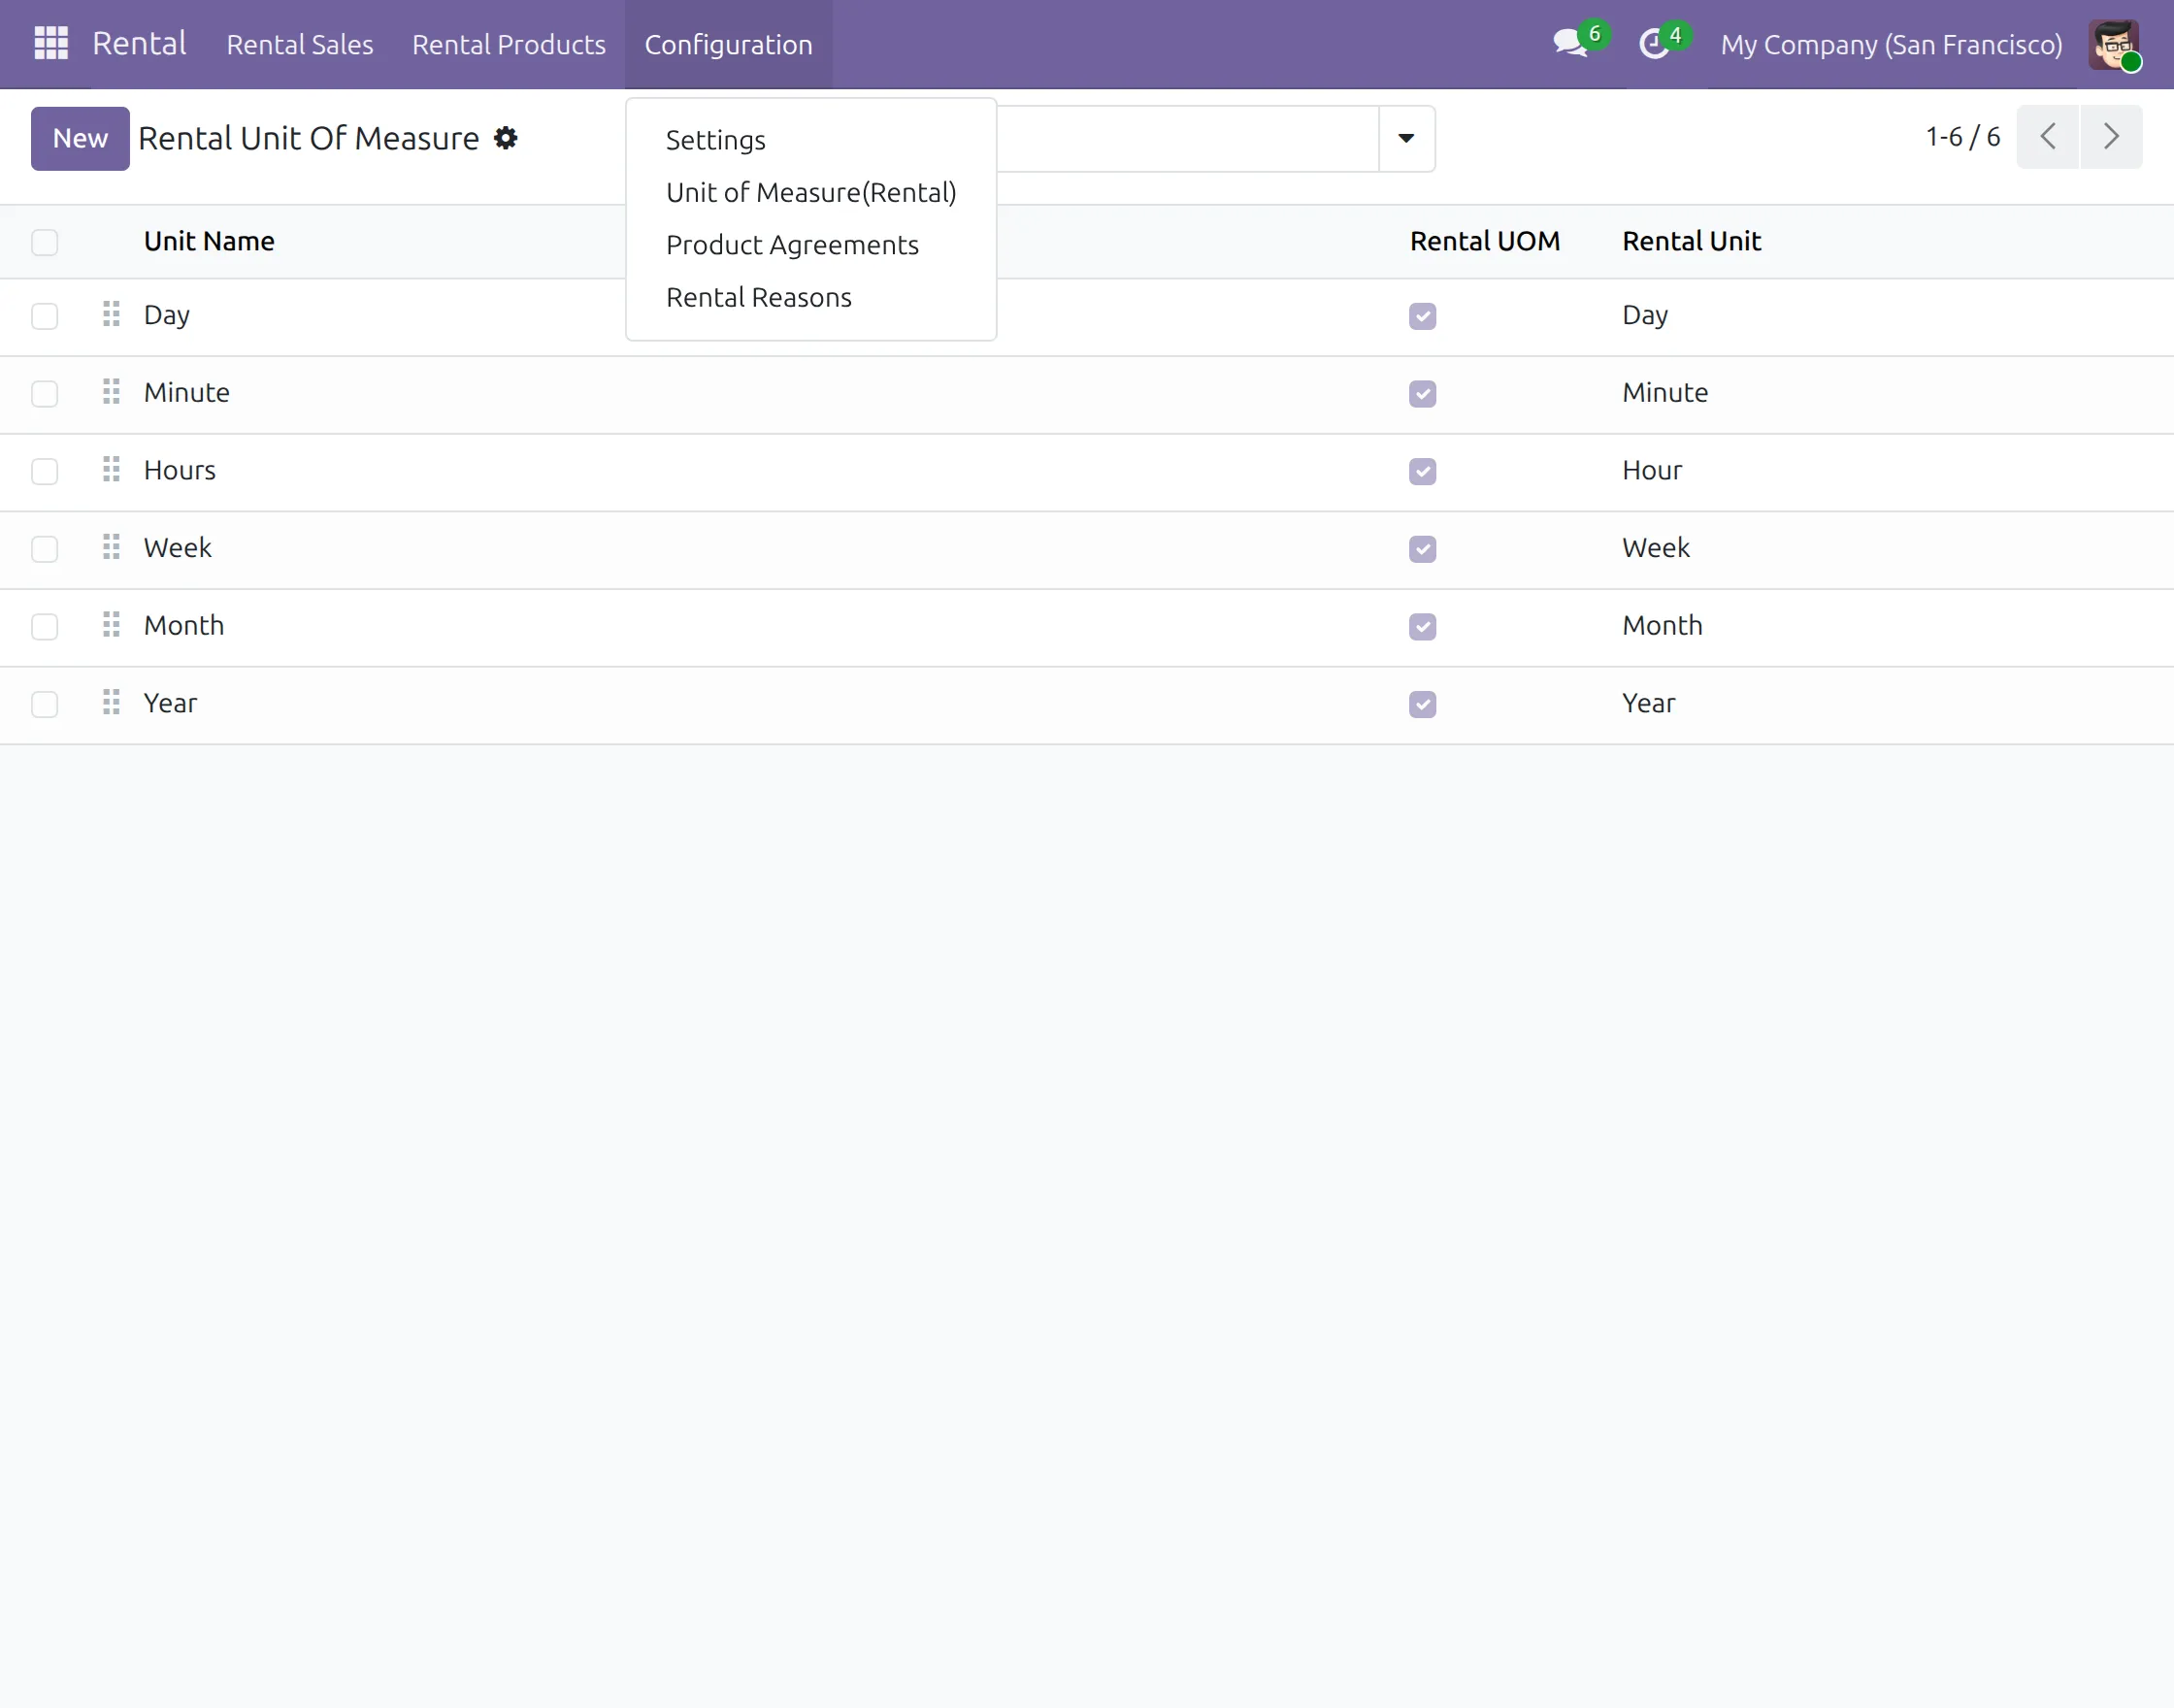
2. Go to Rental >> Configuration >> Unit of Measure (Rental). Here, you can manage the available rental units such as Day, Minute, Hours, Week, Month, and Year.
These units can later be used while defining Rental Pricing for different rental products.
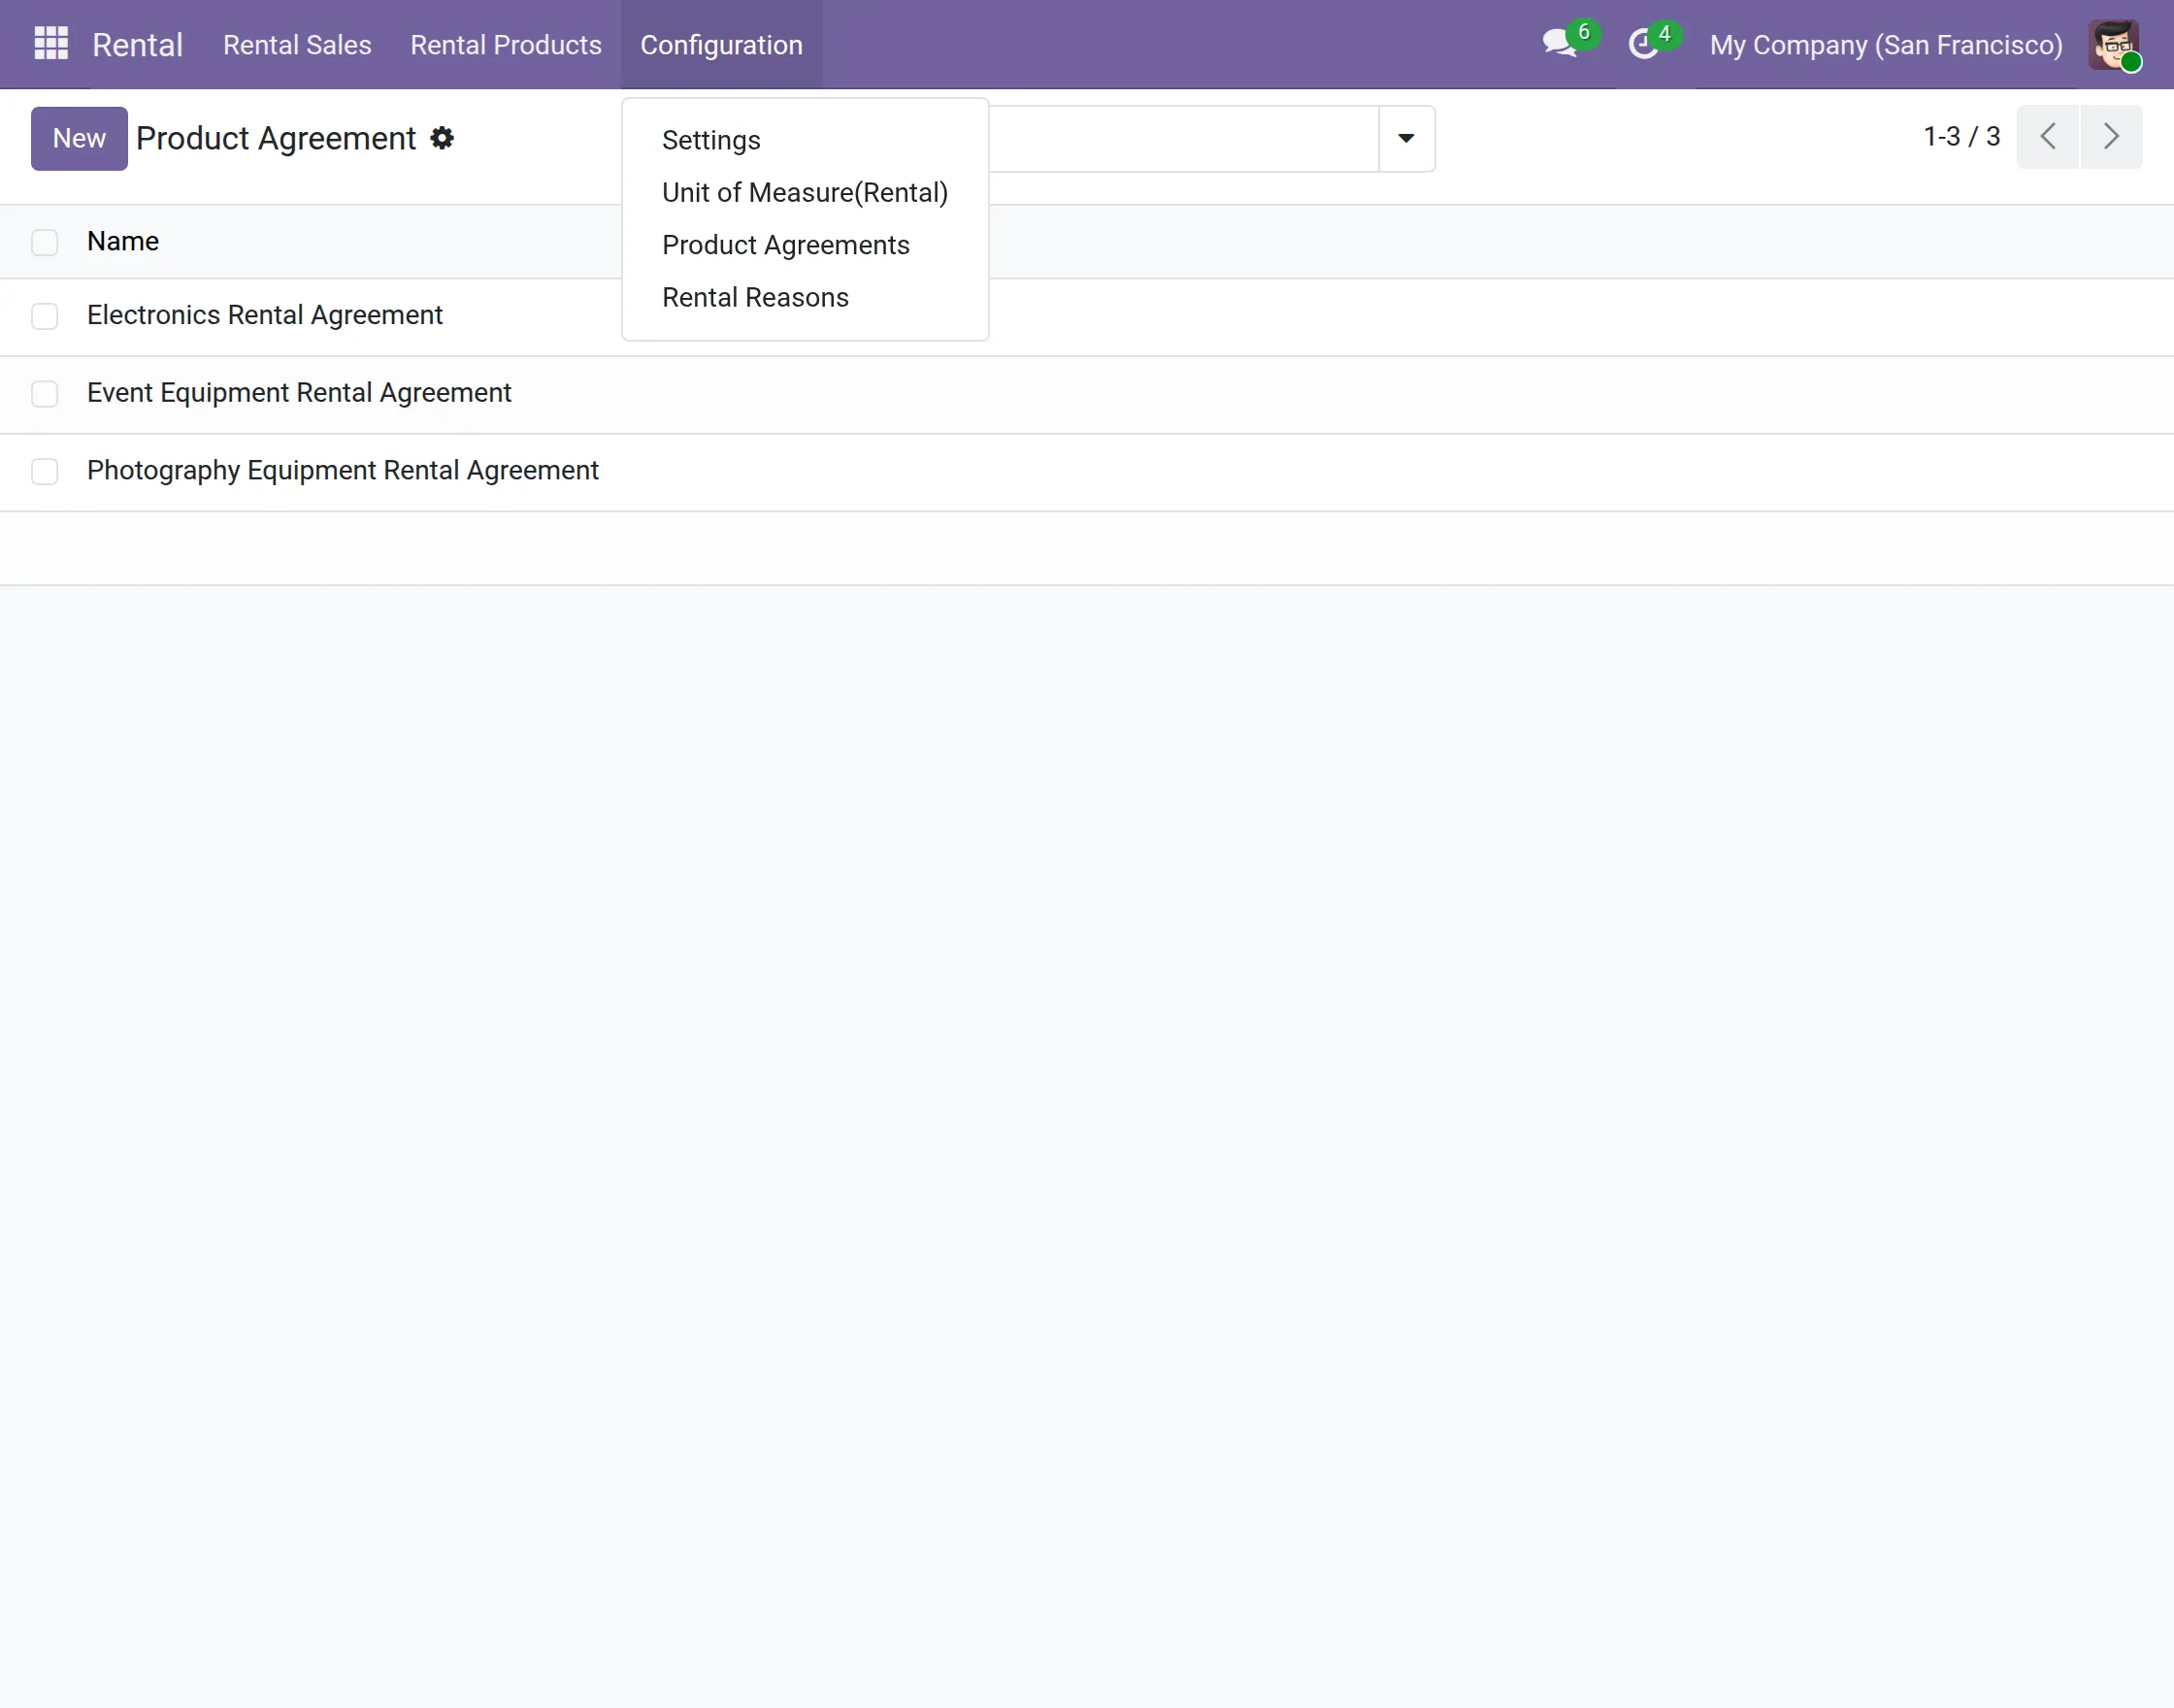
3. Go to Rental >> Configuration >> Product Agreements. Create and manage the agreements that can be assigned to rental products.
The agreement can later be selected while configuring a product and renewing its Rental Contract.
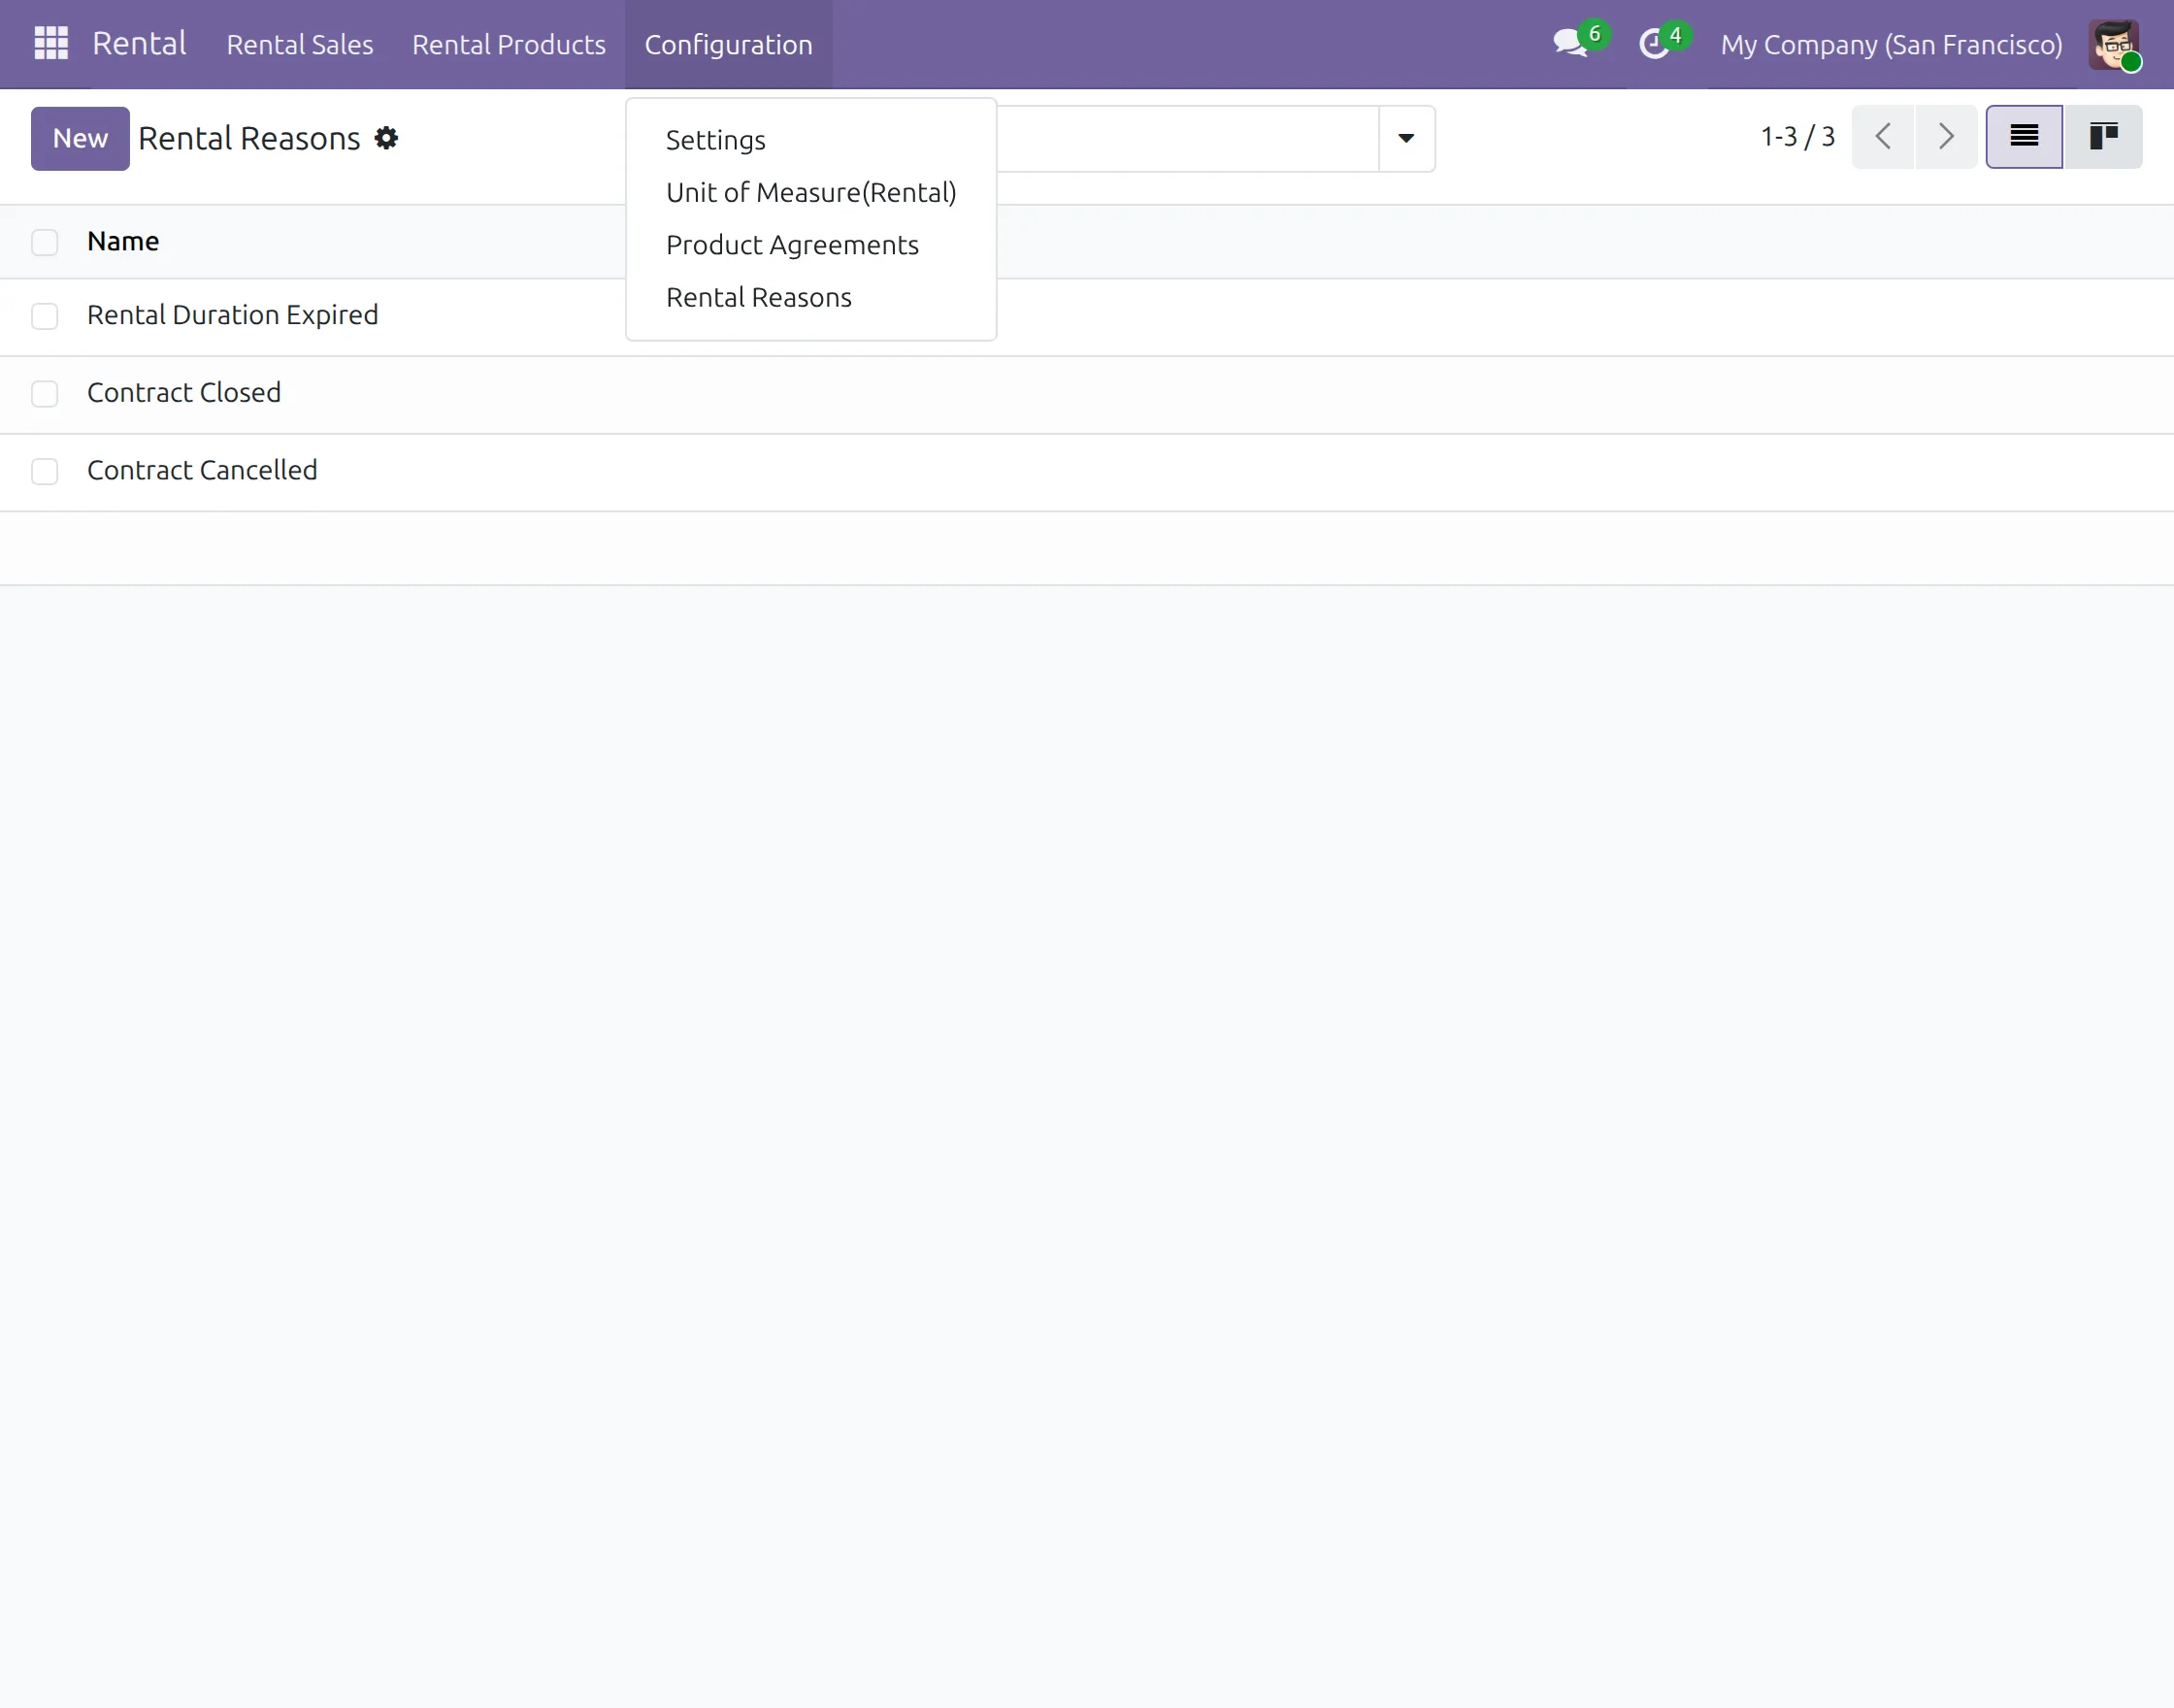
4. Go to Rental >> Configuration >> Rental Reasons to manage the reasons used during different rental conditions.
The available records can include reasons such as Rental Duration Expired, Contract Closed, and Contract Cancelled.
Configure Rental Products
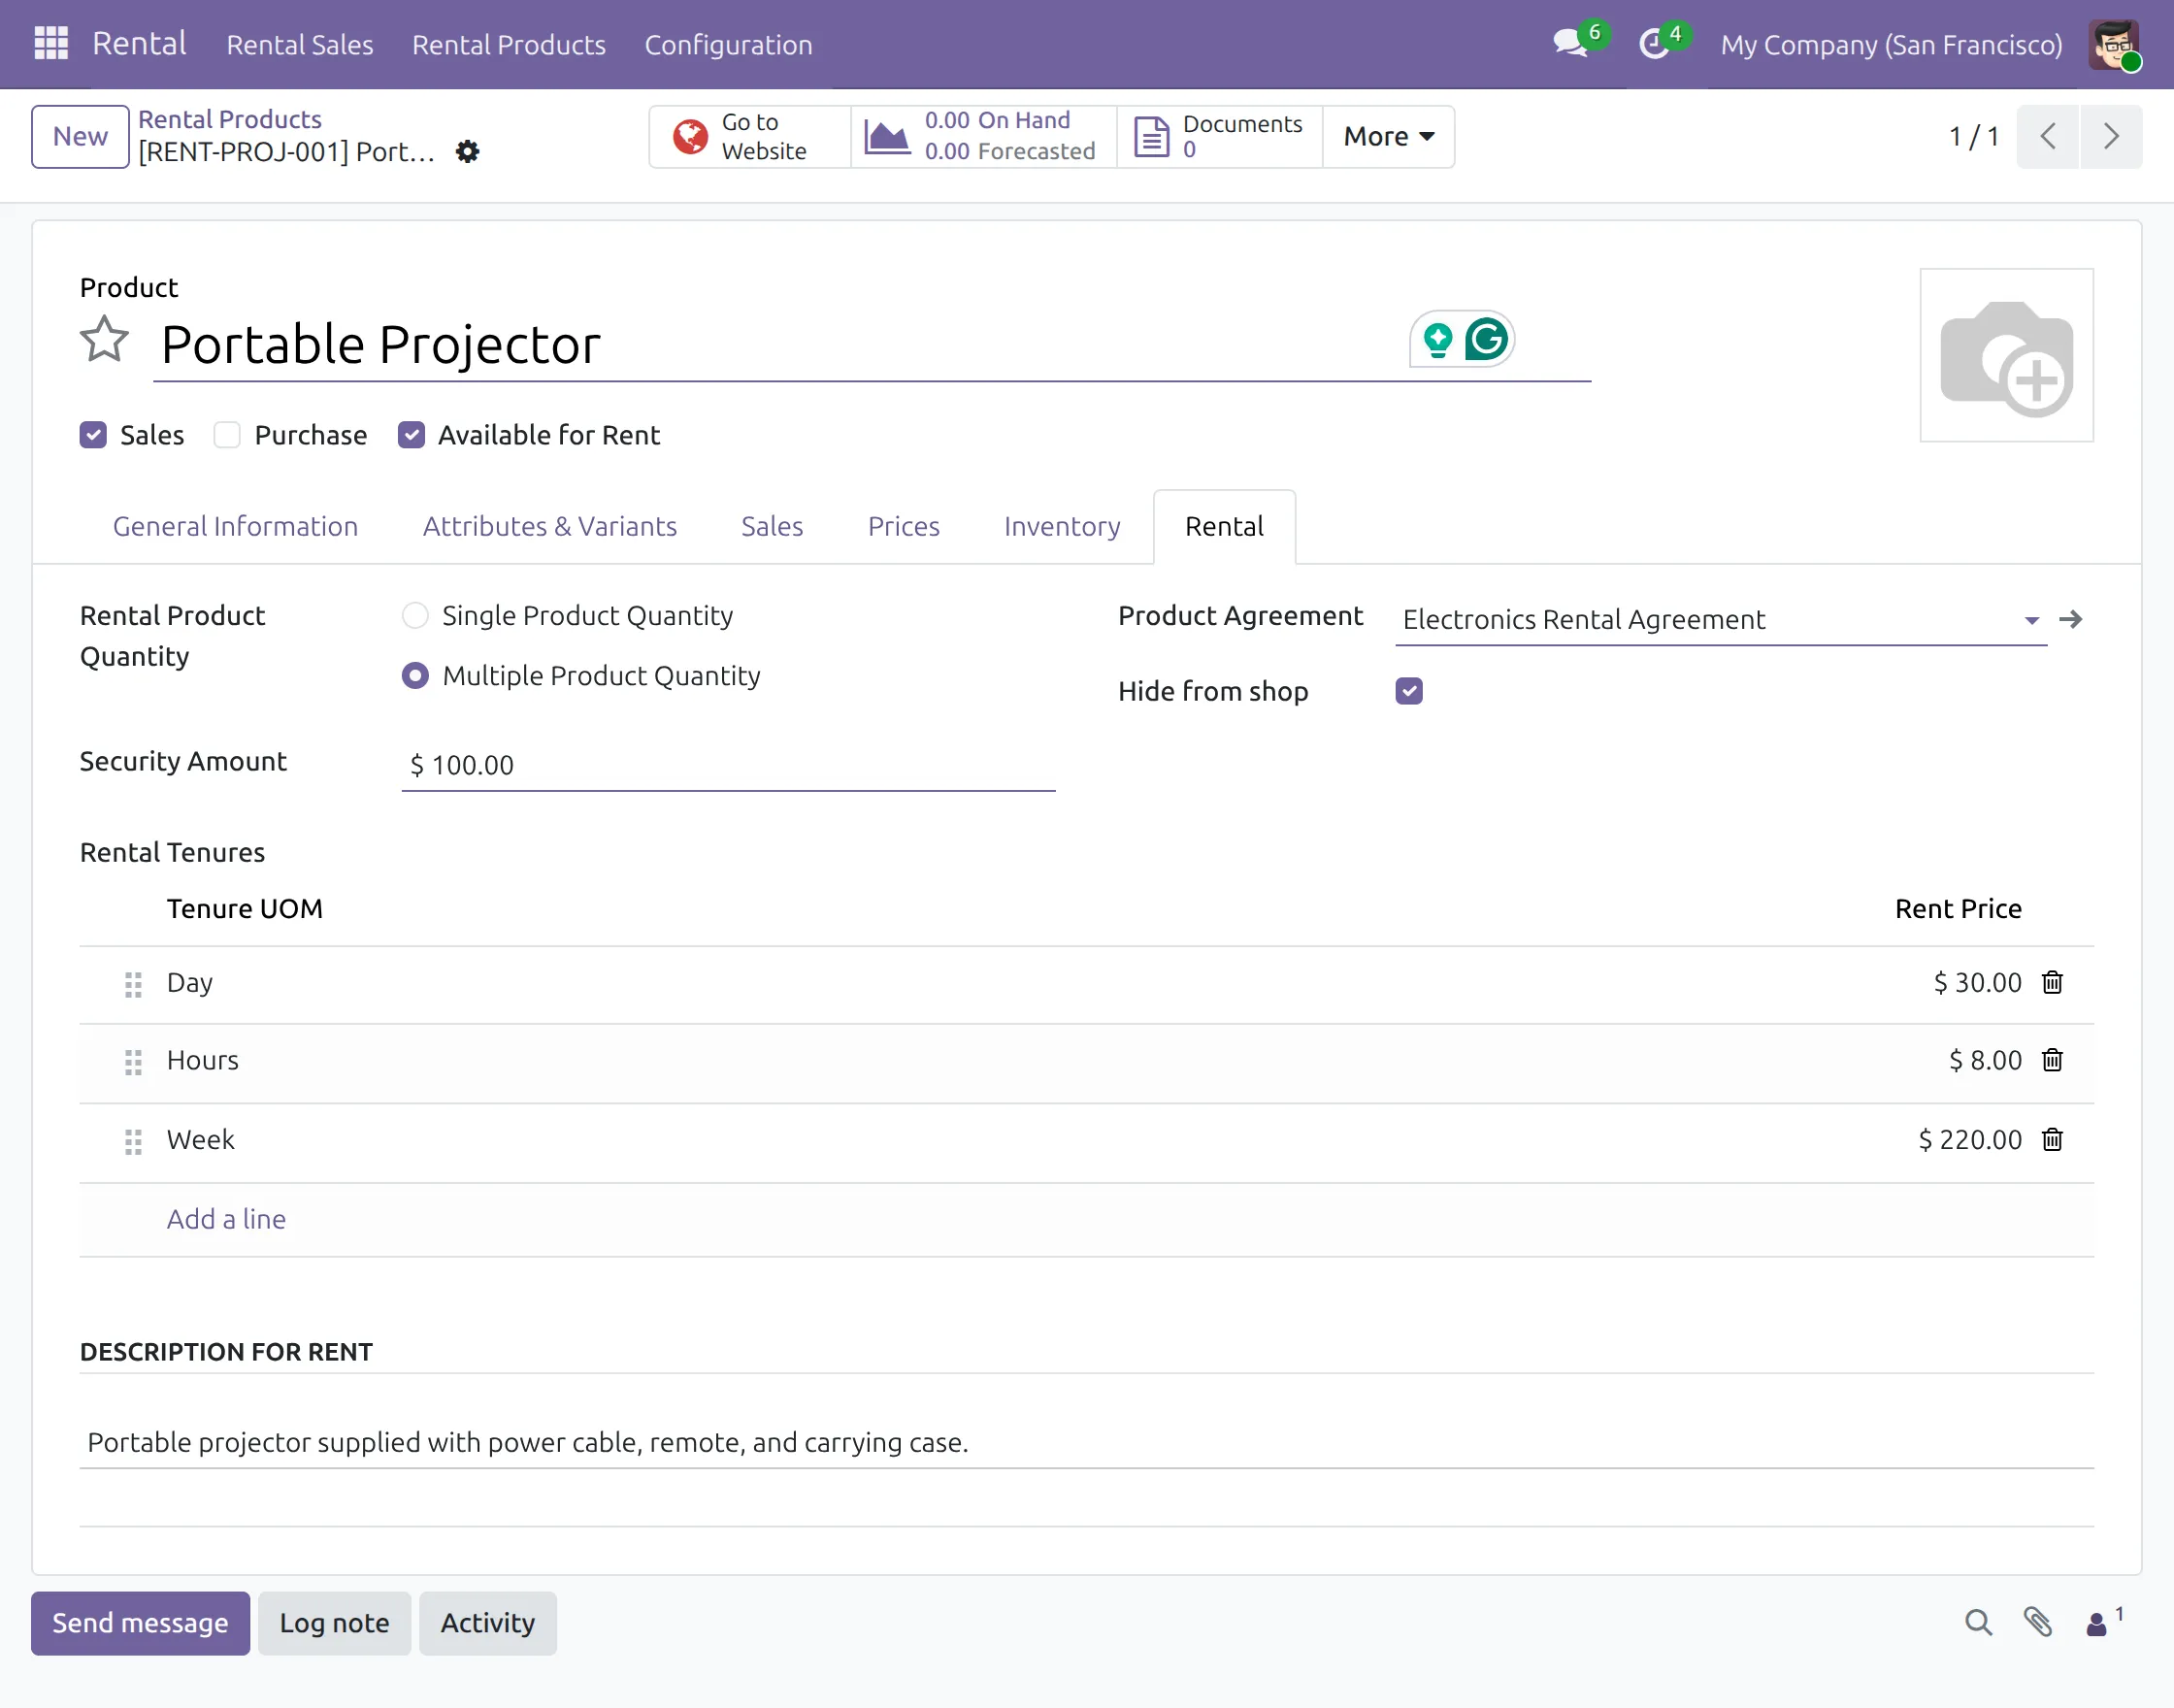
5. Go to Rental Products and open the required product. Enable Available for Rent, then open the Rental tab.
Select single or multiple product quantity handling, set the Security Amount, assign a Product Agreement, and define the required Rental Pricing for different rental units.
Create and Confirm Rental Booking
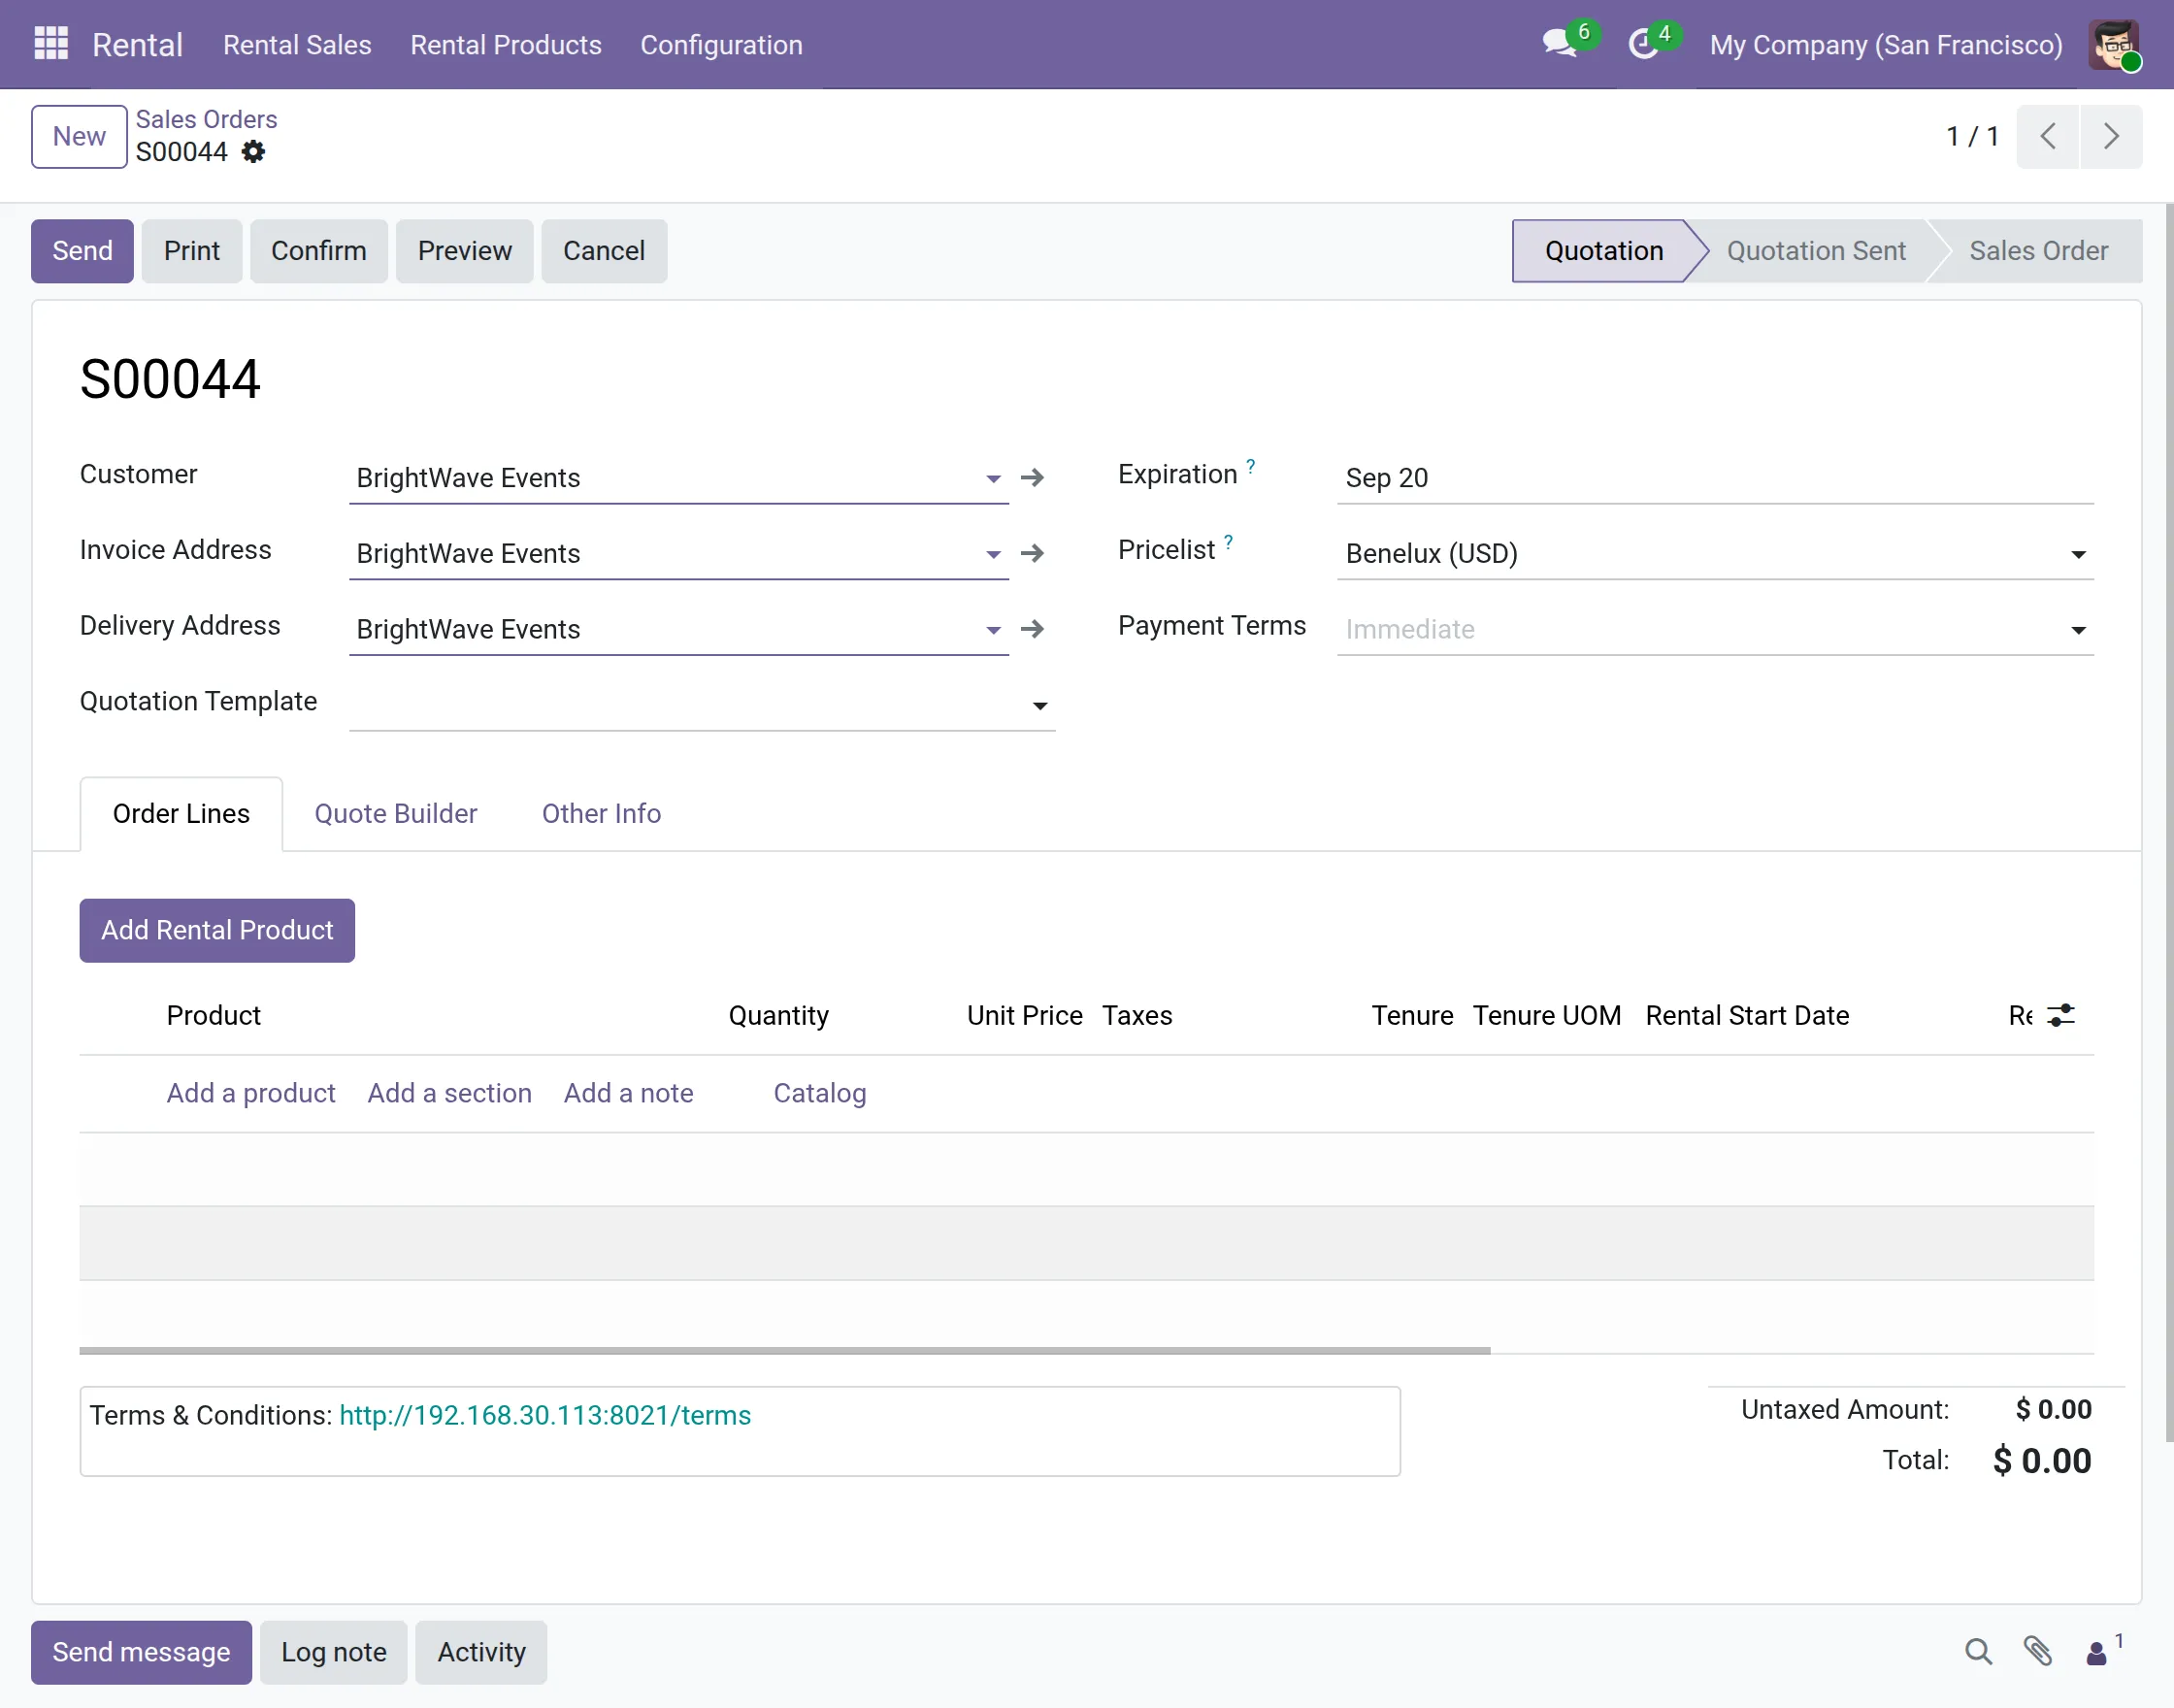
6. To create a rental booking, go to Rental Sales >> Sales Orders and create a new quotation.
Select the customer and enter the required quotation details. Under Order Lines, click Add Rental Product.
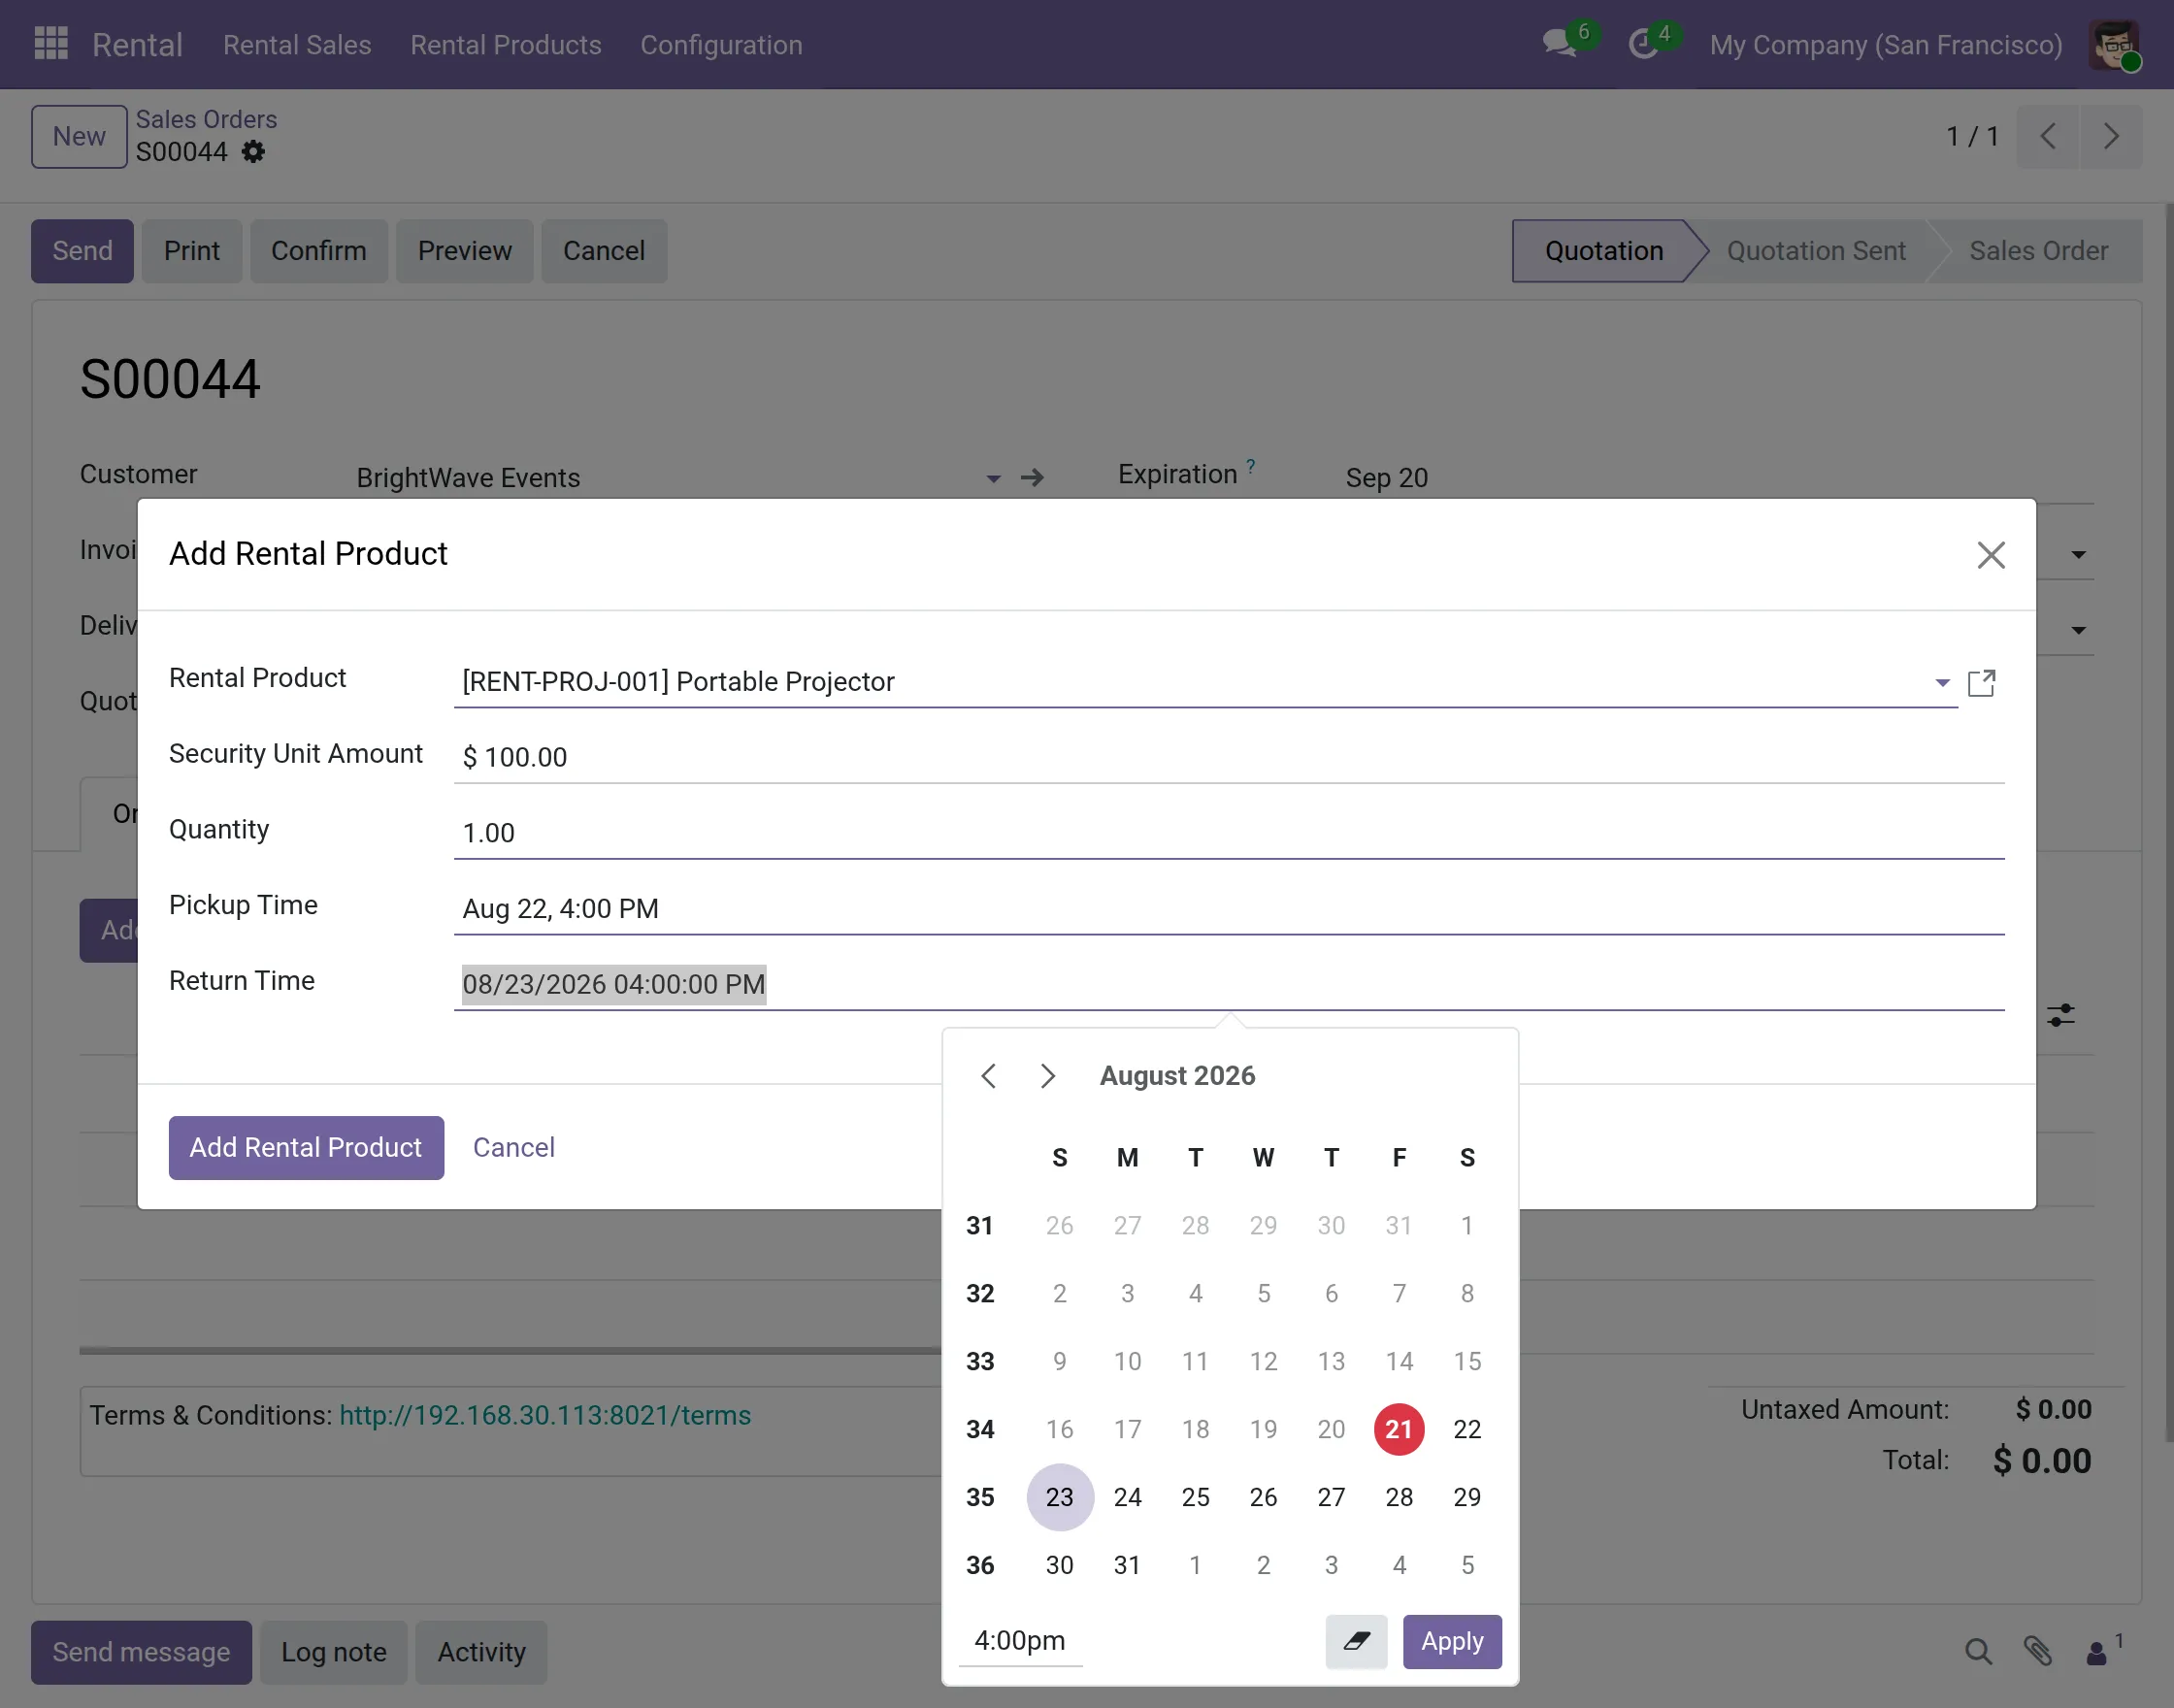
7. In the Add Rental Product window, select the required rental product. The configured Security Unit Amount appears automatically.
Enter the quantity, Pickup Time, and Return Time. The selected dates define the required rental period. Click Add Rental Product to continue.
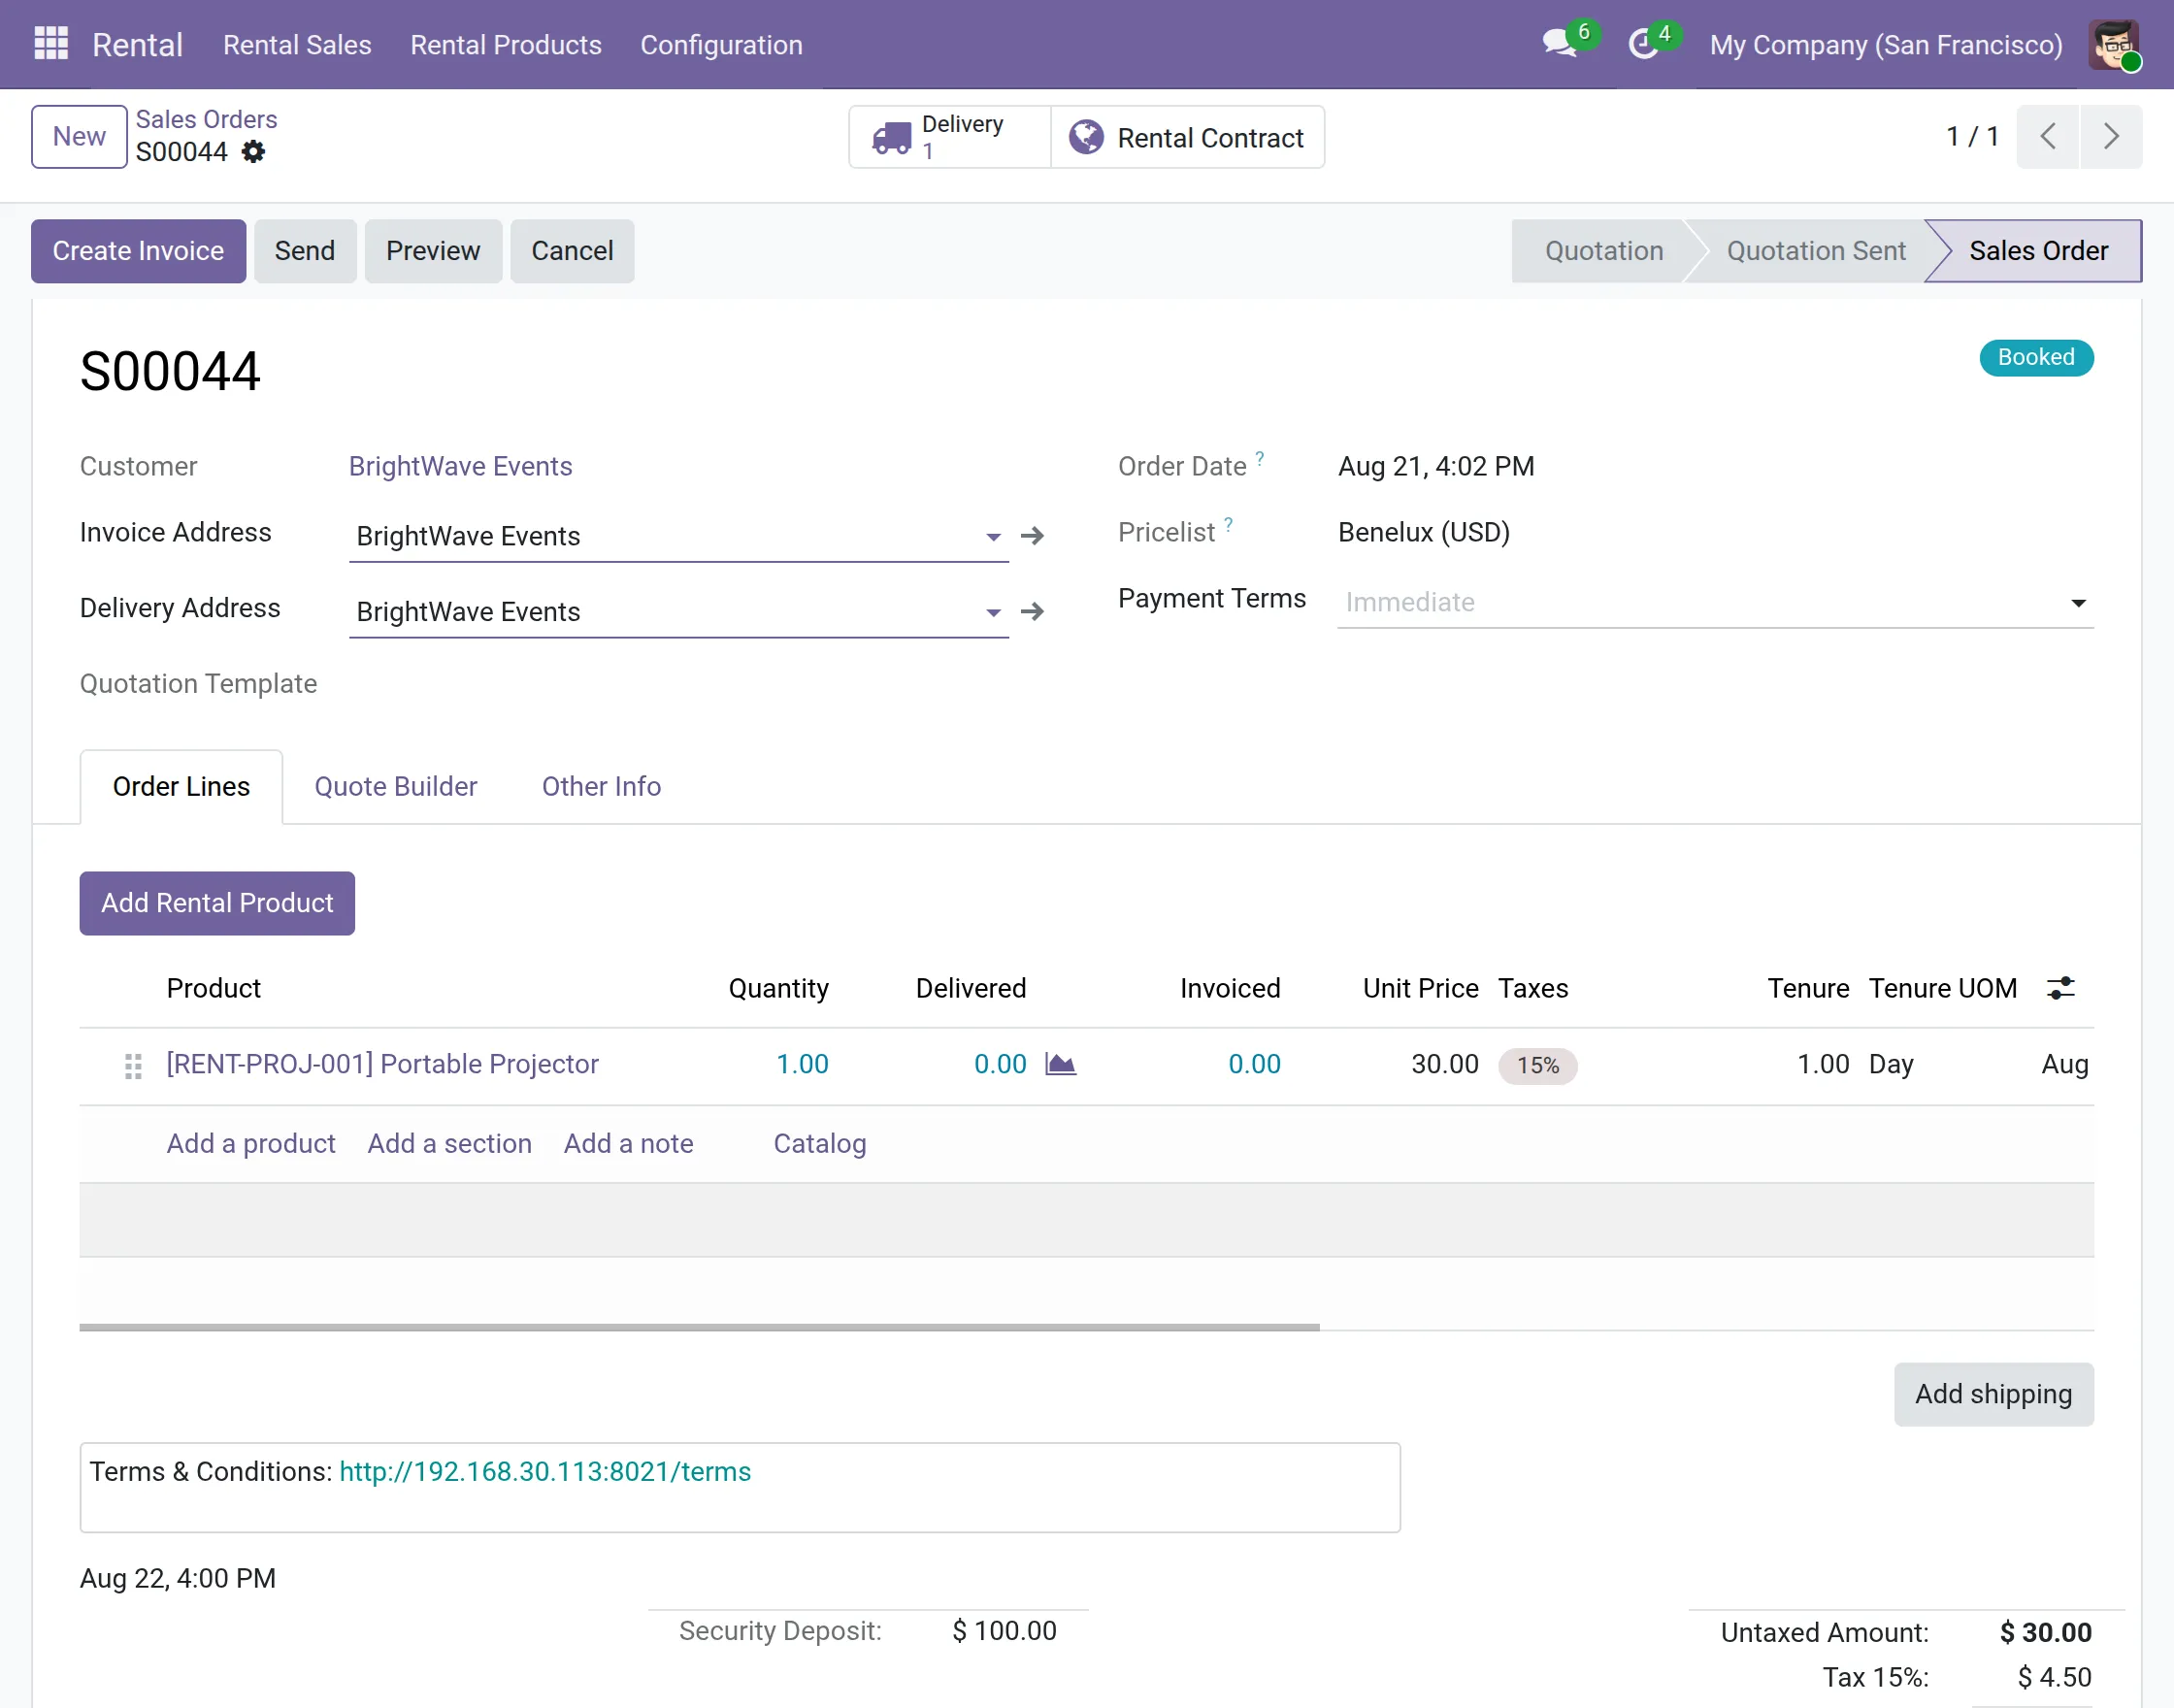
8. Review the quotation after adding the rental product. Odoo displays the product quantity, Rental Pricing, tenure, Tenure UOM, rental dates, and Security Deposit.
Confirm the quotation to create the rental booking. The related Delivery and Rental Contract become accessible from the confirmed Sales Order.
Process Rental Pickup
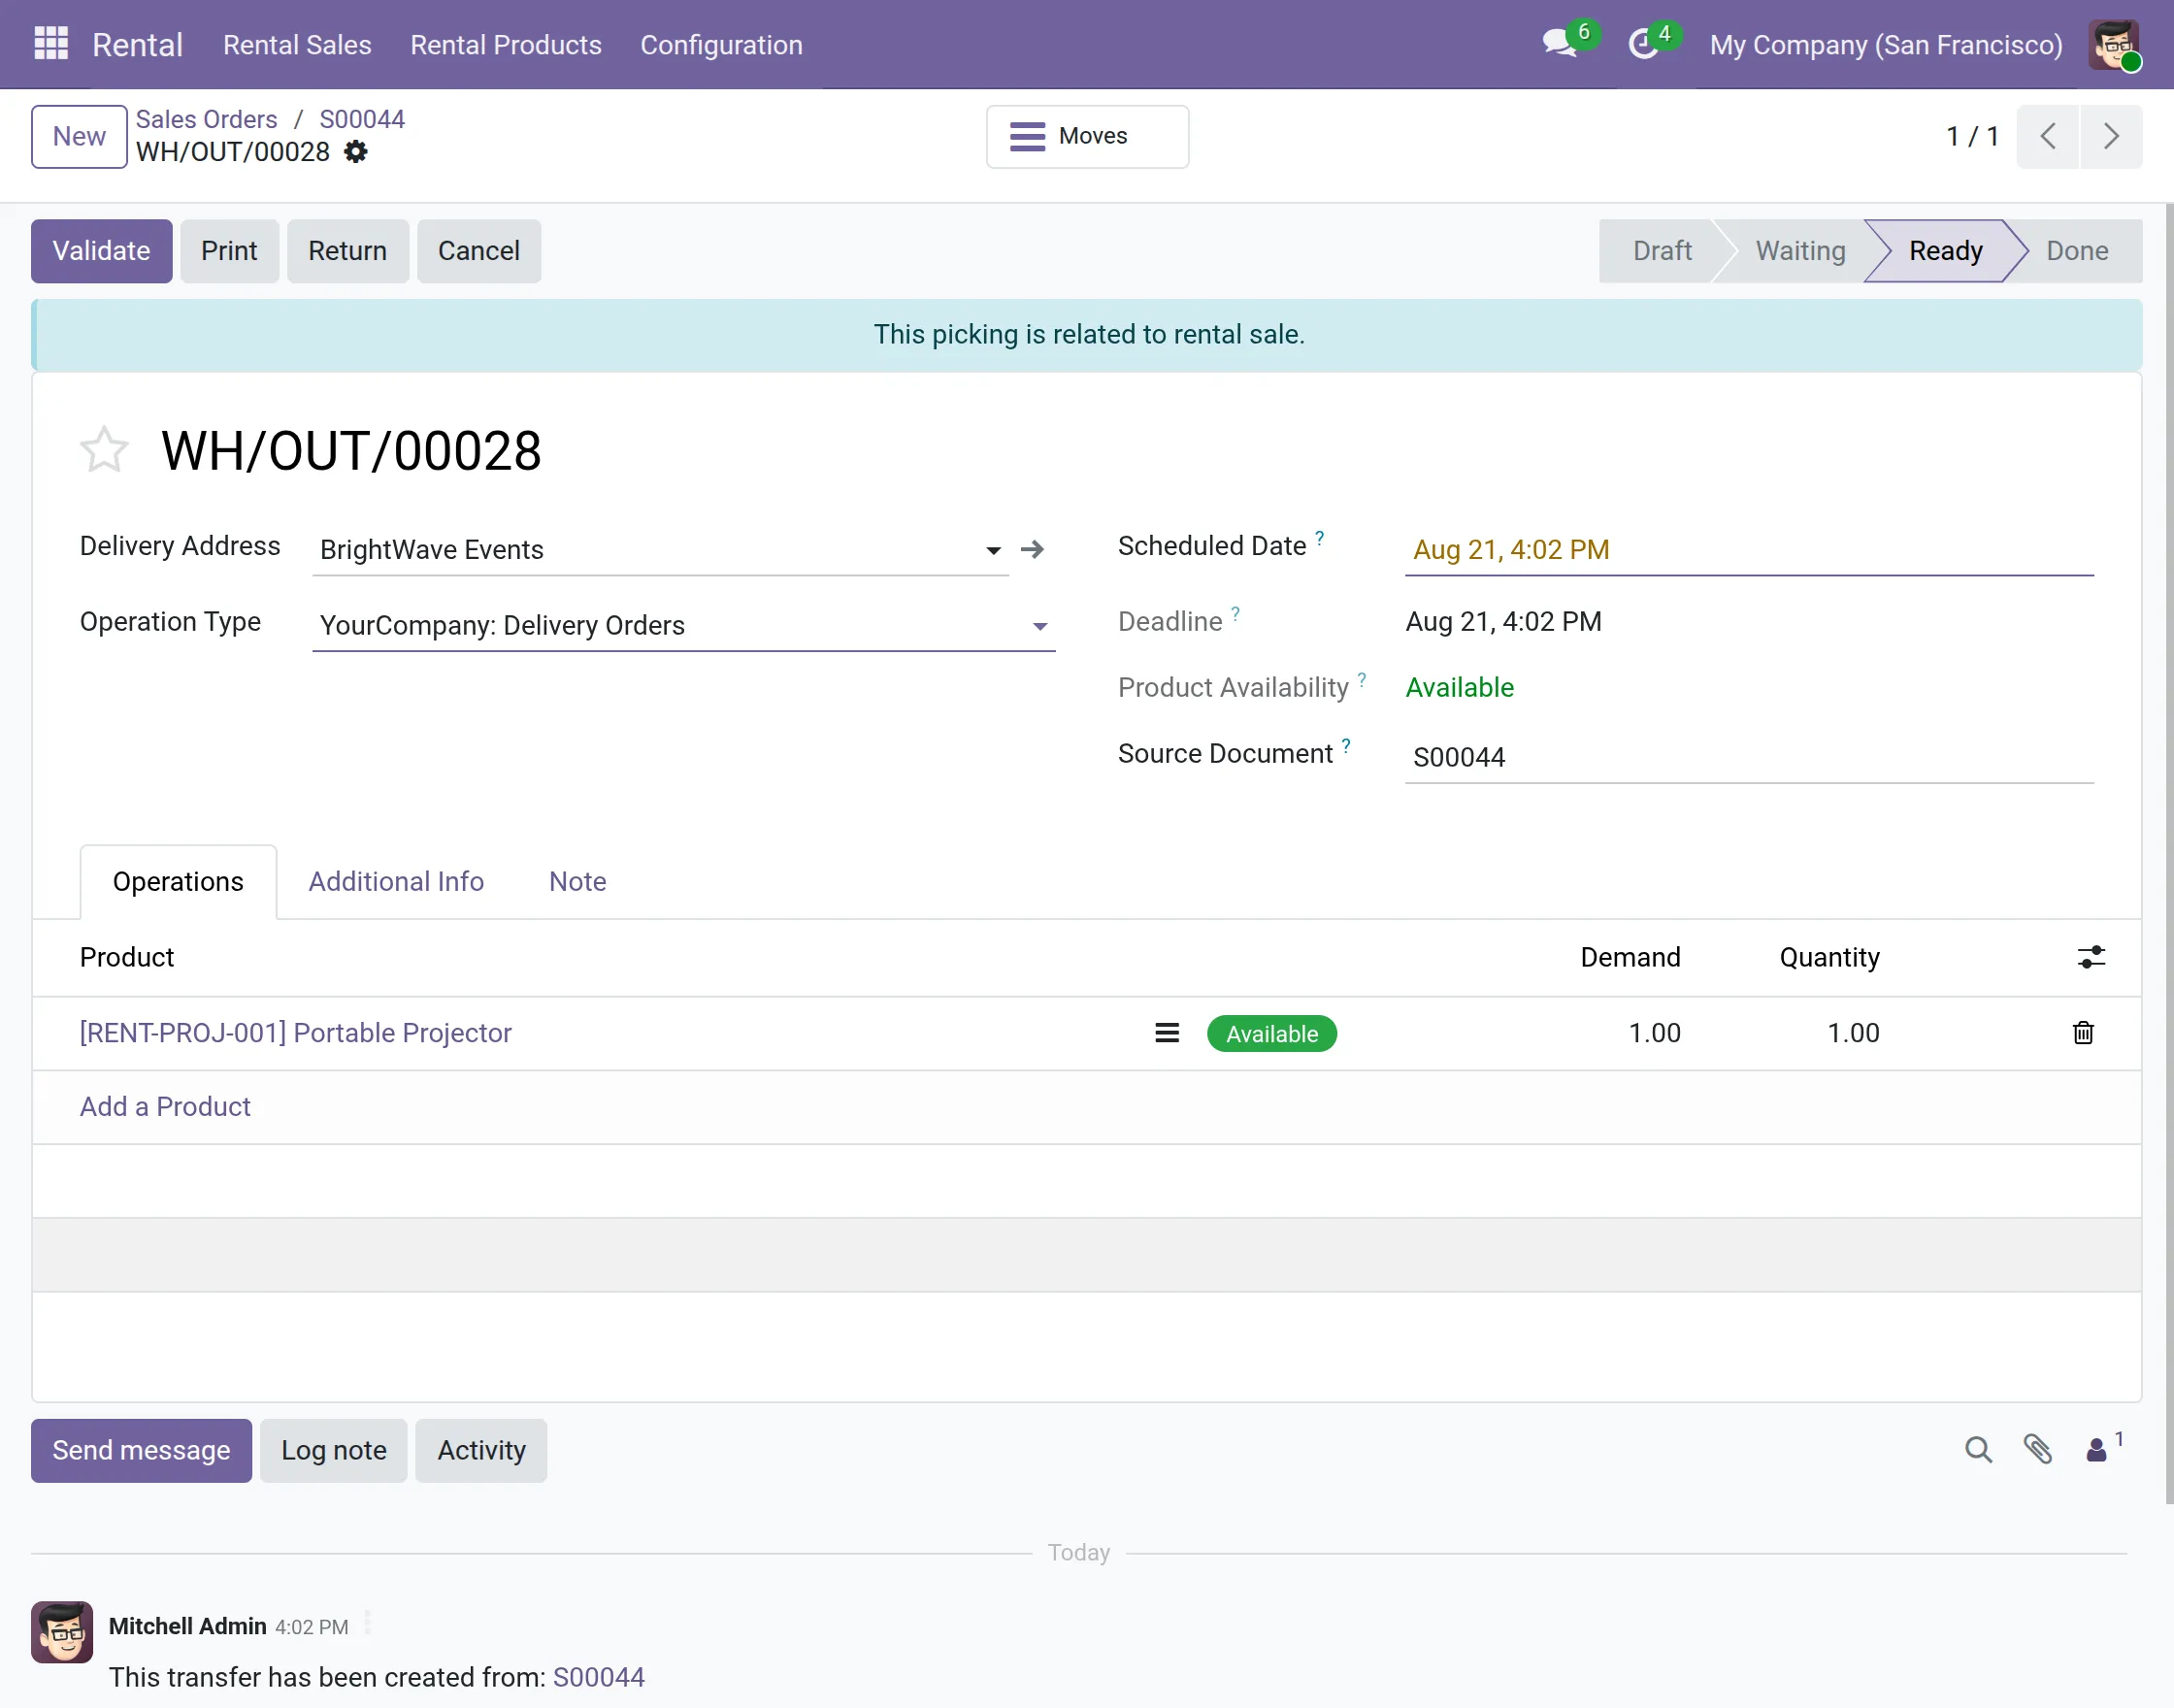
9. Open the delivery created from the confirmed rental booking.
The outgoing transfer displays the customer, scheduled date, rental product, stock availability, demand, and quantity.
Click Validate when the rented product is handed over to the customer.
Manage Rental Contracts
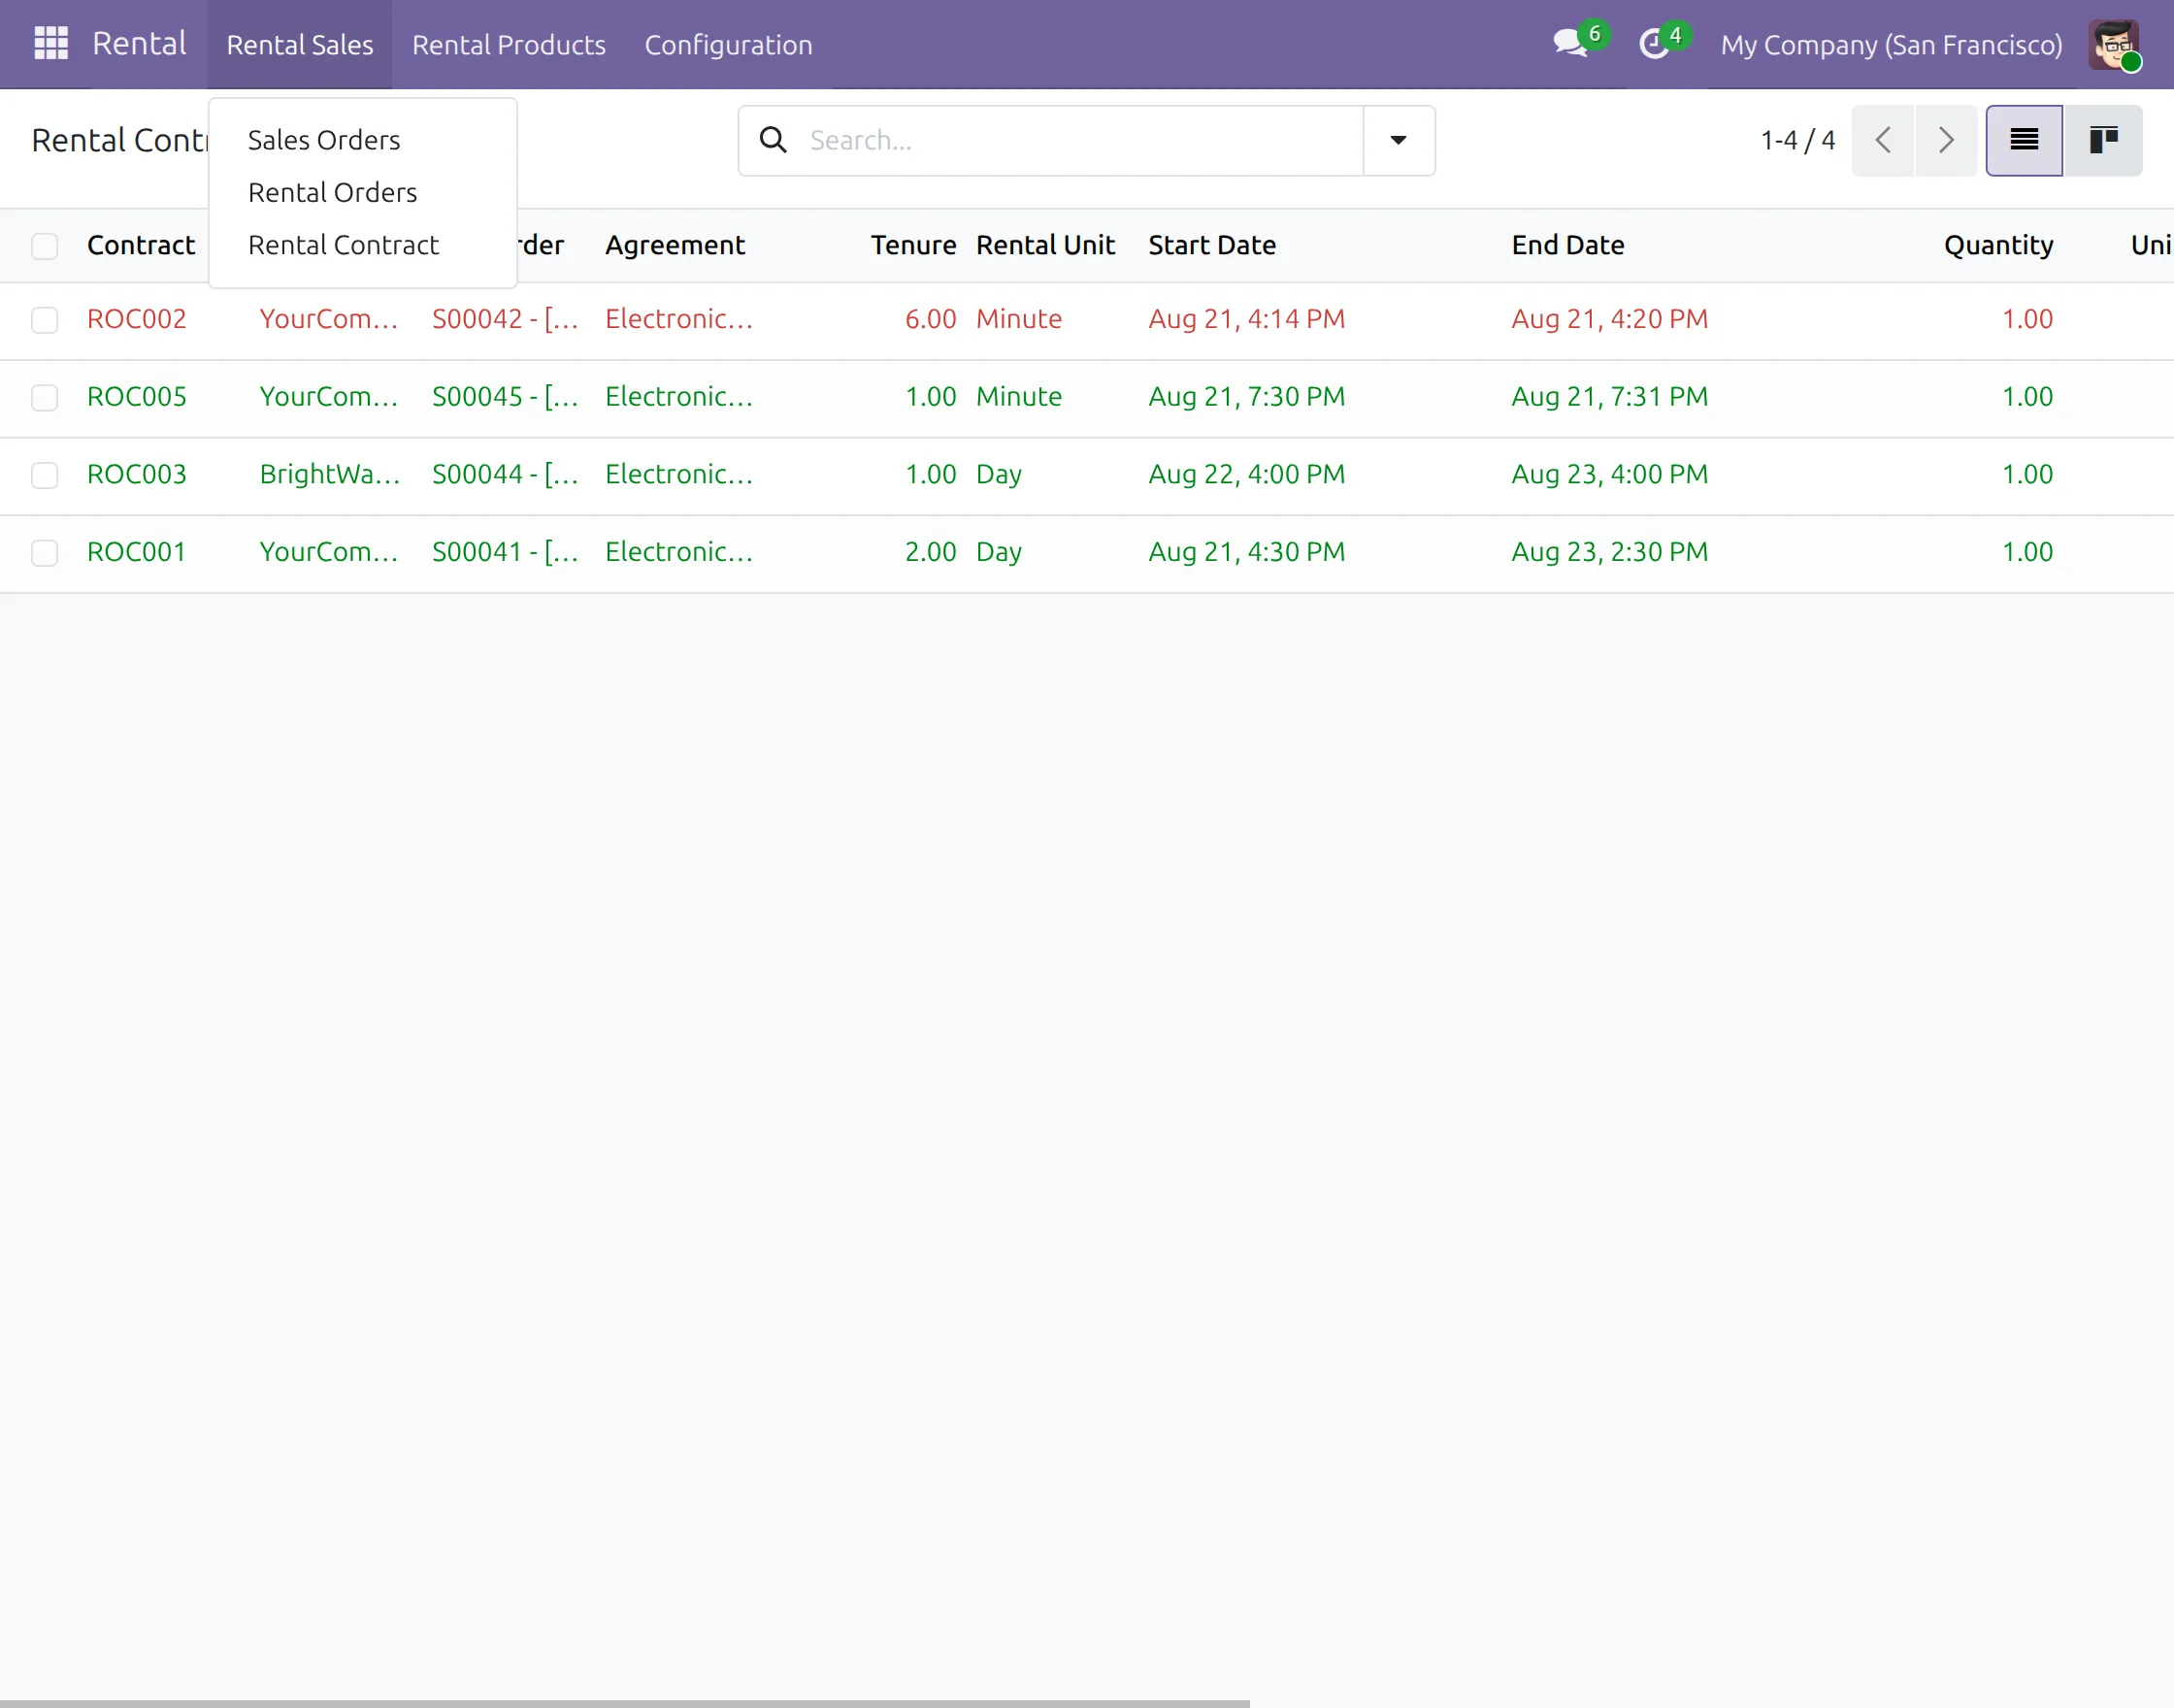
10. Go to Rental Sales >> Rental Contract to view the Rental Contracts generated for confirmed rental bookings.
You can review the contract number, Rental Order, agreement, tenure, rental unit, start date, end date, and quantity.
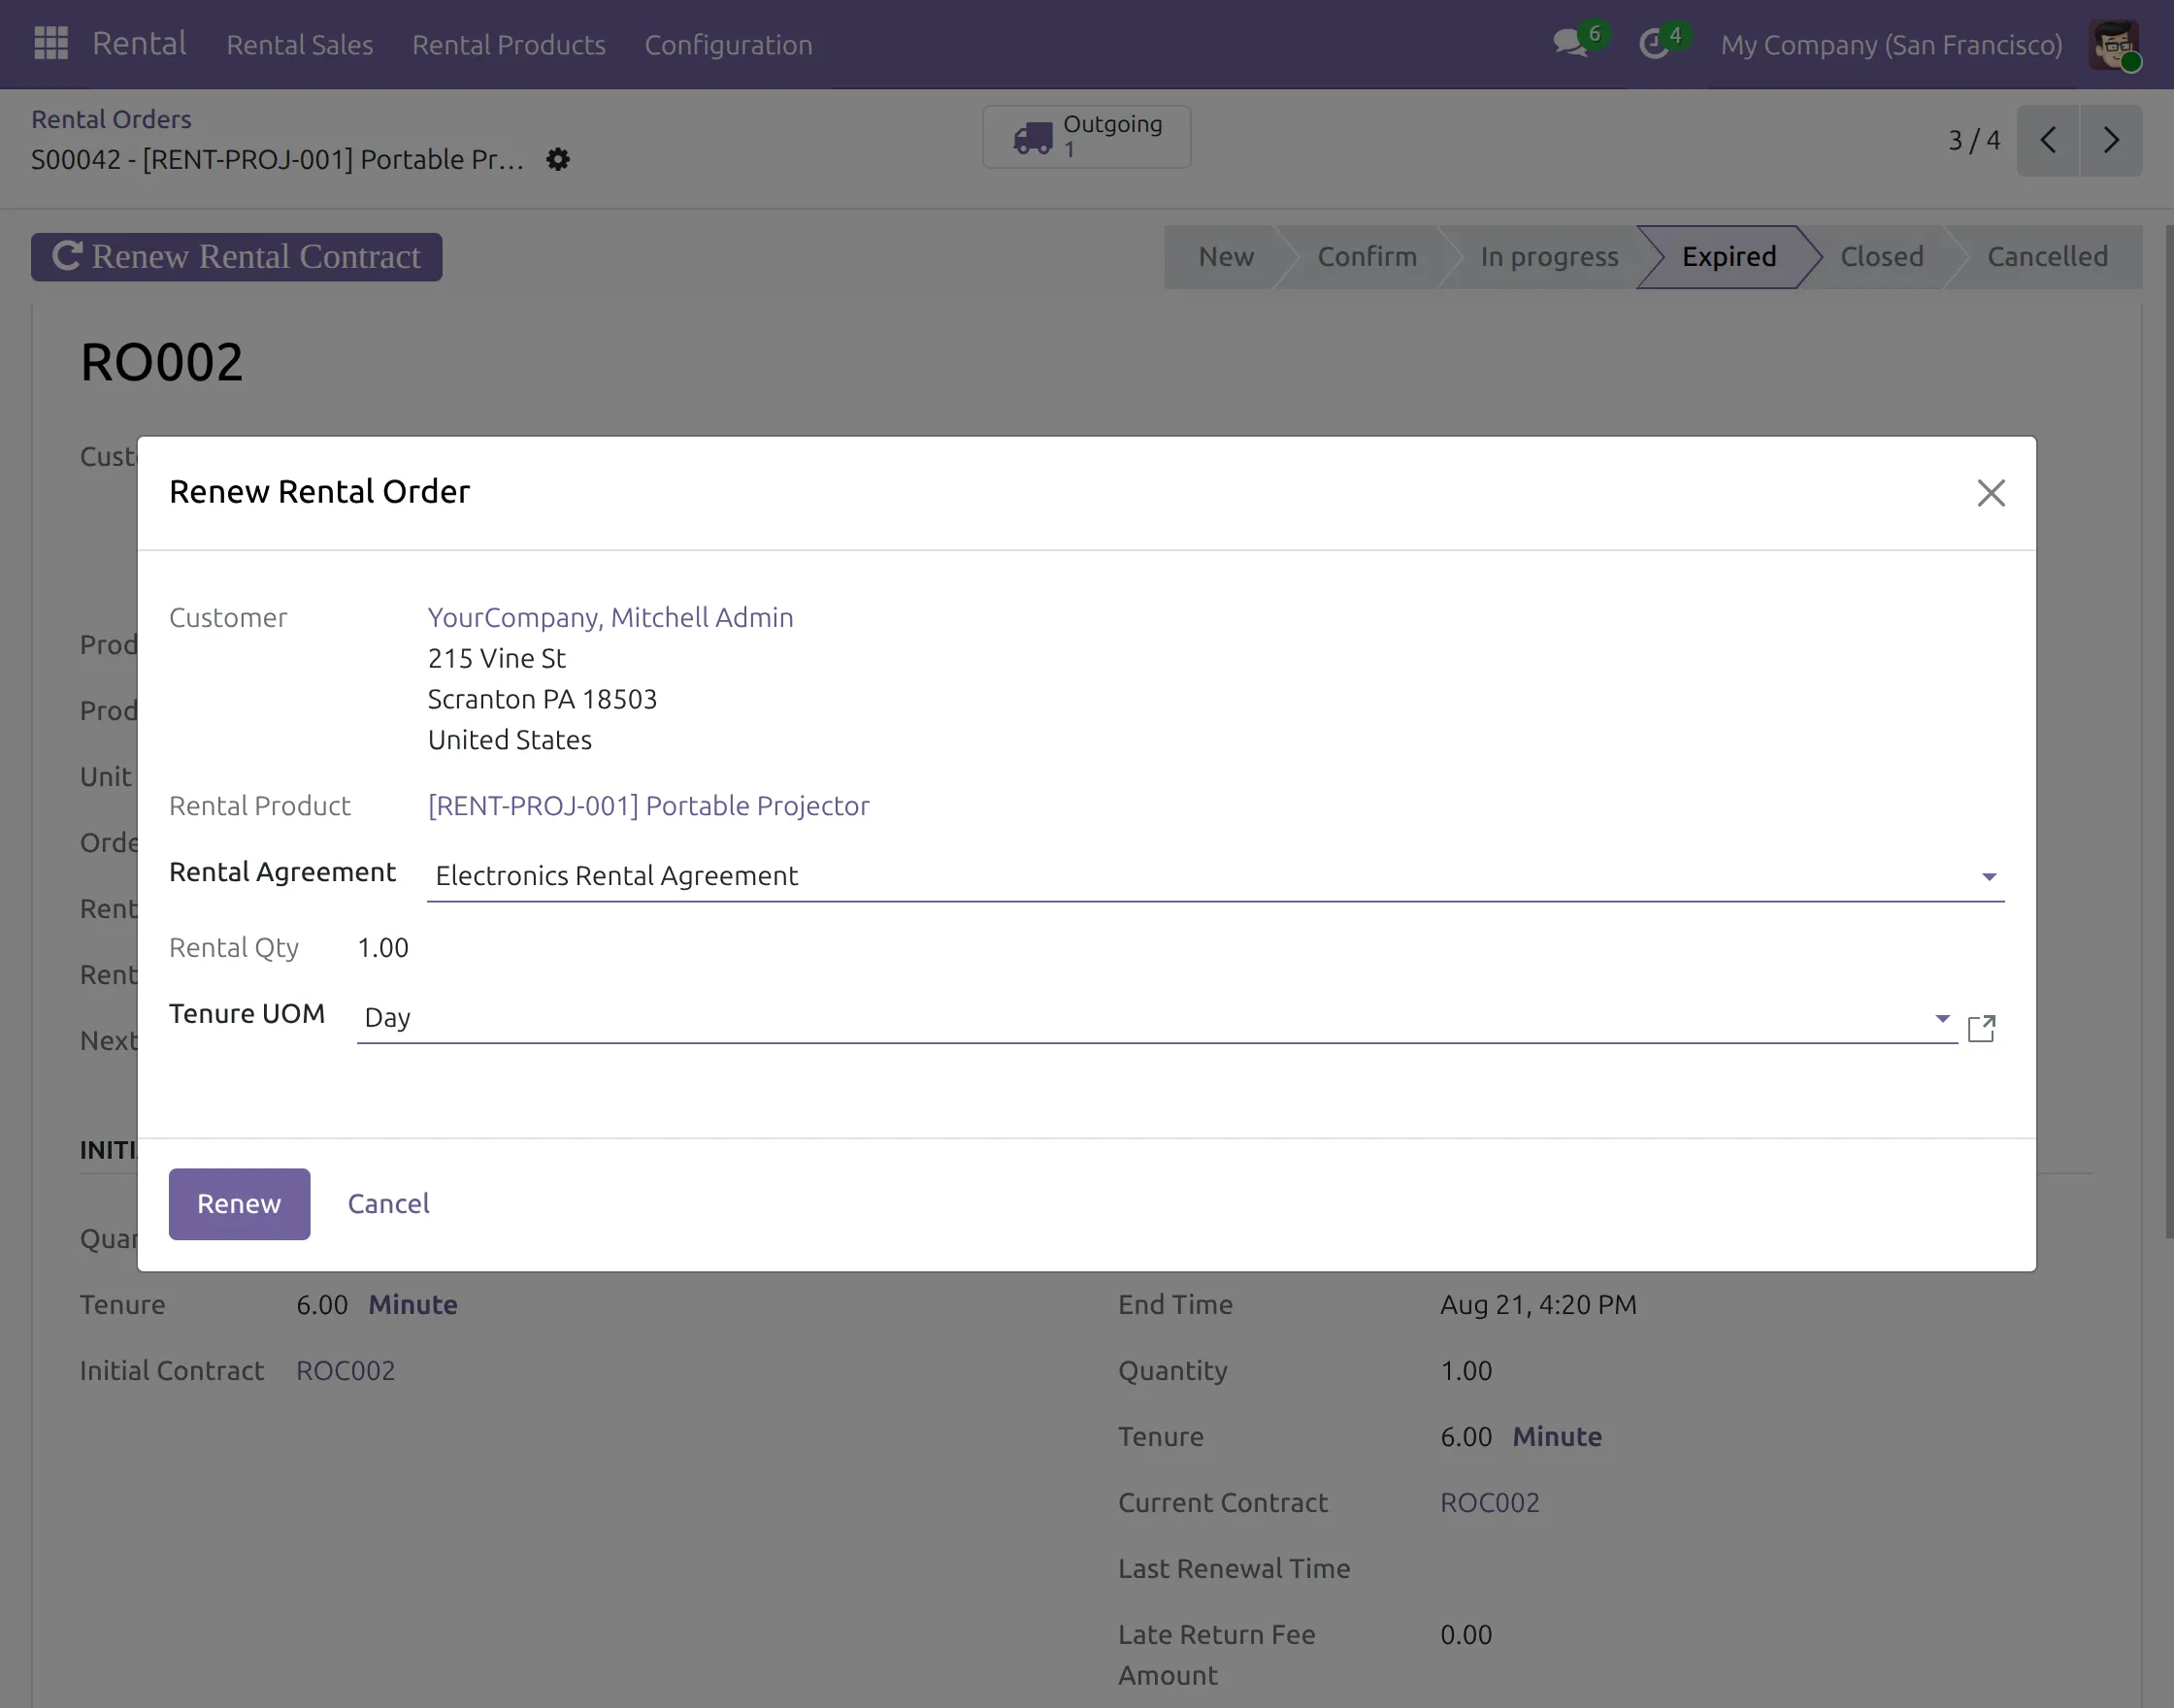
11. When a Rental Contract reaches its expiry, open the related Rental Order and click Renew Rental Contract.
In the renewal window, review the customer and rental product. Select the required Rental Agreement and Tenure UOM, then click Renew.
Process Rental Return
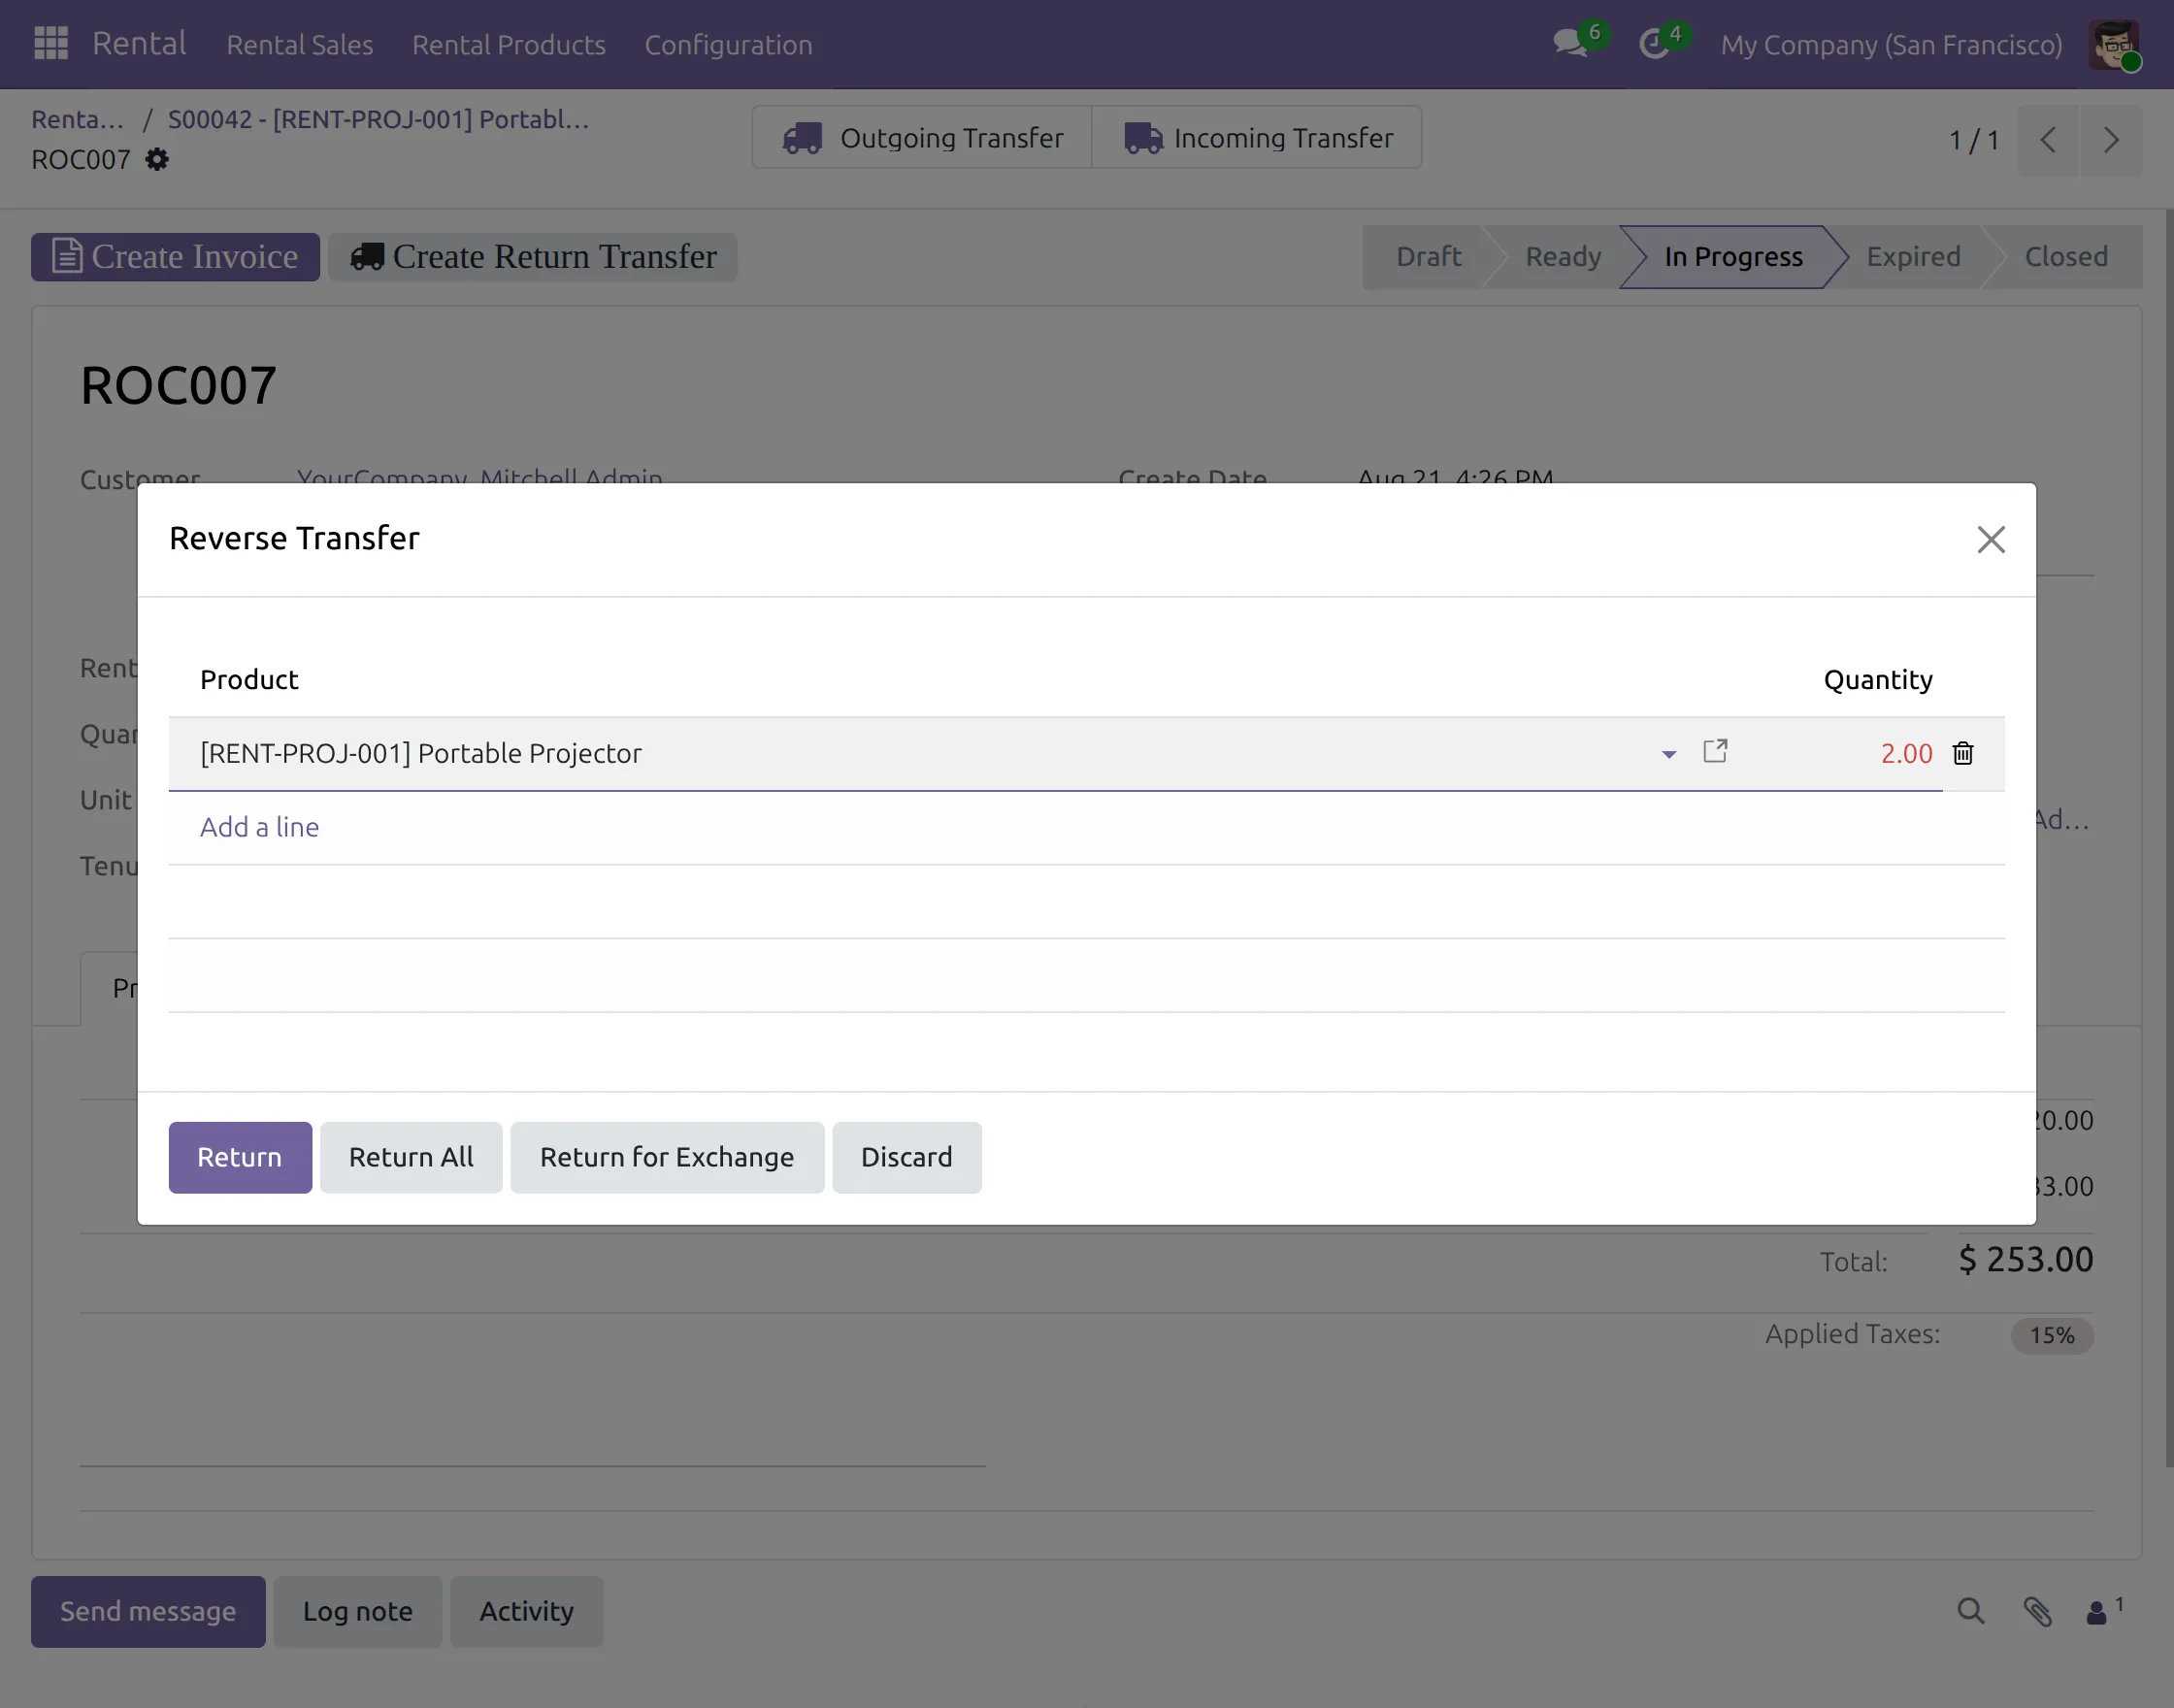
12. To return the rented product, start the return process from the related rental record. The Reverse Transfer window displays the rented product and quantity.
Enter the quantity being returned and click Return to create the reverse transfer.
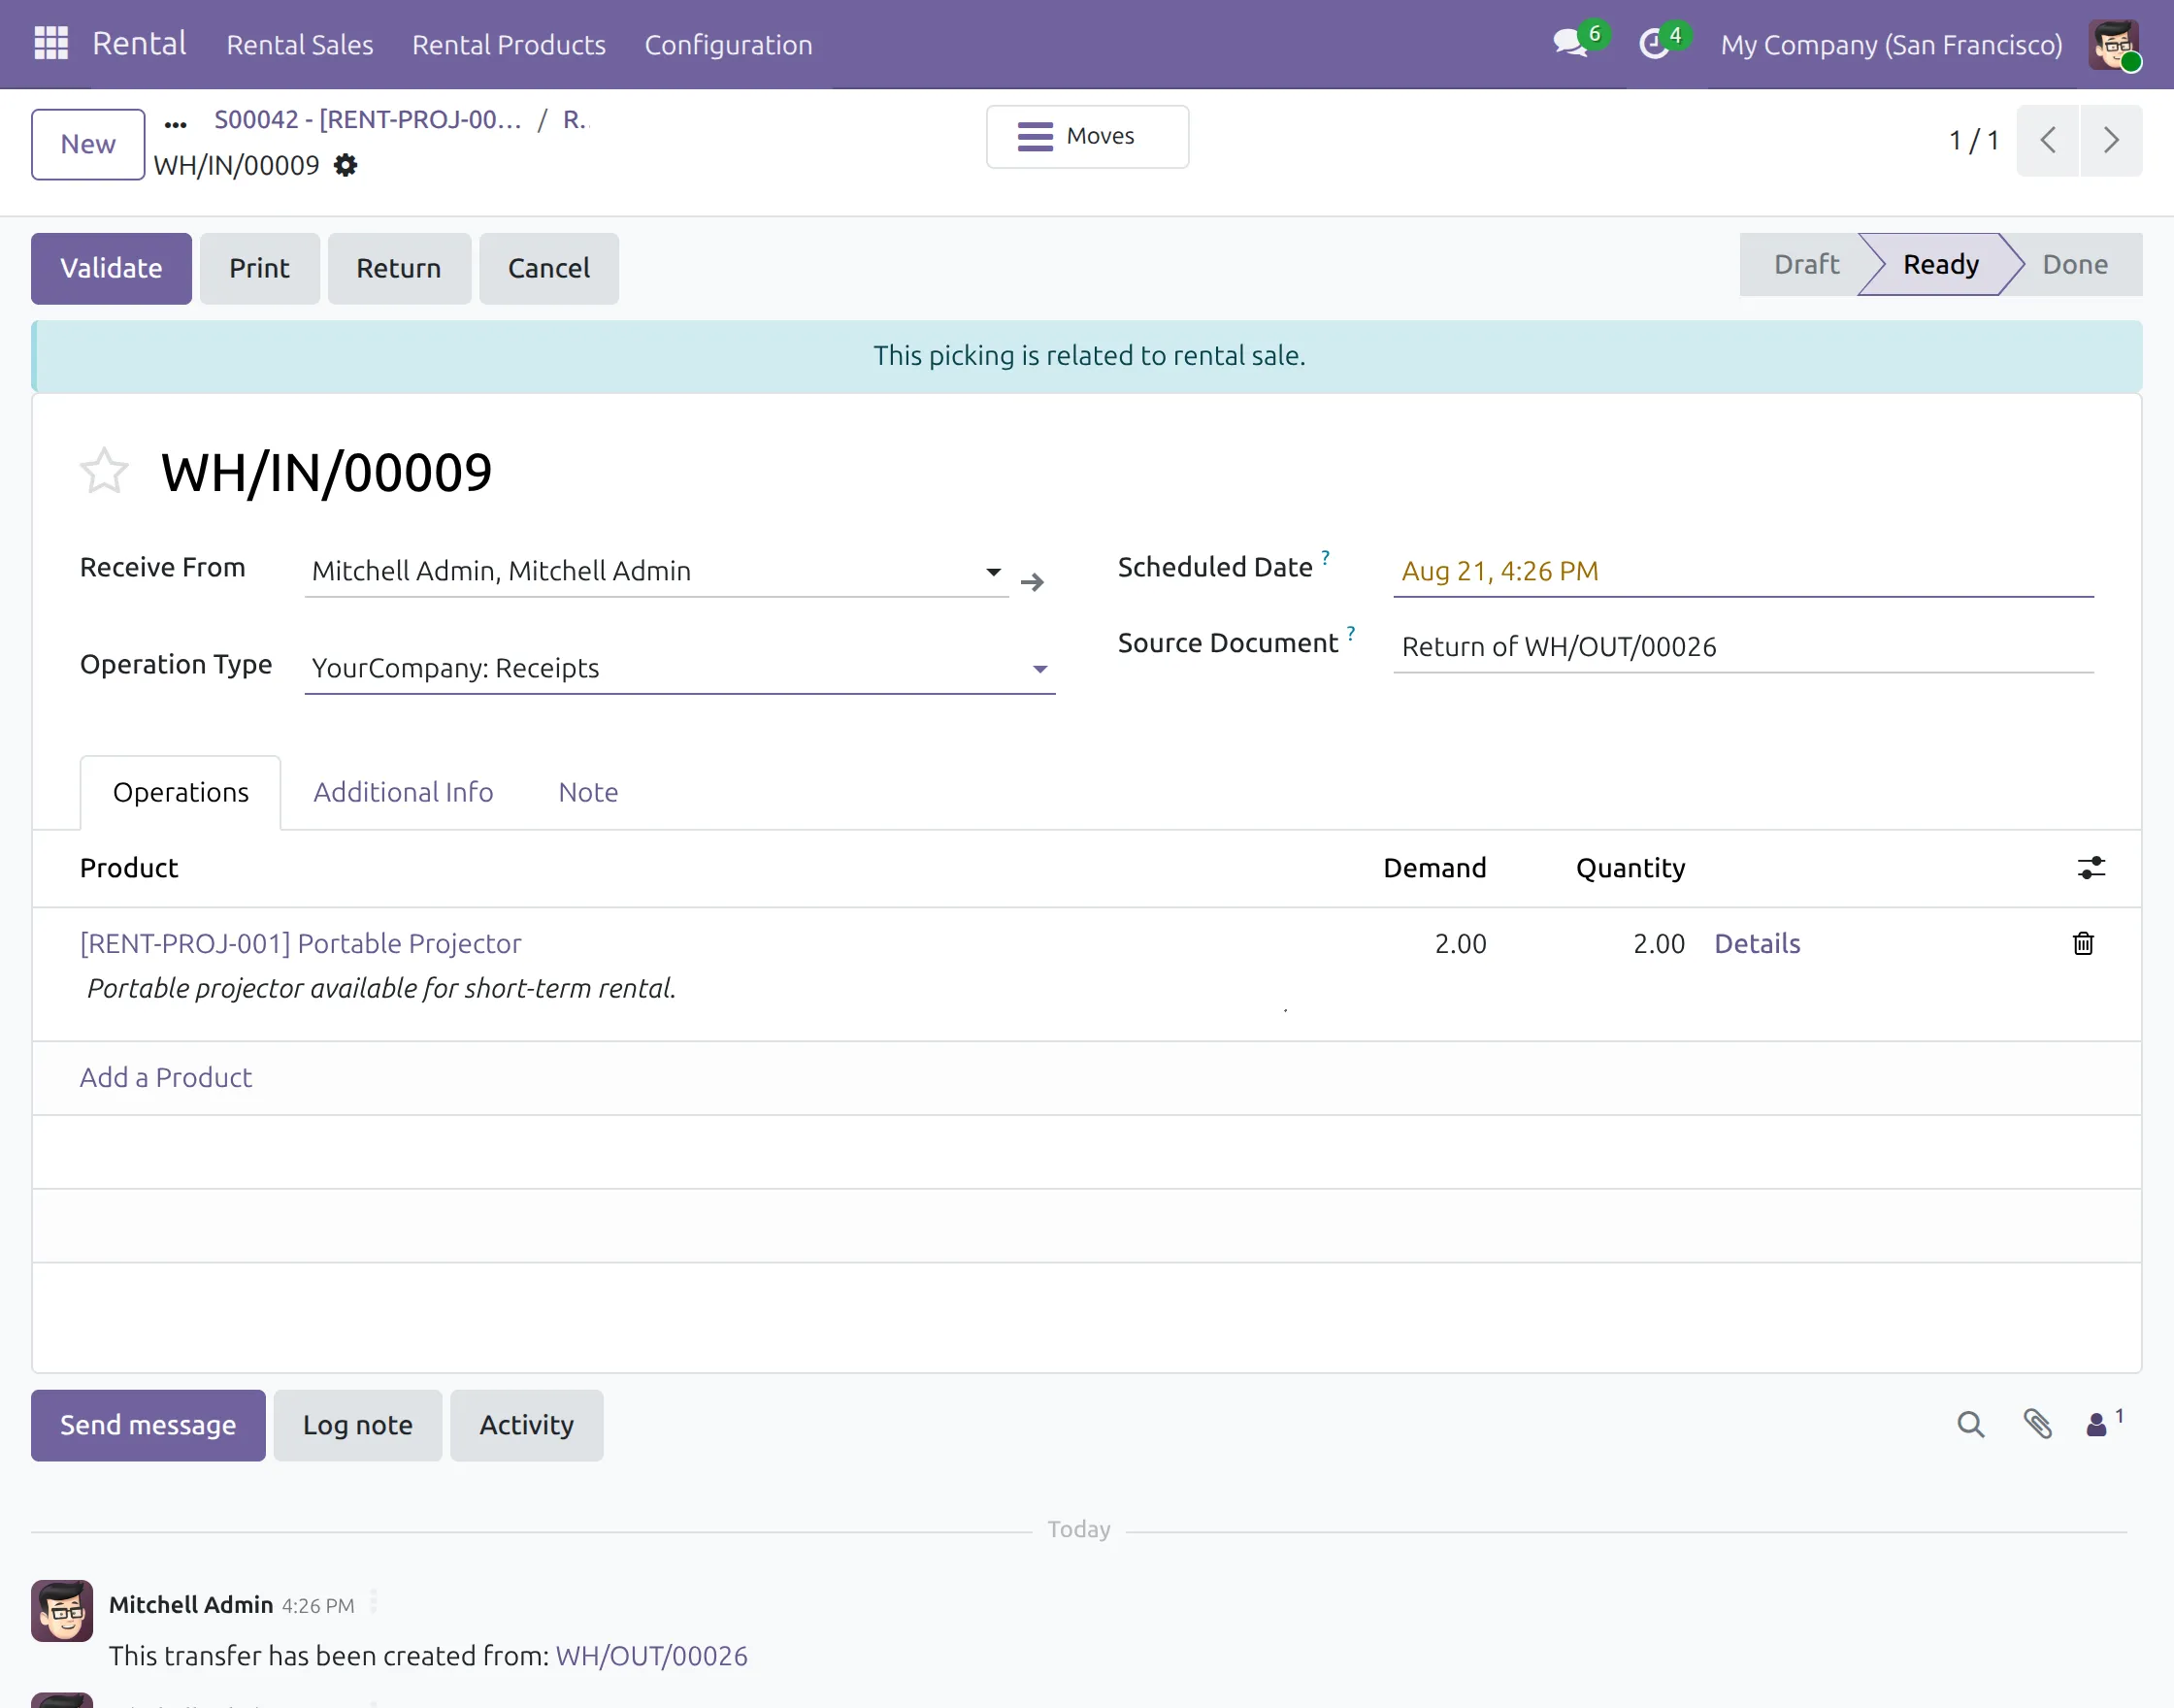
13. Odoo creates an incoming receipt for the returned rental product. Review the received product and quantity in the incoming transfer.
Click Validate to complete the rental return and move the product back into the available Odoo inventory.
OTHER ODOO WEBSITE MODULES
- Odoo Spin And Win
- Odoo Website Save For Later
- Website Product Multi-Videos
- Odoo Website Social Share
- Odoo Website Survey to Employee
- Website Survey to Mailing List
- Odoo Website Google Adsense
- Odoo Affiliate Multi-tier Commission
- Website Survey Expiry Date
- Odoo Manage Vendors Per Variant
- Odoo Website OTP Authentication
- Website Product Related Accessories
NEED HELP?
Hope you find the guide helpful! Please feel free to share your feedback in the comments below.
If you still have any issues or queries, please create a ticket at the UV Desk.
In case of any further queries, contact us at our support mail.
Thanks for paying attention!!
Current Product Version - 1.1.0
Supported Framework Version - V19, V18, V17

Be the first to comment.