INTRODUCTION
Nowadays, a business needs to be faster, to grow and attract the customers.
To boost your sales & work more productively, you need to be even faster on the run time as well. As it increases the probability of frequent visits by customers at your store or restaurant.
Similarly, while working on Point Of Sale, often you need to create a new customer or company. Although you can create a new contact in a running POS session in the default Odoo POS as well.
But if the contact is a company, then you can not specify whether the contact is an individual or a company. For that, you have to go back to the Odoo back-end. Which is not a convenient way as it takes time & effort.
Therefore, we are here to introduce you to our Odoo POS Customer Contact module. Which facilitates the POS user to manage the customers and their contacts efficiently in running POS sessions.
It allows the POS user to create customer contacts and addresses dynamically from the POS session. This way you do not need to switch to the back-end to create customer contacts and addresses.
Check out our, Odoo POS Address Autocomplete helps you quickly fill in customer addresses in your point-of-sale system. It uses the Google address database to suggest and fill in complete addresses to save time and reduce mistakes.
FEATURES
1. The Odoo POS Customer Contact module helps the POS user to manage the customers and their contacts efficiently in the running POS session.
2. The POS user can create customer’s contacts and addresses from the POS Session.
3. Customer contact type includes-Contact, Shipping address, Invoice address, and Location.
4. The User can select the default view of the customer screen to show all customers (both customer contacts and parent customer) or only parents from the backend.
5. You can select between the options to show all the customers or only parents (Individual or company).
INSTALLATION
1.) Once you purchase the Odoo POS Customer Contact module From the Webkul store, you will receive the link to download the zip file of the module.
2.) Extract the file on your system after the download finishes. You will be able to see a folder named- “pos_customer_contacts”.
3.) Copy and paste this folder inside your Odoo Add-Ons path.
4.) Now, open the Odoo App and click on the Settings menu. Here, click on Activate the Developer Mode.
5.) Then, open on the Apps menu and click on the ‘Update Modules List’.
6.) In the search bar, remove all the filters and search “pos_customer_contacts”.
7.) Now you will be able to see the module in the search result. Click on ‘Install’ to install it.
WORKFLOW
Back-end
1. Initially, login to your Odoo database and navigate to the Point Of Sale app.

2. Then, navigate to the settings of POS session by clicking on the ellipsis.

3. Now, scroll down to the ‘Customer View Option’ under the ‘POS Interface’ section, and select between the options to show all the customers or only parents (Individual or Company).

4. Now, you can launch the POS session and proceed further.

Front-end
5. This is the view of the contact list as customers (In configured from the Back-end).
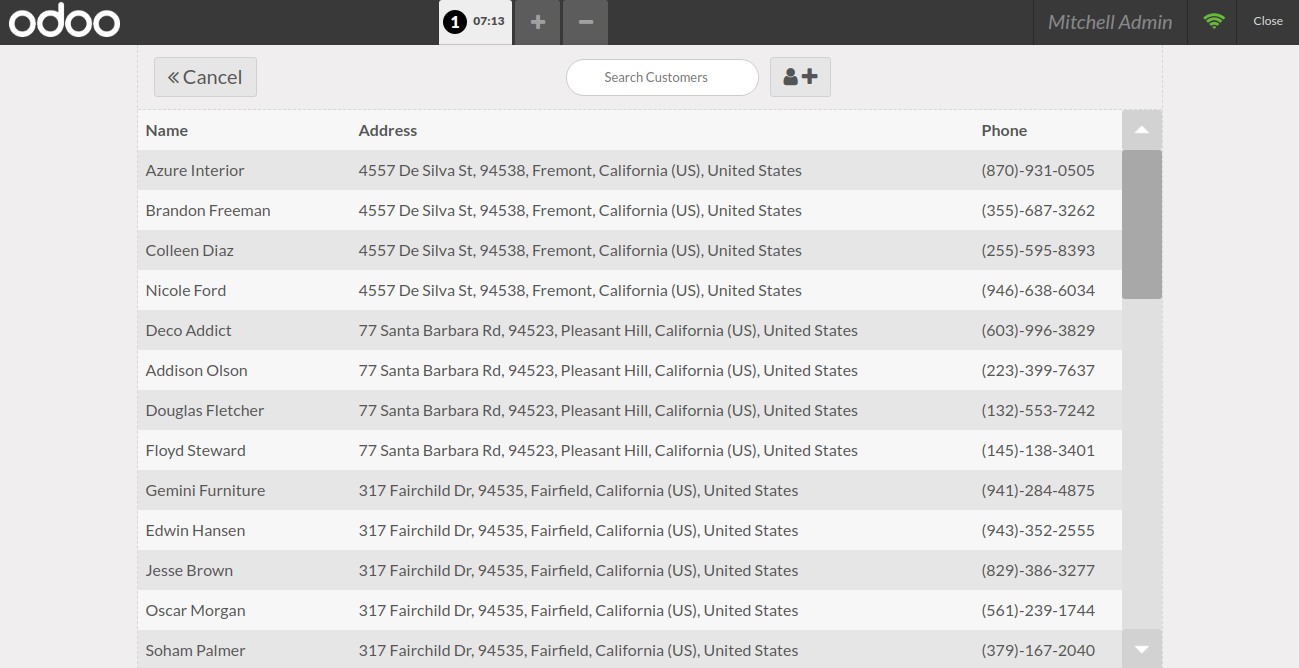
6. This is the view of the contact list as the company (In configured from the Back-end).

7. Click on the ‘Contact icon’ to create a new customer from running POS session. There’s no need to go back to the back-end in order to create a new customer.

8. Here, you can add all the details of the customer. Moreover, you can add a photo of the customer and set the profile whether it is an individual or company.

9. Click on this icon to show all the contacts & addresses of the selected customer.

10. Here, click on the ‘Plus’ button to add contacts & addresses to the selected customer. Moreover, all the contacts under this parent customer are shown below.

11. As mentioned on the screenshot below – add a new contact to the parent customer. POS User can aslo select the contact type and fill in details of the contact accordingly.

Back-end
12. Now, navigate to the ‘Customer’ under the ‘Orders’ tab.

13. Select the customer/contact you have added new contacts to.

14. The details of the customer contact and addresses will be saved in the back-end too. As visible in the image below.

Also Read The User Guide For The Other Modules
Odoo POS Advanced Product Ordering
NEED HELP?
Was this guide helpful? Please share your feedback in the comments below.
If you have any issues/queries regarding the module please raise a ticket at https://webkul.uvdesk.com/en/customer/create-ticket/
For any doubt contact us at [email protected].
Thanks for reading!!
Current Product Version - 1.1
Supported Framework Version - Odoo V13, V12, V11, V10, V9

Be the first to comment.