Introduction
Odoo Franchise Management System helps businesses manage franchise operations from one centralized platform. As a result, franchisors can handle applications, agreements, royalties, and performance tracking in a more organized way.
Moreover, Odoo Franchise Management System simplifies franchise onboarding and daily operations through structured workflows. This helps reduce manual work and keeps franchise activities easy to manage.
Additionally, the module provides tools for compliance management, KPI tracking, training, audits, and financial monitoring. As a result, businesses can maintain better control across their entire franchise network.
Features
- Accept and manage franchise applications through a structured onboarding workflow directly inside Odoo.
- Capture franchise inquiries and track them efficiently using the built-in CRM and lead management system.
- Move franchise leads through different approval stages without losing important application details.
- Create, manage, and store franchise agreements from one centralized platform.
- Assign and manage franchise territories properly to avoid overlapping locations and operational conflicts.
- Maintain complete franchisee records, including agreements, onboarding details, and operational information.
- Track royalty payments automatically and monitor pending or completed payments in real time.
- Generate and manage franchise invoices while keeping all financial records updated and organized.
- View royalty summaries, payment records, and financial performance from a centralized dashboard.
- Schedule and manage franchise audits to ensure every franchise location follows business standards properly.
- Track compliance activities and monitor audit findings across the entire franchise network.
- Manage franchise training programs and monitor training completion for each franchisee.
- Measure franchise performance using KPI tracking and operational analysis tools.
- Access centralized reports for agreements, royalties, audits, KPIs, and franchise performance data.
- Monitor the overall health of the franchise network through a single dashboard view.
- Automate repetitive franchise workflows to reduce manual work and improve operational efficiency.
- Keep franchise operations organized by managing onboarding, agreements, finance, compliance, and reporting from one system.
- Support growing franchise businesses with a scalable management solution built inside Odoo.
Installation
- Once you purchase the App from Webkul store, you will receive a link to download module’s zip file.
- Extract the file on your system after download finishes. As a result, you will be able to see a folder named “wk_franchise_management”.
- Copy and paste this folder inside your Odoo Add-Ons path.
- Now, open the Odoo App and click on the Settings menu. Here, click on Activate Developer Mode.
- Then, open Apps menu and click on ‘Update Modules List.’
- In the search bar, remove all the filters and search ‘wk_franchise_management’
- You will be able to see module in the search results. Click on ‘Activate’ to install it.
Access Rights – Admin
Admins have complete control over all franchise management operations in the system. They can manage franchise applications, agreements, territory assignments, royalties, audits, training programs, KPI tracking, and reporting activities from one centralized platform.
Let’s begin with the workflow of Odoo Franchise Management System, explaining how an admin can efficiently use the module to manage franchise onboarding, finance, compliance, and overall franchise operations effectively.
Workflow
Dashboard
After completing the installation of Odoo Franchise Management System, log in as the admin and open the Franchise Management module.
You will then see the admin dashboard displayed in front of you.
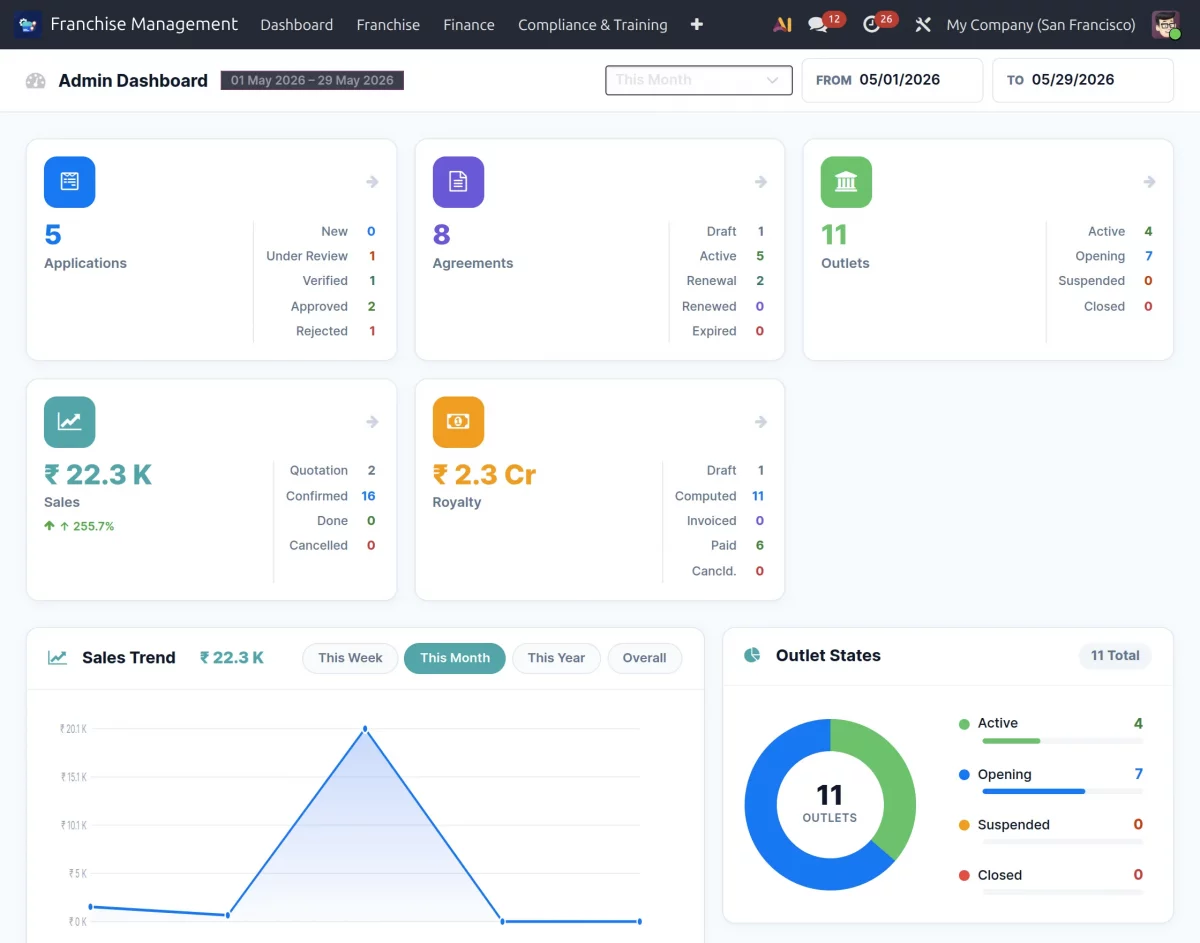
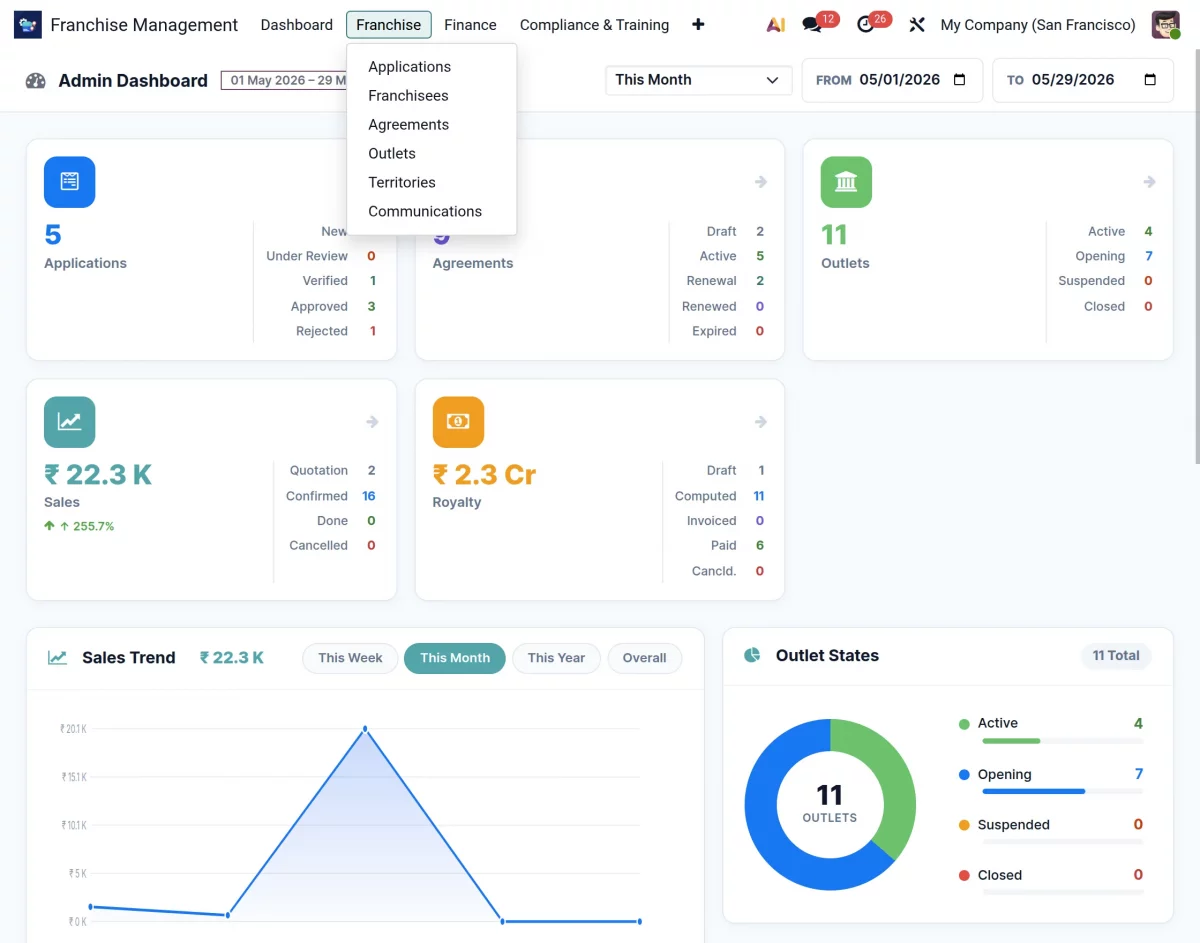
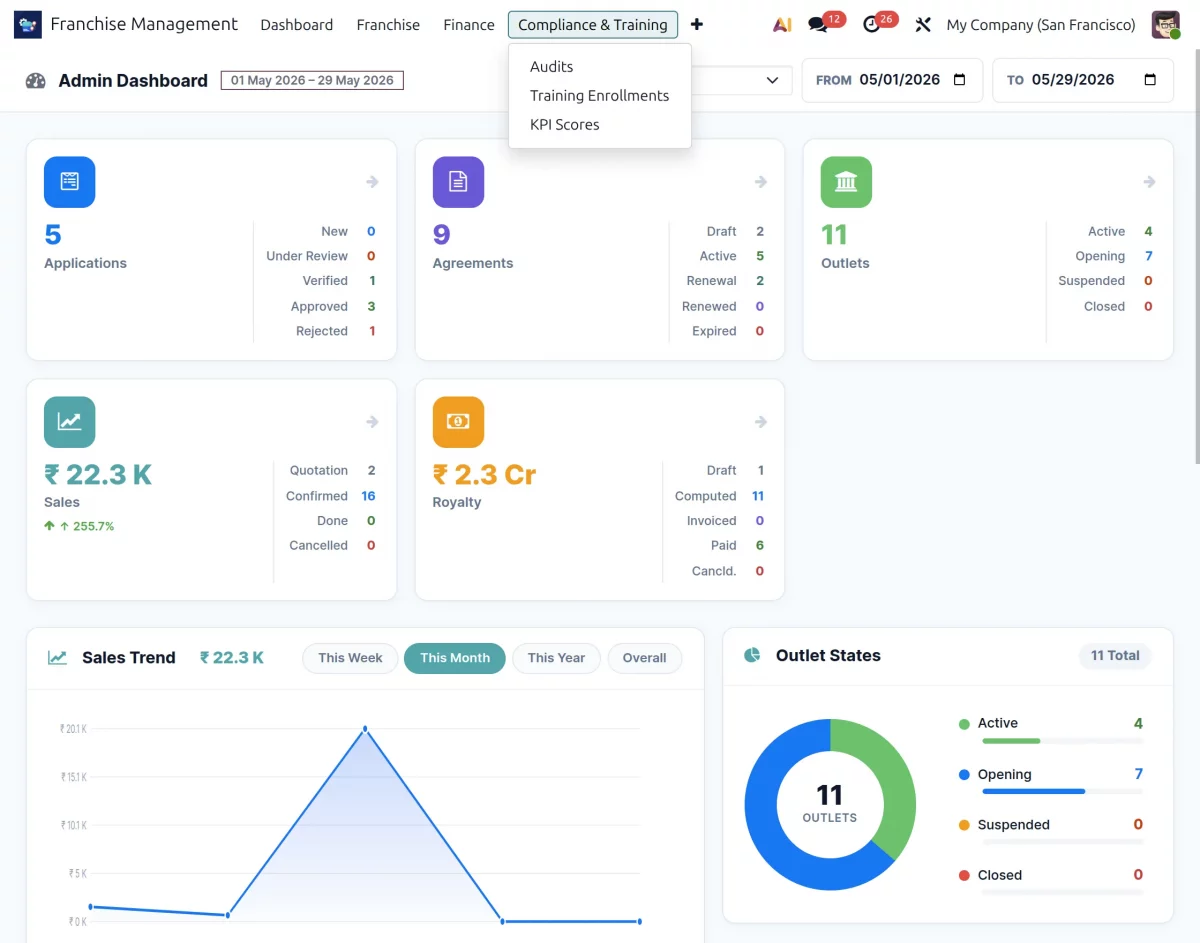
Admin-Dashboard Overview
- Applications: This dashboard card shows the total number of franchise applications along with their current stages, such as New, Under Review, Verified, Approved, and Rejected.
- Agreements: The agreement section displays the total franchise agreements along with their status, such as Draft, Active, Renewal, Renewed, and Expired.
- Outlets: This section provides details about all franchise outlets and their operational status, including Active, Opening, Suspended, and Closed outlets.
- Sales Overview: The sales card displays the overall franchise sales performance along with quotation, confirmed, completed, and cancelled sales details.
- Royalty Tracking: The royalty section helps admins monitor royalty invoices, paid amounts, draft records, and pending royalty payments from one place.
- The dashboard also displays graphical sales trends for different periods, such as weekly, monthly, yearly, and overall performance.
Additionally, admins can view outlet-wise sales reports, top-performing outlets, onboarding progress, and recent franchise communications directly from the dashboard. This way, they can quickly access important franchise insights from one place.
Franchise Management Configuration
The Configuration menu allows admins to set up and manage the core settings of the franchise network.
From franchise plans and audit categories to onboarding checklists and training programs, all franchise-related configurations can be managed from one centralized location.

1. Go to Configuration → Settings to configure the default franchise settings. Here, you can select the default franchise plan and configure agreement renewal reminder settings.
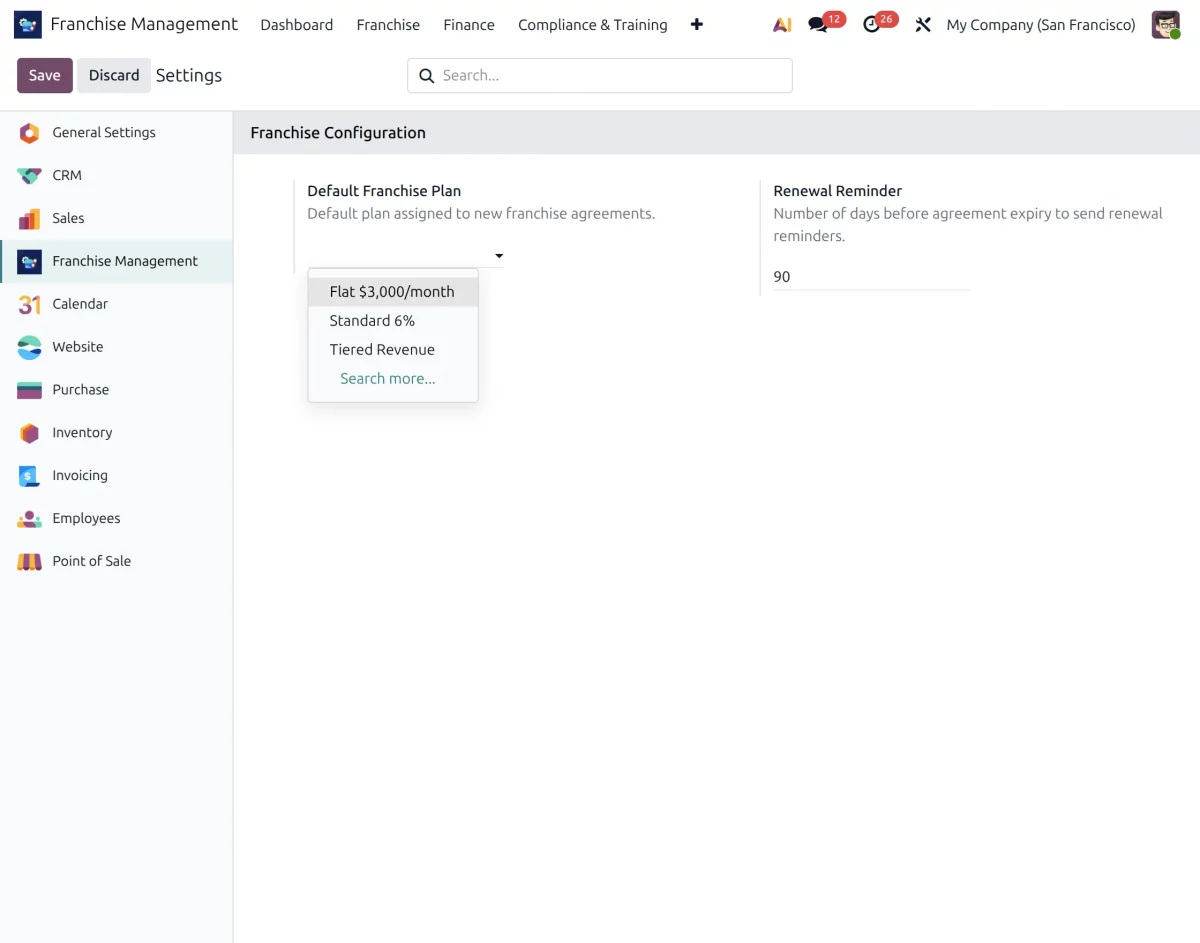
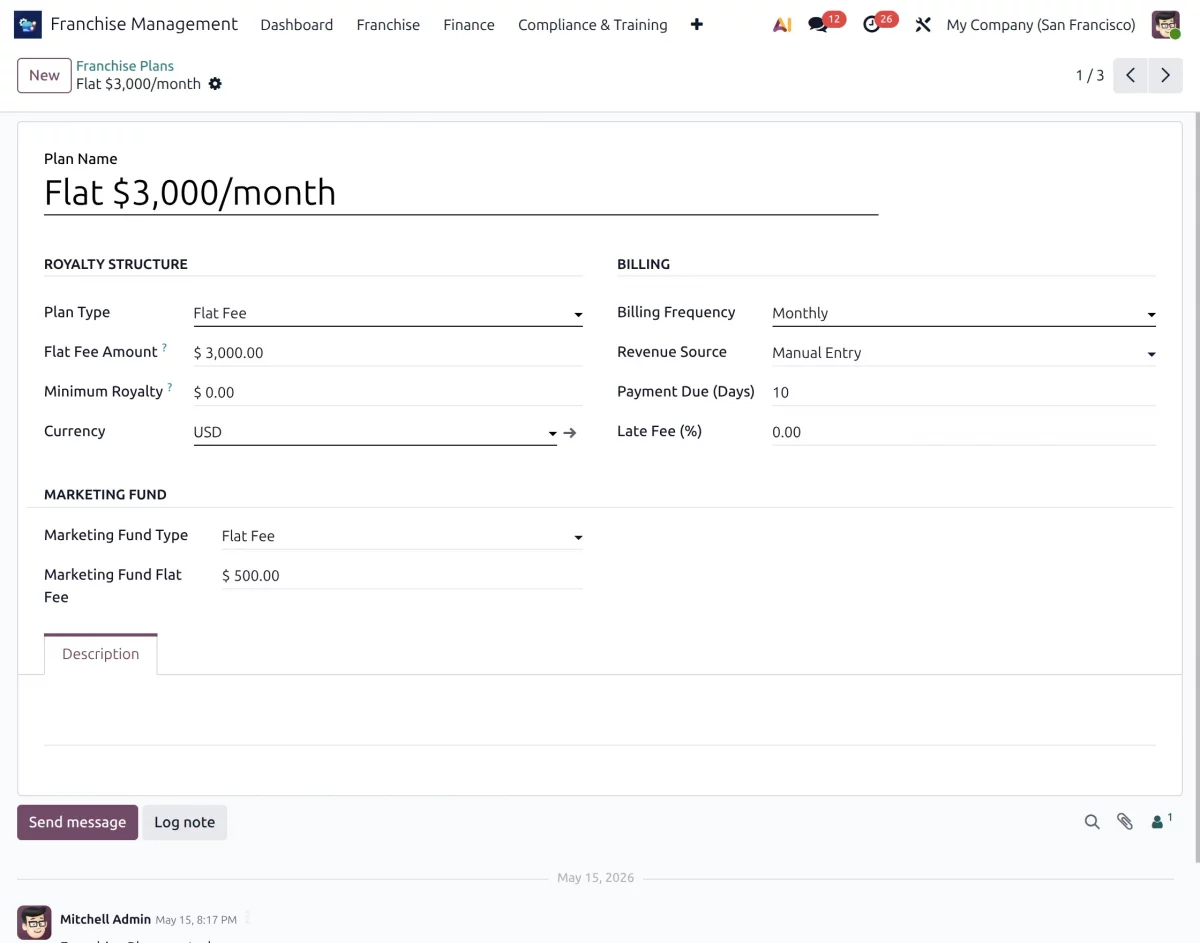
2. Next, navigate to Configuration → Franchise Plans to create franchise plans based on your business requirements. You can also view and manage all previously created franchise plans from this menu.
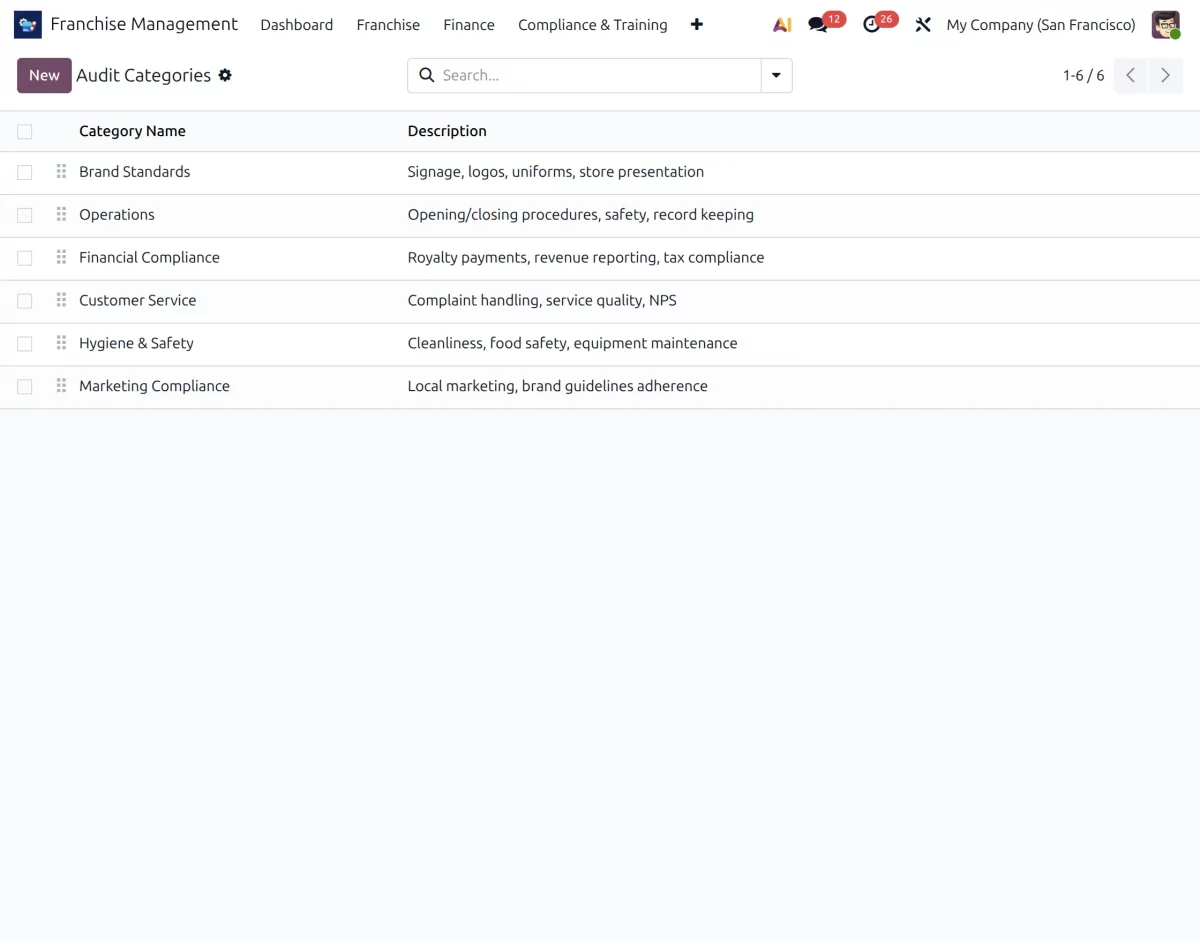
3. Go to Configuration → Audit Categories to create and manage compliance categories for franchise audits.
For example, you can create categories such as Brand Operations, Financial Compliance, Customer Service, Marketing Compliance, and Hygiene standards.
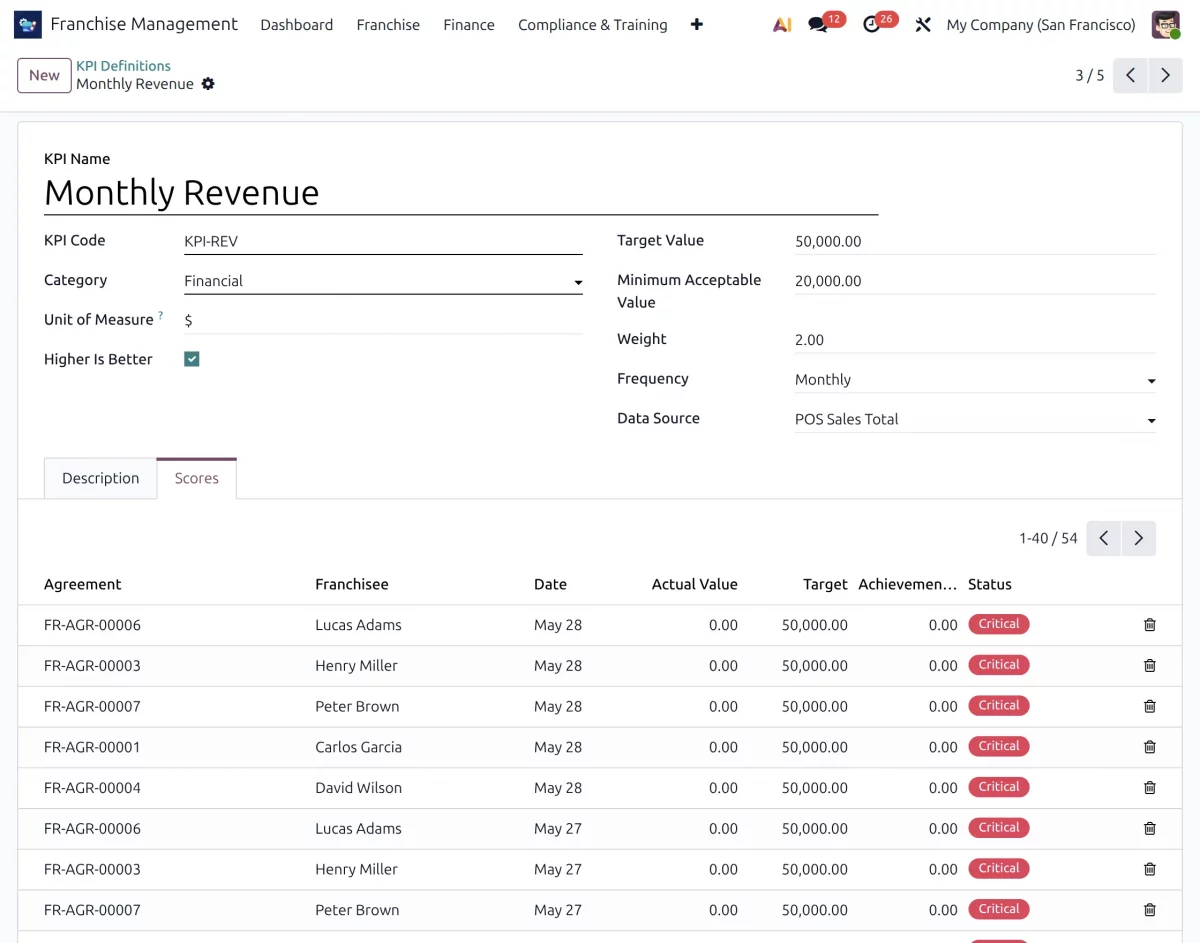
4. Navigate to Configuration → KPI Definitions to define the performance indicators used to evaluate franchise outlets.
These KPIs may include revenue growth, customer acquisition, sales performance, customer satisfaction, and other business metrics.
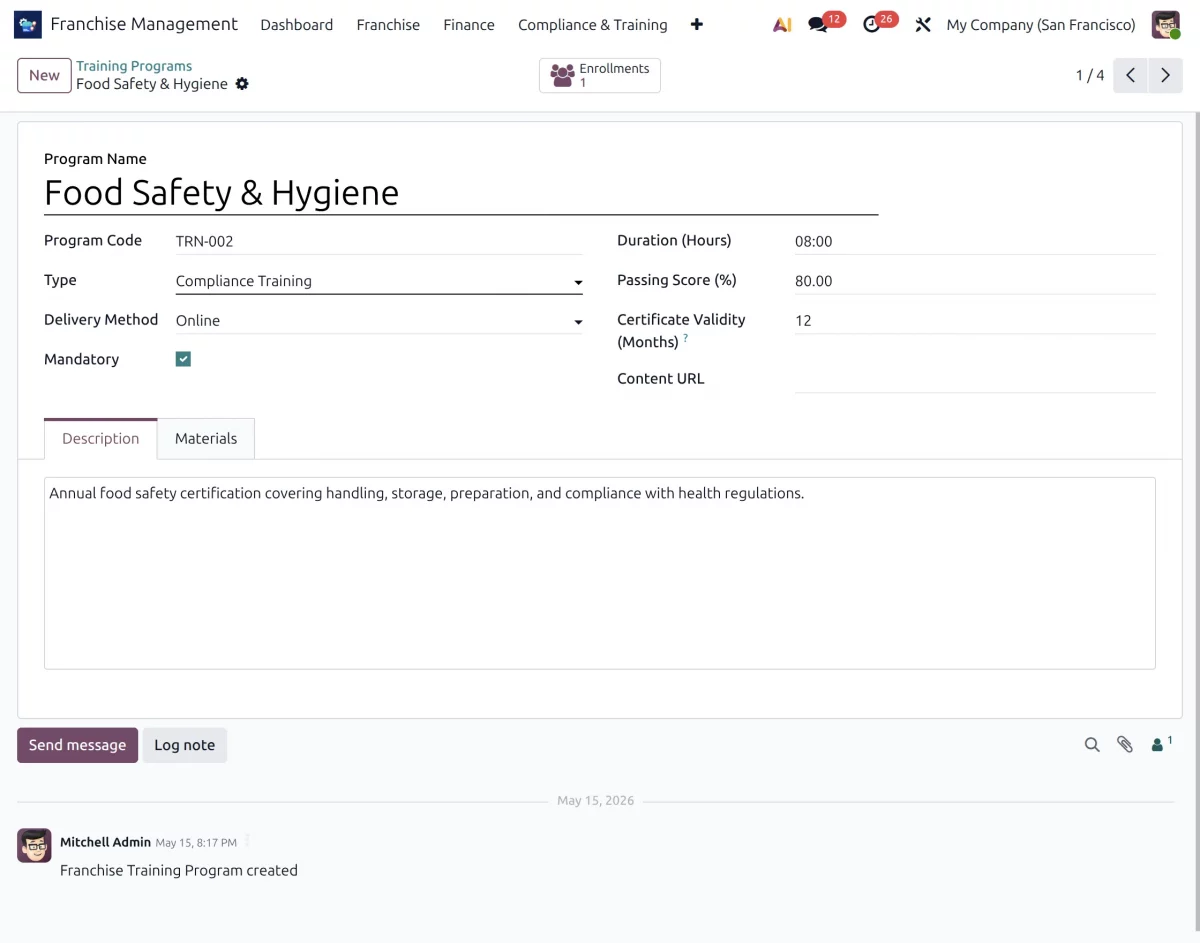
5. To manage franchise learning activities, go to Configuration → Training Programs. Here, you can create and assign training programs for franchise outlets and staff members.
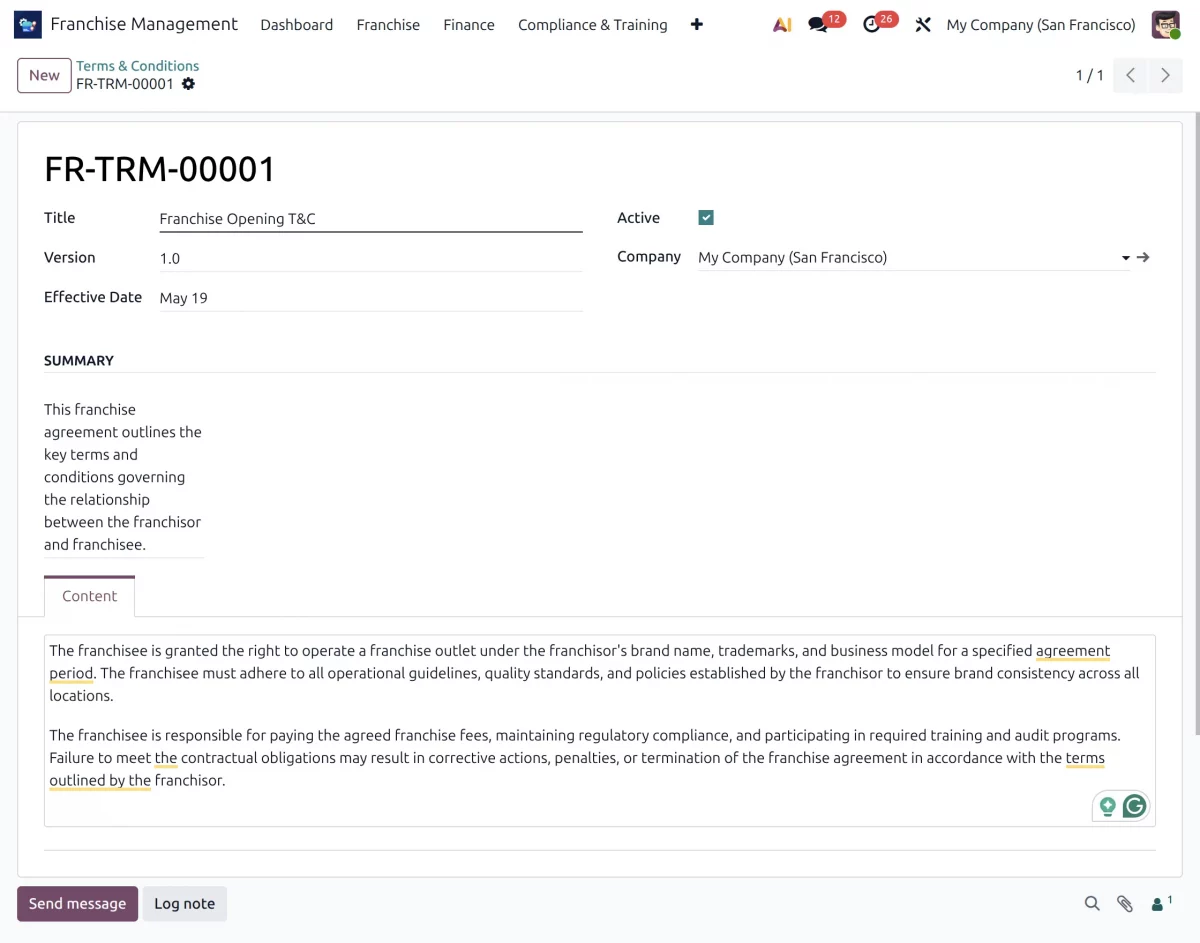
6. Open Configuration → Terms & Conditions to define franchise policies, operational guidelines, and agreement terms that can be used during the franchise agreement process.
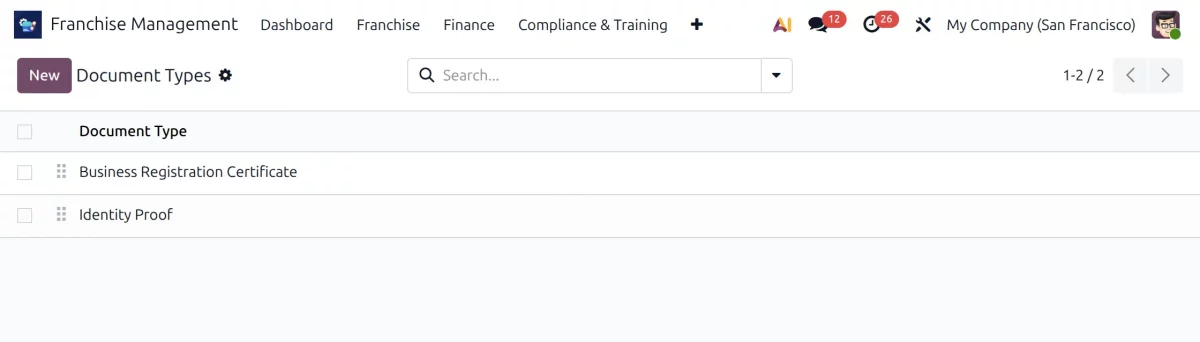
7. Go to Configuration → Document Types to configure the documents required from franchise applicants before the onboarding process begins. This helps standardize document verification across all franchise applications.
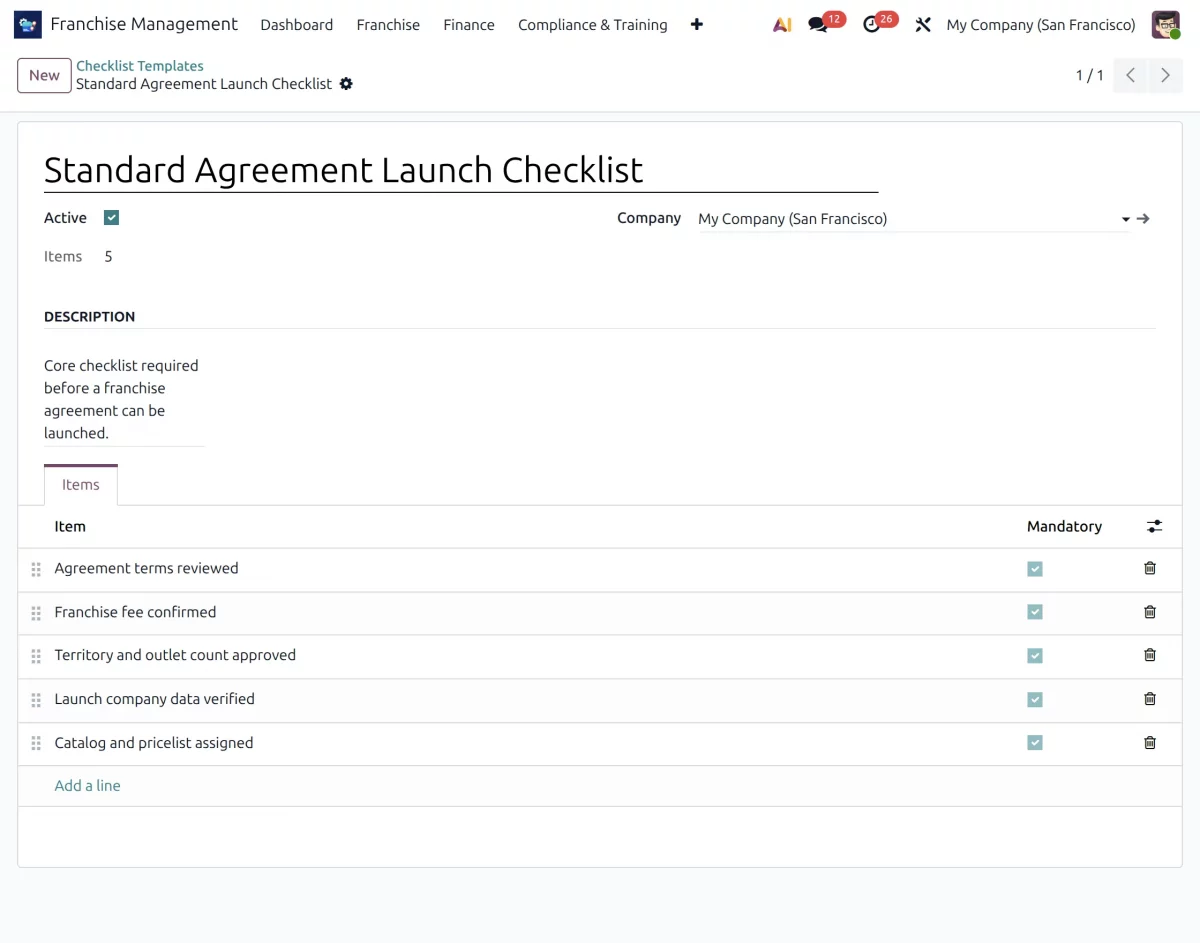
8. Next, navigate to Configuration → Checklist Templates to create and manage checklist structures used for compliance verification and operational reviews.
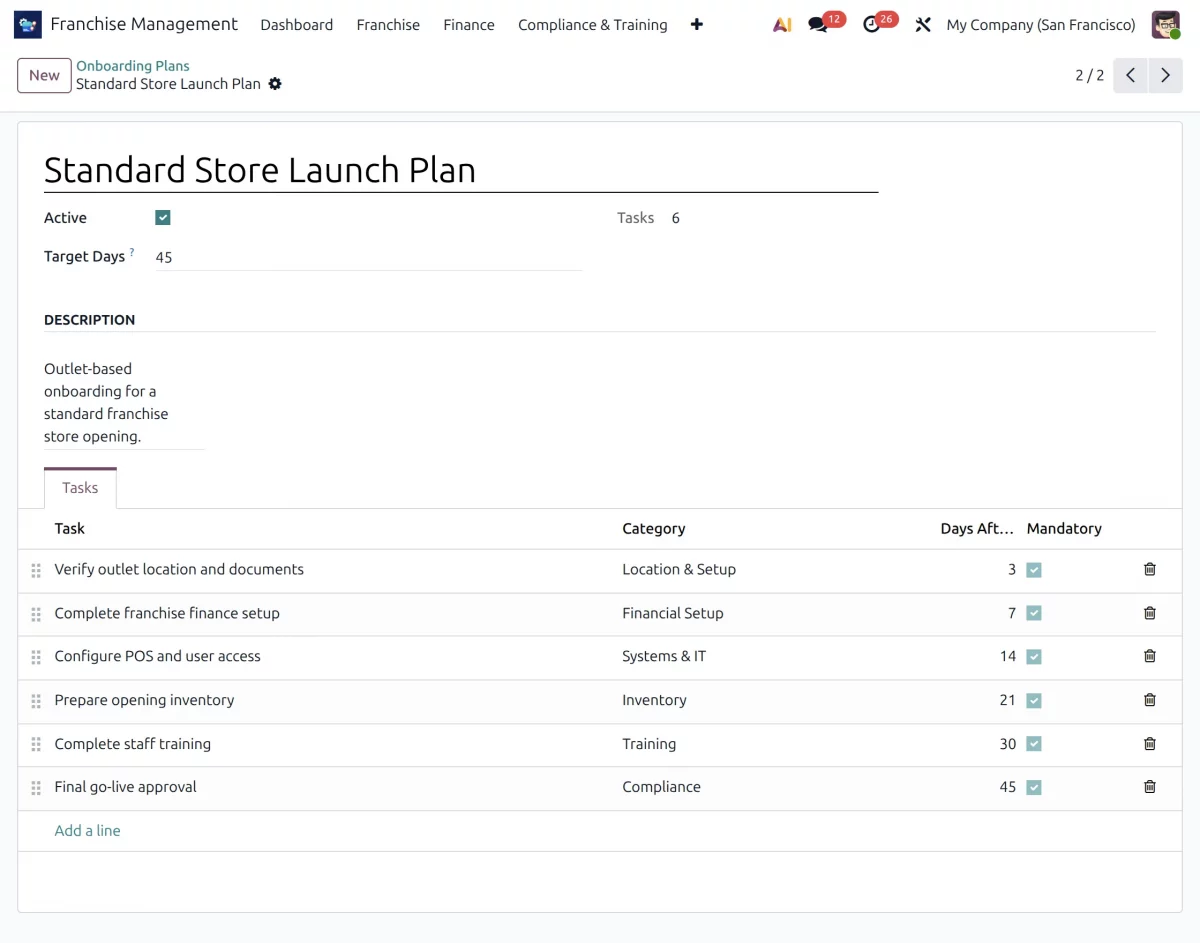
9. Go to Configuration → Onboarding Plans to configure franchise onboarding processes. Here, you can define onboarding activities such as verification tasks, inventory preparation, outlet setup, and launch readiness checks.
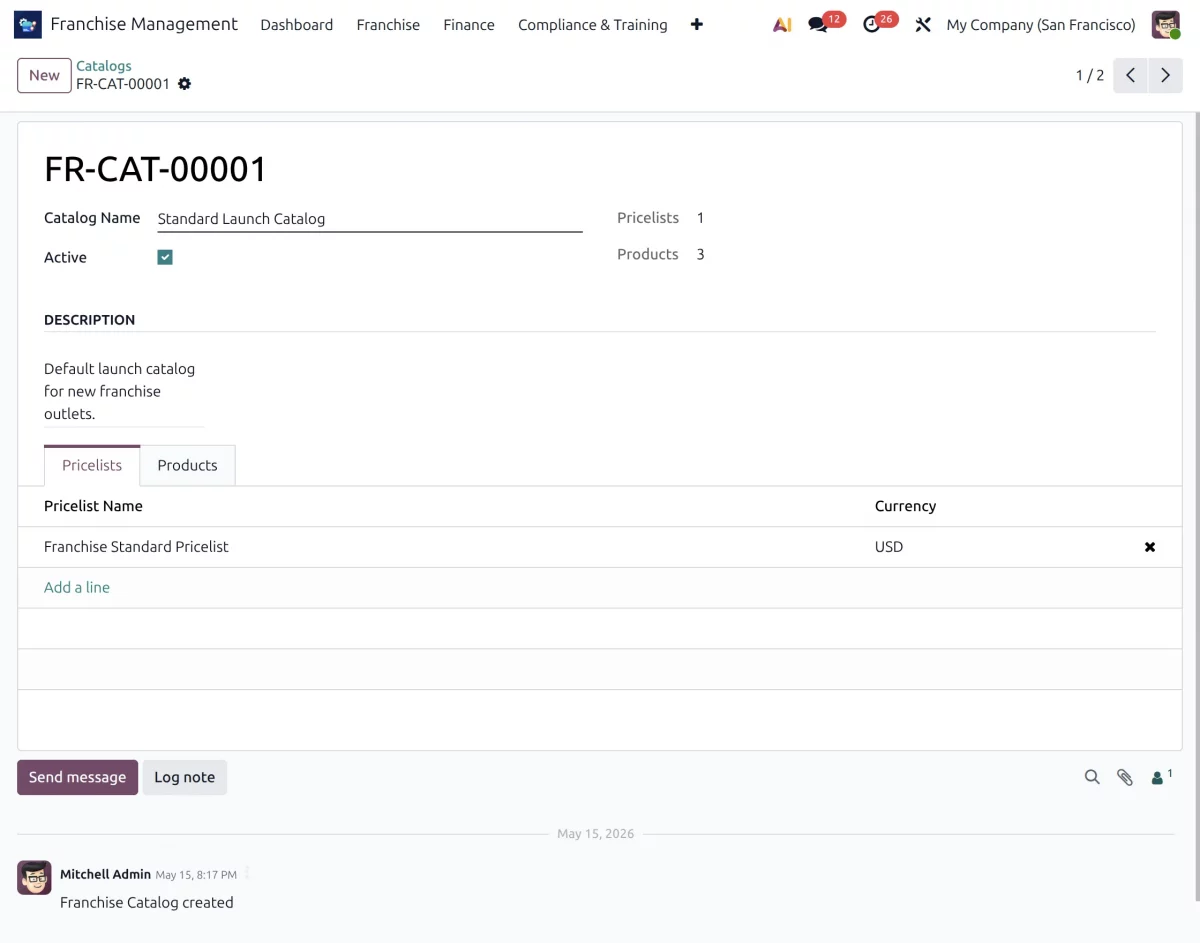
10. Open Configuration → Catalogs to create and manage product catalogs for franchise outlets. Additionally, you can assign pricelists to products so that franchisees can use the predefined product information during product creation and management.
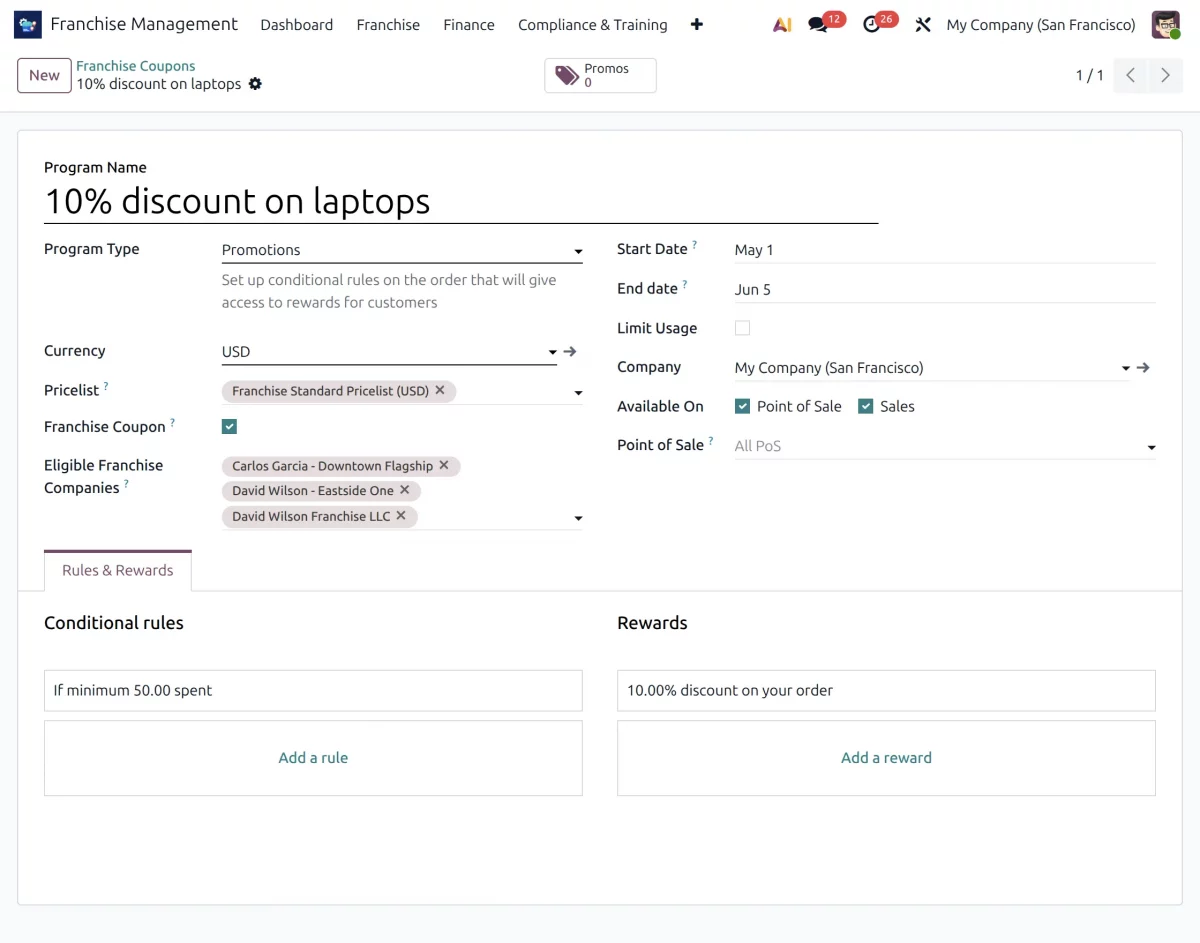
11. Finally, navigate to Configuration → Franchise Coupons to create and manage franchise-specific coupons. Here, you can configure coupon validity dates, discounts, reward rules, and promotional conditions for franchise outlets.
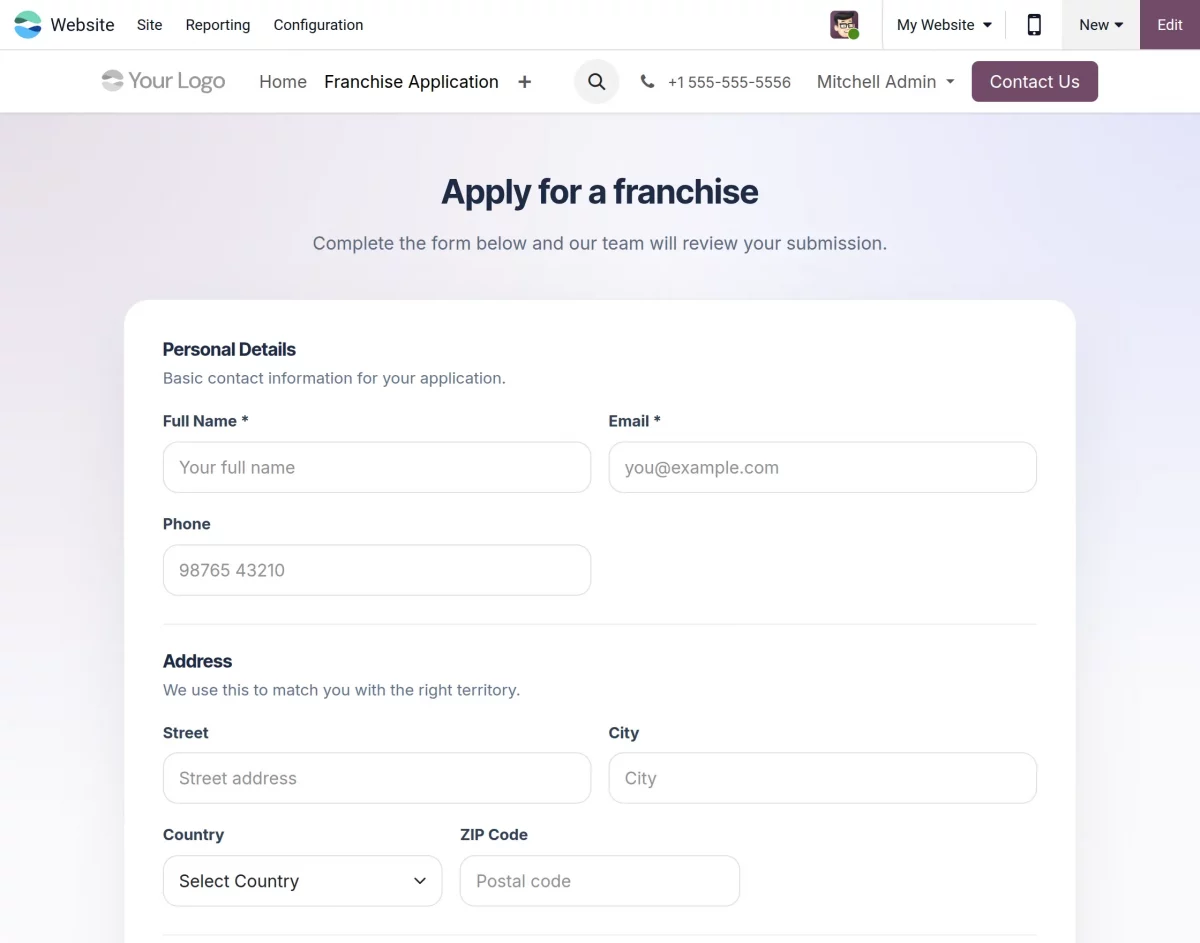
Franchise Application & Onboarding Workflow
12. Once a customer visits the franchise website and submits the franchise inquiry form, the system automatically creates a franchise application lead inside Odoo Franchise Management System.
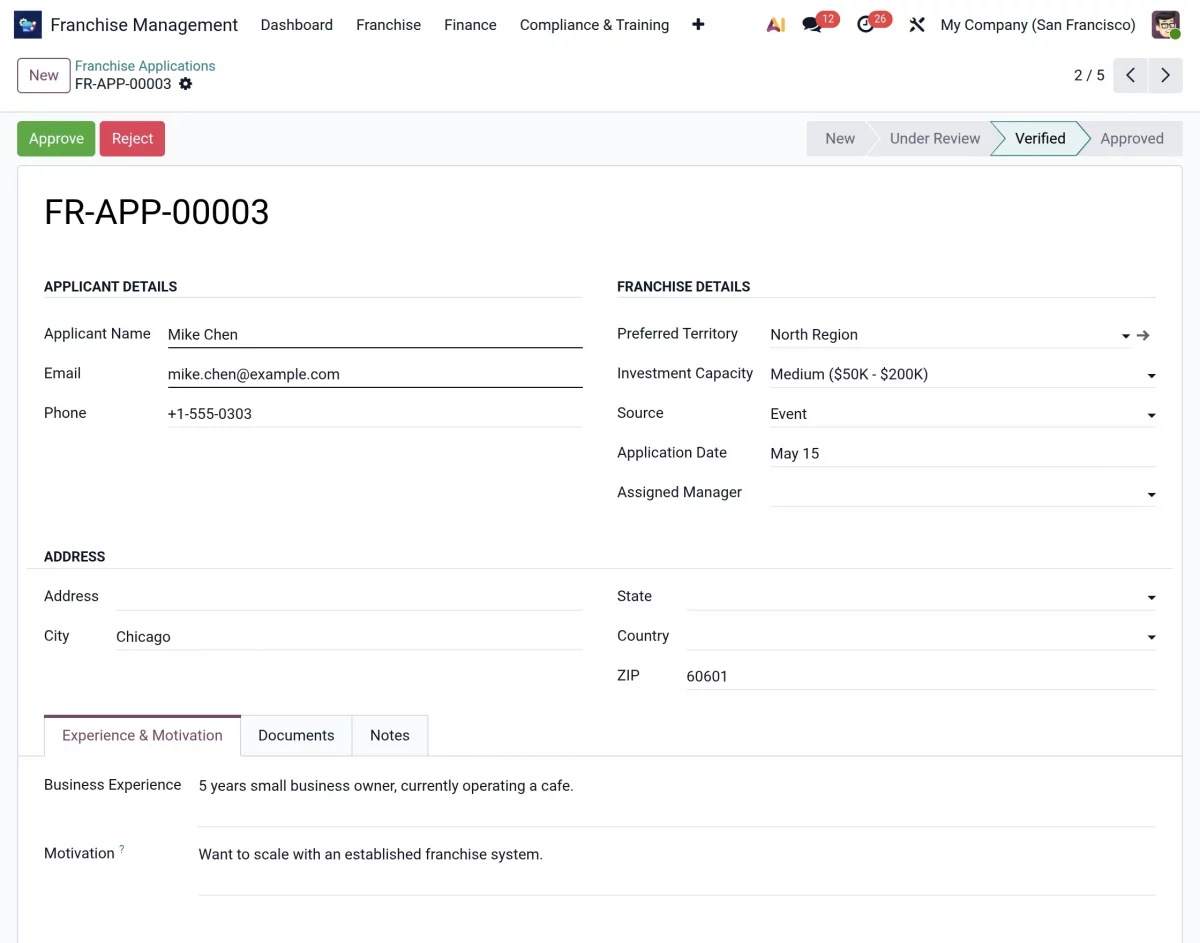
13. Next, the admin can open the franchise application and review all submitted details, such as applicant information, uploaded documents, and business details.
14. After reviewing the application, the admin can verify the details and either approve or reject the franchise request based on the verification process.
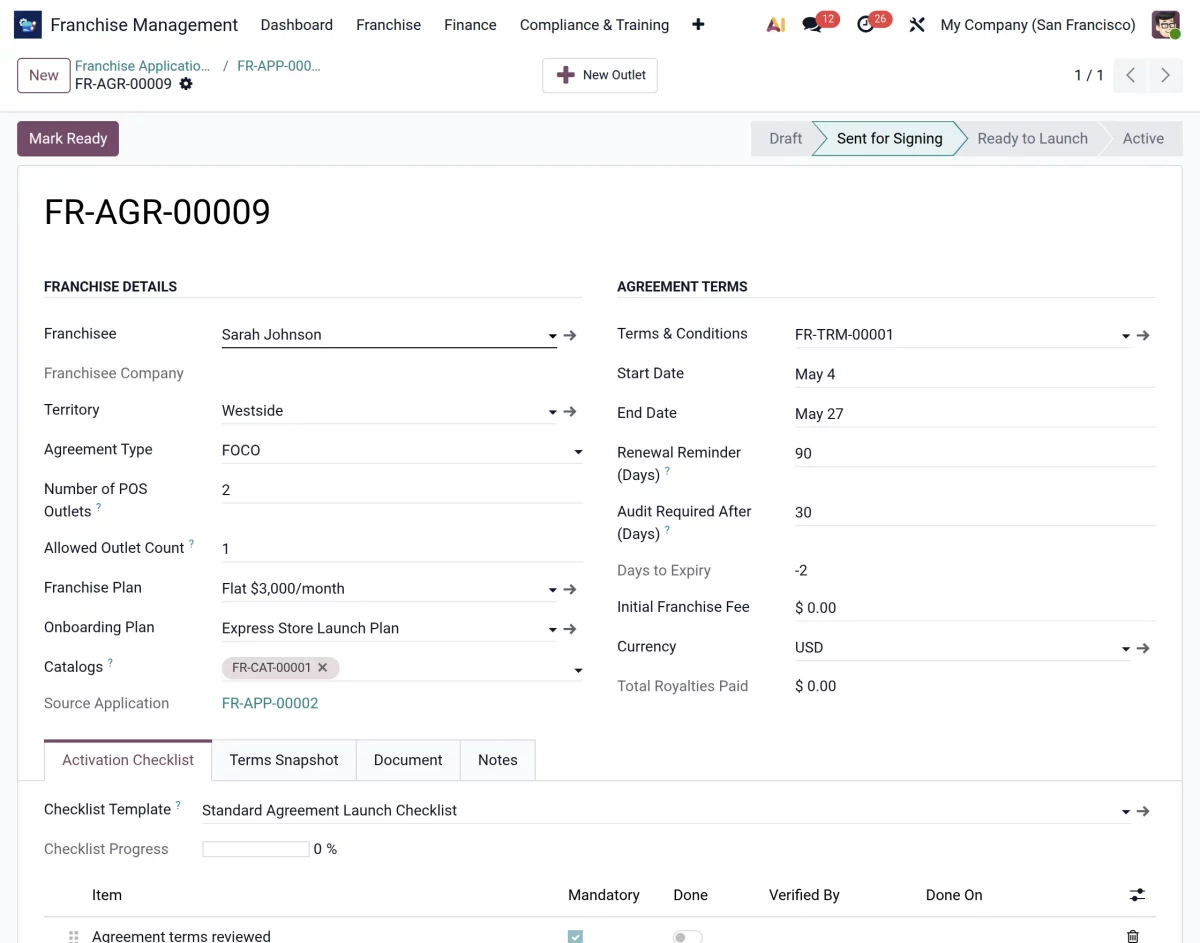
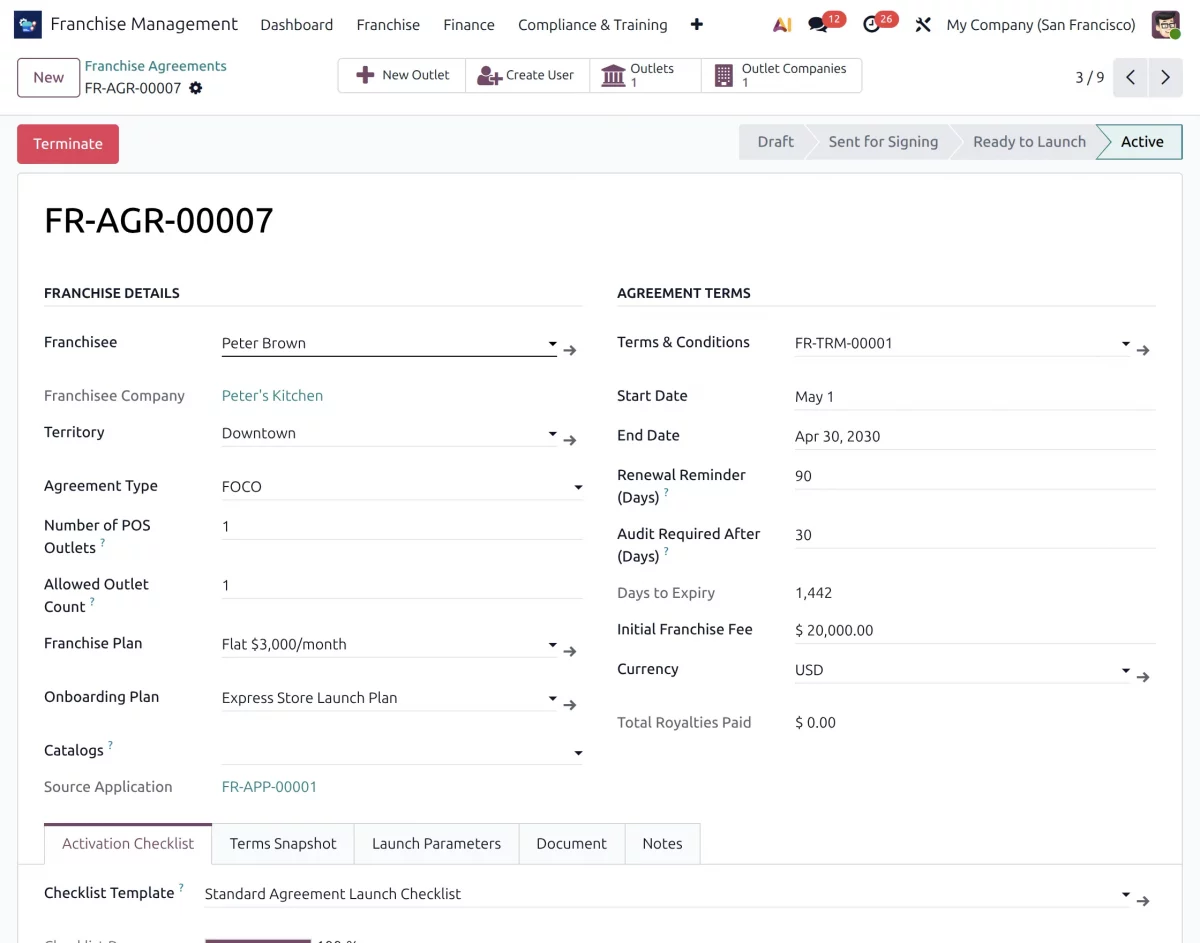
15. Once the application is approved, the system automatically generates a franchise agreement containing all franchise details and operational terms.
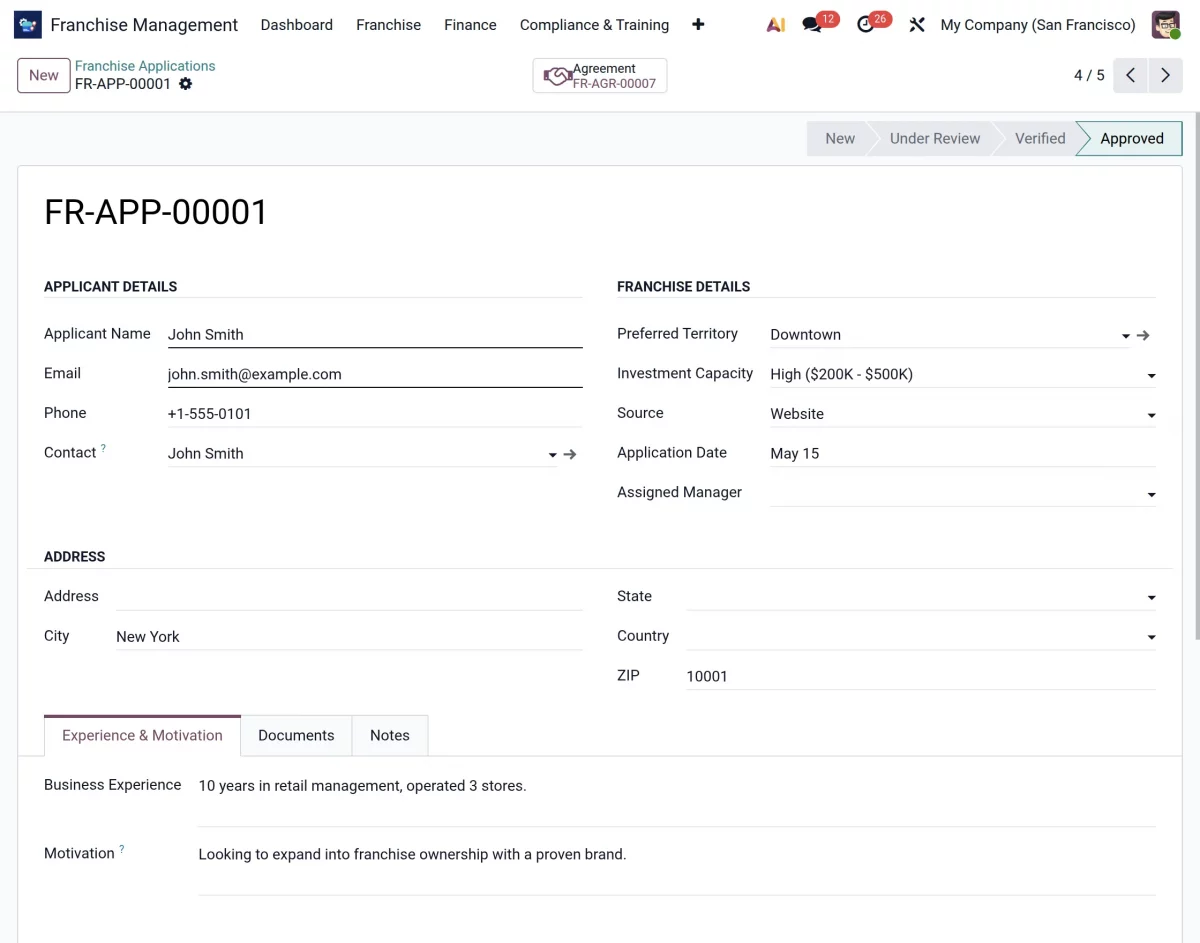
16. Now, the admin can complete the agreement information and send the agreement document to the franchise applicant for signing.
17. After receiving the signed agreement, the admin can begin the franchise onboarding process by reviewing the franchise opening checklist.
18. The admin can then verify each onboarding activity and checklist task to ensure all franchise setup requirements are completed properly.
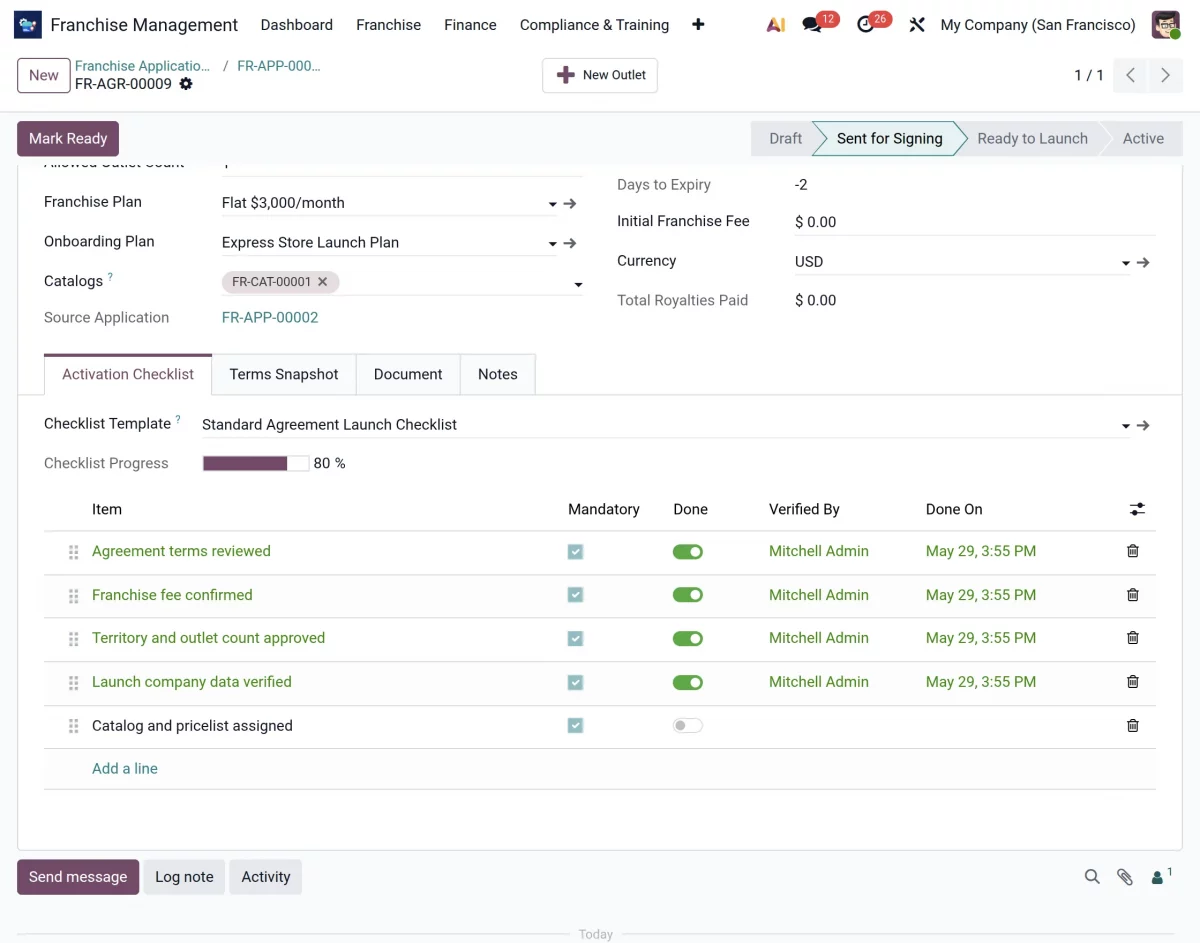
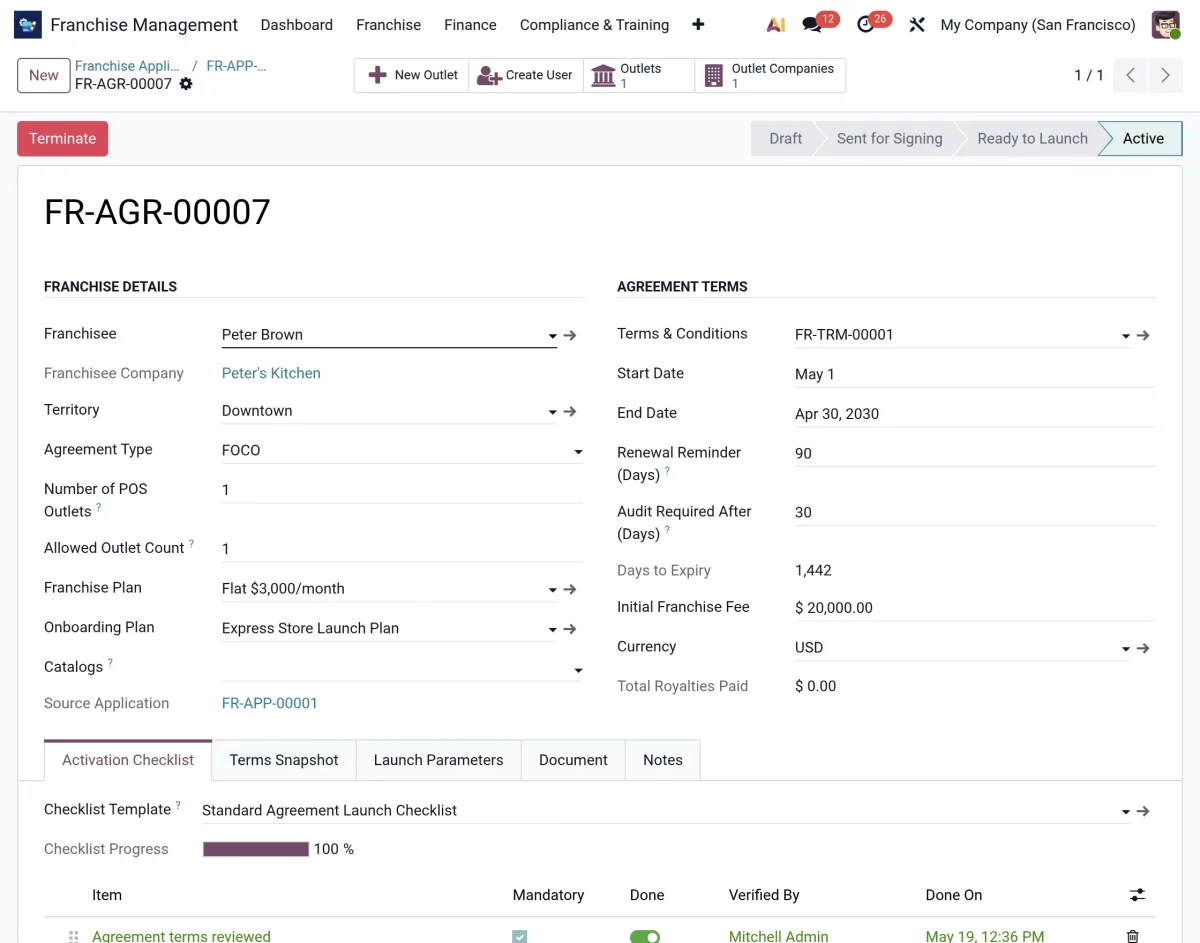
19. Once the entire onboarding checklist is completed, the franchise is ready for launch. The admin can now mark the franchise as an Active Outlet in the system.
20. Finally, odoo franchise management system creates a dedicated outlet record along with separate login credentials and email access for the franchisee.
Franchisee Portal Access Workflow
21. Once the franchise agreement is created and approved, the admin can provide portal access to the franchisee to access the franchise management system.
22. To provide access, open the agreement record and go to Franchise → Franchise Name. Then, click on the internal link arrow beside the franchise name to open the franchise contact details.

23. Now, click on the Action menu and select the option to Grant Portal Access to the franchisee user.

24. After granting portal access, go to Settings → Users & Companies → Users and open the franchisee user record. From here, click on Send Password Reset Instructions so the franchisee can set their login password securely.
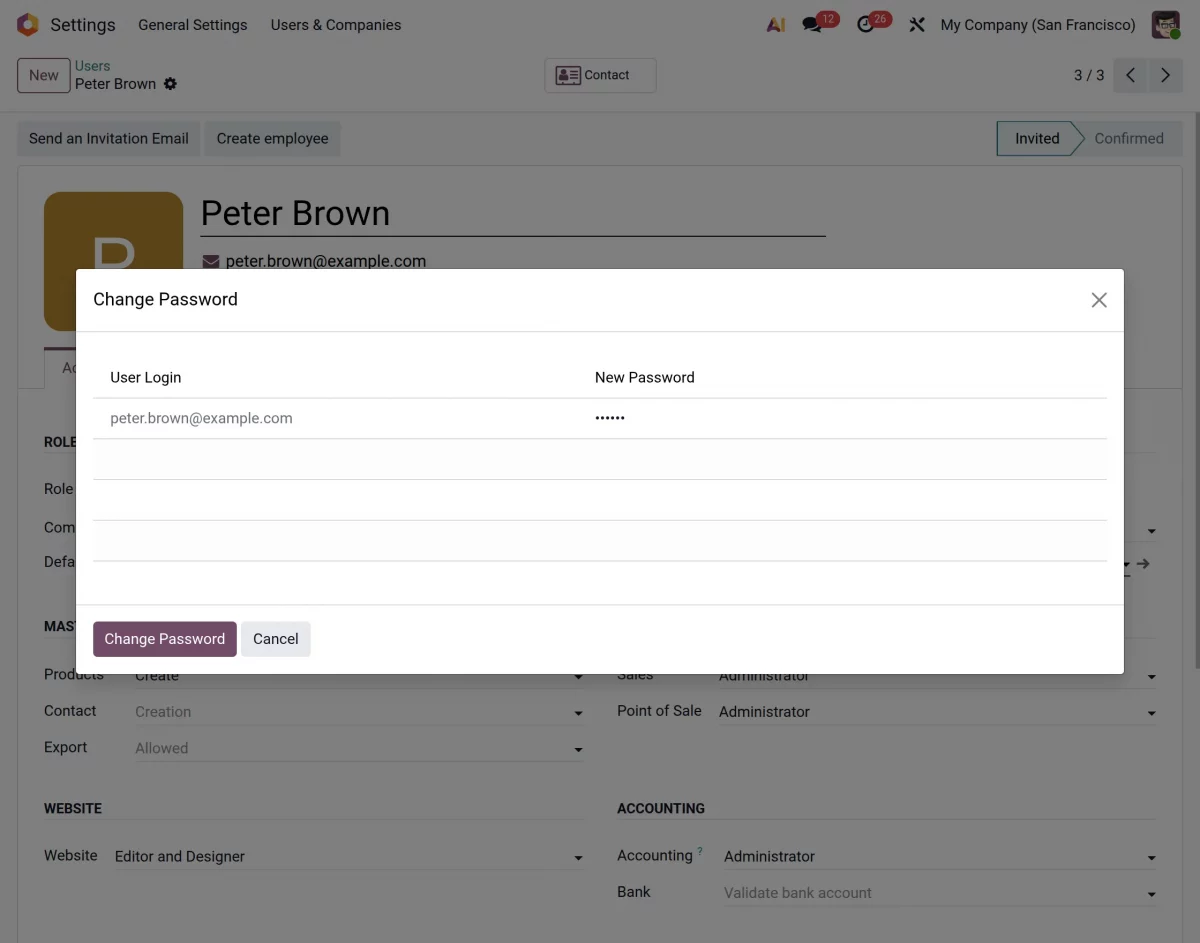
25. Once the password setup is completed, the franchisee can log in to Odoo portal using their registered email address and password.
This allows them to access their franchise operations, agreements, onboarding activities, reports, and other assigned records from their dedicated portal account.
Franchise Management Workflow – Admin
26. After logging in to your Odoo instance, open the Franchise Management System module. Here, you will be able to access the franchise dashboard and all franchise management menus from one centralized location.
27. From the Franchise menu, you will find multiple options related to franchise operations, such as Applications, Franchises, Outlets, Territories, and Communications, furthermore, these options help you manage franchise activities efficiently from one place.
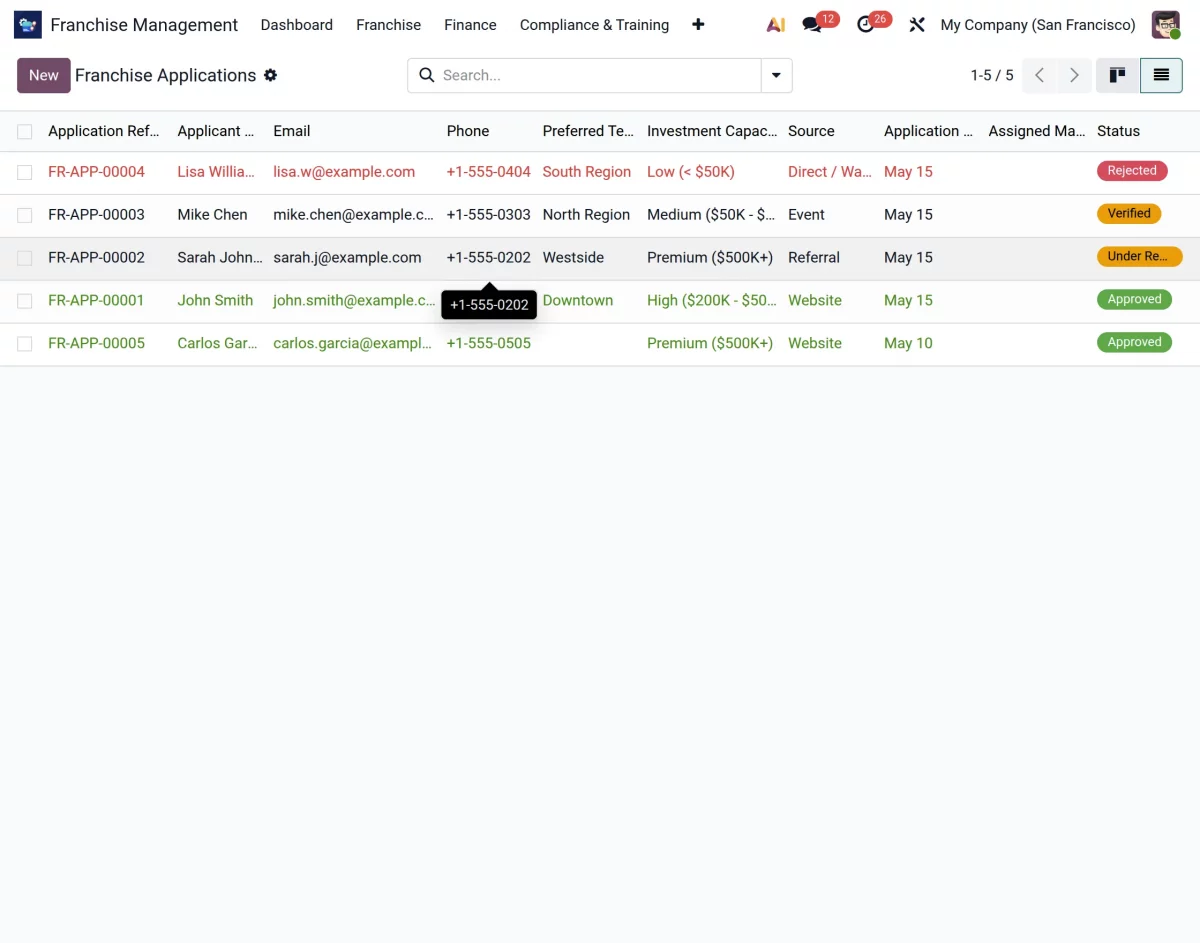
28. Click on Franchise → Applications to view all franchise applications submitted by prospective franchisees.
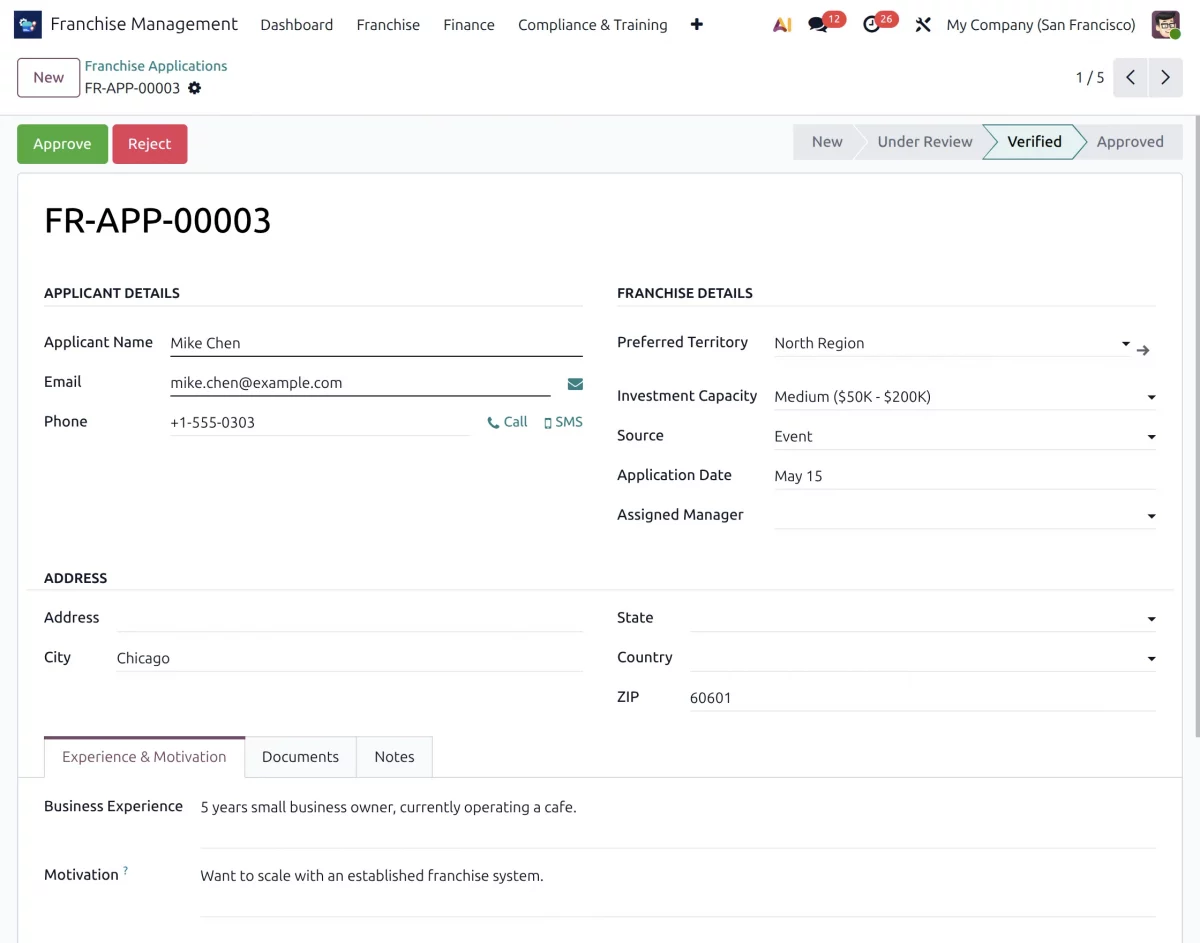
29. Open any application to review the submitted details and documents. After verification, you can proceed with the agreement creation and onboarding process as explained in the previous workflow.
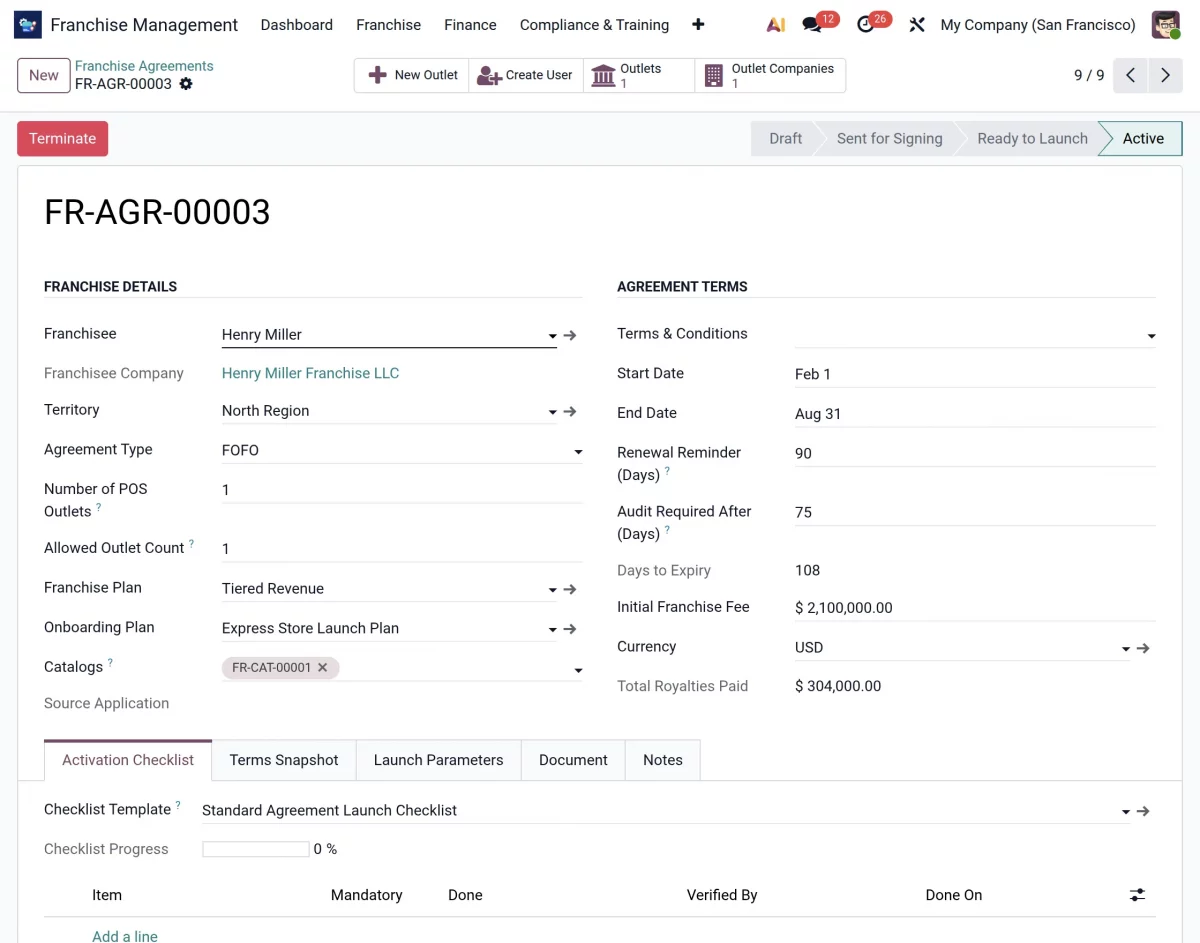
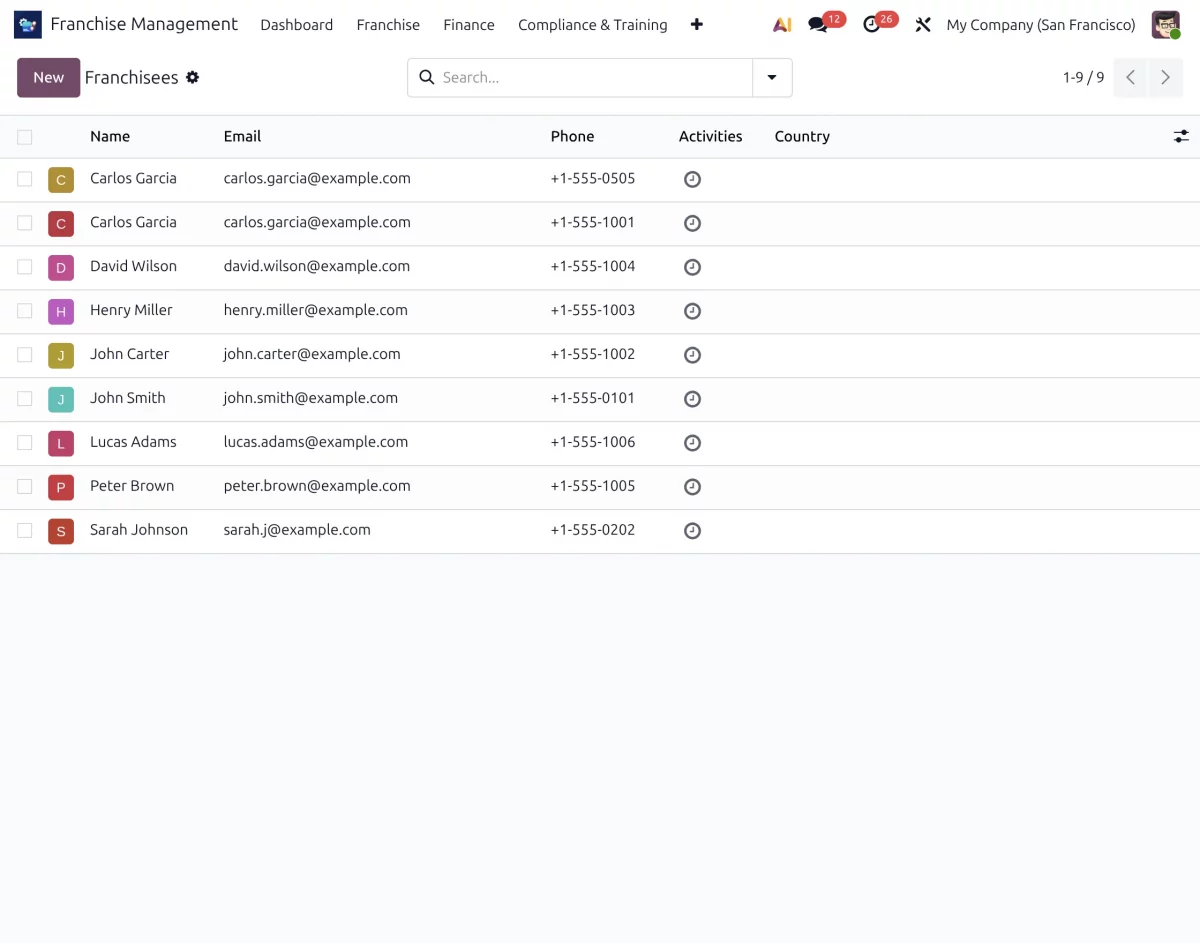
30. Now, go to Franchise → Franchises to view the list of active franchisees. Moreover from here, you can review franchise details and update information whenever required.
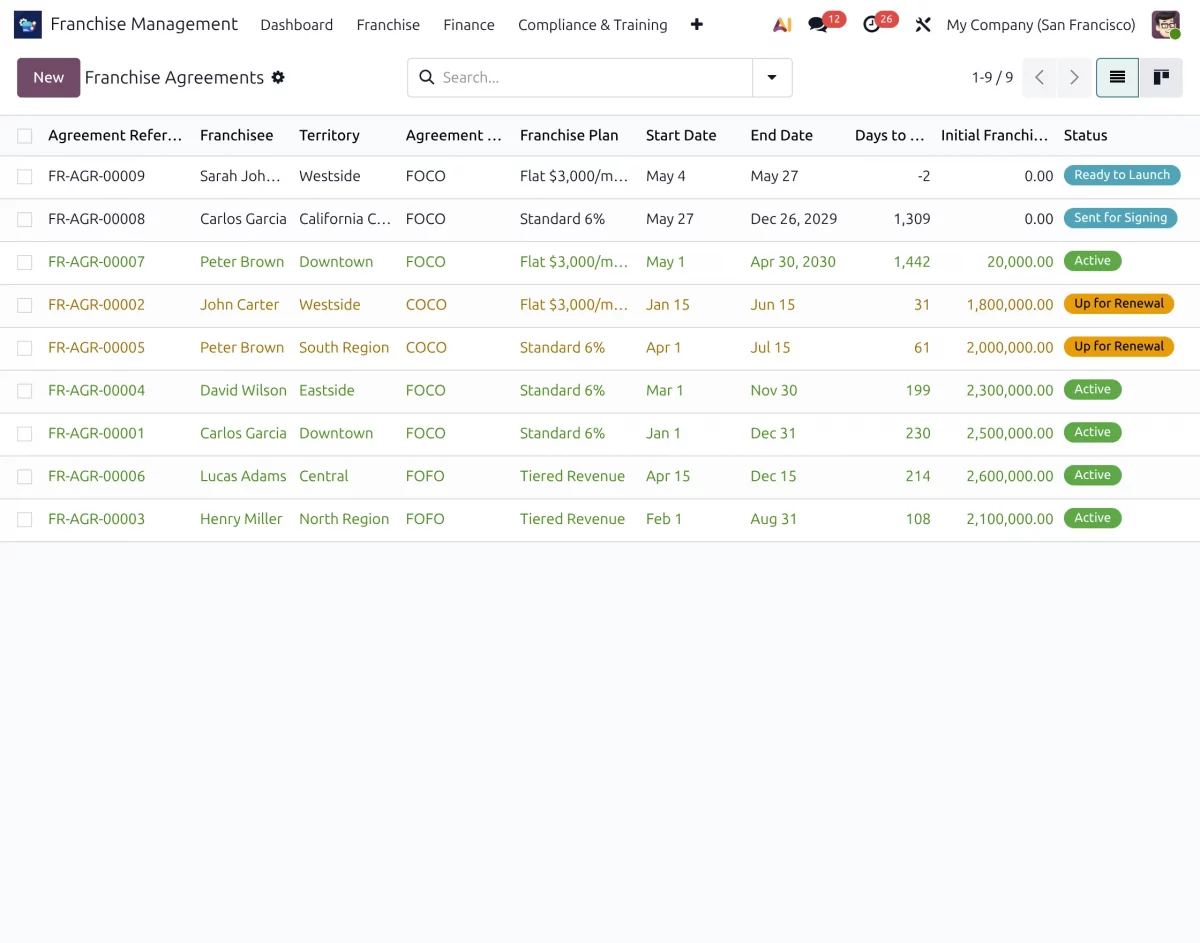
31. Now, go to Franchise →Agreements to see the list of agreements currently ongoing. You can monitor the agreements and view the status of renewal and terms & conditions.
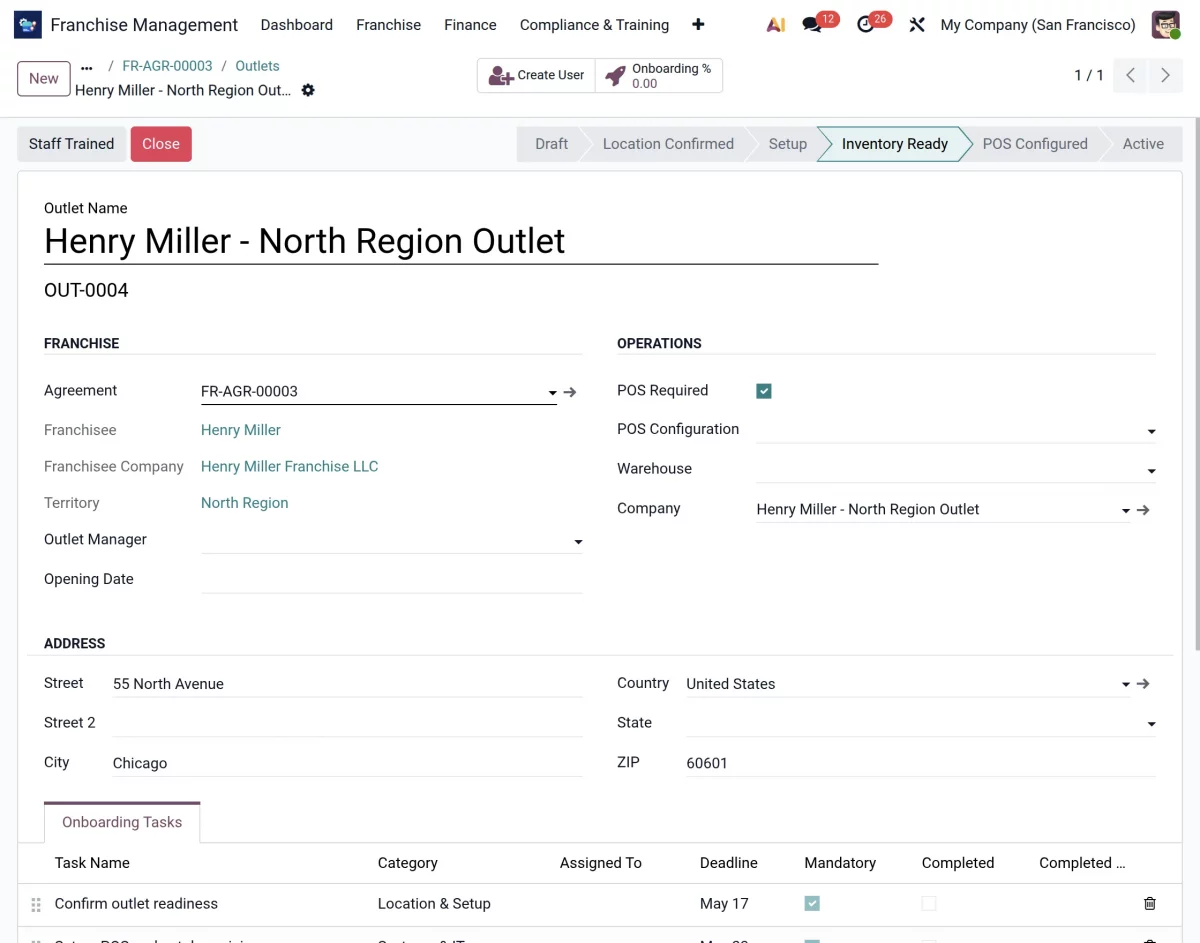
32. Next, navigate to Franchise → Outlets to view all franchise outlets and monitor their current operational status.
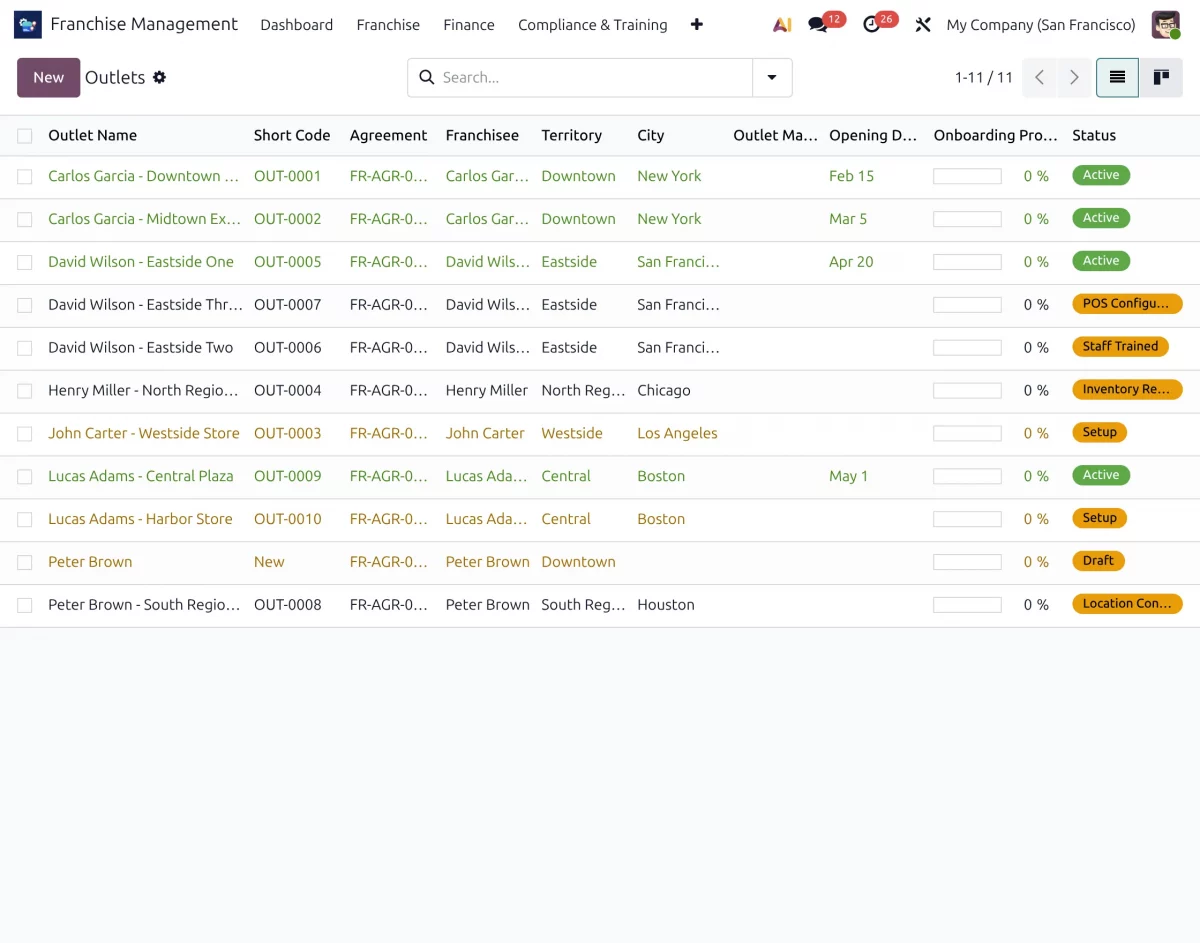
32.1. Within each outlet record, you can review onboarding progress, setup activities, and outlet readiness status.
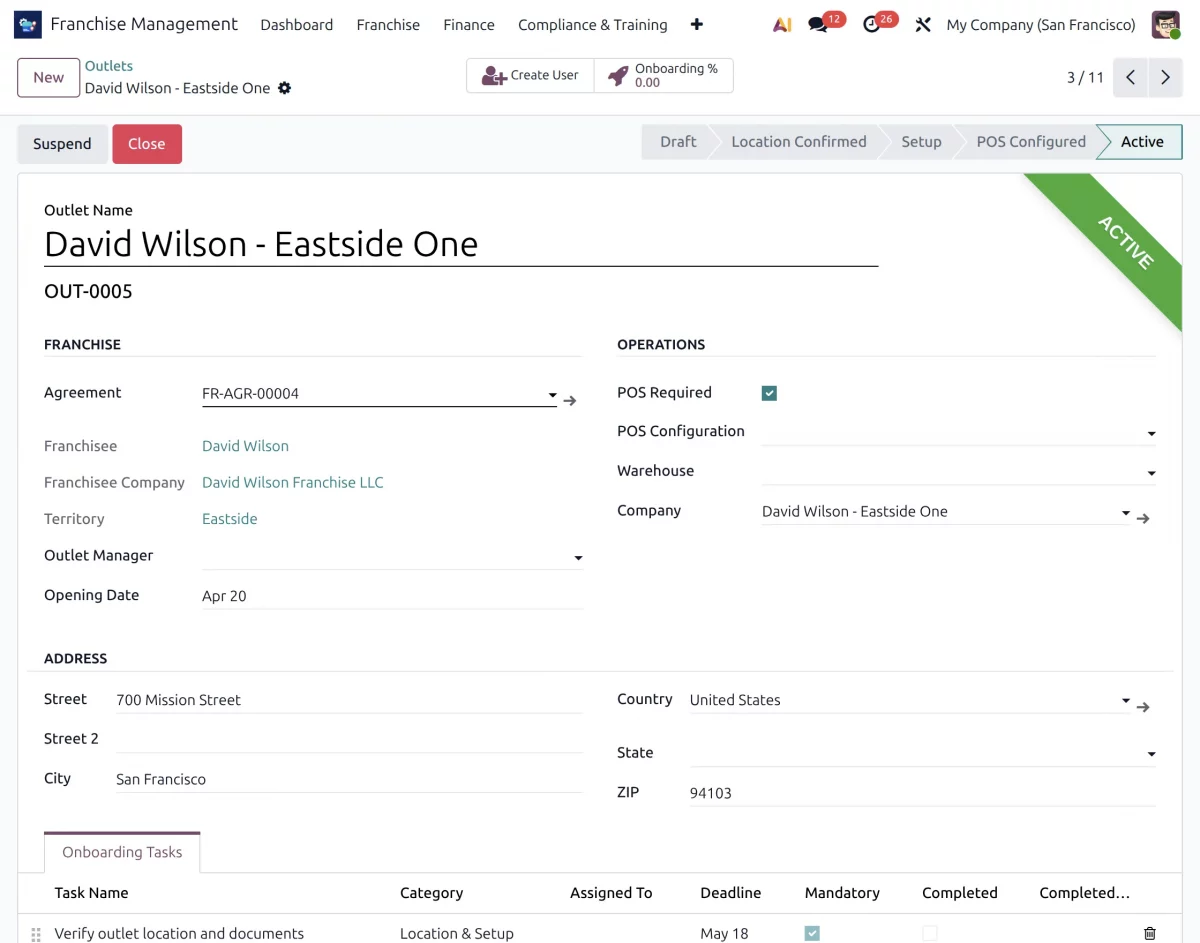
32.2. You can create onboarding tasks, verify completed activities, perform audits, approve outlet status, additionally suspend an outlet whenever required.

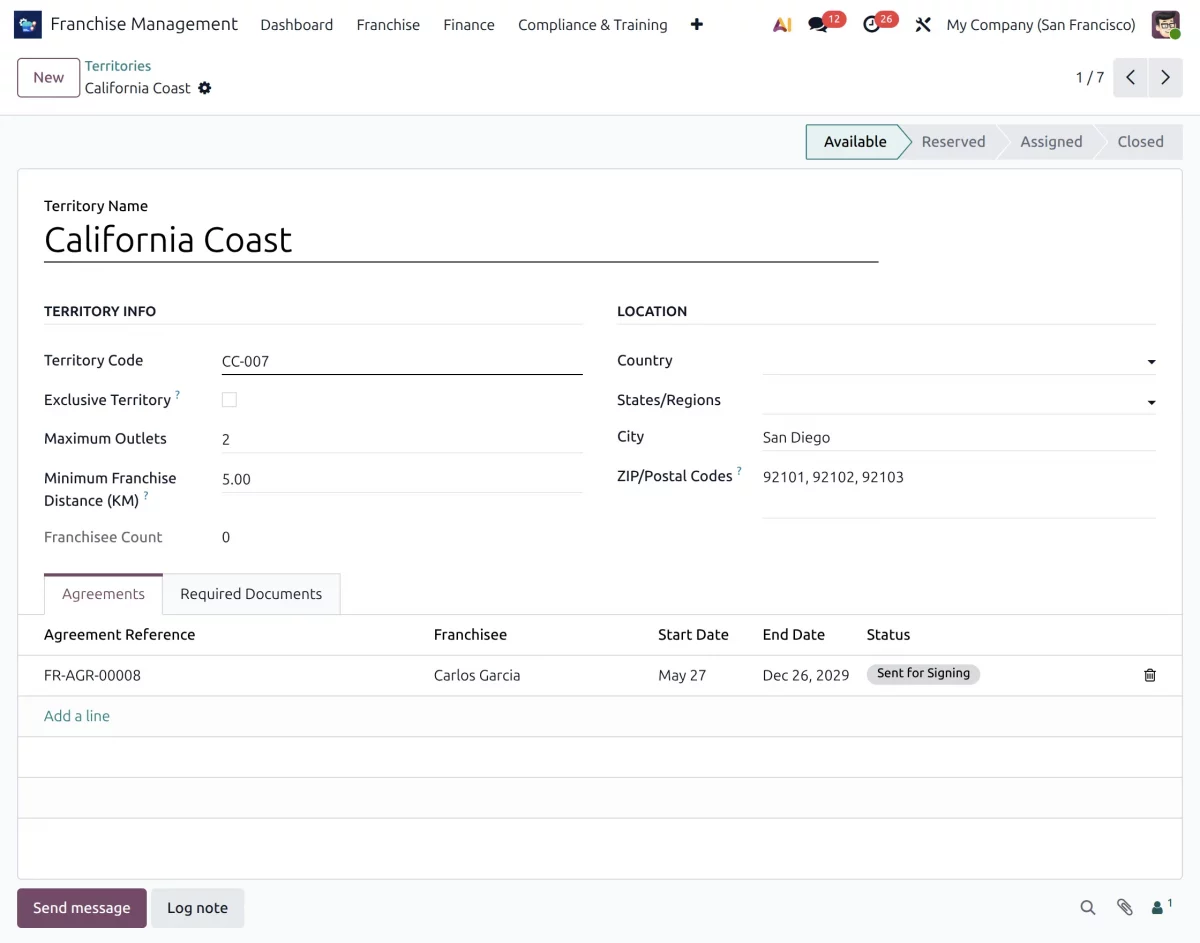
33. Go to Franchise → Territories to configure and manage franchise territories. Here, you can monitor territory availability and track territories that are available, reserved, or assigned.
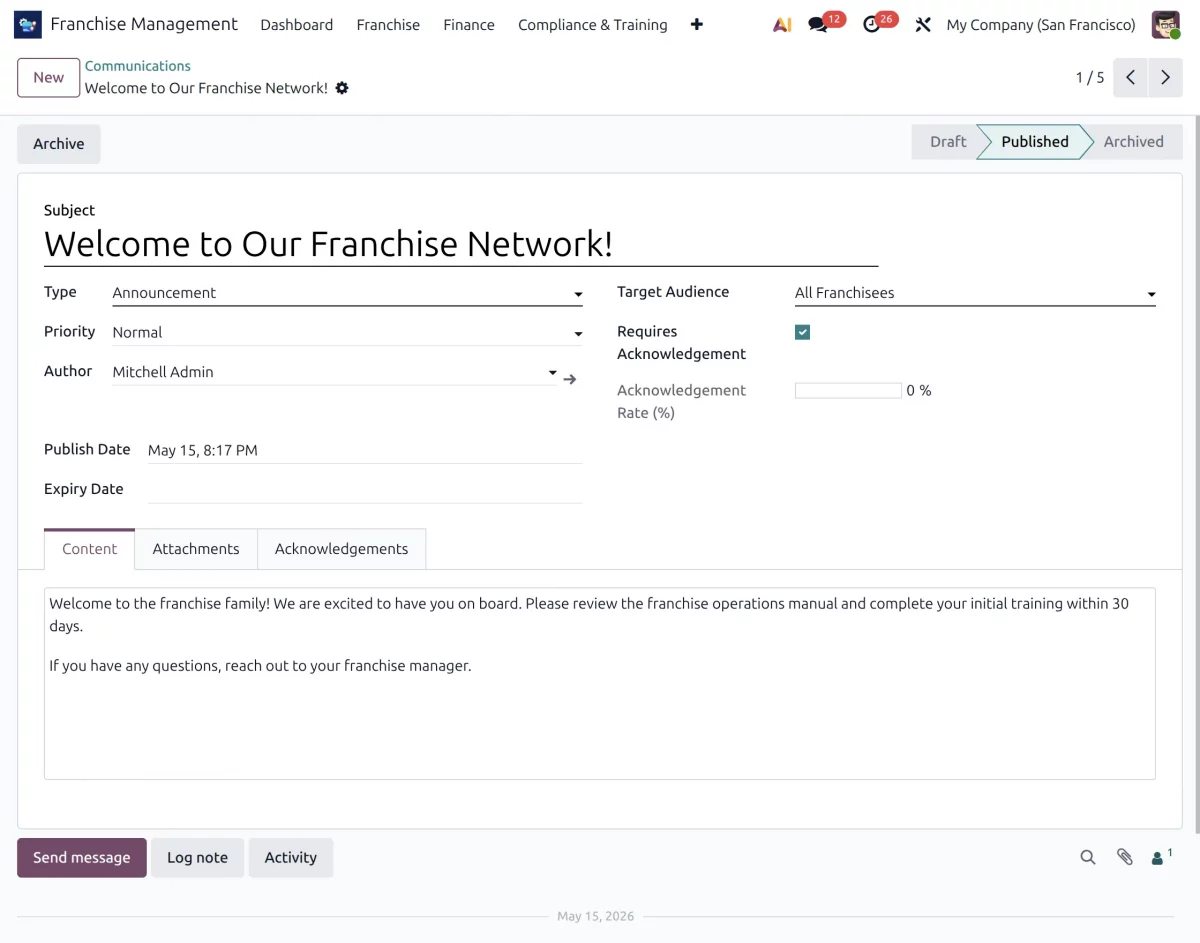
34. Click on Franchise → Communications to create announcements and share important information with franchisees. You can send communications to all outlets, specific franchises, or selected territories.
35. Now, navigate to the Finance menu and open Royalties & Invoices to manage franchise royalty payments and invoice records.
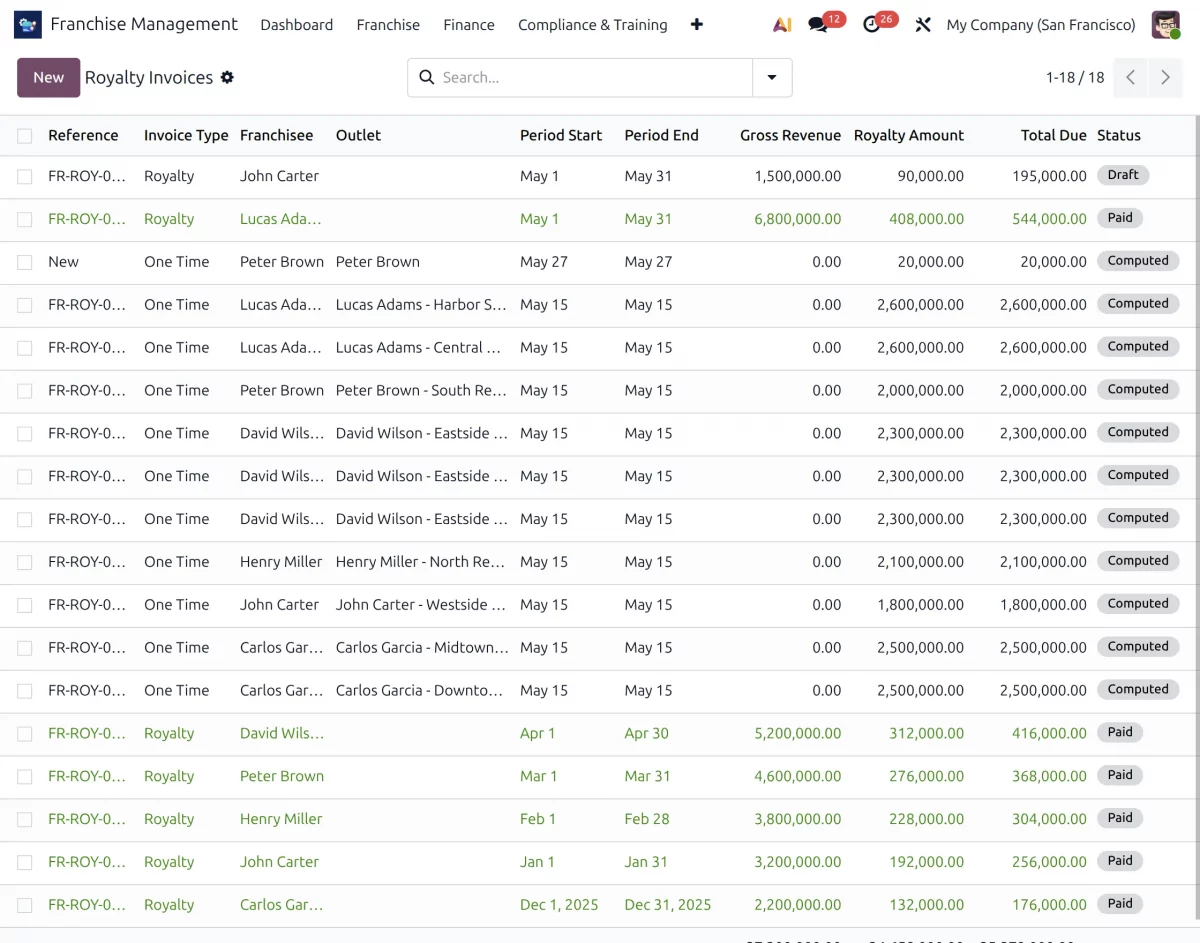
35.1. Here, you can track royalty payments received from franchise outlets and review their current payment status.
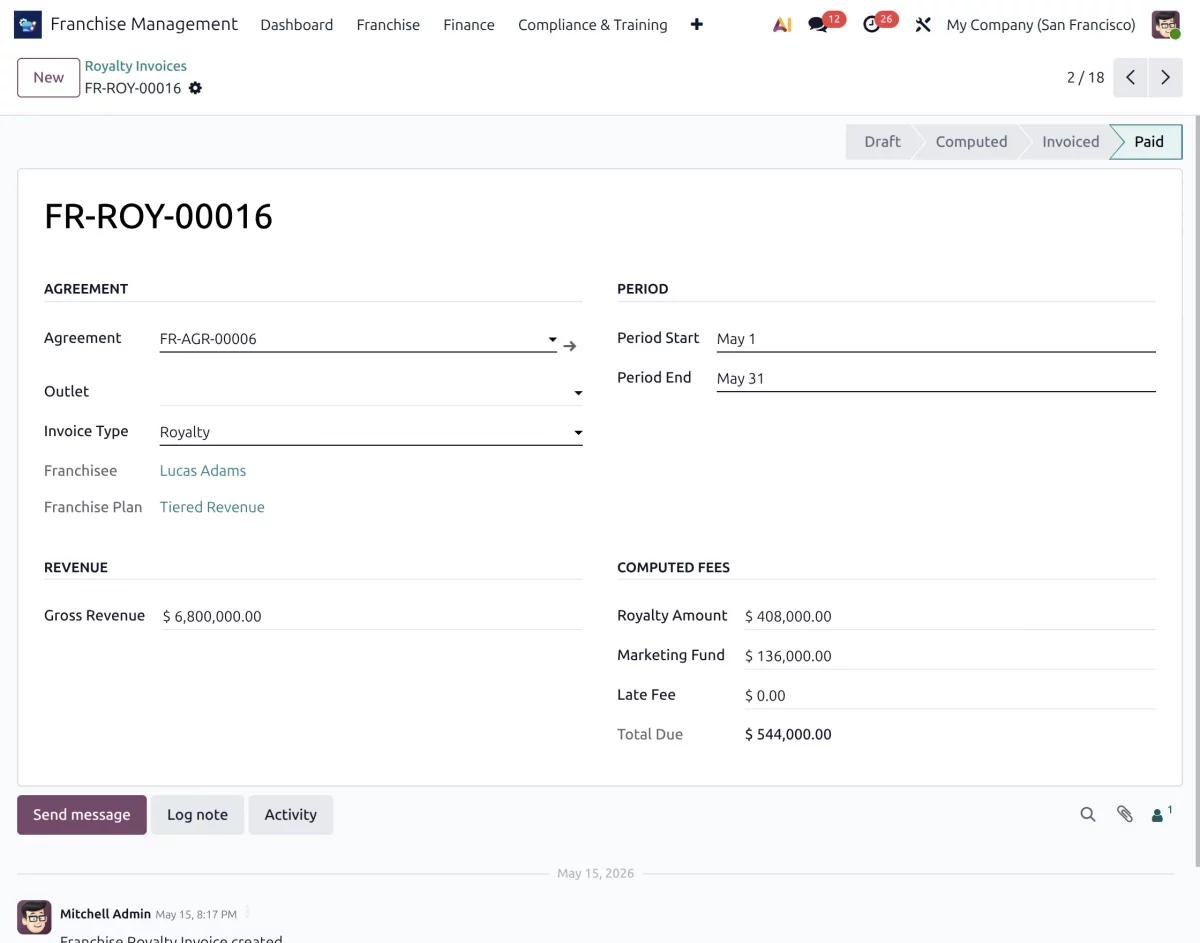
35.2. Furthermore, you can verify invoice records, monitor pending payments, moreover maintain complete financial visibility across the franchise network.
36. The Compliance & Audits menu contains all activities related to franchise audits, compliance management, training, and KPI monitoring.
36.1. Go to Compliance & Audits → Audits to create and manage compliance audits for franchise outlets.
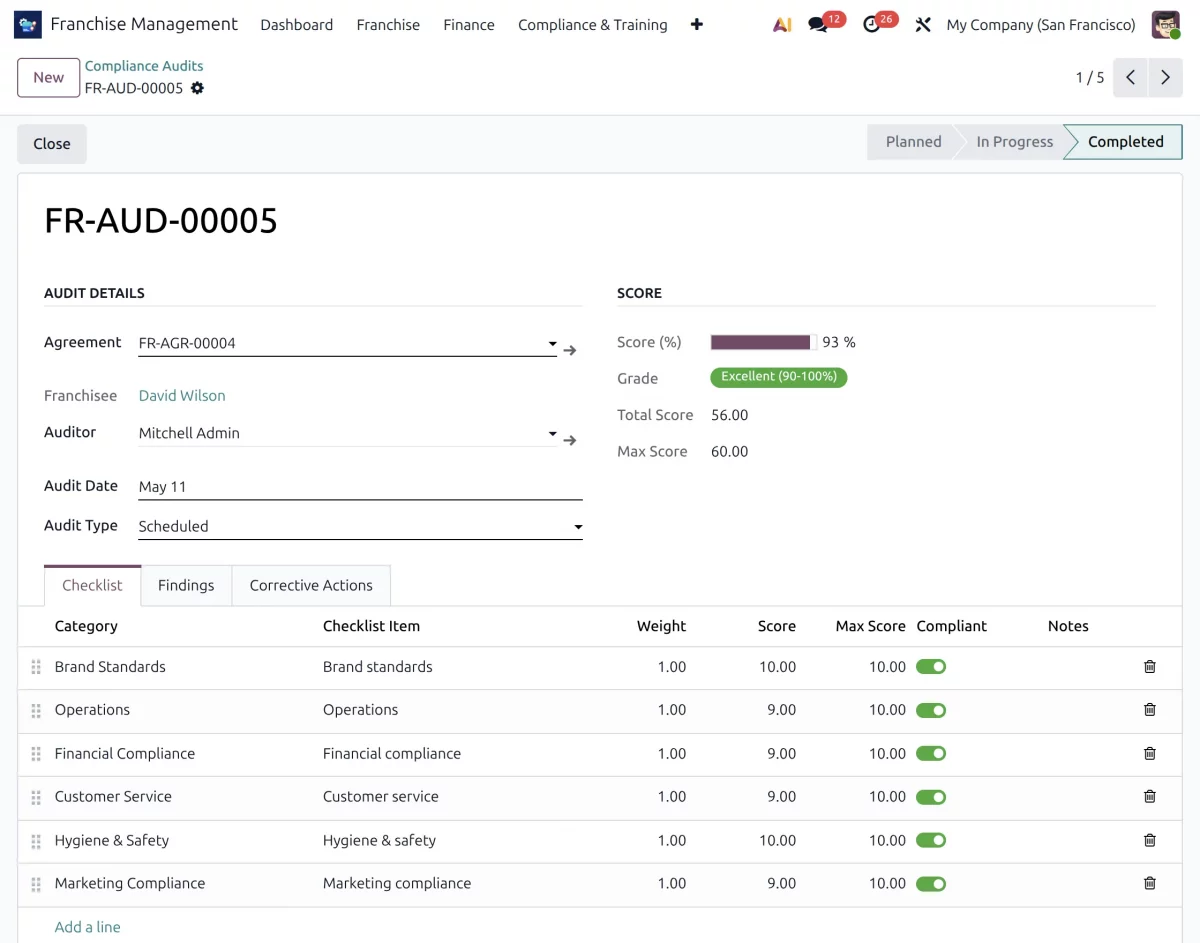
36.2. For example, you can create audit categories such as Brand Standards, Operations, Financial Compliance, Customer Service, Hygiene & Safety, and Marketing Compliance, additionally, these categories help standardize the audit process across the franchise network.
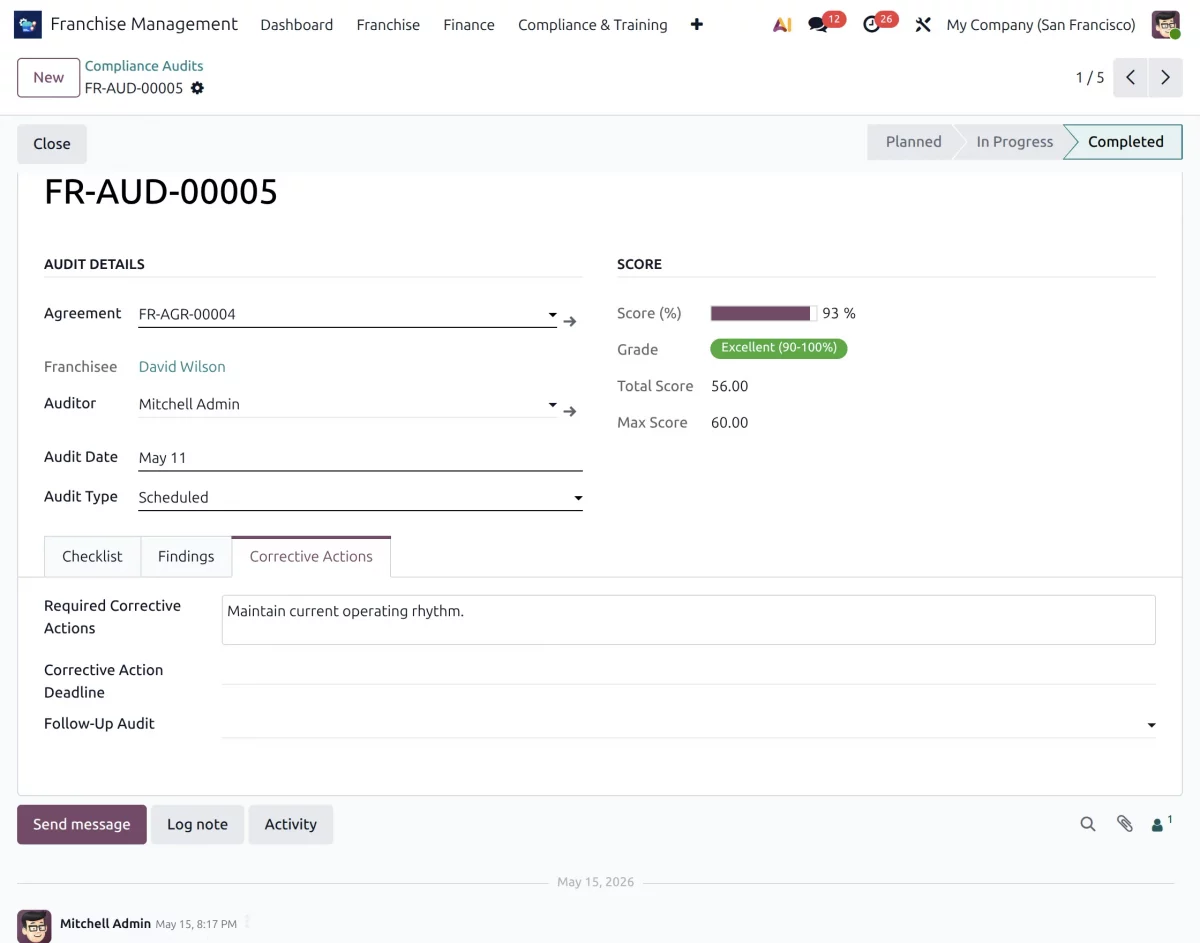
36.3. Within each audit, you can record findings, document observations, and assign corrective actions to improve outlet compliance and operational performance.
37. Next, navigate to the Training & Enrollment section to create training programs and assign them to franchise outlets or staff members.
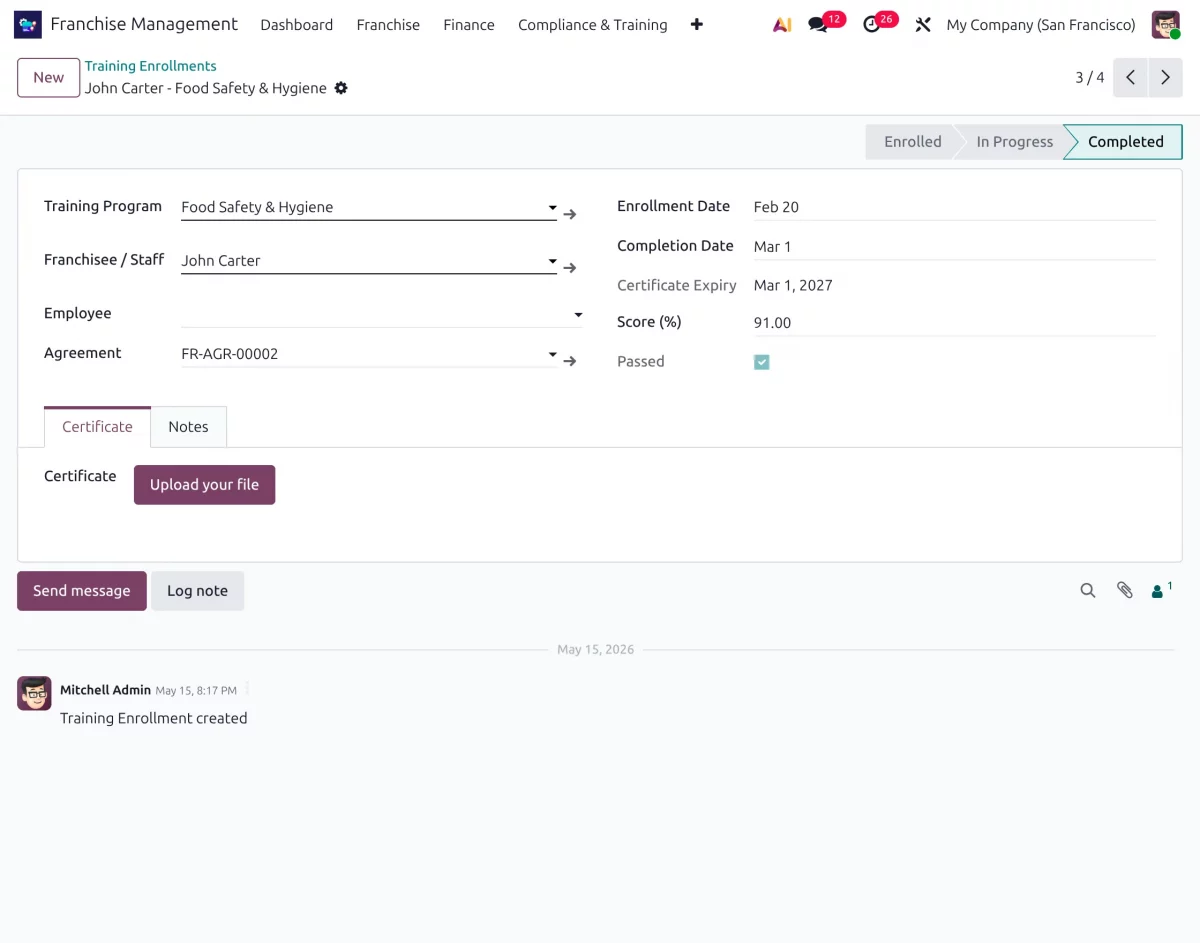
37.1. Furthermore, you can assign certifications based on training completion and performance evaluation results.
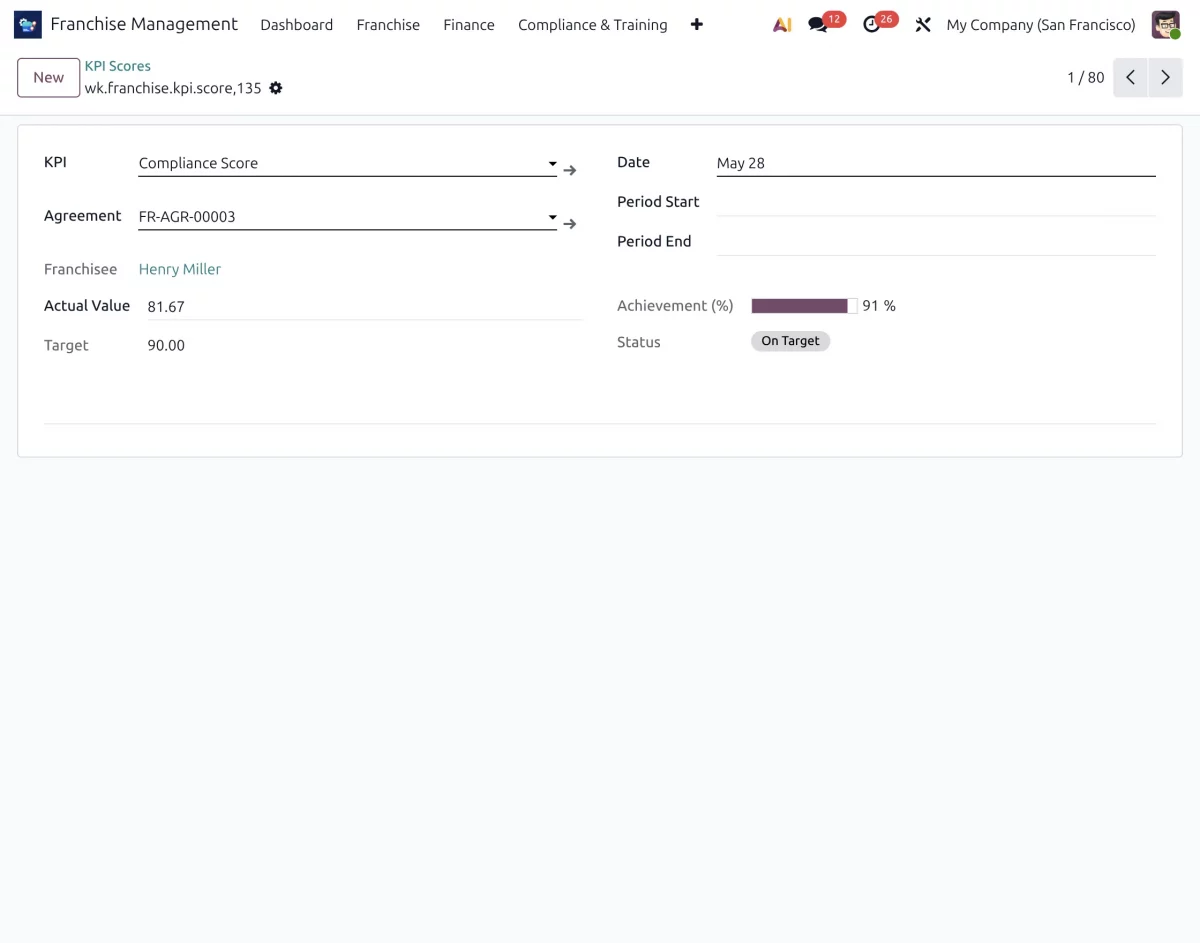
38. Open the KPI Scores section to monitor outlet performance and compliance achievements.
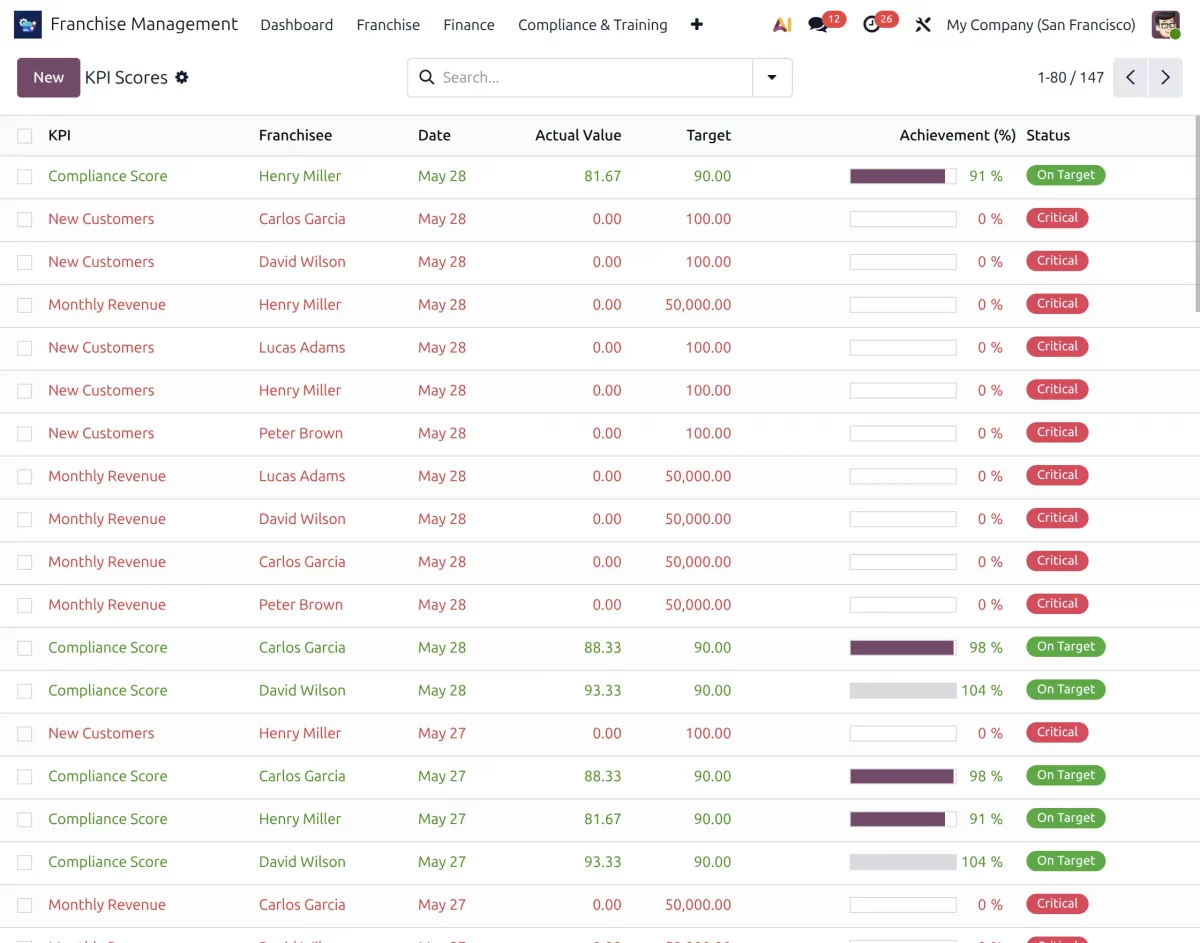
38.1. Here, you can review outlet performance based on sales, hygiene standards, product quality, customer reviews, operational compliance, and other business KPIs.
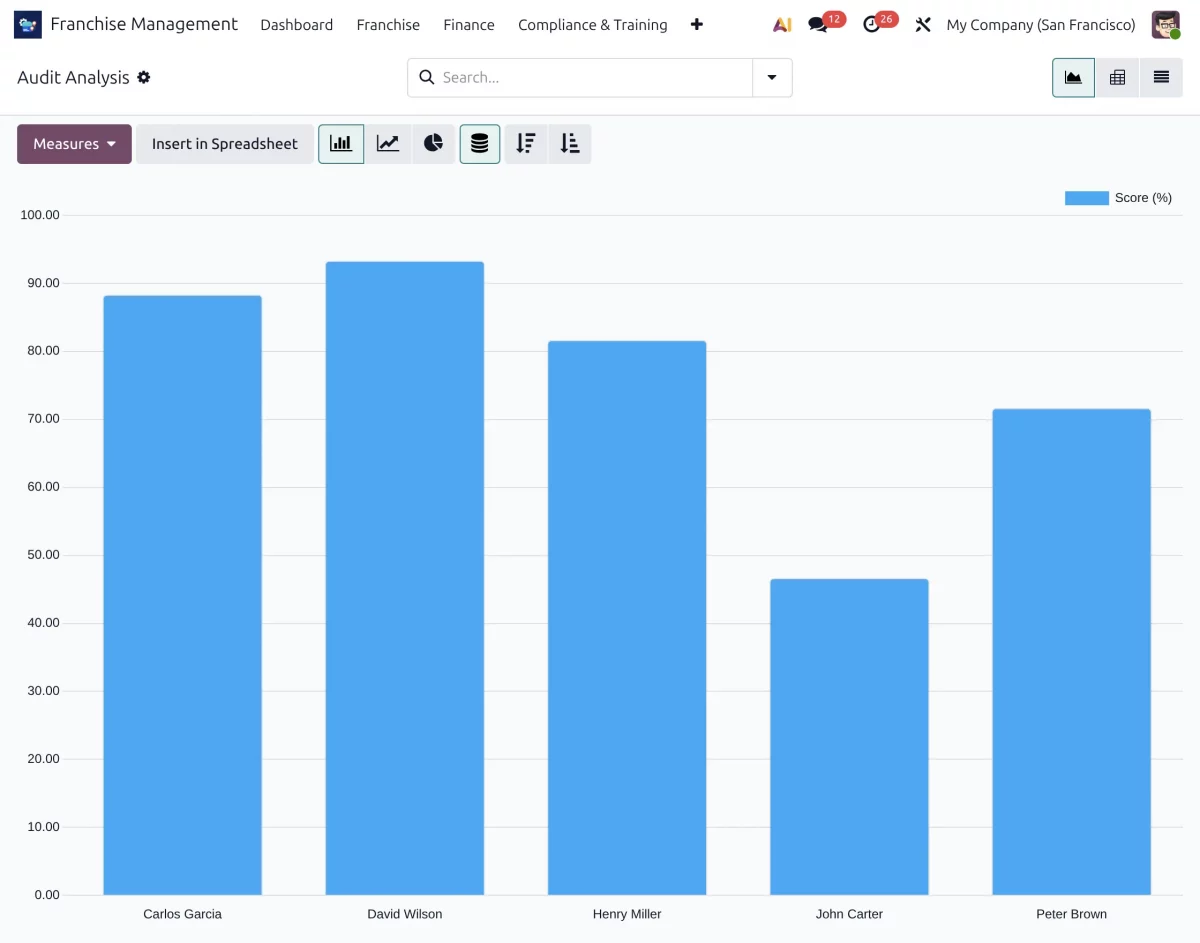
39. Finally, go to the Reporting menu to access franchise analytics and graphical reports. Moreover the system provides agreement reports, royalty reports, audit reports, KPI analysis, and outlet-wise performance insights for better decision-making.
Need Help?
Hope you find the guide helpful! Please feel free to share your feedback in the comments below.
If you still have any issues/queries, please create a ticket at the UV Desk.
I hope this helps. In case of any further queries, contact us at our support mail.
Thanks for paying attention!!
Current Product Version - 1.0.0
Supported Framework Version - Odoo V19

Be the first to comment.