INTRODUCTION
Odoo eLearning Marketplace facilitates global access to education, enabling working individuals to pursue further studies conveniently.
The Odoo eLearning Marketplace module establishes a robust online learning environment, enabling individuals to complete courses remotely.
Educators can upload courses, students can enroll and pay, and instructors can offer diverse content formats using the Odoo Institute Management module.
Odoo eLearning Marketplace offers flexibility, allowing students to review materials repeatedly from anywhere. Additionally, quizzes gauge student comprehension.
Discover the efficiency of the Odoo Multi Vendor Mobile App, your all-in-one solution for managing online marketplaces on the go.
Featuring intuitive seller and product management tools, this Odoo mobile App revolutionizes the online selling experience.
Prerequisites For Using Odoo eLearning Marketplace
The Odoo eLearning Marketplace Module works in conjunction with the following module:
To make the module work well, you’ll need to install this module first.
FEATURES
- You can start your online courses in the Odoo eLearning Marketplace.
- Invite educators to market their courses in the Odoo Marketplace.
- For an Admin, you can accept apt courses. You may even disapprove of courses that other instructors do not find suitable.
- Throughout every class, you can assign a quiz. And assign Reward points for the quiz depending on the number of attempts.
- The augmented scoring system shows students’ ranking and the latest achievement addiction.
- Students can pay online and review the courses as they wish.
- As marketplace vendors, teachers can build service-type items. They can however associate courses with that product.
- In addition, teachers can apply course fees to the serviceable package with the help of Odoo eLearning Marketplace.
INSTALLATION
- Once you purchase the App from the Webkul store, you will receive the link to download the zip file of the module.
- Extract the file on your system after the download finishes. As a result, you will be able to see a folder named- ‘marketplace_elearning’
- Copy and paste this folder inside your Odoo Add-Ons path.
- Now, open the Odoo App and click on the Settings menu. Here, click on Activate the Developer Mode.
- Then, open the Apps menu and click on ‘Update Modules List.’
- In the search bar, remove all the filters and search ‘marketplace_elearning’
- You will be able to see the module in the search results. Click on ‘Install’ to install it.
WORKFLOW
Admin end in eLearning Marketplace in Odoo:
Creating Courses:
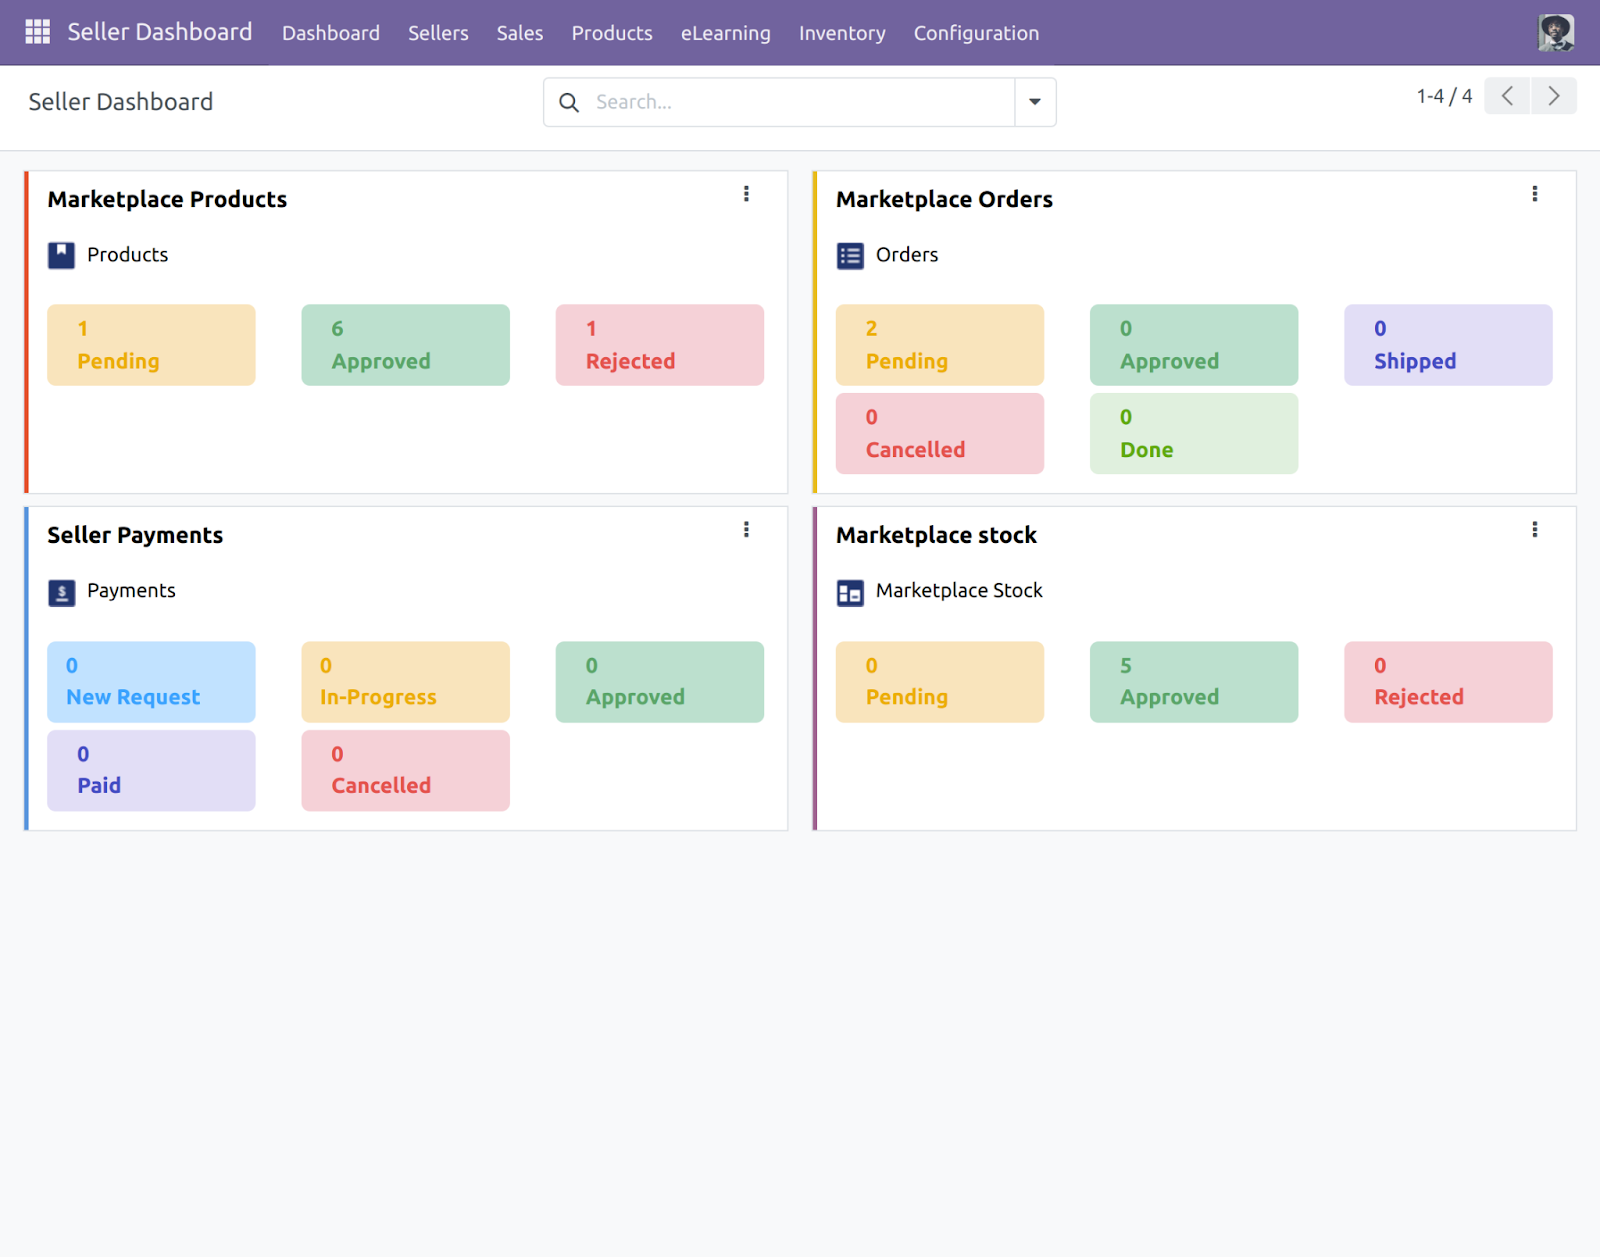
1) First login into the Odoo database to go to the ‘Seller Dashboard’ module. Under the home menu you can see the option of Seller Dashboard click on that.
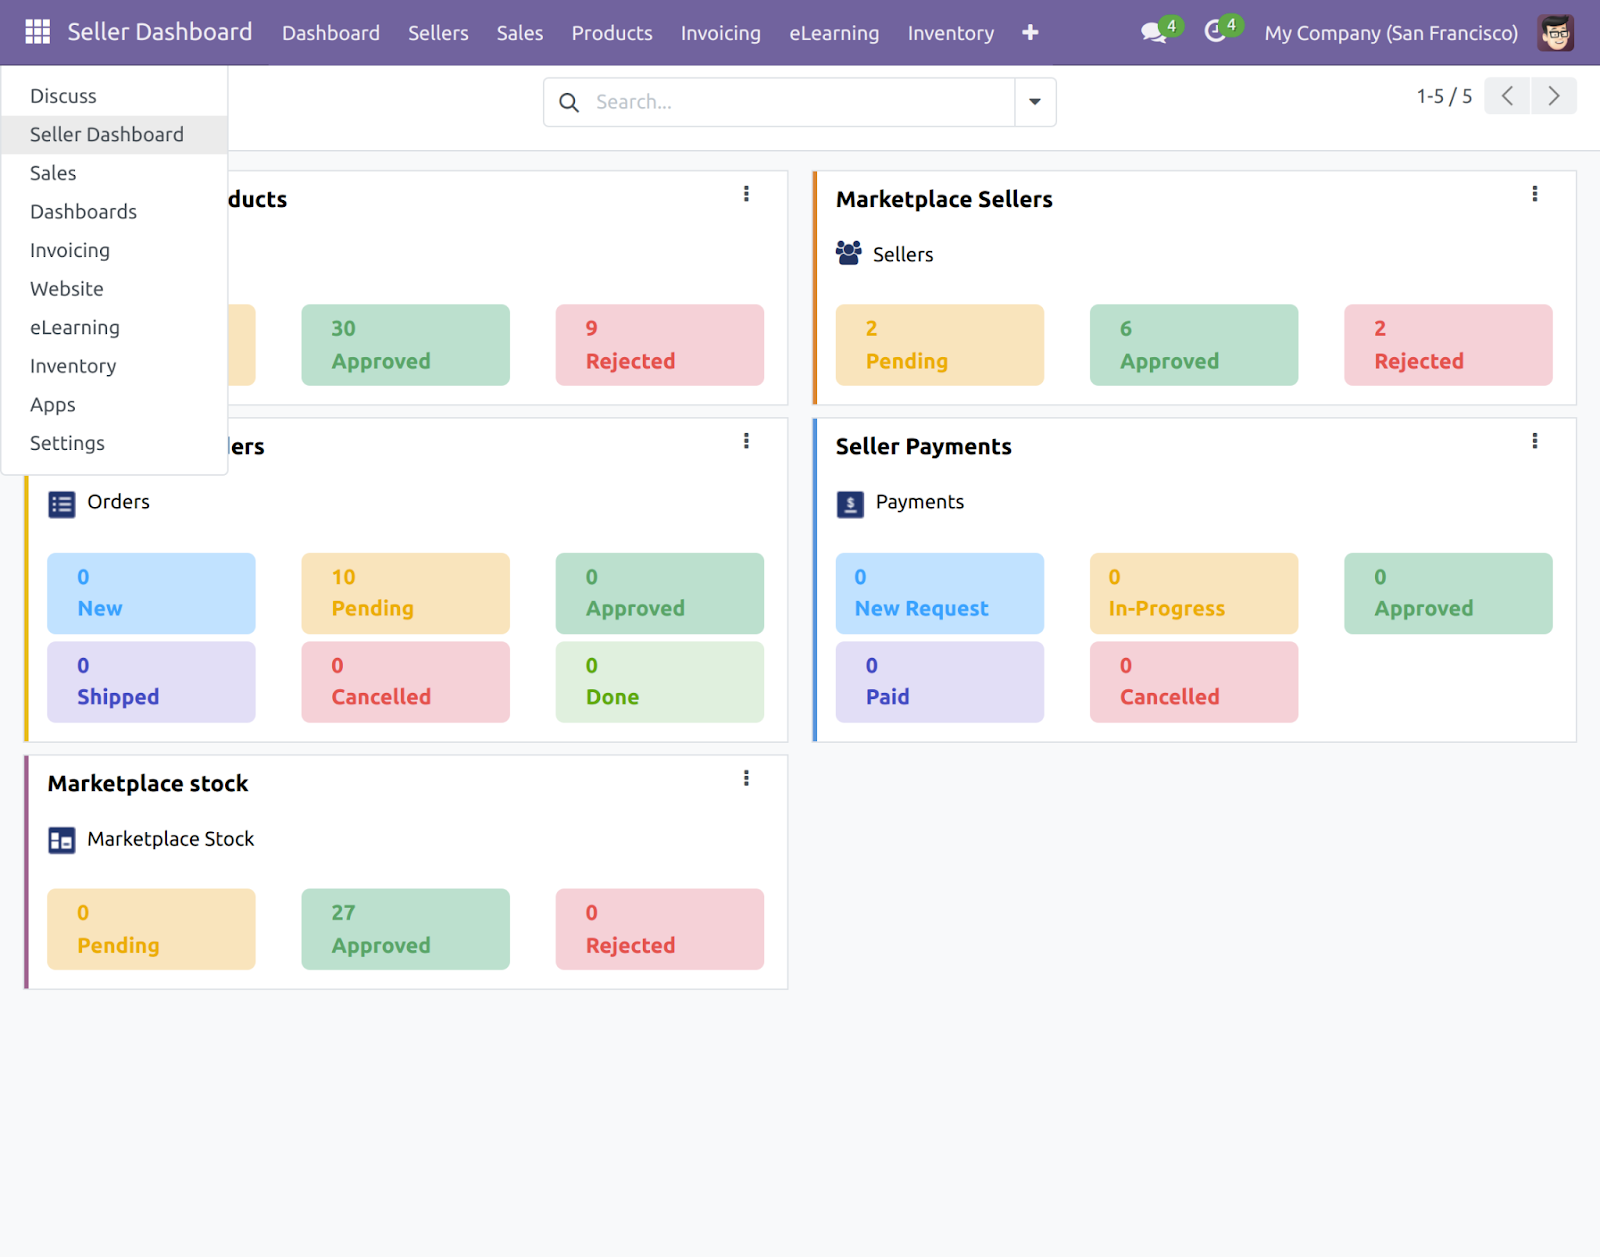
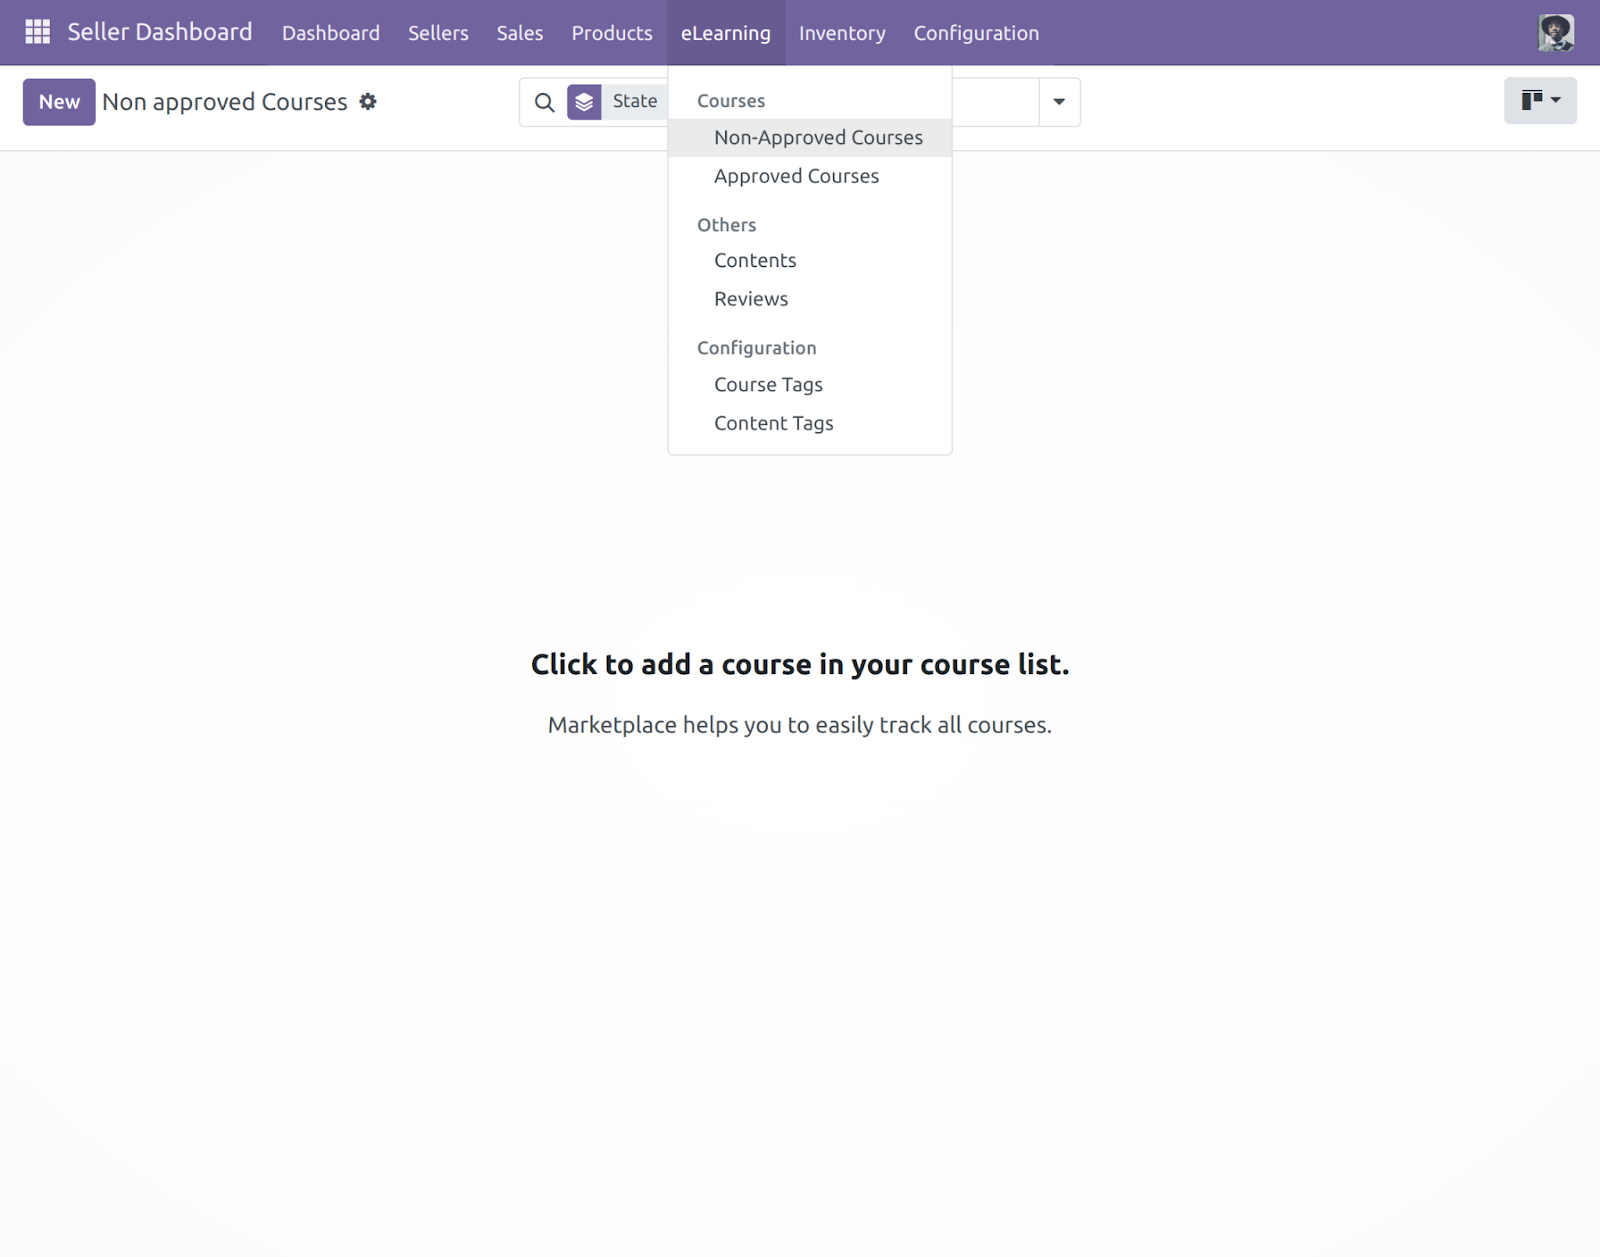
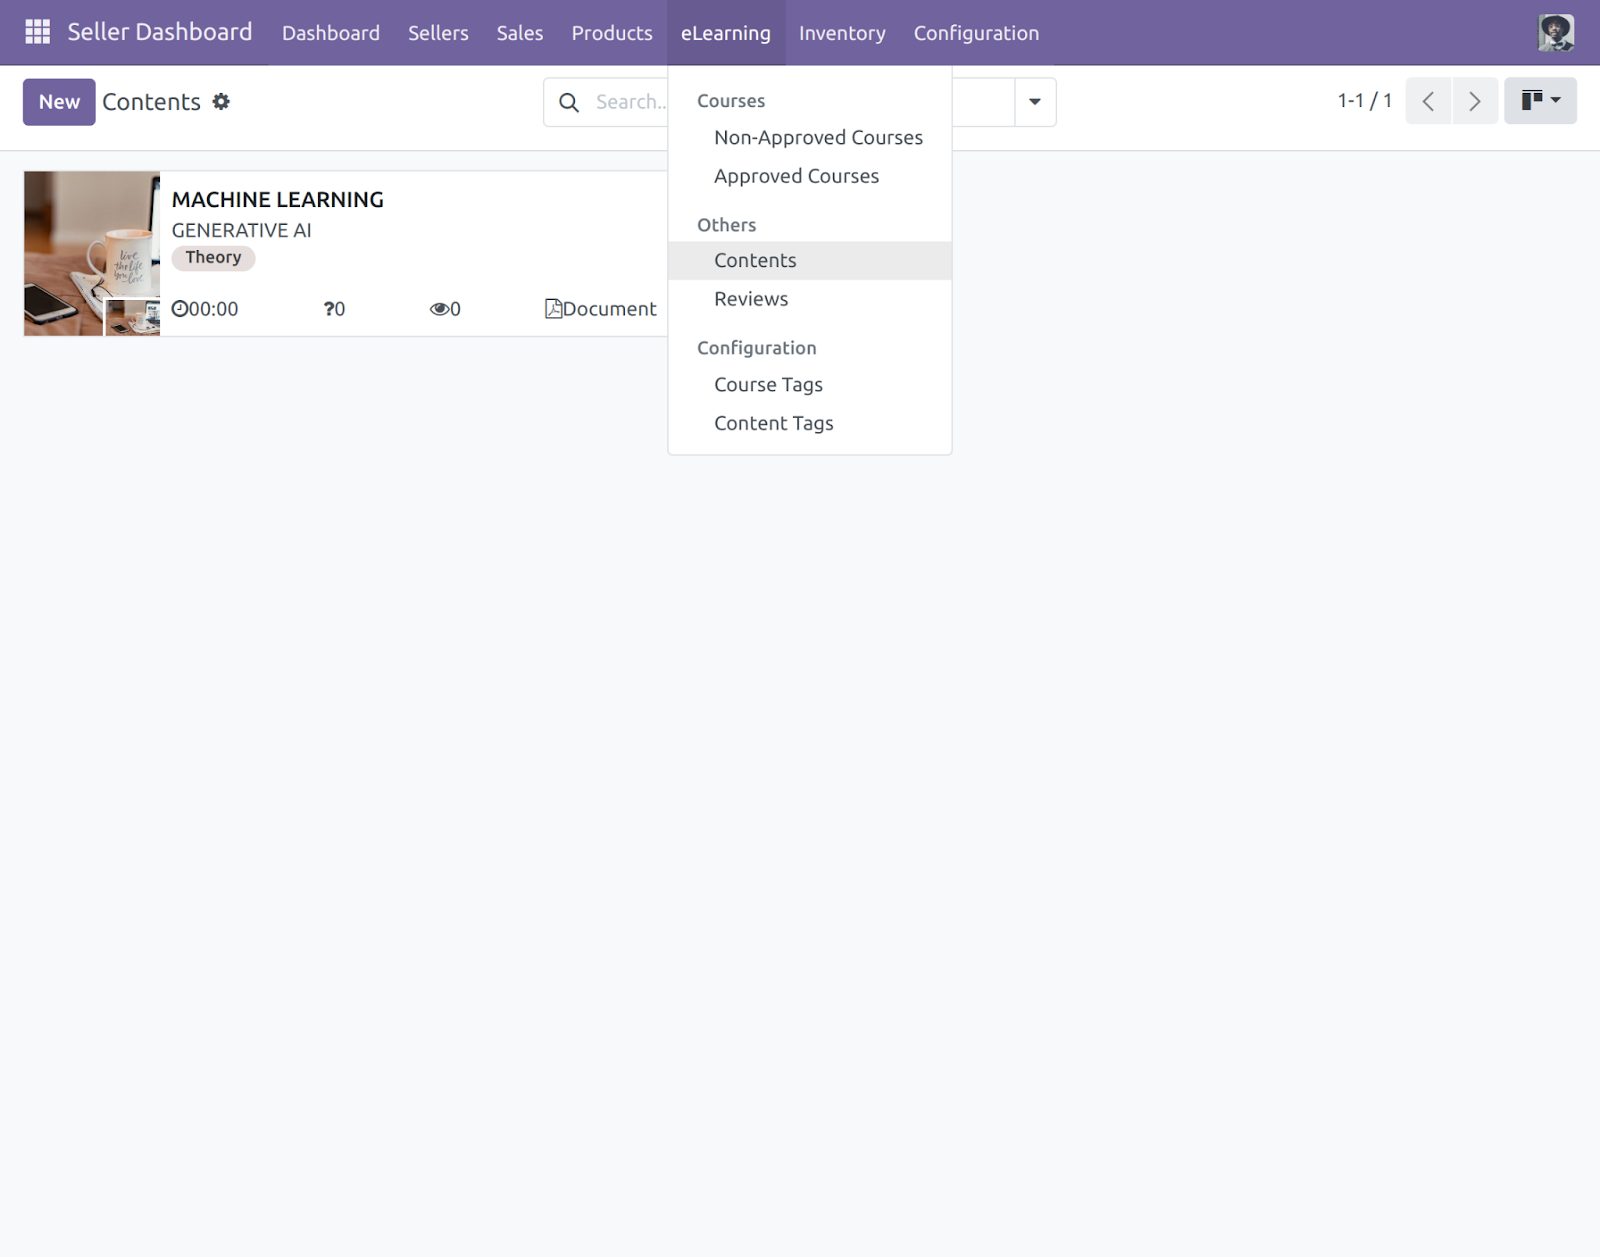
2) In the ‘Seller Dashboard’ module go to the ‘eLearning’ tab.
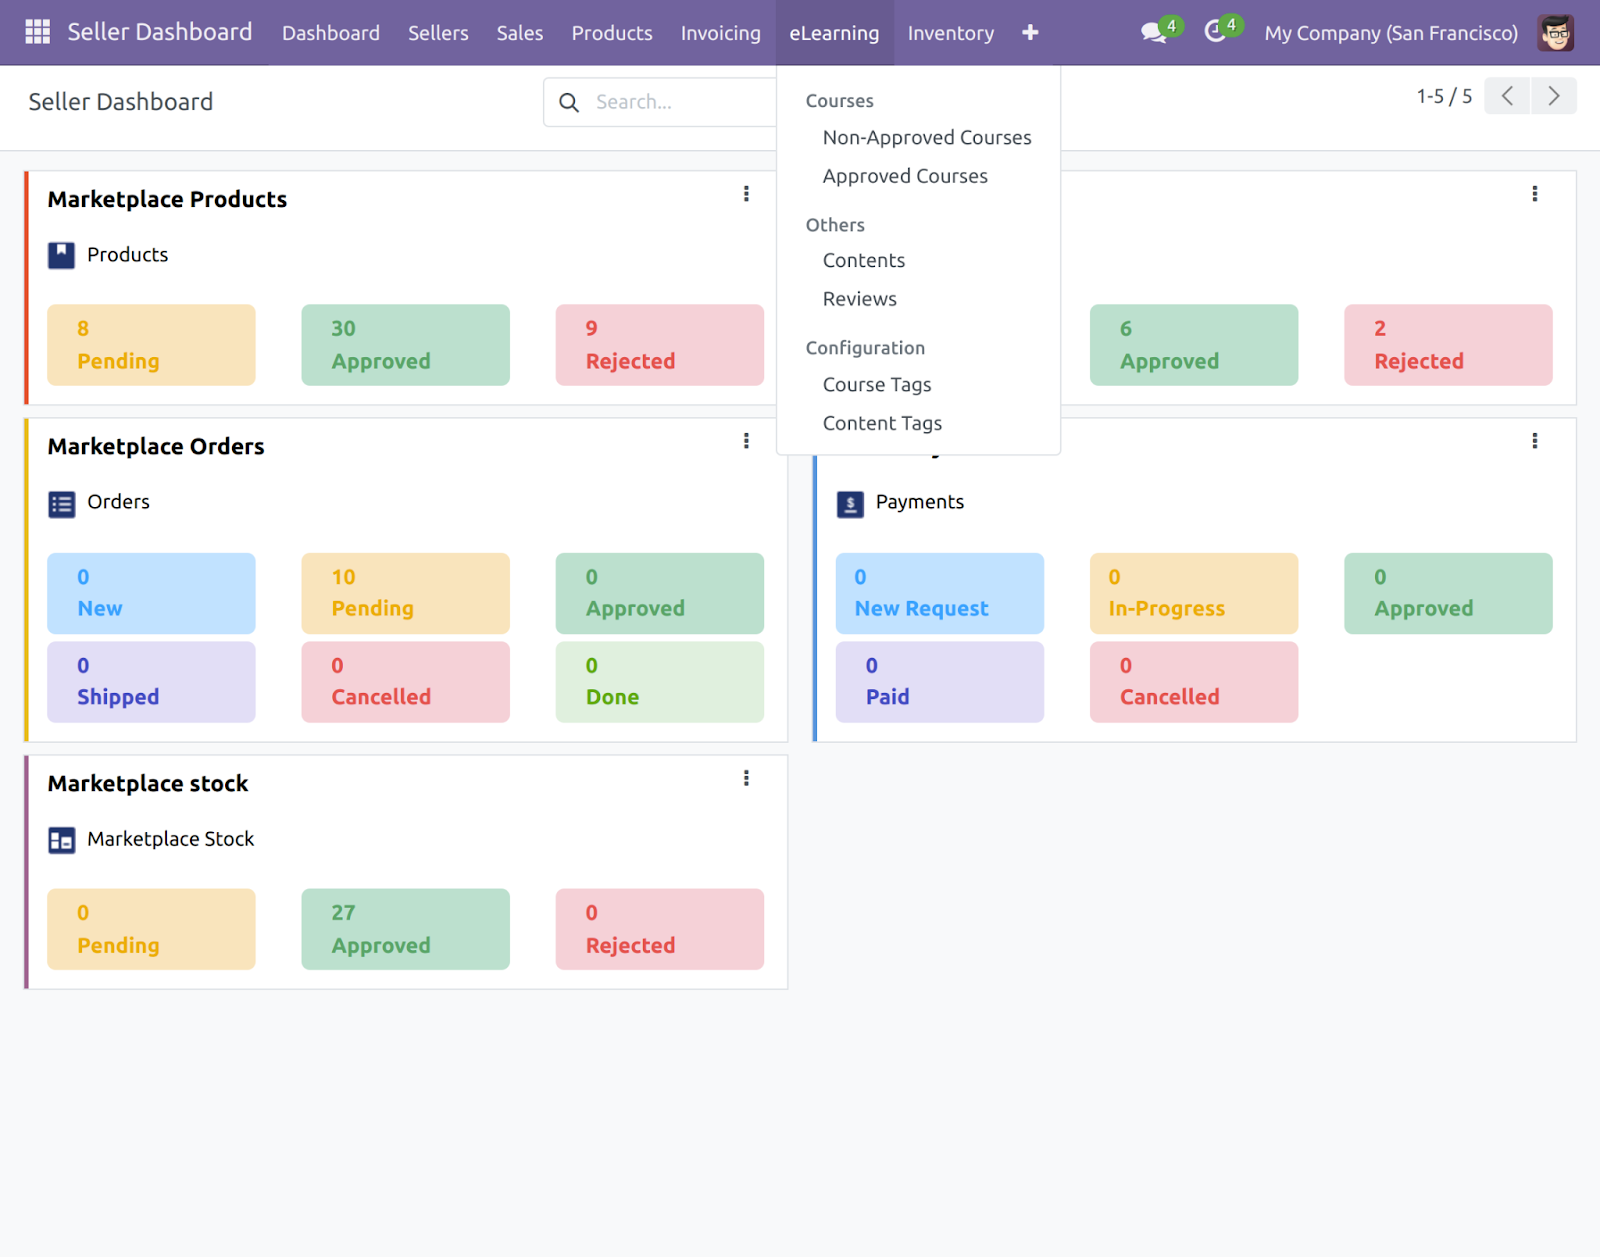
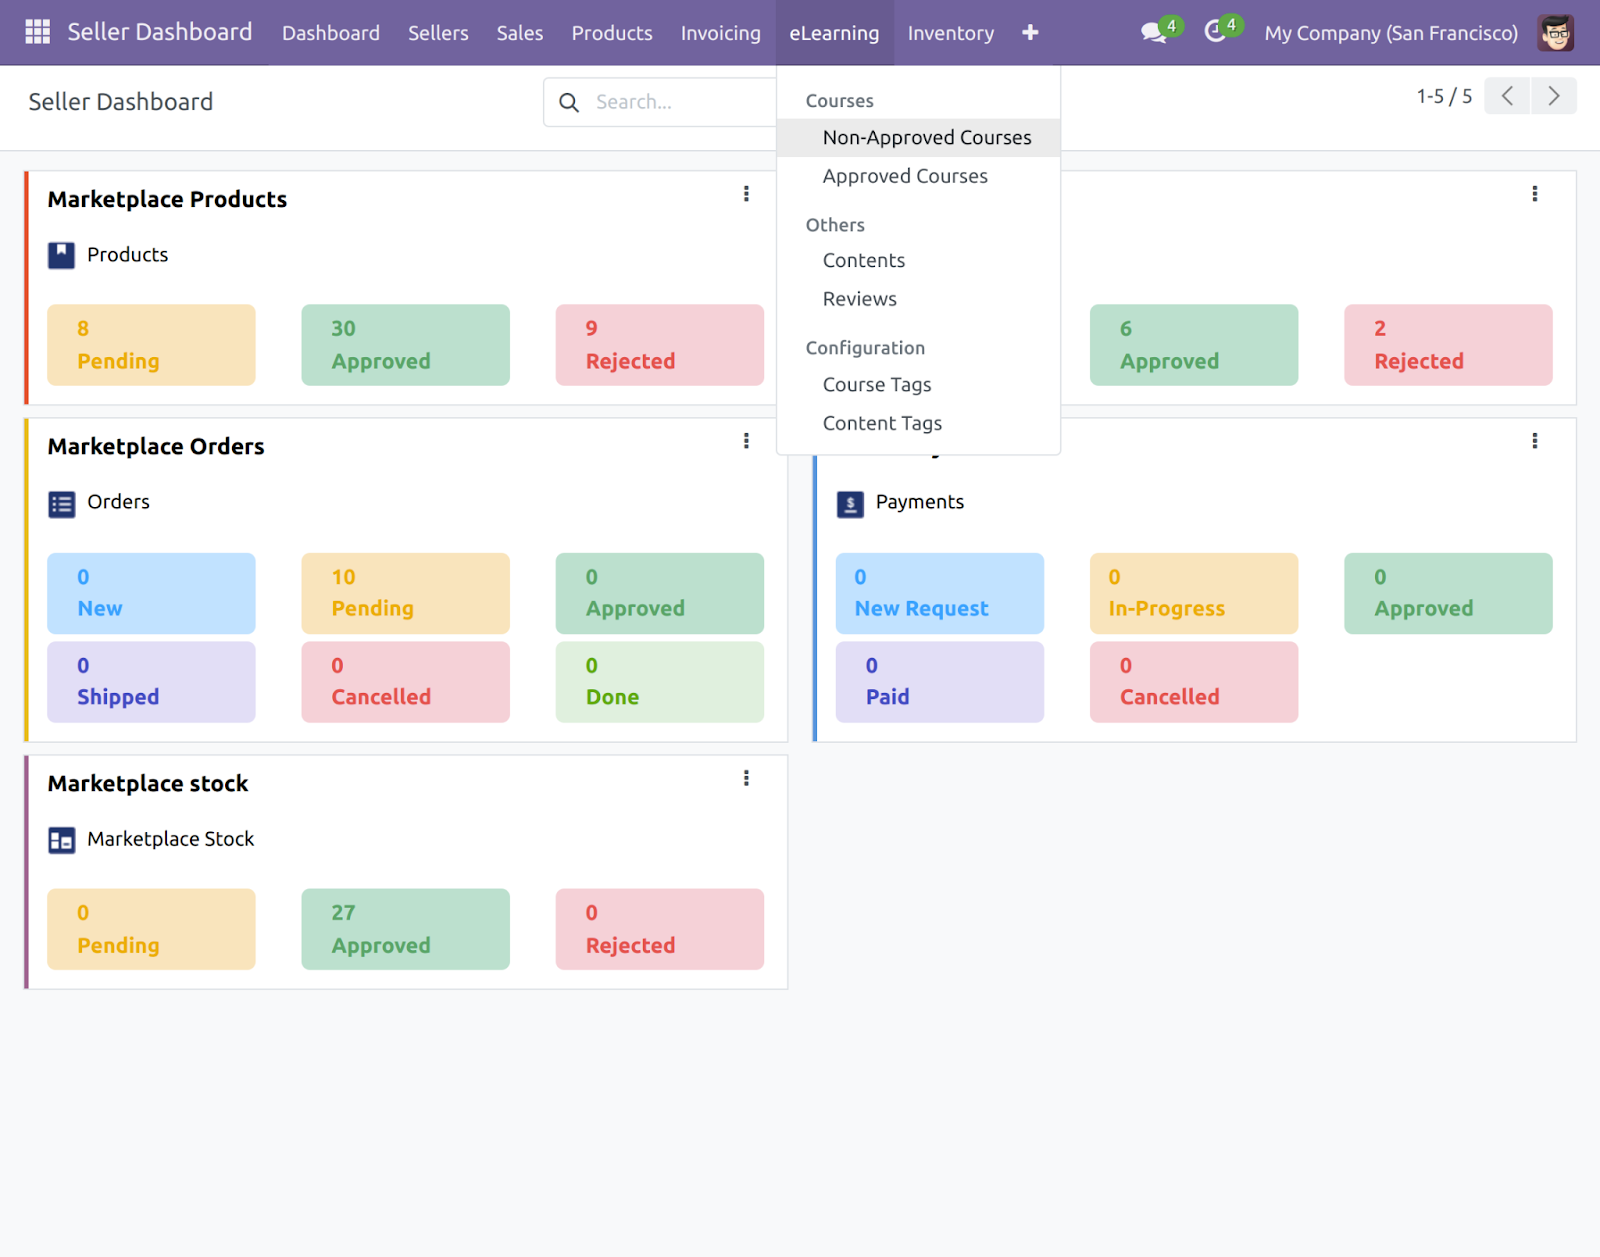
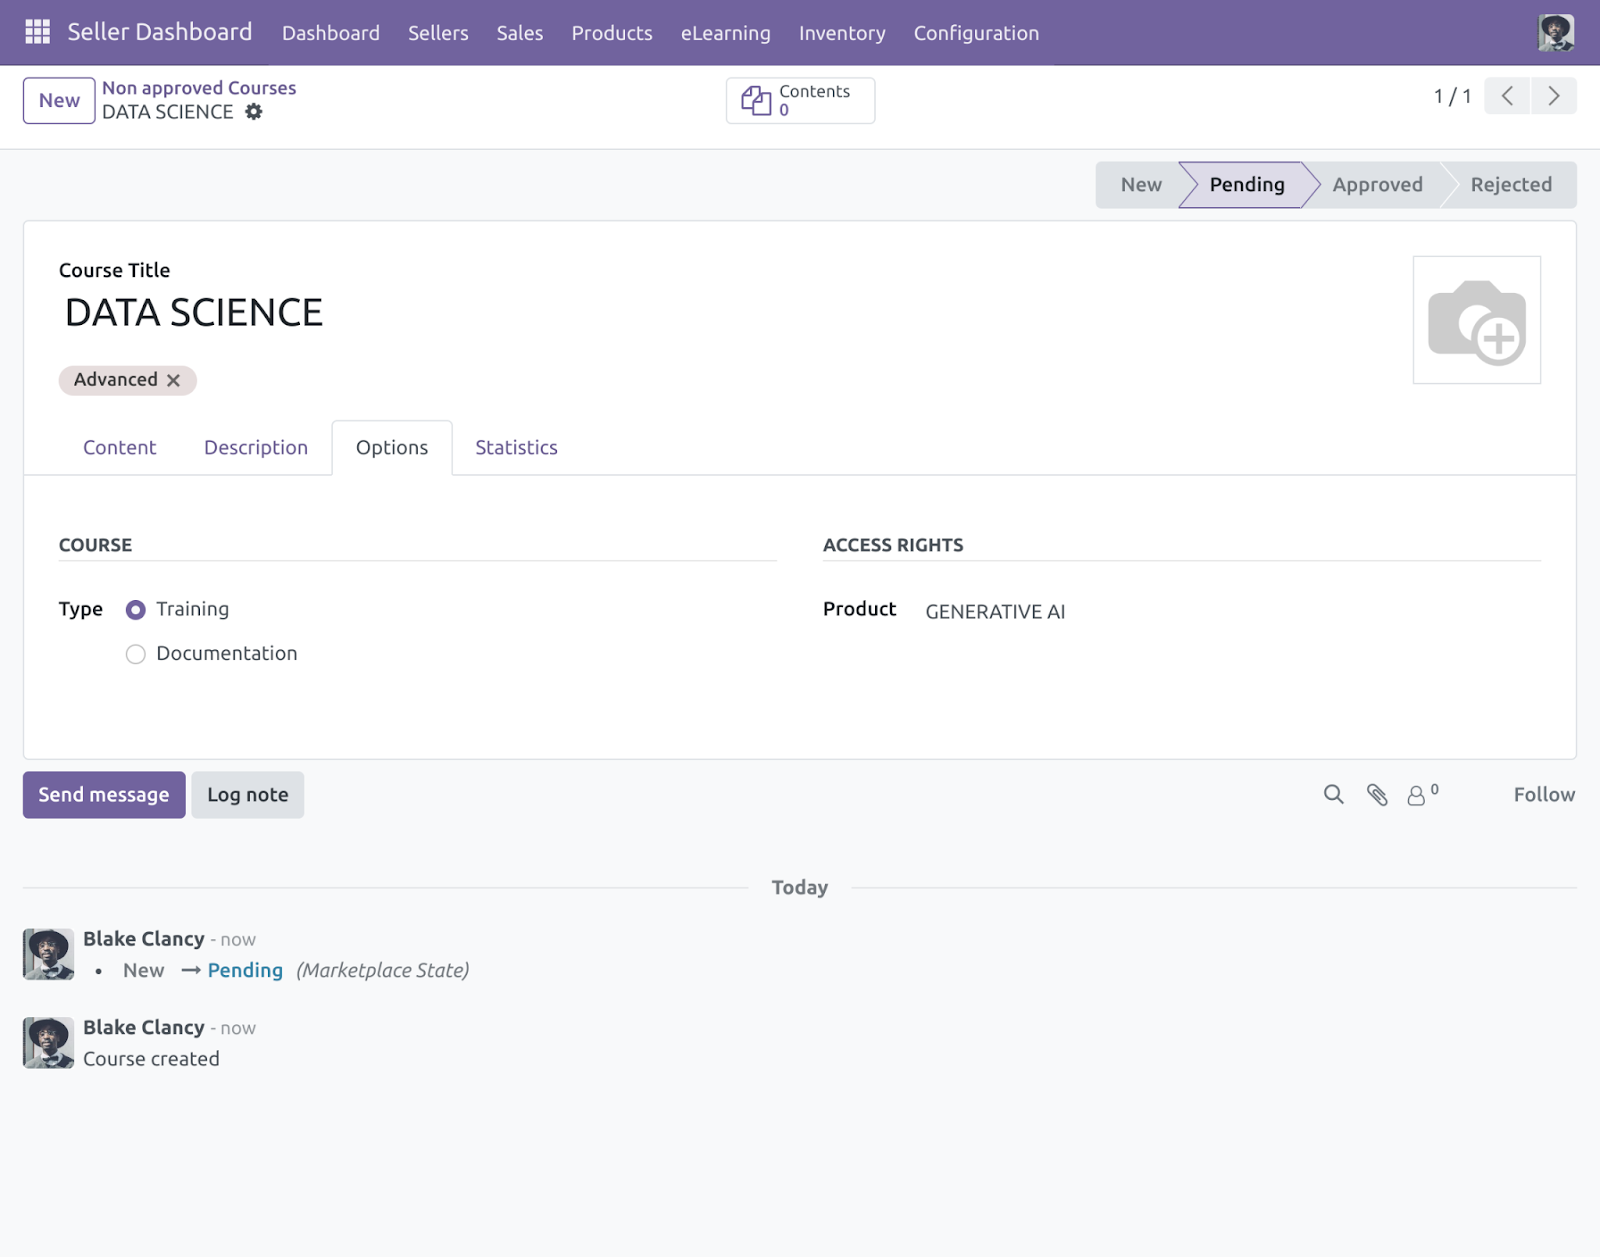
3) Under the ‘eLearning’ tab click on the Non-Approved Courses.
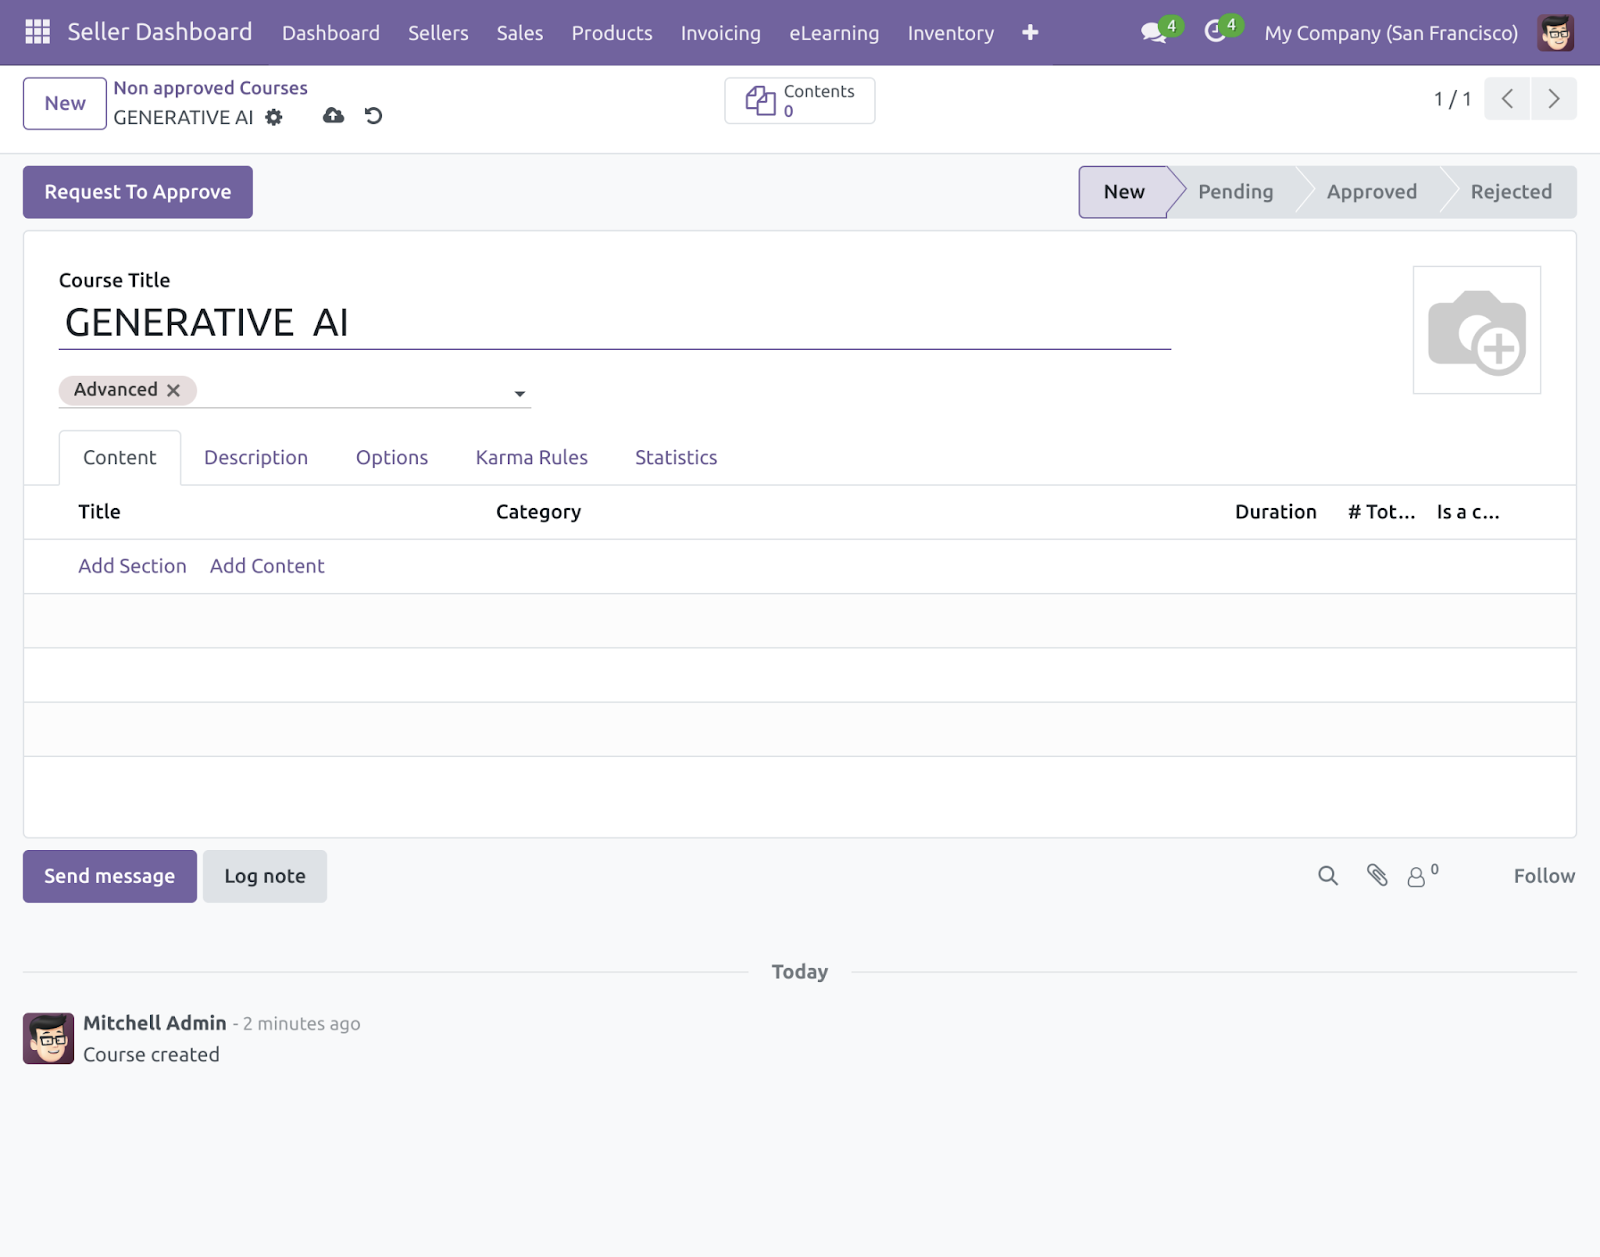
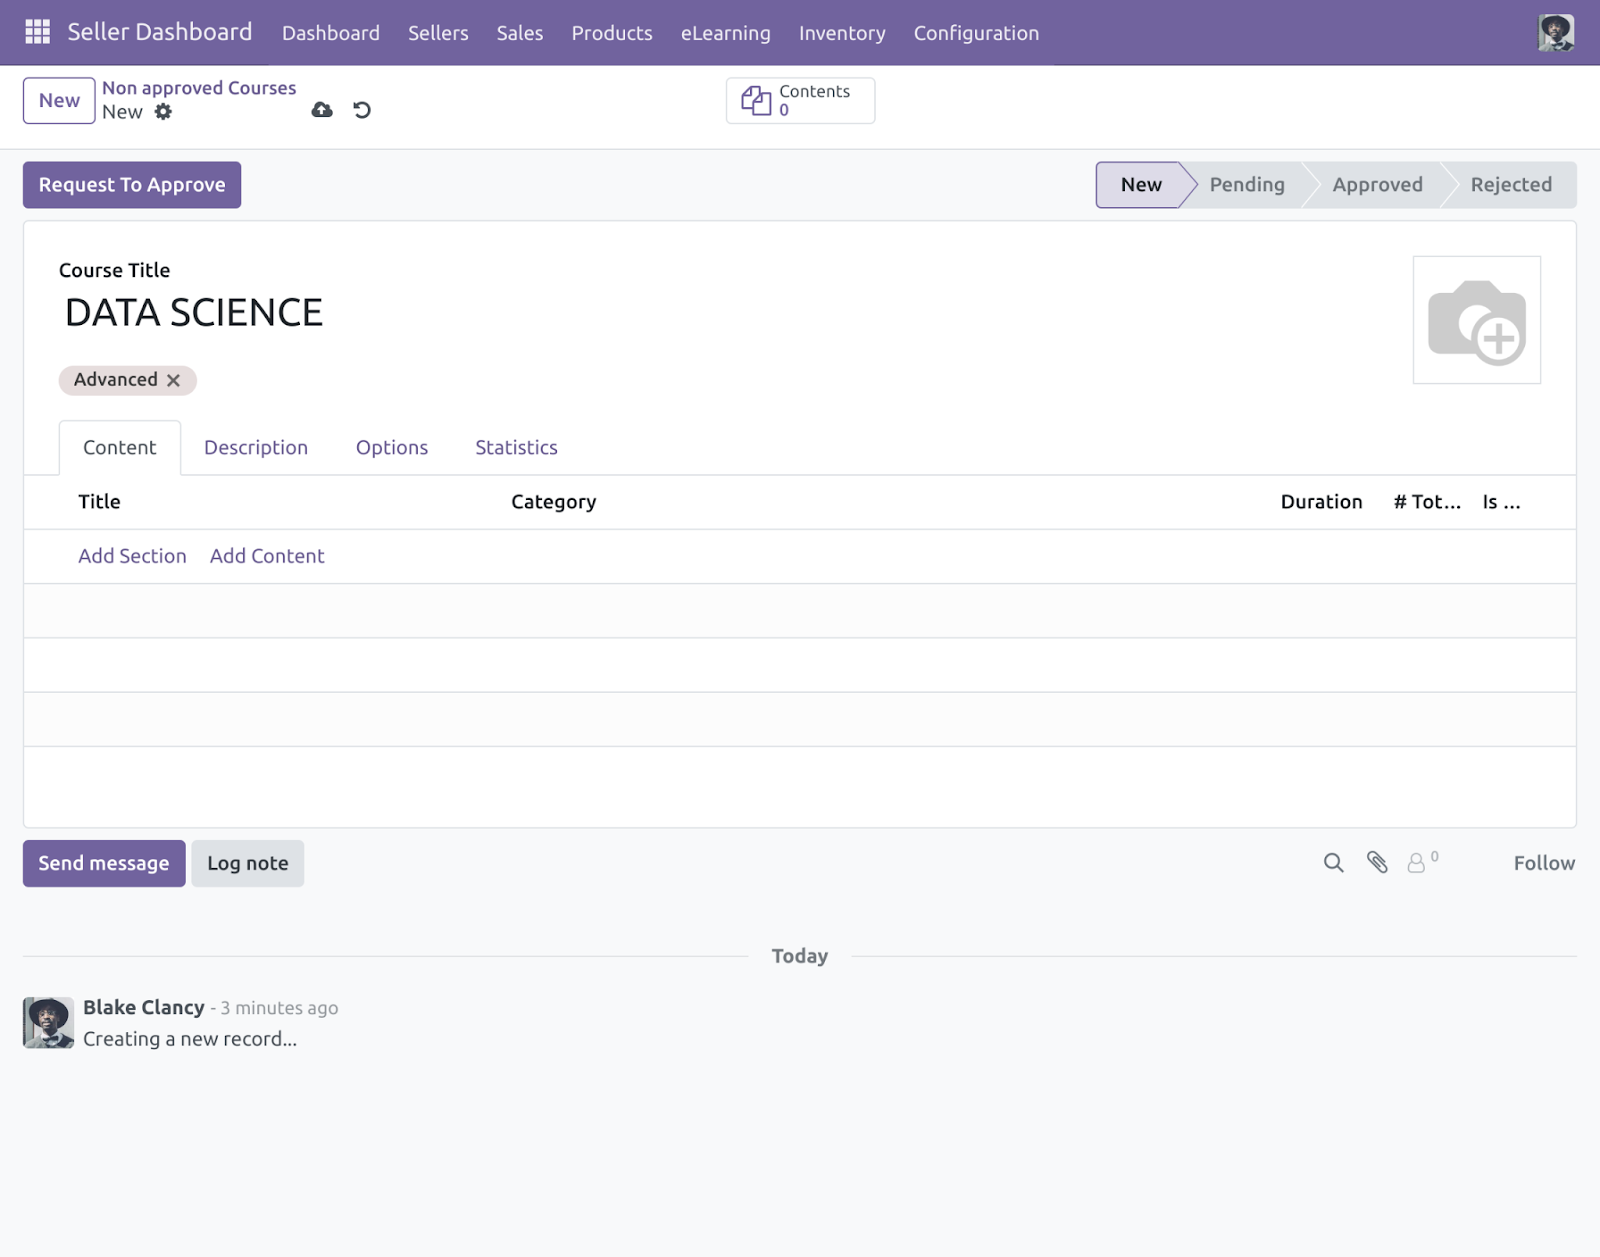
Click on the ‘Create’ button for creating a New Course.
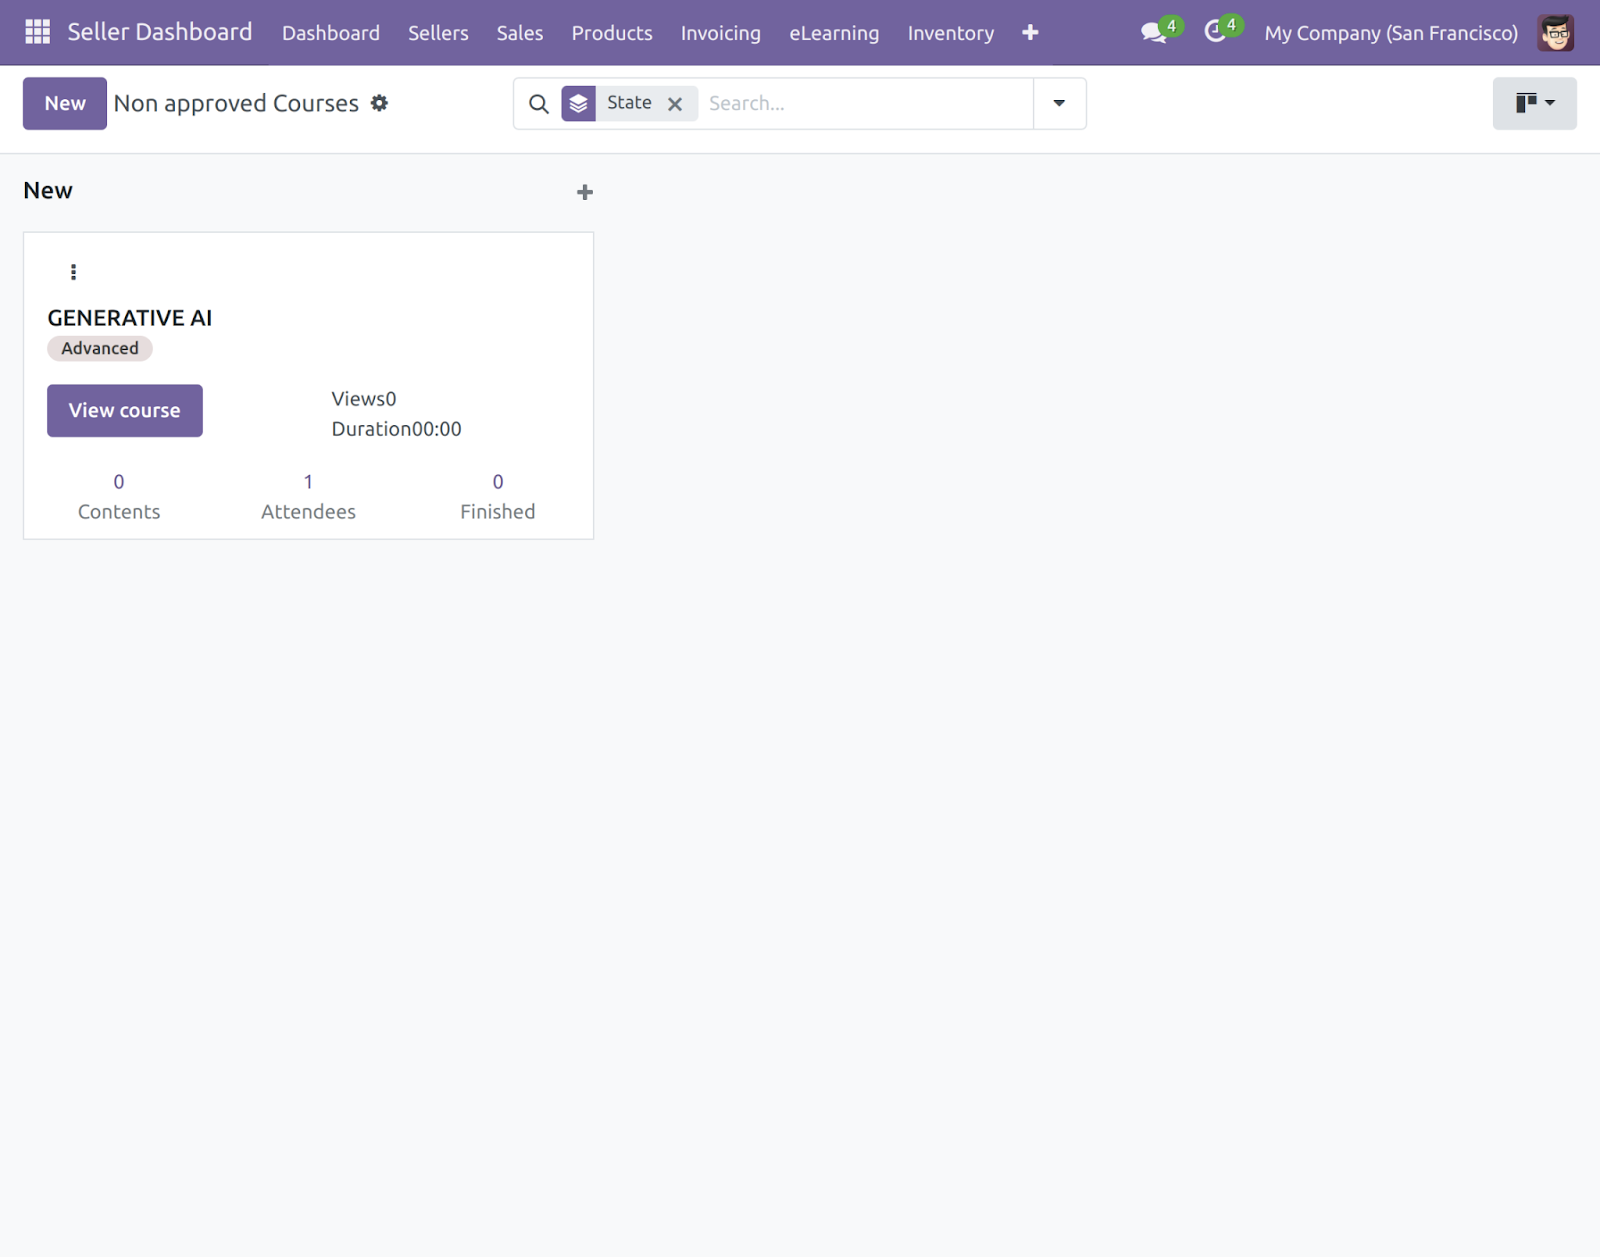
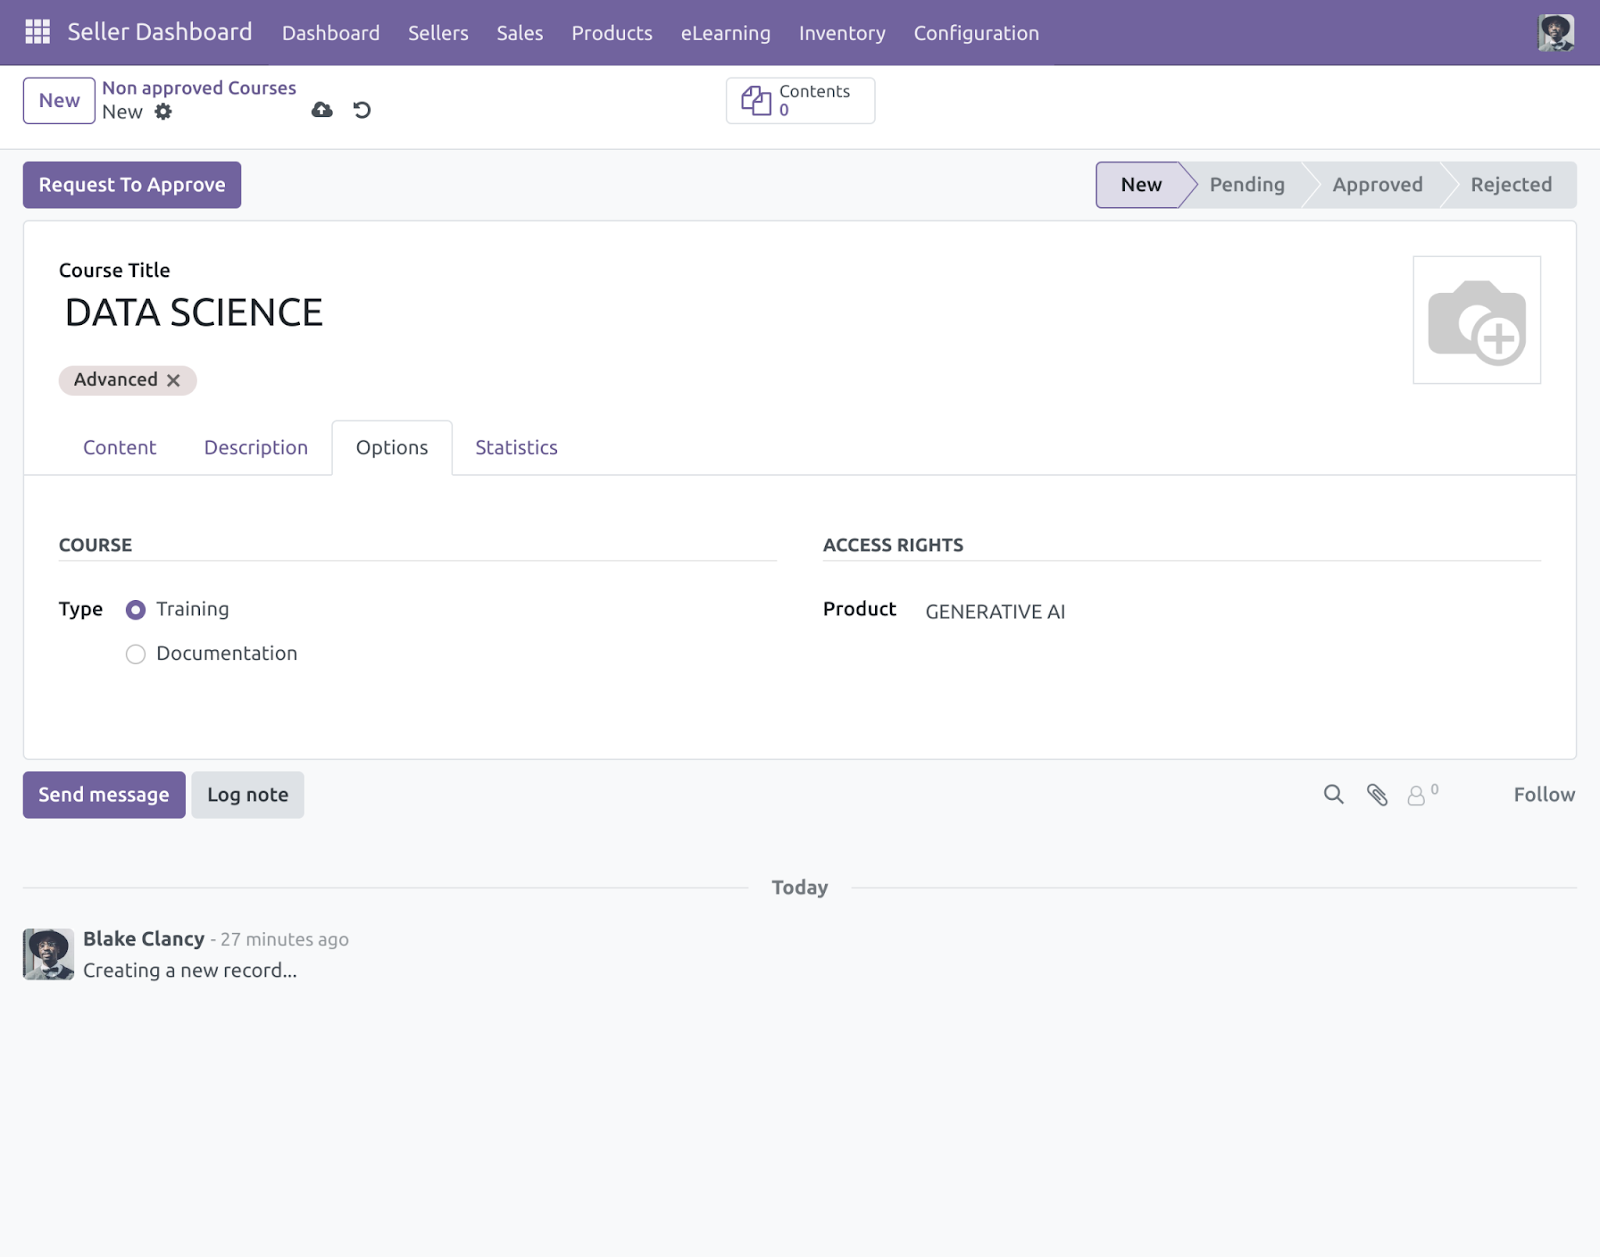
4) Add the fields ‘Course Title’, ‘Tags’, ‘Marketplace Seller’, ‘Product’, and other details. Click on the ’Save’ button to save the Course.
Afterward, you save the course the stage, of course, will be the ‘New’ stage.
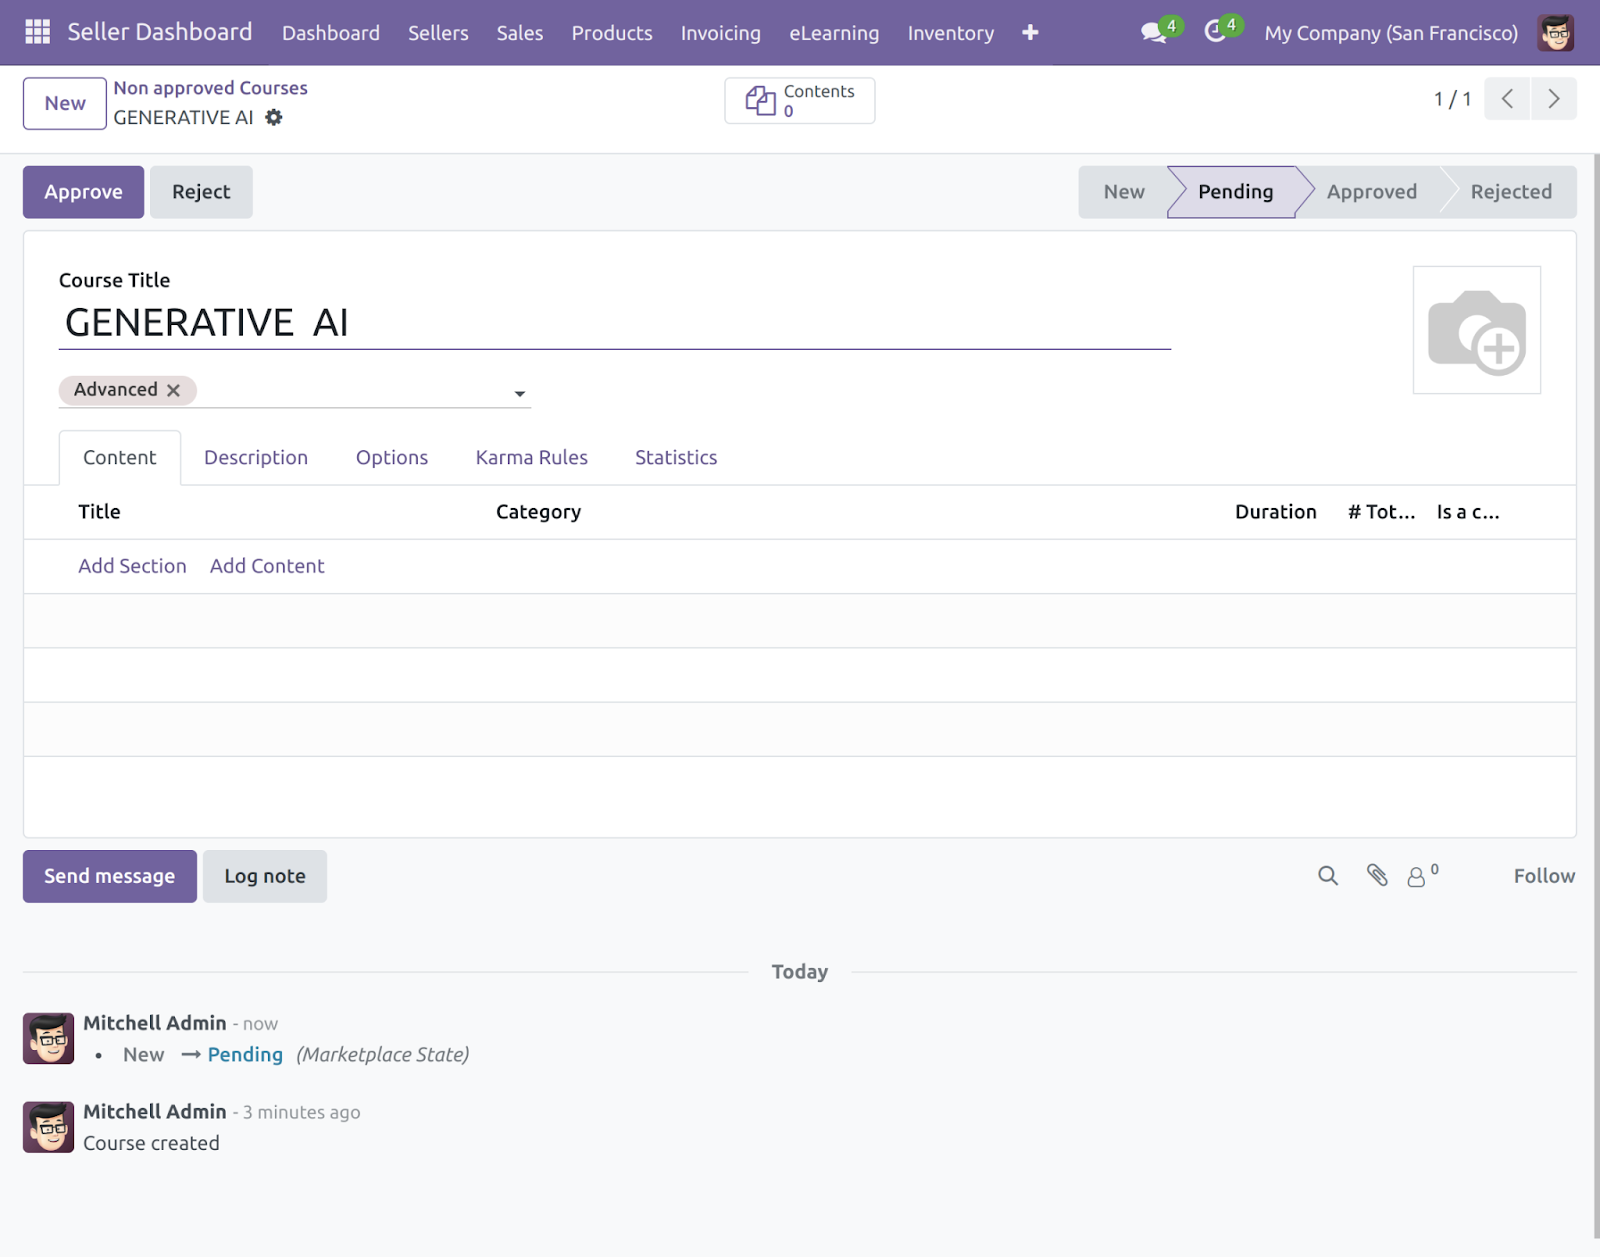
5) As soon as you save the non-approved course. You can request for the approval of the course. Click on the ‘Request to Approve’ button to request the approval of a newly created course.
6) The stage will be moved from ‘New’ to ‘Request’ as soon as you request approval. Once you request for approval of a newly created course through the Admin end.
The admin can ‘Approve’ or ‘Reject’ the request of course.
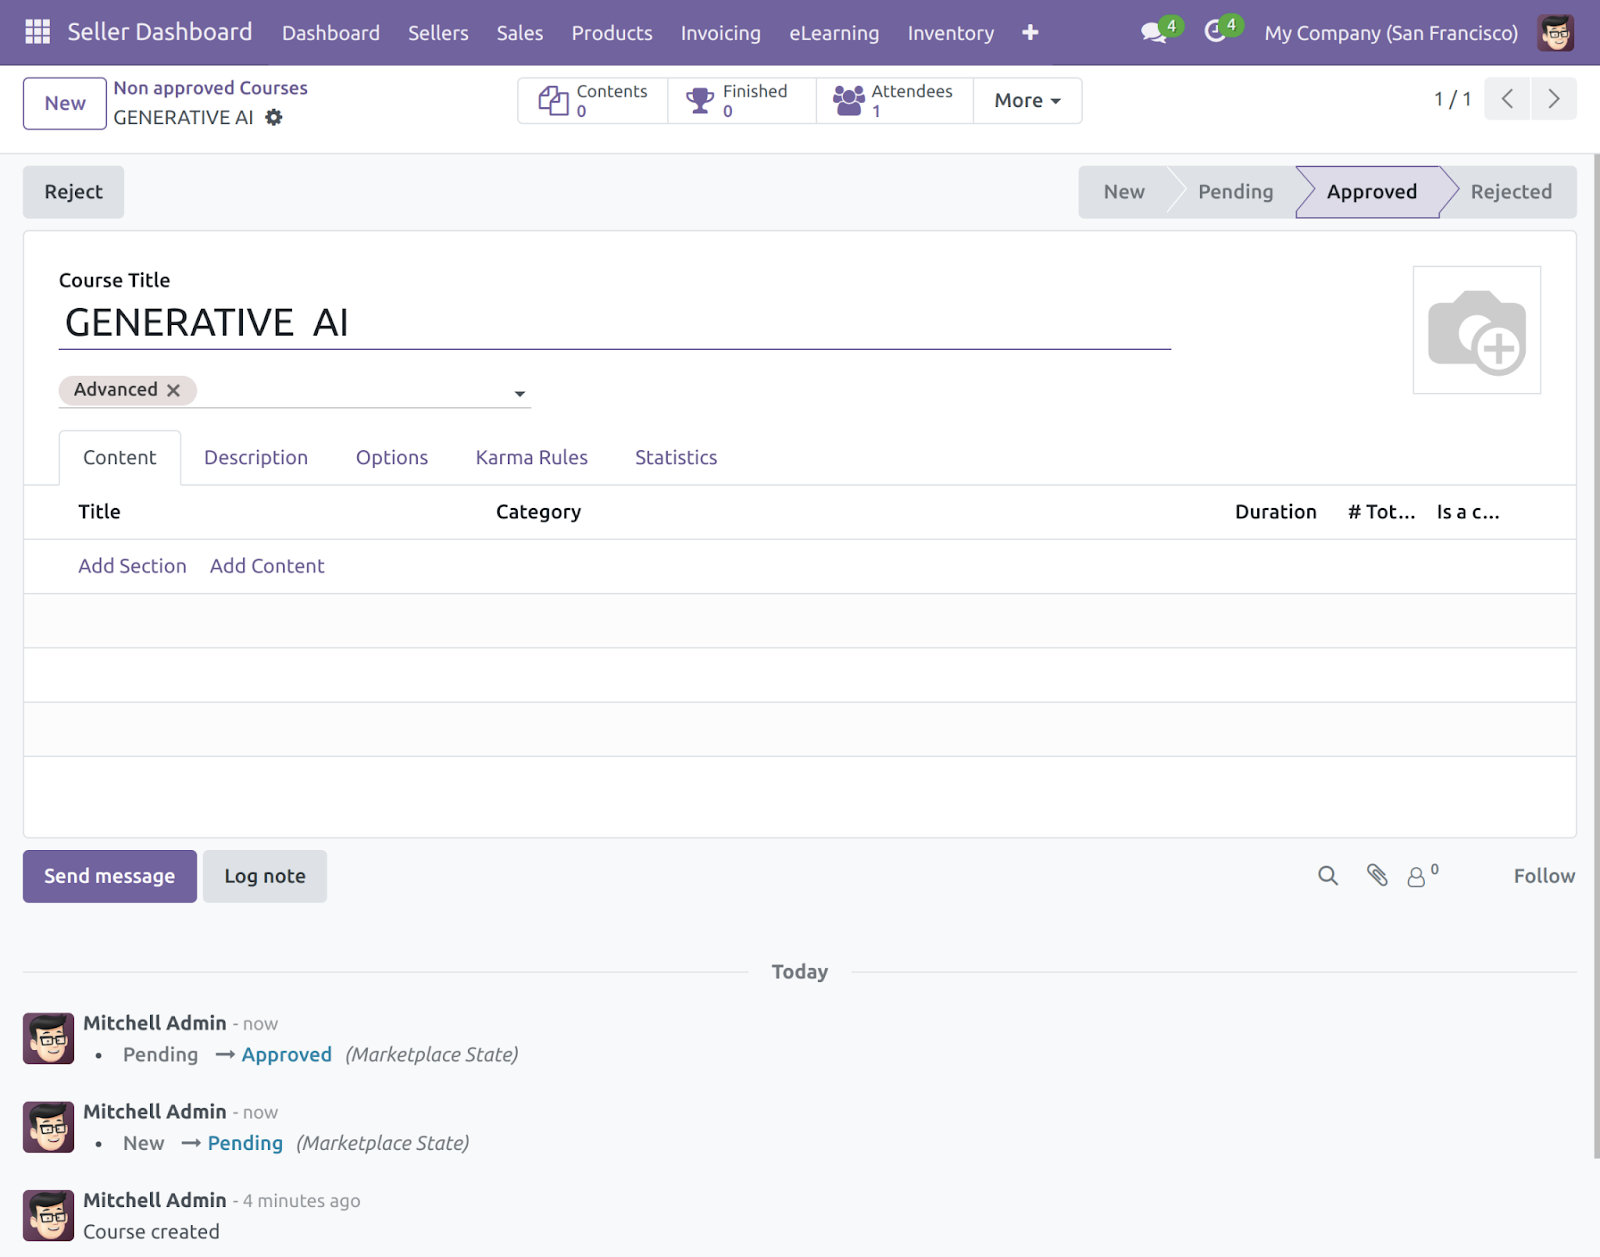
7) Once you ‘Approve’ the request for approval of a new course the stage will be moved from ‘Pending’ to ‘Approved’. You can also ‘Reject’ an approved course.
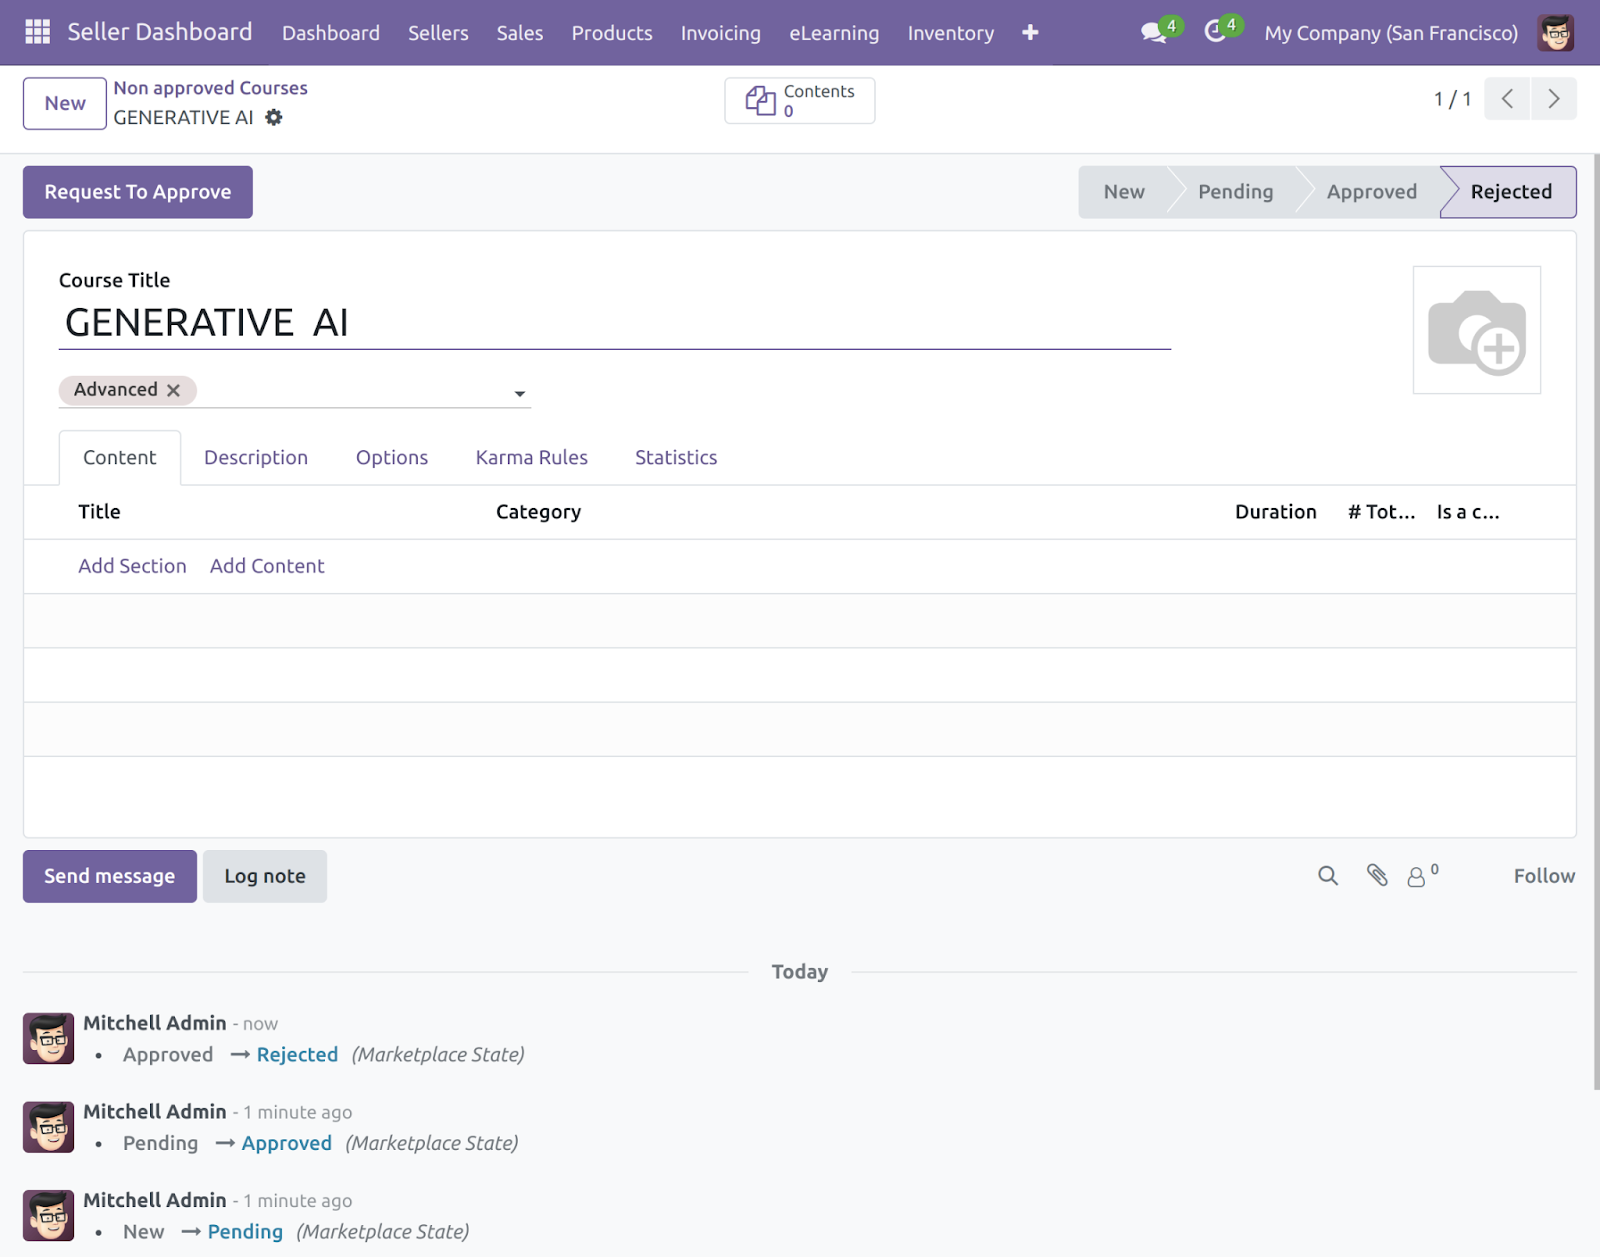
Click on the ‘Reject’ button to reject the course.
8) Once you click on the ‘Reject’ button the stage will be moved to ‘Rejected’. Hence you can ‘Request to Approve’ the course again.
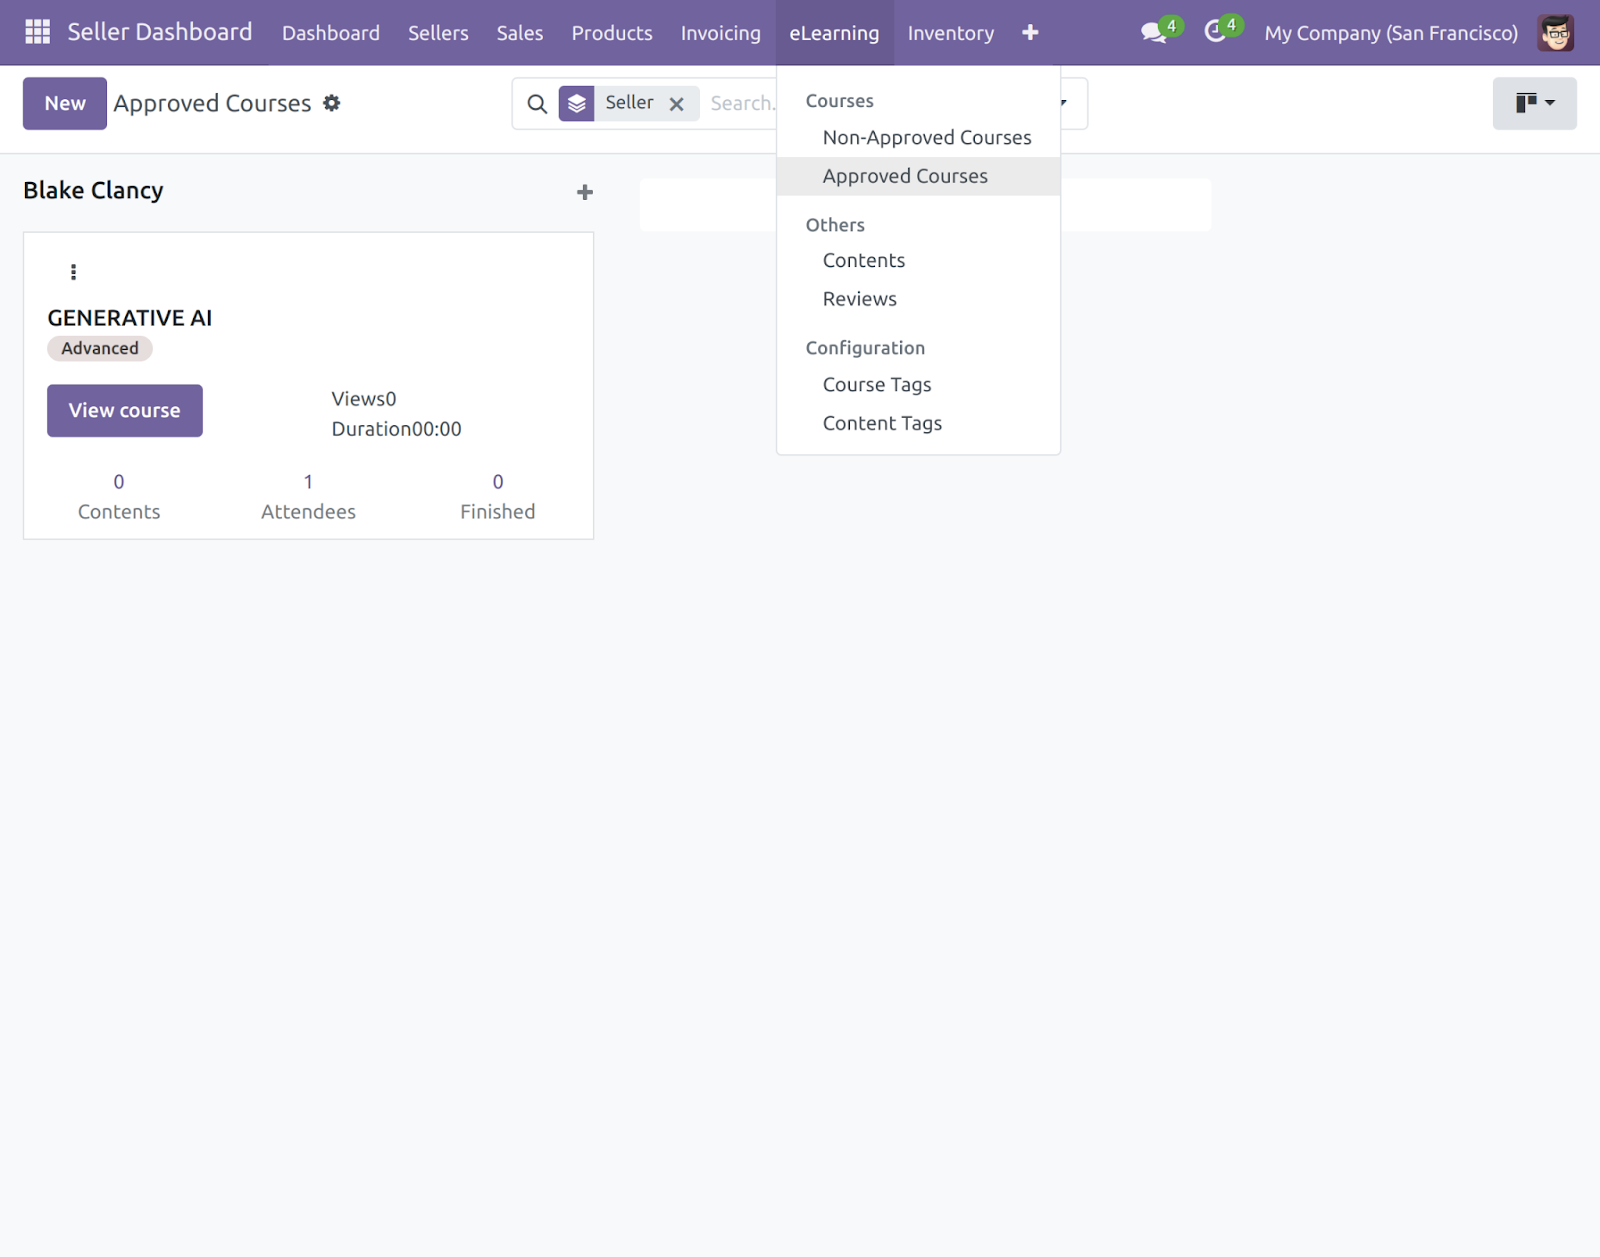
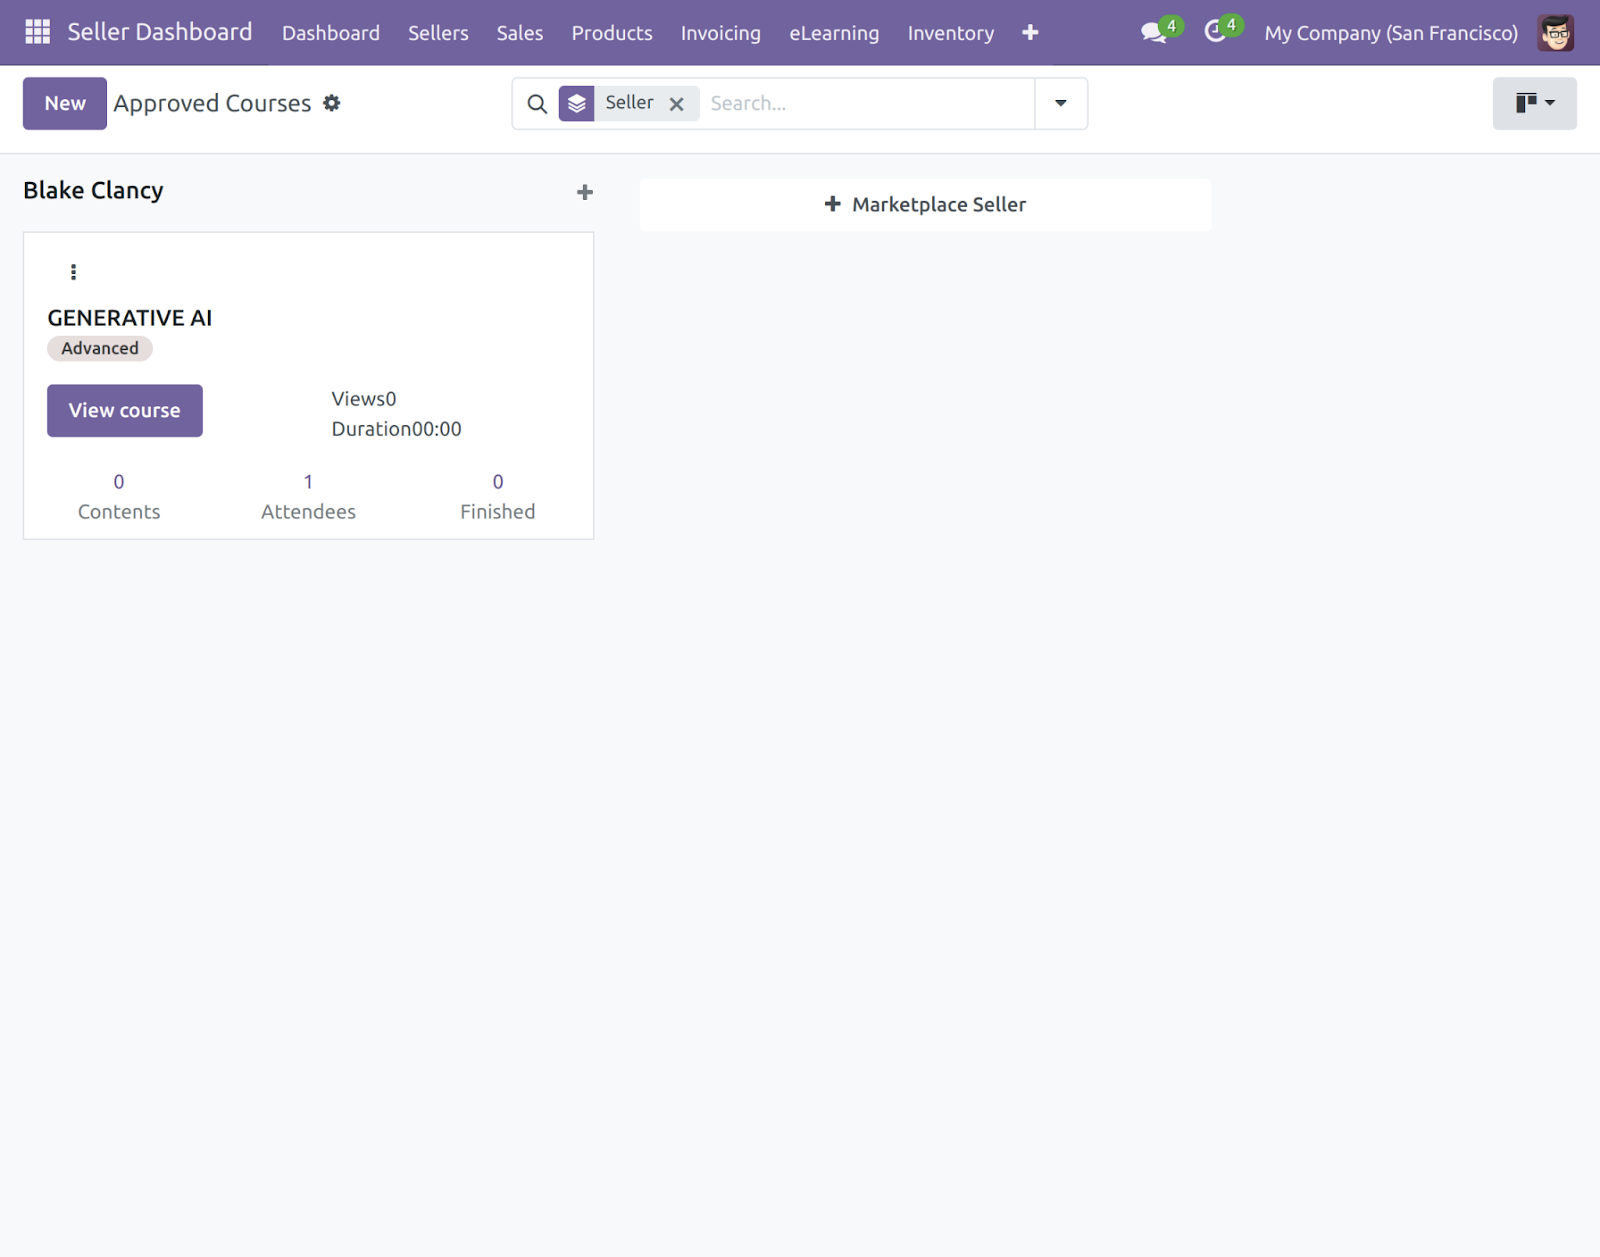
9) Go to Seller Dashboard>> eLearning>> Approved Courses. In approved courses, all the courses that are approved by Admin for all the sellers will be visible.
10) Click on the ‘NEW’ button to create a course.
11) Add the fields ‘Course Title’, ‘Tags’, ‘Marketplace Seller’, ‘Product’, and other details.Afterward, click on the ’Save’ button to save the Course.

Create Content:
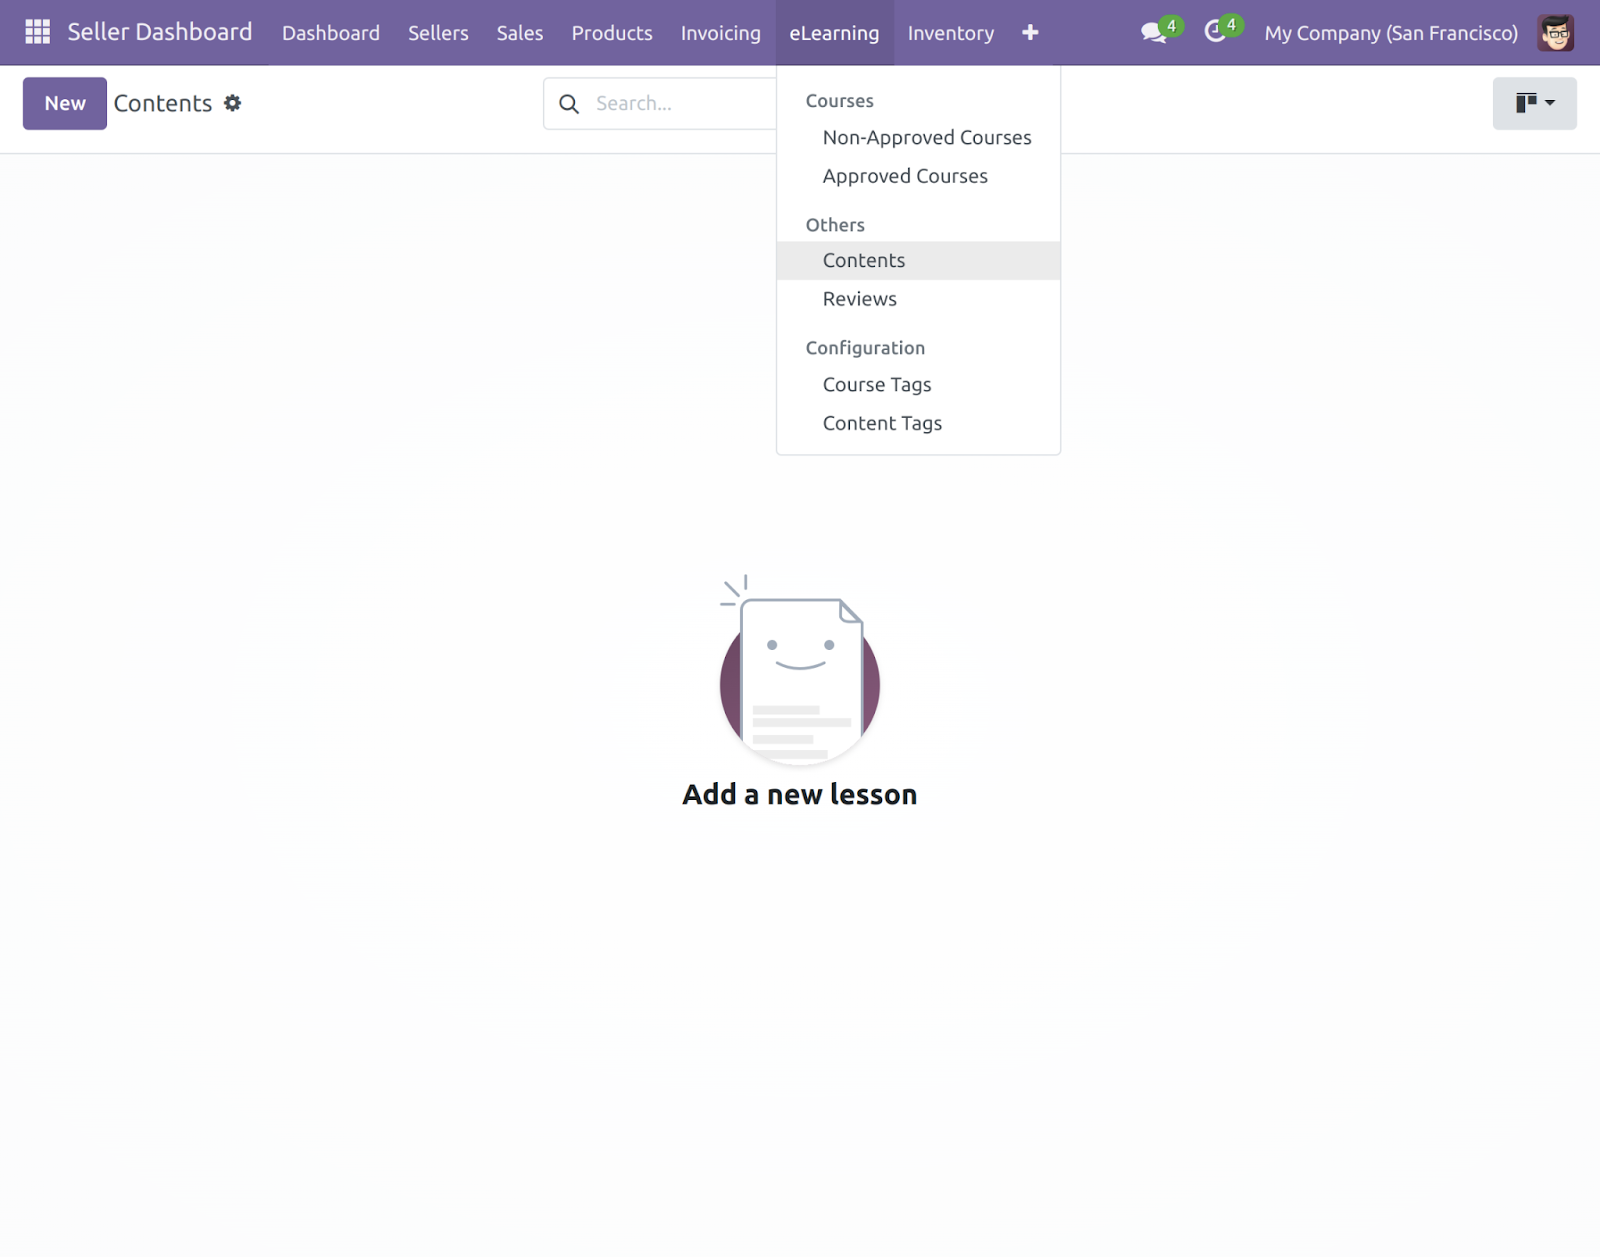
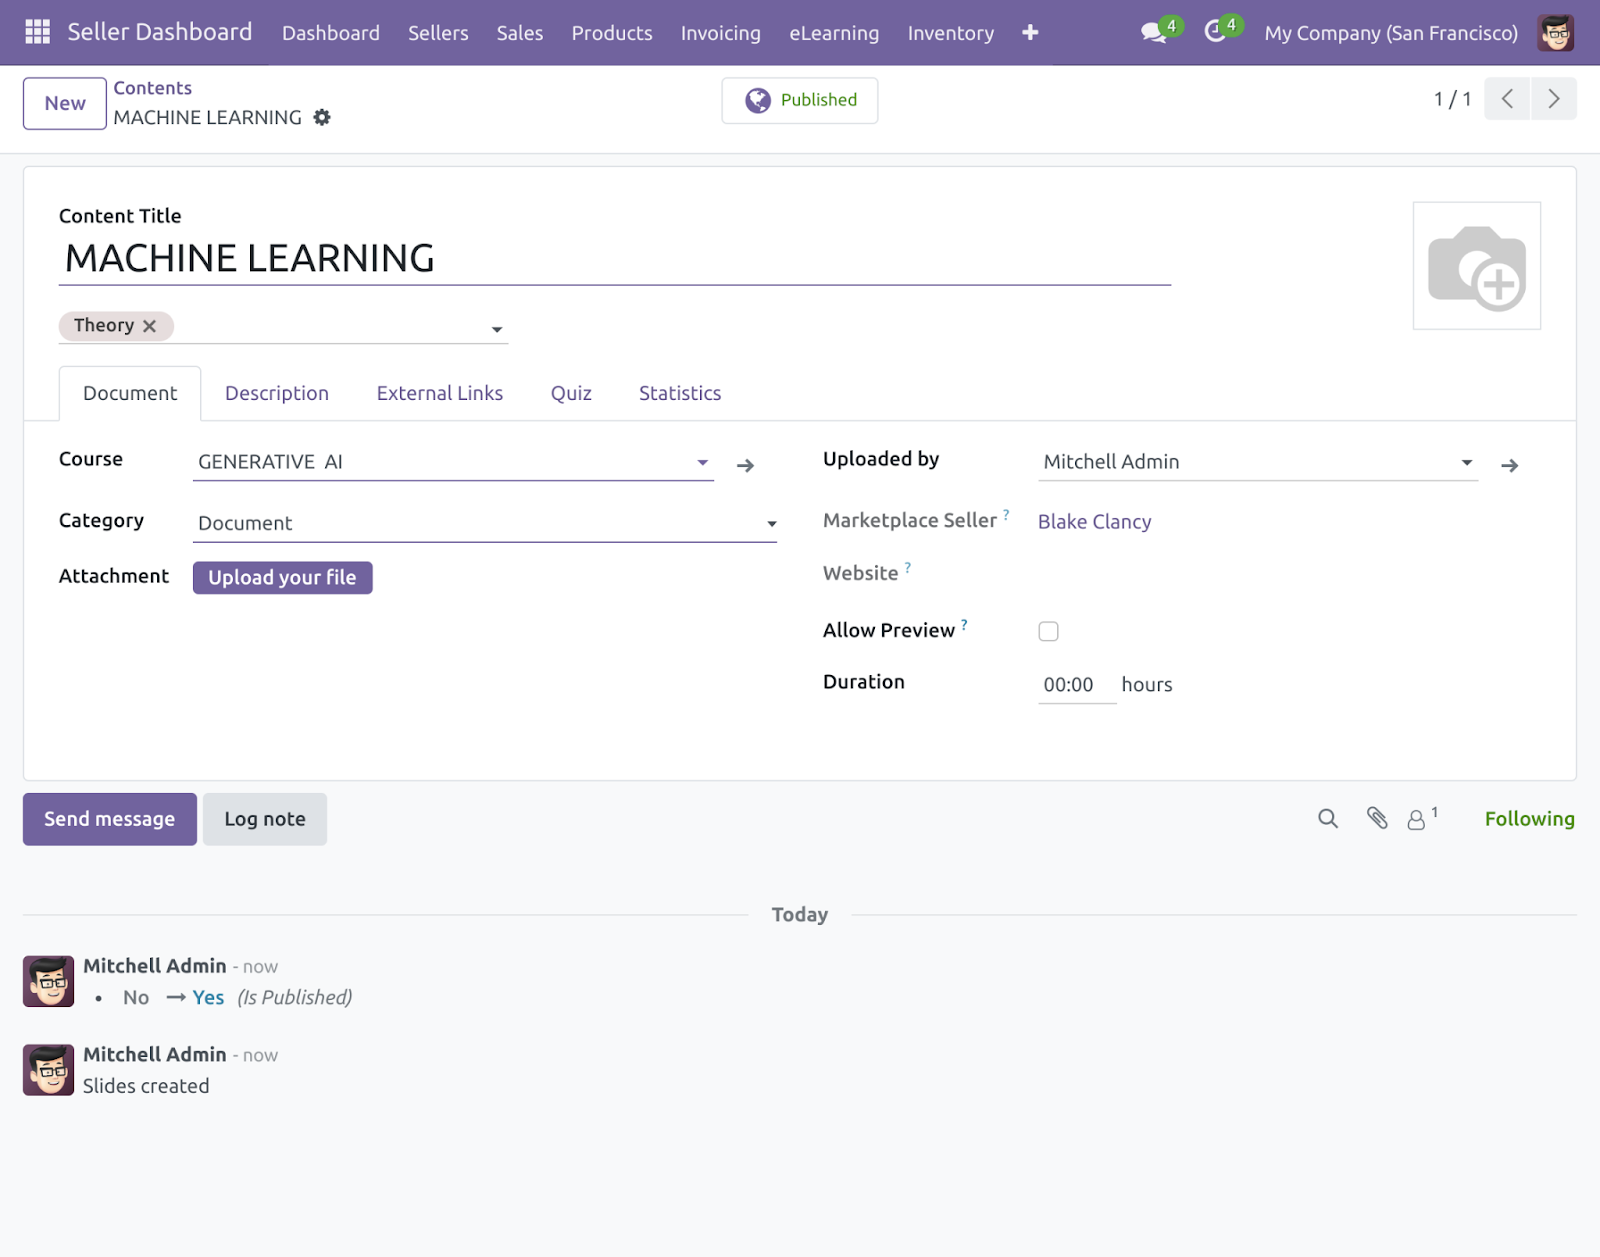
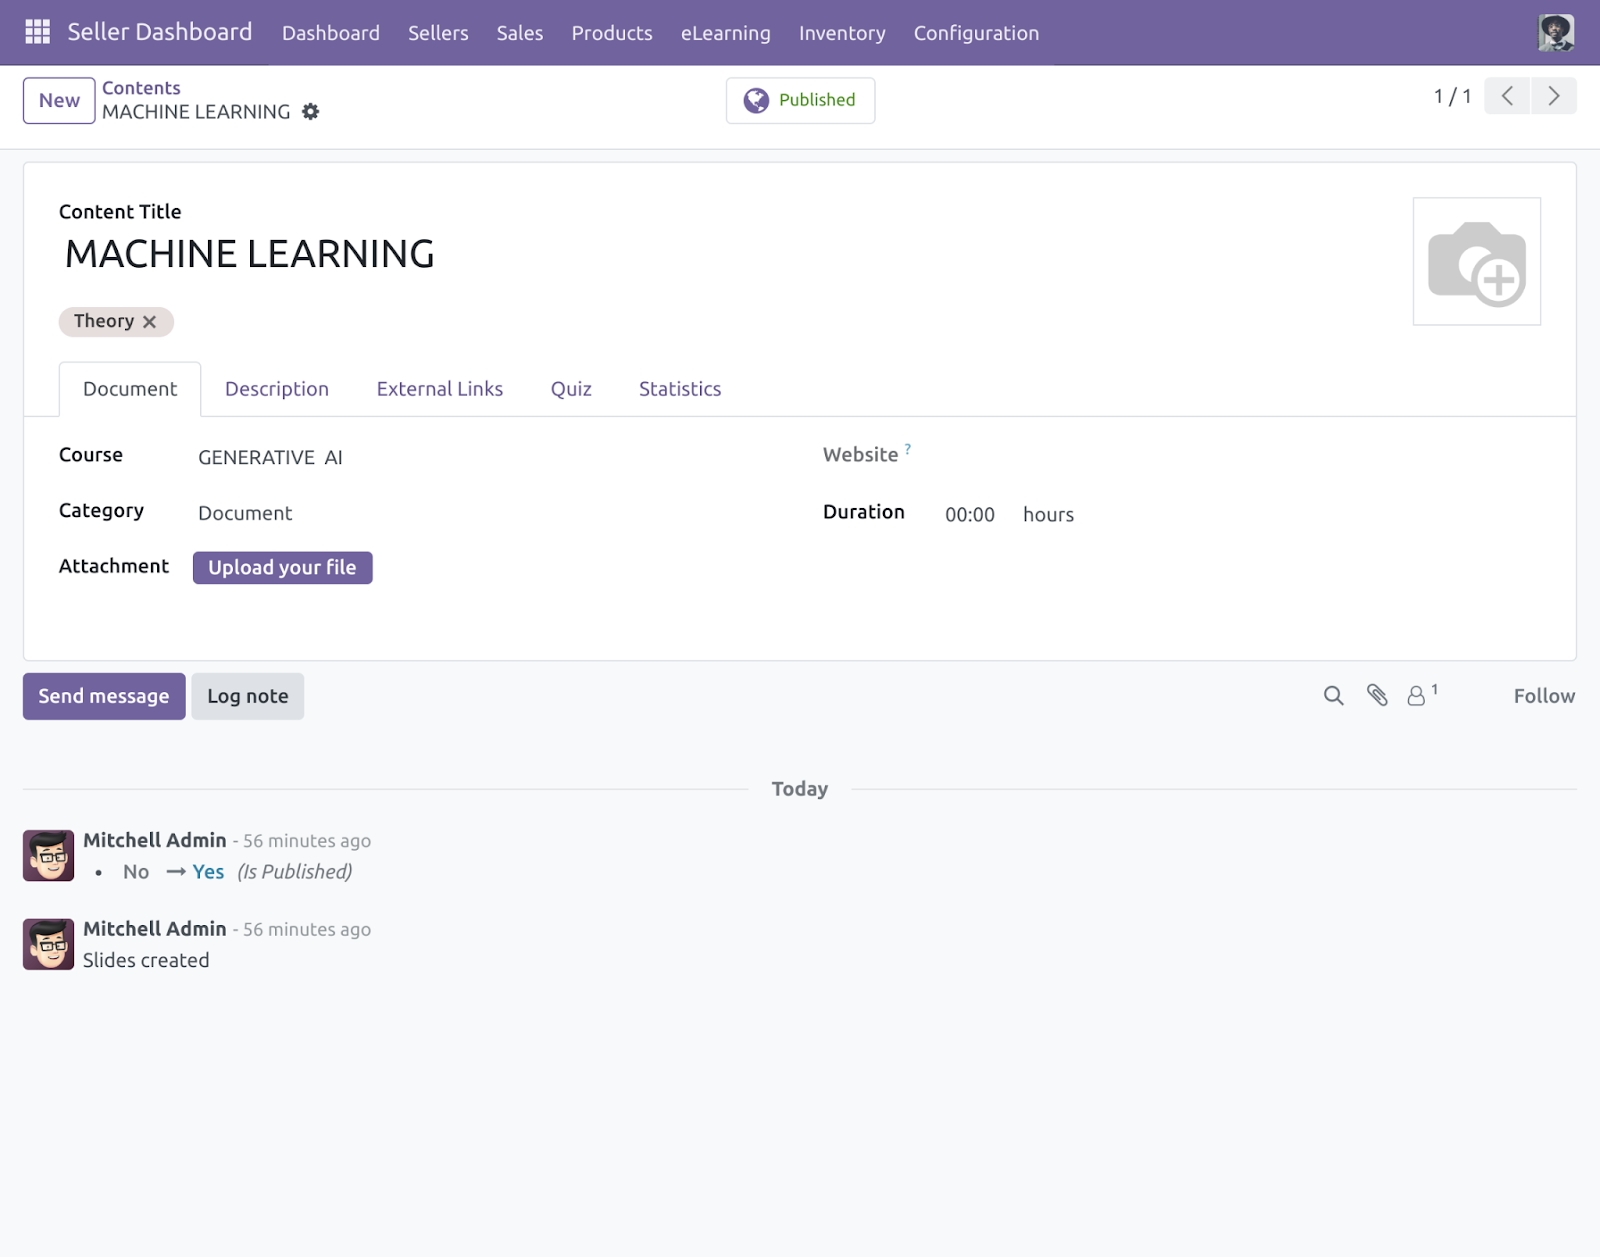
12) You can also add Content for courses. Go to Seller Dashboard>> eLearning >> Contents. Click on the ‘Create’ button to create new content for courses.
13) Add the fields ‘Content Title’, ‘Course’, ‘Type’, and other details. Click on the ‘Save’ button to save the content created.
Reviews of Courses:
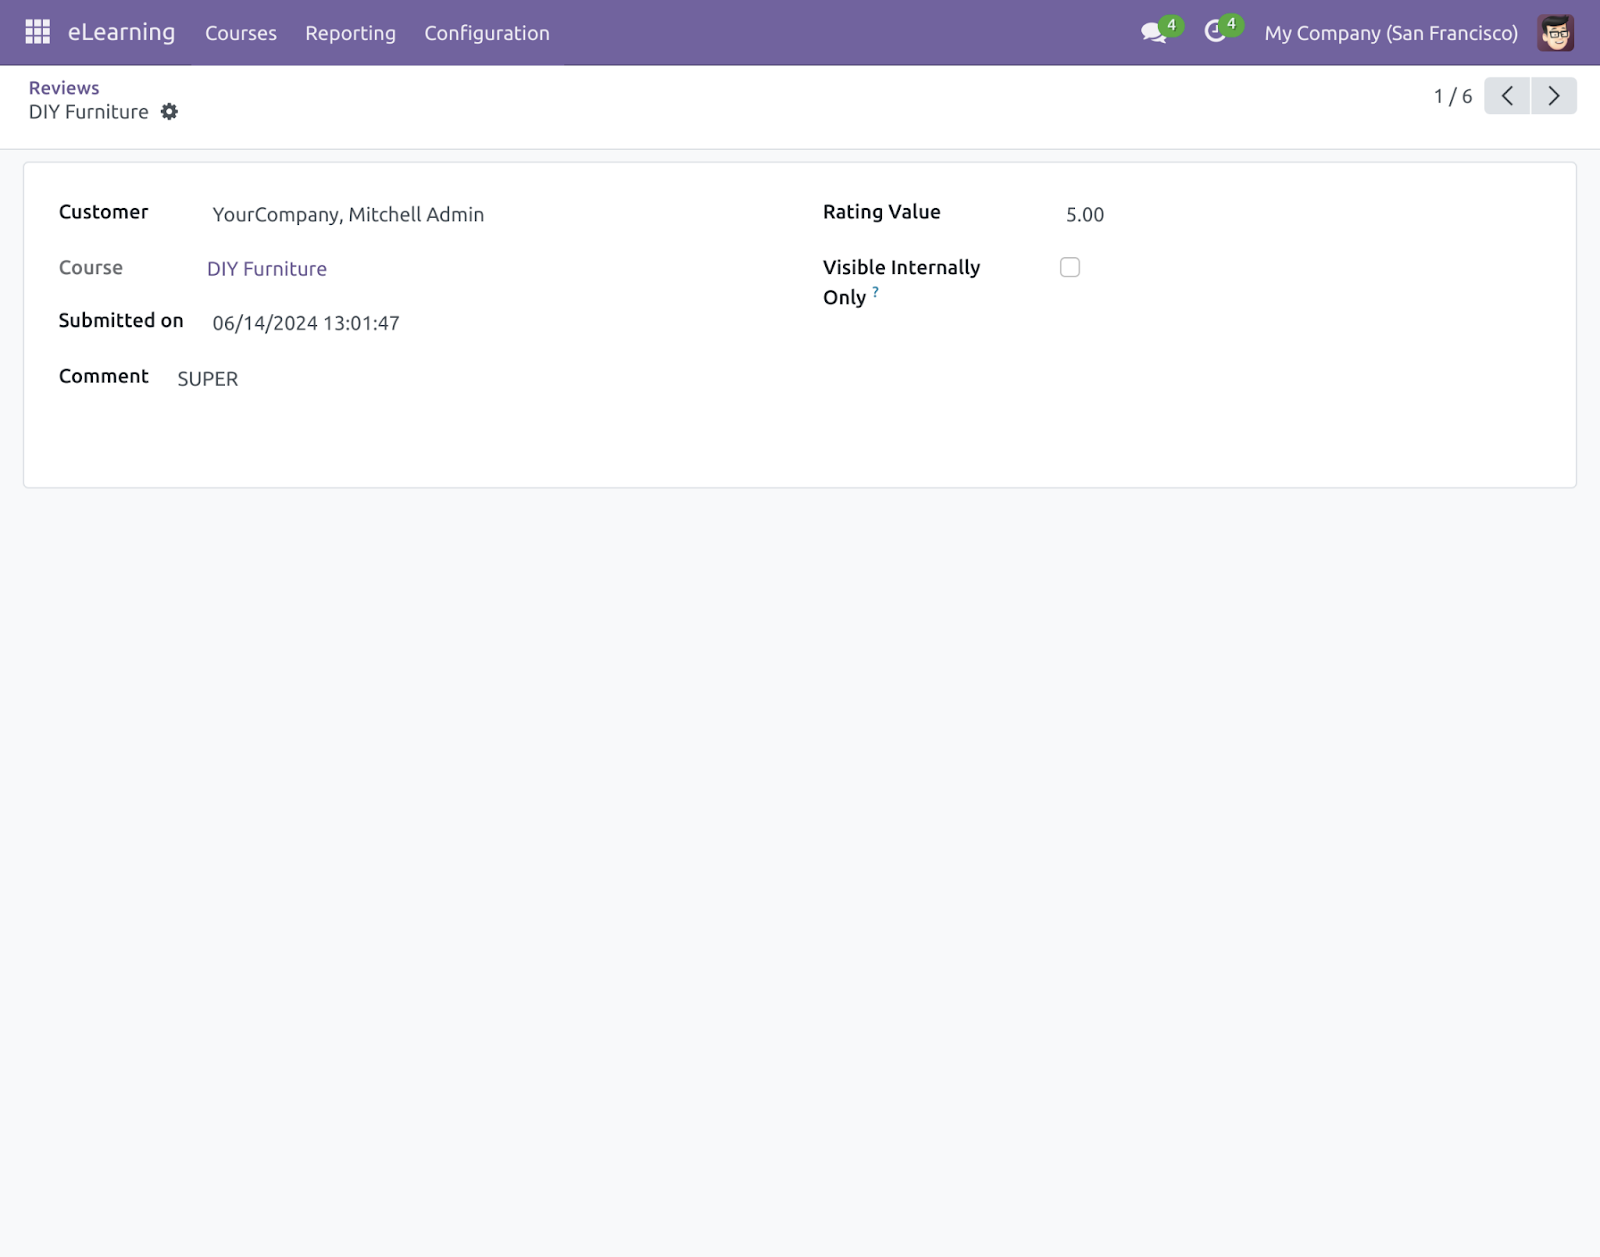
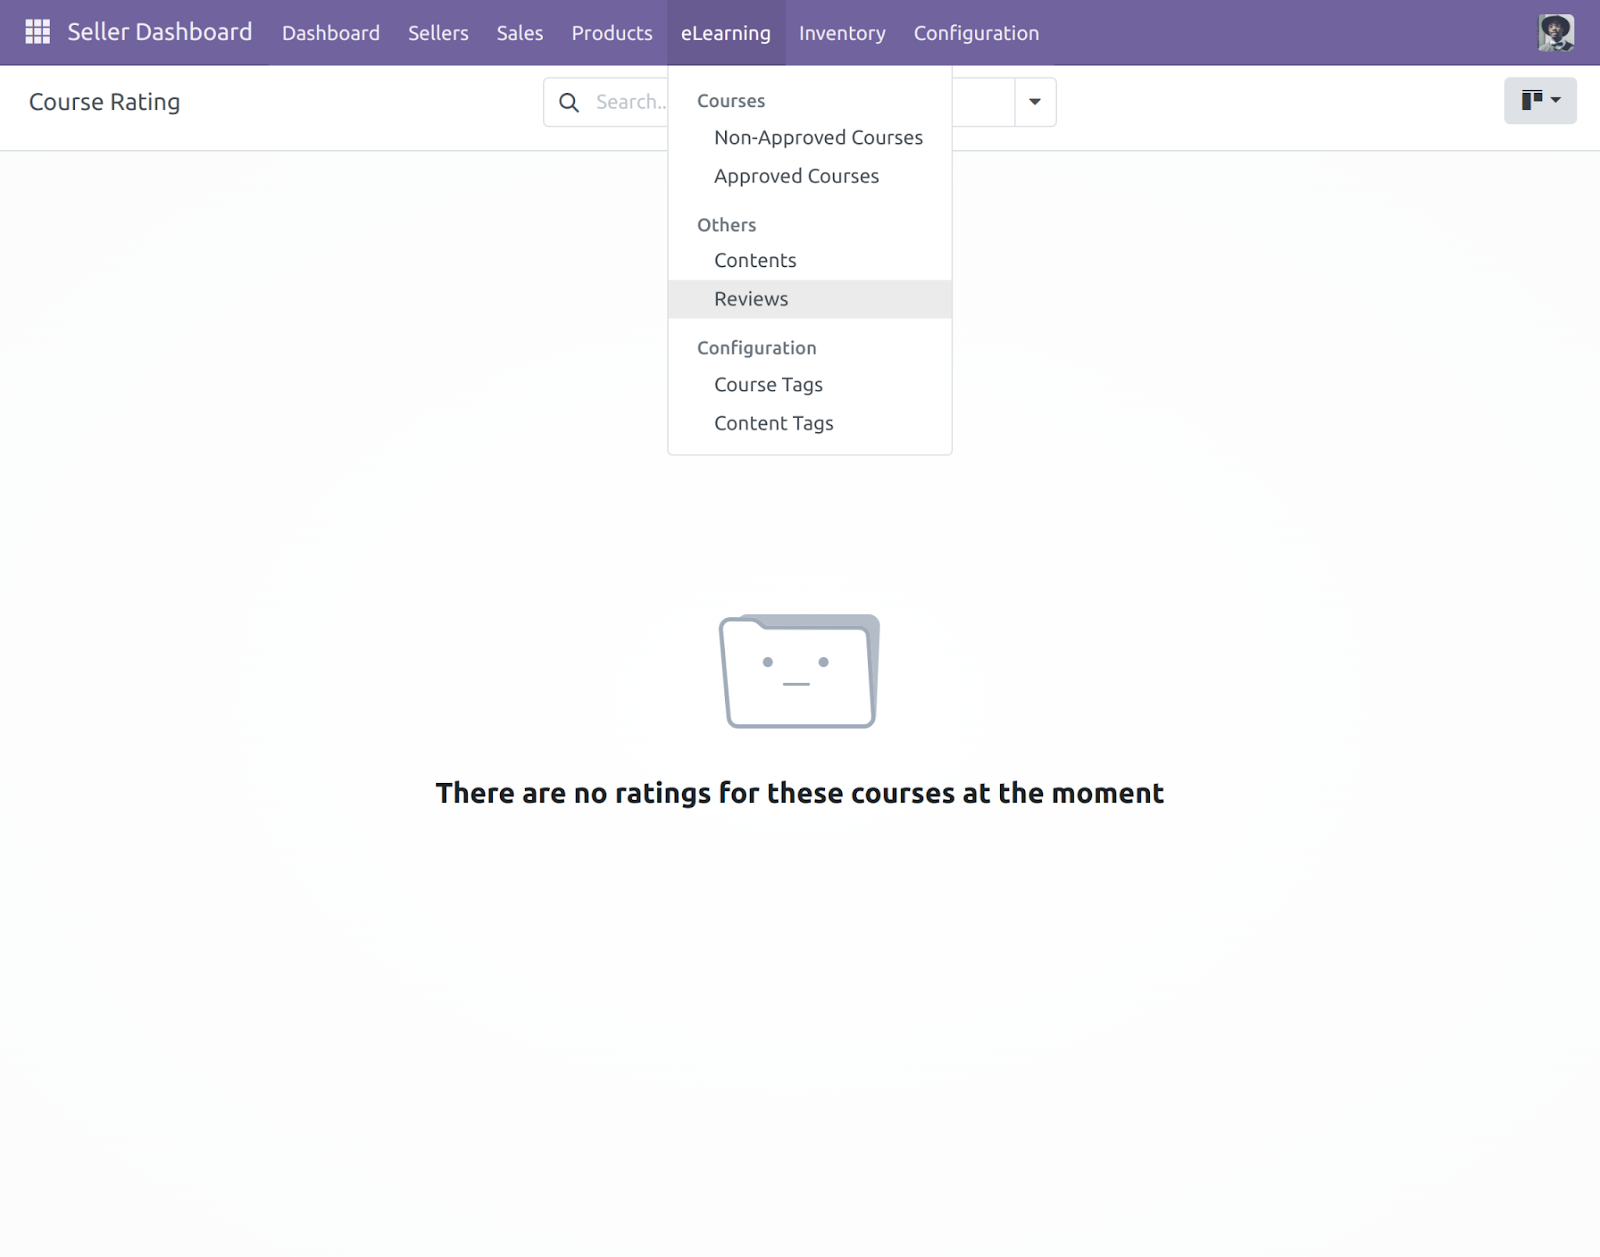
14) You can check the reviews for all the courses published on the website. Go to Seller Dashboard>> eLearning >> Reviews.
15) You can go through the Reviews/ Rating of the courses individually by clicking on the course.
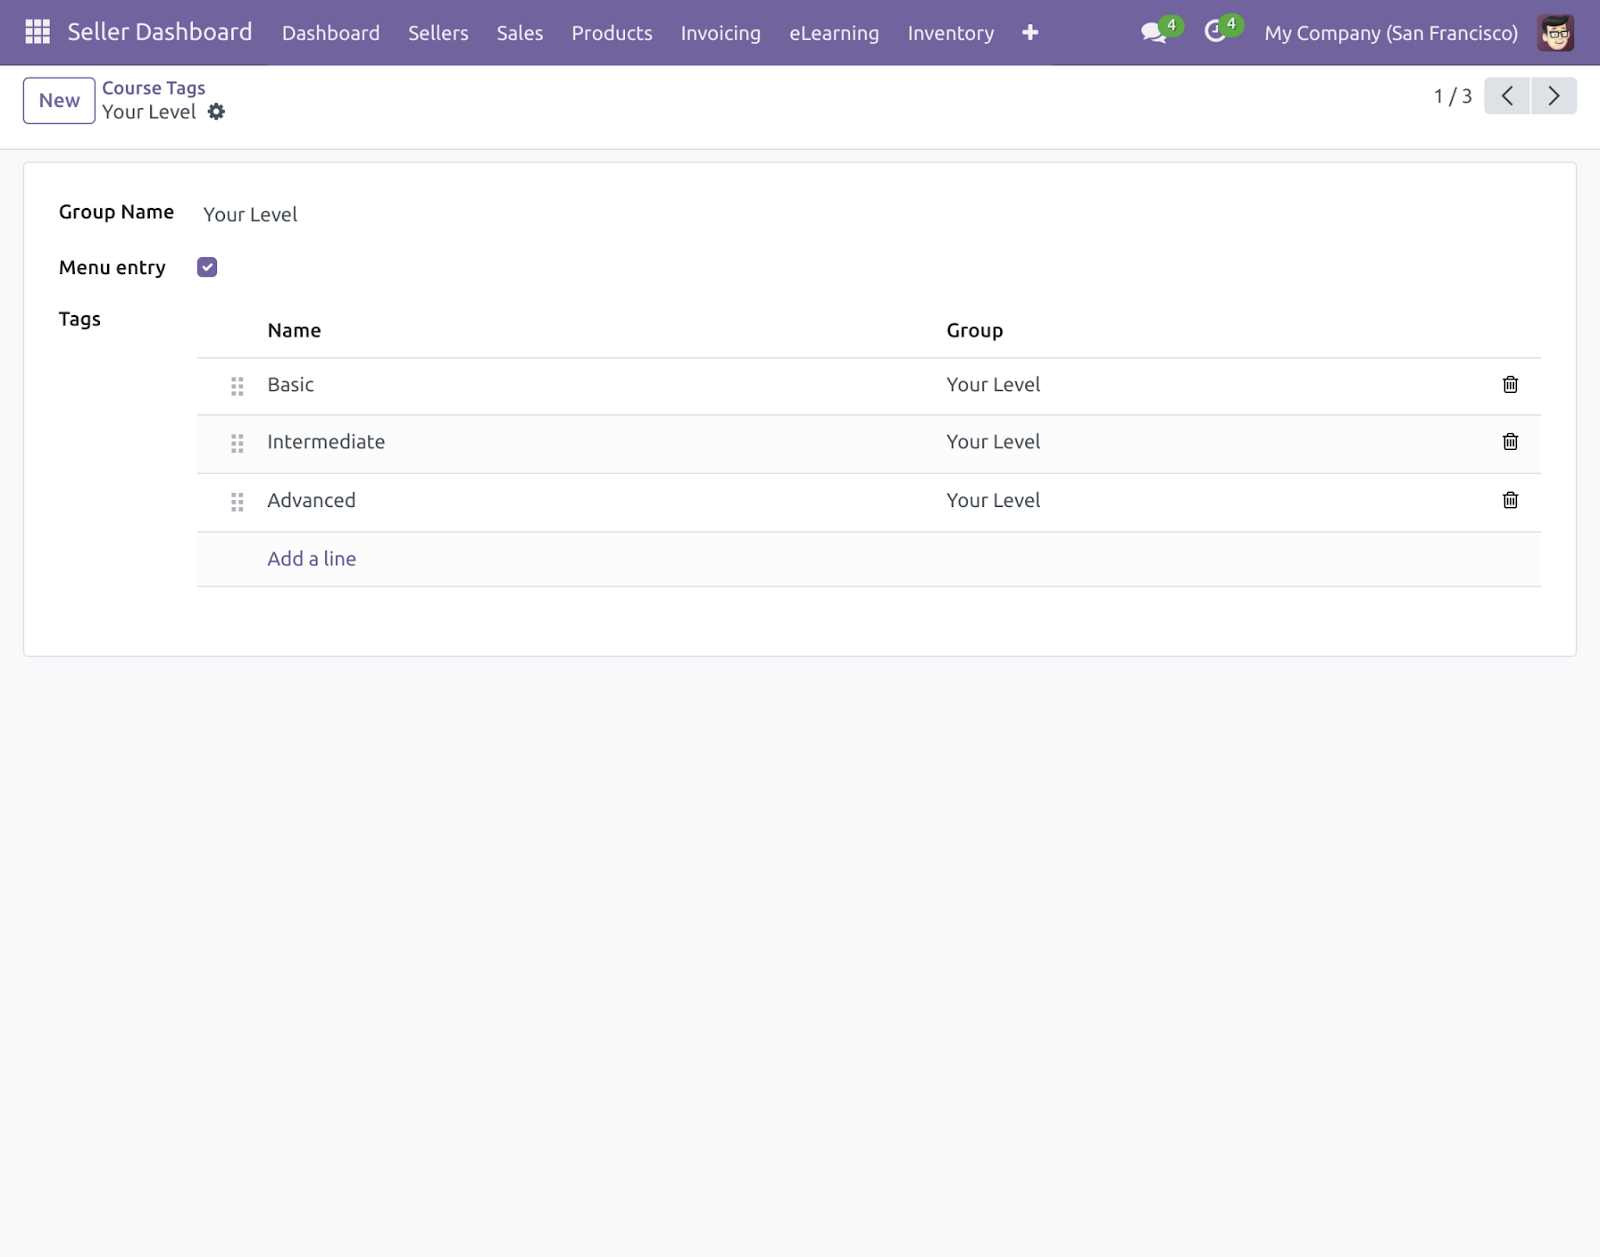
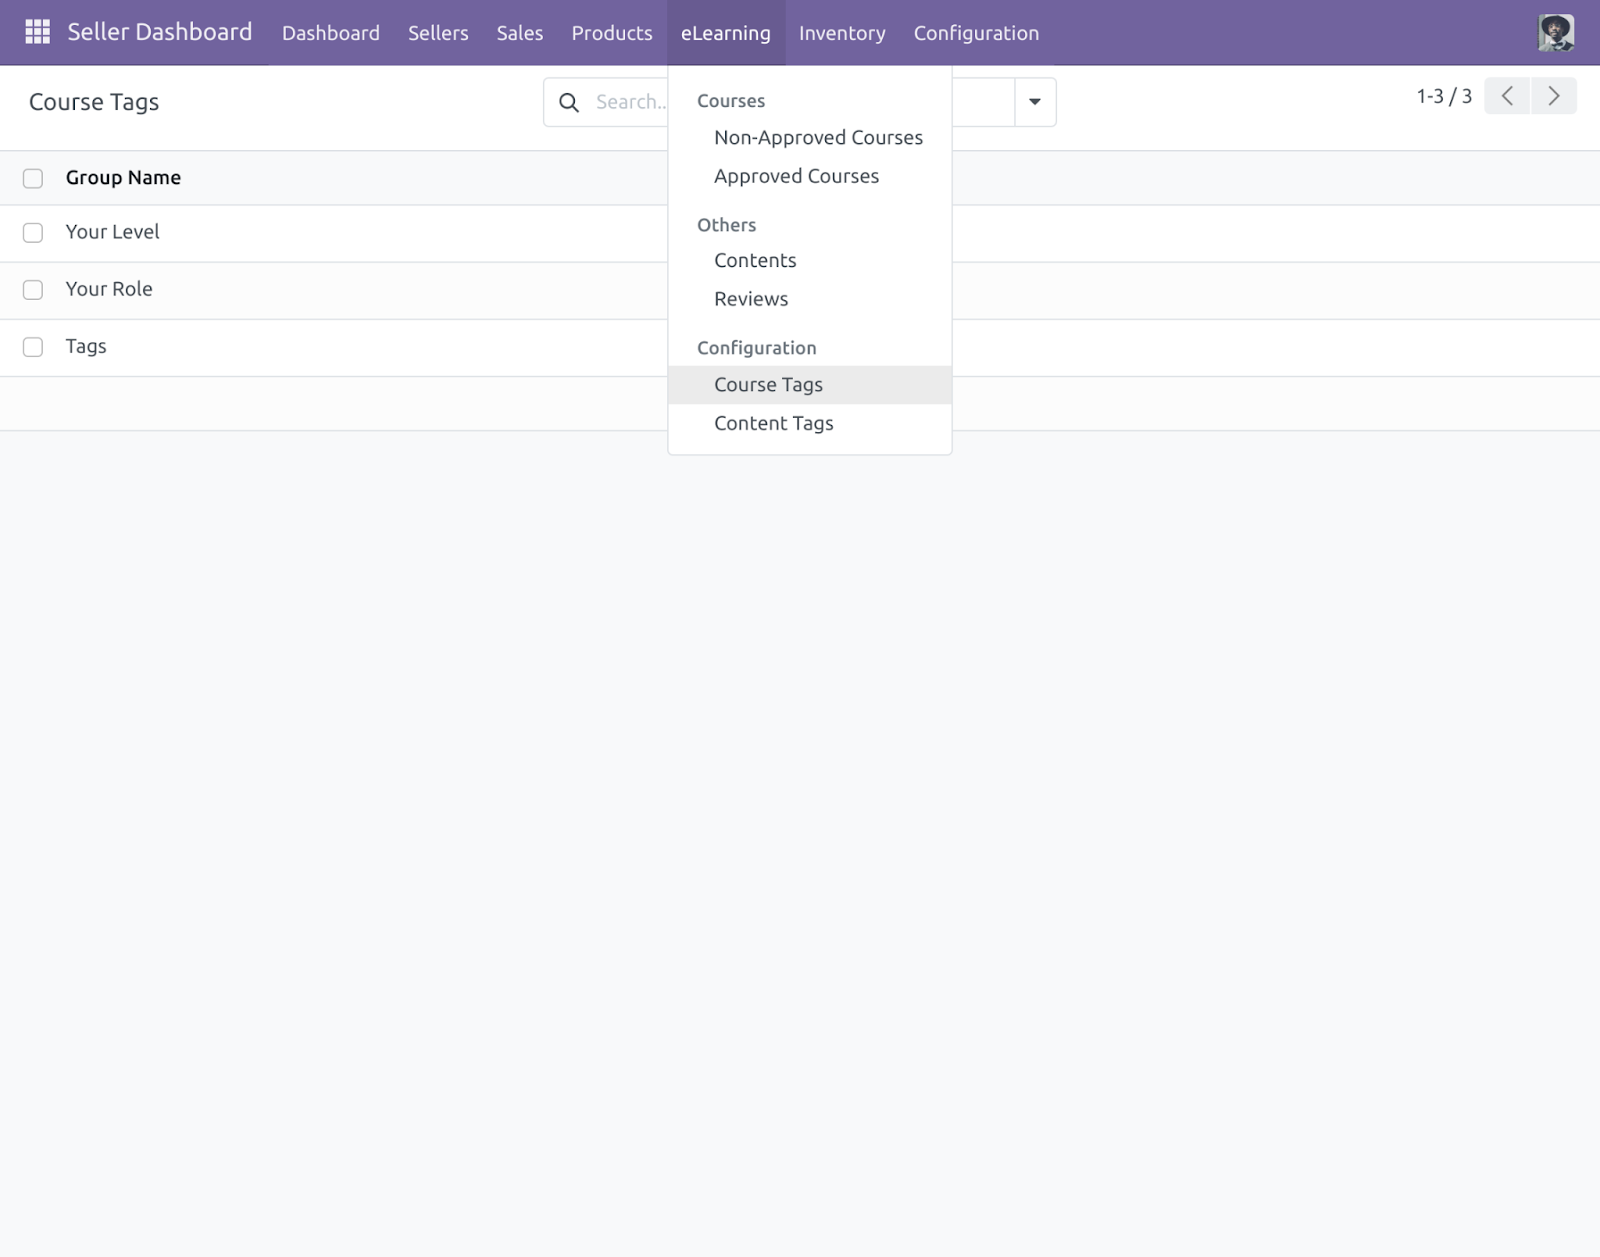
Course Tags
16) By the way, you can also create Course Tags as well. Go to Seller Dashboard>> eLearning >> Course Tags. Click on the ‘Create’ button to create a new course tag.
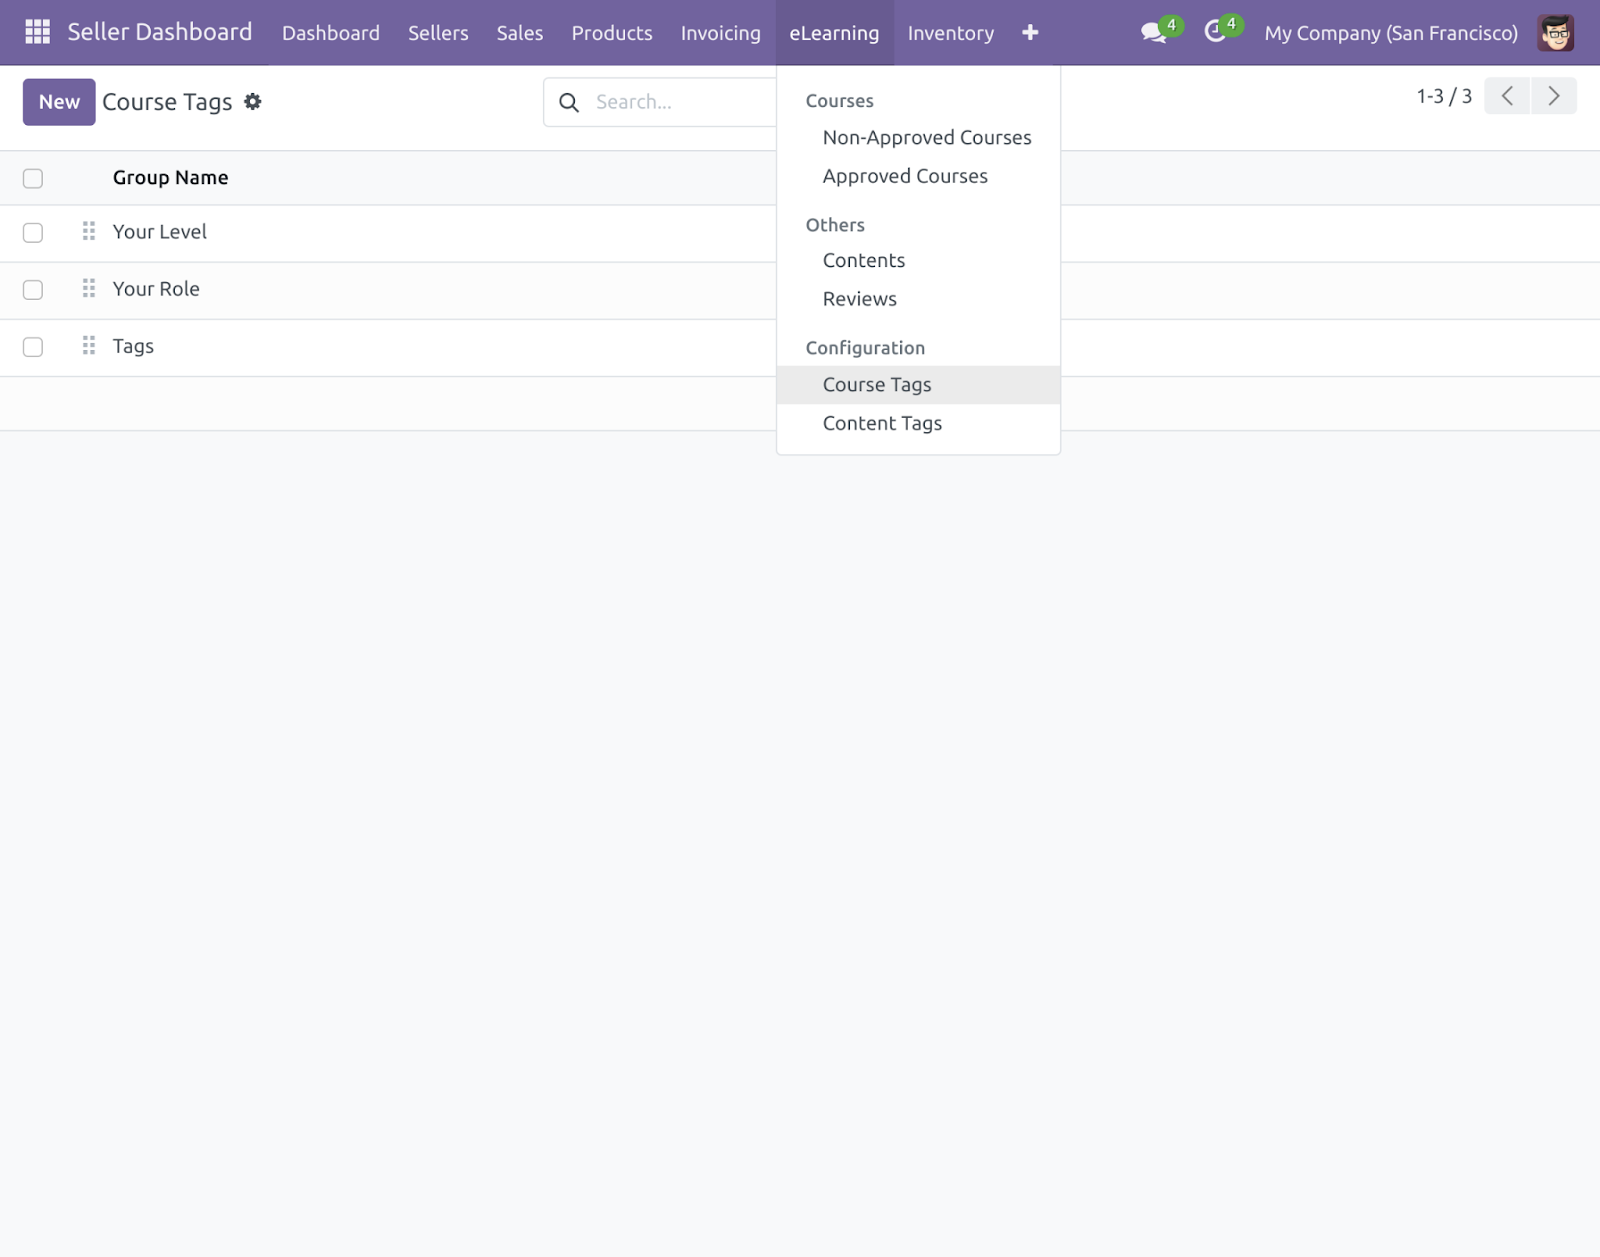
17) Add fields ‘Name’, ‘Menu Entry’, and ‘Tags’ to create course tags. Click on the ‘Save’ button to save the newly created course tag.
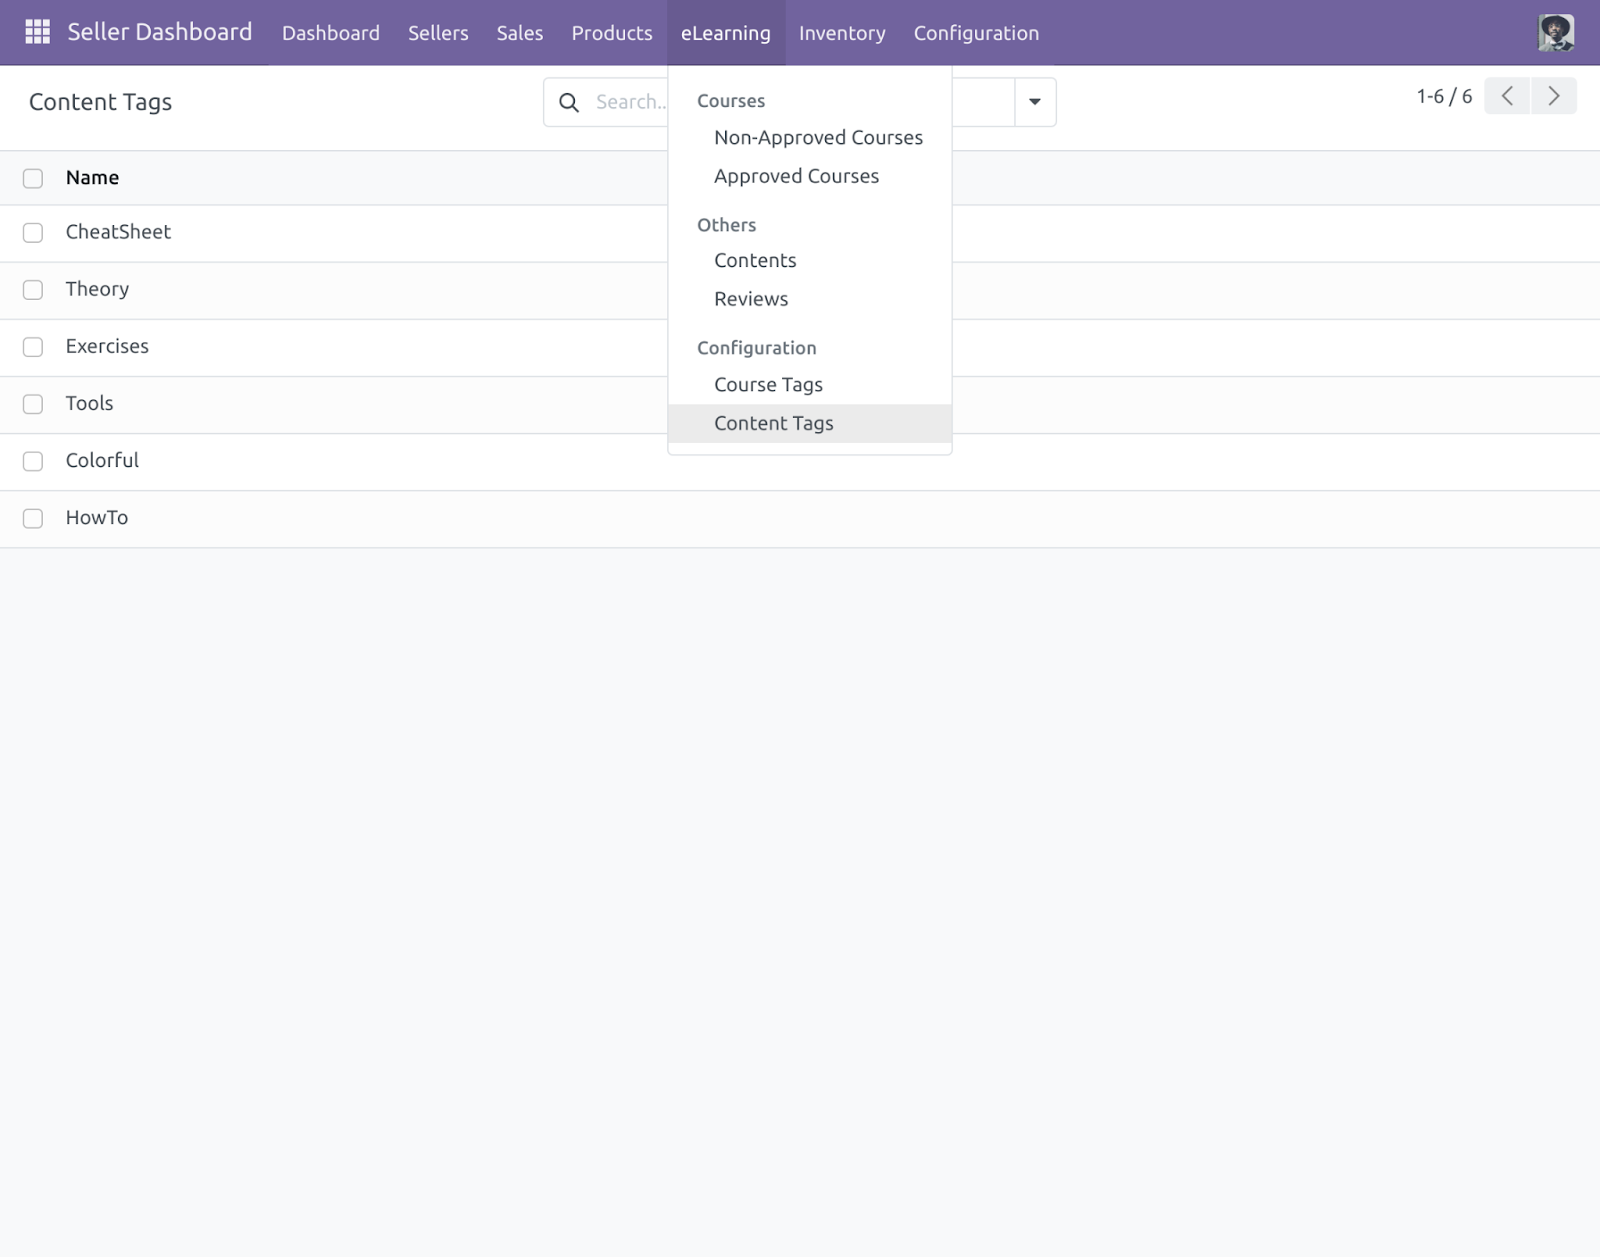
Content Tags:
18) You can also create Content Tags as well for the content. Go to Seller Dashboard>> eLearning>> Content Tags. Click on the ‘Create’ button to create a new Content tag.
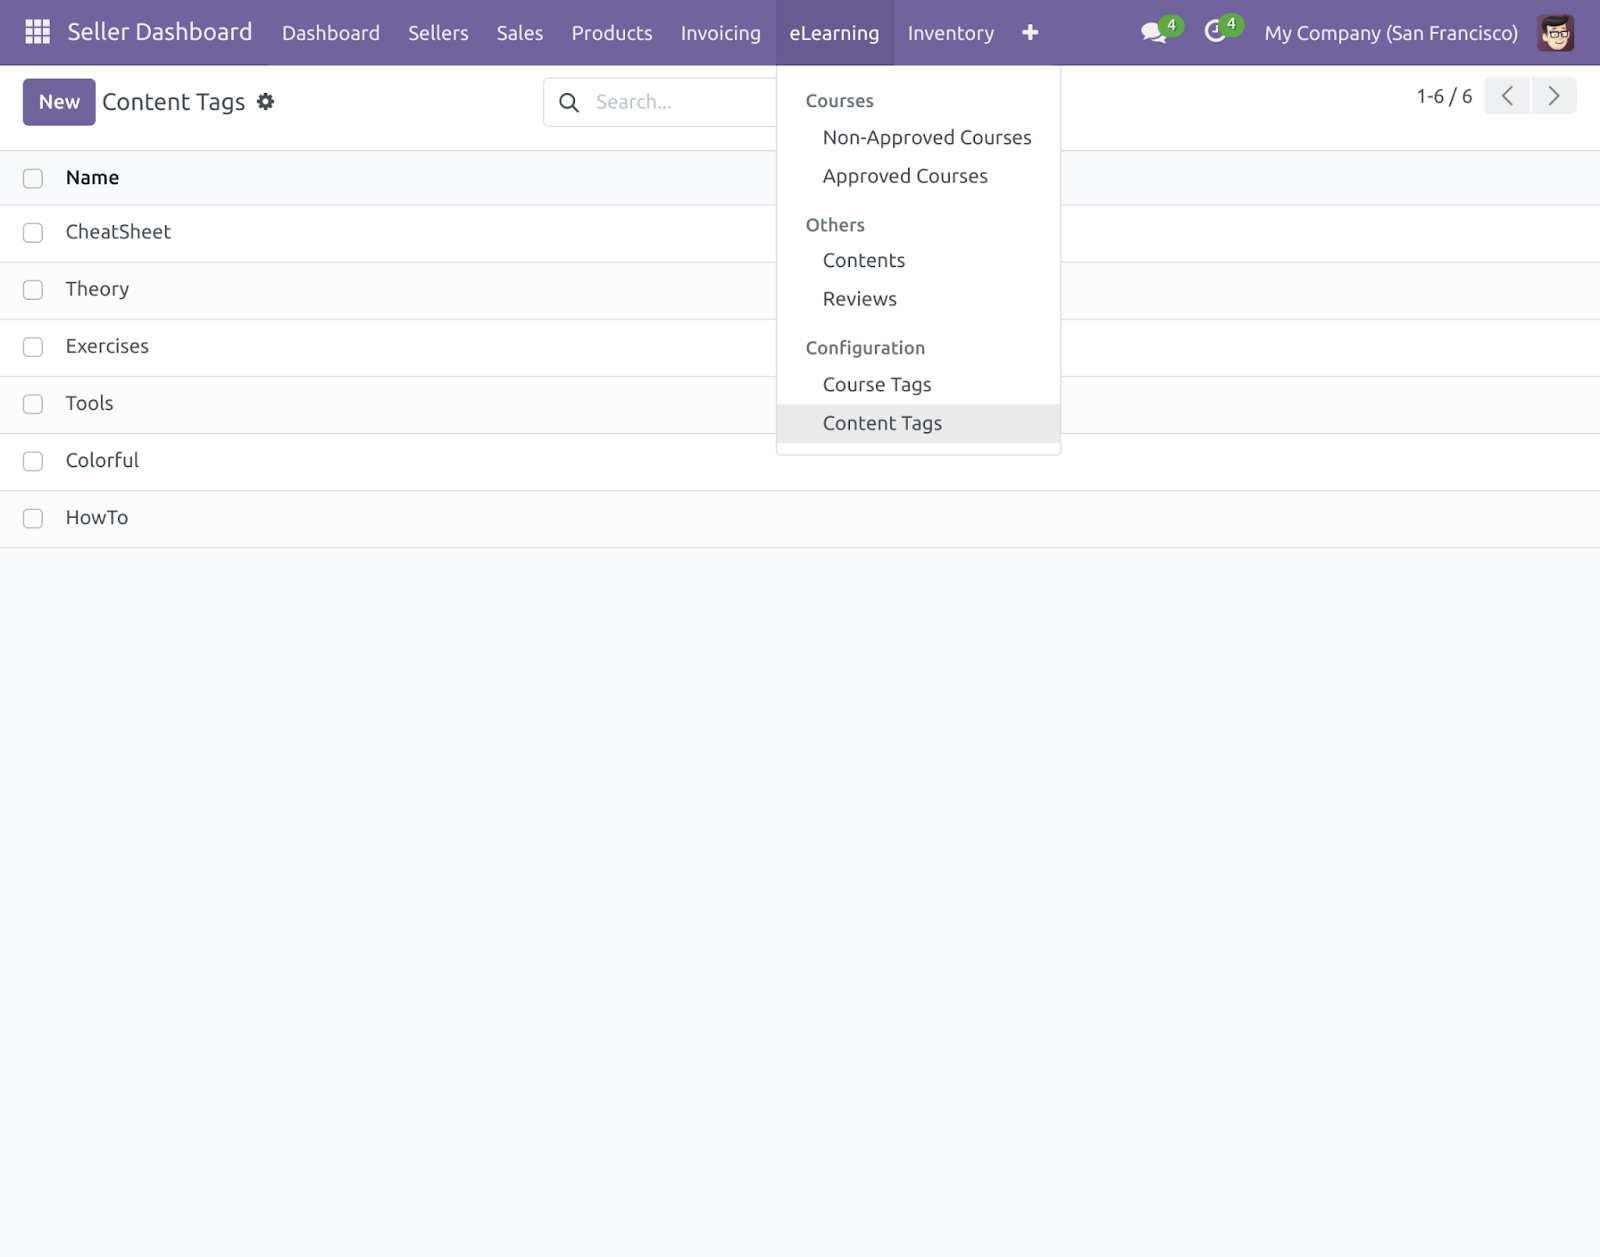
19) Add the ‘Name’ of content tags. Click on the ’Save’ button to save the Content Tags.

Are you looking to optimize customer support on your Odoo Marketplace? Odoo Marketplace Q&A and FAQ module is here to streamline the process.
By providing quick and comprehensive answers to common queries, we empower customers to find solutions in seconds.
Front End in eLearning Marketplace in Odoo:
20) Similarly login to Odoo Backend and go to the ‘Website’ module.
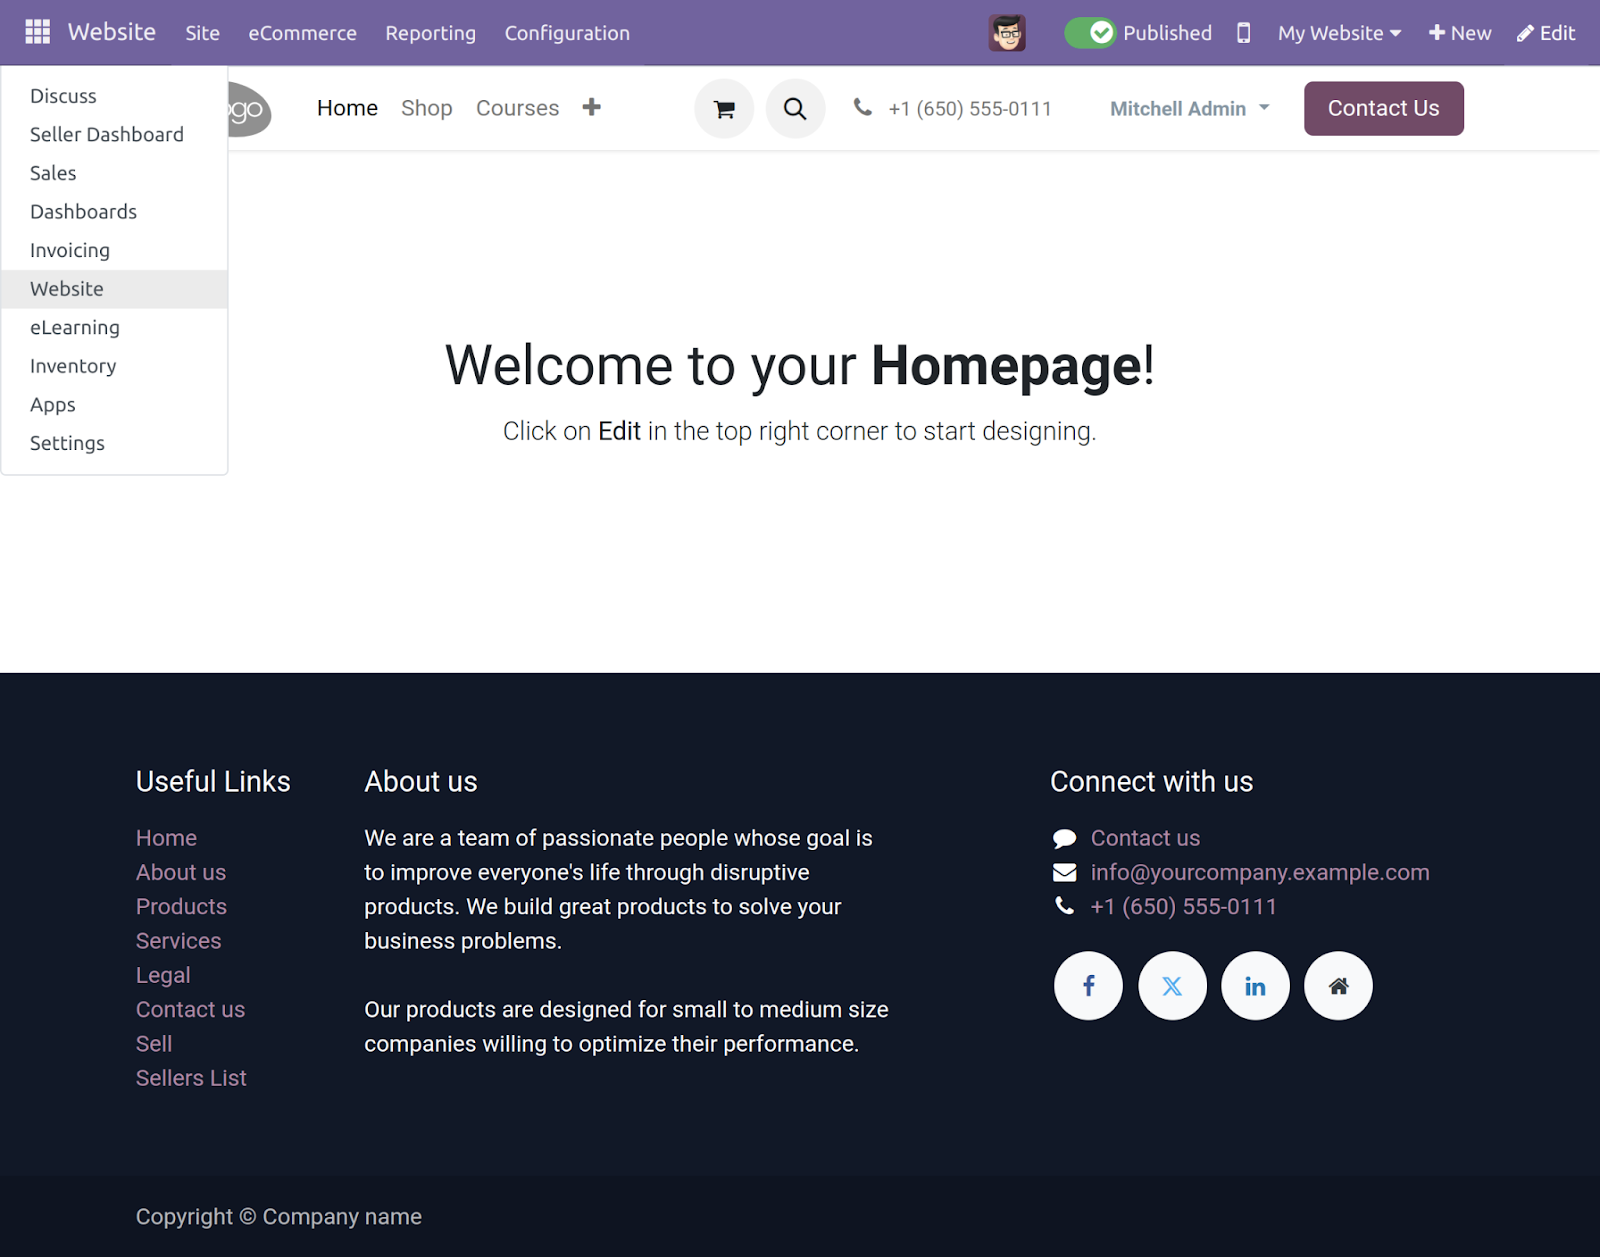
21) In the ‘Website’ module click on ‘Go To Website’.
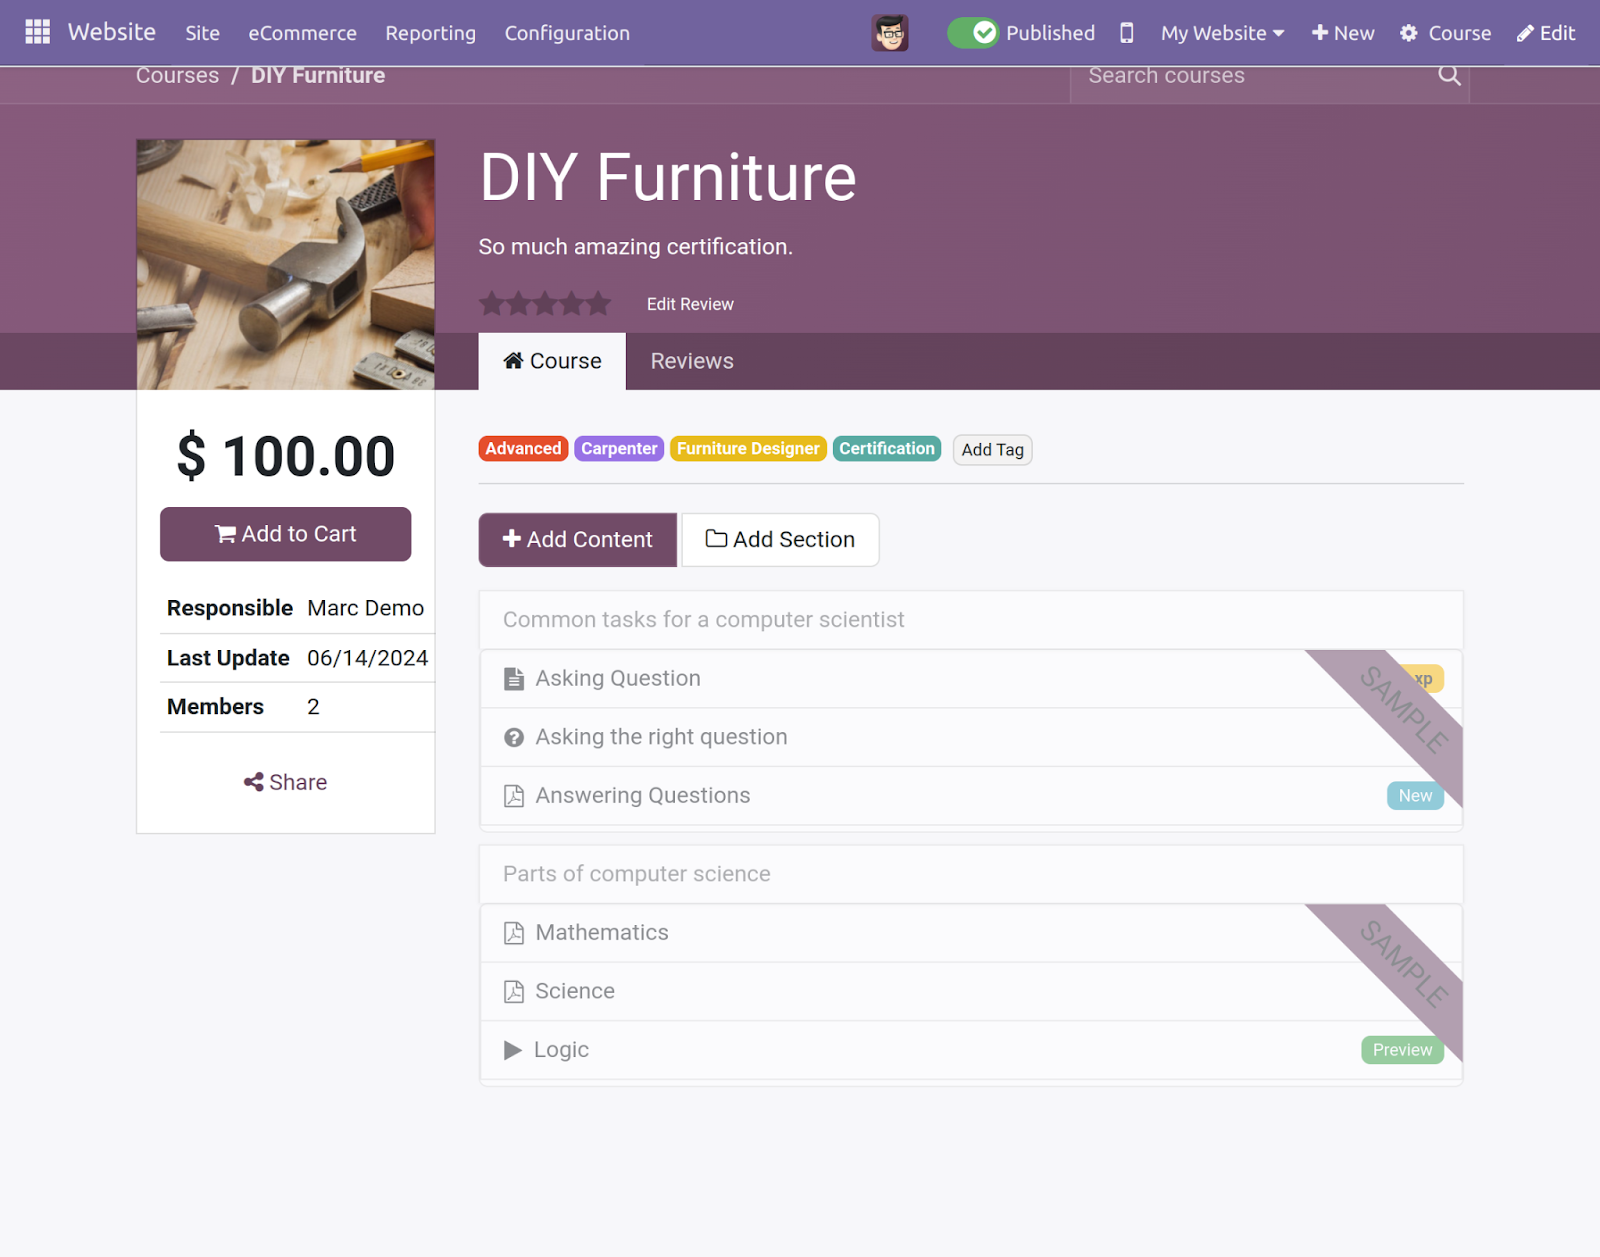
22) Once you are on Website go to ‘Course’ tab.
23) Accordingly you are redirected to the ‘Courses’ page. All the Published courses of all the sellers will be visible here.
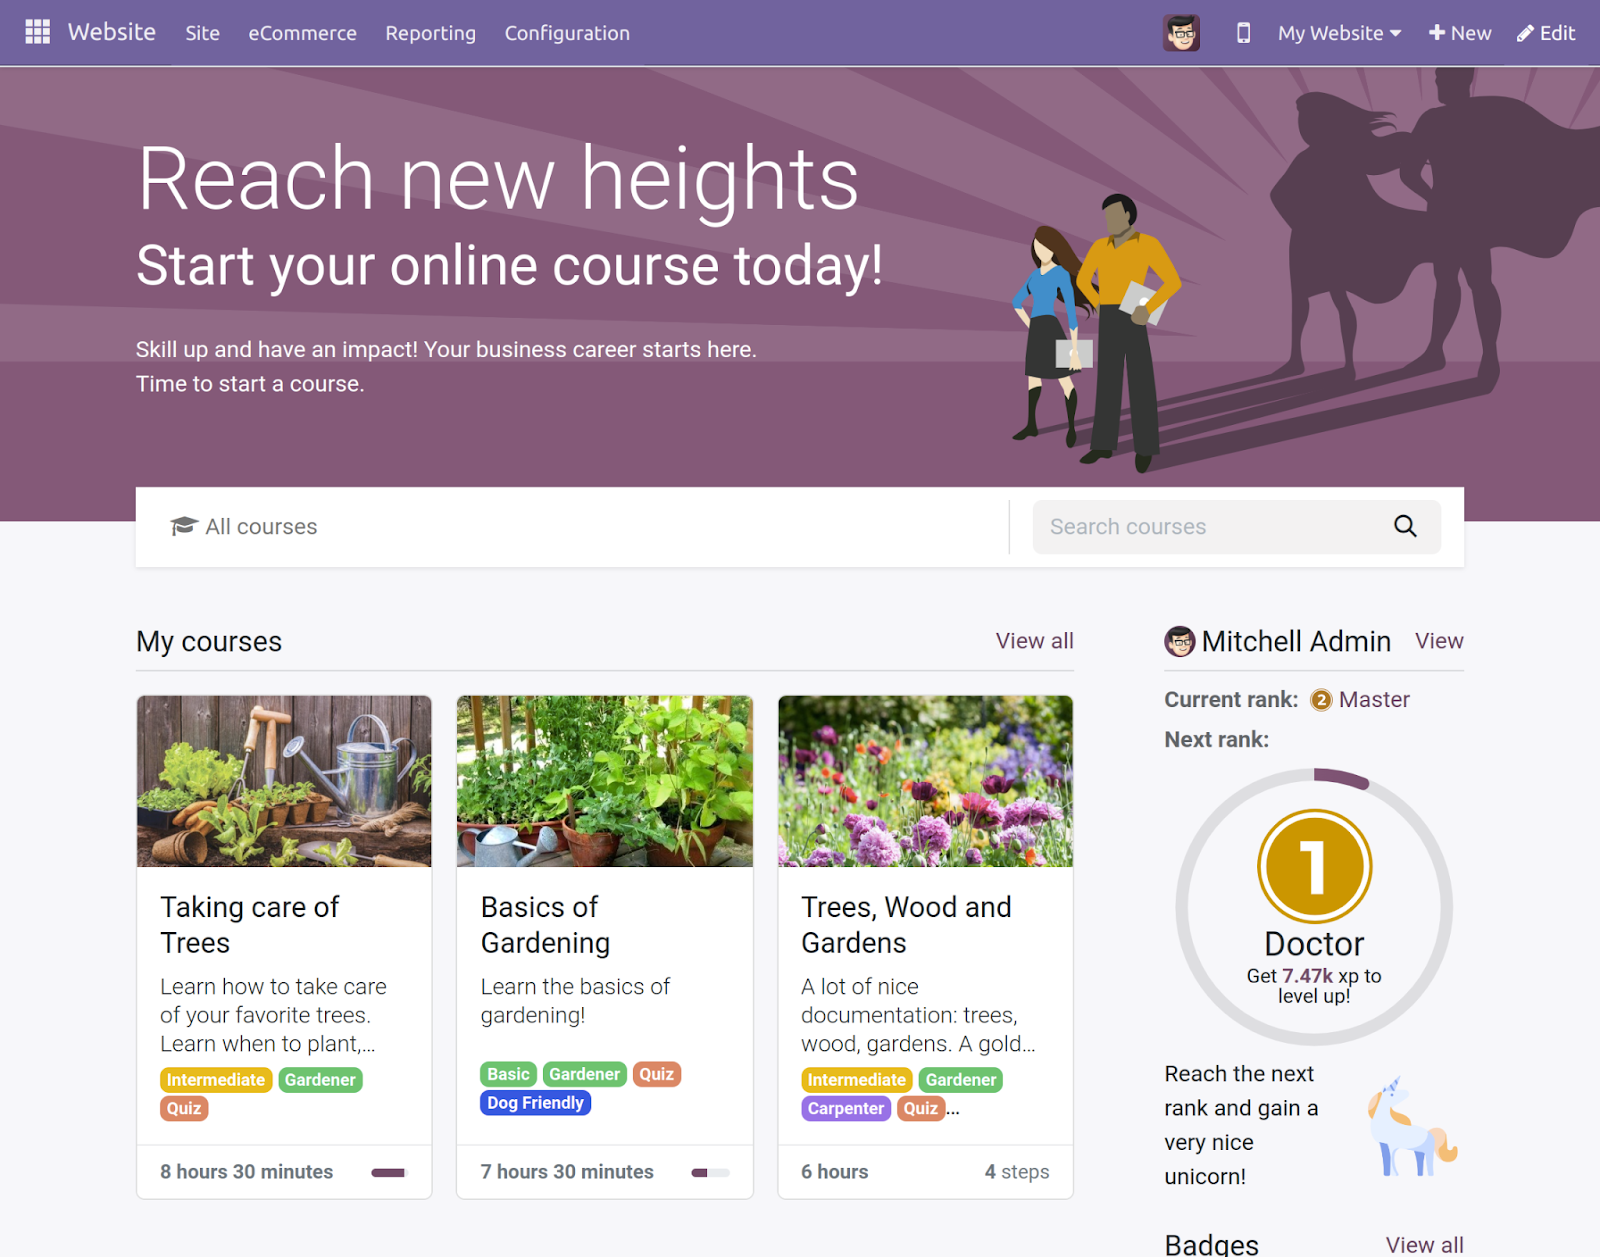
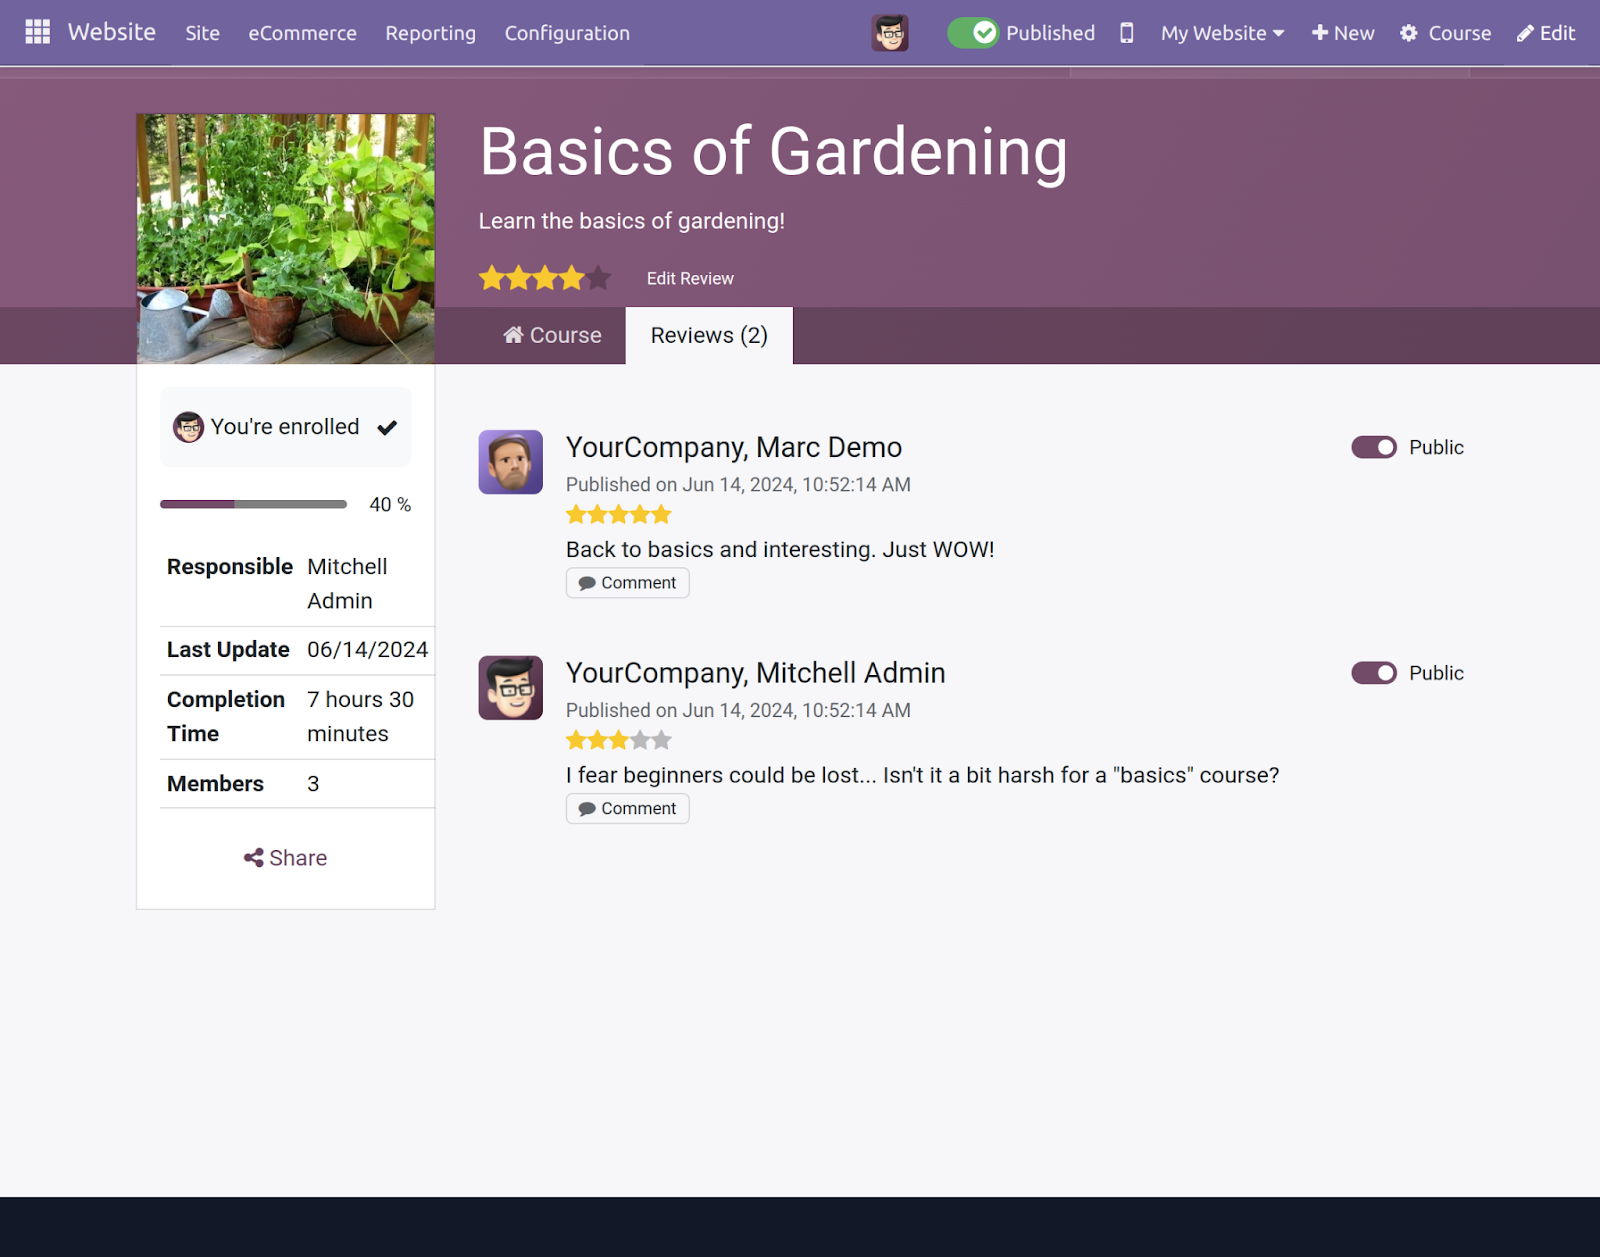
24) You can view the detailed information related to the Course once you click on a particular course.
25) The Review given for the courses will be visible in the courses.
Seller End in eLearning Marketplace in Odoo:
Create courses at Seller’s End:
26) At Seller End Go to Seller Dashboard>>eLearning for the detailed information of the seller related to the courses.
27) In the Seller Dashboard module go to Non-Approved Courses for all the courses which are not approved by the Admin but the seller has requested for.
Click on the ‘New’ button to create a new course.
28) Add the fields ‘Course Title’, ‘Tags’, ‘Product’, and other details. Click on the ’Save’ button to save the Course.
As a result, you can save the course the stage, of course, will be the ‘New’ stage.
29) Click on the ‘Request to Approve’ button to request approval of the course.
30) As soon as you request the approval of course you will be moved to the ‘Pending’ stage.
31) Furthermore, the seller can check for all the Approved Courses. Go to Seller Dashboard>> eLearning >> Approved Courses.

Create Content at Seller’s End:
32) Here you can create Content for the courses. Go to Seller Dashboard>> eLearning>> Content. Click on the ‘Create’ button to create new content for the courses.
33) Add the fields ‘Course Title’, ‘Course’, ‘Type’, and other details. Click on the ‘Save’ button to save the content for courses.
Reviews of courses:
34) The seller can also view the Reviews for their published courses. Go to Seller Dashboard>> eLearning >> Reviews.
Course Tags at Seller’s End:
35) Also you can view all the Course Tags. Go to the Seller Dashboard>> eLearning>> Course Tags.
Content Tags at Seller’s End:
36) Moreover you can also view all the Content Tags. Go to the Seller Dashboard>> eLearning>> Content Tags.
NEED HELP?
Hope you find the guide helpful! Please feel free to share your feedback in the comments below.
If you still have any issues/queries regarding the same, please raise a ticket at the UV Desk.
I hope this helps. In case of any further queries, contact us at our support mail.
Thanks for paying attention!!
Current Product Version - 1.0.0
Supported Framework Version - Odoo V17, V16, V15, V14

Be the first to comment.