Magento 2 Marketplace Shippo Shipping extension allows admins to provide Shippo shipping methods for marketplace products.
This extension gets the shipping rates from Shippo API and integrates it with Magento 2 Marketplace module.
This module is an add-on of Marketplace module. To use this module, you must install Magento 2 Marketplace module first.
Features
- Admin can enable or disable Shippo shipping method
- Sellers can add and manage Shippo API credentials
- Get real-time shipping rates using Shippo API
- Generate shipping labels for orders
- Download shipping labels in PDF format
- Admin and seller can create shipments
- Shipping rates based on seller and customer address
- Custom shipping method title shown at checkout
Installation
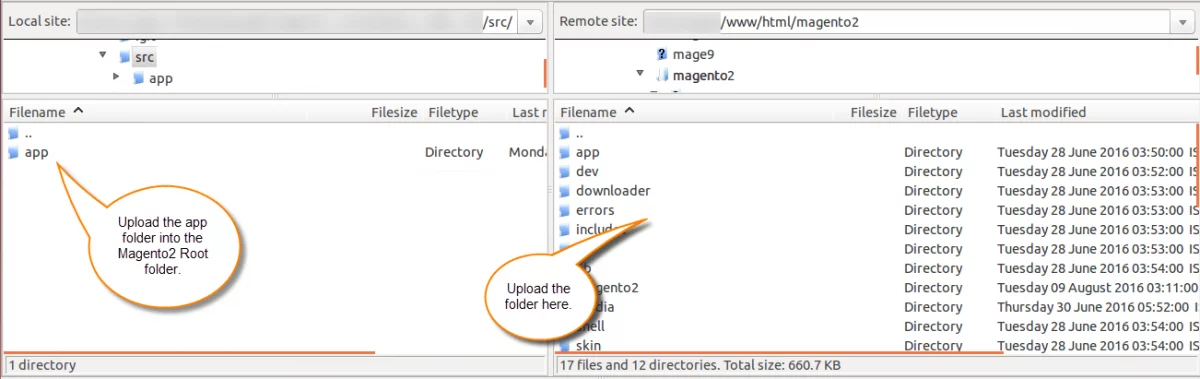
First, Customers will get a zip folder and they have to extract the contents of this zip folder on their system.
Then, open the extracted folder has an src folder, inside the src folder you have the app folder. You need to transfer this app folder into Magento 2 root directory on the server, as shown below.
After that successful installation, you have to run these commands in Magento 2 root directory:
php bin/magento setup:upgrade
php bin/magento setup:di:compile
php bin/magento setup:static-content:deploy
php bin/magento indexer:reindex
php bin/magento cache:flush
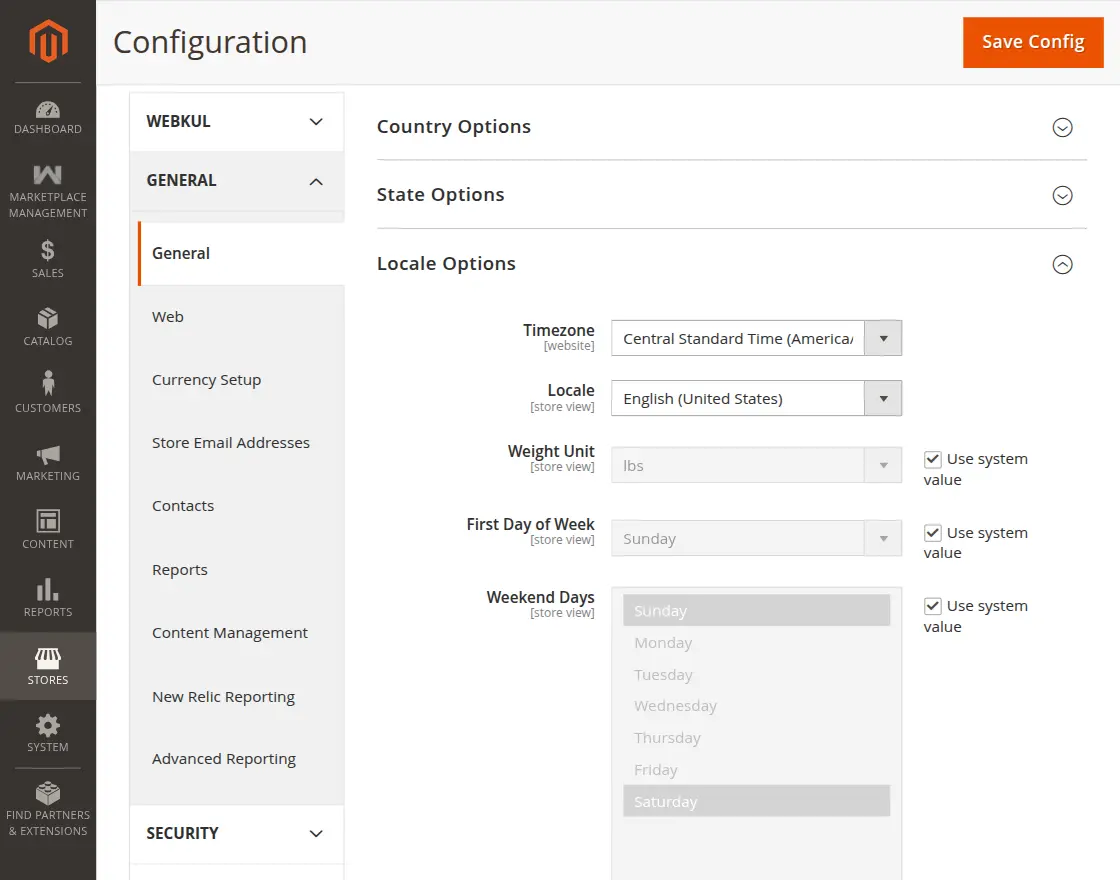
Multi-lingual Support
For the multilingual support, admin will navigate through Store->Configuration->General ->Locale Options and select the locale as German
(the language into which admin wants to translate his store content).
Language Translation
For Magento 2 Shippo Shipping translation, navigate to the following path in your system src/app/code/Webkul/MpShippoShipping/i18n.
Open the file named en_US.CSV for editing as shown in the below screenshot.
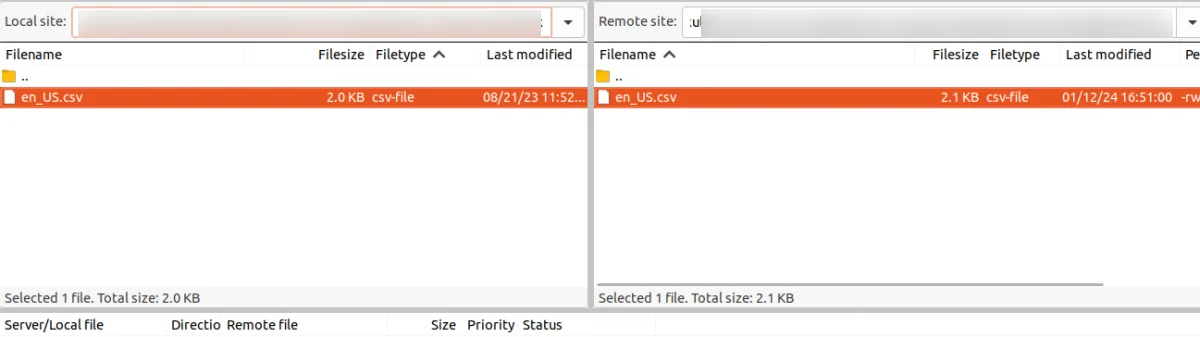
Now, upload it to the path src/app/code/Webkul/MpShippoShipping/i18n where the installation of Magento 2 is on the server. The module gets translated into the desired language.
User can edit the CSV like the image below.
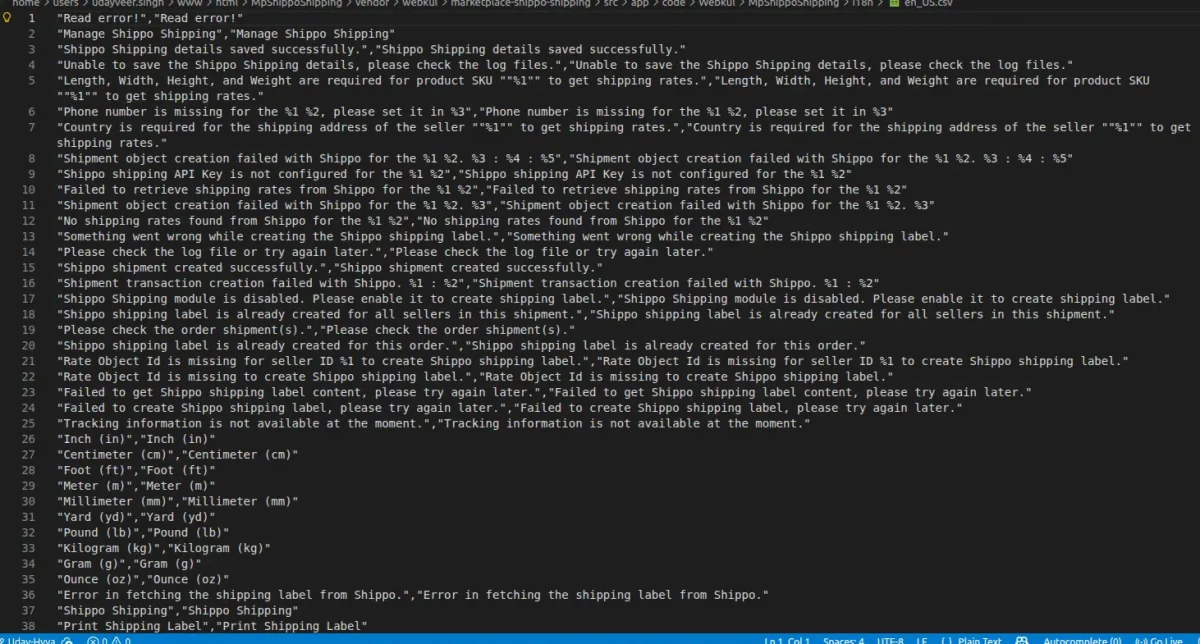
After editing and translating the CSV file, you need to save the translated file name according to your region, language, and country code, such as – de_DE.CSV.
Followed by uploading the translated file to the same folder from where you have obtained it. Now your module translation is complete.
How to Get Shippo API Keys
Please visit the following link for getting Shippo API Key.
Module Configuration
After installation, admin can configure module by navigating to: Marketplace Management → Shippo Configuration Settings → Webkul Marketplace Shippo Shipping

- Enabled for Checkout: Enable or disable Shippo shipping at checkout.
- Title: Enter shipping method name
- Shippo API Key: Enter Shippo API key to connect your store with Shippo.
- Allow Sellers to Save Shippo Shipping Details: Select Yes to allow sellers to add and manage their Shippo details.
- Validate Address on Checkout: Select Yes to validate customer’s shipping address at checkout.
- Ship to Applicable Countries: Choose ‘All allowed Countries’, if you want this shipping to be applicable to all countries. Else, choose ‘Specific’ if you want to apply this fixed rate shipping to certain selected countries.
- Ship to Specific Countries: if you have selected ‘Specific’ in the above column then Choose the specific selected Countries from this column.
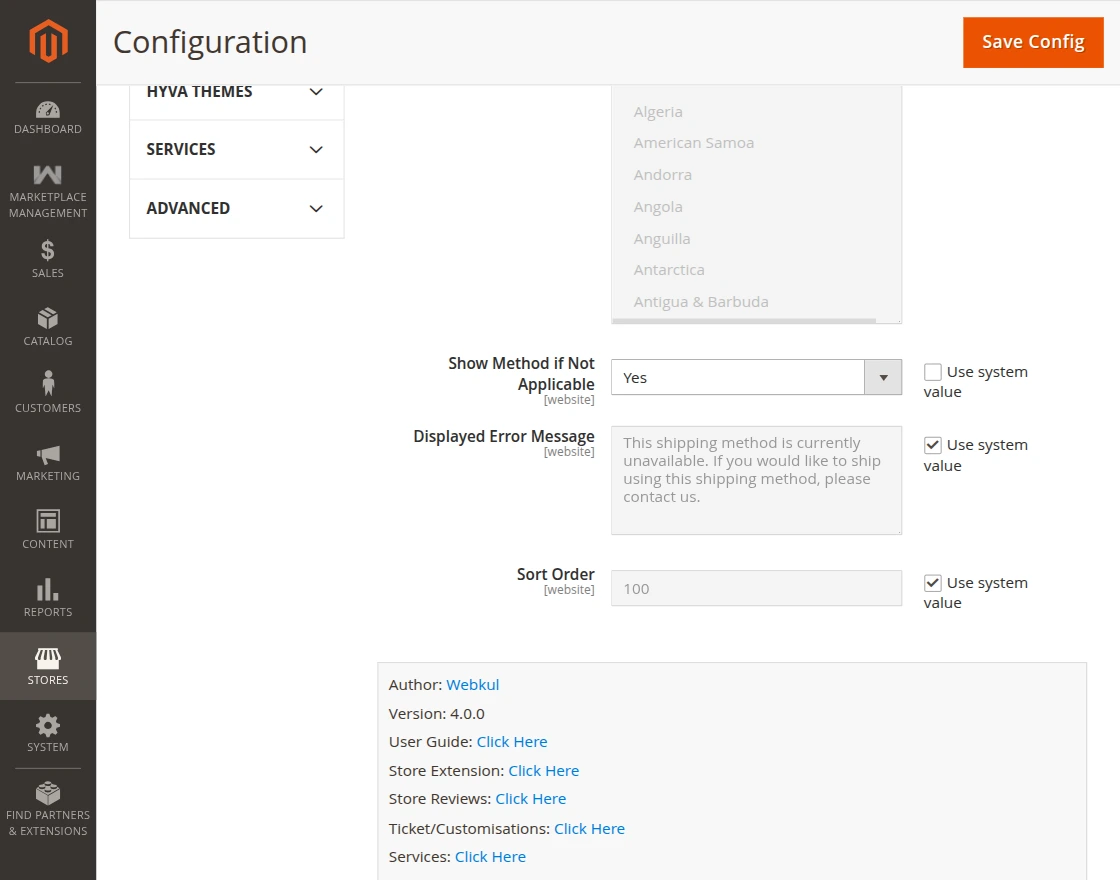
- Show Method if Not Applicable: Display the shipping method even if it is not available.
- Displayed Error Message: Set a custom message when shipping is not applicable.
- Sort Order: Set the display position of the shipping method at checkout.
Note:
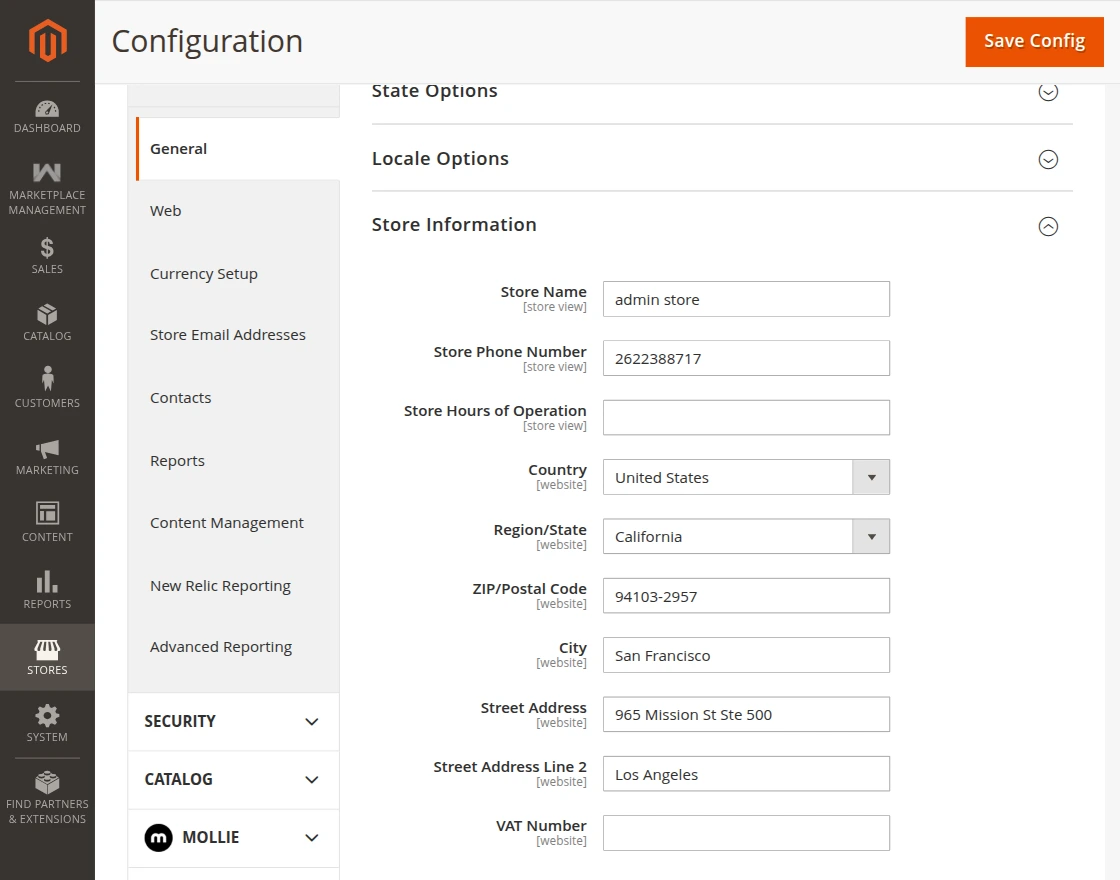
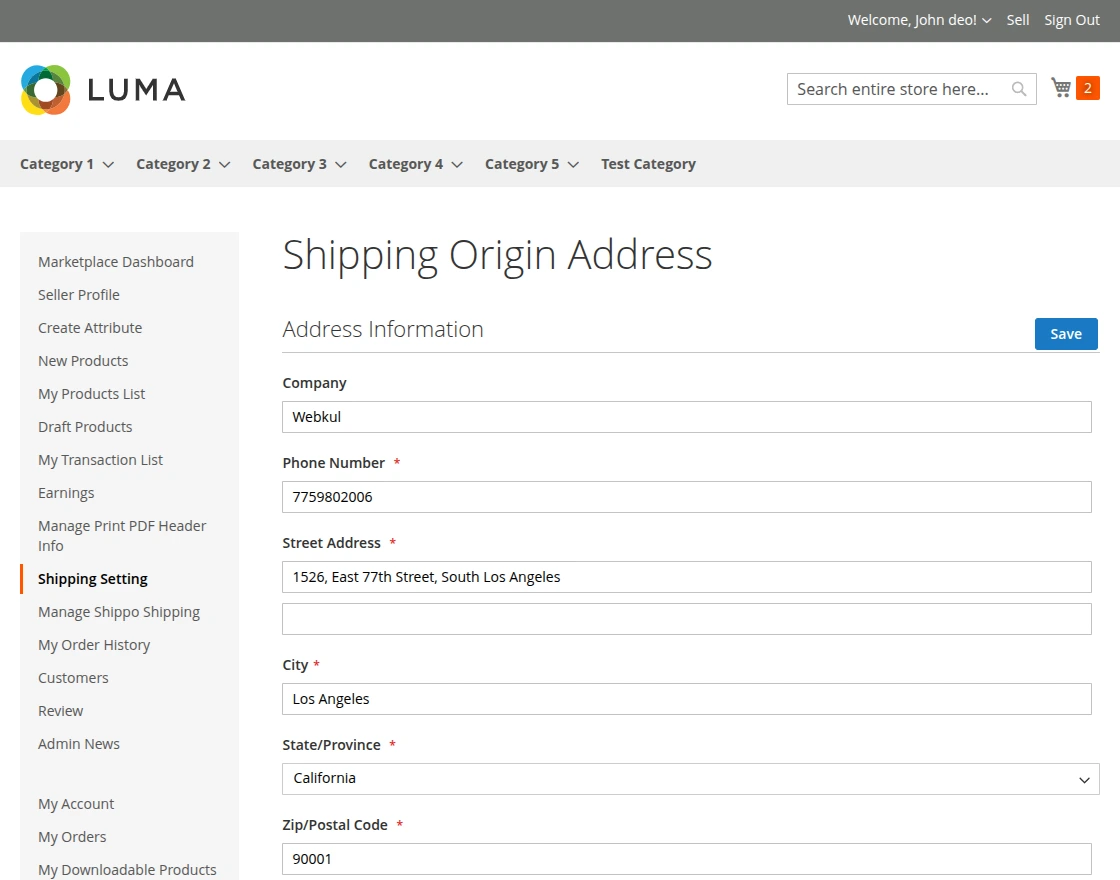
For the proper working of Magento 2 Marketplace Shippo Shipping, you need to configure the shipping origin address and store information.
For the shipping origin address, please follow this path: Stores > Configuration > Sales > Shipping Settings > Origin
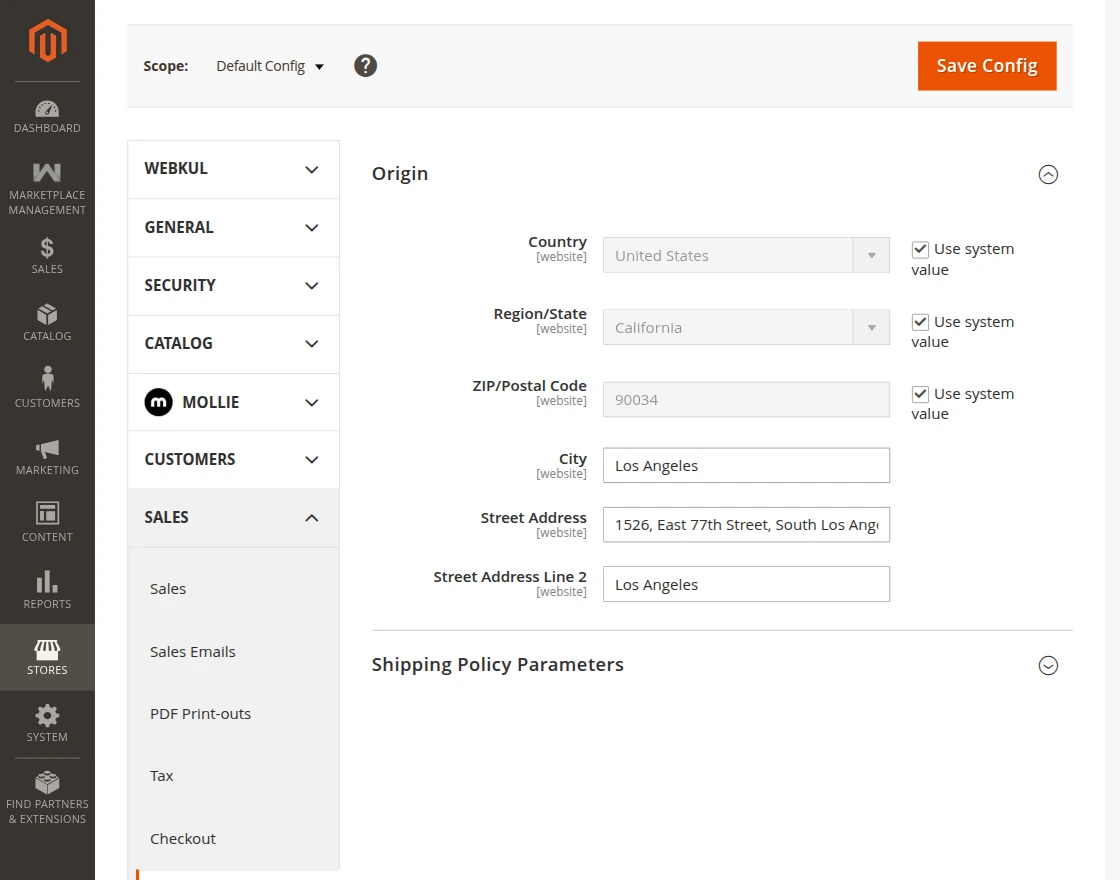
Here, admin can enter the origin address that will be used for shipping rate calculation.
Configure Shippo Settings (Seller Panel)
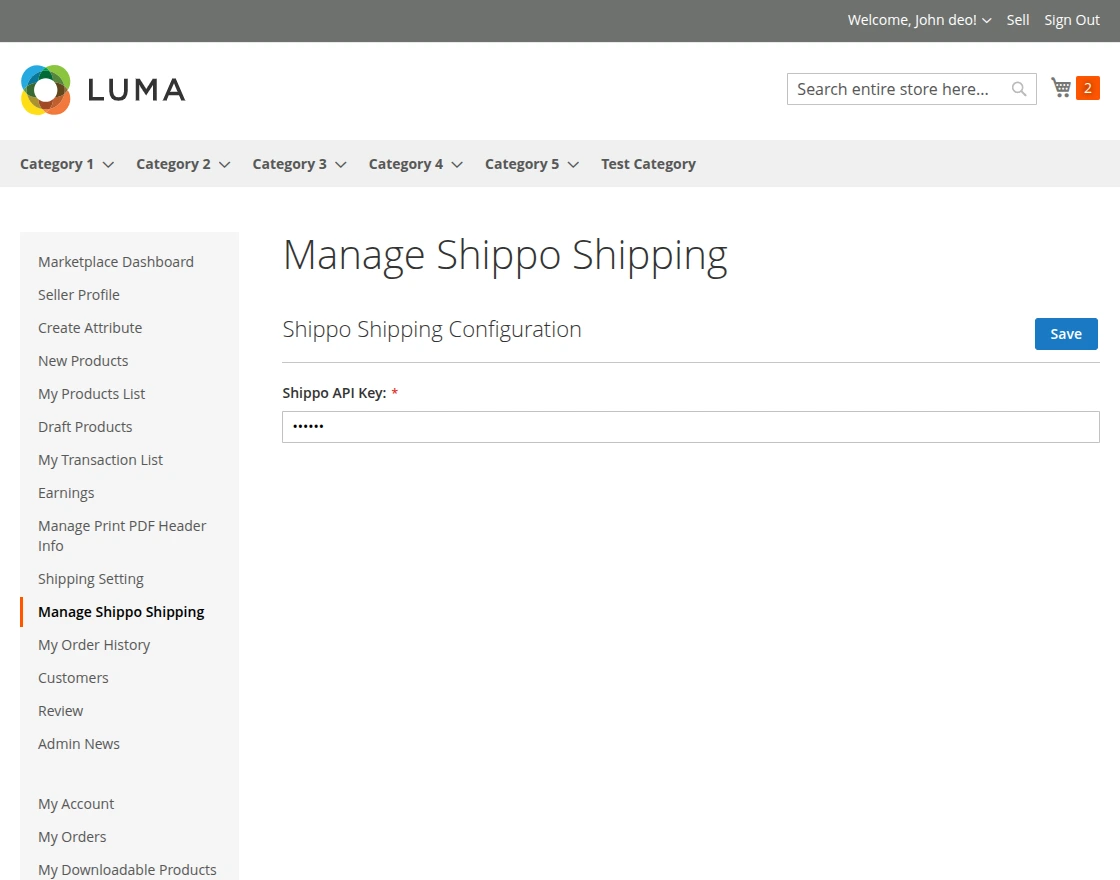
If Allow Sellers to Save Shippo Shipping Details option is set to Yes, then sellers can add and manage their Shippo shipping details from their panel.
First, seller can enter Shippo API key in the configuration section. This key connects the store with Shippo API and allows fetching shipping rates and generating shipping labels.
Next, seller can configure shipping origin address. This address will be used to calculate shipping rates based on the seller’s location, as shown below.
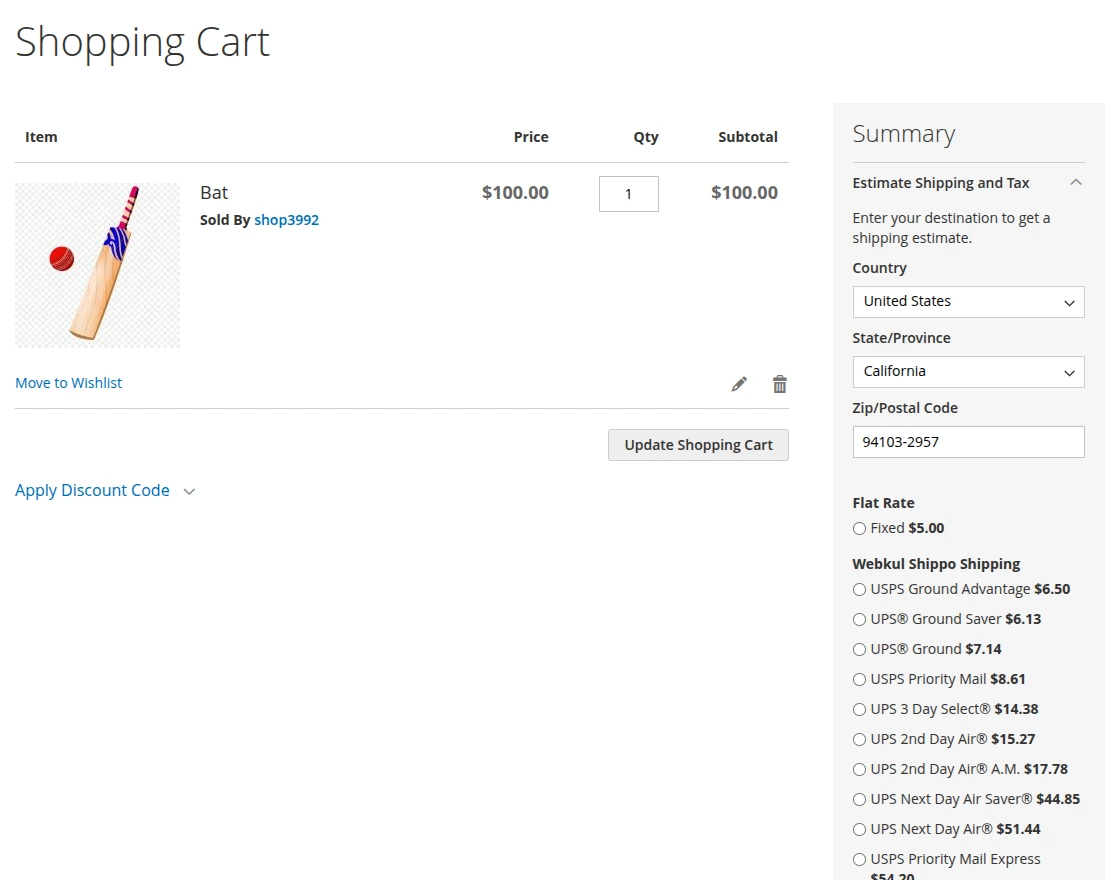
First, buyer adds the product to shopping cart and opens the cart page. The buyer can estimate shipping and tax based on the address.
Then available Shippo shipping methods will be displayed with shipping charges. The buyer selects the preferred shipping method and clicks Proceed to Checkout.
After clicking Proceed to Checkout, the shipping page will open. Here, the buyer can view the shipping address and available shipping methods.
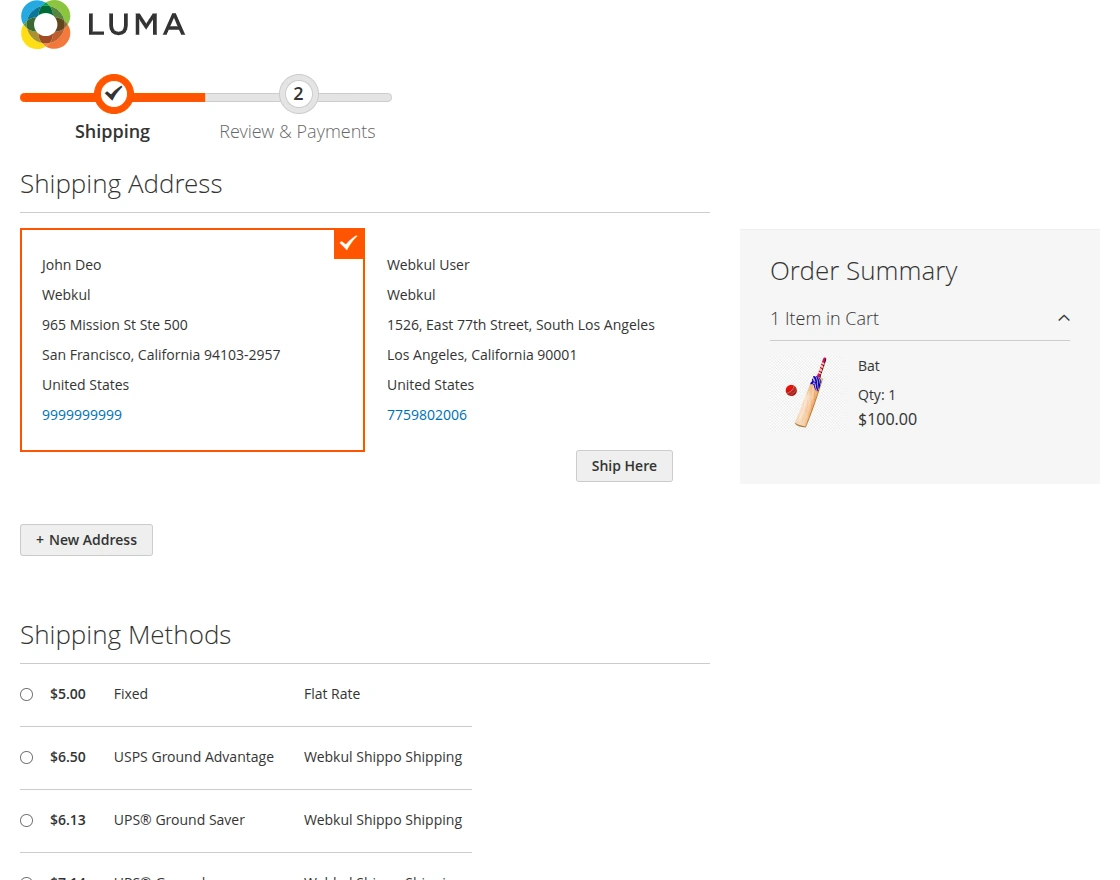
On the payment page, the buyer can review the selected shipping method under the Order Review section.

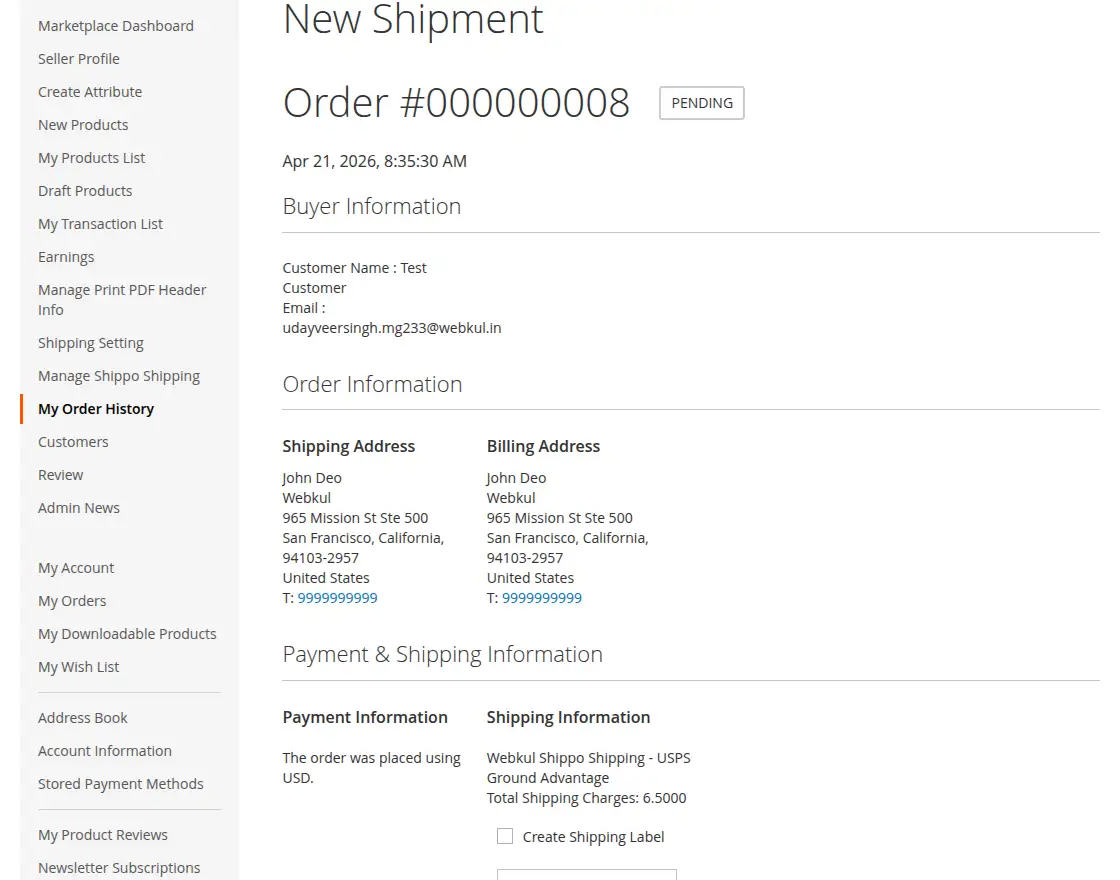
After order placement, the buyer can view the selected Shippo shipping method with all order details.

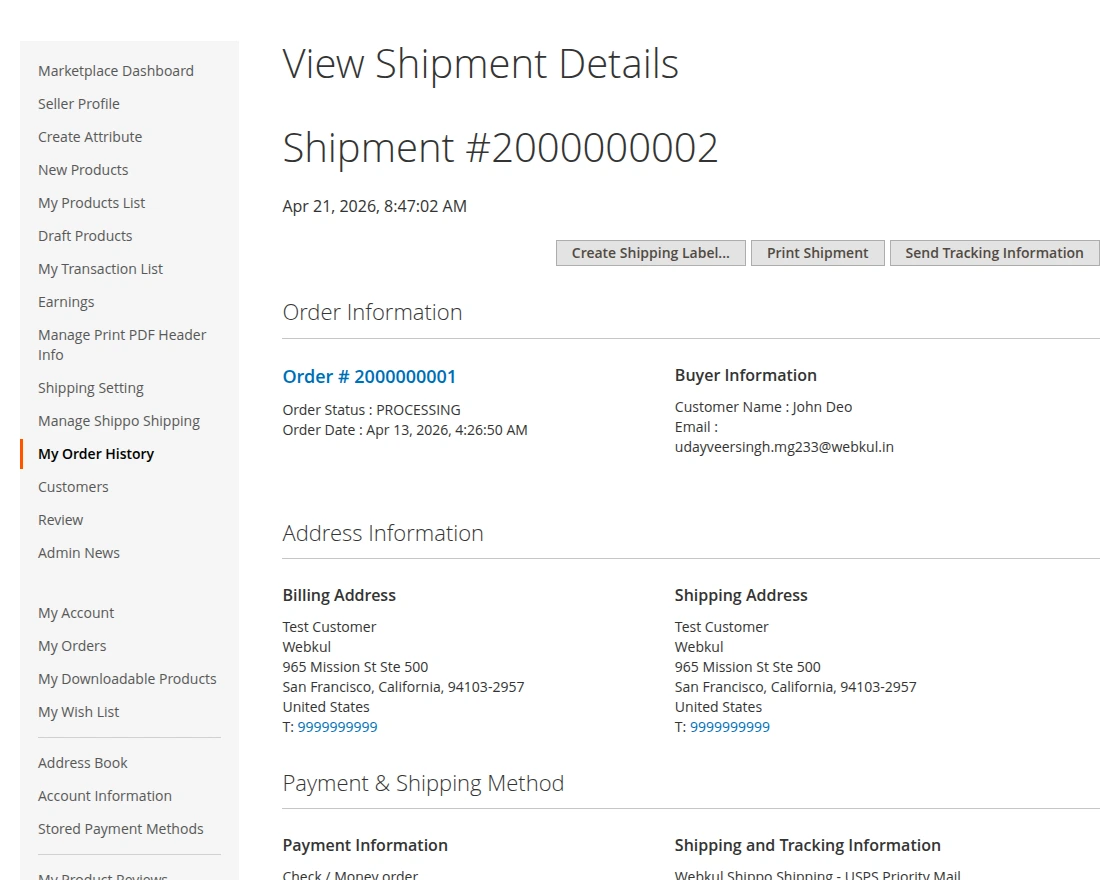
Seller Order Management – Marketplace Shippo Shipping For Magento
Create Shipment with Label
After generating the shipment, the seller can then select the “Create Shipping Label” option during shipment creation.
This will generate the shipping label automatically.
Generate Label from Shipment View
After that, the seller can create the shipping label during shipment creation by selecting the “Create Shipping Label” option.
Then, while creating the shipping label, the seller needs to select the package items for shipment.
After selecting the items, click on the Save button.
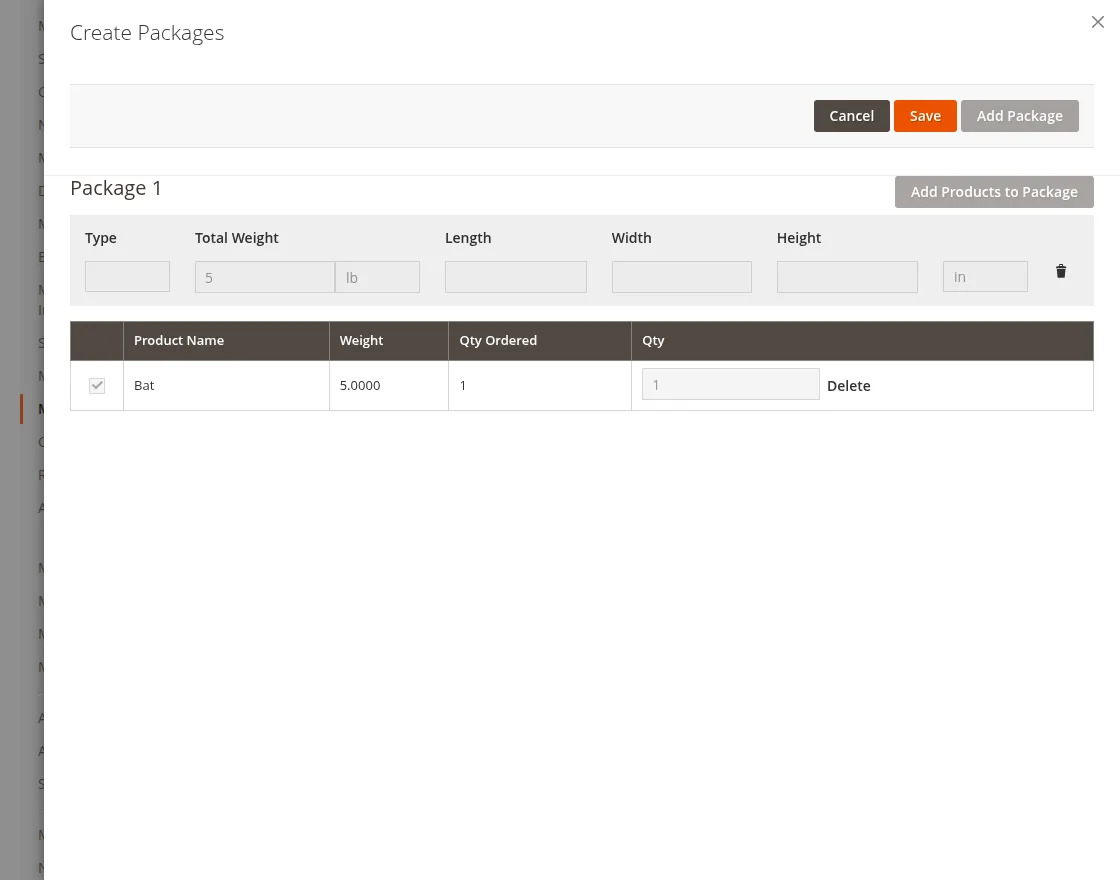
Once the seller clicks the Save button, the shipping label is generated automatically.
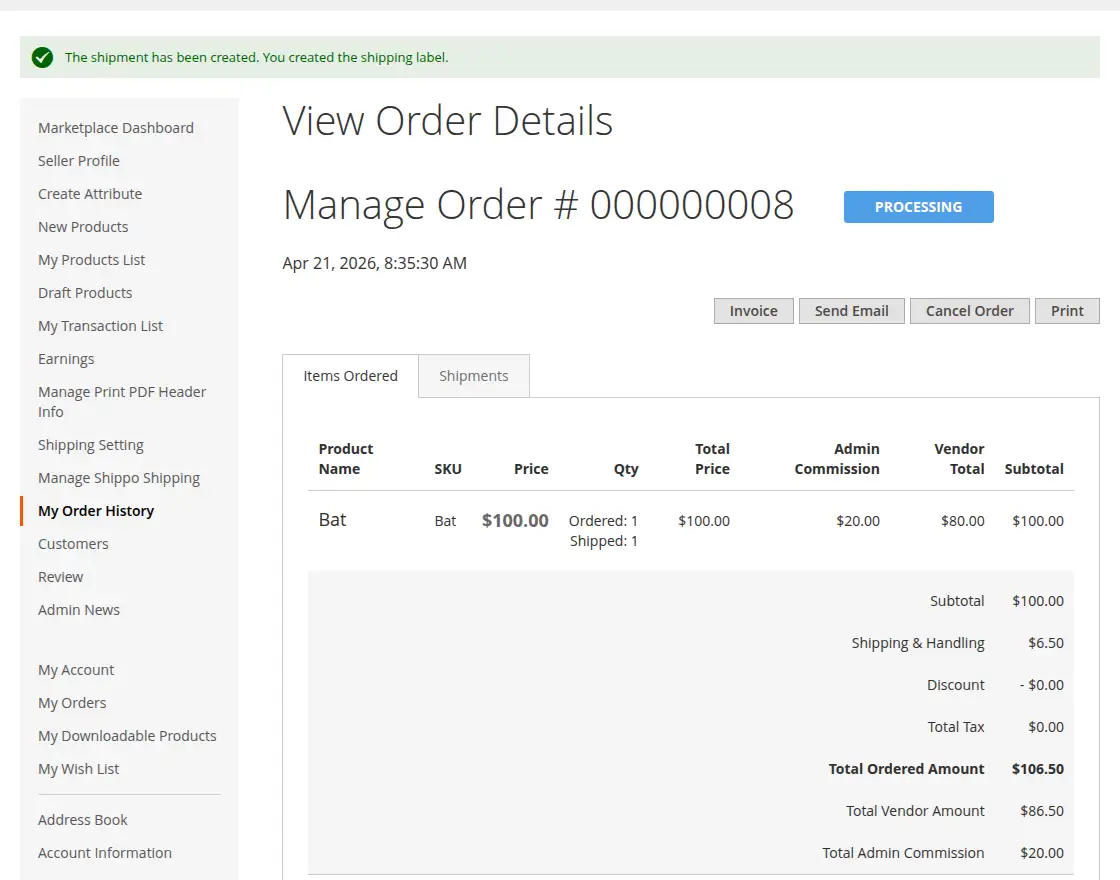
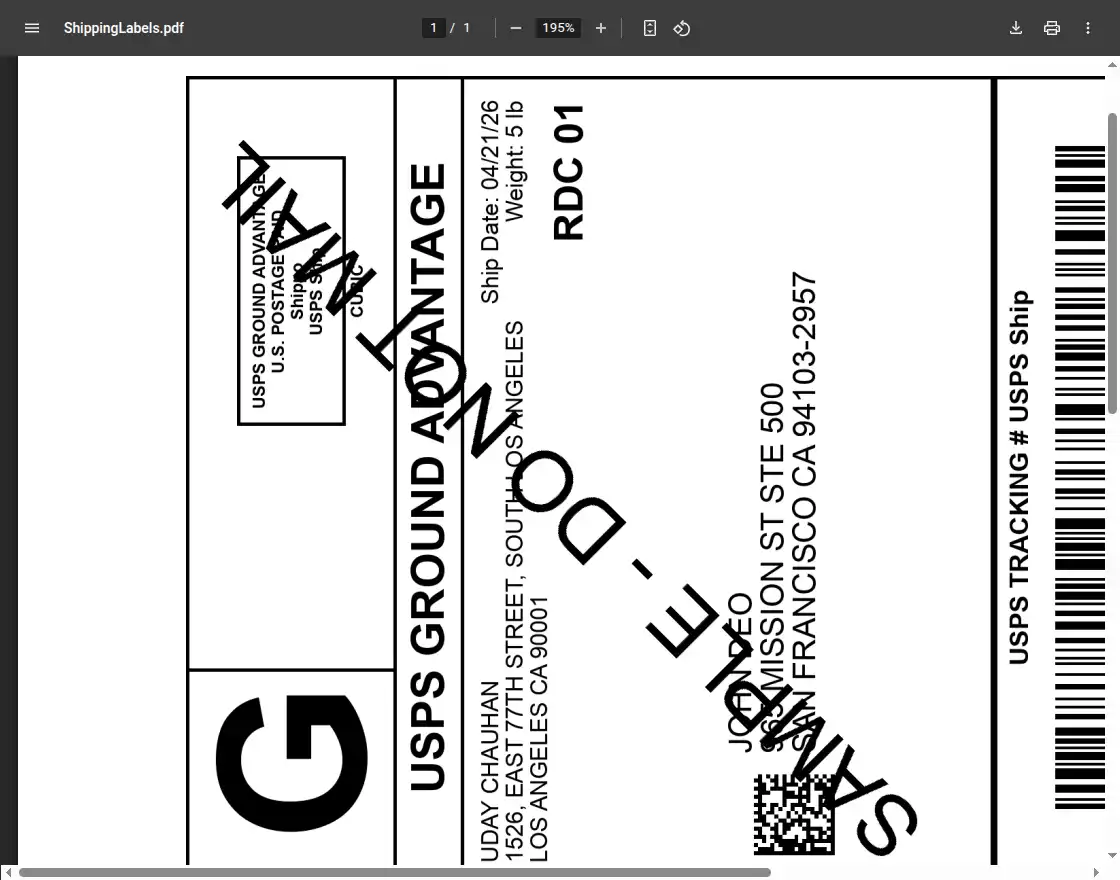
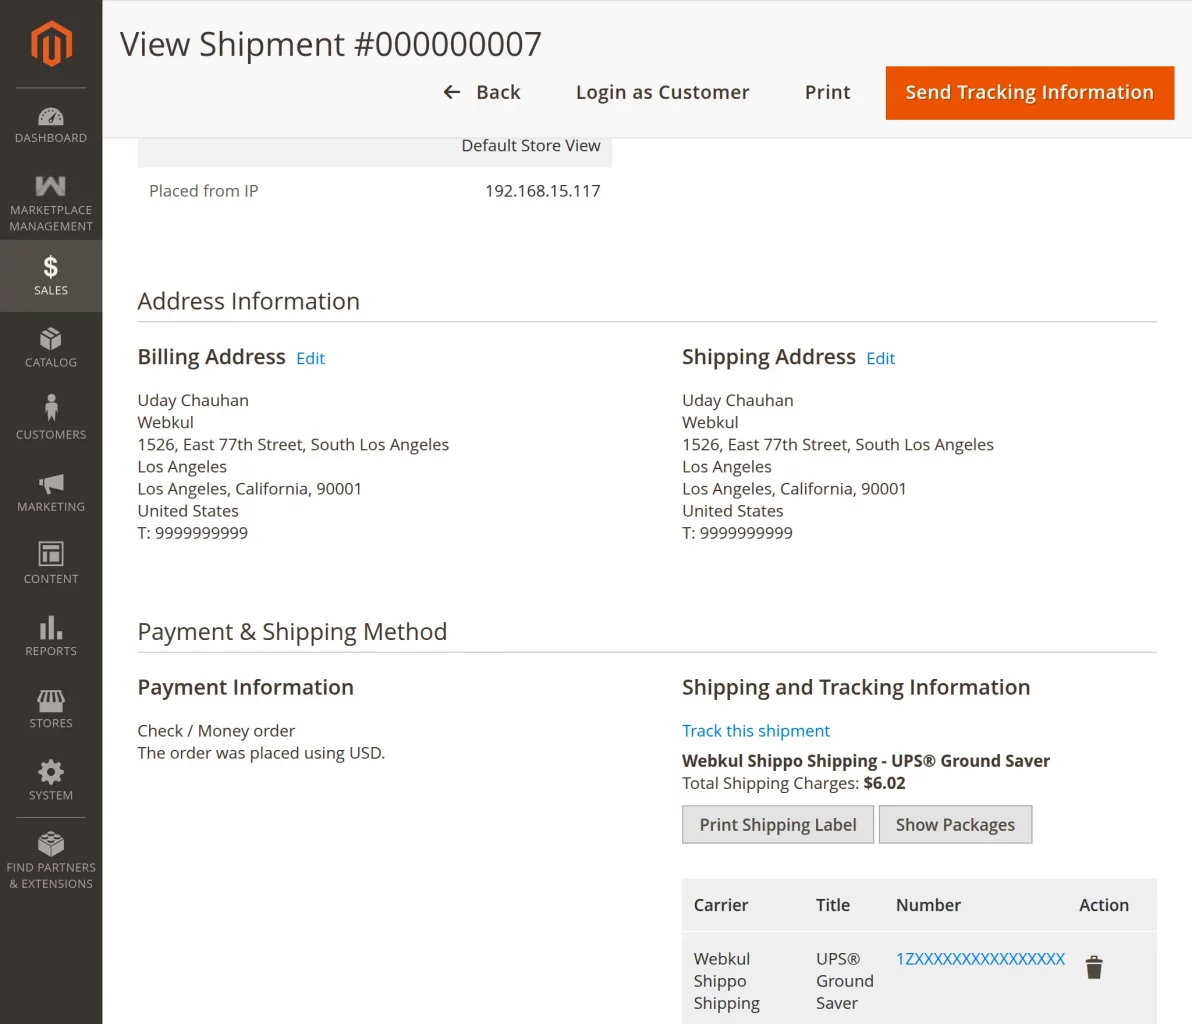
After the label is created, the seller can view it on the shipment page.
Then, they can download the label in PDF format for printing.
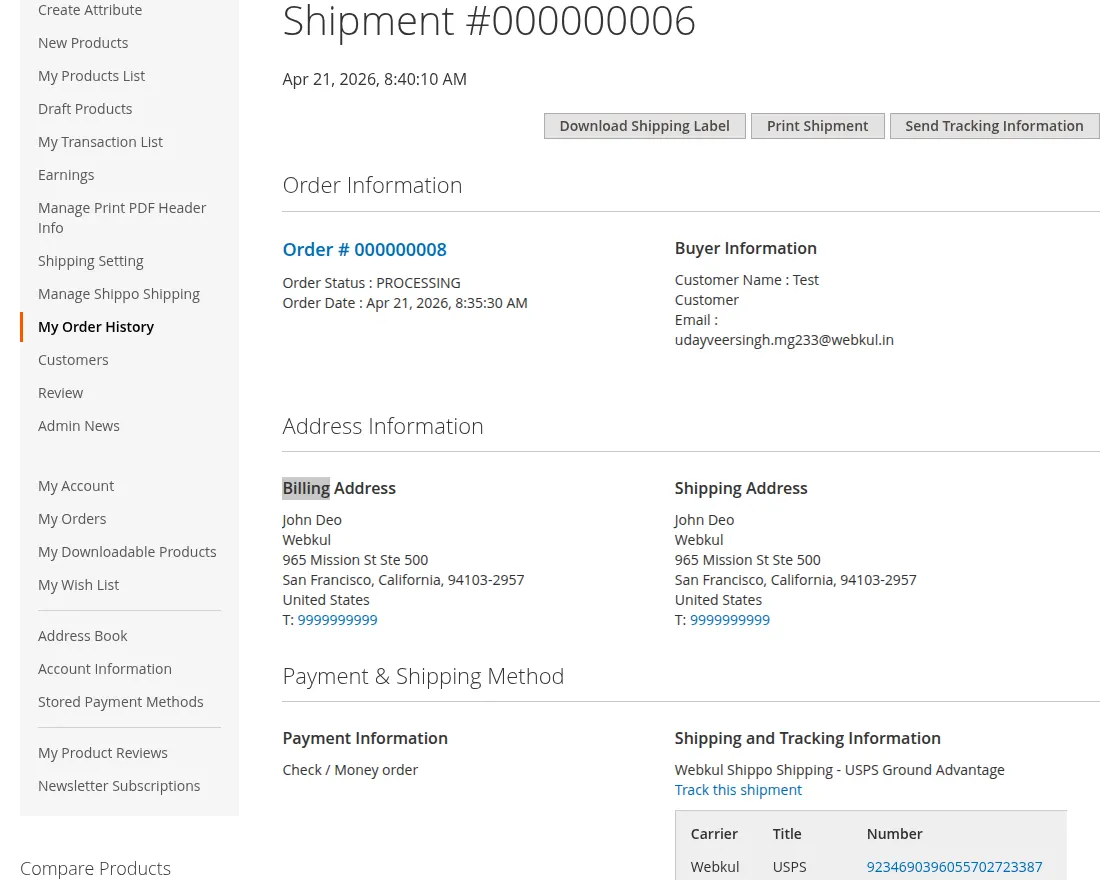
After label creation, click Download Label to get the shipping label in PDF format.
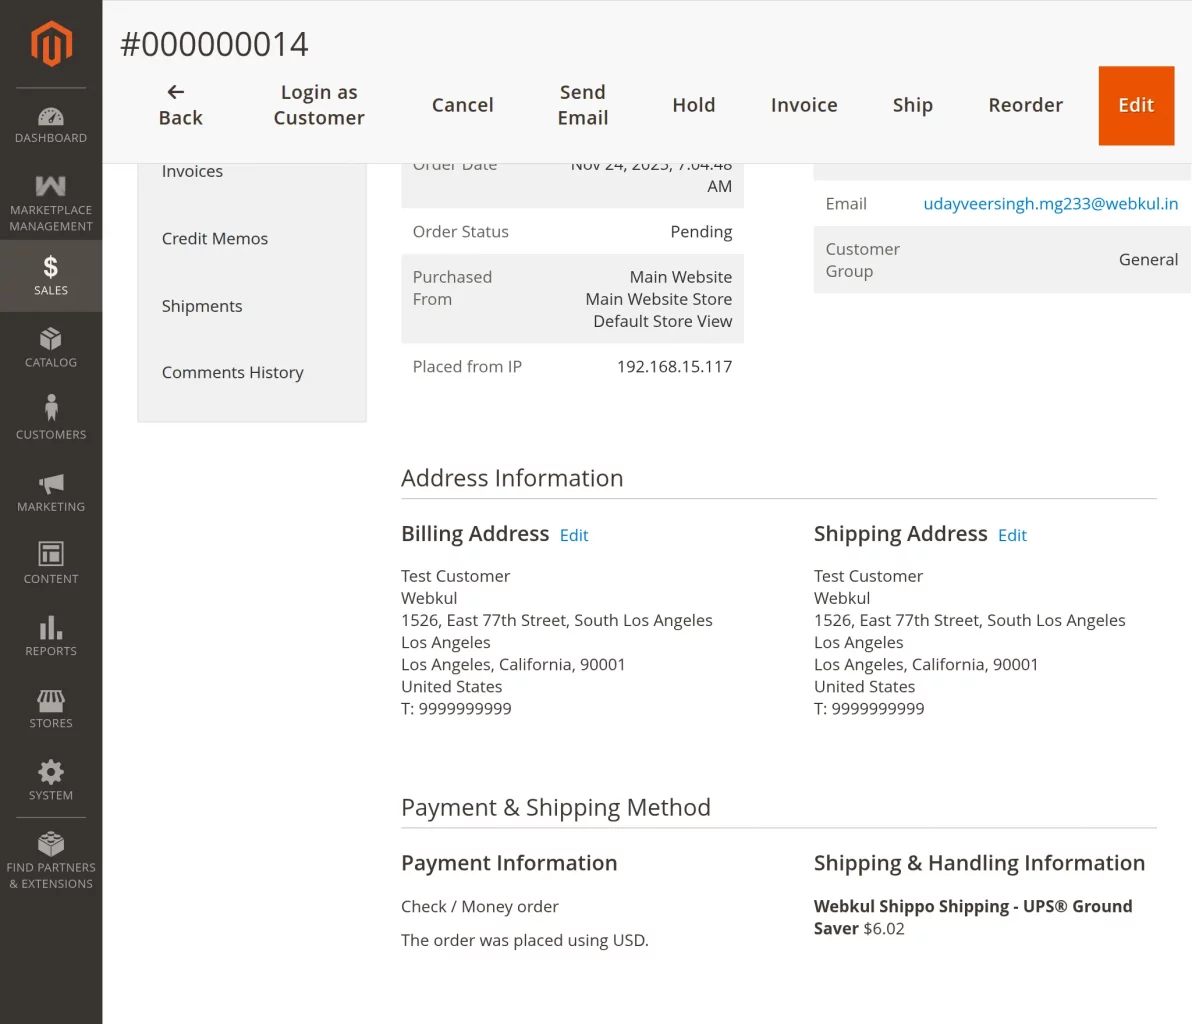
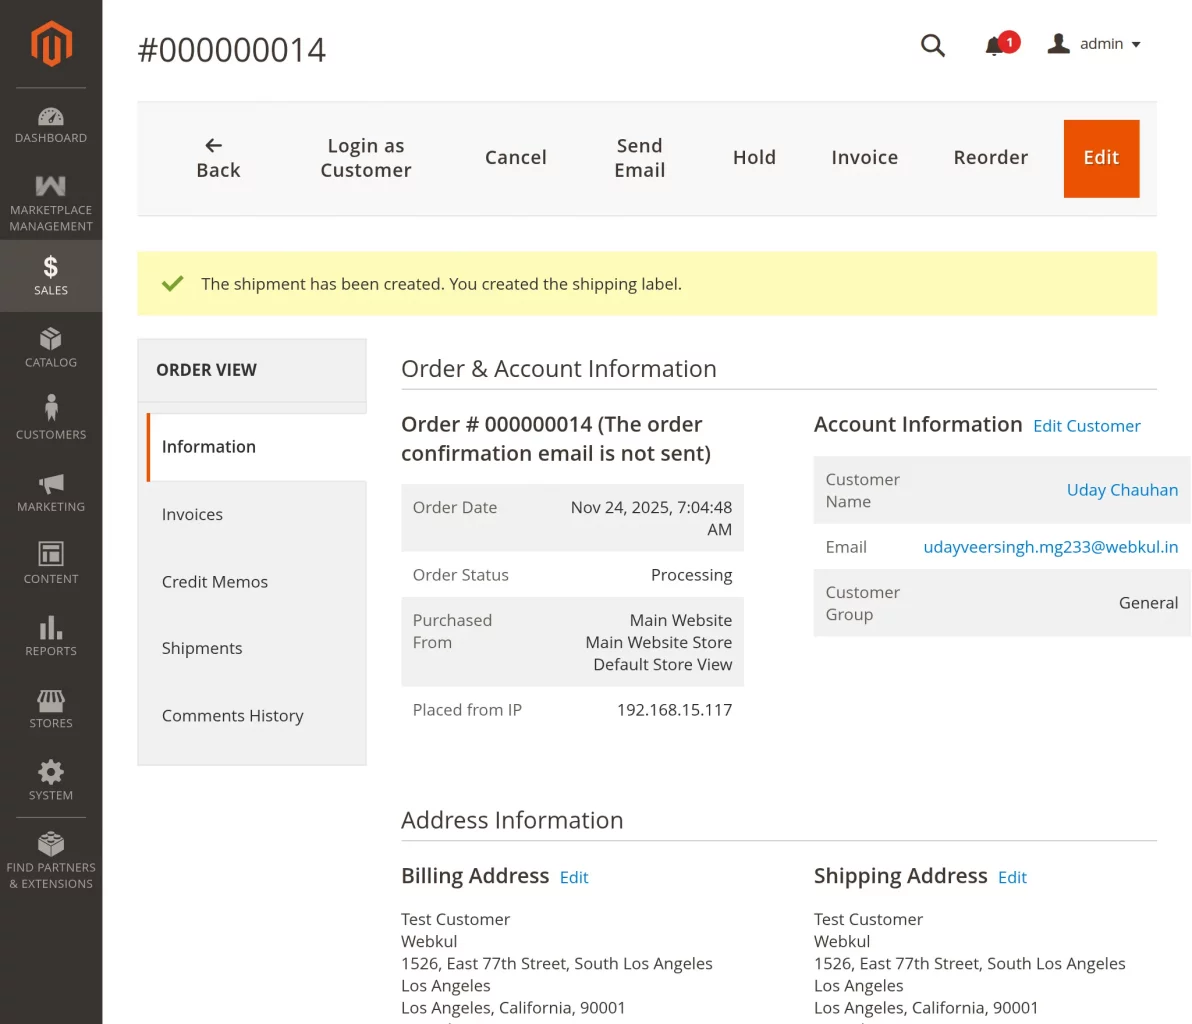
Admin End – View Order Page
After an order is placed, admin can view order details from Sales > Orders and check the selected Shippo shipping method.
After clicking the “Ship” option, the shipment generation page will open up. Here, admin will check the “Create Shipping Label“.
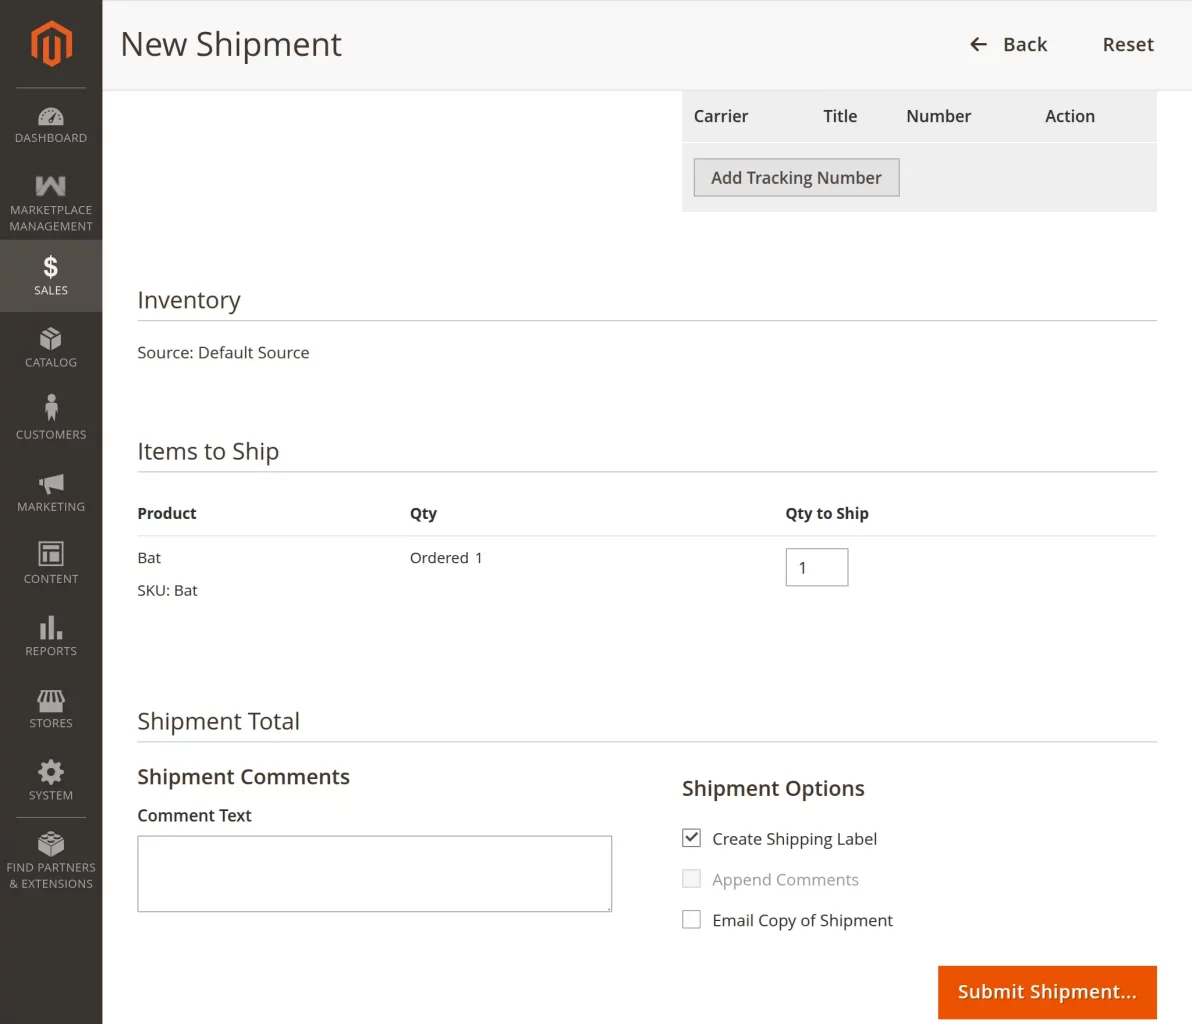
Now, after clicking Submit Shipping, admin will first check the products that are to be added to the package.
Then, click the “Add Selected Products To Package” button, as shown in the snapshot.
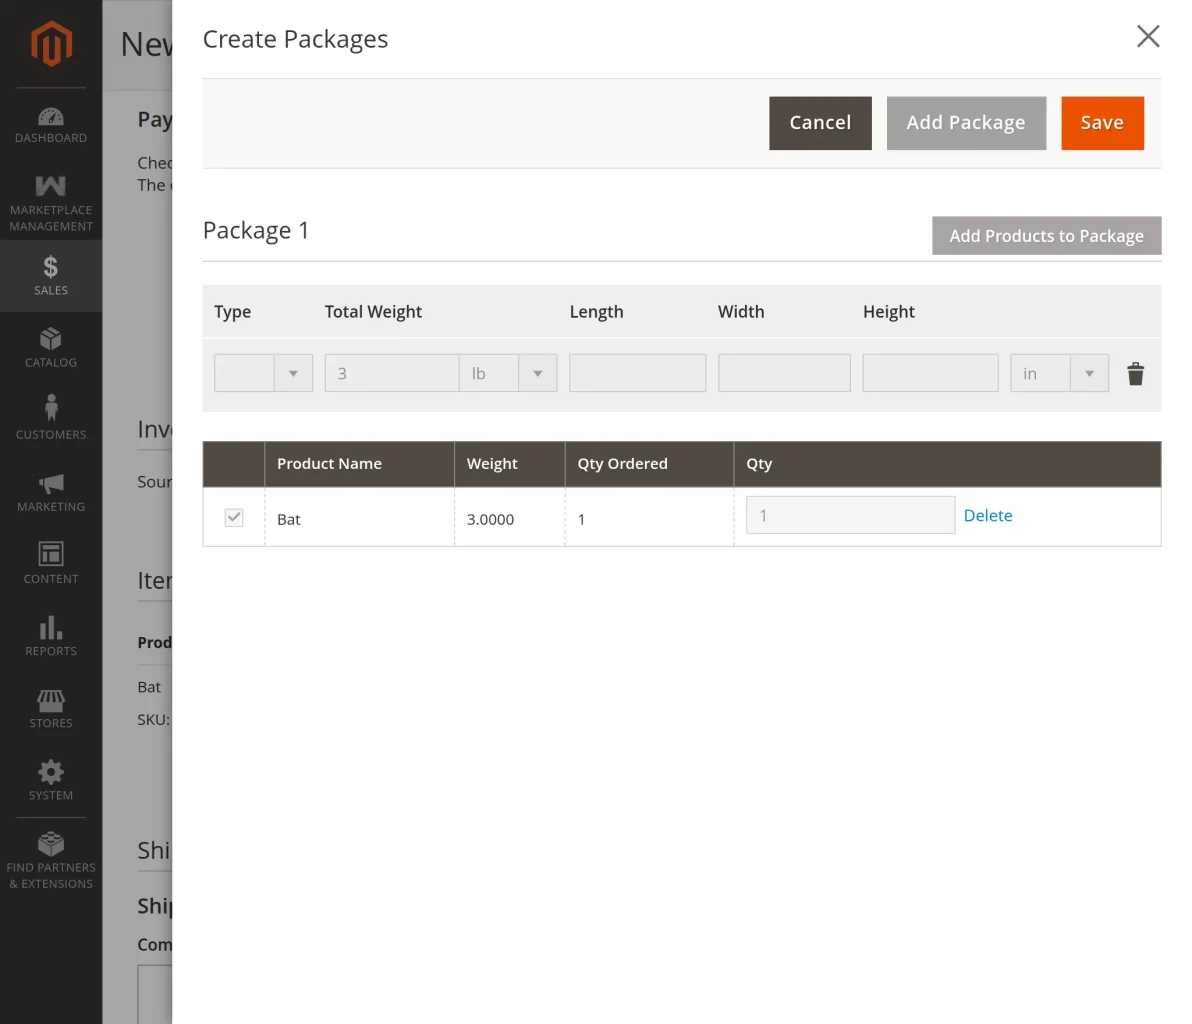
Lastly, admin, after clicking the “Add Selected Products To Package“, will click the button “Add products To Package“.
To add the products to the package. After you need to click the save button, as shown below in the snapshot.
Admin can view shipment details and print the shipping label from the shipment page.
That’s all for Magento 2 Marketplace Shippo Shipping. However, if you still have any issues, feel free to add a ticket and let us know your views to make the module better at webkul.uvdesk.com
Check out our collection of Magento 2 extensions.
Current Product Version - 4.0.0
Supported Framework Version - Magento 2.0.x, 2.1.x, 2.2.x,2.3.x, 2.4.x

Be the first to comment.