Want to make the seller login & sign up process quick? Then here comes the featured app called SOCIAL MEDIA LOGIN.
Through which sellers can login to their Multivendor Marketplace seller panel using Gmail and Facebook accounts.
Let’s understand this featured app step by step:-
How to Enable the Social Media App in Multivendor Marketplace
Go to the multivendor admin panel >> hover on three dots >> click on feature apps.

Now, scroll down and Click on enable to pay for Social media login feature app.

Configuration Settings for Social Media in Marketplace Admin
Once the admin has paid for this featured app then a sub menu named “SOCIAL MEDIA CONFIGURATION is added under the configuration dropdown.
i.e. Marketplace admin panel>>Configuration>>Social media configuration

Click on social media login configuration and the admin have to enable the LOGIN WITH FACEBOOK and fill in their Facebook API app ID and click SAVE CHANGES.
Similarly, enable the LOGIN WITH GMAIL and fill in their Gmail API client ID and Gmail API secret key click SAVE CHANGES.

Steps to make App development mode live
- Login to your developer account of Facebook through this link – https://developers.facebook.com/
- Click on “Create app” button.

3. Now, select the type of account and click on the “Next” button below.
Note: App type can’t be changed after you created this app.

4. After this, enter your marketplace shop name in the “display name” field, your email in-app contact email field, and Click on create app button.

5. Now, you will be redirected to the dashboard page of your Facebook developer account where you will see the application ID.
But before you copy and paste the App ID in the social media login configuration, first you have to follow some steps to make the app development mode live.

6. To make app development mode live, click on Setup buton on the Facebook login section and then click on Basic Settings.


Now, fill in your admin panel URL in the App domain field, enter the privacy policy URL, enter the terms of service URL and select the category.

After the above steps then click on the Start verification button for the verification.

Scroll down to fill “Data protection officer contact information” section i.e. Name, email, Street Address, City/district, country, etc.

Now, click on “Add platform” button to select the platform of your multivendor marketplace app that you have currently and then Click “Next” & “SAVE CHANGES” buttons.


7. Now, some permission is needed for email and the public_profile.
Go to App review >> Permissions & features >> click the “Get advanced access” button in front of the Email and public_profile.


8. Now, the final steps to make App development mode live.
Go to Facebook login section >> Settings >> Enable “Login with the javascript SDK” and click “SAVE CHANGES” button below.
After this, you will see that the APP development mode is live.

9. Lastly you can paste the Facebook API App ID in the social media login configuration.

Configure OAuth Credentials for Google Login in MVM
- Log in to your Gmail developer account through this link – https://console.developers.google.com
- Go to your Enabled APIs & services section >> Click on the “Create Project” button.

Now, write your project name and give the organisation location and click on “Create” button.

3. Now, Go to “OAuth consent screen” >> check your app name and user support email >> add your website URL in the Authorized domain and Click the “SAVE & CONTINUE” button.


4. Now, Go to Credential >> click on “Create Credential” >> then Click on OAuth clientID

5. After, clicking on OAuth client ID, you have to fill in your admin panel URL in the Authorized Javascript origins field and Click “SAVE” button below.

6. Again go to the OAuth consent section >> finally click on “publish app” button.

Now, you can get the client ID and secret key from the Credential section >> click on that app name and copy the Client ID and secret key.
Copy this client ID and secret in the social login configuration of the marketplace app.


As soon as you have pasted this client ID and secret in the social login configuration of the marketplace app.
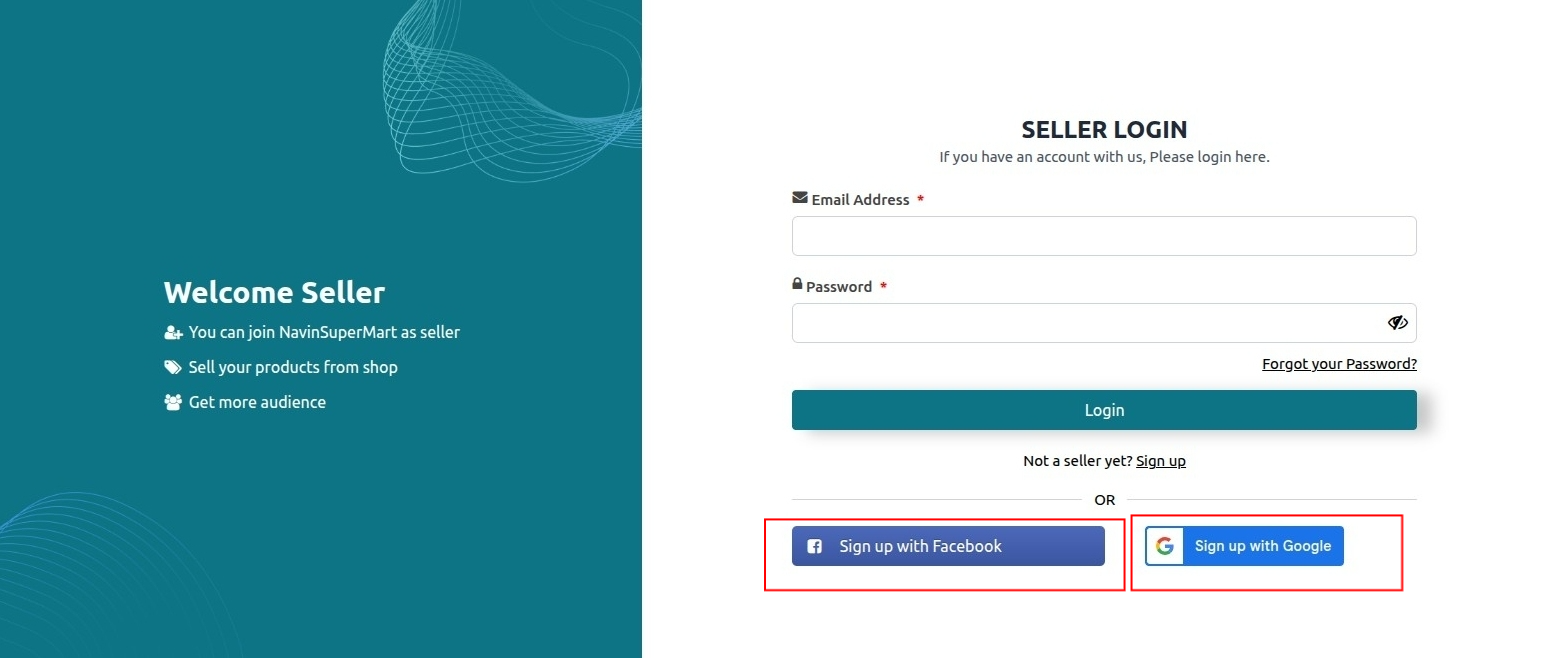
Then your seller login page will look like the below:-
Social Media Login Enhancement
Sellers who registered using email and password can also log in via Google or Facebook, as long as the social account uses the same email address as their marketplace account.
Login Rules:
- Sellers who signed up with an email and password can log in using either:
- Email & Password (Normal Login)
- Google/Facebook Login (Social Login)
- Sellers who created their account exclusively through Google or Facebook login cannot log in using the normal email/password method unless a password is separately set for their account.
This enhancement provides a more flexible and convenient login experience while maintaining account security and consistency.
Support
If you need any kind of support, just raise a ticket at https://webkul.uvdesk.com/en/. You can also contact [email protected] to get proper assistance.
Thank You for reading this Blog!

Be the first to comment.