This guide describes the configuration and workflow for Odoo Bridge For Magento® 2 (MOB) Credit memo.
To know how to set up the configuration of Odoo and Magento® 2, please refer to the User Guide for Odoo Bridge For Magento 2.
INTRODUCTION
Just a few clicks to Render the Credit Memos!
Returns and Refunds of the orders are managed through credit memos. Do you sell your products on Magento® and still in the dilemma of managing order returns and refunds? Odoo Bridge For Magento® 2 (MOB) Credit Memo is a perfect solution for you.
Return and Refund of Orders plays a crucial role while running an e-commerce business. There can be many reasons for your customers that they ask for return or refund for any order. At such time offering easy return and refunds can create a loyal customer’s base.
It’s not just the order returns and refunds that can be managed by Credit Memo in MOB2 but you can also offer Cashbacks (Adjustment Refunds) too.
Moreover, if you want to migrate the credit memos from Magento® 2 to Odoo then also Odoo Bridge For Magento® 2 (MOB) Credit memo can help you to a great extent. Hence, the credit memos you will create on Magento® 2 will reflect as credit notes on Odoo Backend.
Features
- Odoo Bridge For Magento® 2 (MOB) Credit memo allows you to track and manage credit balance & transaction history
- It offers Real-time synchronization from Magento to Odoo.
- You can maintain customer return and refund under accounting in Odoo backend.
- Credit Memo in MOB2 also facilitates you to generate partial returns and refunds.
Installation
- Once you purchase the App from Webkul store, you will receive the link to download the zip file of the module.
- Extract the zip file on your system after the download finishes.
- You can find two folders named as Magento® Module and Odoo Module in the zip file.
Magento End
- Place “Magento Module” folder inside Magento® directory.
- Run below-mentioned commands on the terminal from your Magento® root directory.
- You need to upgrade the module list by running the command: “php -f bin/magento setup:upgrade“
- Then do index management by running below command on terminal: “php bin/magento indexer:reindex“
- Then do cache management by running below command on terminal: “php bin/magento cache:flush“
- After clearing the cache. Logout and then re-login Magento.
Odoo End
- Place the modules inside Odoo Addons which are available in “Odoo Module” folder.
- Now, open the Odoo and click on the Settings menu. Here, click on Activate the Developer Mode. One can also activate the developer mode by typing ‘debug’ after ‘web?’ in the URL.
- Then, open on Apps menu and click on ‘Update Apps List’.
- In the search bar, remove all the filters and search ‘odoo_magento_order_refund’.
- You will be able to see the module in the search result. Click on ‘Install’ to install it.
CONFIGURATION
- Firstly, login to the Magento Database then click on the Stores tab.
- Now, click on the “Configuration”, then select Catalog to go to the Inventory.
- Here, admin can select inventory to allow the setting to automatically return the credit memo items on stock.

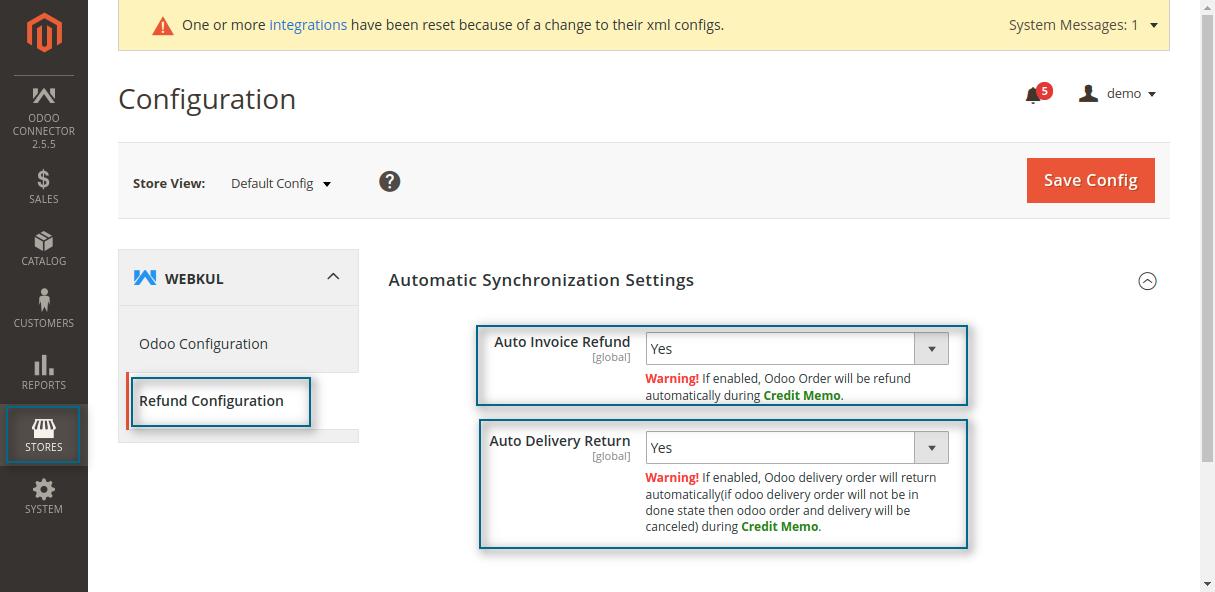
- For the refund configuration, click on the Odoo Configuration then select refund configuration.
- Here, admin can allow the settings for automatic invoice refund and automatic delivery return in Odoo.
WORKFLOW
- In the Magento end, go to the sales order and select the invoiced order.
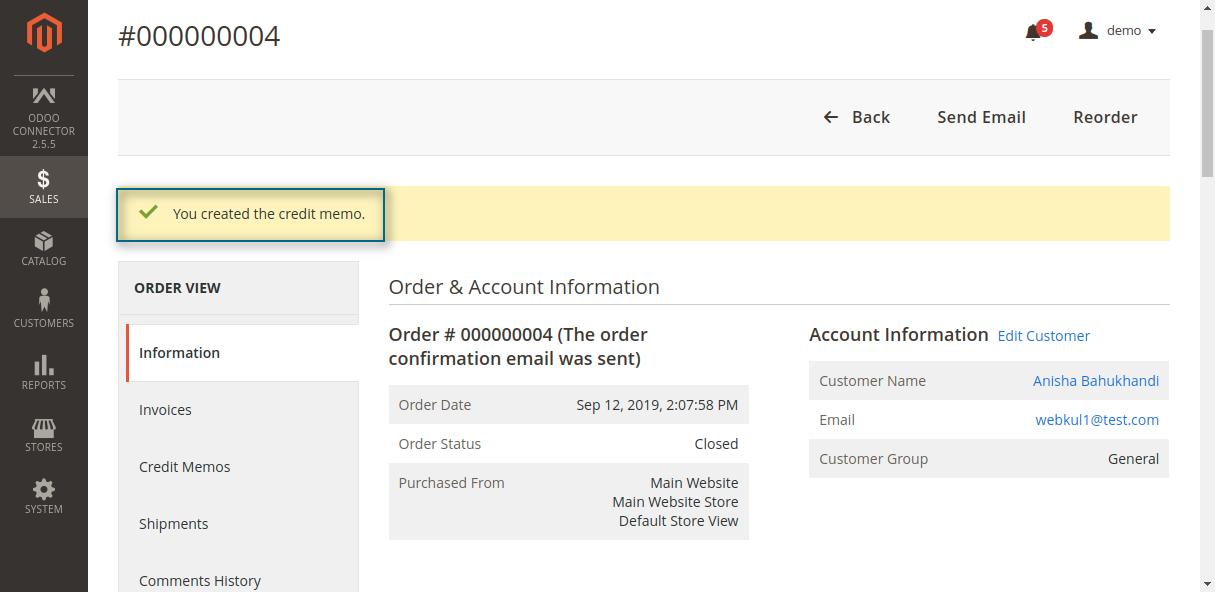
- Now, click on the “Credit Memo” to generate an order refund.


- You will receive a notification after the success of the order refund.
- Login to the Odoo Backend, select the sales order for which you have created order refund.
- Here, you can see the message for successful delivery return

- Click on the Other Information tab, here you can see the enabled Refunded checkbox.

- Now, go to the Invoicing then click on the Payments which is available under Vendors Tab.
- Here, you can see the payment refund.

NEED HELP?
Did you find the guide helpful? Please feel free to share your feedback in the comments below.
If you have any issues/queries regarding the module please raise a ticket at
https://webkul.uvdesk.com/en/customer/create-ticket/
For any doubt contact us at [email protected].
Thanks for paying attention!!
Current Product Version - 2.1.0
Supported Framework Version - Magento 2.0.x, 2.1.x, 2.2.x,2.3.x, 2.4.x

Be the first to comment.