Magento 2(Adobe Commerce) Marketplace Multishipping allows customers to select shipping according to the seller in the marketplace.
This will benefit the buyers and sellers in a whole lot of different ways.
Magento 2 Multi Shipping Marketplace extension will assist the sellers in allowing different Shipping methods for their products.
The buyers can select from the different shipping services from different sellers in the same order.
Moreover, to use Marketplace Multishipping For Magento 2 extension you must have installed the Magento 2 Marketplace Module and one of our below-listed shipping methods by Magento 2 Marketplace.
Check the multi shipping plugin working at the storefront and the initial configuration settings via marketplace admin and the vendors:-
- Table rate Shipping.
- UPS Shipping .
- Per Country Per Product Shipping .
- Free Shipping.
- USPS Shipping Management.
- DHL Shipping.
- Fixed Rate Shipping.
- Shipping On Per Product.
- Aramex Shipping.
- Canada Post Shipping.
- Fastway Shipping.
- Royal Mail Shipping.
- Correios Shipping
- Australia Post Shipping
- EasyPost Shipping
- Frenet Shipping
- Fastway Shipping
- Australia Post Shipping
- Distance Based Shipping
- ShipStation Integration
Features
- The Sellers can allow their shipping services from their panel.
- Buyers can select shipping according to sellers in the same order.
- Admin has to install the shipping addon from above list to manage the shipping from vendor panel.
- Sellers can choose the shipping channel which they want to display at checkout. So that shipping will be based on per seller / vendor instead of the whole cart.
- This addon will enable the shipping selection and freight calculation at the vendor level.
Installation
The installation is quite simple just like the standard Magento 2 extensions.
Customers will get a zip folder and they have to extract the contents of this zip folder on their system.
The extracted folder has an src folder, inside the src folder you have the app folder. You need to transfer this app folder into the Magento 2 root directory on the server as shown below.

After the successful installation, you have to run these commands in the Magento 2 root directory:
php bin/magento setup:upgrade
php bin/magento setup:di:compile
php bin/magento setup:static-content:deploy
php bin/magento indexer:reindex
php bin/magento cache:flush
Configuration For Multi-lingual Support
For multilingual support, the admin will navigate through Store->Configuration->General ->Locale Options and select the locale as German (the language into which the admin wants to translate his store content ).

Translation
If a user wants to translate their module from English to German then they need to follow the path app/code/Webkul/MpMultiShipping/i18n in their unzipped folder and will get a CSV file with the name “en_US.csv”.
Further, they will rename that CSV as “de_DE.csv” and translate all right-side content after the comma in the German language. After editing the CSV, save it and then upload it to the path app/code/Webkul/MpMultiShipping/i18n where they have installed Magento 2 on the server.
After that, the module will be translated into the German Language. It supports both RTL and LTR languages.
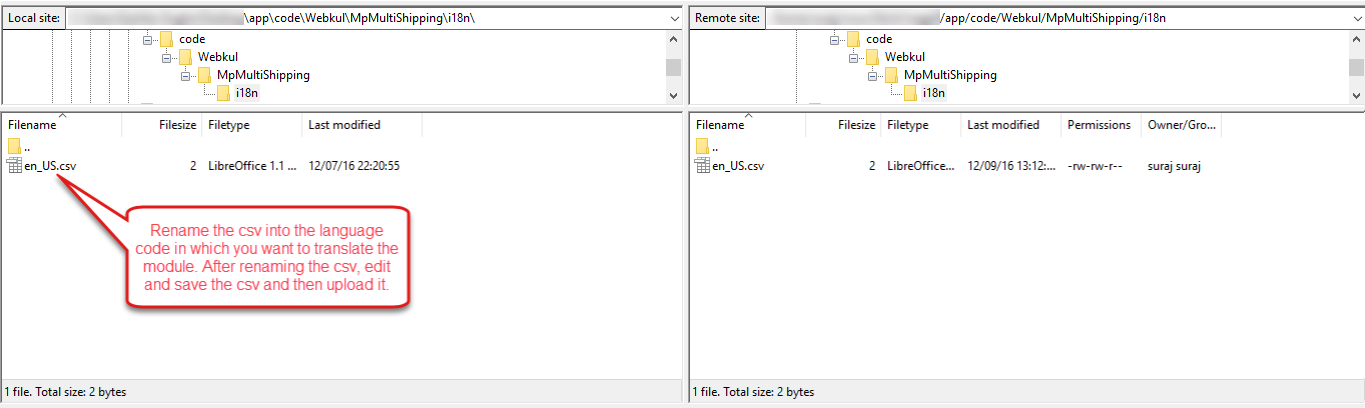

Meanwhile, the user can edit the CSV like the image below.
Admin Management
After the successful installation of the module, you will see Webkul Marketplace Multi Shipping method under Stores > Configuration > Sales > Delivery Methods, here you can make the following settings:
Enabled for Checkout- From here the admin will select ‘Yes’ to activate multiple shipping.
Title- Enter the shipping title here.
Method Title- Enter the shipping method name here.
Show Price- The admin can show the price in two ways; Seller wise and Product wise. From here the store admin can set the price visibility from the dropdown list.
Show Method if Not Applicable- The admin can select Yes it will display the message ‘The method is not applicable’.

How To Use Marketplace Multishipping For Magento 2
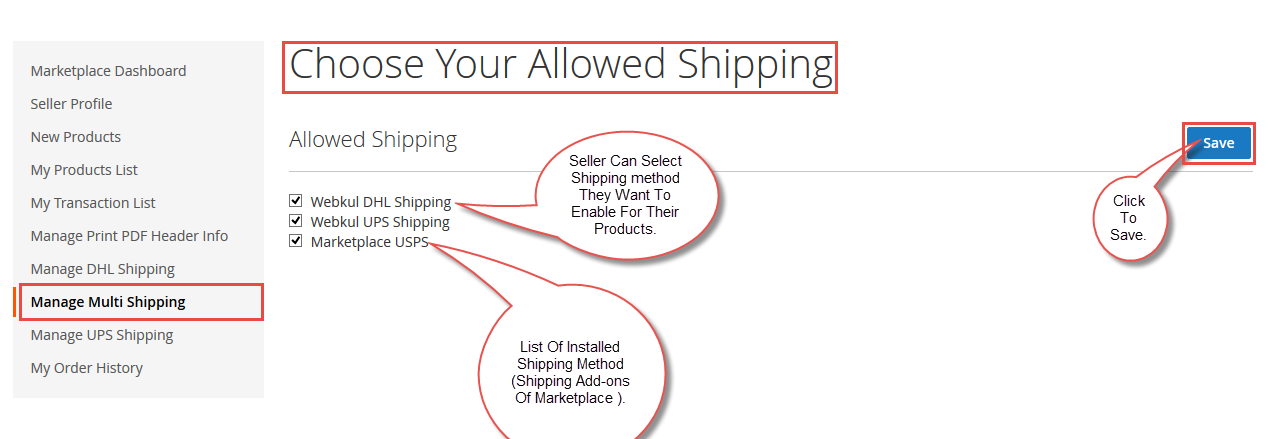
After the successful installation of the Adobe Commerce Multi Shipping Marketplace module, you will see a menu item Manage Multi-Shipping under the Seller panel.
Further, when you click on the Manage Multi Shipping tab, you will have to choose your shipping method as shown in the screenshot below.
After that, the seller can enter his origin address under the Shipping Setting option in order to calculate the shipping charges as per the distance from the destination.
Note:- If you had already added shipping details under shipping settings in any of the shipping modules then there is no need to add it again here.

After that, the buyers can select the shipping service according to the sellers.
Further, the buyer can see the Multi Vendor Marketplace Multishipping method under the Order Review page as shown below.
 Moreover, that is all for the Marketplace Multishipping For Magento2, still have any issue feel free to add a ticket and let us know your views to make the module better at webkul.uvdesk.com
Current Product Version - 5.0.2
Supported Framework Version - Magento 2.0.x, 2.1.x, 2.2.x,2.3.x, 2.4.x

I’m tryng to using this plugin, but it’s not working for me, in the seller environment the configs are normaly appers, and is possible to enable the shippings, but in the checkout nothing appers. Can you help me, please?