Facebook pixel is an analytic tool which allows you to measure, optimize and build audiences for your advertisements by understanding the actions people take on your website.
Magento 2 Facebook Pixel tracks which page the visitor has visited, what all the products they have bought and much more.
Magento 2 Facebook Pixel extension is used to integrate Facebook pixel analytics tool to your Adobe Commerce store.
This will allow the store owner to track visitors and their behavior on your website.
It works by placing and triggering cookies to track users as they interact with the website.
Watch the video tutorial below to understand Magento 2 Social Pixel extension workflow:
Features
- Integrate Facebook Pixel to your website.
- Magento 2 Facebook Pixel extension can be completely disabled whenever required by admin panel.
- Can add multiple Facebook Pixel IDs as per multiple store views.
- Track standard events like Product View, Category View, Add to Cart, Add to Wishlist, Initiate Checkout, Purchase, Product Search, and Customer Registration.
- Each event can be enabled or disabled separately.
- Can create the custom audience and reach them via targeted Facebook ads.
- Can also target your audience via dynamic Ads. But for dynamic ads, you need to have your product catalog on Facebook as well.
- Easy access to manage the module configurations by admin panel.
Installation
Customers will get a zip folder and they have to extract the contents of this zip folder on their system.
The extracted folder has an src folder, inside the src folder you have the app folder.
You need to transfer this app folder into Adobe Commerce Cloud root directory on the server as shown below.

After the successful installation, you have to run these commands in the Adobe Commerce Cloud root directory.
First command- php bin/magento setup:upgrade

Second Command – php bin/magento setup:di:compile

Third Command – php bin/magento setup:static-content:deploy

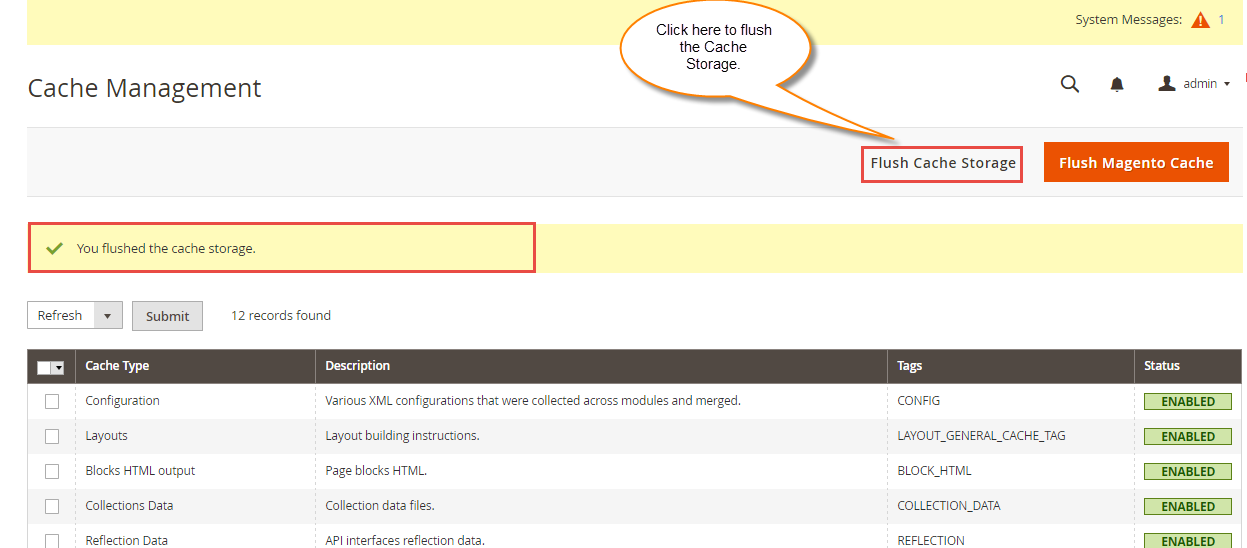
After running the commands, you have to flush the cache from the Adobe Commerce admin panel by navigating through->System->Cache management as shown below.
Multilingual Support
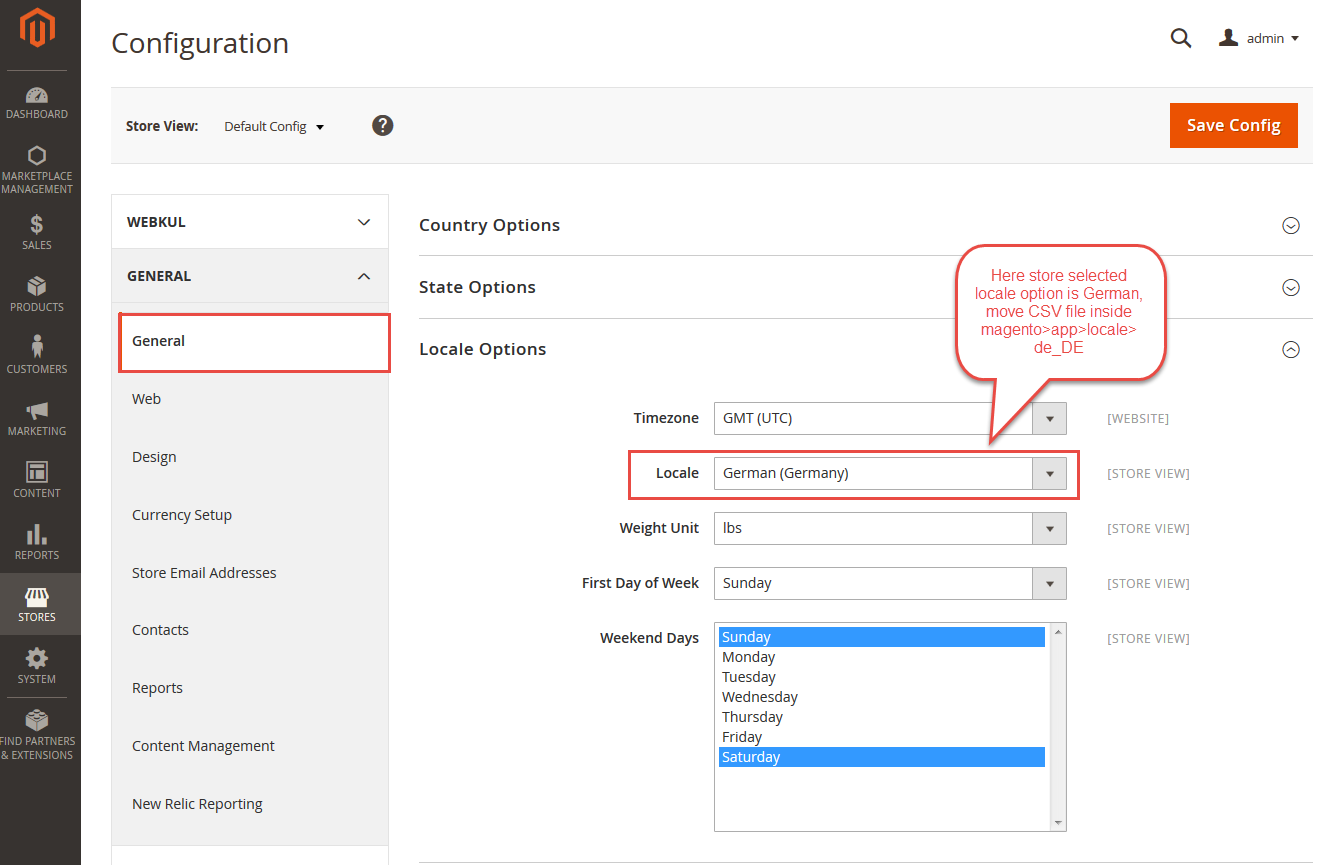
For the multilingual support, admin will navigate through Store->Configuration->General ->Locale Options and select locale as German.
(the language into which admin want to translate his store content).
Translation
If you need to do the module translation, please navigate to the following path in your system – app/code/Webkul/FbPixel/i18n.
Open the file named en_US.CSV for editing as shown in the below screenshot. It supports both RTL and LTR languages.

Once you have opened the file for editing. Replace the words after the comma(,) on the right with your translated words.

After editing and translating the CSV file, you need to save the translated file name according to your region language and country code such as – de_DE.CSV.
Then upload the translated file to the same folder from where you have obtained it. Now your module translation is complete.

Facebook Pixel ID
To use this module, you first need to create a Facebook Pixel in your Facebook Business Manager. For this, click on the link – https://www.facebook.com/ads/manager/pixel
![]()
After login, you get navigated to the Facebook Event Manager account of your Facebook.
Note: Click on Login if you already have a Facebook account. Else click on Sign up to create the facebook account first.
Now, you need to goto Business Settings under Event Manager as per below image:
![]()
After that, you need to select Pixels under Data Sources and can add new pixel by clicking on Add, as per below image:
![]()
Here, after clicking on “Add”, you will get a pop when you will click on the Create button.

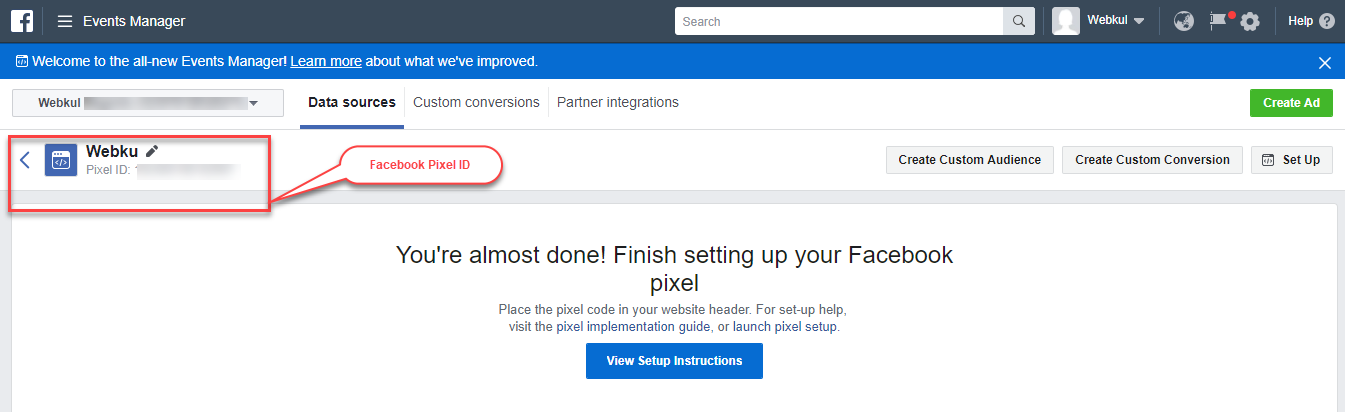
After clicking on the Create button you will get a success message as per the below image.

After this, you will get the Facebook Pixel ID.
Module Configuration
After installing Magento 2 Social Pixel module and creating the Facebook Pixel ID, the admin will configure the module settings.
For this, the admin will navigate to Stores -> Configuration ->webkul ->Facebook Pixel.

This will navigate the admin to the module configuration page.

Here the admin will:
General Settings:
- Enable FB Pixel: enable or disable the module.
- Enter Facebook Pixel ID: enter the Facebook Pixel ID
Manage Events you wish to track:
There are various store events that can be tracked using this module. Each event can be enabled or disabled separately.
- Product View – track event when someone visits the product page.
- Category View – track event when someone visits the product page.
- Add to Cart – track event when someone clicks on ‘Add To Cart’ button to adds a product to the cart.
- Add to Wishlist – track event when someone adds a product to the wishlist.
- Initiate Checkout – track event when someone lands on the checkout page.
- Purchase – track event after someone places an order in your store.
- Product Search – track event when someone searches for something using the search feature.
- Customer Registration – track event when someone creates an account.
Frontend
Once you have configured the module settings, log in to your Facebook Business Manager account.
In the Data Sources section, select the Overview tab as shown below.
The admin can view Events and can view details of the Event by selecting “View Details“.

On selecting View Details, a pop box will appear as shown below.

Here, the admin can track the information for all the dynamic events of the Adobe Commerce Cloud store conveniently.
Verify Events
The admin can even verify individual pages and make sure that the events are installed correctly.
For this, the admin needs to install the Facebook Pixel Helper as a chrome extension. This is optional.

Facebook Pixel Helper is a tool that checks the accuracy of the Facebook Pixel and tests that the pixel is working fine.
Please Note – Facebook Pixel will not work if any ad-blocker is enabled in your browser.
That’s all for the Magento 2 Facebook Pixel module. If still have any issues, feel free to contact us at http://webkul.uvdesk.com/.
Check out our best-selling Magento 2 extensions for advanced features.
Current Product Version - 3.0.0
Supported Framework Version - Magento 2.0.x, 2.1.x, 2.2.x,2.3.x, 2.4.x

Be the first to comment.