Magento 2 Lookbook Module allows the admin to showcase a group of associated products on the storefront using this extension.
Allowing customers to discover multiple products and purchase the complete look through one single product.
Products that are complementary or from the same product line. Examples – t-shirt, lower, socks, gym bag, sweatband, sports jacket, activewear, etc. These products can be showcased to the customer to complete the gym look.
Features- Lookbook Extension
- The admin can create a LookBook-type product.
- Allow admin to add a marker for the associate products of the Lookbook product.
- The admin can create a slider widget of products.
- Allow admin to create a grid view widget of products.
- Customers can change the Lookbook associate product quantity by clicking on markers.
- The Customers can buy products by using slider markers.
- The extension is compatible with the Hyva Theme.
Watch the below video tutorial to understand the extension workflow :
Installation- Lookbook Extension
Customers will get one zip folder and they have to extract the contents of the zip folder on their system.
Also, the extracted folder will have an src folder, inside the src folder you have the app folder.
Then, You need to transfer this app folder into the Magento2 root directory on the server as shown below.

After the successful installation, you have to run these commands in the Magento2 root directory:
First command –
| 1 | php bin/Magento setup:upgrade |
Second Command –
| 2 | php bin/Magento setup:di:compile |
Third Command –
| 3 | php bin/Magento setup:static-content:deploy |
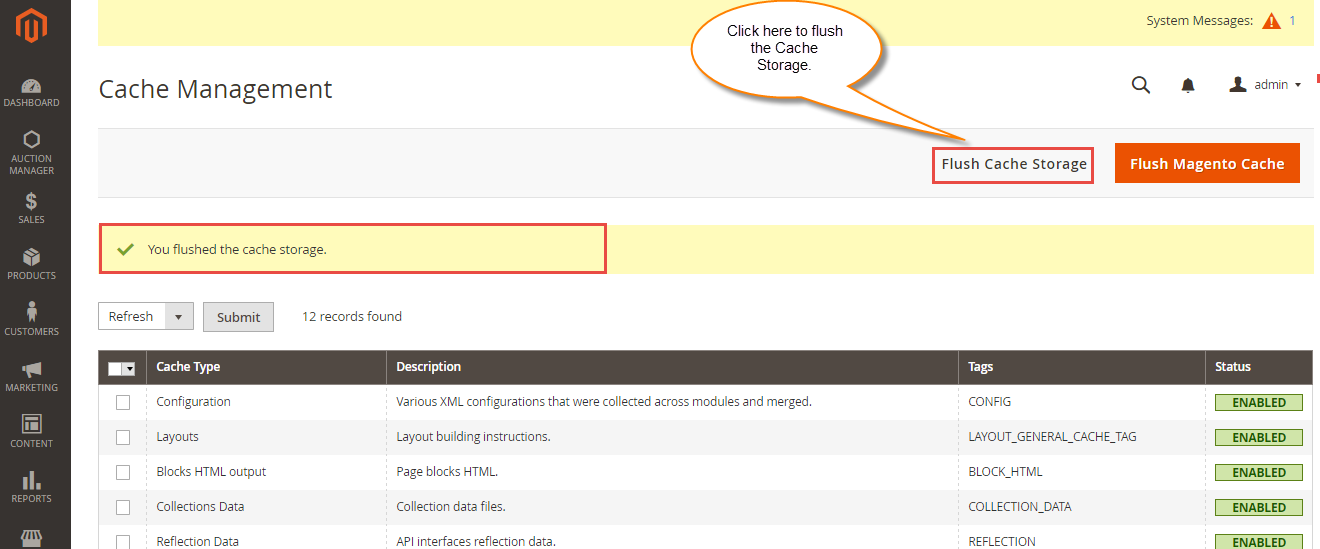
Hence, after running the commands, you have to flush the cache. This is done from the Magento admin panel by navigating through->System->Cache management as shown below.
Configuration For Multi-lingual Support
For the multilingual support, the admin will navigate through Store->Configuration->General ->Locale Options
Then, the admin can select the locale as German (the language into which the admin wants to translate his store content).

Translation
If the user wants to translate their module from English to German.
Then, they need to follow the path app/code/Webkul/lookbook/i18n in their unzipped Magento 2 CRM folder and will get a CSV file with the name “en_US.csv”.
Now they will rename that CSV as “de_DE.csv” and translate all right side content after the comma in the German language.
After editing the CSV, save it and then upload it to the path app/code/Webkul/lookbook/i18n where they have installed Magento2 on the server.
The module will get translated into the German Language. It supports both RTL and LTR languages.

Then, the user can edit the CSV file as shown below.

Admin Workflow – Lookbook Extension for Magento 2
After the successful installation, the admin will be able to create lookbook products. They will be able to view the extension in the admin dashboard sidepanel shown as below,

Admin will find this “lookbook product type” while adding a new product under the admin panel.
Admin adds Lookbook product
The admin needs to navigate to “ Catalog -> Manage Products -> Add Product”, the admin will tap the “Add Products” to add a new product as shown below in the snapshot.
Here, a drop-down to select the product type for the products will appear, now the admin will select the “LookBook Product” type for the new product and then tap the “Continue” button to proceed further.

Clicking the LookBook Product button will bring another page where the admin has to enter all the required information about the LookBook product.

On this page, the admin will find the option to add the products to this lookbook product by clicking on “Add Products to Lookbook”. The selected products will be the constituents of this LookBook product.
Now, the admin needs to select the products by selecting the checkboxes and click on the “Add Selected Products“.

Now, the selected products will be added to this LookBook product. Click on save to save this LookBook product.

Add Marker to Lookbook product
The Admin can add markers on each of the lookbook products. The markers will be added to the image of the lookbook product.
Admin can add the markers to the image of the lookbook product by clicking on the update option of the products linked to the lookbook product as shown in the image below:

Once clicked on the update, the admin can set the position of the marker on the image of the lookbook product and can click on Save Marker Position.

Similarly, the admin can set a marker position for each product under the lookbook product and click on save the product.
Create Widget Lookbook product
Also, the Admin can create a widget for lookbook products and add it to any of the CMS pages. The admin will have to navigate through content>pages and click on the edit option of the page on which lookbook products will be added.

Once clicked on edit, the admin will move to that particular page and need to insert a widget by clicking on the widget option on the content section of that page.

Now, the admin needs to select the type of widget, we have selected the lookbook widget. on clicking on the lookbook widget, the admin needs to enter widget information as shown below:

Each configuration is explained below:
- Select Option: Select the option to display the widget. The admin can select from the slider or grid view.
- Number of Products: Enter the number of products allowed to display.
- Products Ids: The admin needs to enter the product IDs of the lookbook product with comma separation.
- Width: Here, the admin will enter the width of the lookbook widget.
- Height: Enter the height of the lookbook widget.
Now, the admin will click on the insert widget and then select the widget and click on save.

The Widget will be now added to the home page.
Customer End Workflow
The customer can search for the lookbook product on the front-end. The lookbook product will be displayed as shown below:

Now, when the customer clicks on the marker, the customer can update the quantity of the product associated with that marker.
After the quantity is updated, the customer can add the product to the cart and complete the checkout process.

Also, the customer can update the number of products on the shopping cart page.

Now the customer can click on Proceed to checkout and complete the checkout process.
There is also an option “More Images” where the customer can check all the images of the lookbook product. When clicked on more images the customer can view all the attached images in the lookbook product.

Displaying lookbook product widget
Also, the customer can view the lookbook products displayed as a widget on the home page.

The customer will be able to see all the lookbook products on the slider of which product IDs are added while adding the lookbook product to the widget.
If the admin will select grid view while adding widget then the customer will be able to view the lookbook products as shown below:

When clicked on the marker of the lookbook product, then the individual product associated with the marker of the lookbook product will be visible to the customer.

Also, the customers can click on add to cart and add the product to the cart individually. Similarly, by clicking on every marker the customer can add that respective product to the cart and proceed towards checkout.
This was all about Magento 2 Lookbook Extension. For any further, assistance, just raise a ticket here and for any doubt contact us at [email protected].
Current Product Version - 4.0.3
Supported Framework Version - Magento 2.0.x, 2.1.x, 2.2.x,2.3.x, 2.4.x

Be the first to comment.