Odoo Bridge for OpenCart enables seamless integration, using OpenCart as the frontend interface while Odoo handles backend operations.
OpenCart is ideal for online sales, while Odoo excels in inventory, accounting, CRM, and news management.
This guide will provide a step by step walkthrough of how to configure Odoo Bridge For OpenCart, providing a smooth integration between OpenCart and Odoo.
By the end, you’ll be able to sync and manage products, orders, and customer data across both platforms effortlessly with Odoo Bridge For OpenCart.
Refer to the User Guide for Odoo Bridge For OpenCart to learn about the module’s installation process and workflow.
ESTABLISHING A CONNECTION
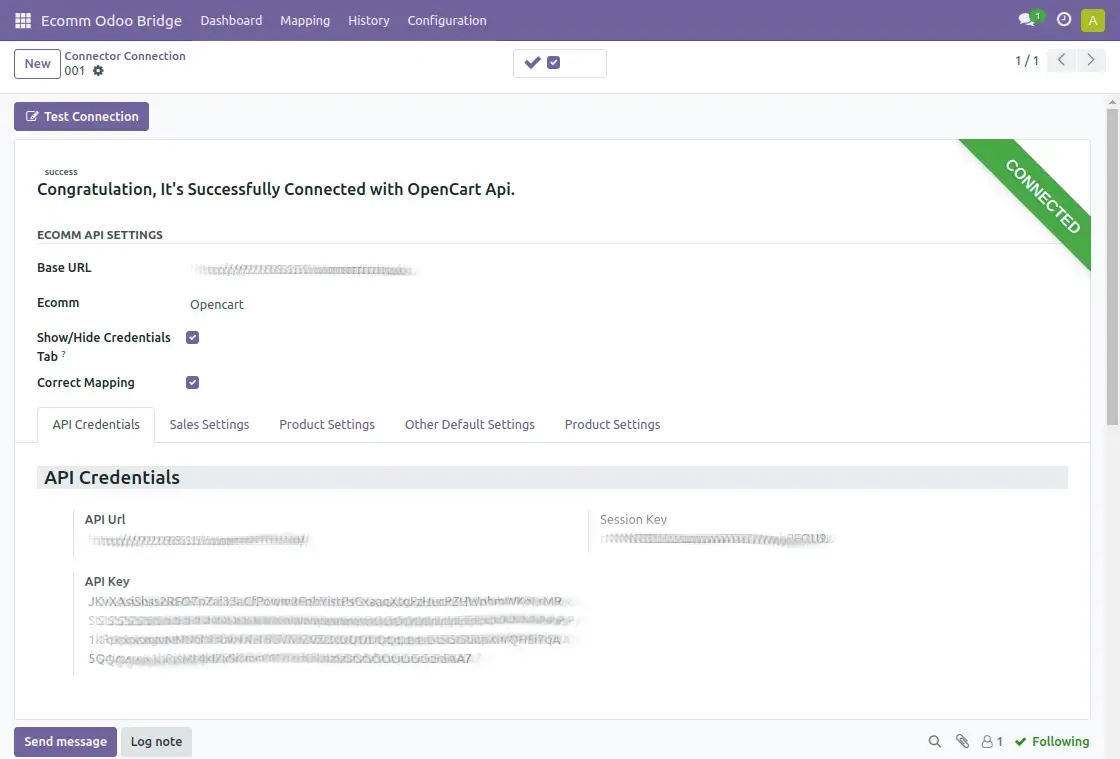
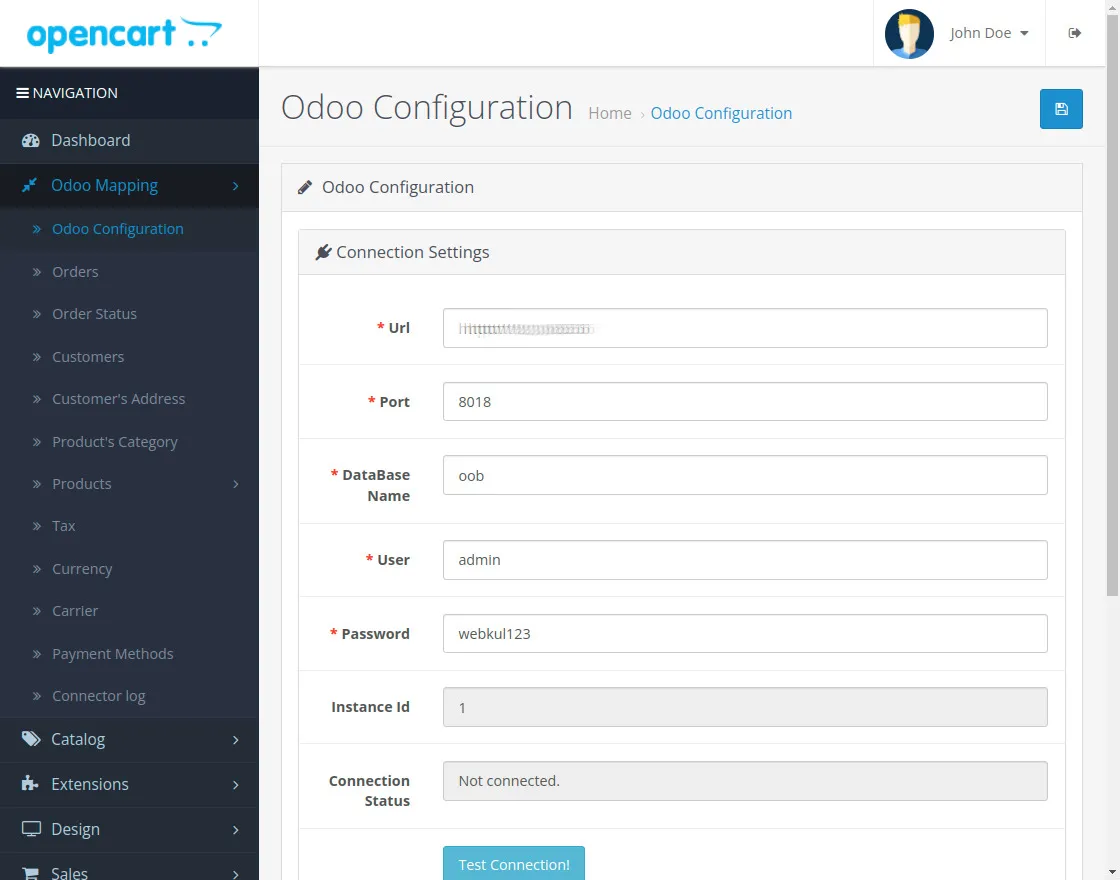
1 . In Odoo, navigate to OpenCart Connection to find which Ecom is connected to Odoo and find the necessary details.
2. To test the connections in Odoo for Odoo Bridge For OpenCart, you’ll need the OpenCart Base URL, API URL, API Key, and Session Key.
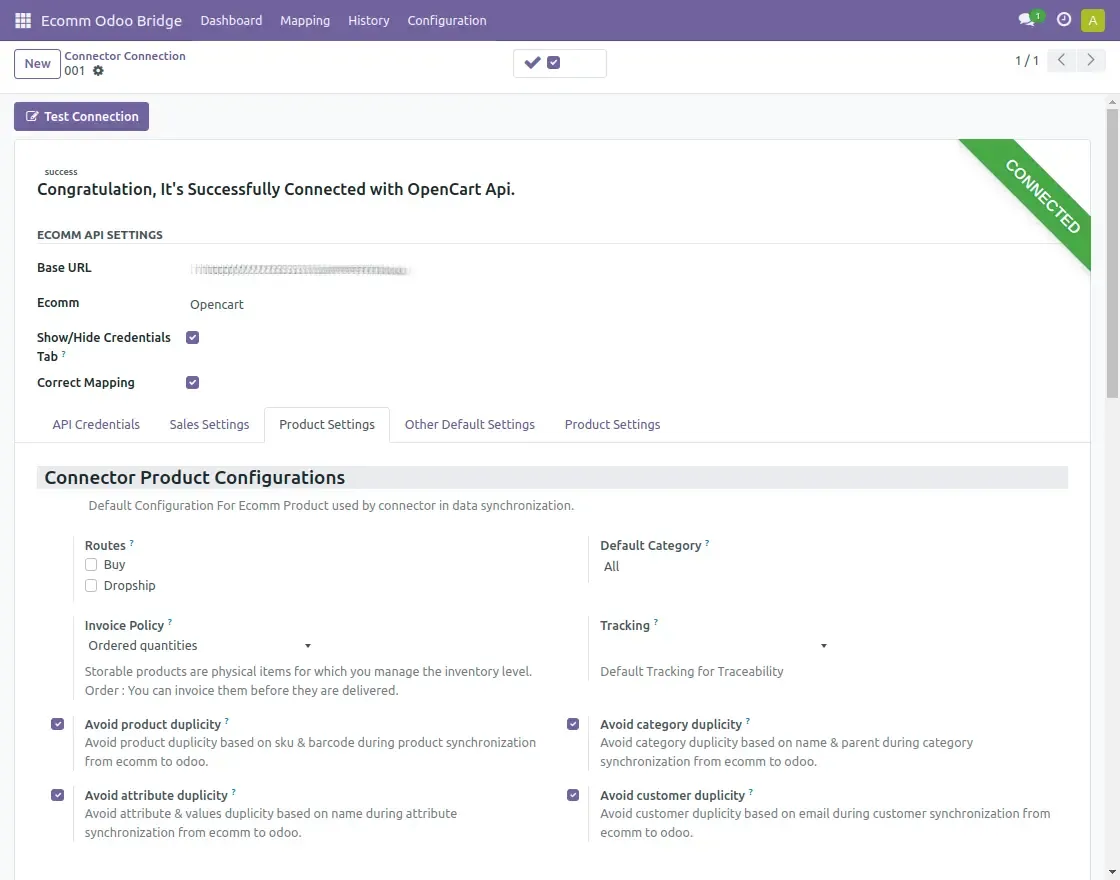
3. Navigate to the product settings tab and choose either Product Template or Product Variants for synchronizing the selected product type.
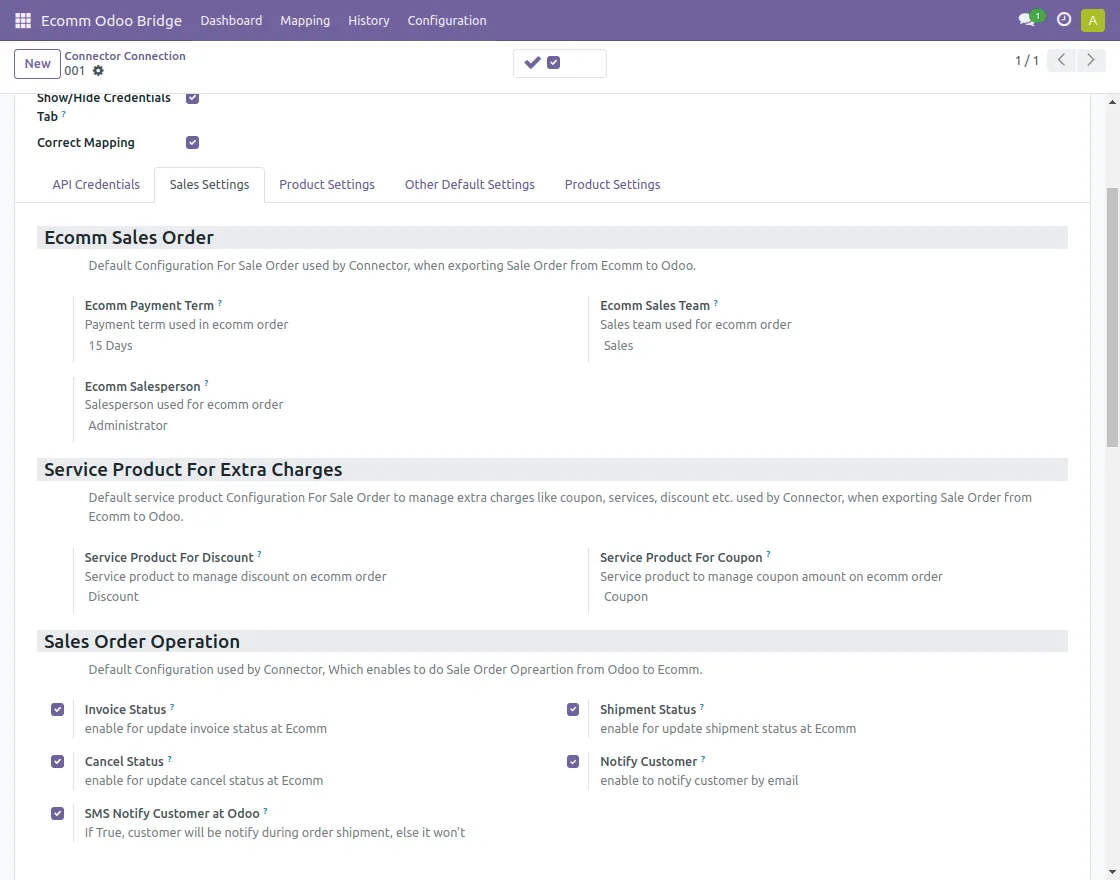
- Navigate to the Sales tab in the OpenCart Connection settings of Odoo Bridge For OpenCart to adjust the following options:
- Update payment terms in Odoo to reflect automatically in OpenCart orders.
- Add the OpenCart Salesperson in Odoo for use in OpenCart orders.
- Add the OpenCart Sales Team in Odoo for integration with OpenCart orders.
- Enable Invoice Status to sync the invoice status with OpenCart.
- Enable Cancel Status in Odoo to update cancellations in OpenCart.
- Enable Shipment Status to sync shipment updates with OpenCart.
- Enable Notify Customer to send customer notifications via email in OpenCart.
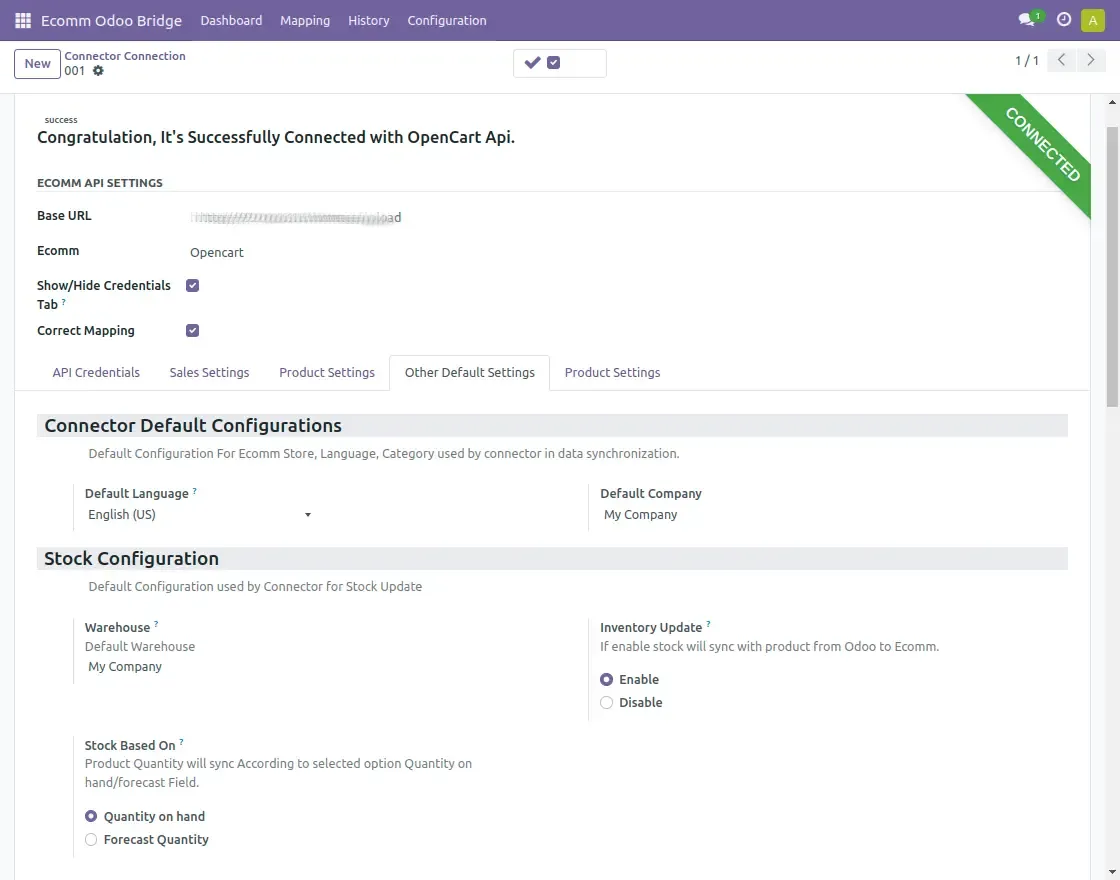
- Now, go to the Other Default Setting tab of OpenCart Connection of Odoo Bridge For OpenCart to update the following setting:
- Set the default language for OpenCart.
- Add a default category for OpenCart products.
- Update the barcode attribute in OpenCart.
- Specify a discount product to apply discounts in OpenCart.
- Add a warehouse name for automatic stock updates.
- Enable “Inventory Update” to auto-sync stock levels from OpenCart to Odoo.
- Choose “Stock Based On” to sync product quantity based on “Quantity on Hand” or the “Forecast” field.
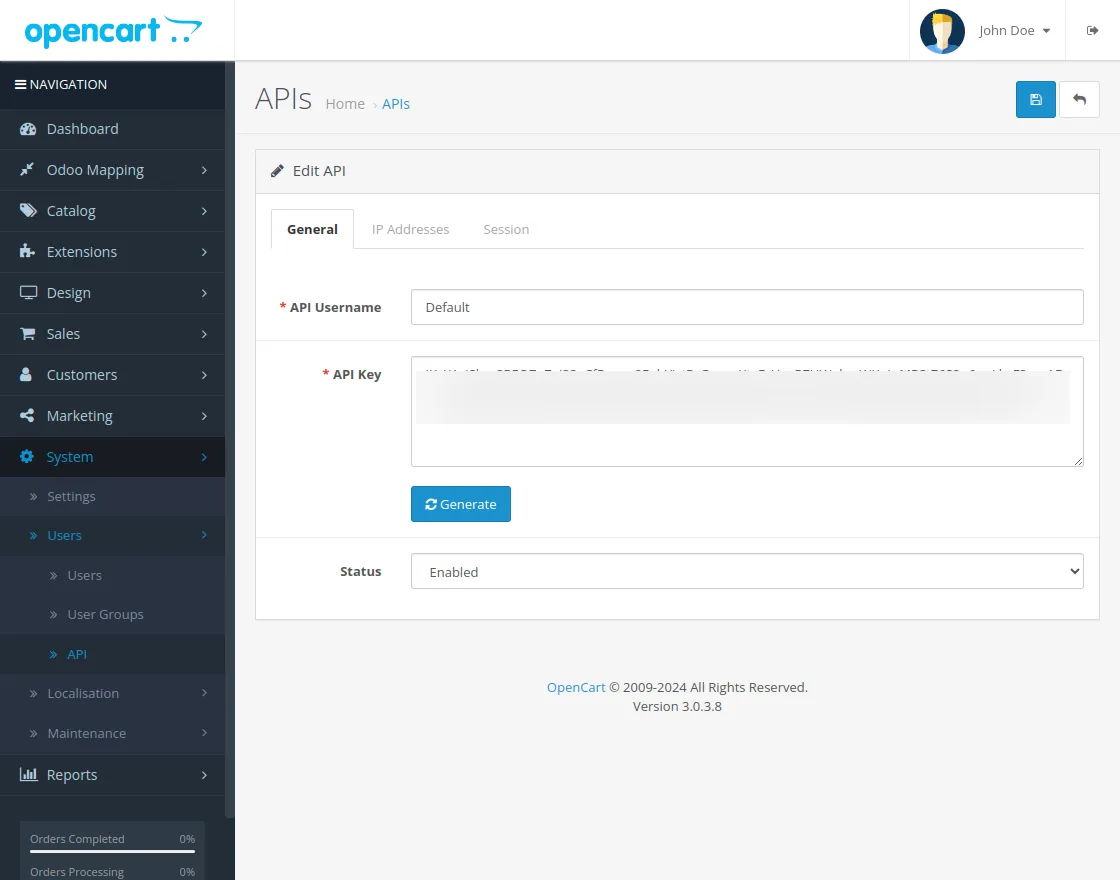
How to get the API URL from the open cart.
- You can follow the steps mentioned below to generate the API name and password
- In OpenCart, navigate to system >> users >> API.
- Now, add the API username, and generate the API url.
- This API URL is used in odoo when establishing a connection.
- Users can also set the status as enabled or disabled.
- When testing the connection from OpenCart, you’ll need the Odoo URL and database details. Additionally, enter the Odoo user and password.
- Odoo URL: This is the web address of the Odoo instance you want to connect with OpenCart.
- Odoo Port Number: This specifies the assigned port space for the connection.
- Odoo User and Password: These are the login credentials used for accessing Odoo.
Odoo Backend Sync Settings
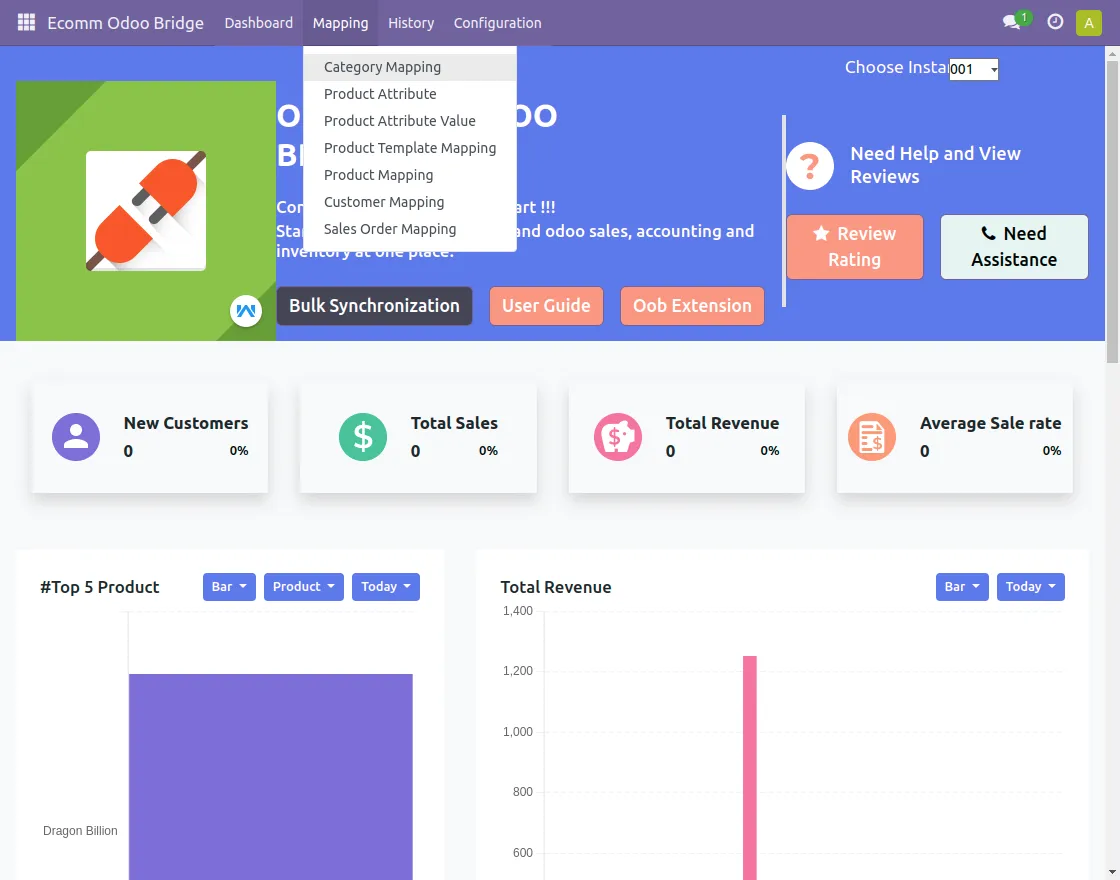
Mapping
- Mapping of data can also be done from Odoo to Opencart by navigating to the mapping tab.
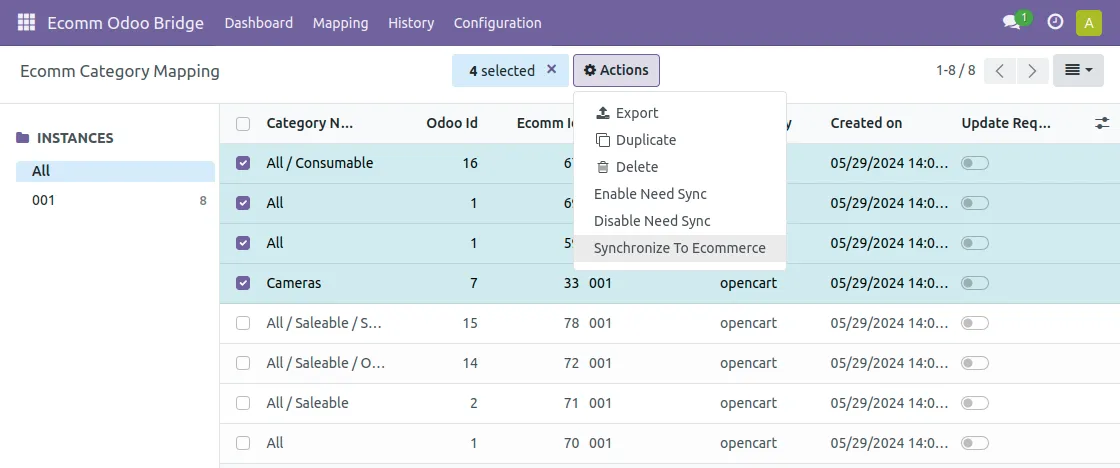
- Manually select all the categories that the user needs to map to Opencart, click on actions, and then on synchronize to e-commerce.
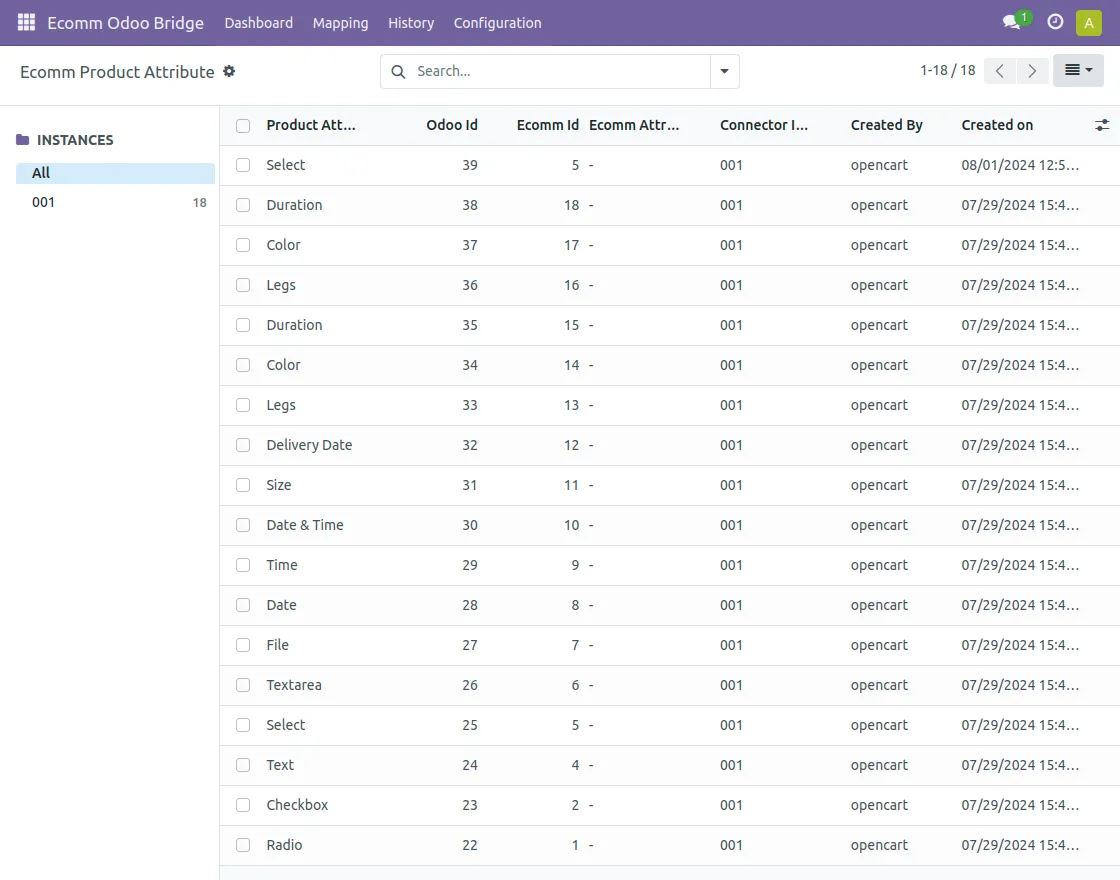
- Find all the mapped products in the Ecomm Product Attribute with their e-com id and odoo id.
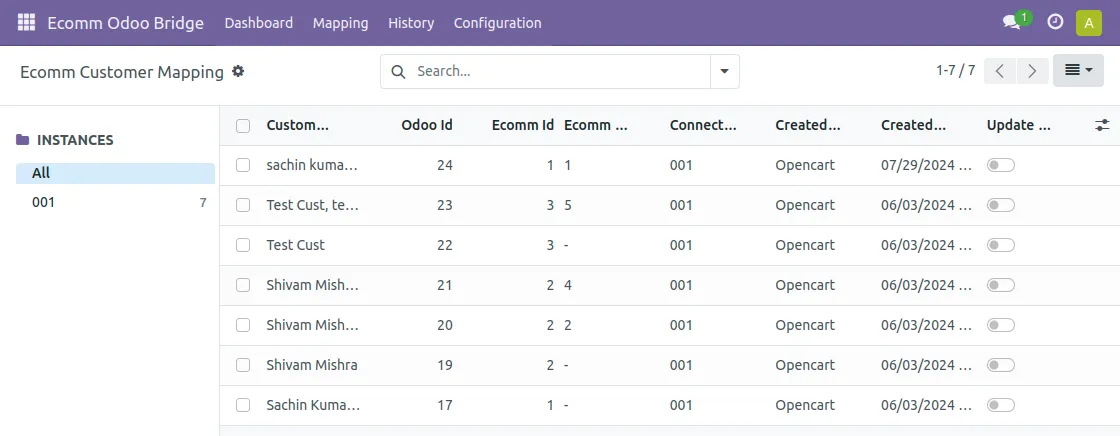
- Mapped customers
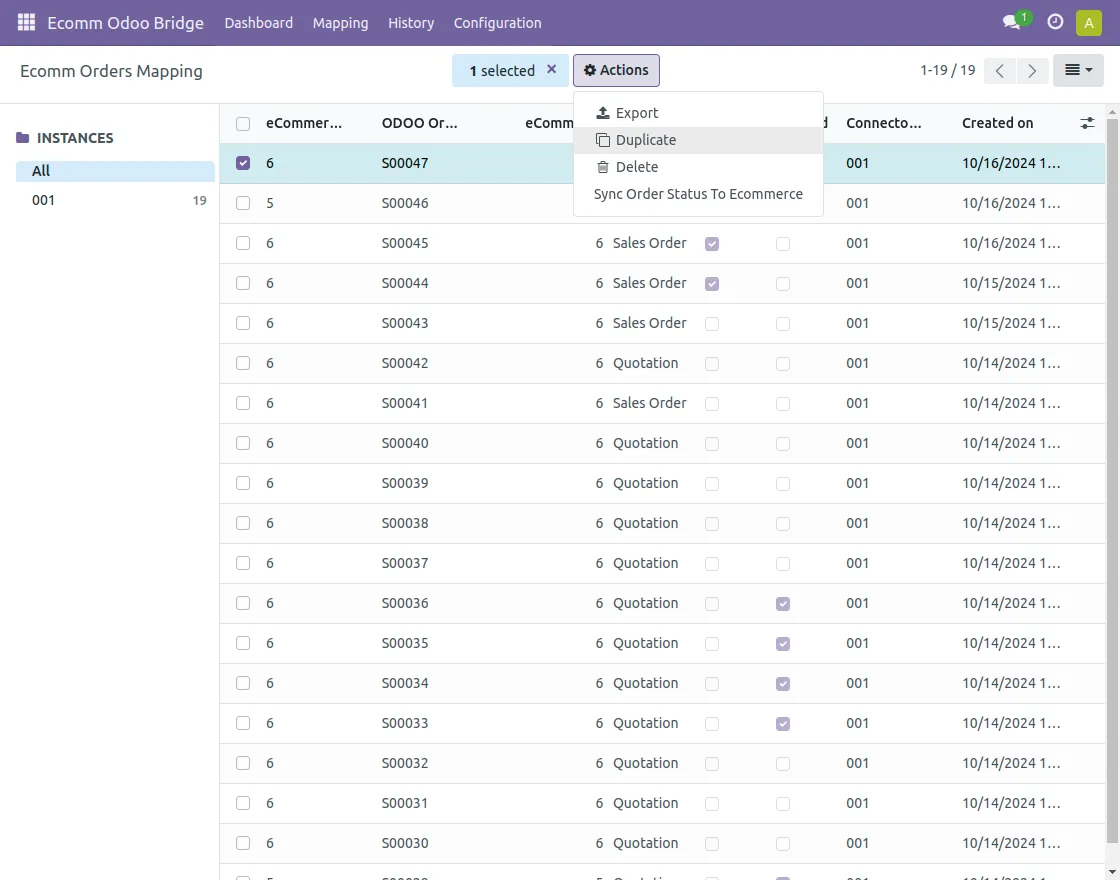
- Synchronize the sale order status by selecting the orders you need to sync.
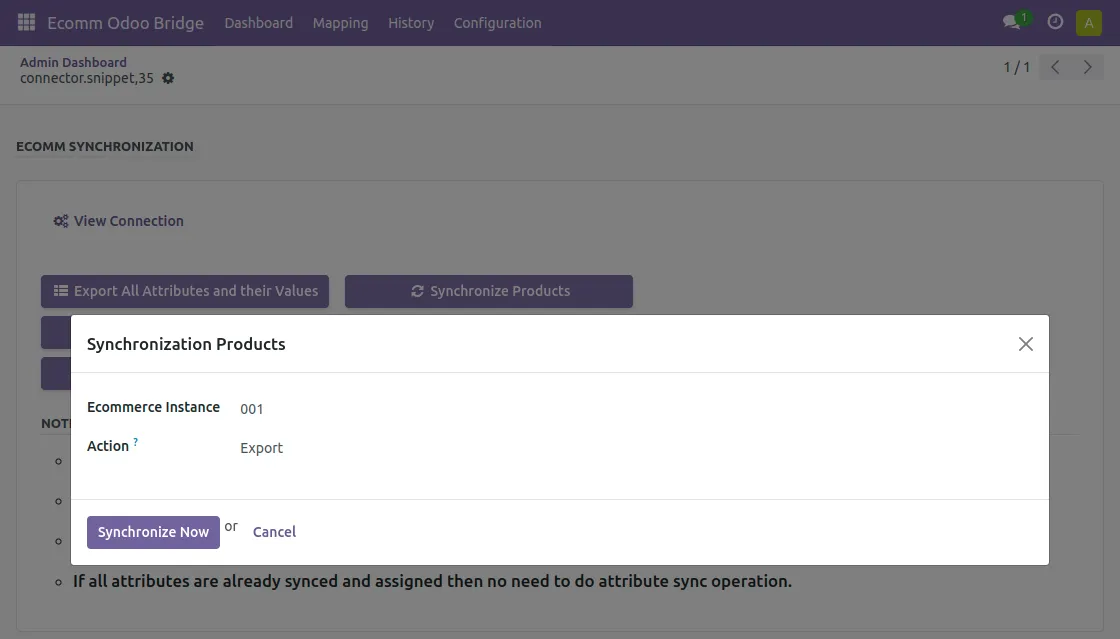
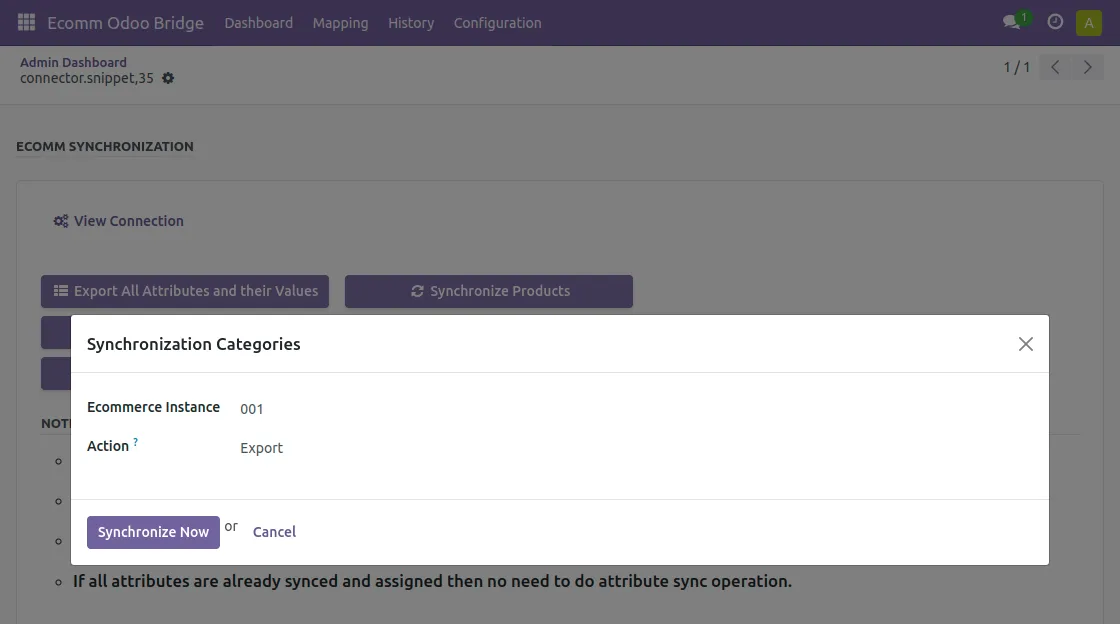
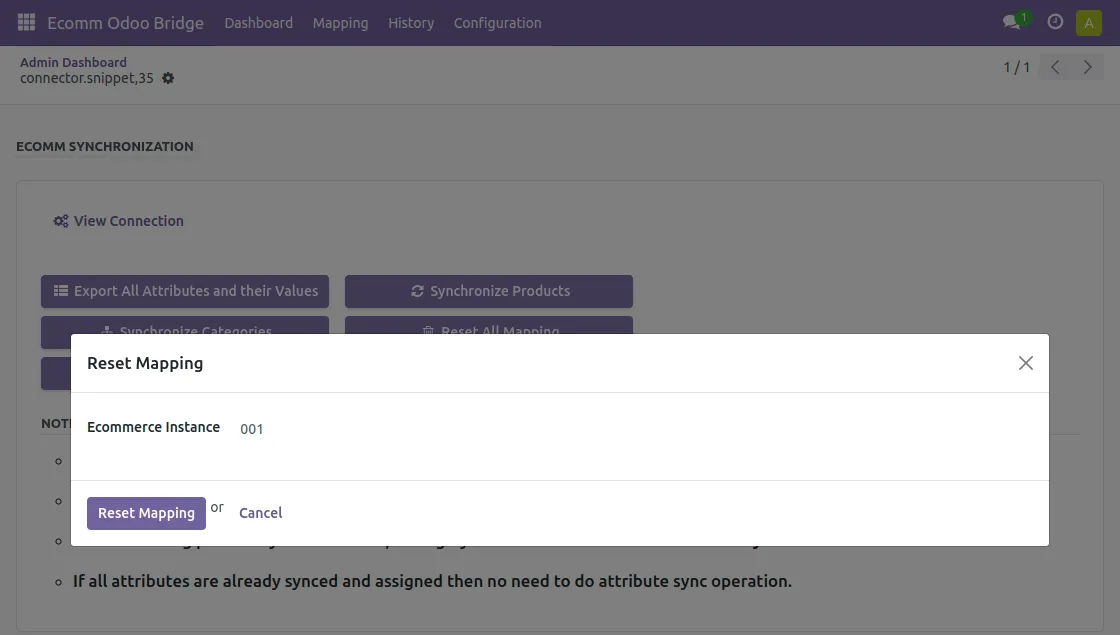
9. After logging into Odoo backend navigate to Ecom Odoo Bridge to find the dashboard for Opencart odoo bridge bulk synchronization from Odoo to Opencart.
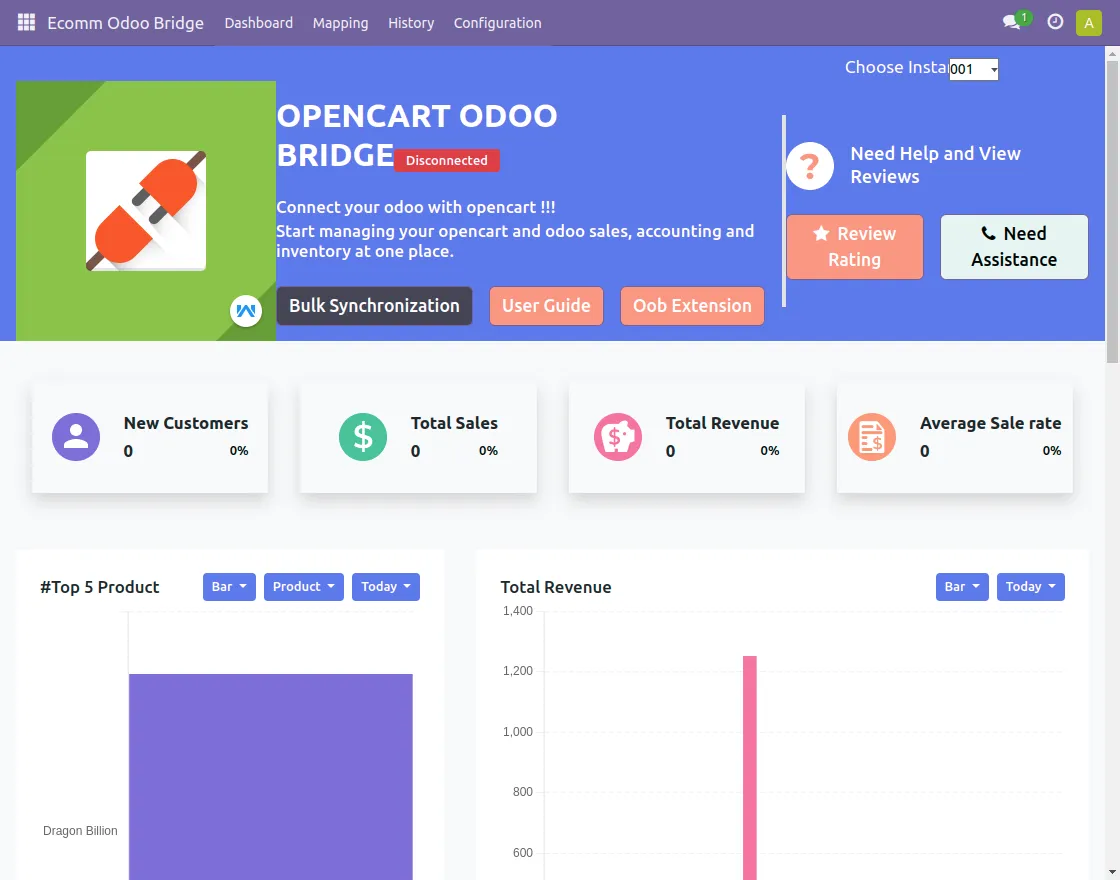
10. Click on bulk synchronization to export data from Odoo to Opencart in bulk.
- Export all attributes and their values

- Product synchronization
- Synchronize categories
- You can also reset all the mapping done until now.
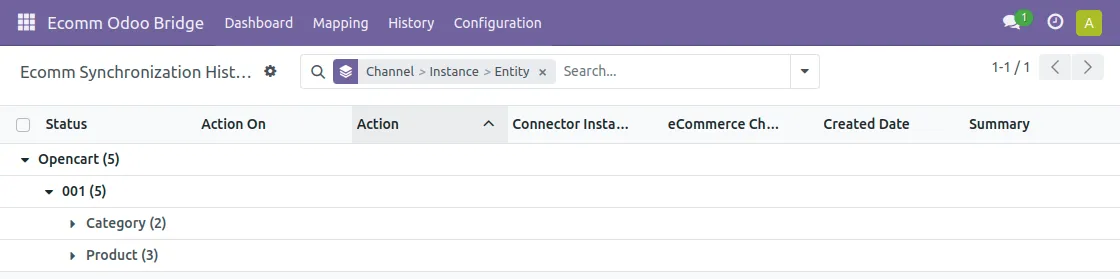
11. The user can also see the synchronization history of all the data that has been synchronized from Opencart to Odoo.
NEED HELP?
Hope you find the guide helpful! Please feel free to share your feedback in the comments below.
If you still have any issues/queries regarding the same, please raise a ticket at the UV Desk.
I hope this helps. In case of any further queries, contact us at our support mail.
Thanks for paying attention!!
Current Product Version - 1.0.0
Supported Framework Version - Odoo V18, V17, V16 & OpenCart 4.x.x.x, 3.x.x.x

Be the first to comment.