Laravel eCommerce Blog extension enables store owners to create, manage, and publish blog posts directly from the admin panel.
It includes SEO-friendly URLs, categories, tags, responsive images, comments, and scheduled publishing to help improve customer engagement.
Discover our premium-quality Bagisto Extensions to extend and enhance your store’s functionality.
Features of Laravel eCommerce Blog Extension
Blog Extension for Laravel eCommerce provides a complete blogging solution for creating engaging content, improving SEO, and enhancing customer interaction.
Key features include:
- Create SEO-friendly blog URLs using page numbers, primary categories, and unique blog slugs.
- Organize blog posts by categories, tags, and authors for easy content management and navigation.
- Display responsive blog images that automatically adapt to different screen sizes and devices.
- Show the number of blog posts associated with each category and tag.
- Enable or disable the comment widget individually for each blog post.
- Additionally, built-in widgets such as Recent Posts and Related Posts help improve content discovery.
- Support nested replies in comments to encourage organized discussions and user engagement.
- Schedule blog posts for automatic publishing on a specified date and time.
Installation of Laravel eCommerce Blog Extension
- Unzip the respective extension zip and then merge “packages” folder into project root directory.
- Goto composer.json file and add following line under ‘psr-4’
"Webkul\\Blog\\": "packages/Webkul/Blog/src"
- Goto bootstrap/providers.php file and add following line under ‘providers’
Webkul\Blog\Providers\BlogServiceProvider::class,
- Run these commands below to complete the setup
composer dump-autoload

php artisan blog:install
That’s it, now just execute the project on your specified domain.
Configuration of Laravel eCommerce Blog Extension | Admin configuration
After installing the extension successfully, the admin can configure the blog settings from the admin panel.
Navigate to Configure → Blog.
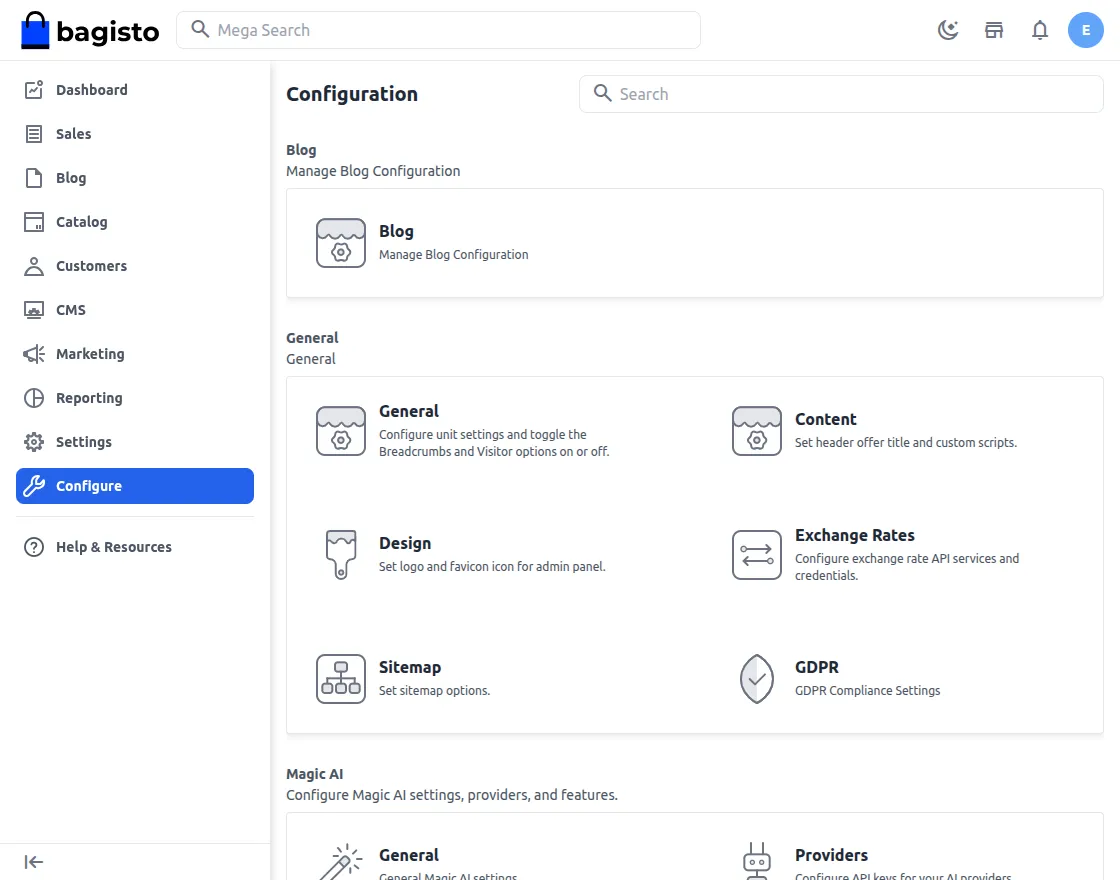
Next, the admin can configure the following settings:
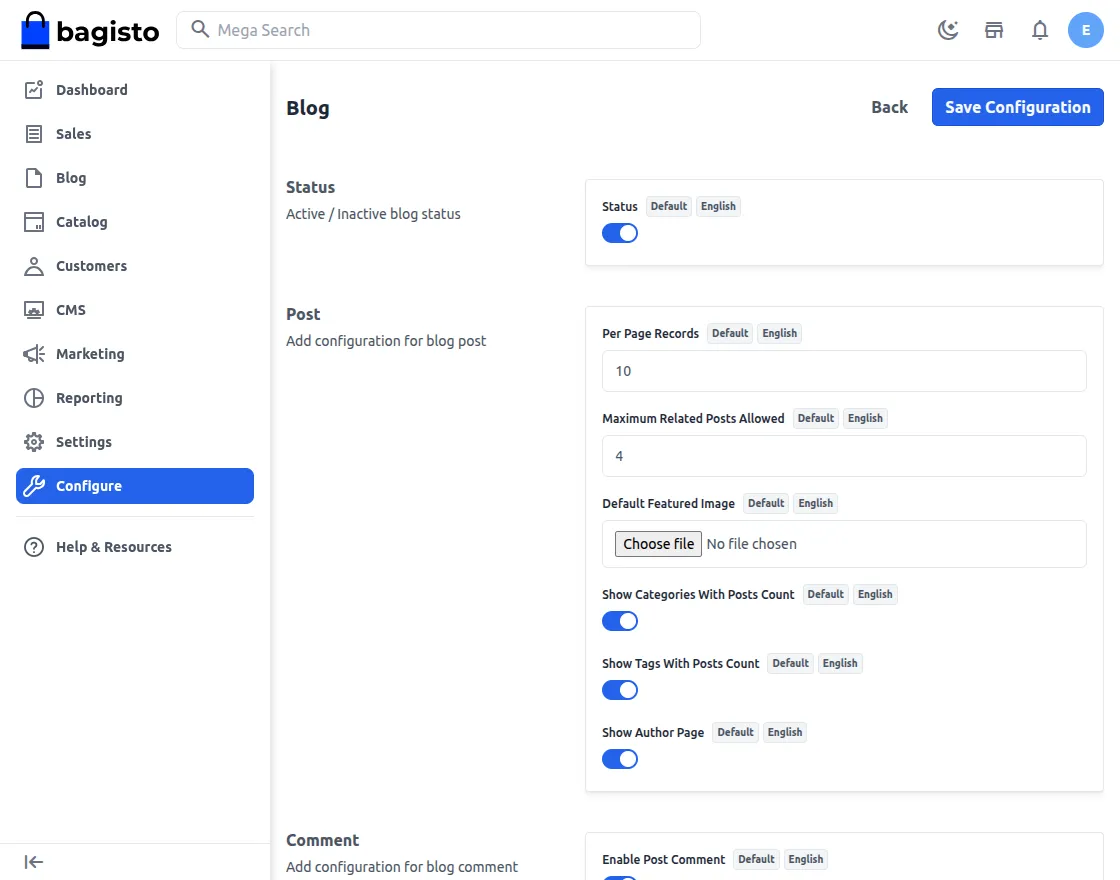
General
The General section allows the admin to enable or disable the blog module for the storefront.
- Status – Enable or disable the Blog extension.
Post
The Post section lets the admin configure how blog posts are displayed on the storefront.
- Per Page Records – Specify the number of blog posts to display on each page.
- Maximum Related Posts Allowed – Set the maximum number of related blog posts displayed on the blog detail page.
- Upload a Default Featured Image – If a blog post does not have its own featured image, then the uploaded default image will be displayed automatically.
- Show Categories With Posts Count – Display the total number of posts associated with each category.
- Show Tags With Posts Count – Display the total number of posts associated with each tag.
- Show Author Page – Enable or disable the dedicated author page on the storefront.
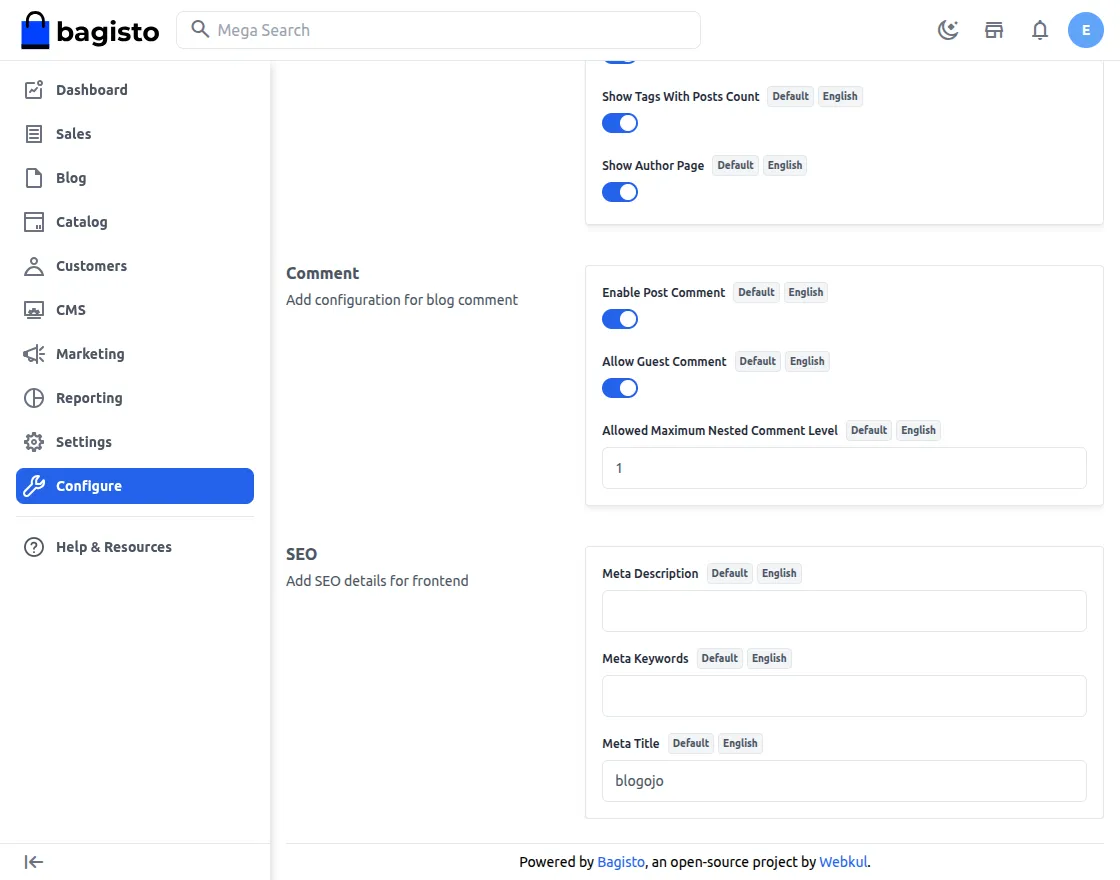
Comment
The Comment section allows the admin to configure the blog commenting functionality.
- Enable Post Comment – Enable or disable the comment section for blog posts on the storefront.
- Allow Guest Comment – Enable this option to allow visitors to post comments without logging in.
- Allowed Maximum Nested Comment Level – Set the maximum number of nested replies allowed in a comment thread.
SEO
The SEO section allows the admin to configure the default search engine optimization settings for the blog pages.
- Meta Title – Specify the default meta title displayed by search engines for blog pages.
- Meta Description – Enter the default meta description to provide a concise summary of the blog content for search engine results.
- Meta Keywords – Add relevant keywords to improve the discoverability of blog pages in search engines.
Blogs
After navigating to Blog → Blogs, the admin can view all the existing blog posts from the blog listing page.
The blog grid displays the available blog posts and provides options to search, filter, edit, or delete them. To publish a new blog post, click the Create button.
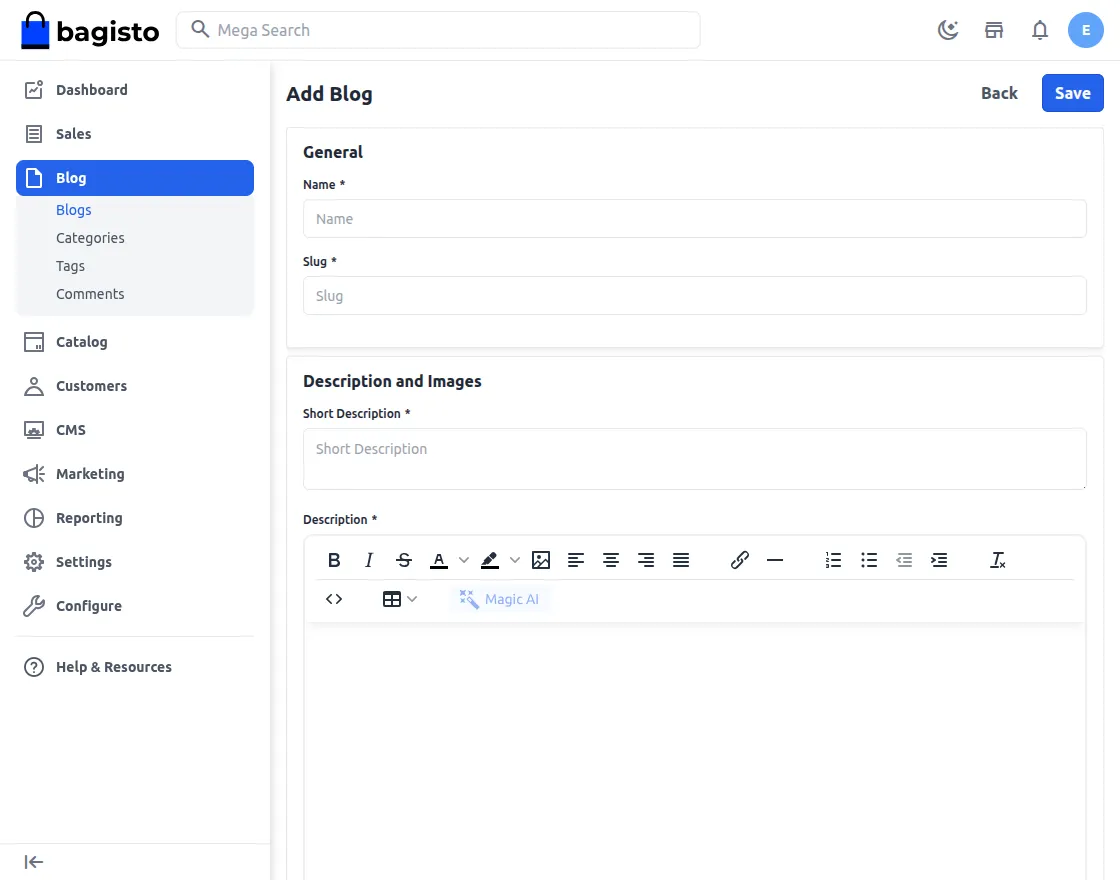
General
The General section allows the admin to enter the basic details of the blog post.
- Name – Enter the title of the blog post that will be displayed on the storefront.
- Slug – Specify a unique, SEO-friendly URL slug for the blog post.
- Short Description – Add a brief summary of the blog post.
- Description – Enter the complete blog content using the rich text editor. It supports text formatting, images, links, and other content elements.
- Thumbnail – Upload a thumbnail image that represents the blog post in blog listings and other sections where a compact preview is displayed.
- Featured Image – Upload a featured image that appears prominently on the blog detail page and wherever the featured image is used on the storefront.
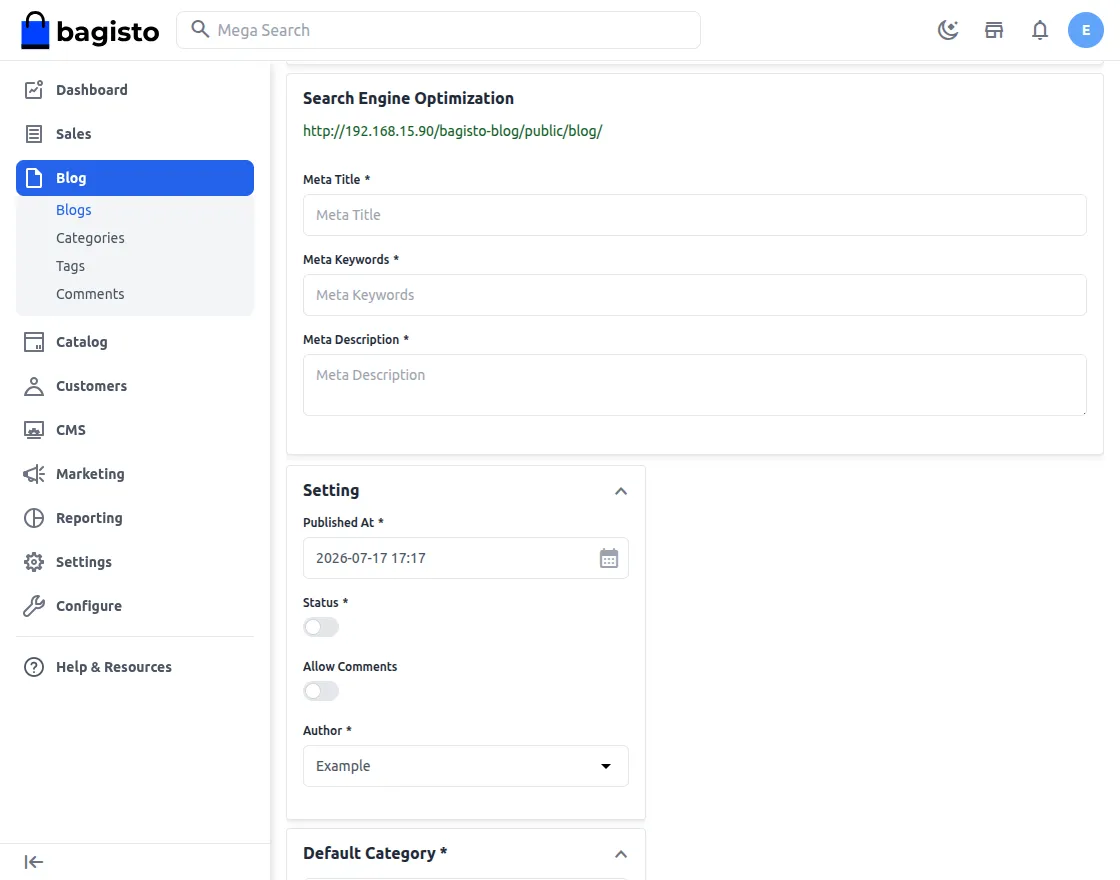
Search Engine Optimization
The Search Engine Optimization section allows the admin to configure SEO metadata for the blog post, helping improve its visibility in search engine results.
- URL – Displays the blog post URL based on the configured slug.
- Meta Title – Enter a descriptive title that will appear in search engine results and browser tabs.
- Meta Keywords – Specify relevant keywords associated with the blog post to help categorize its content.
- Meta Description – Provide a concise summary of the blog post that may be displayed in search engine results.
Settings
The Settings section allows the admin to control the publishing status and commenting options for the blog post.
- Published At – Specify the date and time when the blog post should be published.
- Status – Enable or disable the blog post. Only enabled posts are visible on the storefront.
- Allow Comments – Enable or disable comments for the individual blog post.
- Author – Displays the author information associated with the blog post, allowing readers to identify who published the article.
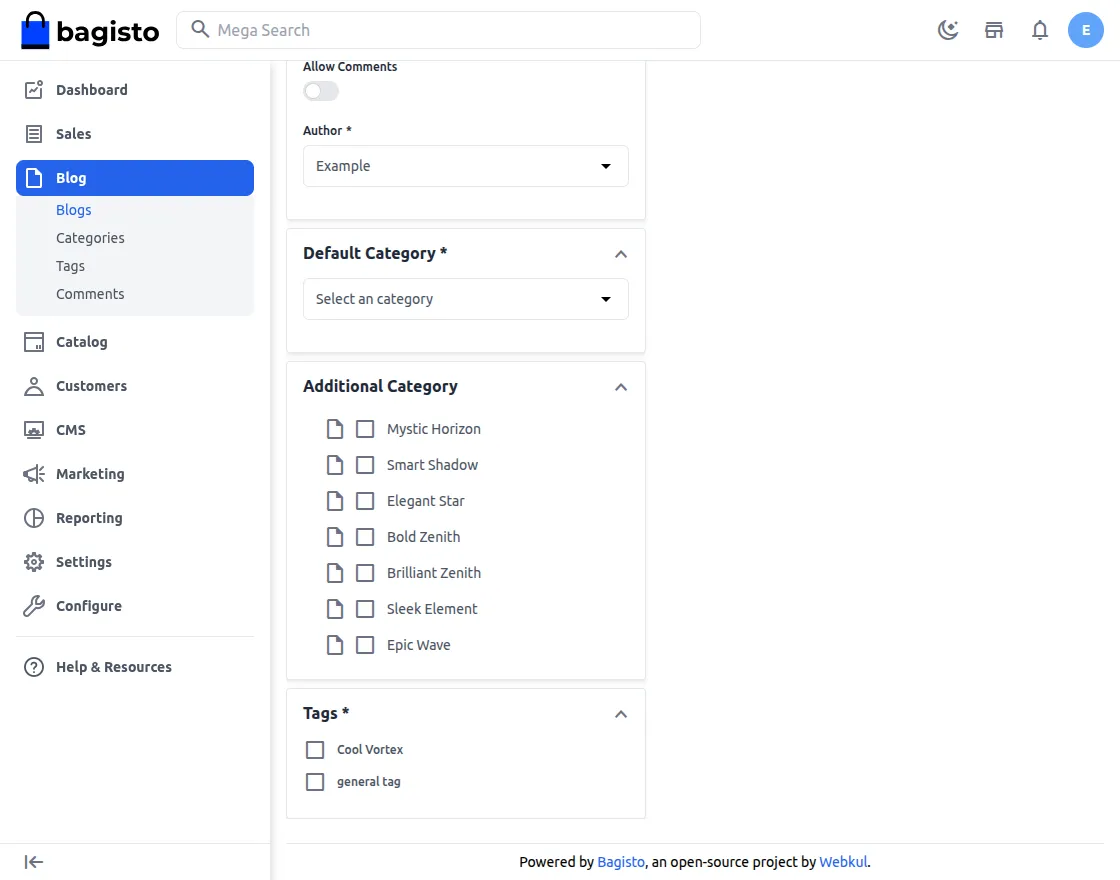
Categories and Tags
The Categories and Tags section allows the admin to organize blog posts, making it easier for customers to browse and discover related content.
- Default Category – Select the primary category for the blog post. It helps organize the post and may also appear in the blog URL.
- Additional Category – Select one or more additional categories to associate the blog post with multiple topics.
- Tags – Assign relevant tags to the blog post to improve content organization and help visitors discover related articles.
Categories
Navigate to Blog → Categories to manage the blog categories.
The Categories page displays a list of all the existing blog categories. From this grid, the admin can search, view, edit, or delete categories as required.
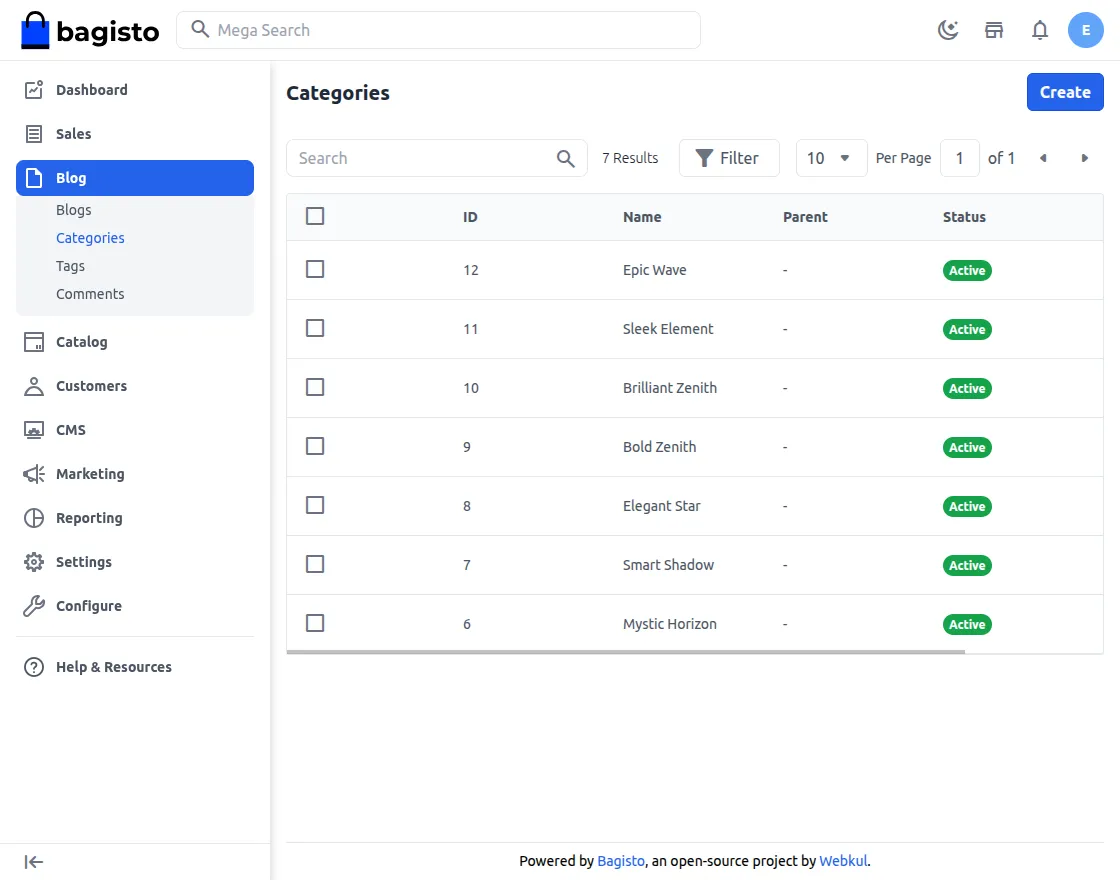
To create a new category, click the Create button.
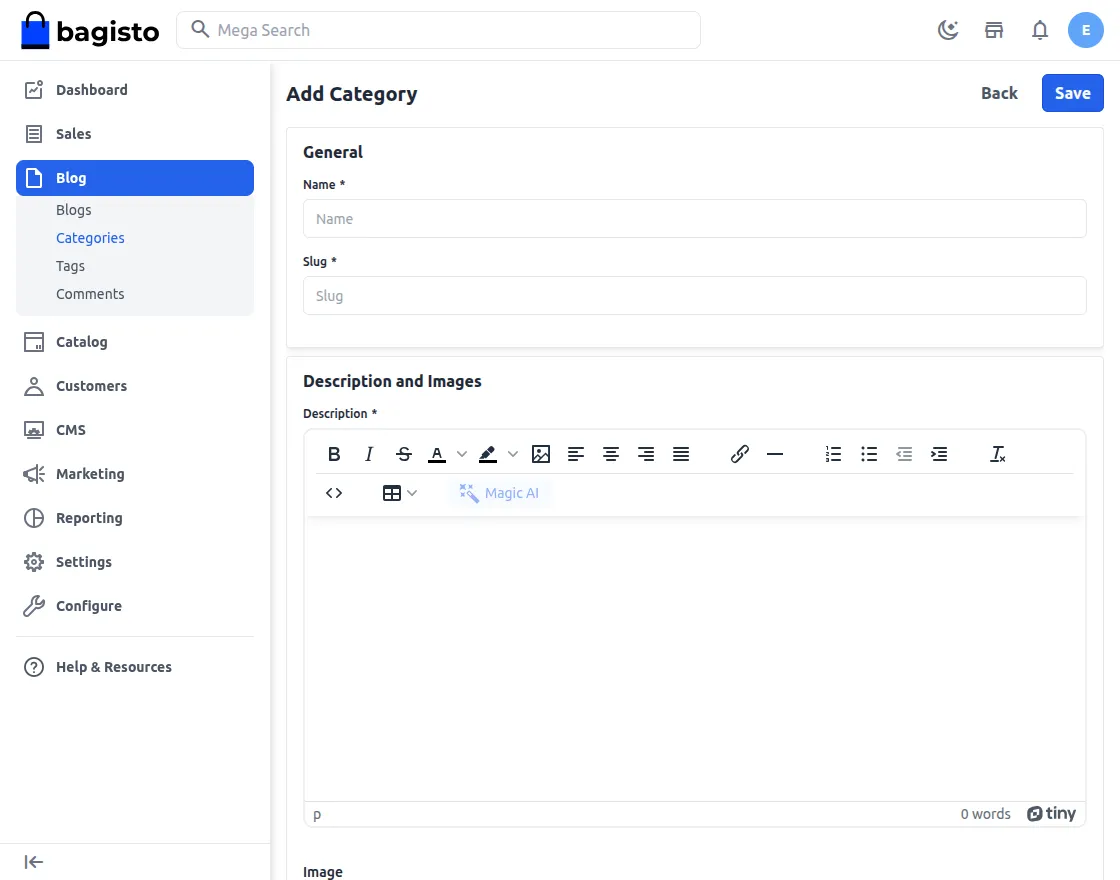
General
The General section allows the admin to provide the basic information for creating a blog category.
- Name – Enter the name of the category. This name will be displayed on the storefront and used to organize blog posts.
- Slug – Specify a unique, SEO-friendly slug for the category. The slug is used to generate the category URL.
- Description – Provide a description for the category using the rich text editor. This helps describe the purpose or content of the category.
- Image – Upload an image to represent the category on the storefront wherever category images are displayed.
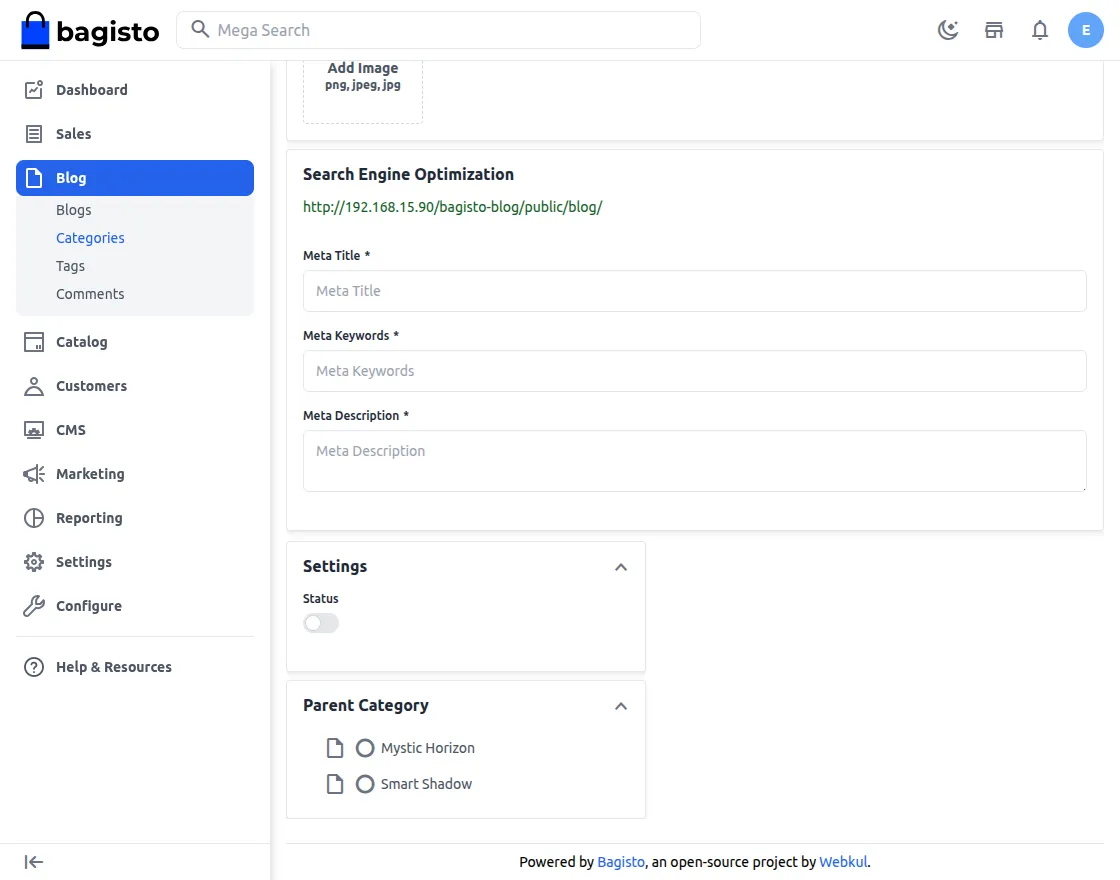
Search Engine Optimization
The Search Engine Optimization section allows the admin to configure SEO metadata for the blog category, helping improve its visibility in search engine results.
- URL – Displays the category URL based on the configured slug.
- Meta Title – Enter the default meta title for the category page.
- Meta Keywords – Specify relevant keywords associated with the category.
- Meta Description – Provide a concise description of the category to improve its appearance in search engine results.
Settings
The Settings section allows the admin to configure the category status and hierarchy.
- Status – Enable or disable the category. Only enabled categories are available on the storefront.
Parent Category
Select an existing category to organize the current category under it. Leave this field blank to create a top-level category.
Tags
Navigate to Blog → Tags to manage the tags associated with blog posts.
The Tags page displays a list of all the existing tags. From this grid, the admin can search, view, edit, or delete tags as needed.
To create a new tag, click the Create button.
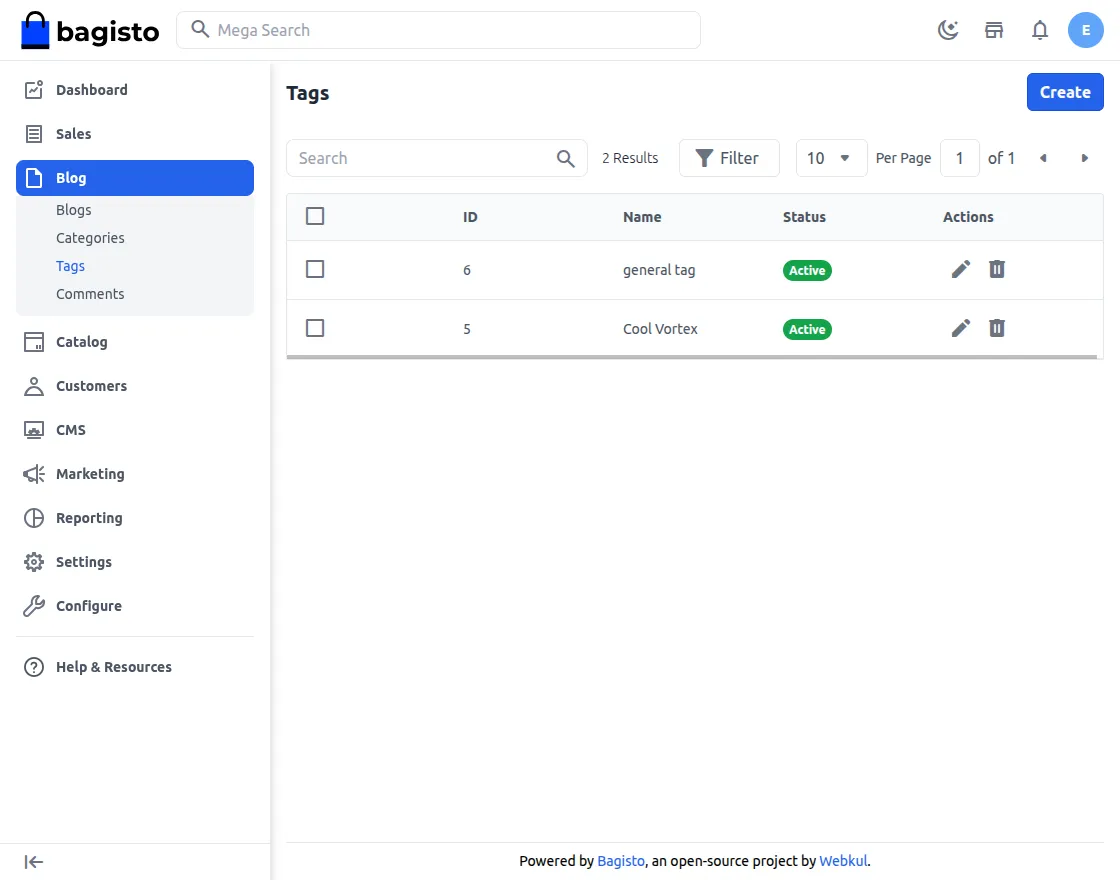
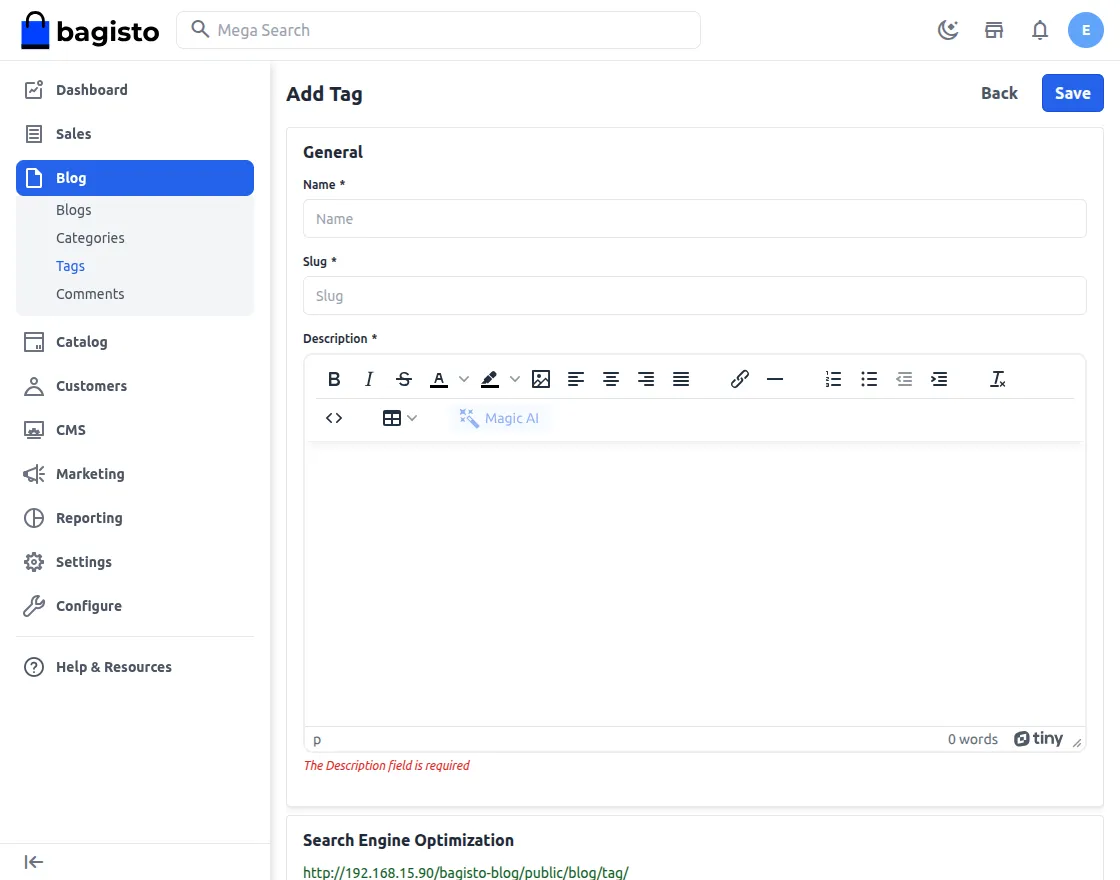
Clicking the Create button opens the tag creation form, where the admin can enter the required details to create a new tag.
General
The General section allows the admin to provide the basic information for creating a blog tag.
- Name – Enter the name of the tag. The tag is used to categorize blog posts and improve content discoverability.
- Slug – Specify a unique, SEO-friendly slug for the tag. The slug is used to generate the tag URL.
- Description – Provide a brief description of the tag using the rich text editor. This helps define the purpose or context of the tag.
Search Engine Optimization
Search Engine Optimization section allows the admin to configure SEO metadata for the blog tag, helping improve its visibility in search engine results.
- URL – Displays the tag URL based on the configured slug.
- Meta Title – Enter the default meta title for the tag page.
- Meta Keywords – Specify relevant keywords associated with the tag.
- Meta Description – Provide a concise description of the tag to improve its appearance in search engine results.
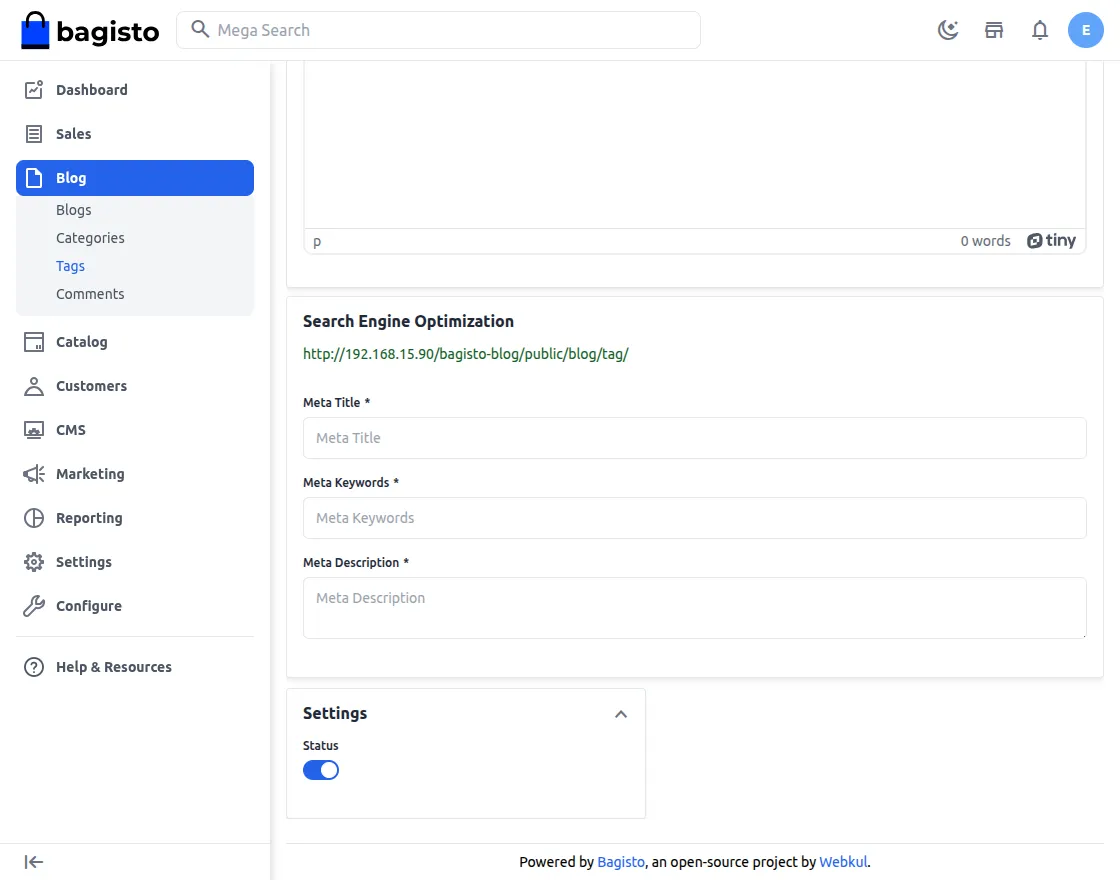
Settings
The Settings section allows the admin to configure the status of the blog tag.
- Status – Enable or disable the tag. Only enabled tags are available for association with blog posts and displayed on the storefront.
Comments
Navigate to Blog → Comments to manage the comments submitted on blog posts.
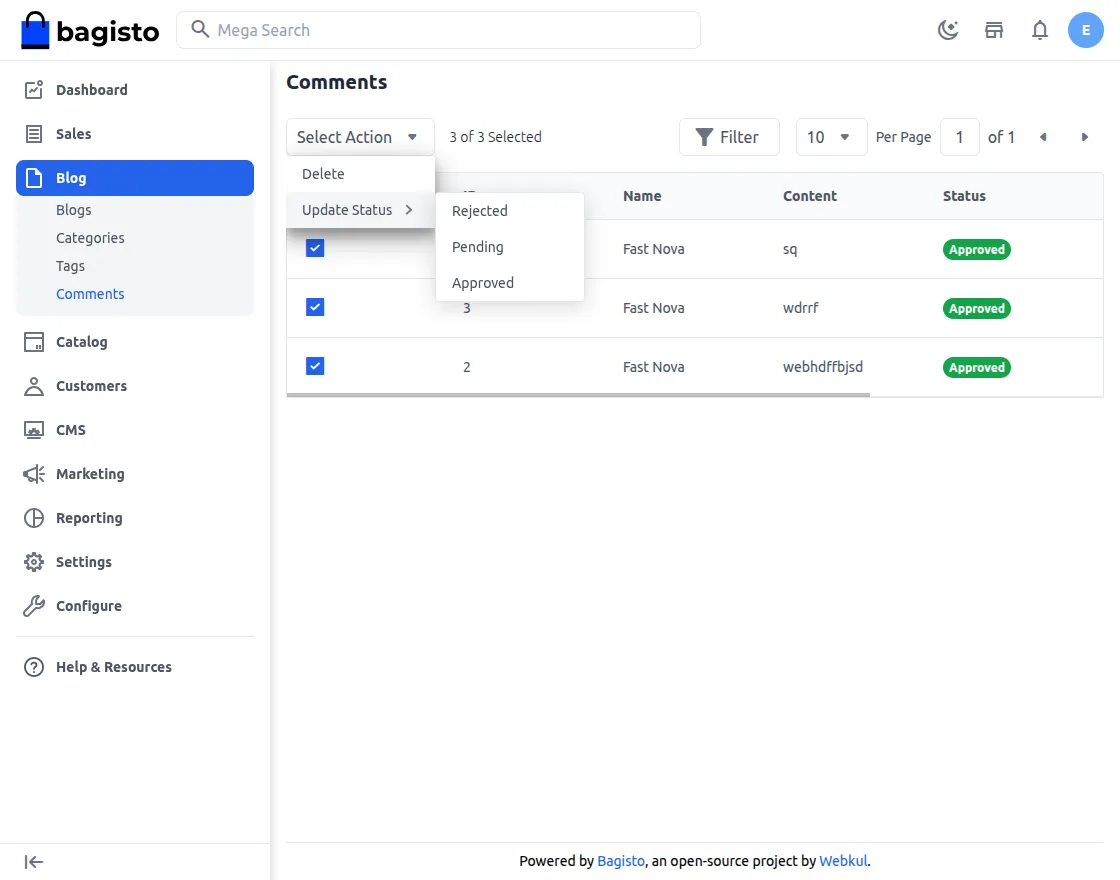
The Comments page displays a list of all the comments received on the blog posts. From this grid, the admin can search, view, edit, approve, or delete comments.
By managing comments from this section, the admin can moderate discussions and ensure that only appropriate comments are displayed on the storefront.
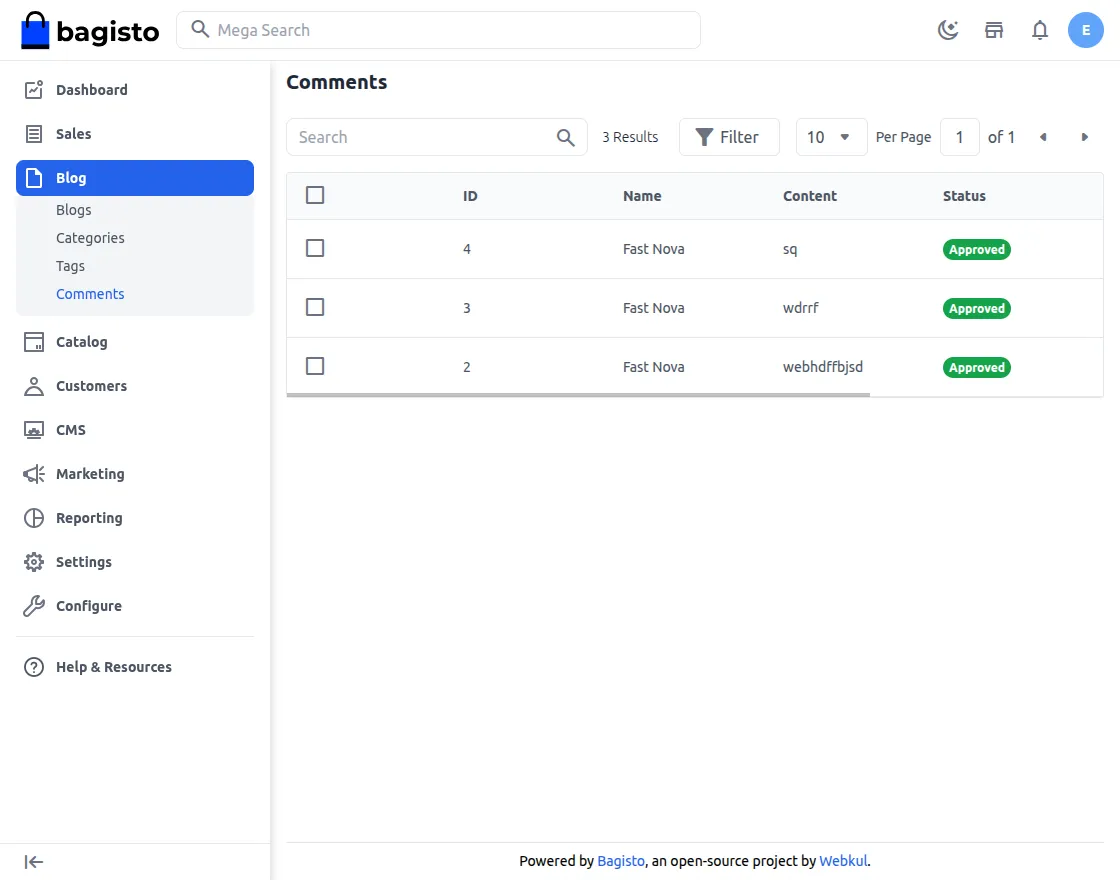
The Comments page allows the admin to review, update, and delete blog post comments from a single location, helping maintain meaningful discussions.
Shop Front
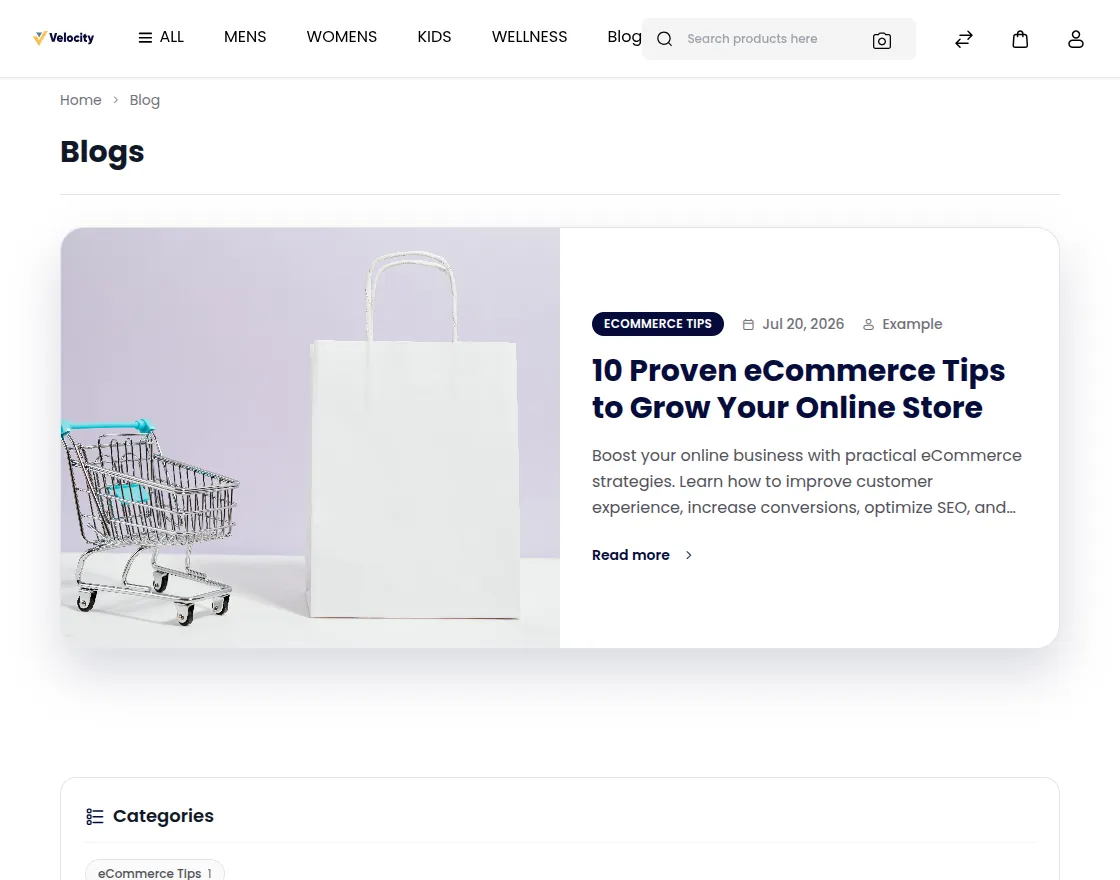
Once published, blog posts are displayed on the storefront, allowing customers to browse articles, explore categories and tags, and interact with the content.
Furthermore, the blog section provides an intuitive interface that helps customers discover informative content while enhancing their overall shopping experience.
Categories
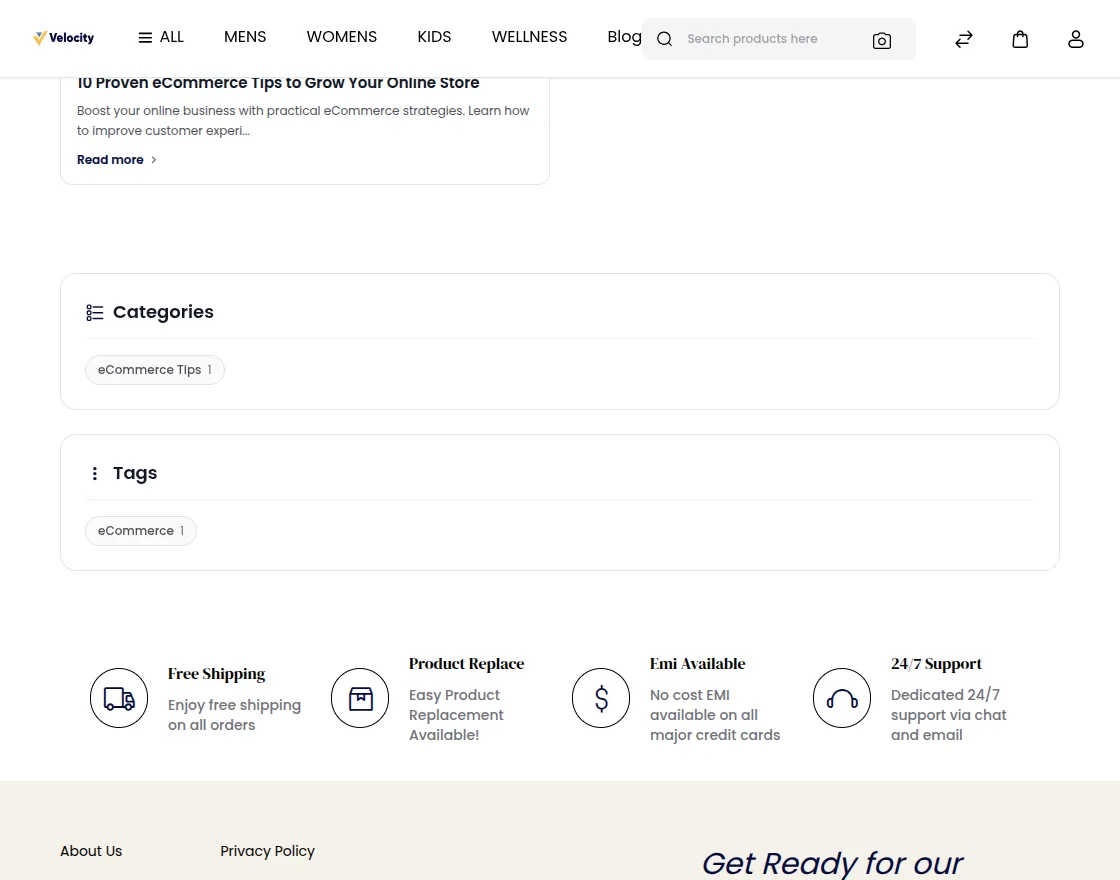
The Categories section groups blog posts by topic and displays the number of posts in each category, helping customers find relevant content quickly.
Tags
The Tags section displays relevant keywords along with the number of associated blog posts, helping customers quickly discover related content.
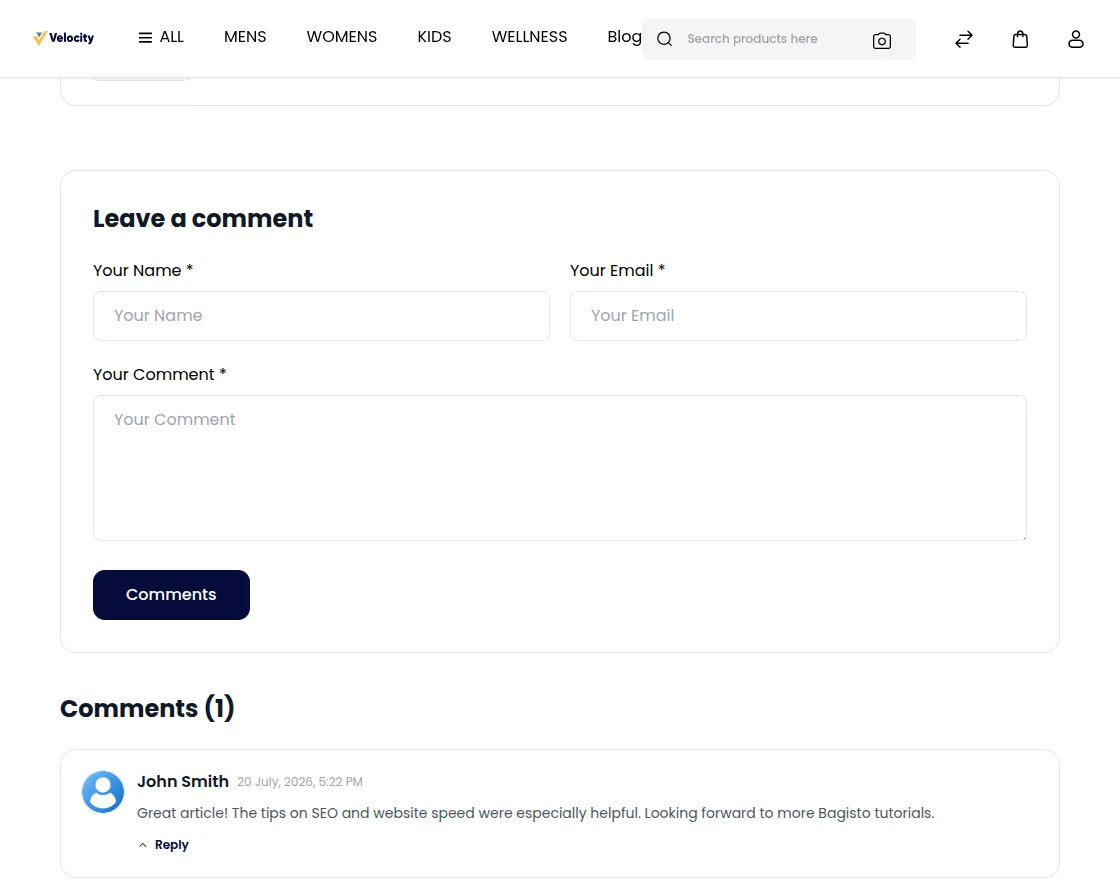
Comments
The Comments section allows customers to engage in discussions by viewing all approved comments associated with the blog post.
Customers can read user feedback. Furthermore, if enabled by the admin, they can reply to comments and join threaded conversations.
Support
So, that was a bit about the Blog Extension for Laravel eCommerce. For any queries or doubts, reach out to us at [email protected].
Additionally, You can also raise a ticket at our HelpDesk System.
Current Product Version - v2.4.7
Supported Framework Version - v2.4.x


Be the first to comment.