Magento 2 Facebook Wall Post integrates your e-commerce store with the world’s largest active social networking platform – Facebook.
With Facebook Wall Post extension you can instantly share your Facebook updates such as links, stories, images, videos with your customers and socialize with them further. All the information appears exactly as it appears on the Facebook.
You can customize the extension using various options such as – color customization, size, number of feeds to display, etc.
Facebook Wall Post for Magento 2 will display latest feeds from your Facebook Page/Profile/Group. Social Media integration in an online store is a requirement and it surely increases more user engagement in the online store which results in more revenue.
Features
- Open link in new tab or same window.
- Show/hide – Facebook likes, profile pictures, media images, comments, guest entries, date.
- Enter custom header text.
- Set the character limit for the feed.
- Set the number of feeds to display.
- Text color picker for – comment and feed data
- Customize background color for comment and feed data.
- Customize the height and width for the frontend.
Installation
Customers will get a zip folder and they have to extract the contents of this zip folder on their system. The extracted folder has an src folder, inside the src folder you have the app folder. You need to transfer this app folder into the Magento2 root directory on the server as shown below.

After the successful installation, you have to run these commands in the Magento2 root directory.
First command-
php bin/magento setup:upgrade
Second Command –
php bin/magento setup:di:compile
Third Command –
php bin/magento setup:static-content:deploy
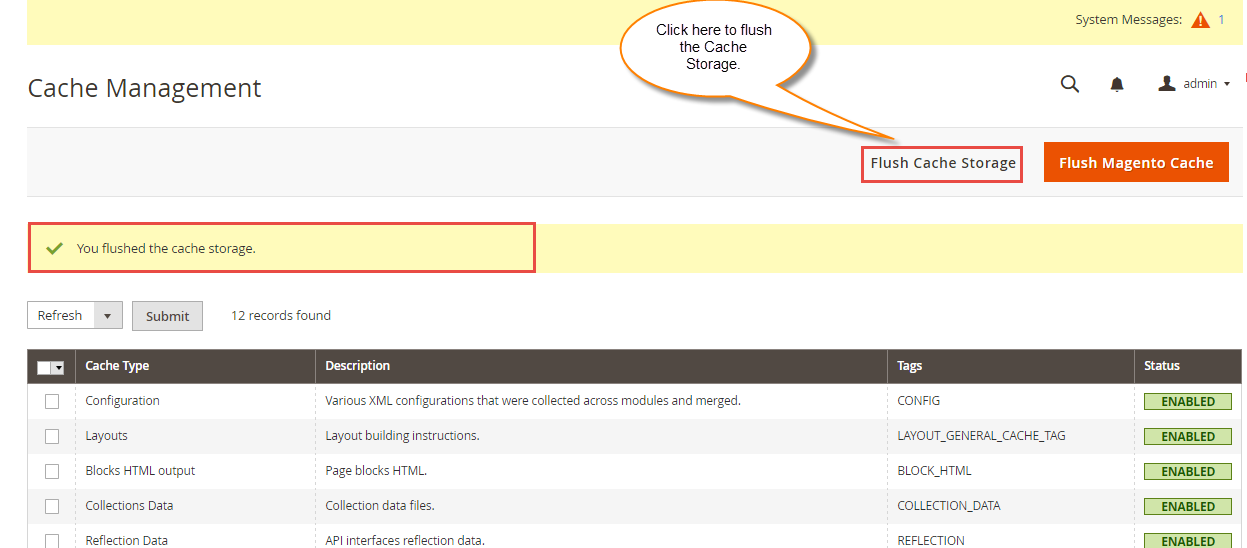
After running the commands, you have to flush the cache from Magento admin panel by navigating through->System->Cache management as shown below.
Multi-Lingual Configuration
For Multilingual support, please navigate to Store>Configuration>General >Locale Options. And select your desired language from the Locale option.
Module Language Translation
If you need to do the Magento 2 Facebook module translation, please navigate to the following path in your system app/code/Webkul/FacebookWallPost/i18n.
Open the file named en_US.CSV for editing as shown in the below screenshot.

Once you have opened the file for editing. Replace the words after the comma(,) on the right with your translated words.
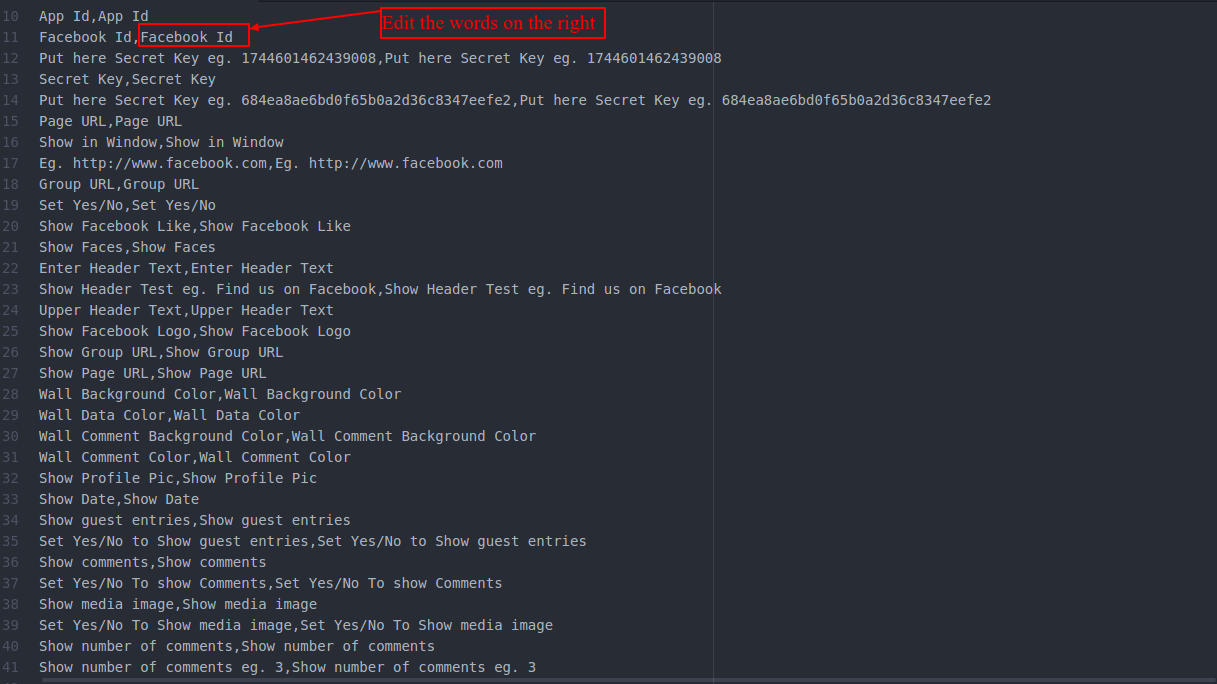
After editing and translating the CSV file, you need to save the translated file name according to your region language and country code such as – de_DE.CSV. Then upload the translated file to the same folder from where you have obtained it. Now your module translation is complete.

How To get API keys?
You can create a Facebook application using this link https://developers.facebook.com/
1. Click on “Add New App”.

2. Go to My App > Setting and enter email id.

3. Now go to My App > App Review and set “YES” so that the app is public

4. At last, you can receive your App ID and App Secret under My Apps > Dashboard.

Facebook Wall Post Configuration
For the module configuration, the admin will follow the path Stores > Configuration > Facebook Wall Post Parameters and enter all the details like Facebook Id, App Id, Secret Key and other important details and then save the configuration.

Now, the admin will follow the path Content > Pages and then select and edit the page where you want to show the Facebook Wallpost Feeds. 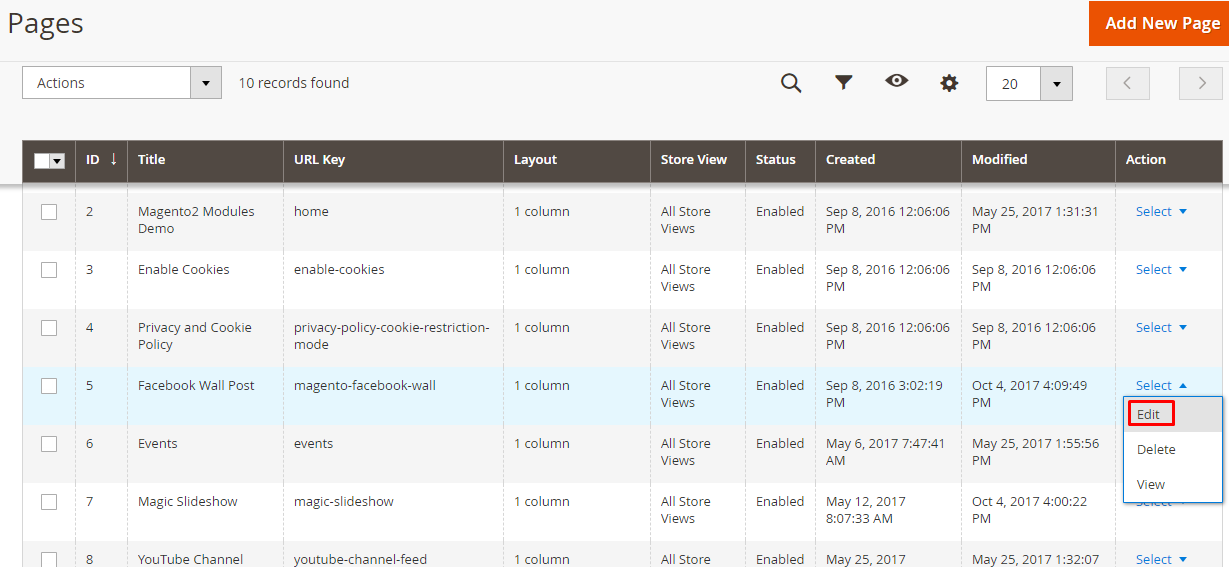
Then go to the Content section and copy & paste the following block code.
{{block class="Webkul\FacebookWallPost\Block\Facebookwallpost" template="Webkul_FacebookWallPost::facebookwallpost.phtml"}}

If there are multiple stores then please make sure in the admin panel, follow the path Stores > Configuration > Facebook Wall Post Parameters > Current Configuration Scope:[STORE VIEW] and all the fields should be checked like the image below.

Front-end
After the module installation & configuration, the customer can see Facebook Wall Post on the storefront like the image below.

Thanks for reading this blog post 🙂 If you still have any issue feel free to Create a ticket and let us know your views to make the module better or send an email to [email protected]
Current Product Version - 2.0.2
Supported Framework Version - Magento 2.0.x, 2.1.x, 2.2.x,2.3.x, 2.4.x

But it appeared following issue.
“API access deactivated. To reactivate, go to the app dashboard.”
How should I solve this issue?