Introduction
ERPNext ZKTeco Attendance Integration connects a ZKTeco device to ERPNext. It brings each punch from the device into ERPNext, so you no longer copy biometric attendance by hand.
HR teams and system managers use it. They add each ZKTeco device, link device users to employees, and read every punch log in one place.
By the end of this guide, you can add a device, receive punches, and check attendance, breaks and sync results.
Prerequisites for using ERPNext ZKTeco Attendance Integration
ERPNext ZKTeco Attendance Integration works in conjunction with the following modules:
ERPNext and HRMS
You must install the above-mentioned modules to use the ERPNext ZKTeco Attendance Integration.
Features
- Add any number of ZKTeco device records, each with its own address and settings.
- Pull biometric attendance from a device on a schedule, or sync it at once.
- Receive punches from remote devices with ADMS Push.
- Link device users to employees, and enroll employees on a device.
- Keep every punch log without duplicates.
- Create an Employee Checkin for each punch.
- Track employee breaks with their length.
- Read punches and hours in the attendance reports.
- Check each sync run and the state of each ZKTeco device.
Installation
- After purchasing the app from Webkul Store, you will receive a link to download the module ZIP file.
- Extract the ZIP file. You will see a folder named ‘erpnext_zkteco_attendance_integration’.
- Set up the module in your git repository, then fetch it using:
bench get-app --branch main https://git.webkul.com/erpnext-apps/erpnext_zkteco_attendance_integration.git
(Replace “main” with your branch name and replace the “HTTPS URL” with your HTTPS clone URL.)
- Install the app on your site:
bench --site <your-site-name> install-app erpnext_zkteco_attendance_integration
- Run bench migrate to complete the setup.
Workflow
Adding a ZKTeco Device
- Open the ZKTeco Device list. It shows each device with its connection mode and status.
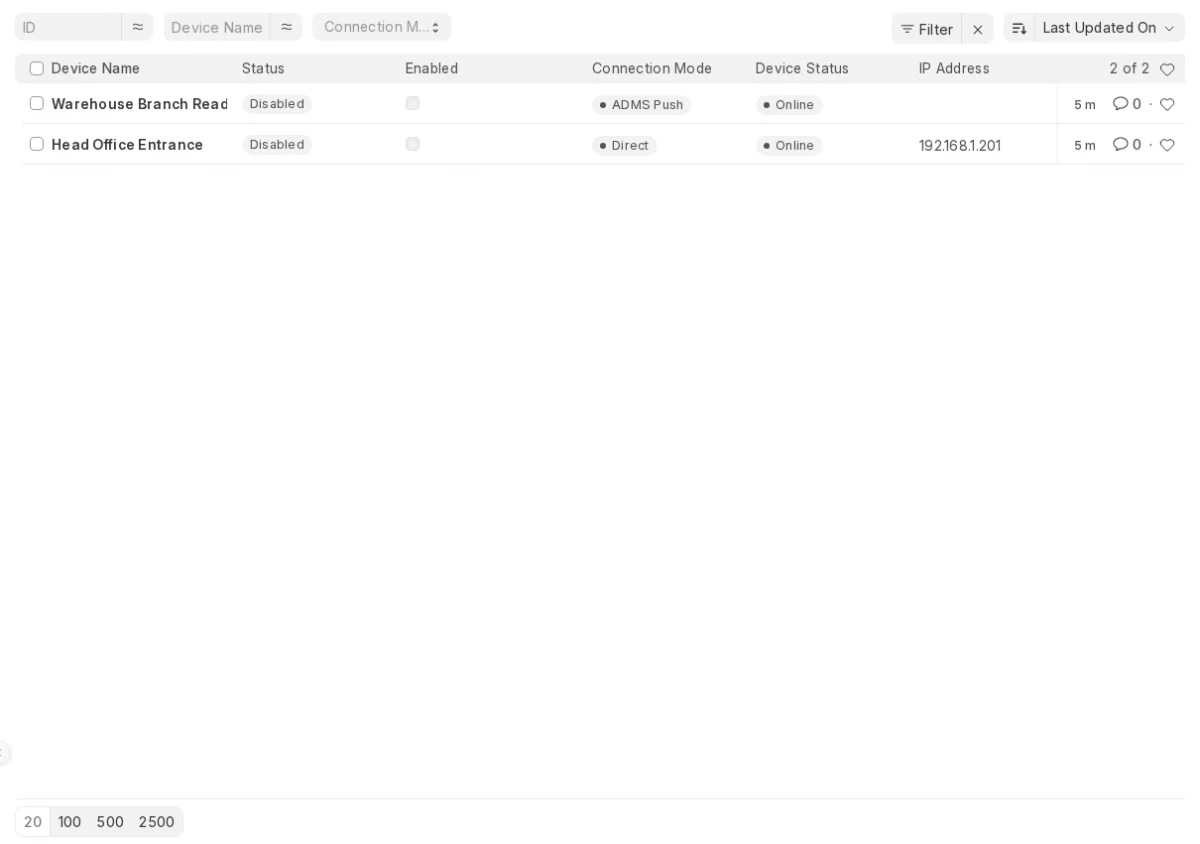
- Click Add ZKTeco Device. The new device form opens.
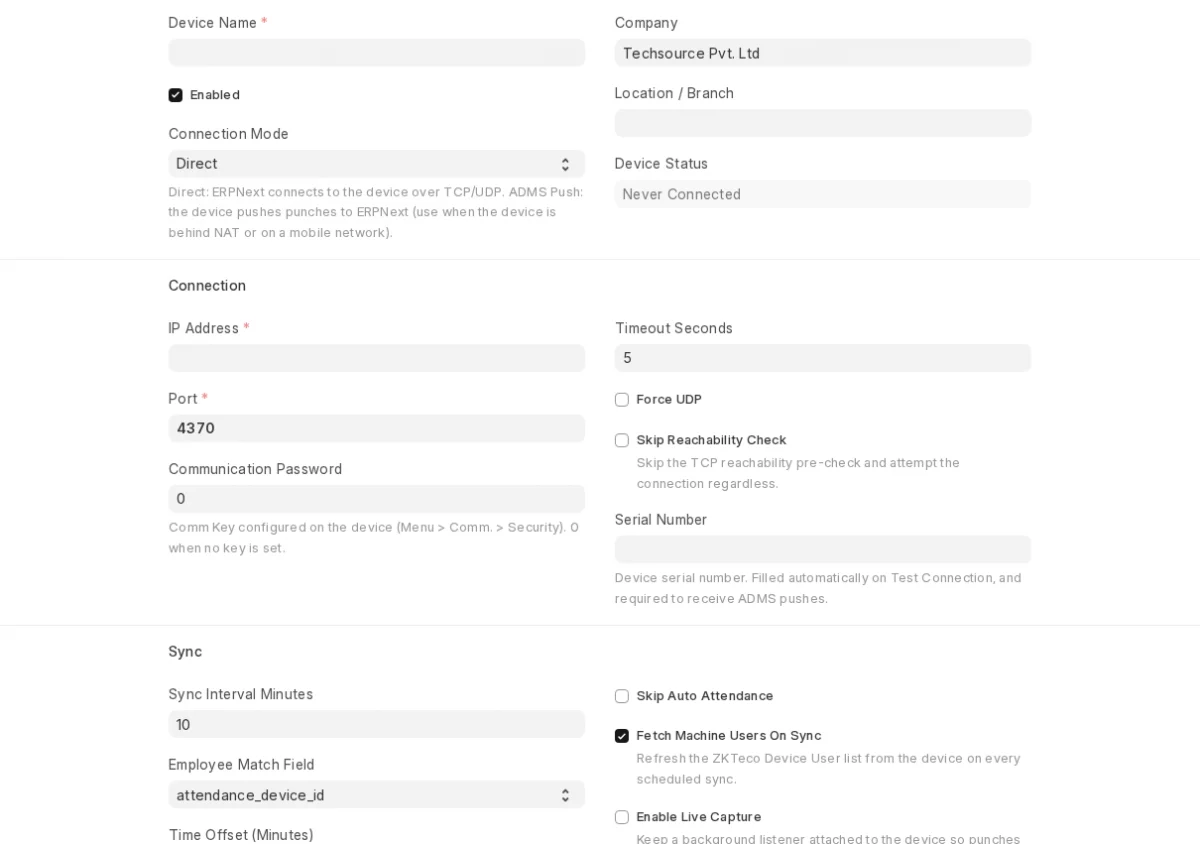
- Enter the Device Name, IP Address and Port. The default port is 4370.
- Click Save, then click Test Connection. ERPNext reads the model and serial number of the ZKTeco device.
- Click Sync Now to pull the punch log from the device.

Receiving Punches With ADMS Push
- Open ZKTeco Settings. The status panel shows if the library, HRMS and your devices are ready.
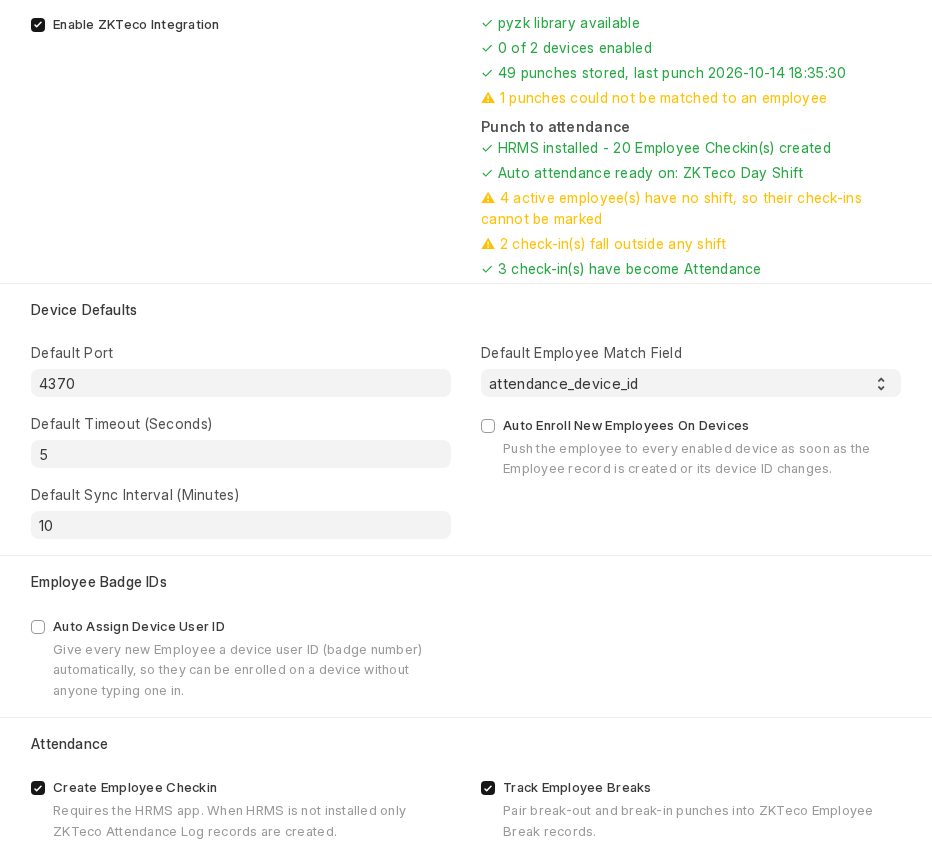
- Tick Enable ADMS Push Mode. Use this when ERPNext cannot reach the device, for example behind a router.

- On the device, enter your ERPNext address as the cloud server.
- On the ZKTeco Device form, set Connection Mode to ADMS Push and enter the Serial Number.
Linking Device Users to Employees
- Open a ZKTeco Device and click the Users menu.
- Choose Fetch Machine Users to copy the device user list into ERPNext.
- Choose Enroll Employees to write employees onto the device, or Remove Employees to delete them.

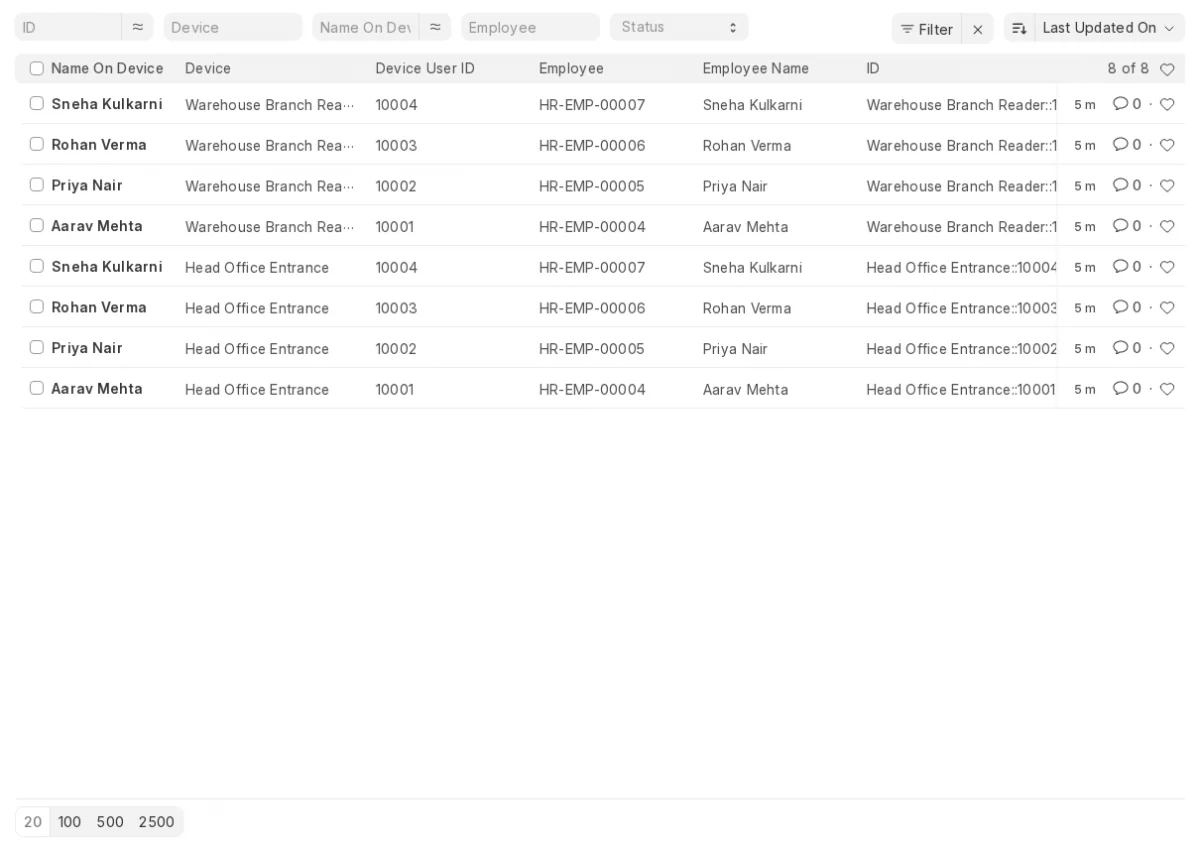
- Open the ZKTeco Device User list. Each row shows the device user ID and the linked employee.
Reading Attendance
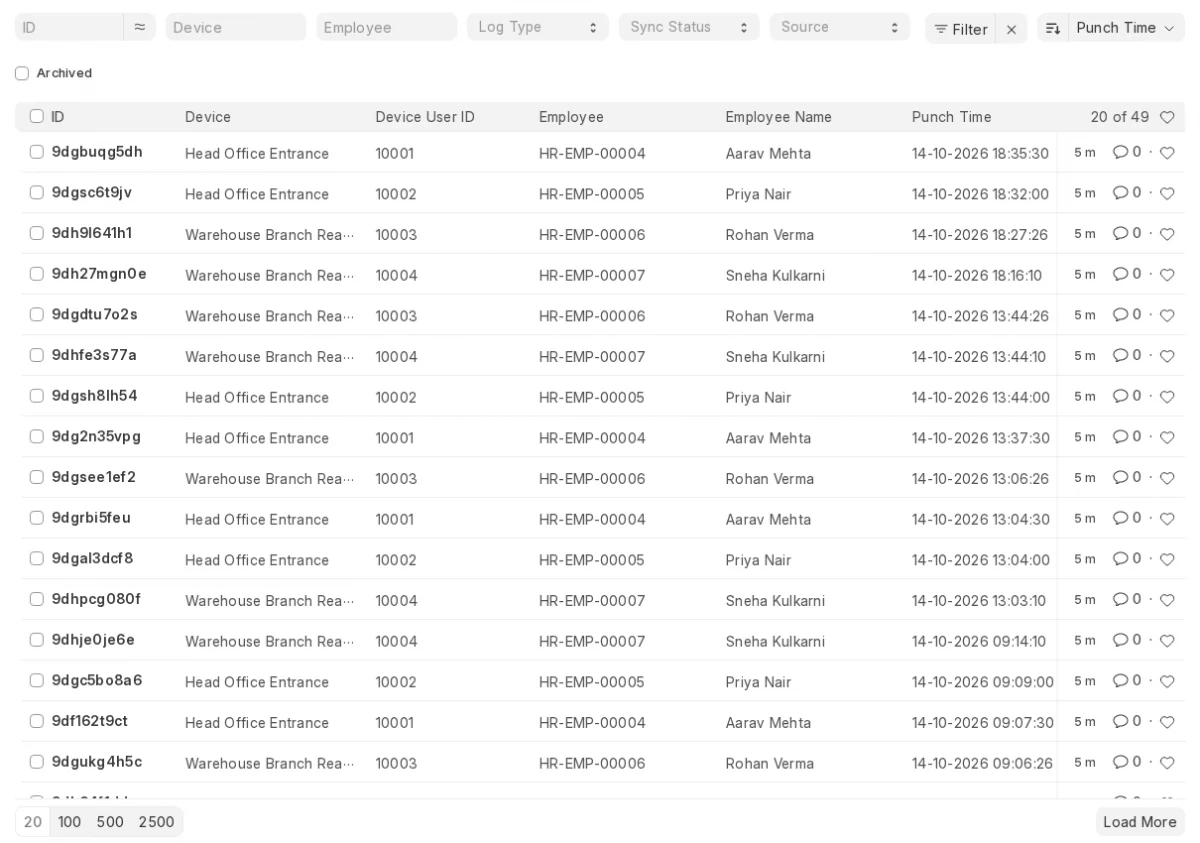
- Open the ZKTeco Attendance Log list. It holds every punch log with its device and employee.
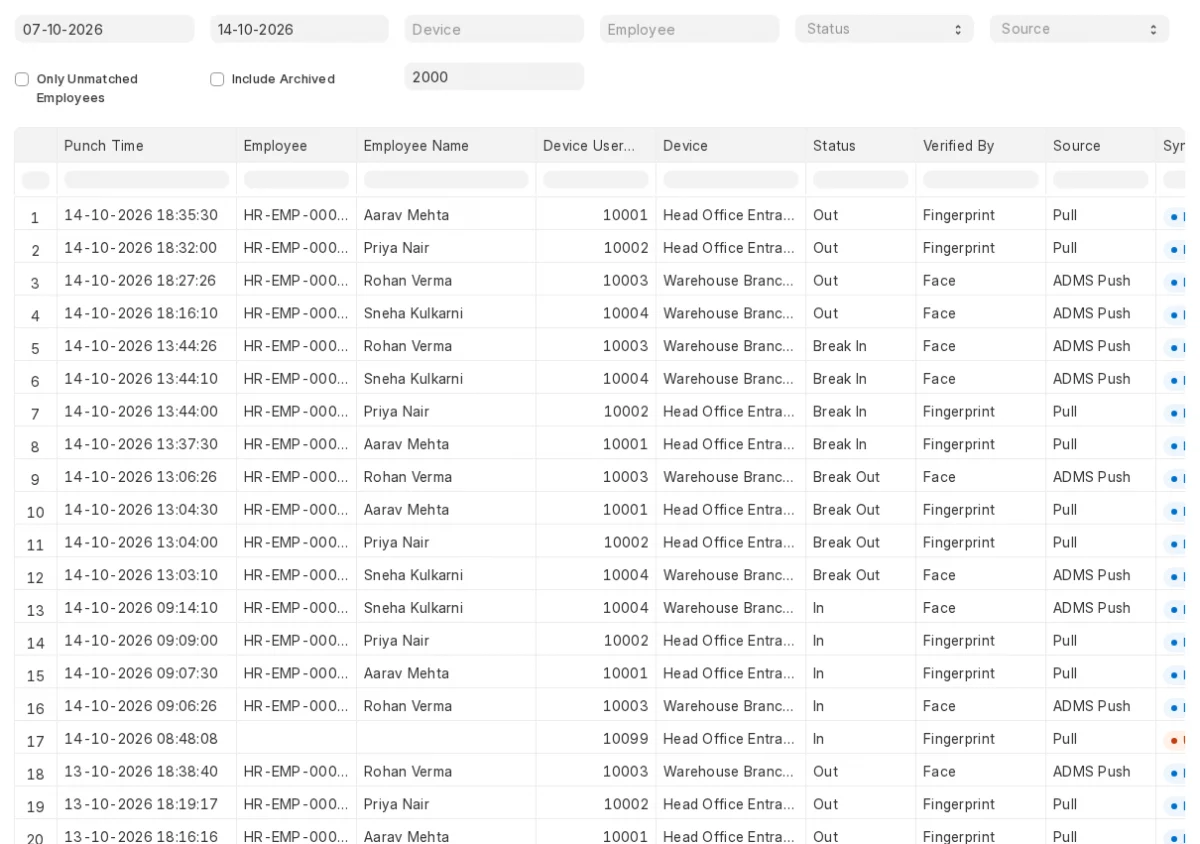
- Open the ZKTeco Attendance Feed report. Filter by date, device or employee.
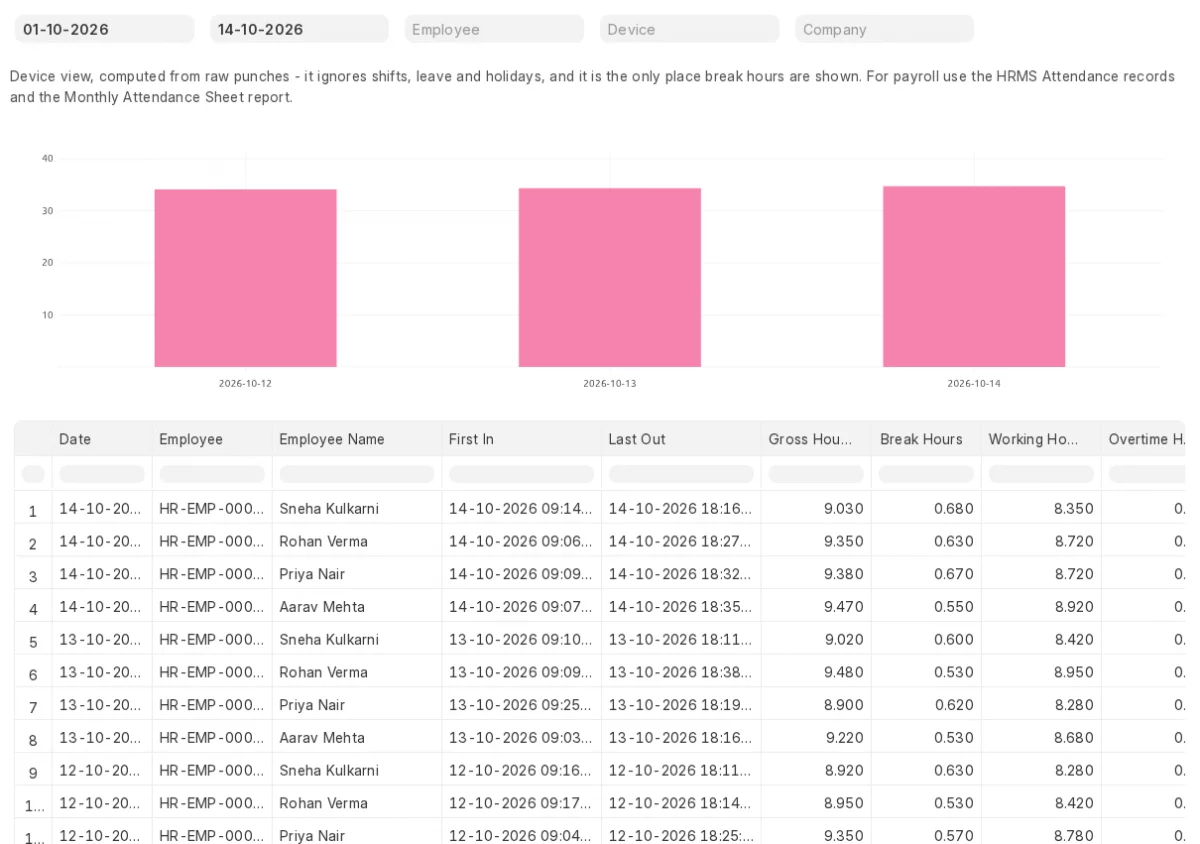
- Open the ZKTeco Daily Attendance report. It shows first in, last out, break hours and working hours for each day.
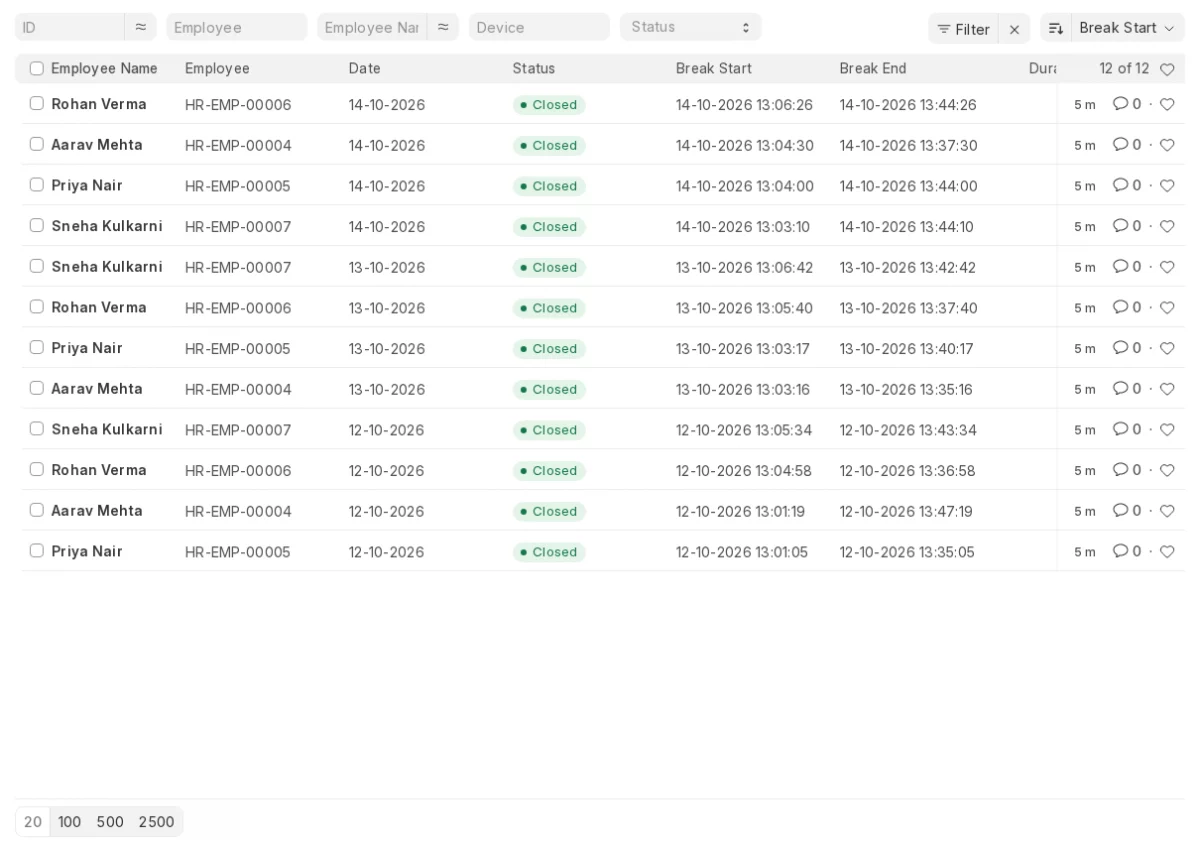
- Open the ZKTeco Employee Break list to see each break and how long it lasted.
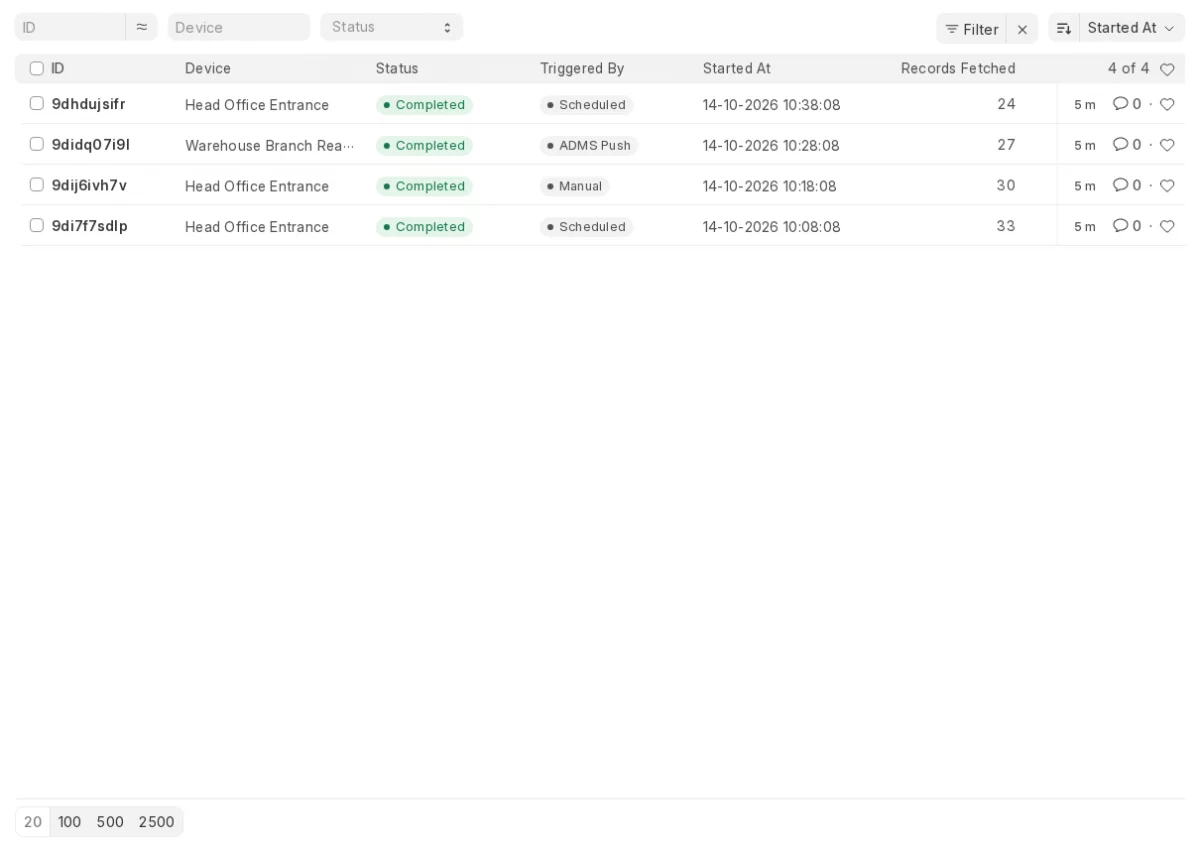
- Open the ZKTeco Sync Run list to see the result of each sync.
Need Help?
Hope you find this guide helpful! Please feel free to share your feedback in the comments below.
If you still have any issues/queries, please create a ticket at the UV Desk.
I hope this helps. In case of any further queries, contact us at our support mail.
Thanks for paying attention!!
Current Product Version - 0.0.1
Supported Framework Version - ERPNext V16

Be the first to comment.