CS-Cart Endicia Shipping Label Generation helps store administrators generate USPS shipping labels directly from the CS-Cart backend.
The add-on connects CS-Cart with Endicia and lets administrators manage shipping labels, check account details, and add Endicia postage from the backend.
Admins and vendors can create individual or bulk shipping labels for their shipments.
Features of Endicia Shipping Label Generation
- Well integrated with CS-Cart Multi-Vendor.
- Both Admin and vendor can generate shipping labels.
- Also Option to generate labels in bulk for various shipments.
- Moreover Functionality to check Endicia account status and all transactions at admin end.
- In addition Admin can add Endicia postage directly from the CS-Cart backend.
- Functionality to view Endicia transactions at vendor end.
- Also Option to change Endicia passphrase directly at admin end.
- Easy to configure and manage at admin end.
- Moreover the codes are open to be further customized easily.
Note: Due to Endicia API update, our add-on is in the process of getting Approval from Endicia. For now, the add-on will work only in test mode.
Video Tutorial
How To Upload and Install Endicia Shipping Label Generation
After downloading the CS-Cart Endicia Shipping Label Generation add-on, you’ll get one zip file, one install.txt file, and a relevant User Guide manual doc.
Please read it carefully for proper configuration.
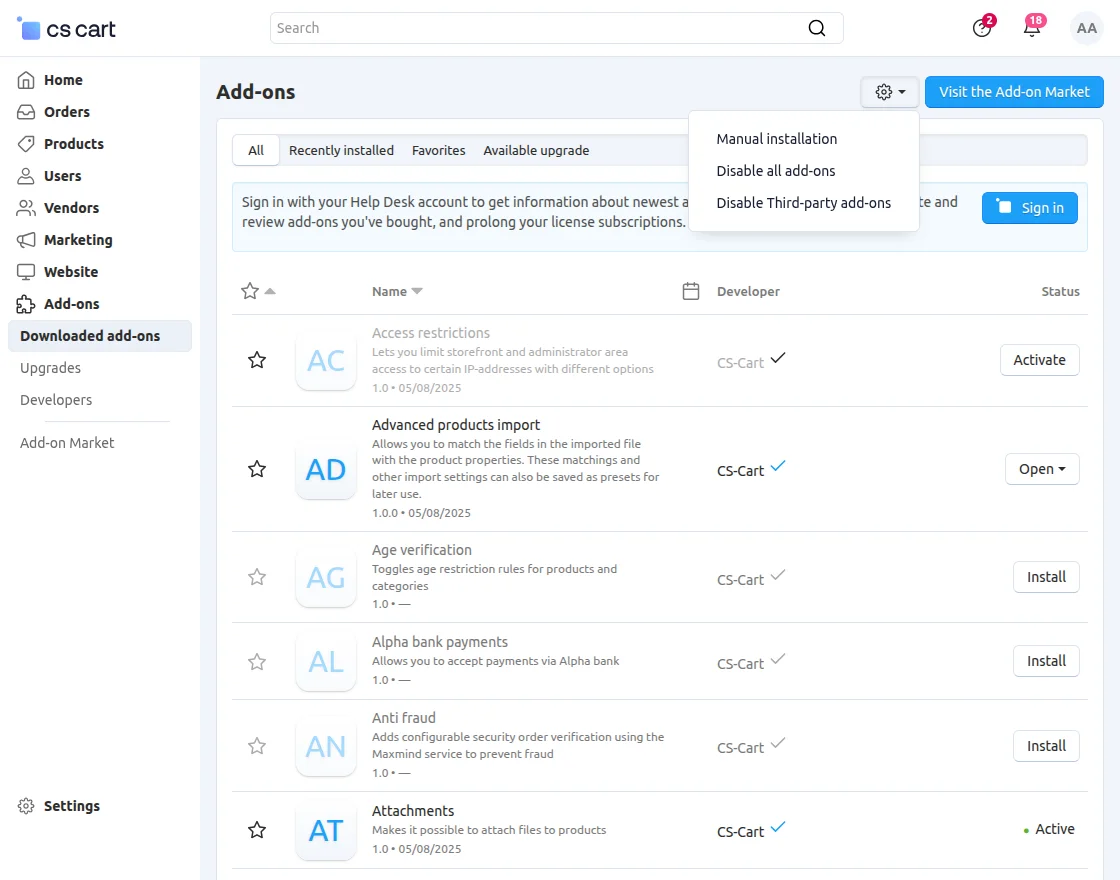
Go to Manage Add-ons, and click on “Manual Installation” as shown below in the snapshot.
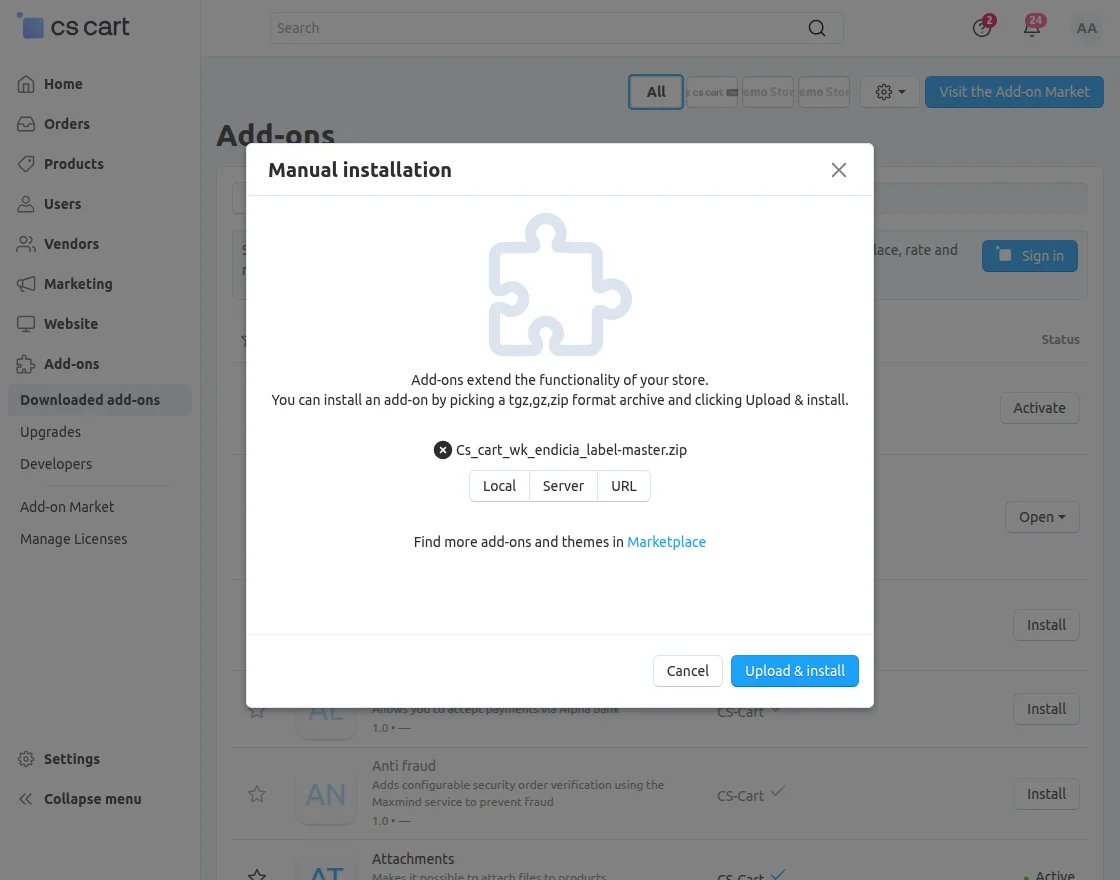
Click on “Local” to browse the zip file, and then click on “Upload & Install” as shown below in the snapshot.
Configuration of Endicia Shipping Label Generation
To configure the module, go to the Add-Ons >> Developers >> Webkul Software Pvt Ltd. >> Endicia Shipping Label >> Settings.
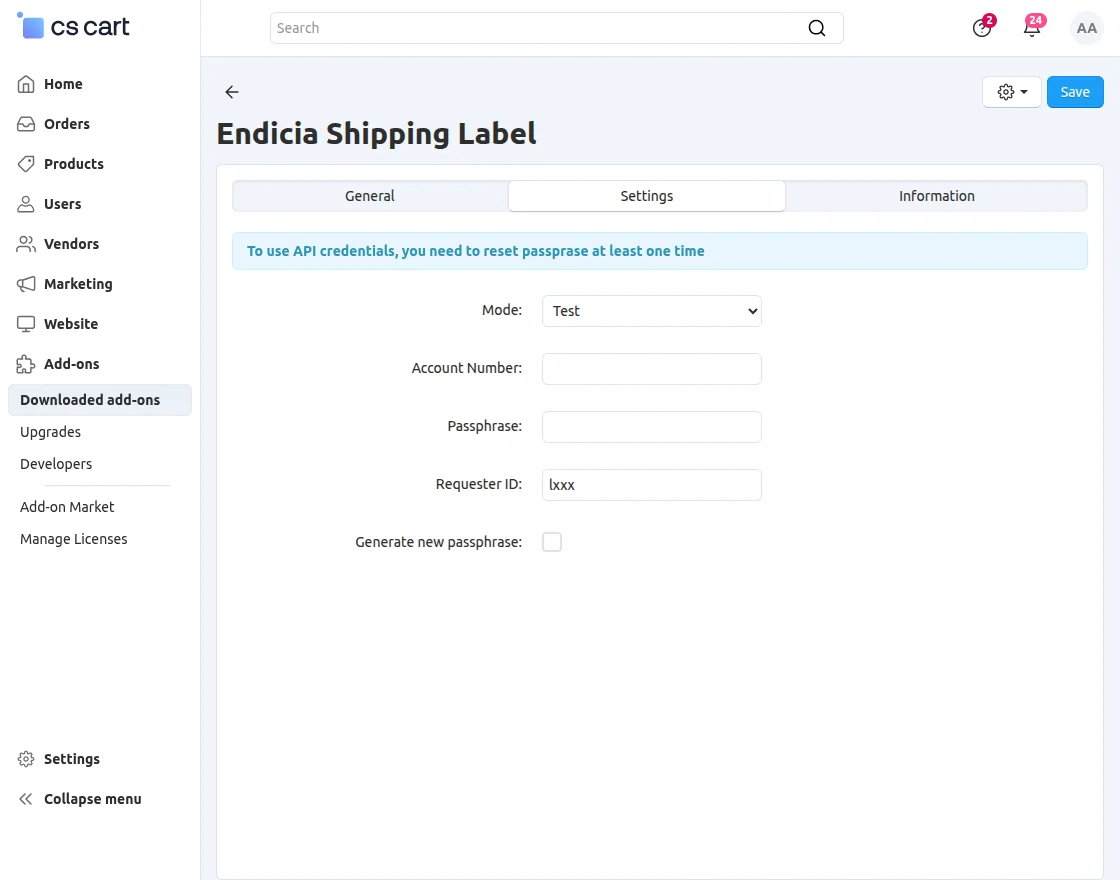
Set the below-mentioned parameters:
- Select the Mode (Test or Production) as per your requirement.
- Enter the Endicia credentials, which include Account Id, Passphrase.
- Check the box if you need to generate a new passphrase.
- Save the settings.
The new passphrase (if generated) will get automatically entered in the “Passphrase” field. Just need to save this new passphrase to add-on settings.
Shipment Creation At Backend
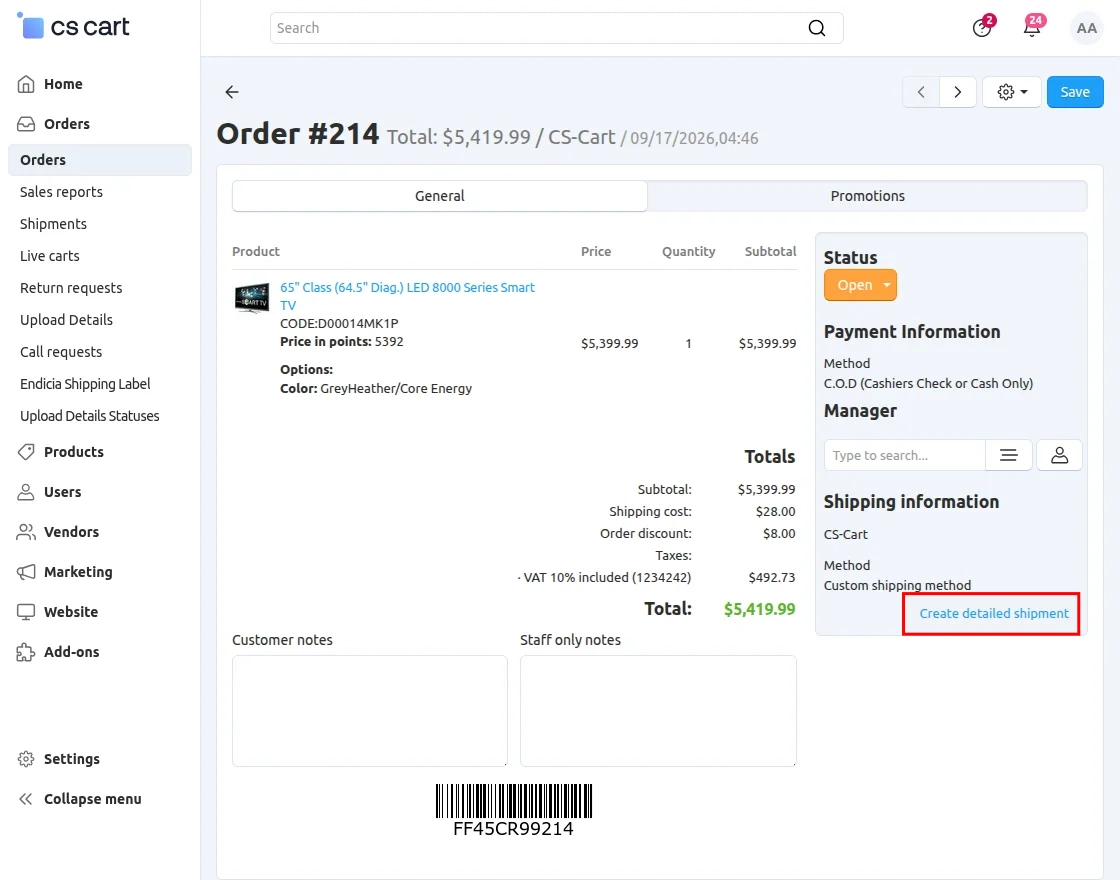
Open the order detail page at the backend. Click on Create detailed shipment to create a new shipment.
Shipping method will be as per chosen by the customer at front end. Select the carrier as USPS and click the checkbox to generate the shipping label for USPS in Real Time.

On clicking the checkbox to Generate Endicia Label, You will get an option to choose the Endicia Mail Class, Label Type and Mailpiece Shape. Select the fields and fill the other parameters accordingly. Click on the button to Create the shipment.


Once the shipment is created, a shipping label is generated automatically in accordance with a shipping method chosen by a customer in Shipment Creation At Backend. The charges for label generation will get deducted from the Admin’s Endicia Account Balance on each label generation.
How To Generate Shipping Label
On successful shipment creation, the option to print an Endicia Label appears on various pages at the backend. Let’s see how can we get USPS label:
On shipment creation, an option to Print Endicia Label appears on clicking the gear button on the right corner of order detail page. Please check the screenshot below.

Also, You can print it from the shipment list page. Click on Shipments on the order detail page at the backend. Refer the below snapshots.

Click on gear button of the desired shipment and click on Print Endicia Label.

Endicia USPS Shipping Label:

Is there any way to print labels in bulk ??
Yes, To Print labels in bulk for various shipments: Select the desired shipments by clicking the checkbox and click on Endicia Label Bulk Print to print the USPS label in bulk.

Endicia Account Management At Admin End
A separate view for Endicia account details has been provided at admin end. Where admin can view all the transactions at Endicia end along with the account balance.
Go to Orders and click on Endicia Shipping Label as shown below.

Here admin can view the transactions details and Account balance. These Account Balance and Transaction logs are getting updated in real time.
Admin can change the status (Paid or Unpaid) of the transactions made at vendor end.

How To Add Endicia Postage ?
To add postage from the backend, Go to Orders -> Endicia.
- Enter the amount.
- Click on Buy button to add postage.
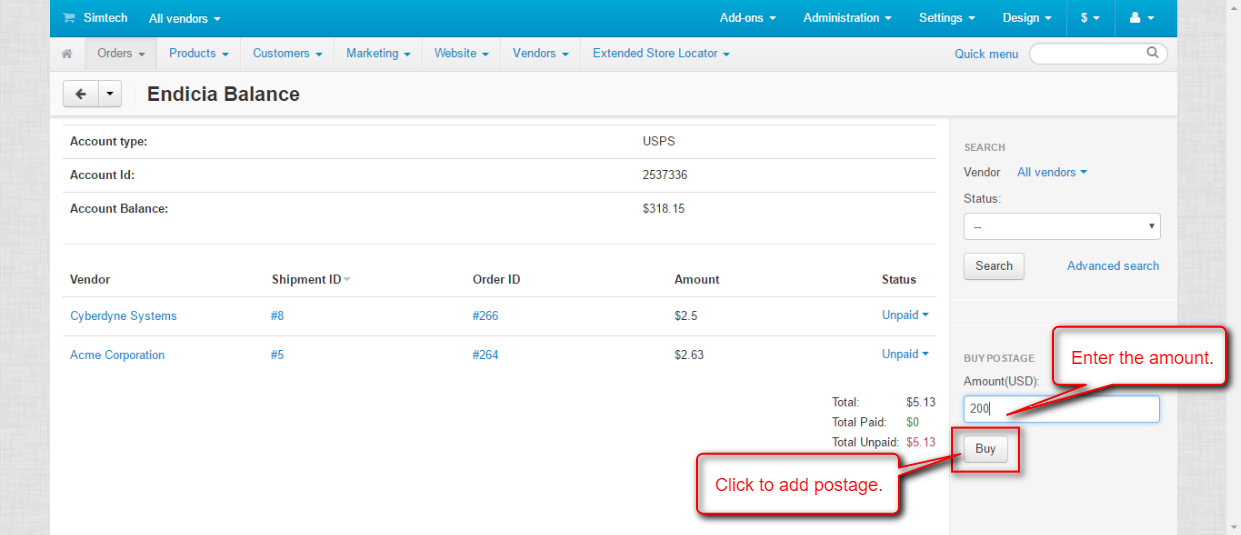
After you click Buy, Postage will be added directly.

Make sure that the amount added is greater than $10; otherwise, you will get an error message as shown below:

Vendor End View
The vendor can also create shipments in the same way an admin does. Also, the vendor can view all the transactions made while generating shipping labels. Here is the view of the same:

Support
If you have any questions, suggestions, or customization requests, feel free to contact us at [email protected] or submit a ticket at webkul.uvdesk.com.
Explore our premium-quality CS Cart Extensions to enhance your store functionality.
You can also explore our CS-Cart Development Services and Quality CS-Cart add-ons.
Current Product Version - 1.3
Supported Framework Version - 4.18.x, 4.19.x, 4.20.x

Be the first to comment.