Every Pimcore class carries a set of options that shape how its objects behave. This guide covers Class Setting in Pimcore for the latest Studio.
You already know how to create a class and a data object. This post goes one layer deeper into the class options themselves.
We target Pimcore 12 (Platform 2026.1). Screens, paths, and labels all match the modern React-based Pimcore Studio.
One heads-up before you start. The legacy ExtJS “classic” admin no longer ships in 2026.1, so the old “Settings > Data Objects > Classes” route is gone.
Where Class Setting in Pimcore lives now
Every class option sits on the class definition, inside Studio. You reach it through the left navigation.
Follow this exact path:
- Open Data Management in the left navigation.
- Expand Data Model Definitions.
- Click Classes, then open your class.
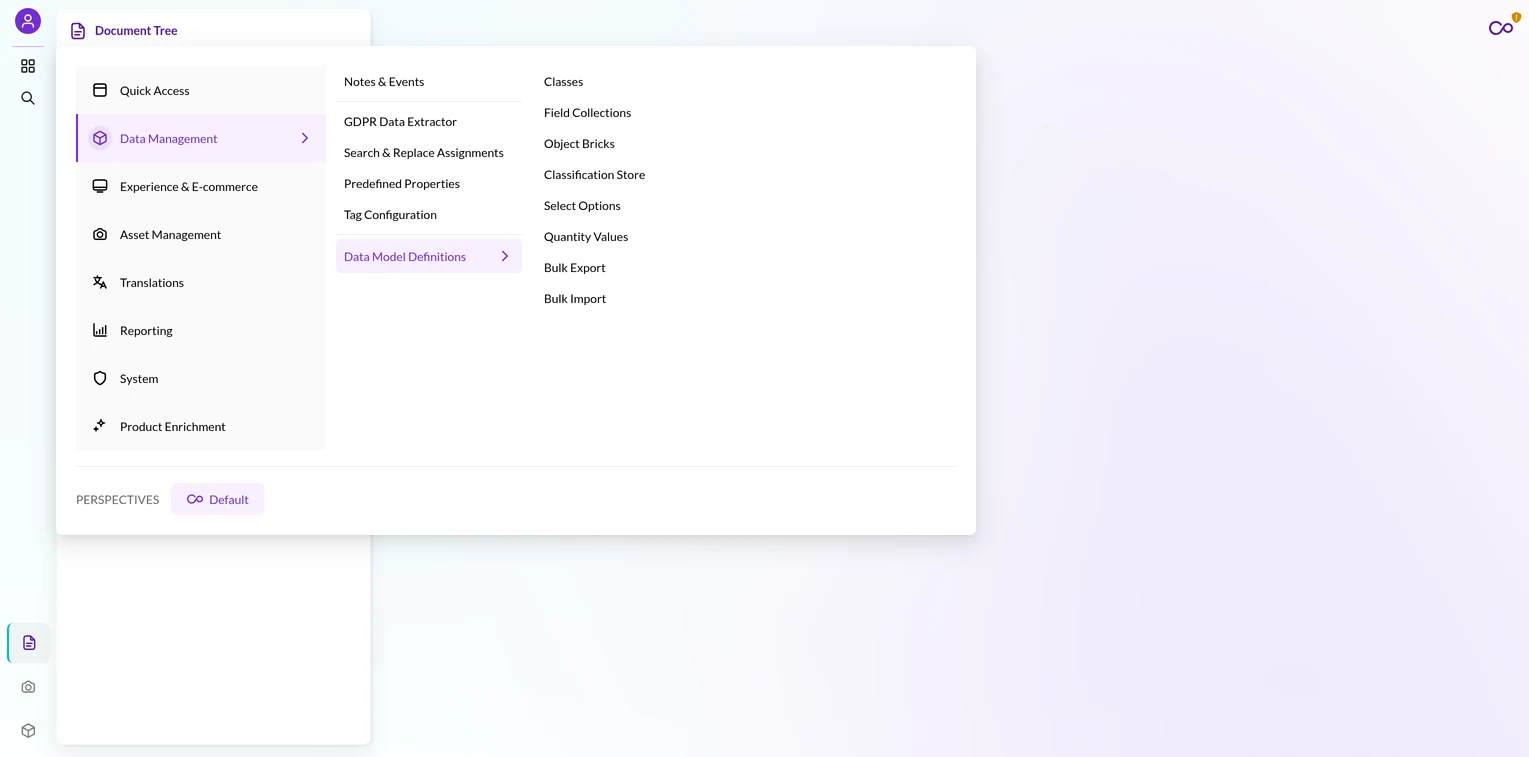
You will see siblings next to Classes. These include Field Collections, Object Bricks, Classification Store, Select Options, Quantity Values, Bulk Export, and Bulk Import.
Open any class and you land on its General tab. That tab is where Class Setting in Pimcore begins.
The General tab at a glance
The General tab holds the class-wide options. Each option here is one piece of Class Setting in Pimcore, and it controls behavior, not the individual fields.
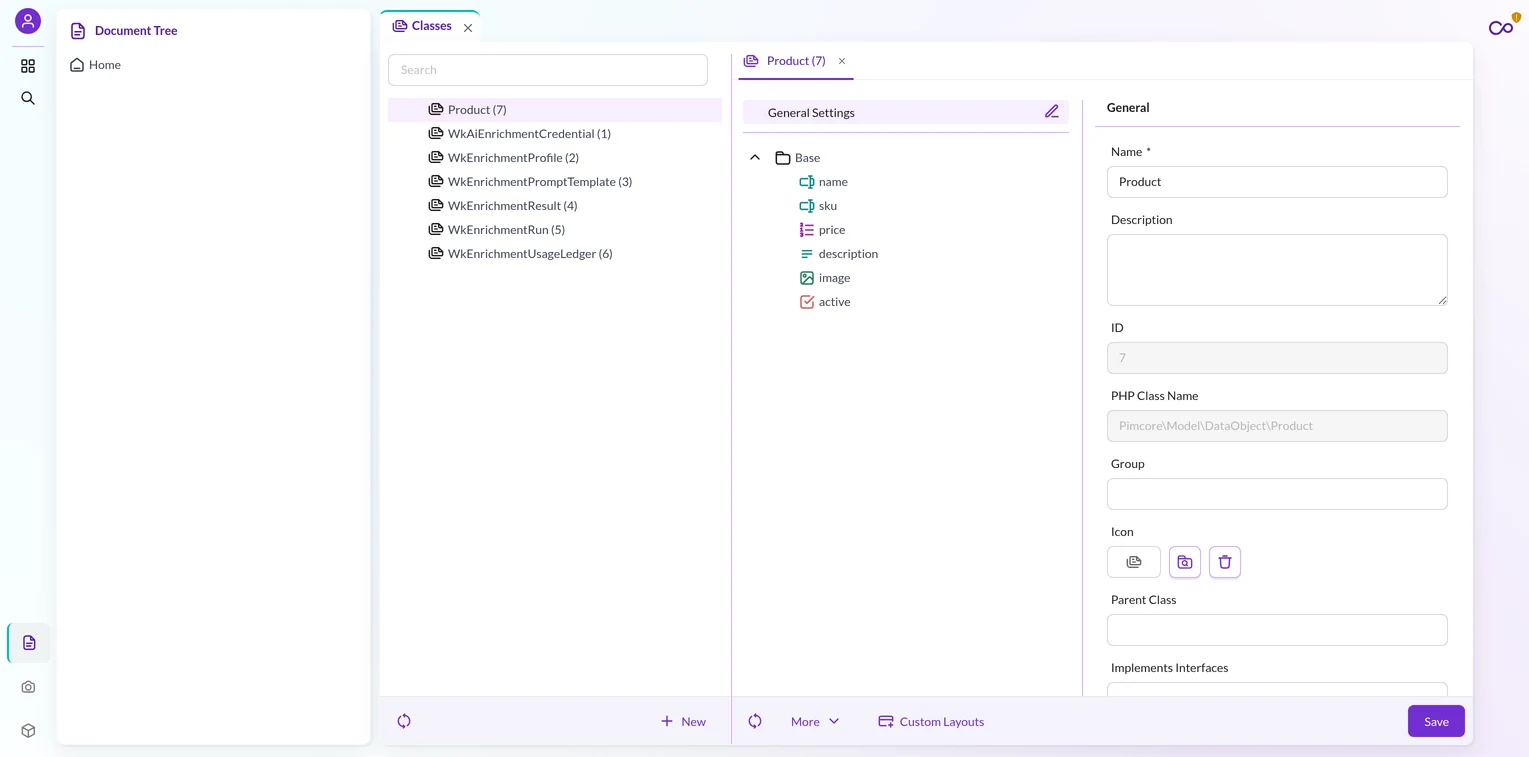
A first-timer only touches a few of these. The rest stay at their defaults until a model needs them.
The sections below walk each important option in turn. Each maps to one real property on the class definition.
Parent PHP Class
Every Pimcore class is a PHP class under the hood. By default it extends Pimcore\Model\DataObject\Concrete.
The Parent Class field lets you change that base. Point it at your own PHP class to share methods and logic across several classes.
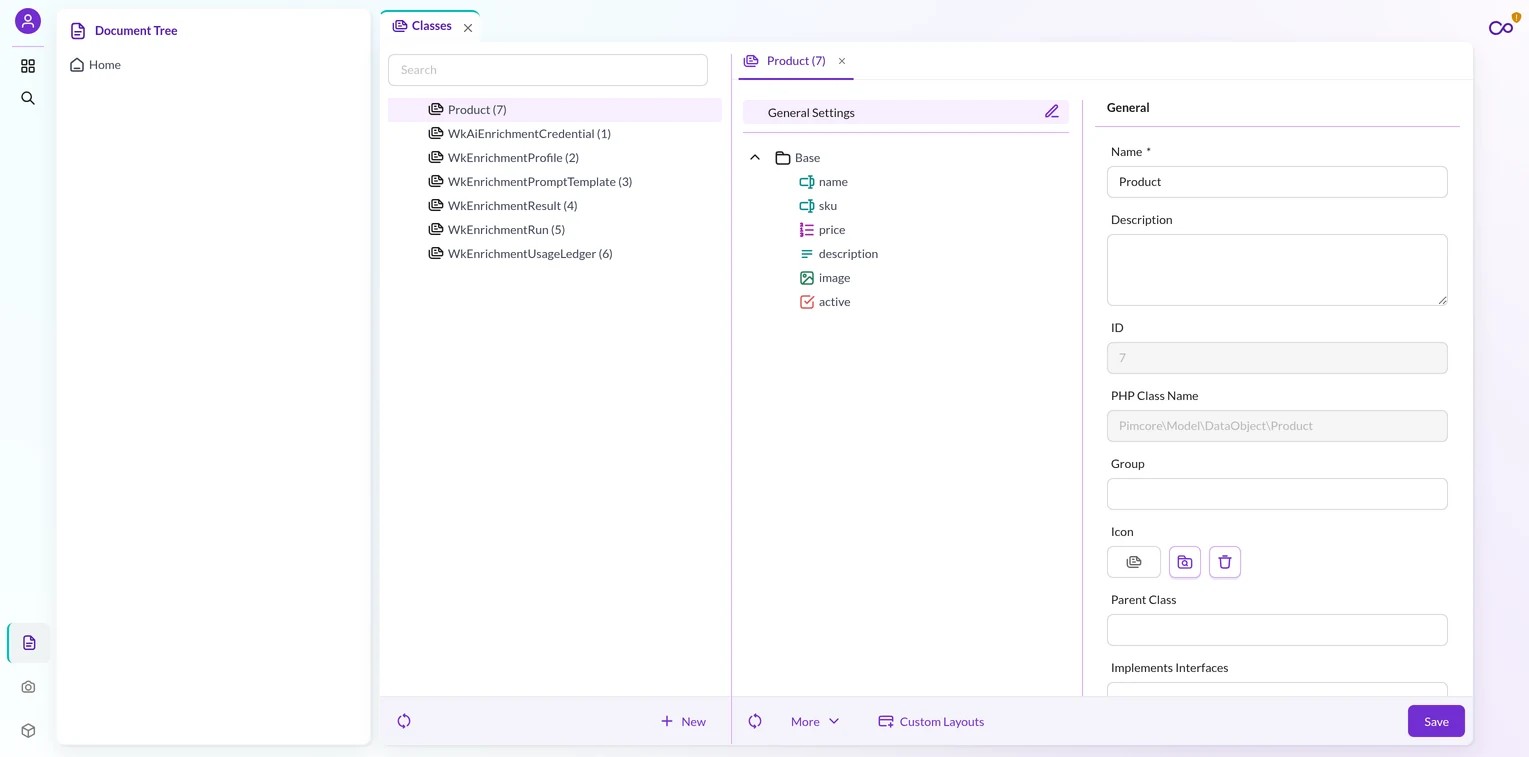
Leave this field empty for a normal class. Pimcore then generates a model that extends Concrete, and you get every standard object method for free.
Keep one distinction clear. Parent Class is PHP code inheritance, not the object value inheritance in the next section.
Allow Inheritance
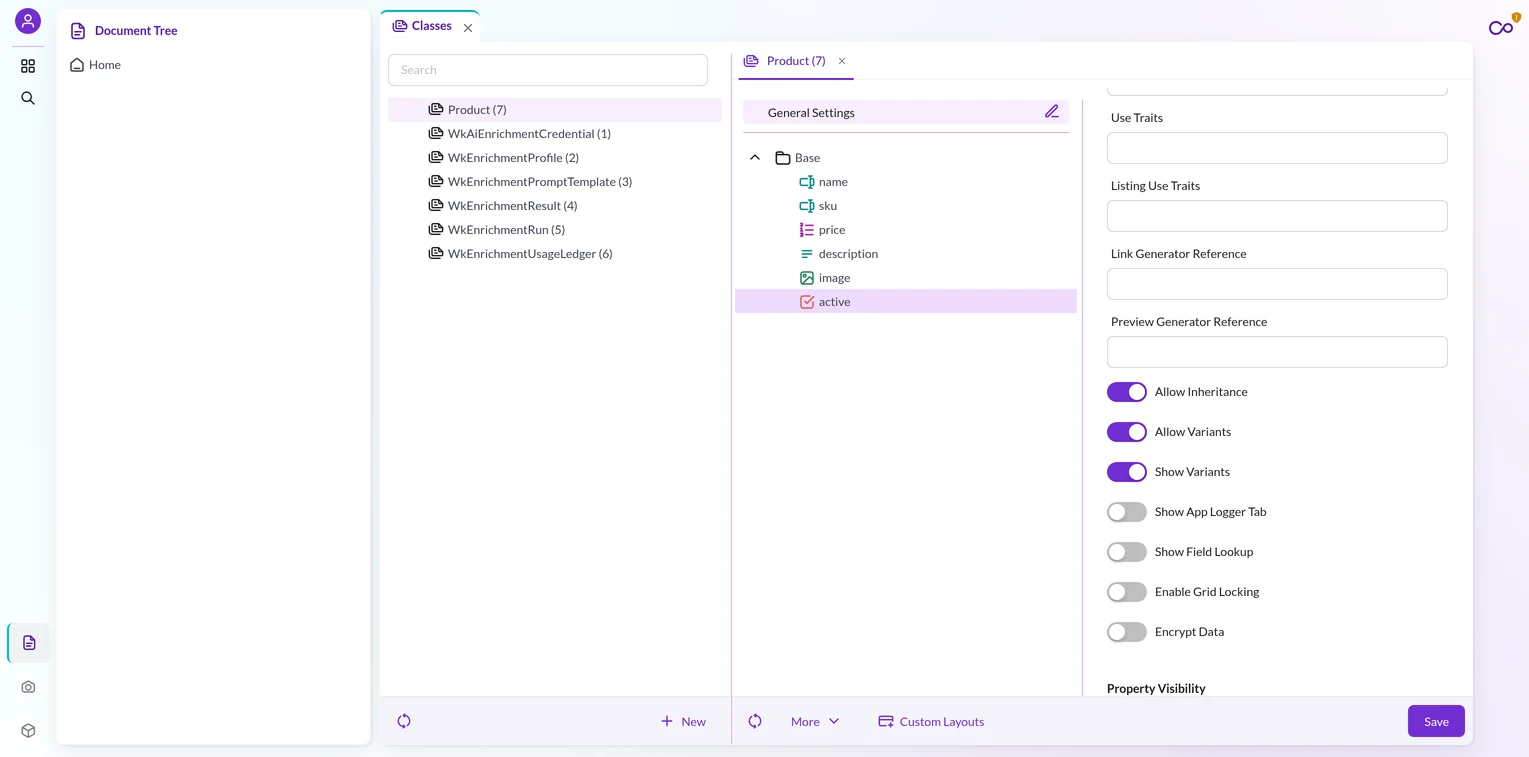
Allow Inheritance is the class option most teams reach for first. It is off by default.
Turn it on and a child object inherits any unset field value from its parent object. Pimcore walks up the tree to the nearest parent of the same class.
Picture a clothing catalog. A parent “Shirt” object holds shared values like brand and material.
Child objects under it override only what differs, such as size or color. The children inherit everything else from the parent, so you never retype shared data.
This inheritance also flows through variants. A variant inherits from its parent object exactly the same way, as long as both share the class.
Variants: Allow Variants and Show Variants
A variant is a special object that models a variation of a product. Think one shirt in red, blue, and green.
Two separate options on the General tab govern variants. Both start switched off.
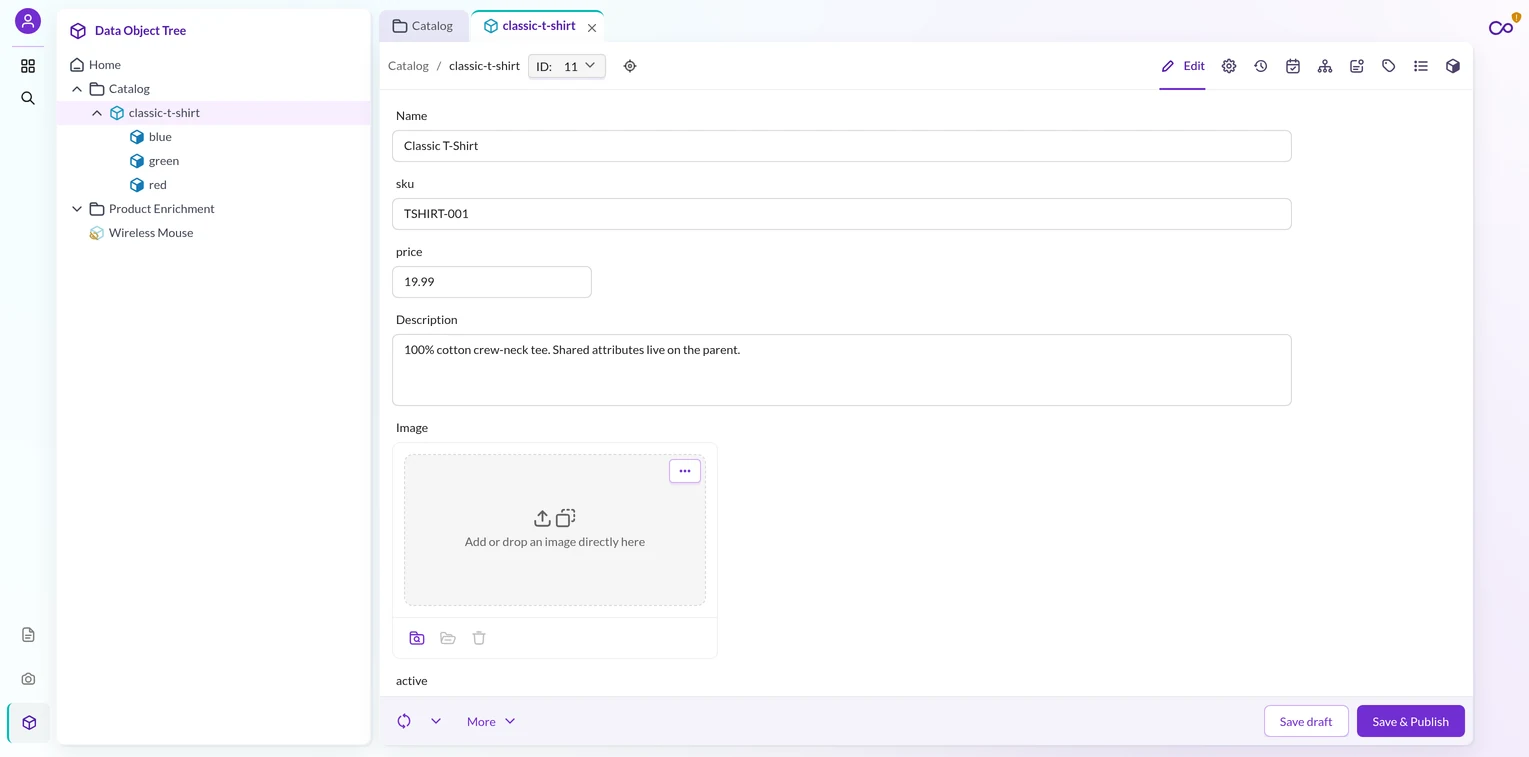
Allow Variants enables variant children on the class. Only then can an object of this class hold variants beneath it.
Show Variants is a display option, not a data option. It controls how variant objects surface in the object tree, separate from whether the class permits them.
Under the hood, a variant is just an object with the type variant. It sits below a parent object of the same class and pairs naturally with Allow Inheritance.
Custom icon for a class
A custom icon makes a class easy to spot in the tree. Set it once on the class and every object of that class shows it.
The Icon field on the General tab opens an icon selector. You can search the built-in icon sets or point to a custom icon path.
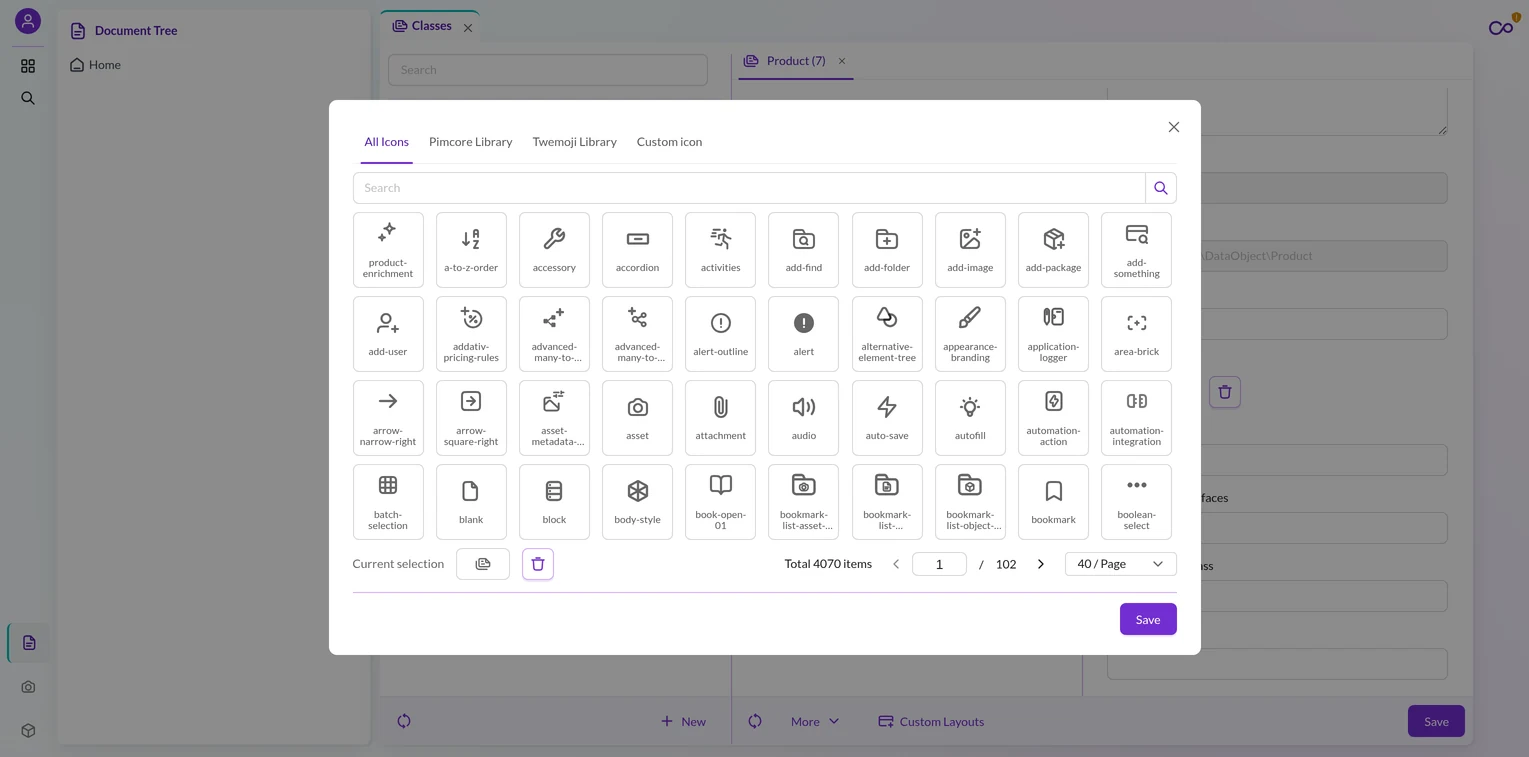
One change from older Pimcore is worth noting. In Pimcore 12 the icon is a class-level option, so there is no separate per-object icon field.
Custom layouts
A custom layout is an alternative view of the same class. The data stays identical, but the field arrangement changes per audience.
Use custom layouts to show a lean set of fields to one team and the full set to another. You configure them right inside the class editor.
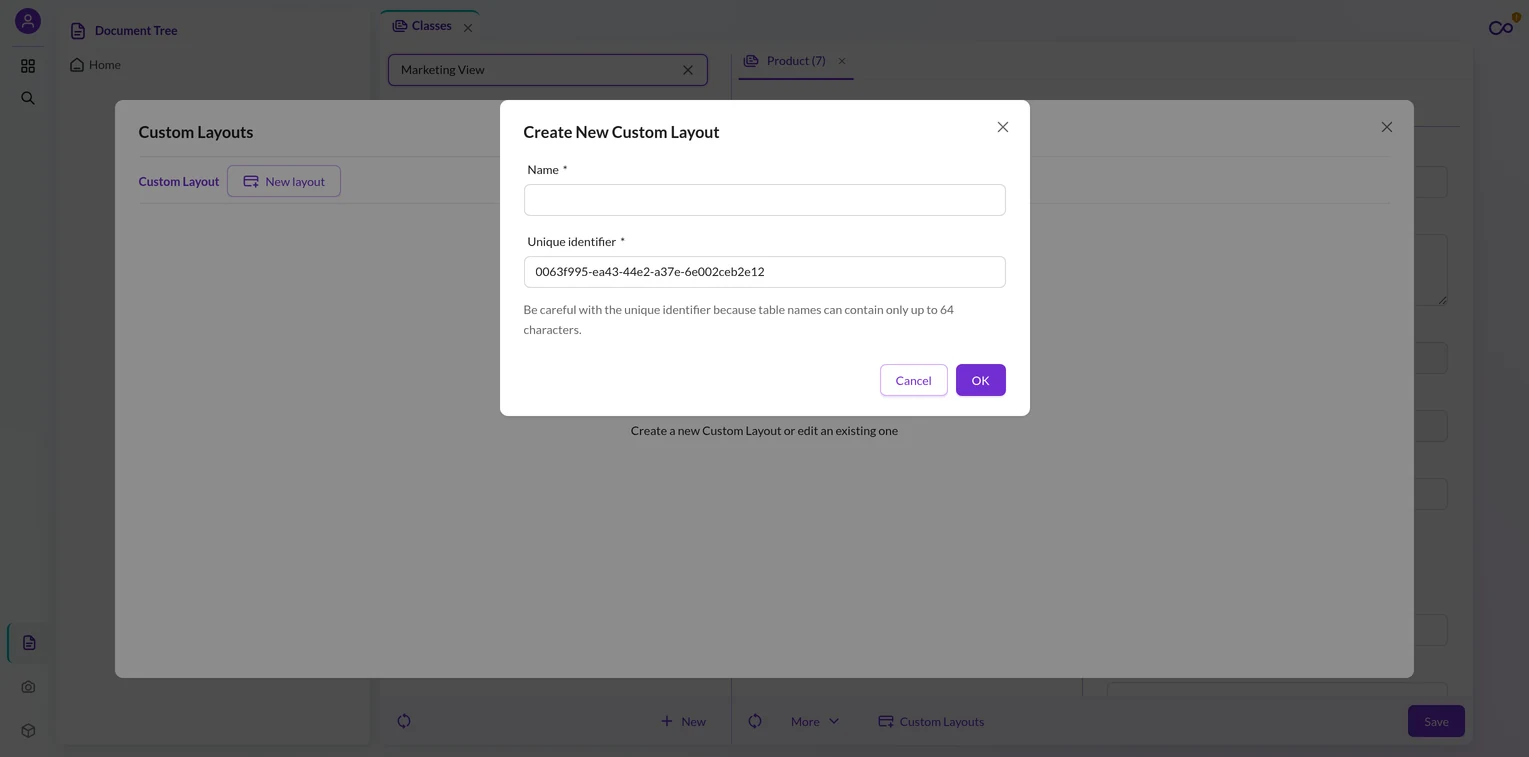
Each custom layout takes a name and an optional description. You can flag one as the default layout for the class.
Studio also respects permissions here. Non-admin users only see the custom layouts their role allows, so you can tailor the editor per team.
Other class settings in Pimcore worth knowing
A handful of remaining options round out Class Setting in Pimcore. You will not need them on day one, but they matter as models grow.
- Group — bundles related classes under a named group in the class list.
- Description — a plain-text note on what the class is for.
- Implements Interfaces and Use Traits — inject PHP interfaces or traits into the generated model.
- Composite Indices — add multi-column database indices to speed up queries.
- Encryption — enable field-level encryption on the class.
- Grid & Search visibility — choose which system columns (id, path, published, dates) show in listings.
Leave each at its default until a real requirement appears. You can revisit the General tab any time and re-save.
How Pimcore 12 changed class settings
Two platform changes affect anyone refreshing older knowledge. Both are easy to miss.
First, the classic ExtJS admin is gone. Studio (React) is now the only admin UI, so every part of Class Setting in Pimcore lives in the Studio class editor.
Second, Pimcore 12 dropped the old o_ column prefix on the base objects table. You now see id, key, published, and parentId, never o_id or o_key.
Saving a class still builds the same per-class tables behind the scenes. Pimcore creates object_<id>, object_store_<id>, object_query_<id>, and object_relations_<id> for you.
Prefer code? Set class settings in Pimcore with PHP
Studio is the fastest route, but you can script every part of Class Setting in Pimcore too. Pimcore supports a full code-first workflow.
Load a class definition, then call setters like setAllowInherit(true), setAllowVariants(true), or setParentClass(...). Save it, then sync with two console commands:
bin/console pimcore:build:classes
bin/console pimcore:deployment:classes-rebuild --force
The first command regenerates the PHP model classes. The second syncs the database columns to match your definition.
You can also ship a whole class as JSON. Use Data Model Definitions > Bulk Import to load one, and Bulk Export to dump it.
Where your classes go next
A well-configured class is the foundation of Pimcore as a PIM. Each data object built on it feeds the systems around your business.
Inheritance and variants shine when you push a catalog to a storefront. Connectors map each object and its variants to the target platform.
Localized fields carry the multi-language story further. See how the Pimcore DeepL bundle translates those fields in place.
Conclusion
You now know the full path for Class Setting in Pimcore in the latest Studio. You found the General tab, then tuned the parent class, inheritance, variants, icon, and layouts.
The takeaway is simple. Class Setting in Pimcore is all point-and-click in Studio, and each option maps to one real property on the class definition.
Ready to move that structured catalog to a storefront or ERP? Talk to the Webkul Pimcore team about a connector built on your classes.

Be the first to comment.