Introduction
With this module, you can connect Microsoft Azure Blob Storage with Akeneo. You can save your product assets on the cloud. Azure Blob storage is Microsoft’s object storage solution for the cloud. Blob storage helps in storing massive amounts of unstructured data.
Basic Requirements
- This module works with Akeneo 4.0.x, 5.0.x, 6.0.x and 7.0.x. Download Akeneo from here
- Node and Yarn packages need to be installed.
- This module is compatible with the Akeneo community and Enterprise(Flexibility) edition.
- If you want to use this extension on Akeneo EE Serenity mode, please contact us.
- For the Akeneo installation, your Akeneo server should meet these system requirements.
Features
- Integrate Akeneo catalog storage to use Microsoft Azure Storage Blob or File storage
- Migrate existing files data from storage on the server to Azure Storage Blob
- Show viewable Azure Storage Blob URL on product page
- This module is compatible with the latest Akeneo version, 7.0.x
- Support Akeneo EE Assets, Asset move from local storage to Azure Storage Blob.
Installation
Two different types of module installation processes are available for the module.
- Composer Installation
- Manual Installation
Note For Akeneo 6 and 7:
CLI User must be the same as the FPM user, a good practice is to use the FPM user for installation. Also, ownership/permissions for the Akeneo directory must be assigned to the FPM user. otherwise, you will face permission issue during installation.
Installation using Composer Installation
For versions 6 and 7:
Change Package Version
Before installing the connector, You need to change the following package version
- Step 1: Go to the composer.lock file.
- Step-2: Search “name”: “league/flysystem” and change its version to “version”: “2.5.0”
- Step-3: Also, Search “oneup/flysystem-bundle” and update its version to “version”: “4.5.0”,
For version 5:
First, Install the Azure Storage Blob php client package and dependency.
  Search line - "name": "league/flysystem",
      change - "version": "1.1.3",
      in the below line.
  Search key - "oneup/flysystem-bundle",
      change - "version": "3.5.0",
      at two places in  composer.lock file.
Before beginning the composer installation
1: Get the ACCESS KEYS [Create a support ticket]
2: In Akeneo composer.json, add our repository and the installation script.
For Akeneo 6 and 7:
{
  "scripts": {
        "post-update-cmd": [
           "vendor/webkul/azureblobintegrationbundle/src/Webkul/AzureBlobIntegrationBundle/install/config.sh COMPOSER=true NO_DOCKER=true"
        ],
        "post-install-cmd": [
           "vendor/webkul/azureblobintegrationbundle/src/Webkul/AzureBlobIntegrationBundle/install/config.sh COMPOSER=true NO_DOCKER=true"
        ],
        "post-create-project-cmd": [
          "vendor/webkul/azureblobintegrationbundle/src/Webkul/AzureBlobIntegrationBundle/install/config.sh COMPOSER=true NO_DOCKER=true"
       ]
   },
  "repositories": [{
    "type": "composer",
    "url": "https://akeneorepo.webkul.com/"
  }]
}
For Akeneo <=5.x
{
  "scripts": {
        "post-update-cmd": [

"vendor/webkul/azureblobintegrationbundle/composer_install.sh"
        ],
        "post-install-cmd": [

"vendor/webkul/azureblobintegrationbundle/composer_install.sh"
        ],
        "post-create-project-cmd": [

"vendor/webkul/azureblobintegrationbundle/composer_install.sh"
       ]
   },
  "repositories": [{
    "type": "composer",
    "url": "https://akeneorepo.webkul.com/"
  }]
}
3: Use composer to install the extension
composer require webkul/azureblobintegrationbundle
4: Complete the authentication form.
5: Send a Message of Success
6: Delete your browser’s cache.
Manual Installation for Version 6.x and 7.x
- After unzipping the appropriate extension zip, merge the “src” folder into the akeneo project.
Change Package Version
Before installing the connector, You need to change the following package version
- Step 1: Go to the composer.lock file.
- Step-2: Search “name”: “league/flysystem” and change its version to “version”: “2.5.0”
- Step-3: Also, Search “oneup/flysystem-bundle” and update its version to “version”: “4.5.0”,
- From the PIM directory, run the following command over the NO-DOCKER Instance.
./src/Webkul/AzureBlobIntegrationBundle/install/config.sh COMPOSER=false NO_DOCKER=true
- After that run the command below over the PIM directory’s DOCKER instance.
./src/Webkul/AzureBlobIntegrationBundle/install/config.sh COMPOSER=false NO_DOCKER=false
Manual Installation for Version 4.0.x to 5.x
Please follow these steps for installing the Akeneo Azure Blob Storage Integration module in Akeneo.
1 – First of all, the user has to install the Azure Storage Blob php client package and dependency.
2 – Goto your Akeneo Installation Directory then open the “composer.lock” file and change the following package version.
Search for the key “league/flysystem” then update the version to the 1.1.3.
"league/flysystem": "1.1.3",

Search for the key “oneup/flysystem-bundle” and then update the version to the 3.5.0.
"oneup/flysystem-bundle": "3.5.0",


3 – You have to navigate first to Akeneo installation directory (Ex: cd /opt/bitnami/apps/akeneo/htdocs). After SSH, you have to run the command to your Akeneo server by the terminal.
php -d memory_limit=4G /usr/local/bin/composer --no-scripts require oneup/flysystem-bundle 3.5.0
php -d memory_limit=4G /usr/local/bin/composer --prefer-dist --no-scripts require microsoft/azure-storage-Blob;
php -d memory_limit=4G /usr/local/bin/composer --prefer-dist --no-scripts require league/flysystem-azure-blob-storage;
4 – Unzip the respective extension zip and then merge the “src” folder into the Akeneo project root directory.

5 – Goto config/Bundles.php and add line:
Webkul\AzureBlobIntegrationBundle\AzureBlobIntegrationBundle::class => ['all' => true],
in return array.
6 – Copy the “config” folder into akeneo project root directory for routing.

7 – After that, run this command after ssh to your akeneo server by the terminal then navigate to the pim installation directory (don’t run this command directly after ssh, first navigate to pim installation directory using cd command ex. cd /opt/bitnami/apps/akeneo/htdocs)
php bin/console cache:clear--env=prod;
rm -rf var/cache/** && php bin/console cache:warmup && php bin/console blob:setup:install
Docker Installation Command :
For Akeneo 5
alias docker_php='docker-compose run -u www-data --rm php php';
alias docker_yarn='docker-compose run -u node --rm node yarn';
docker_php bin/console cache:clear --env=prod;
docker_php bin/console pim:installer:assets --symlink --clean --env=prod;
docker_php bin/console d:s:u --force;
docker_yarn run webpack;
docker_yarn run update-extensions;
docker_yarn run less;
For Akeneo 4
alias docker_php='docker-compose run -u www-data --rm php php';
alias docker_yarn='docker-compose run -u node --rm node yarn';
docker_php bin/console cache:clear --env=prod;
docker_php bin/console pim:installer:assets --symlink --clean --env=prod;
docker_php bin/console d:s:u --force;
docker_yarn run webpack;
docker_yarn run less;
Common Issues After Installation
It might happen that even after proper installation, upon opening your Akeneo admin dashboard, you see a loading screen. In that case, do check for the following solution:
- Webpack Installation: If you get the below error:

It means that the web pack is not installed in your system then you have to run the following commands:
npm install --save-prod webpack
npm install
- Module routing.yml is not configured properly. Re-check the routing.yml file as mentioned in the 3rd step of Module Installation
- Clear your browser cache.
Uninstall Module: For Akeneo 6 and 7
- From the PIM directory, run the command below over the NO-DOCKER Instance.
./src/Webkul/AzureBlobIntegrationBundle/uninstall/uninstall.sh COMPOSER=false NO_DOCKER=true
- Run the command below over the PIM directory’s DOCKER instance.
./src/Webkul/AzureBlobIntegrationBundle/uninstall/uninstall.sh COMPOSER=false NO_DOCKER=false
Create and Setup Azure Credential in Akeneo
After installing the Module in Akeneo, the user has to set the configuration of Azure in Akeneo. The user can navigate to “/src/Webkul/AzureBlobIntegrationBundle/Resources/config.yml” to add the credentials.
Step 1: Once you save the credential container name, it will be automatically added to the config.yml. For example:
azureblob_container_name: 'Test' #container_name

Step 2: Update the value of the connection string. Here, you have to enter further details:
- Default End Point Protocol
- Account Name
- Account Key
- End Point Suffix
You can find further details on your Azure server. For example:
azure_blob_storage_connection_string: "DefaultEndpointsProtocol=https;AccountName=Test;AccountKey=d1PTfAjsRYMk2dozqYmfIjCQFkEJ3yhToEl==;EndpointSuffix=core.windows.net"

Step 3: Run the command to clear the cache:
php bin/console cache:clear --env=prod

After finish the configuration if you will upload the new images and file in Akeneo then it will automatically be stored in Azure Blob.
Media Migration
With this module, the user can migrate existing and new media files both.
If you have already existing product media data then run the following command from the terminal to move files to Azure Blob Storage
php bin/console azure_integration:move_existing_files
And If you are using Akeneo Enterprise Edition and want to export all your product assets to Azure Blob Storage then run this command.
php bin/console azure_integration:move_existing_asset_files
And If you are using the Webkul DAM assets Module and want to export all Webkul DAM assets to Azure Blob Storage then run this command.
php bin/console azure_integration:move_existing_dam_asset_files
If you want to remove existing akeneo media files after moving them to the Azure Blob Storage then run this command.
php bin/console azure_integration:remove_akeneo_media_files
If you want to remove existing DAM media files after moving them to the Azure Blob Storage then run this command.
php bin/console azure_integration:remove_dam_asset_media_files
Setup Credential in Akeneo
After successfully installing the module in Akeneo, you need to set up the Microsoft Azure API credentials in Akeneo. Please log into Akeneo and follow icon Akeneo Microsoft Azure Blob Storage Integration>>Setting. After that you have to add the region of your store. You have to enter the value like:
- Container Name
- Account Name
- Account Key
- EndPoint Suffix

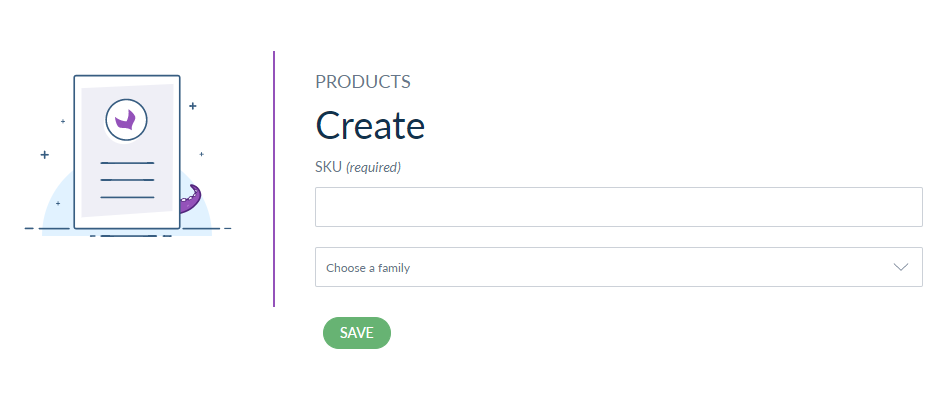
Create Products in Akeneo
To create a product in Akeneo, navigate to Products then click the Create button. Now, you need to choose the product type – as Product or Product Model.
Product – Select this type for creating simple and virtual products.
Product Model – Select this type for creating a configurable product with variations.
If you want to know furthermore details of Akeneo products and product variants then follow this blog – https://webkul.com/blog/create-product-and-product-model-in-akeneo/

Now enter the required SKU, choose a family, after that click the Save button.
Product Family – A family is a set of attributes that will be the same for all products belonging to a family. The product family represents product type, imposes product information structure also defines the list of attributes for a product that it belongs to.
Add Product Details
Now you need to provide information about the product. Here you have to enter further details of the product like quantity, price, size, and description.

Upload the Images
Click on the upload image section or drag and drop feature then add an image.

After uploading the images, you can see the thumbnail of the images.

As a result, the user can see further icons after uploading the images.
- Preview Image
- Download Image
- Delete Image
- Generate the Azure Link
After that, if you will click on the Link button then you will be able to generate the Azure link in Akeneo.

Finally, you can copy the Azure Blob images link in the browser to see the image.

Support
So, that was much about the User Guide of Akeneo Microsoft Azure Blob Storage Integrationr for any queries or doubts reach out to us at [email protected]. You can also raise a ticket at our HelpDesk System.
Please explore our Akeneo Development Services and Quality Akeneo Extensions.
Current Product Version - Akeneo 4 to 5 || 2.0.1 and Akeneo 6 || 3.0.0 and Akeneo 7 || 4.0.0
Supported Framework Version - Akeneo Version 4.0.x ,5.0.x, 6.0.x and 7.0.x

Be the first to comment.