Magento 2 Scan and Go Extension (Adobe Commerce) when enabled by admin, provides the customers with a self checkout system.
Using it, the customers scan the product barcodes from mobile web browser and purchase the products directly from physical retail stores.
The extension removes the requirement of going to sales agents to buy the products.
Addtionally, you can check the Magento 2 OTP (One Time Password) extension if you want to integrate an OTP verification feature into your online store.
Note: QR code will be generated only if the product added into cart by scanning product barcodes.
Apart from this, if you want an extension that simplify the checkout process by reducing the number of steps to only one then you can check the Magento 2 Checkout Extension.
You can also check the below video to get to know the working of the extension,
Features
- The extension is compatible with Simple Product types.
- Customers scan barcodes to add product to cart.
- Guest and Logged-In customers both can use the extension to purchase products.
- Extension works on mobile web browser.
- Product quantity increment and decrement is done after scanning barcode.
- Order QR Code is generated after placing order for verification.
- Verifier scans QR Code to verify order status.
- The admin assigns customer account as a verifier account from backend.
Installation
The installation is quite simple just like the standard Magento 2 extensions.
#Download Module
Firstly, you need to log in to the Webkul Store, go to My Account>My Purchased Products section, verify, and then download and extract the contents of this zip folder on the system.
#Upload Folder
Once the module zip extracts, follow path src>app and then copy the app folder into the Magento 2 root directory on the server as shown below:

#Run Commands
Next, You need to run the following commands,
composer require picqer/php-barcode-generator
composer require mpdf/mpdf
composer require chillerlan/php-qrcode
php bin/magento setup:upgrade
php bin/magento setup:di:compile
php bin/magento setup:static-content:deploy
php bin/magento indexer:reindex
php bin/magento cache:flush
Language Translation
For translating the module language, navigate through the app/code/Webkul/QuickStoreShopping/i18n and edit the en_US.csv file.
Thereafter, rename the CSV as “en_SA.csv” and translate all right side content after the comma in the Arabic language. After editing the CSV, save it.

Now, upload it to the path app/code/Webkul/QuickStoreShopping/i18n where the installation of Magento 2 is on the server.
The Magento 2 Scan and Go extension will be translated into the Arabic Language. It supports both RTL and LTR languages.
The user can edit the CSV like the image below.

Engage and hire Magento developers to solely concentrate on your personalized e-commerce projects for a unique experience.
Initial General Configuration
After the successful installation of the Magento 2 Scan and Go extension, the admin will navigate to Store>Configuration>Quick Store Shopping as per the below image,

Here, the General Settings is available through which the admin can Enable or Disable the extension as per the requirement.
The admin can also navigate to the Configuration directly from the Dashboard by navigating to Quick Store Shopping> Configuration(s) as per the below image,

Assign Order Verifier
The Admin gets the functionality appoint any customer account as an Order Verifier. This user verifies the order status from their own mobile web browser.
The admin will navigate to Customers> All Customers the select the account they want to assign as Order verifier and click on Edit.
Here, they’ll click on Account Information and enable the Order Verifier option.

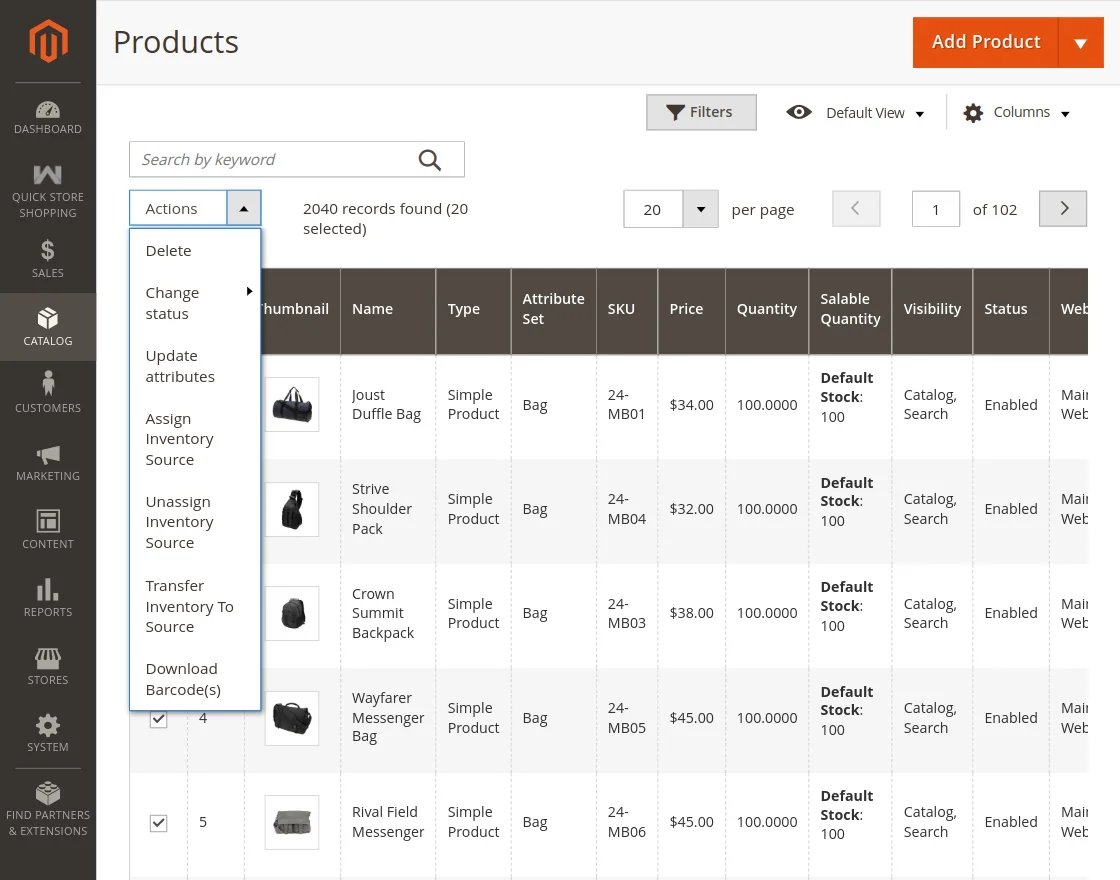
Download Product Barcodes
To download the product barcodes, admin will navigate to Catalog>Products>Actions and then tap on Download Barcode(s).
Using it, they can download the product barcodes in bulk. They also get the option to download the barcodes based on product inventory or a custom quantity.
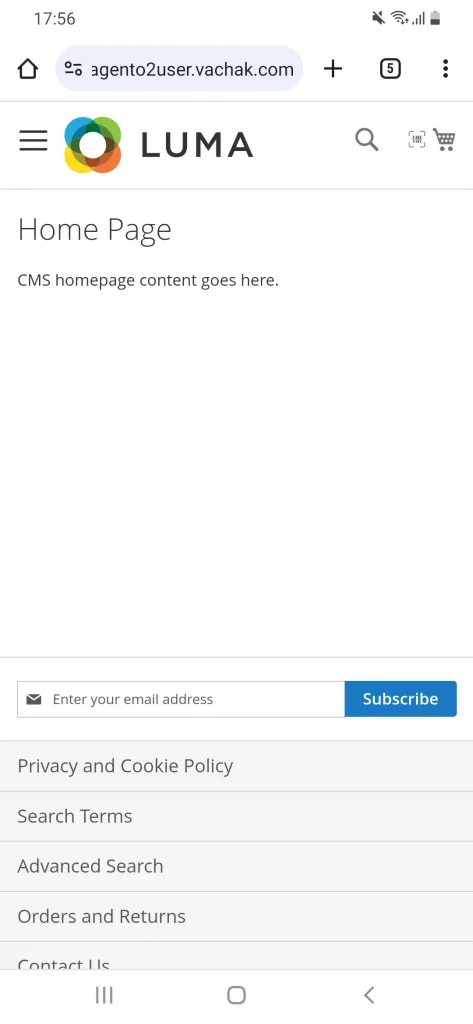
Adobe Commerce Scan and Go – Customer Flow
Initially, the Customer opens the online store through their mobile web browser. To purchase products, they scan the barcode to add them to their carts.
A Scanner Icon is provided on the top right, tap on it to open the barcode scanner. Initially it will request for camera permissions as shown in the image below,
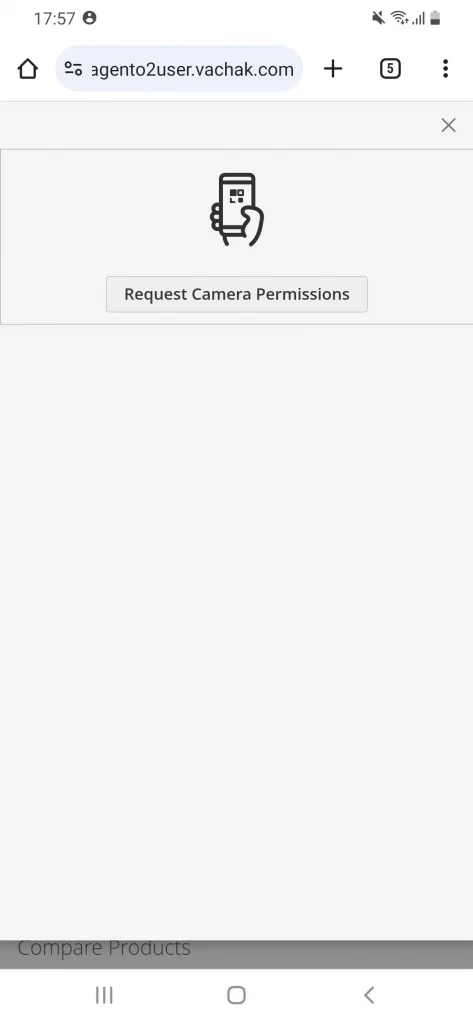
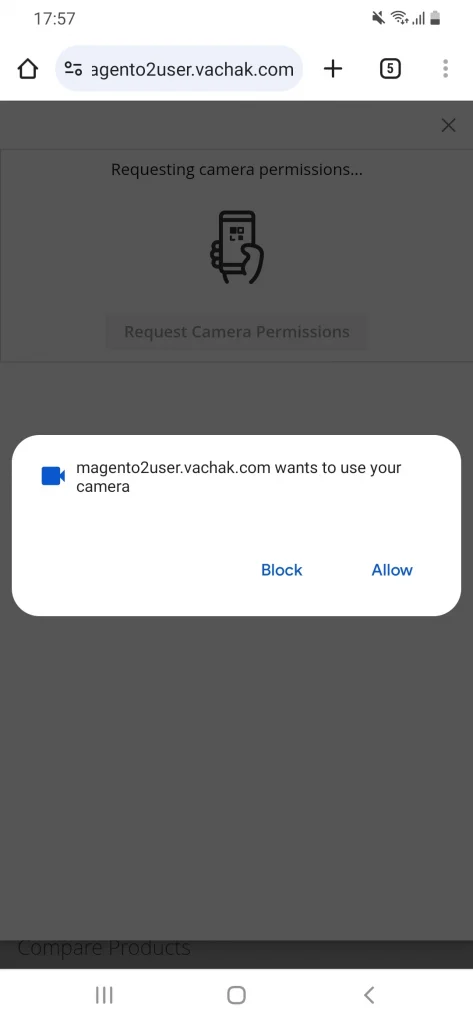
Provide Camera Permissions
Next, the customer taps on Request Camera Permissions following which a pop-up appears on the screen to ask to open the camera.
Once the request is accepted, the customer will choose the camera through which they will scan the barcode.
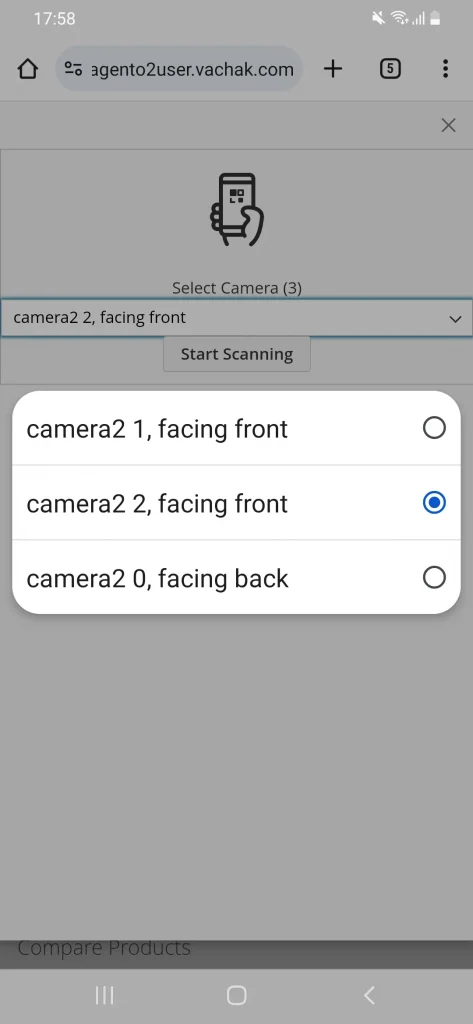
Scan Product Barcode
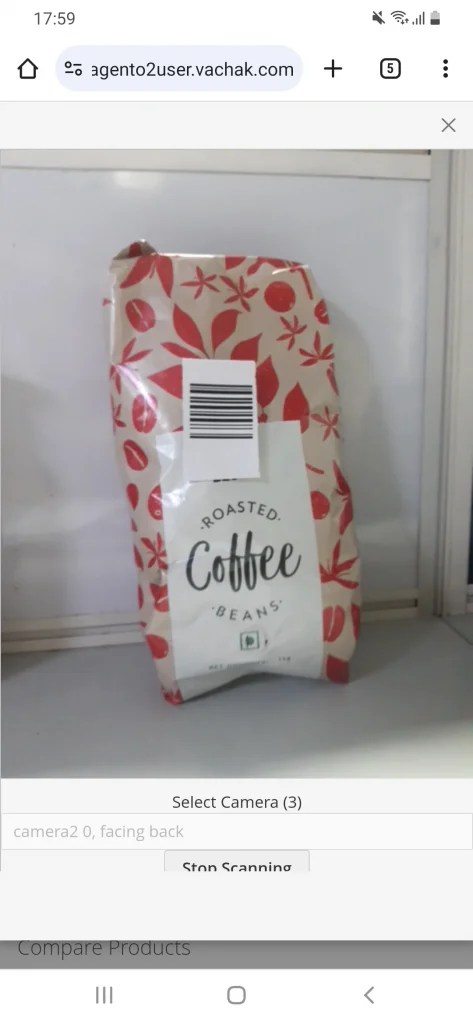
After a camera is selected, the barcode scanner will be opened. The customer now has to scan the product barcode through and add the product to the cart.
They can even increase or decrease the product quantity after scanning the barcode.

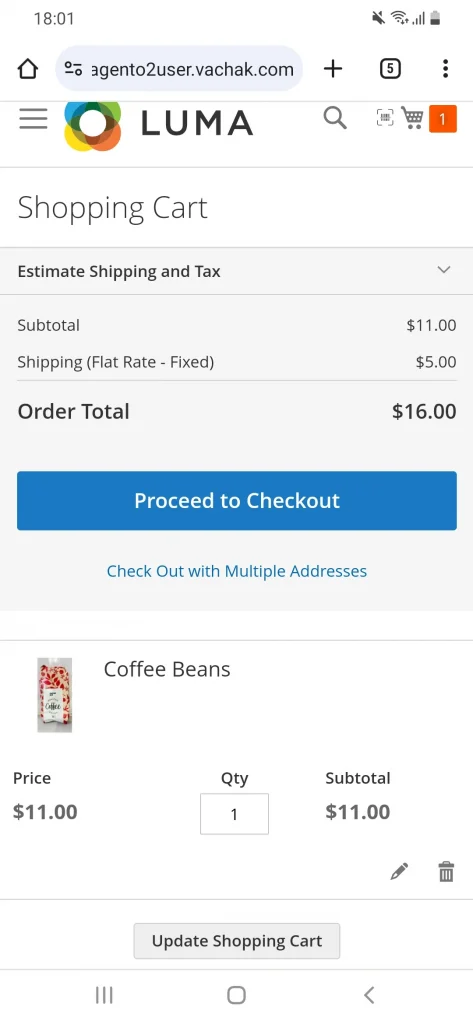
Now, the customer has to click on View Cart to go to their Shopping Cart for further processing. They will then tap on Proceed to Checkout to go to the Payments Page and place the order.
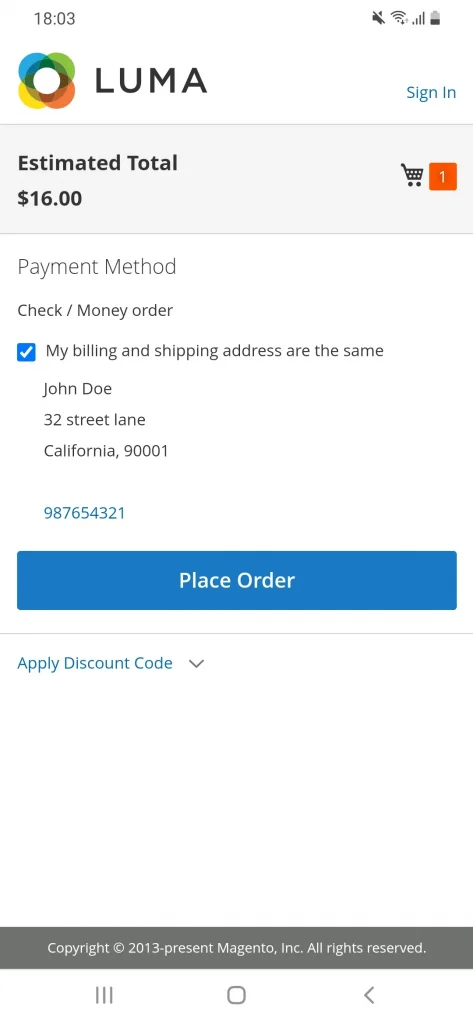
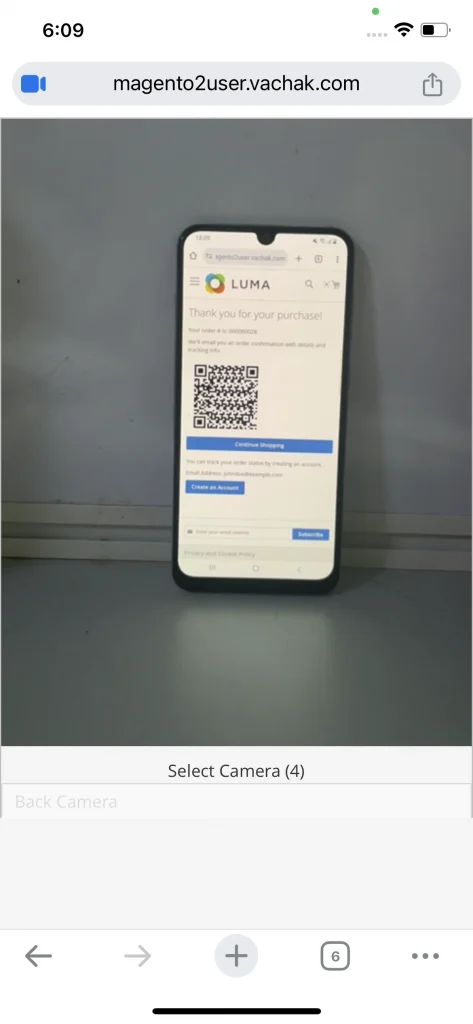
After tapping on Place Order, the order is successfully placed and a QR Code for that order is generated. The QR code will then be scanned by the assigned Verifier for order verification.
Order Verification
The Order Verifier logs in to their account from their mobile web browser to start the order verification process. Next, they’ll go to My Account and tap on Verify Order to open QR Code scanner.
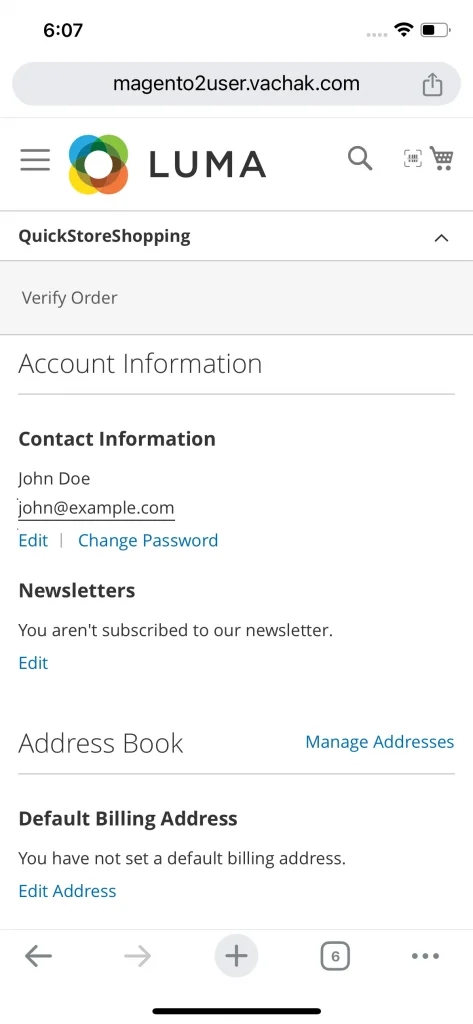
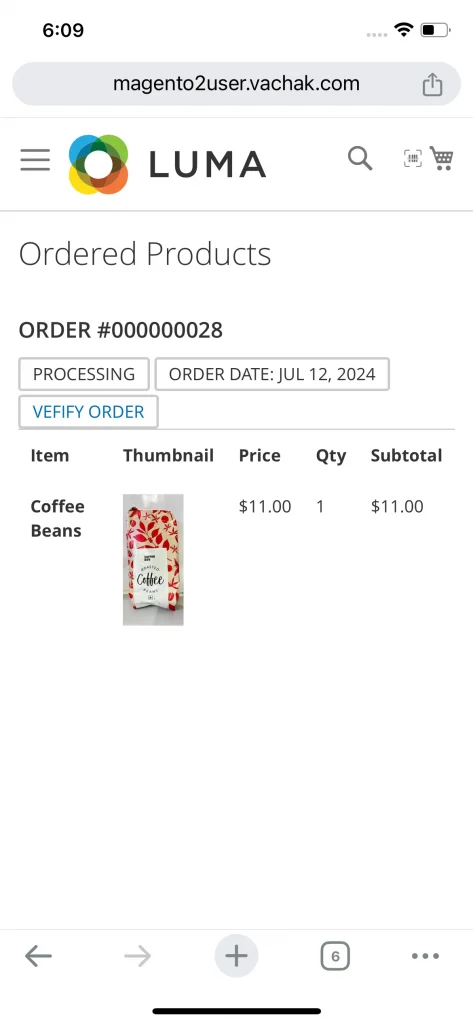
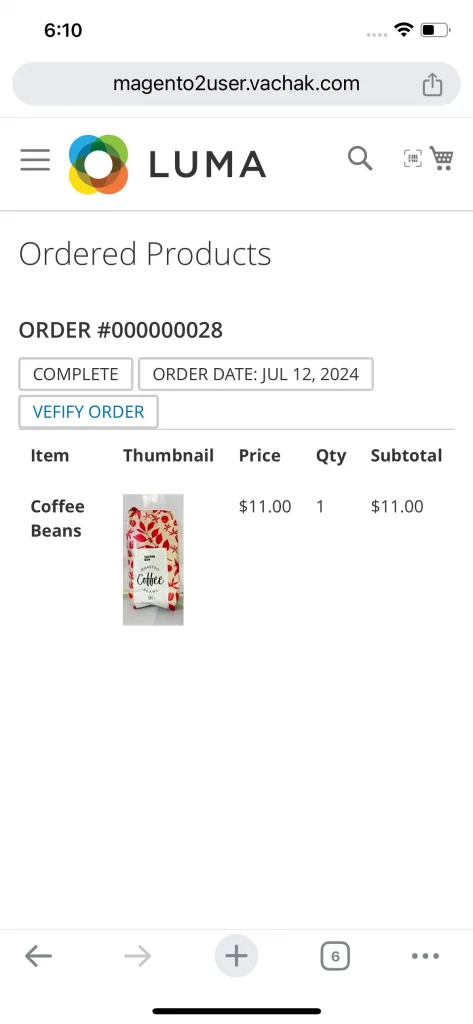
Once the QR code is scanned, the Verifier can Verify the orders in Processing and Complete state both. They’ll tap on Verify Order to verify those orders.
They’ll also be able to view the Product Details which have been purchased by the customer.
Support
So that is all for the Magento 2 Scan and Go extension guide.
For any further queries or assistance, you can drop us an email through [email protected]
Furthermore, there is no need to search elsewhere; seize the chance to initiate your projects with the accredited Magento 2 development company.
For a personalized touch, engage and hire Magento developers who are focused on delivering exceptional results for your custom e-commerce projects.
Current Product Version - 4.0.0
Supported Framework Version - Magento 2.0.x, 2.1.x, 2.2.x,2.3.x, 2.4.x

Be the first to comment.