In the Magento 2 marketplace Multi-vendor marketplace, now the admin can allow the vendors to have a separate vendor panel. As a vendor is also a customer, this separate vendor dashboard functionality will allow the Vendors of the marketplace to have a separate dashboard with a new look and design.
**Note:
- The separate seller dashboard functionality will only be visible when it is enabled by the admin from his admin panel.
- Some options will only be available when the vendor separate dashboard setting is enabled. In the default system, those options will not be available.
Features – Separate Vendor Dashboard
- The admin can allow separate vendor dashboard.
- An interactive vendor dashboard in a separate vendor panel.
- Vendors can access their customer grid, reviews, and activities easily.
- Allowed vendors to make withdrawal request for their remaining amount via separate vendor panel.
Separate Vendor Dashboard Panel
Now, the admin can allow the vendors to have a separate dashboard in the Magento 2 marketplace multi-vendor module. The admin if selects this option as “Yes”, as a vendor is also a customer, the vendors will be able to have a separate dashboard that will not have the account section for the customer but only the vendor dashboard.
To set up this option the admin will navigate to Stores->Configuration->Webkul->Marketplace->Seller Dashboard Layout Setting. Here, the admin will select the option “Allow Seller Separate dashboard” and set it as “Yes”.

Below find the comparison wherein we will show you the changes that take effect after the admin has set this setting “Allow seller separate dashboard” as “Yes“.
When the option is set to “No” which is the default one, the vendor’s dashboard is visible as shown below in the snapshot.
Vendor Dashboard –
The vendor dashboard has the vendor account panel and the customer account panel both visible to the vendor on the left-hand side.

Now, after the admin has set the setting “Allow seller separate dashboard” as “Yes“, the vendor can log in to his account by clicking on the “Vendor Login” link placed in the footer.

Clicking the Vendor Login link, the seller will be able to see the new login section and can enter his credentials to log in to his account panel.

After login, the vendor dashboard will appear as shown in the below snapshot.
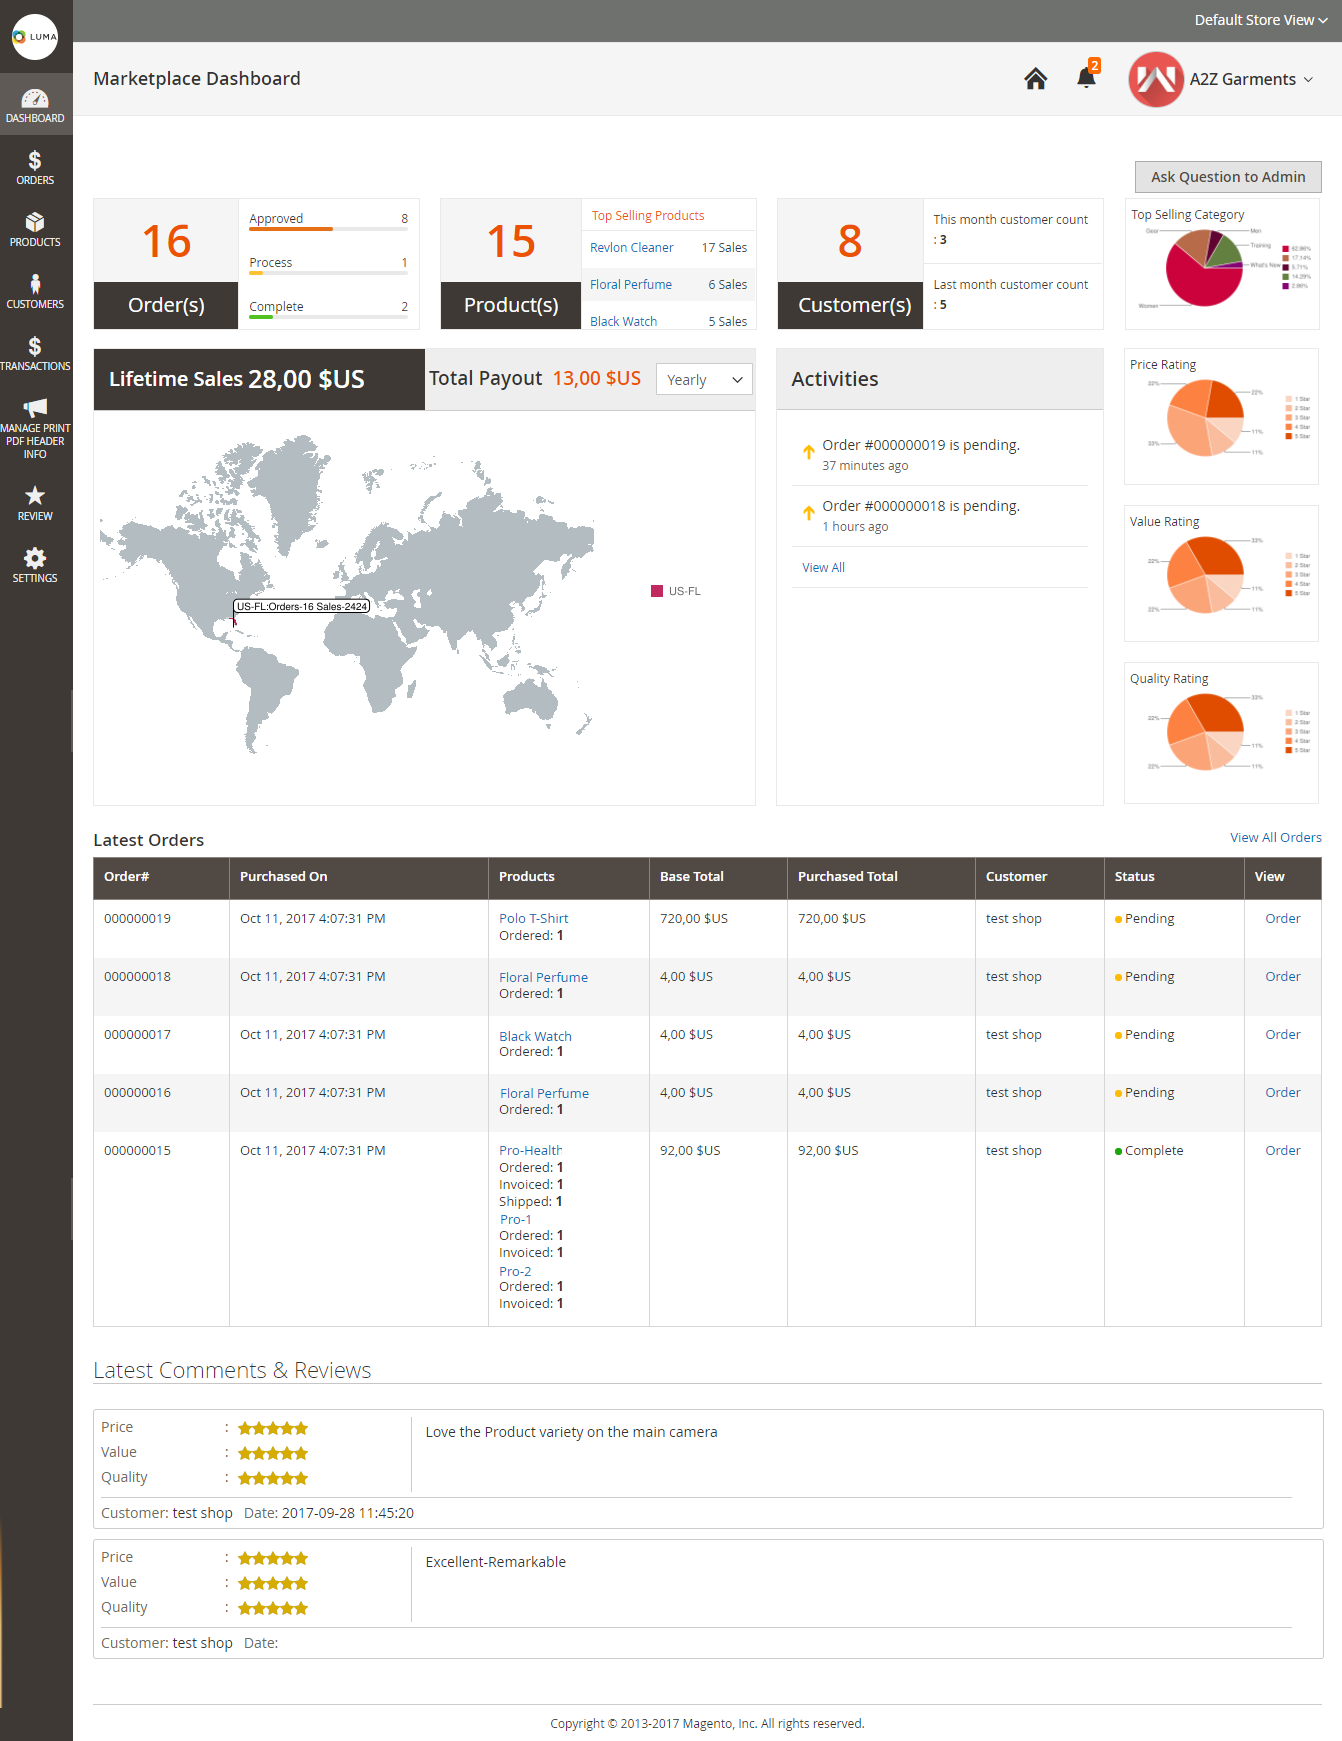
Let’s go through the various options that are available on the above page.
Vendor Account Drop-Down
Clicking on the vendor account drop-down option will show the account related options which include –
- Account Settings
- Buyer Dashboard
- Logout

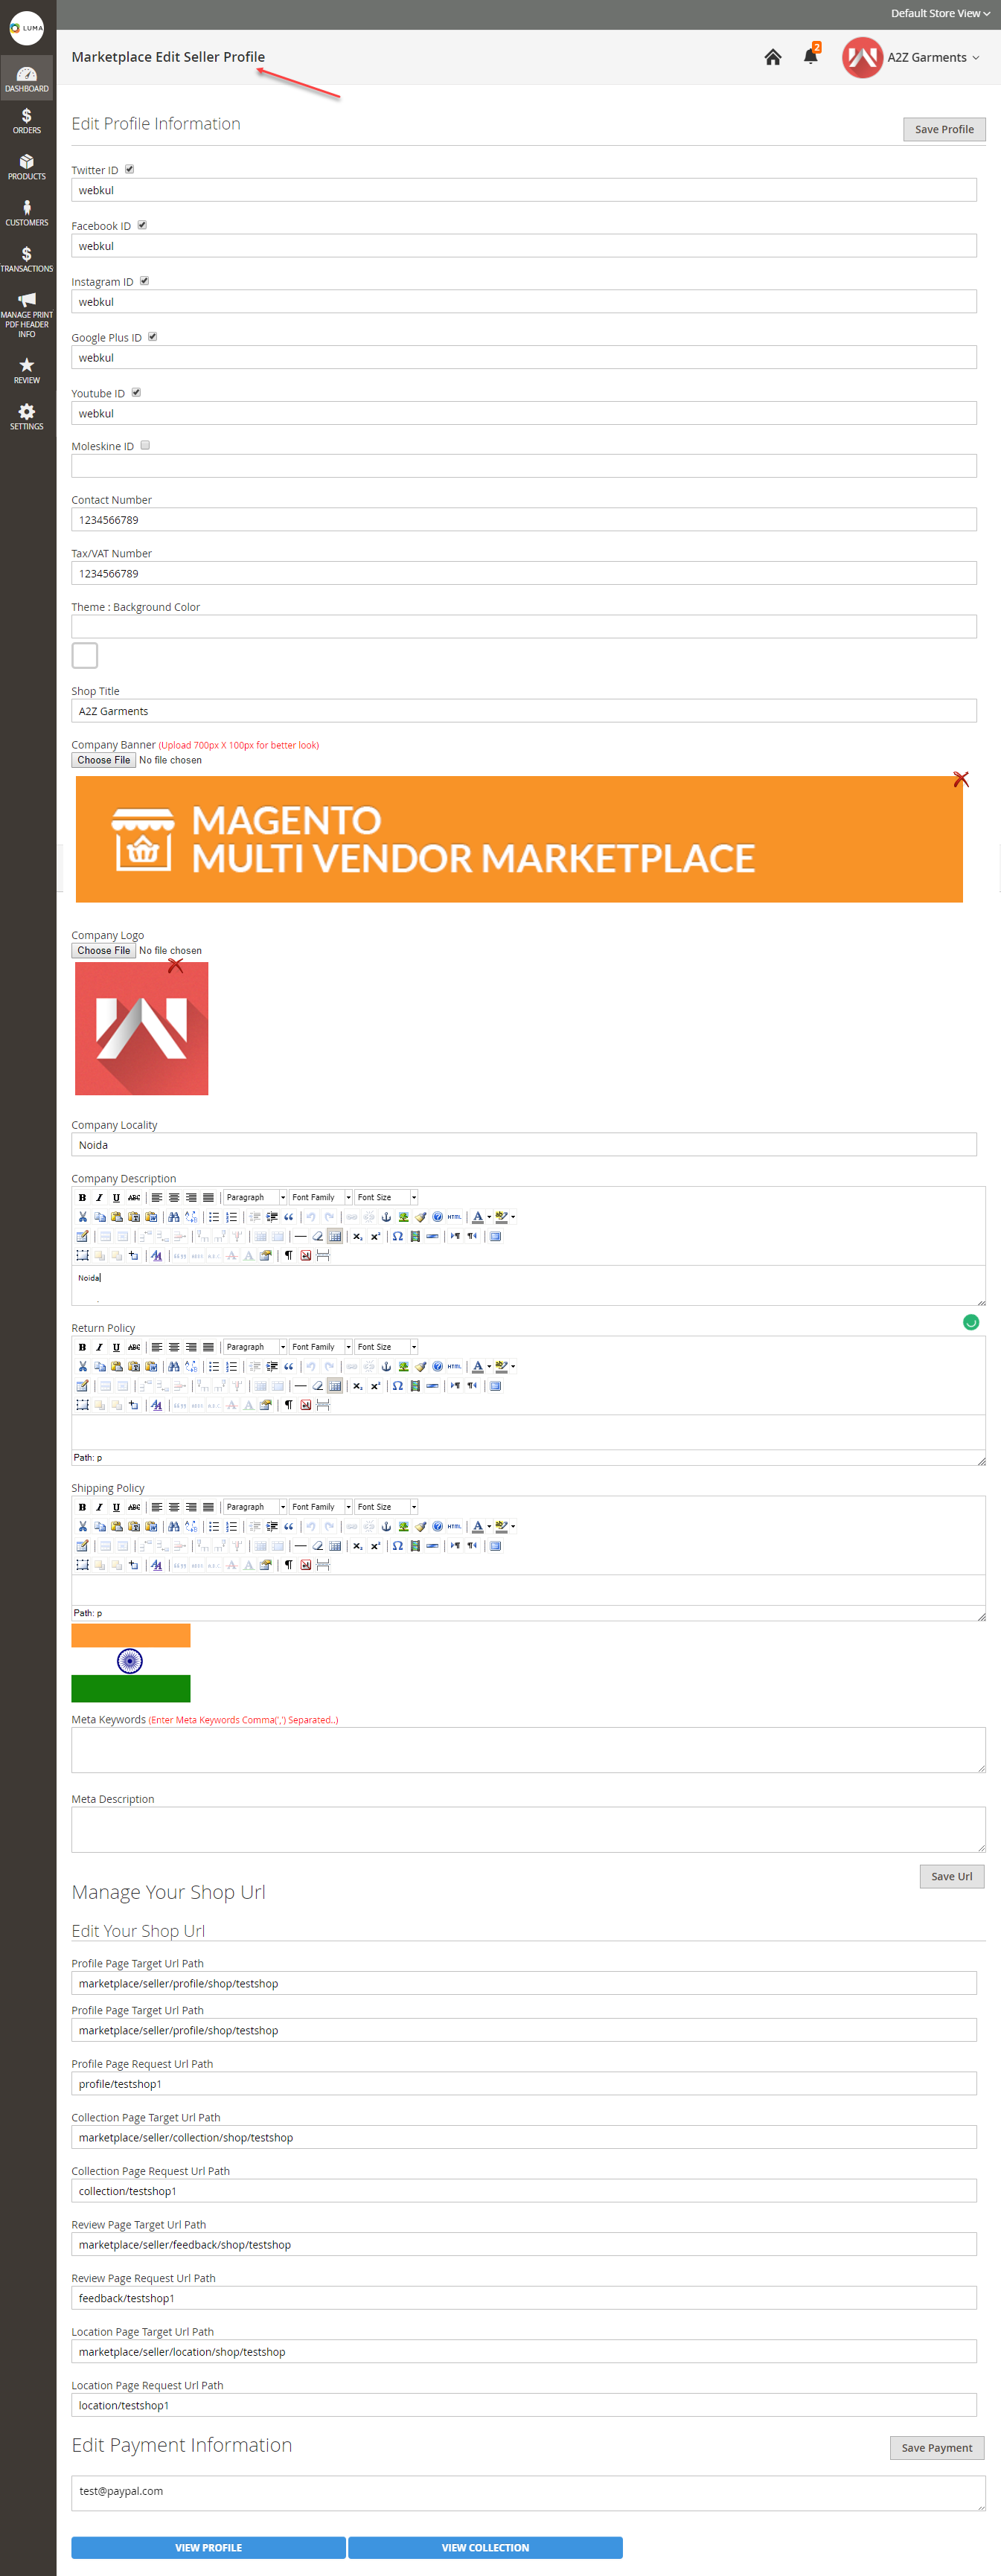
Account Settings
Clicking the account settings menu option will redirect the vendor to the marketplace edit seller profile page. Here, the vendor can edit his profile information and can view his collection and profile pages by clicking the buttons provided for the same. The vendor can manage his payment information on this page as well and much more.
Buyer Dashboard
Clicking the Buyer Dashboard menu option, the vendor will switch to his buyer account panel page. Here, the vendor can see his buyer account panel and the various other options related to it.

Logout
Clicking on the Logout button will log out the vendor from his account panel and will redirect the vendor to the store home page.
Notifications
Clicking the notification icon will show the recent notifications for the Orders(Place Order by customer/after the admin approves an order), Products(add/approve by the admin), Transactions(when the admin makes a payout to the seller), and Feedback(After the approval of seller feedback by the admin).
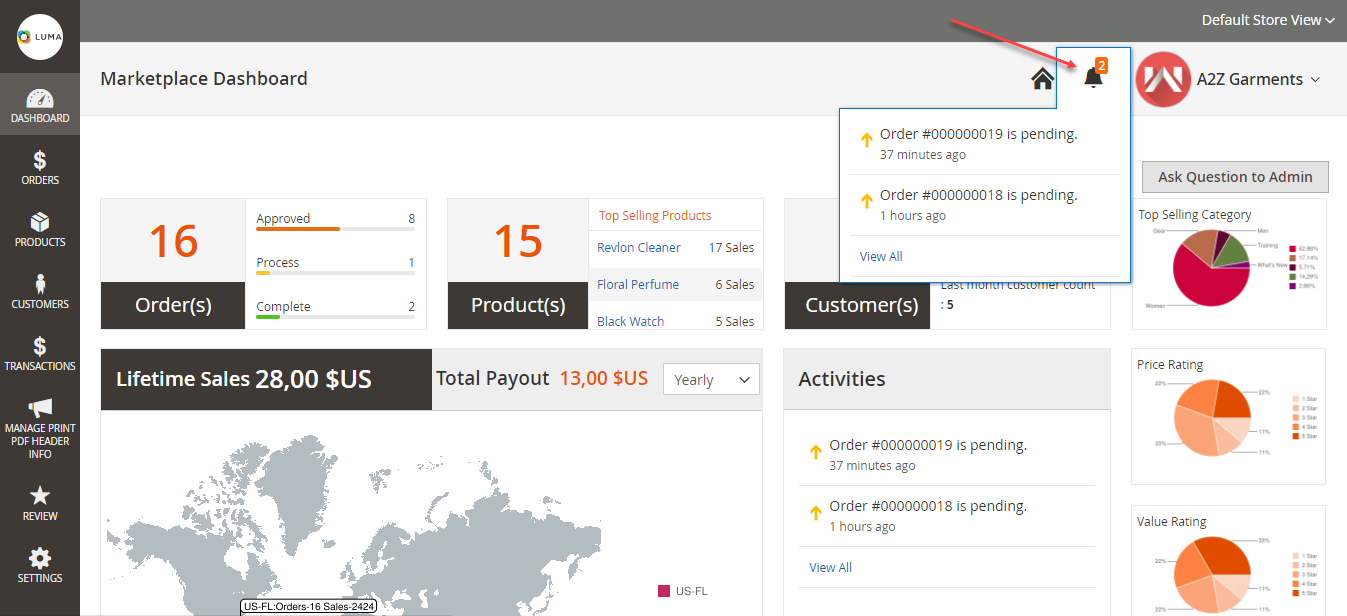
Clicking the “View All” option on the notification panel will redirect you to the grid view of the notifications.

Home Icon
Clicking the home icon will redirect the vendor to the home page as shown below in the snapshot.

Vendor Side Panel Account – Options
Dashboard
After clicking on the dashboard, the vendor will be able to see the complete statistics for his store account. The vendor can see the –
- Number of orders approved
- Number of orders in process
- Number of complete orders
The vendor can also see the total number of orders that have been placed by the customers, the total number products available, and the total number of logged in customers, the lifetime sales and the total payout that has been made by the admin to the vendor. The seller can also find the details of the latest orders that have been placed along with the latest comments and reviews by the customers. the seller can also see the various charts displaying the top-selling category, price, value, and, quality rating.

Orders
Clicking the Orders menu option will bring up the section to view all the orders that have been placed for this vendor’s products. Here, the UI components have been used to display the grid that uses ajax to display the grid data.
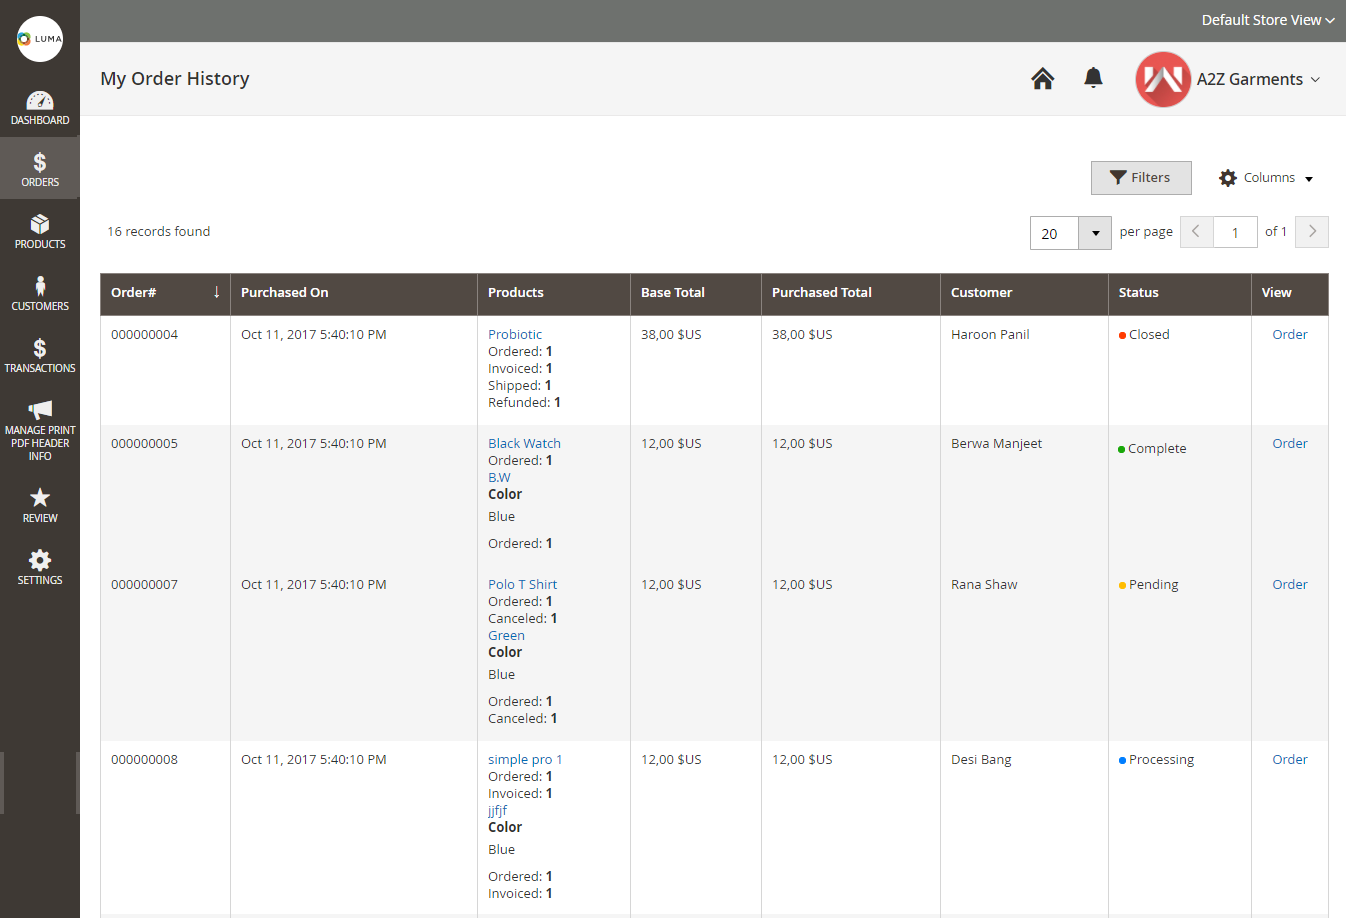
Clicking the “Order” link under the column View will allow the seller to view the complete order details. The seller can then accordingly generate the shipments, create credit memo, send emails to customers and the print the order details.
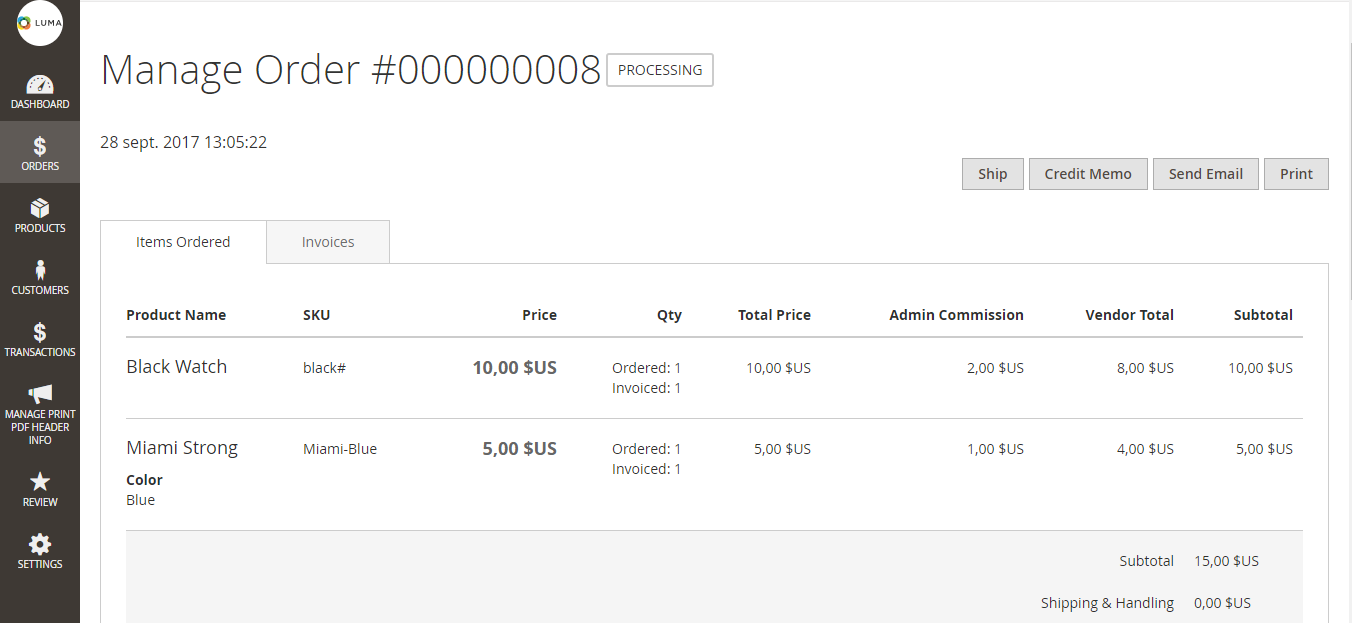
**Note – Orders section will only be available with the option that allows the vendor to have a separate dashboard. In the default system, this option will not be available.
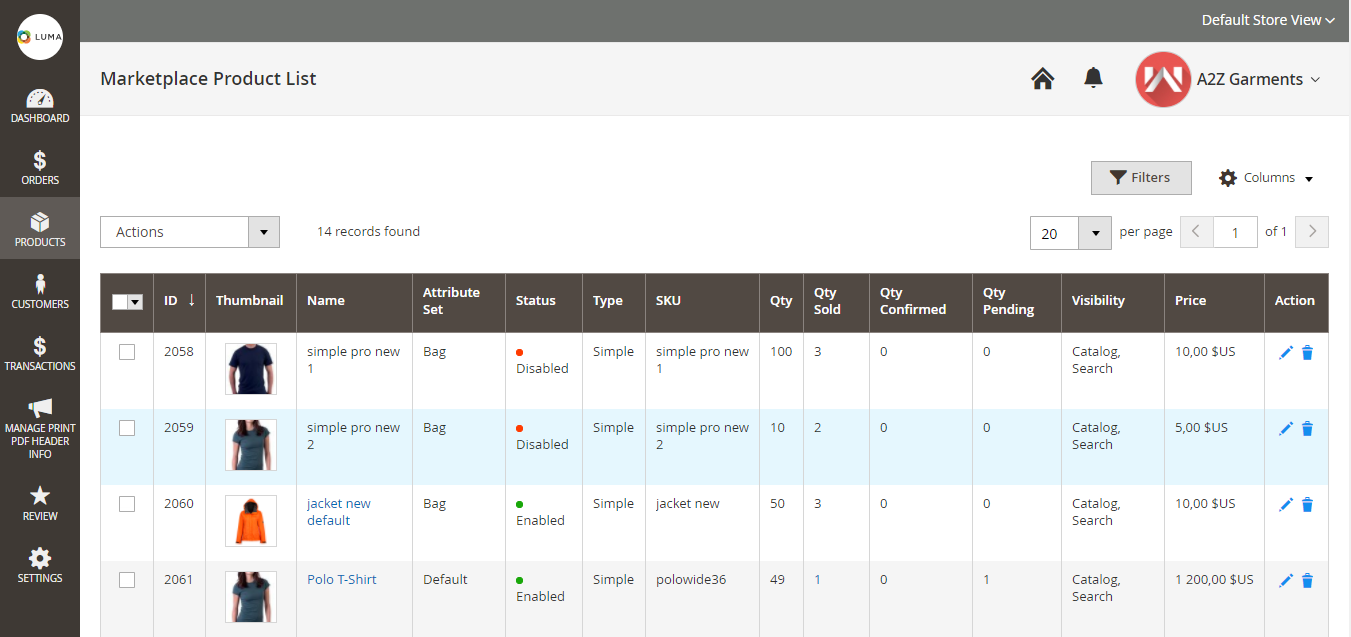
Products

- Taping the Add Products menu option brings up the section to add the products. from here the seller can easily add in his products.

- Under the My product List, the seller will find all of his products. Here, the UI components have been used to display the grid that uses ajax to display the grid data.
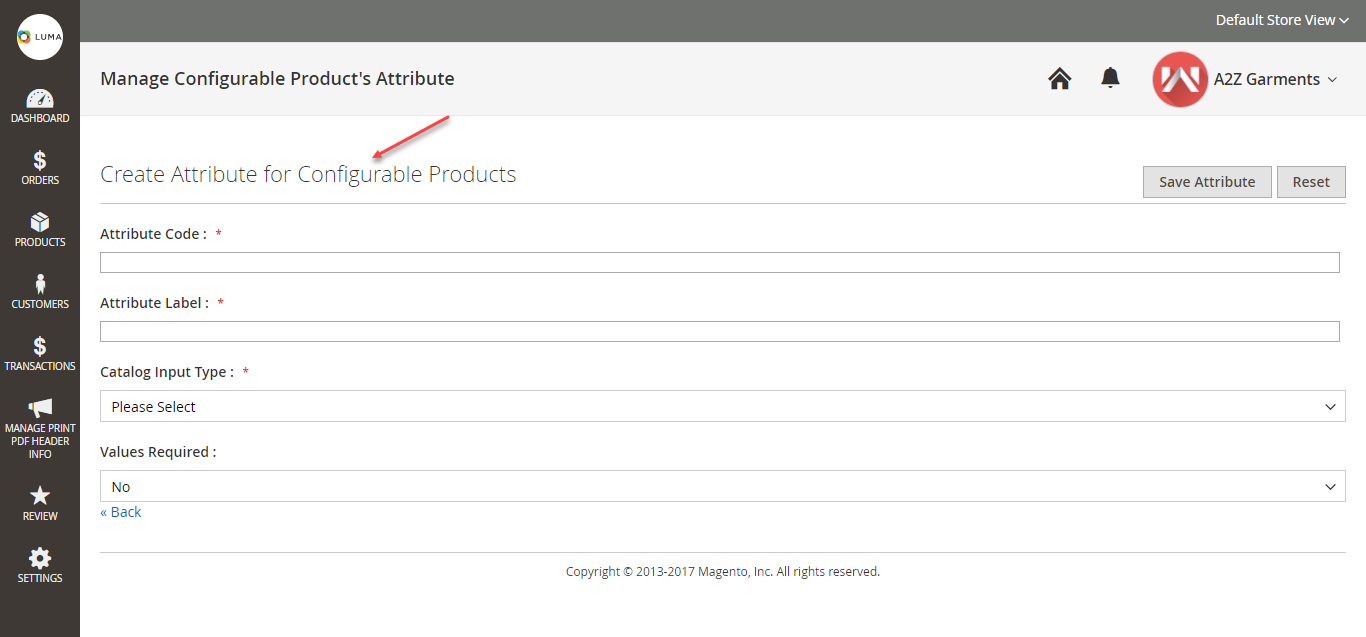
- lastly, under the Configurable Attribute menu option, the seller will be able to create the attribute for Configurable Products including attribute set, group, code, label and more.
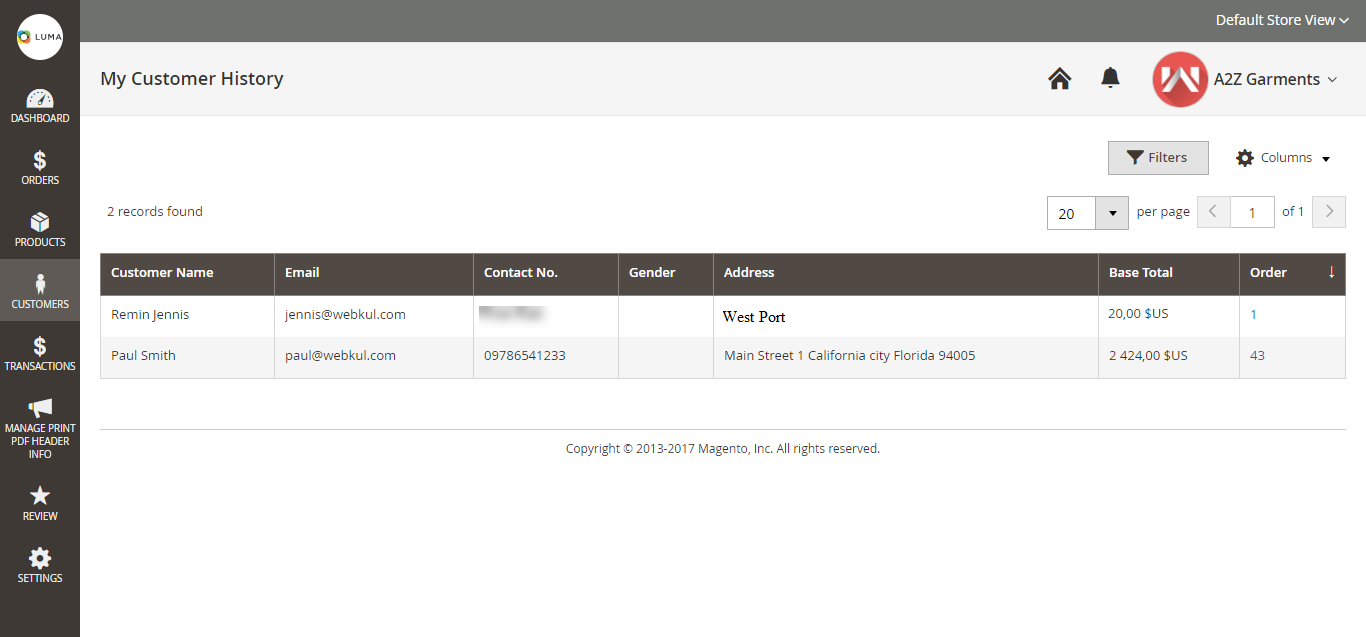
Customers
Under this section, the seller will be able to view all of his customers and can see the order placed by the customers as well. Here, the UI components have been used to display the grid that uses ajax to display the grid.
Transactions
Under the transactions, the sellers can check their statement(their total earnings) and can make a request for the Withdrawal(for their remaining payout). The sellers can request for their remaining payout under this section. Clicking the “Make a Withdrawal” button will send an email to the admin that the seller wants to make a withdrawal.

Clicking the View link the vendor will be able to see the transaction details as shown below in the snapshot.

Manage Print PDF Header Info.
Under this menu option, the seller can add their Invoice and Packing slip Address/Vat/Tax information and this will be visible in the header of the pdf files.

Review
Under this section, the seller can find all the review and ratings given by the customers. The vendor can check the price, value, quality ratings along with the feed summary, review, and the customer name with the status of the review as well. Here, the UI components have been used to display the grid that uses ajax to display the grid.

**Note – Ratings will be only available with the option that allows the vendor to have a separate dashboard. In the default system, this option will not be available.
Settings
Clicking the settings menu option will redirect the vendor to the marketplace edit seller profile page. Here, the vendor can edit his profile information and can view his collection and profile pages by clicking the buttons provided for the same. The vendor can manage his payment information on this page as well and much more.
That’s all for this updated feature. If you have any query or question regarding the functionality or the Magento 2 marketplace extension you can directly get back to us at [email protected] or just raise a ticket at webkul.uvdesk.com

The vendor dashboard menu is not visible. Could you please help?