Opencart The Courier Guy Shipping extension allows the admin to add the Courier Guy Shipping for his products. Now you can ship the products with the reliable and trusted delivery service of South Africa.
Moreover, using this shipping module the admin can add the Courier Guy Shipping method for shipping the products in South Africa.
Note: This shipping method works only in South Africa. The Store’s origin and the customer’s destination should always be from South Africa else the extension will not work.
Watch the video to understand the extension workflow:
Features – Opencart The Courier Guy Shipping
- Admin will enter the account details generated from The Courier Guy website.
- Admin will print the Invoice & Dispatch slips.
- Buyers can choose this service under delivery methods on the checkout page.
- Buyers in South Africa will get reliable and trusted delivery service.
Installation – Opencart The Courier Guy Shipping
STEP – 1
The installation of the Module is easy. Under the module XML, there are 4 folders catalog, admin, system, composer.json you just need to upload these folders to the root directory of the website.

After uploading the files, run the following commands in the terminal for installing the composer.json file.
- curl -s http://getcomposer.org/installer | php
- php composer.phar install
Now log in to the admin backend then navigate through Extensions > Extension Installer. Click the Upload button then browse the XML file, this file is in the ocmod folder. Please select the correct mod folder. According to your Opencart version installed in your system.

Note – You can also install the OpenCart Courier Guy Shipping Extension by uploading the ZIP or XML file from the ocmod folder. Please upload the ZIP file for version 3.X then upload the XML file for version 2.X.
STEP – 3
After uploading the XML file, please navigate through Extensions > Modifications. Forthwith, click the Refresh button as visible in the below snapshot.

STEP – 4
After that, under the Admin panel navigate to System > Users > Usergroup then edit ‘Administrator’ and select all for both Access and Modify Permission then save it.

STEP – 5
Furthermore, under Extension ->Choose the Extension Type(Shipping) install the Webkul The Courier Guy extension. To install the extension click on the install button next to the extension as shown below in the snapshot.

Module Translation – Opencart The Courier Guy Shipping
As the module Opencart The Courier Guy Shipping supports multiple languages, so this section will describe how to make the module work in different languages. Please check the language translation link.
Configuration – Opencart The Courier Guy Shipping
After the successful installation of the module, the admin will navigate through Extensions-> Choose the Extension Type (Shipping)-> Webkul The Courier Guy and click the Edit button to configure the module for use as shown below in the snapshot.

After clicking the Edit button another page to configure the module will appear as shown below.
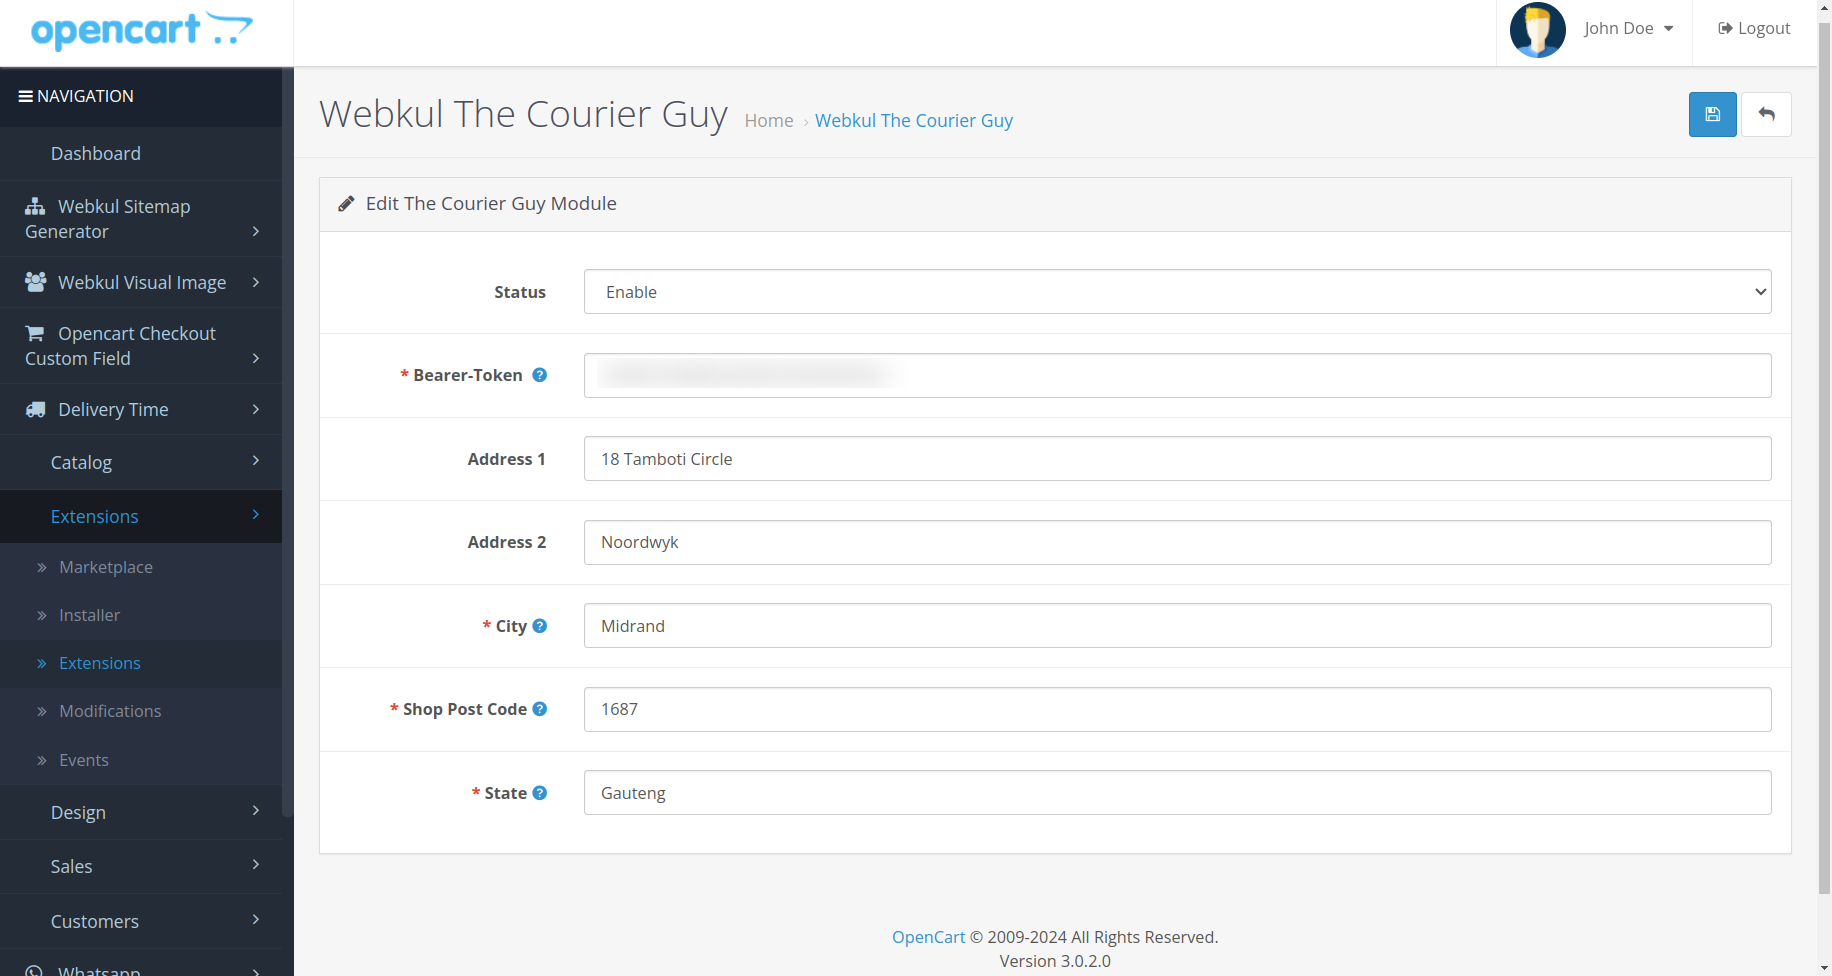
Here the admin will –
- Enter the City, Shop Post Code, and the State.
- Set the status of the extension as Enabled or Disabled.
- Here the admin needs to provide a Bearer Token.
That’s all for the configuration settings in the admin backend for the extension.
How to Get the Access Key?
To use Access Key for Opencart Courier Guy shipping, you need to have Sandbox Credentials It is required during module configuration.
First, go to the sandbox website:- https://sandbox.shiplogic.com/register to create your account.

After creating an account on the sandbox website A small pop-up window will appear with the name SET DEFAULT COLLECTION ADDRESS, Here you have to enter your residential information such as a street address, city, Postal code, etc as mentioned below.

Now continue and verify your email id and set a password.

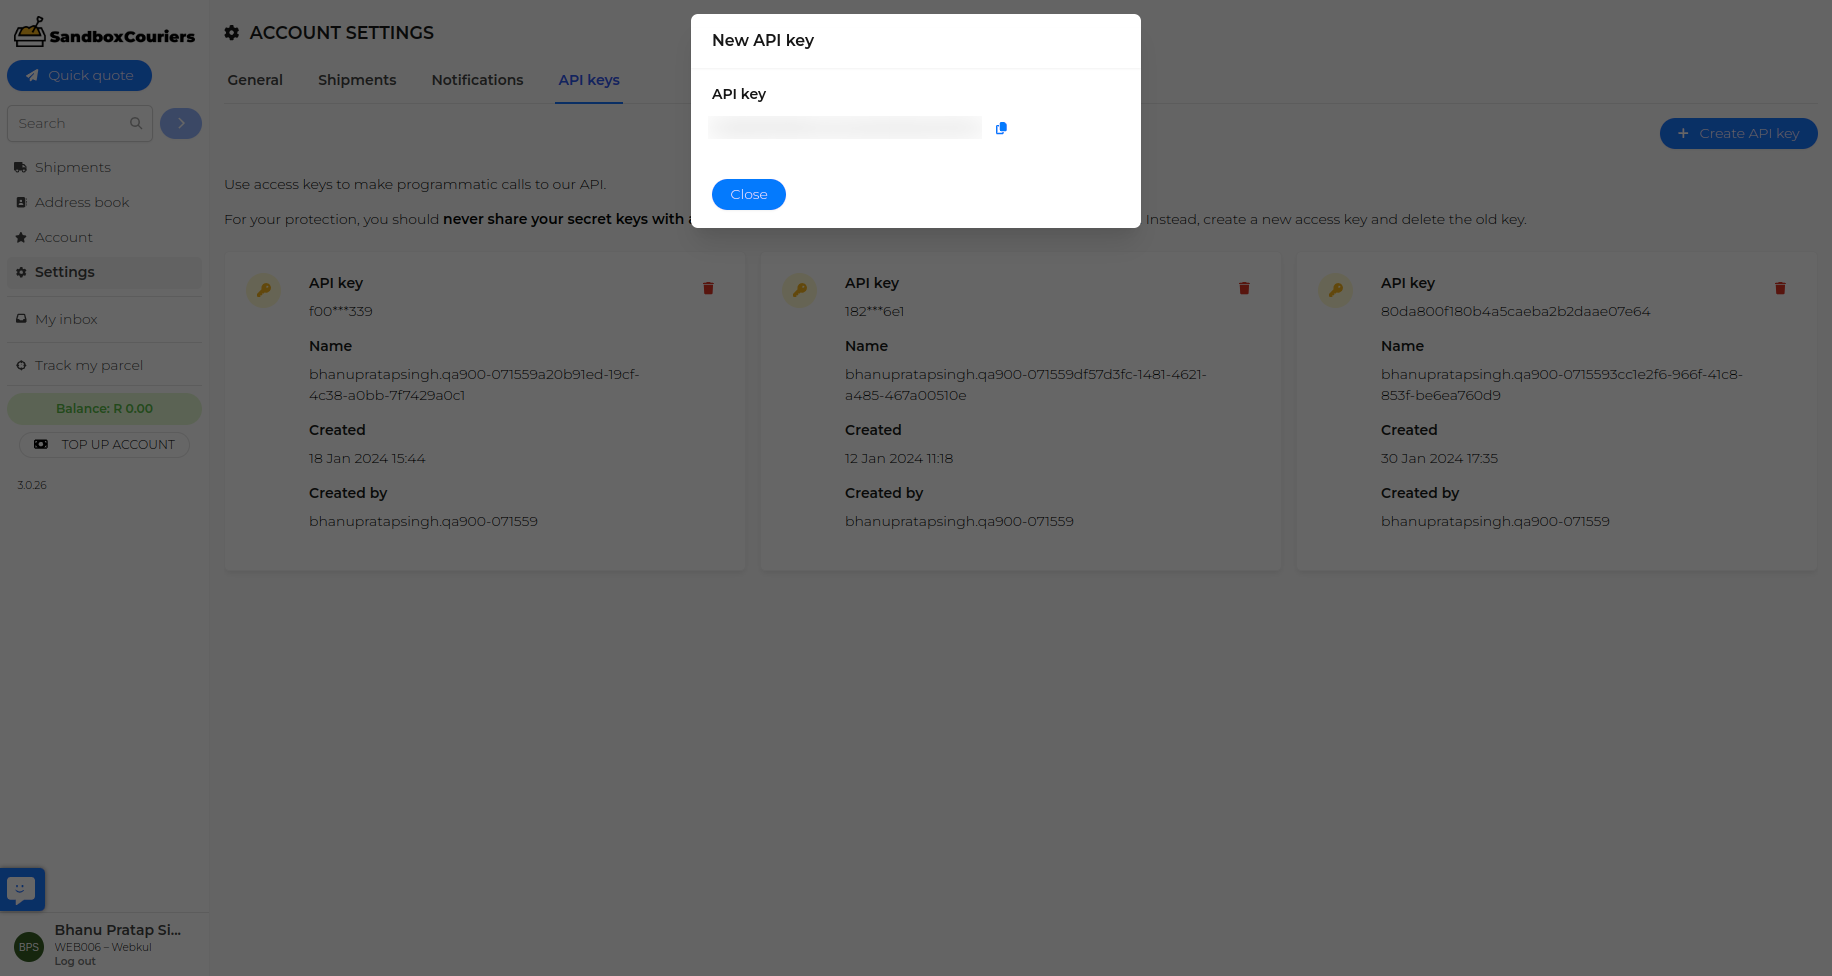
After verifying an email and password click on the Settings menu icon and select the API Keys option, then click on create an API key.

After clicking on Create API keys they will see the API Key.
You can use this API key in the bearer token field in the module configuration.
Workflow – Opencart The Courier Guy Shipping
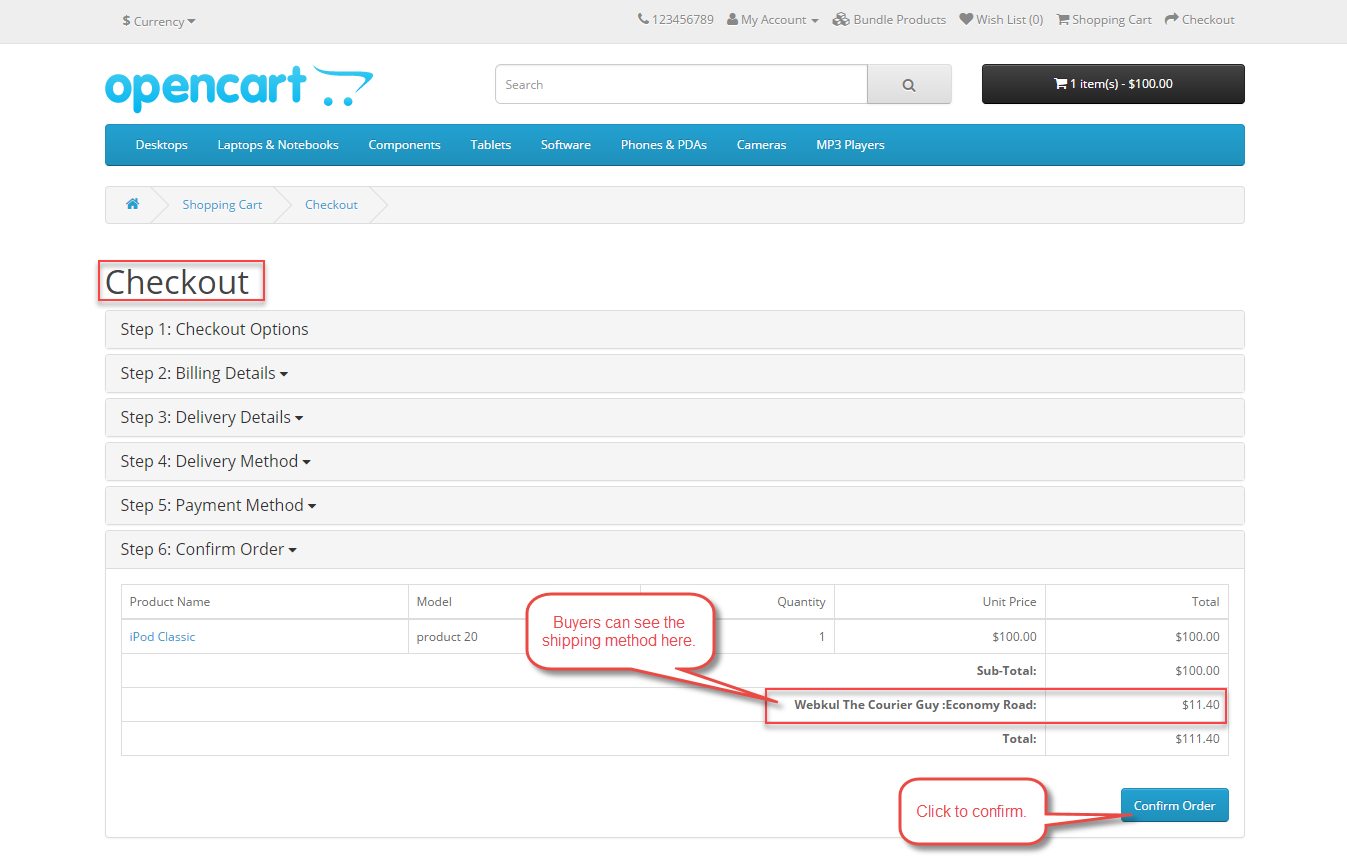
Moreover, when the buyer will place an order for the product, the buyer will be able to see and select The Courier Guy Shipping under shipping methods as per the below screenshot.

Further, the buyers will also be able to see the selected shipping method under Order Review and then they can click on the confirm button to complete their purchase.
After the order has been placed Admin will be able to check the order and can print Invoice slip and dispatch slips at their end as per the screenshot below.

Admin will print the Invoice slip for the order here-

Further, the admin will print the Dispatch slip for the order as shown below in the snapshot.

That’s all for the Opencart The Courier Guy Shipping module Still have any issues feel free to add a ticket and let us know your views to make the module better https://webkul.uvdesk.com/.
Current Product Version - 4.0.0.0
Supported Framework Version - 3.x.x.x

Be the first to comment.