


















The Mollie Connect integration for the Multivendor Marketplace Application enables the admin to route payments between the admin and sellers through Mollie,
The routing is based on the configured payment routing rules set by the admin in Mollie
Customers can select Mollie at Shopify checkout to pay for their orders. Once Mollie confirms the payment, the integration initiates the seller payment routing process based on the configured rules.
The integration routes the funds to the respective sellers through Mollie based on the configured rules.
The admin can also manage these payment routing rules directly in their Mollie account.
Installation
Go to the Feature Applications section in the Marketplace Admin Panel and enable the Mollie feature application by accepting the applicable charges.
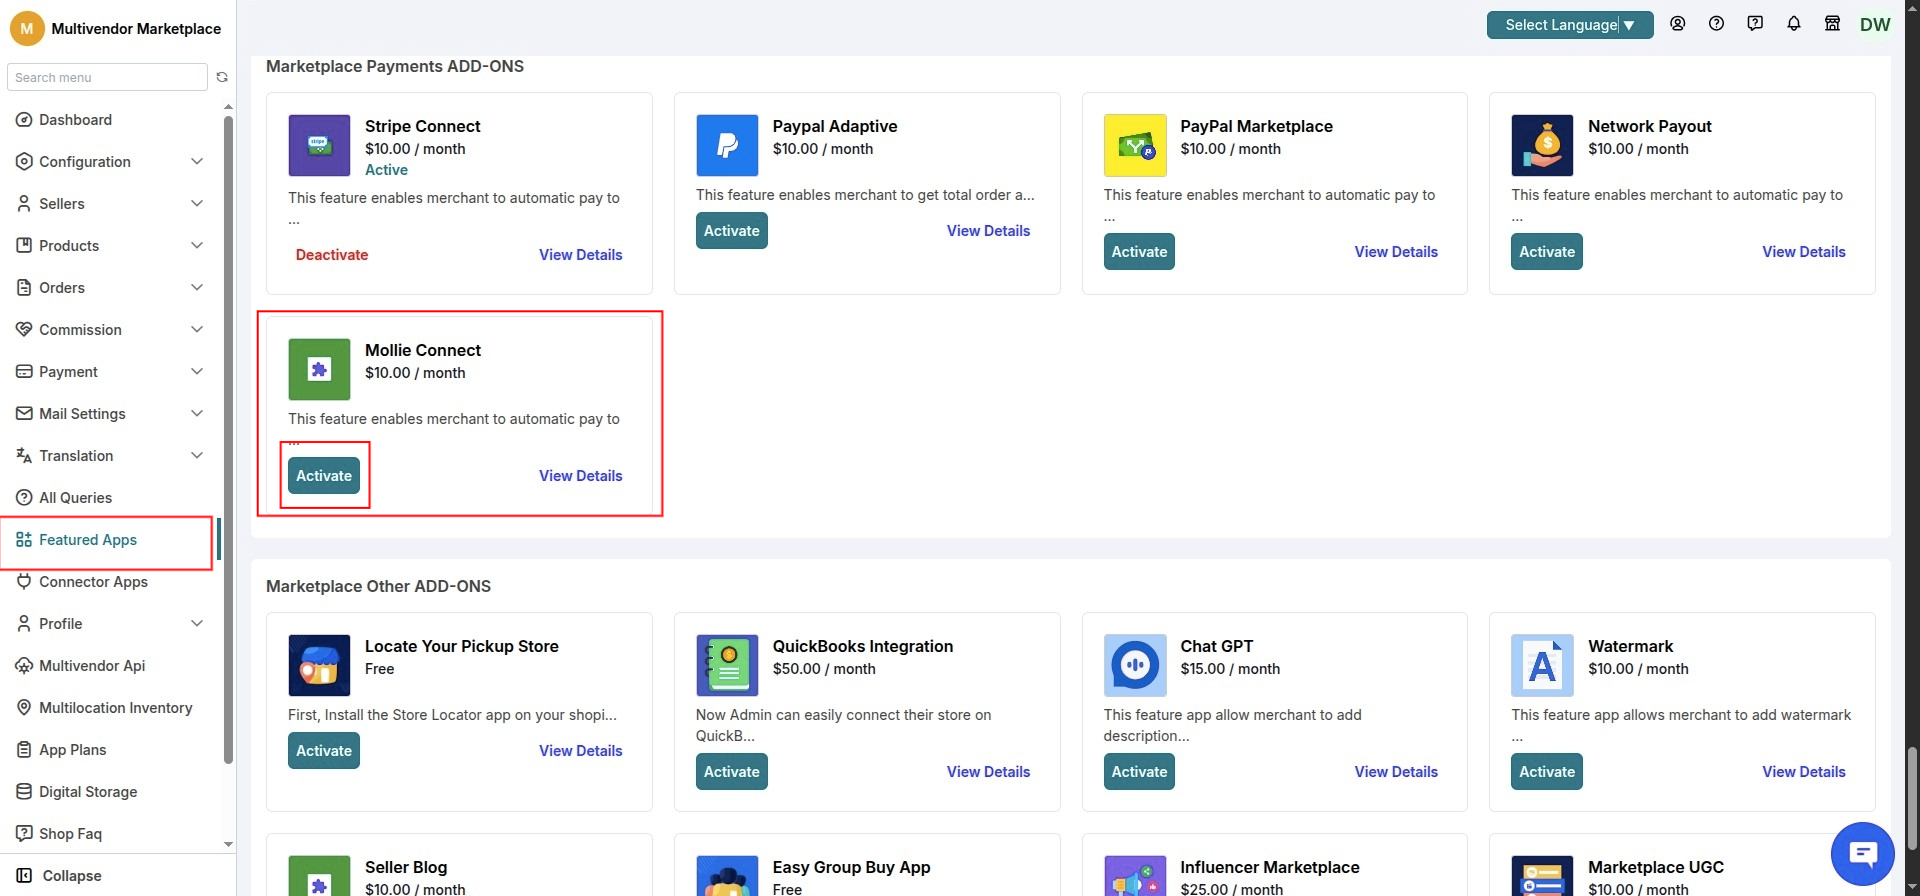
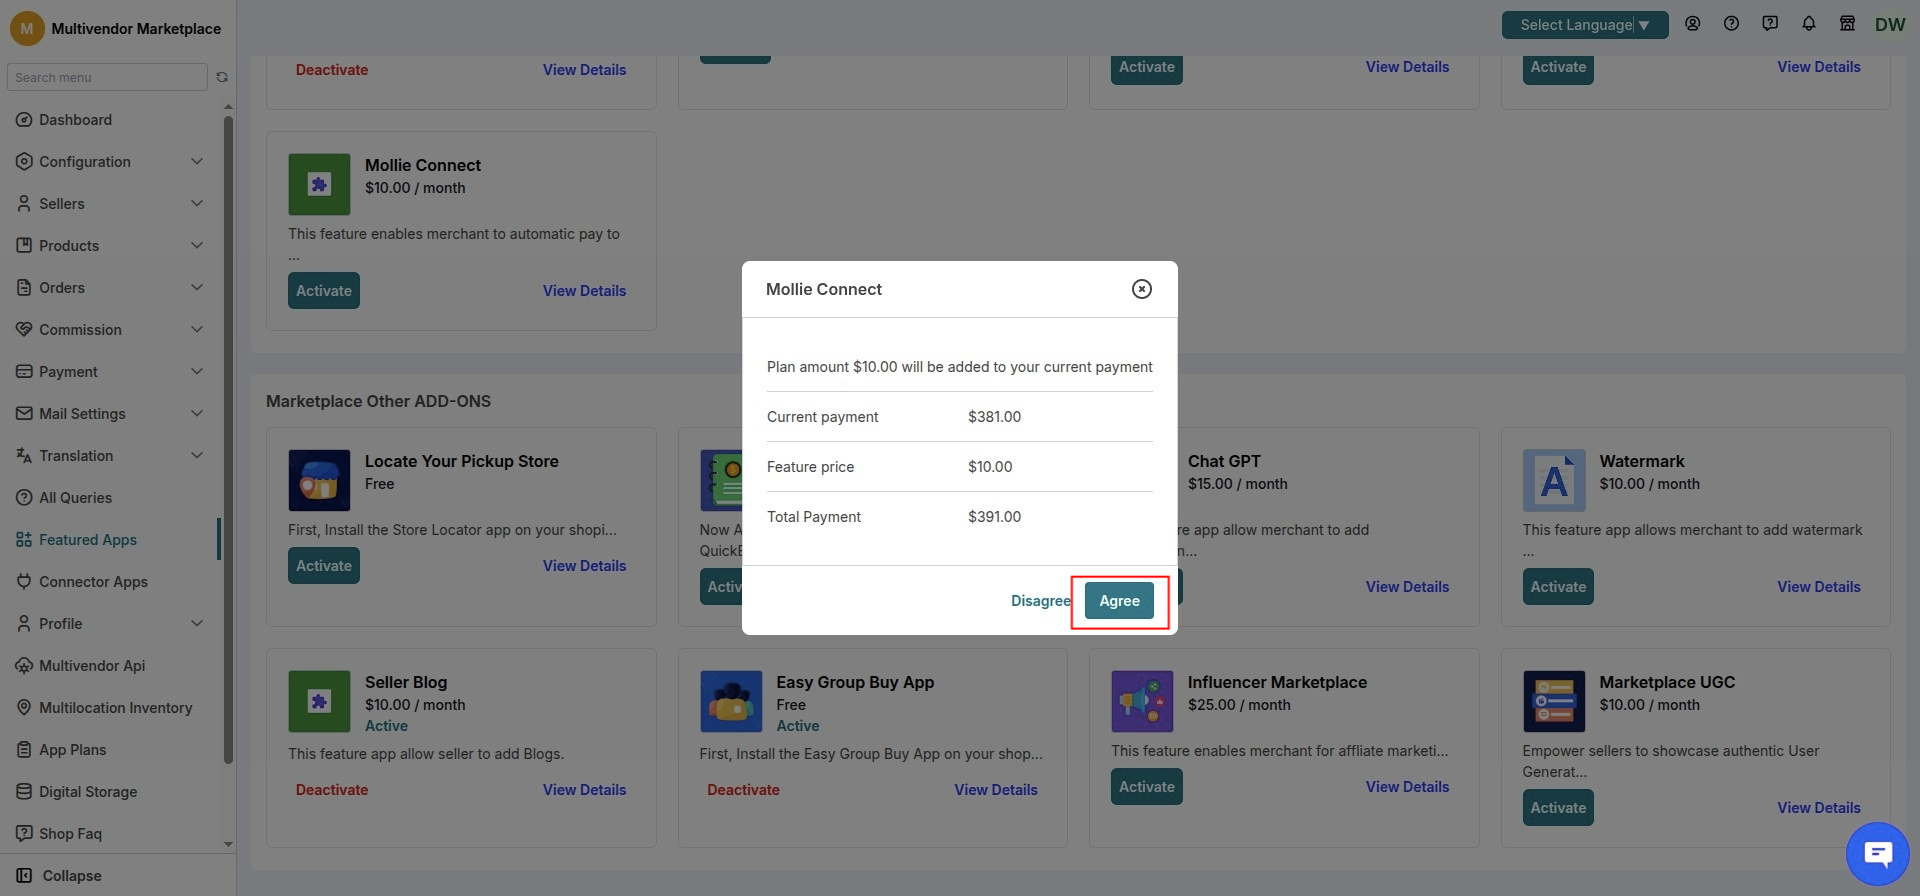
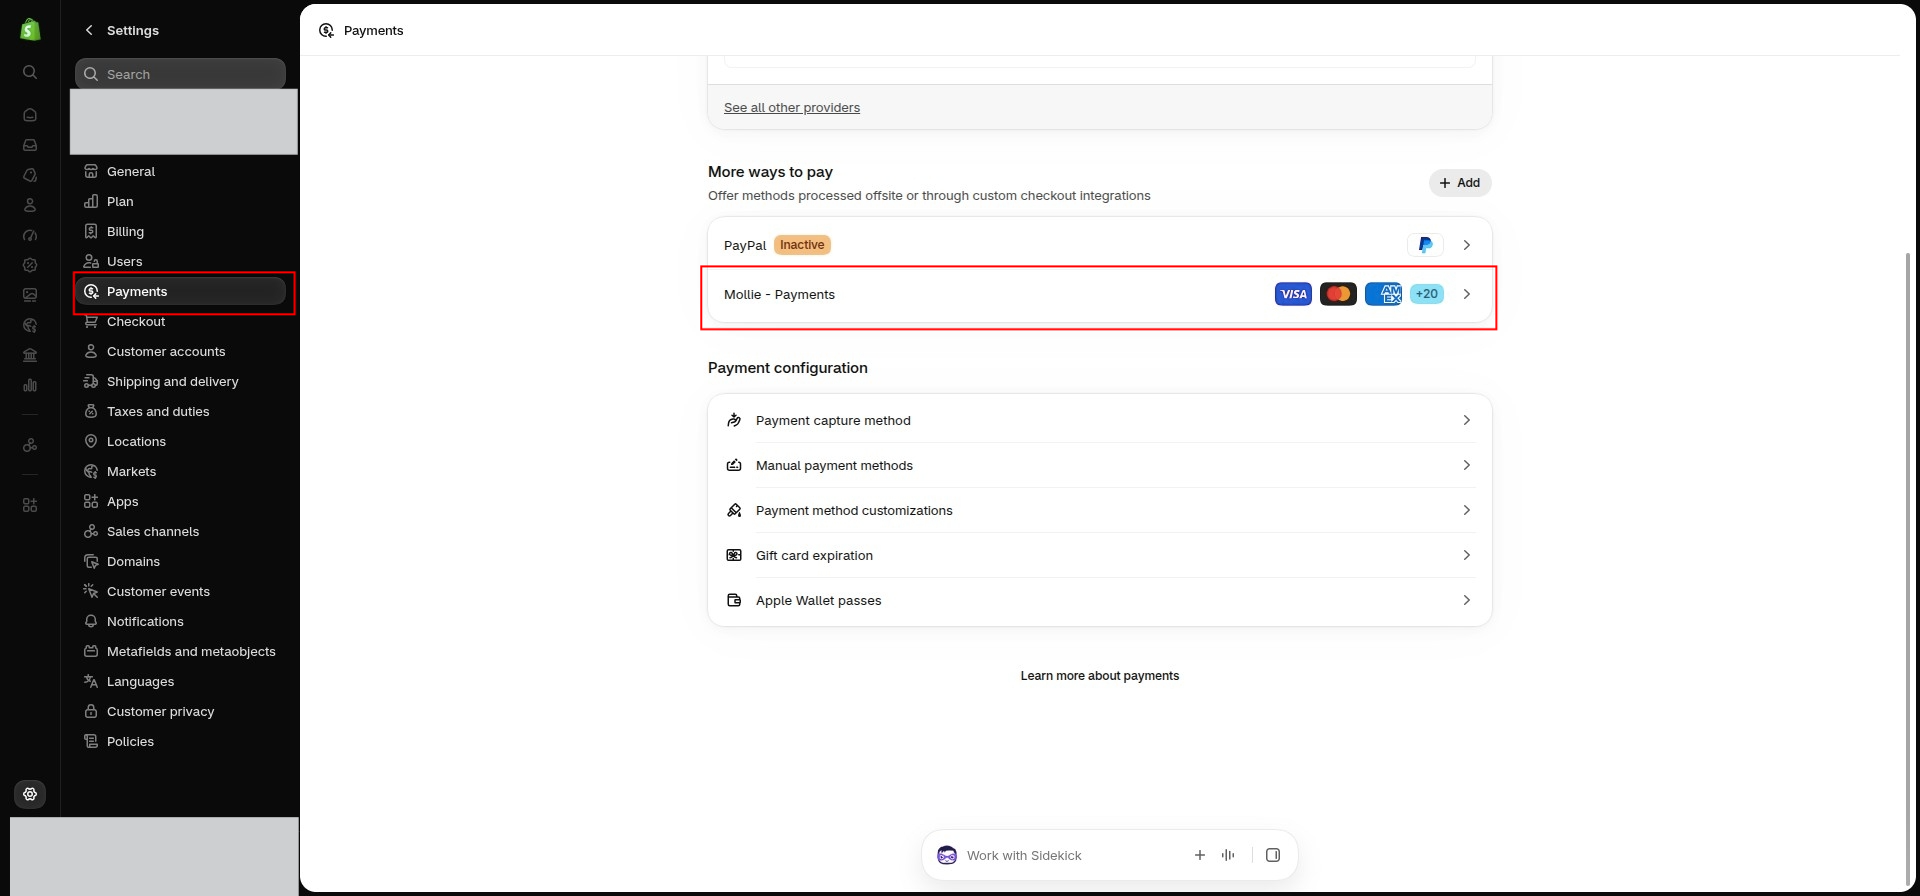
Shopify-End Configuration
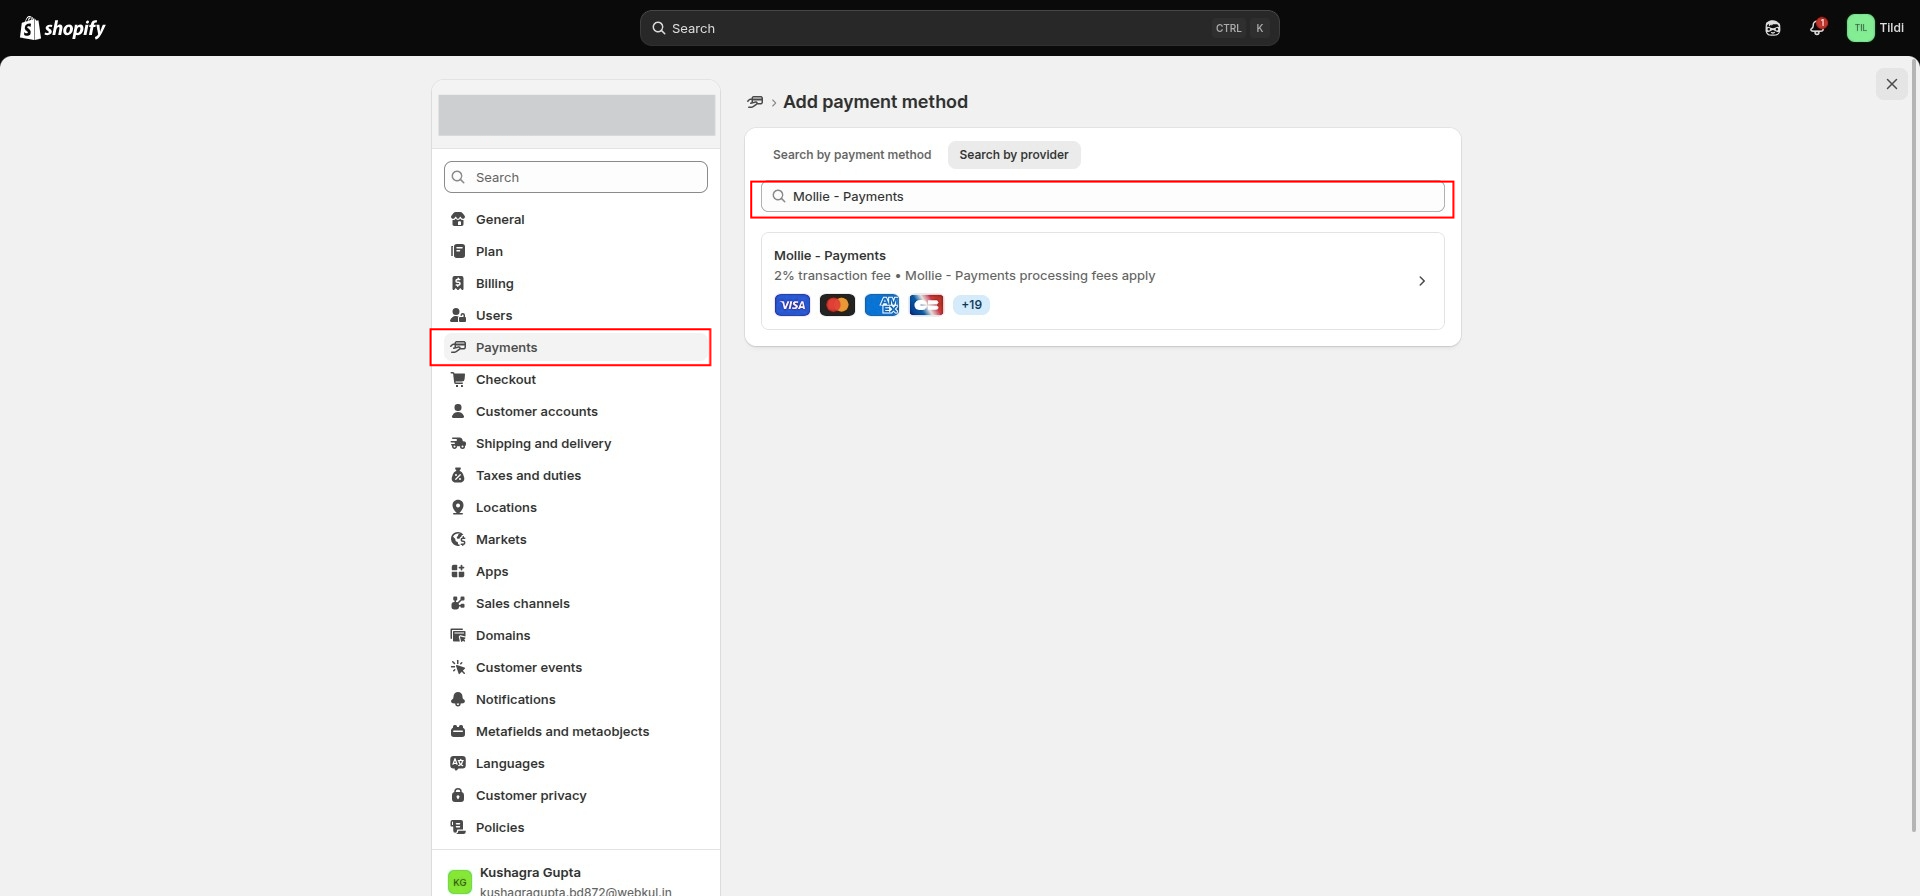
On the Shopify end, you will need to connect Mollie Payments as a payment option.
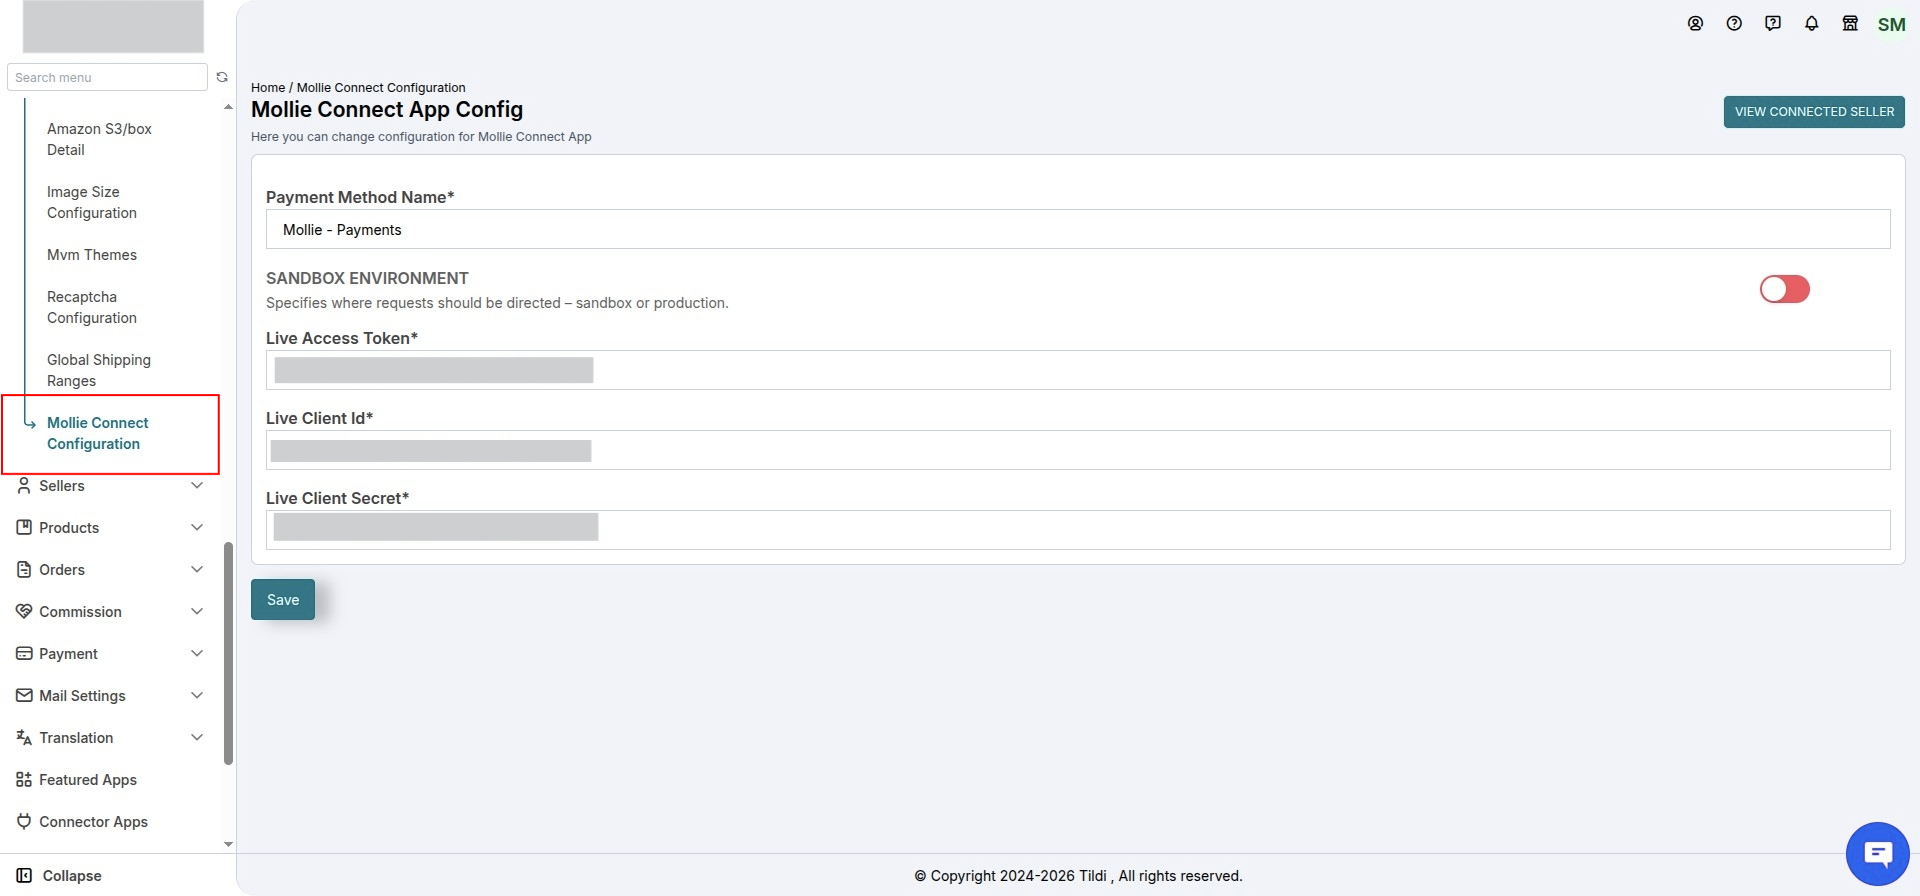
Configure Mollie Connect
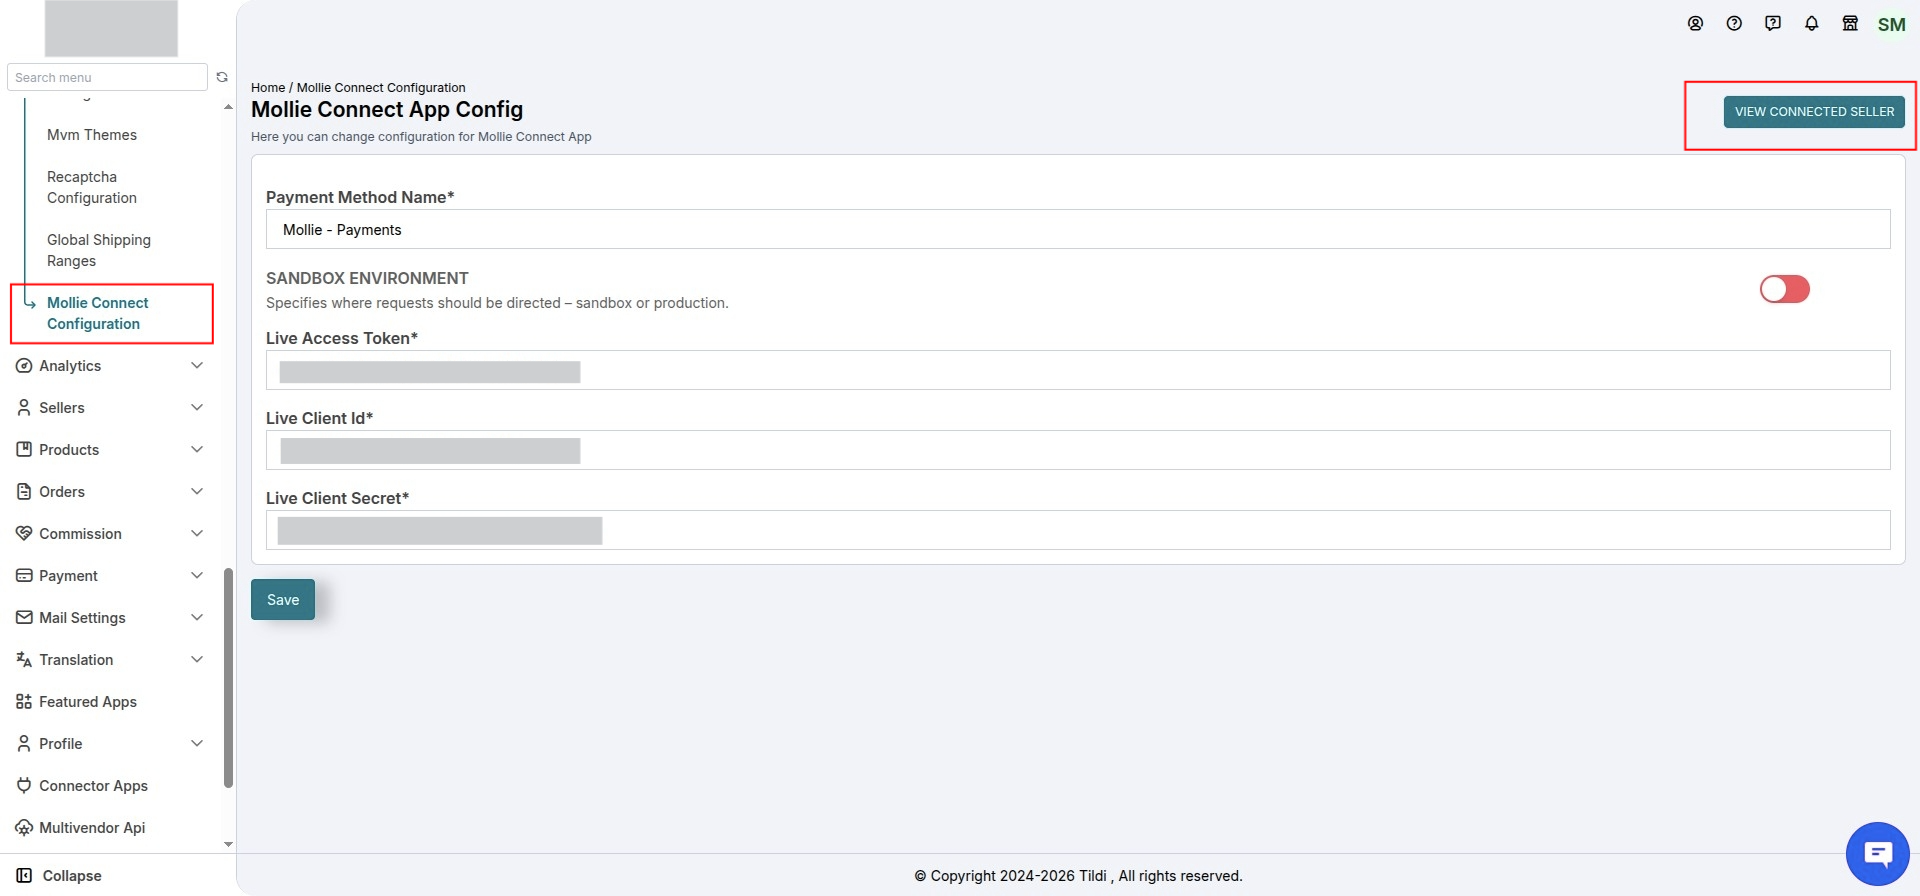
Here, you will need to enter the required API credentials.
- Payment method name – The name of the Mollie payment method name that you have set in shopify
- You can obtain your Access Token by creating an account on Mollie.
- Client ID and Client secret: You will receive them from the Mollie account
Create an Application on Mollie: API keys
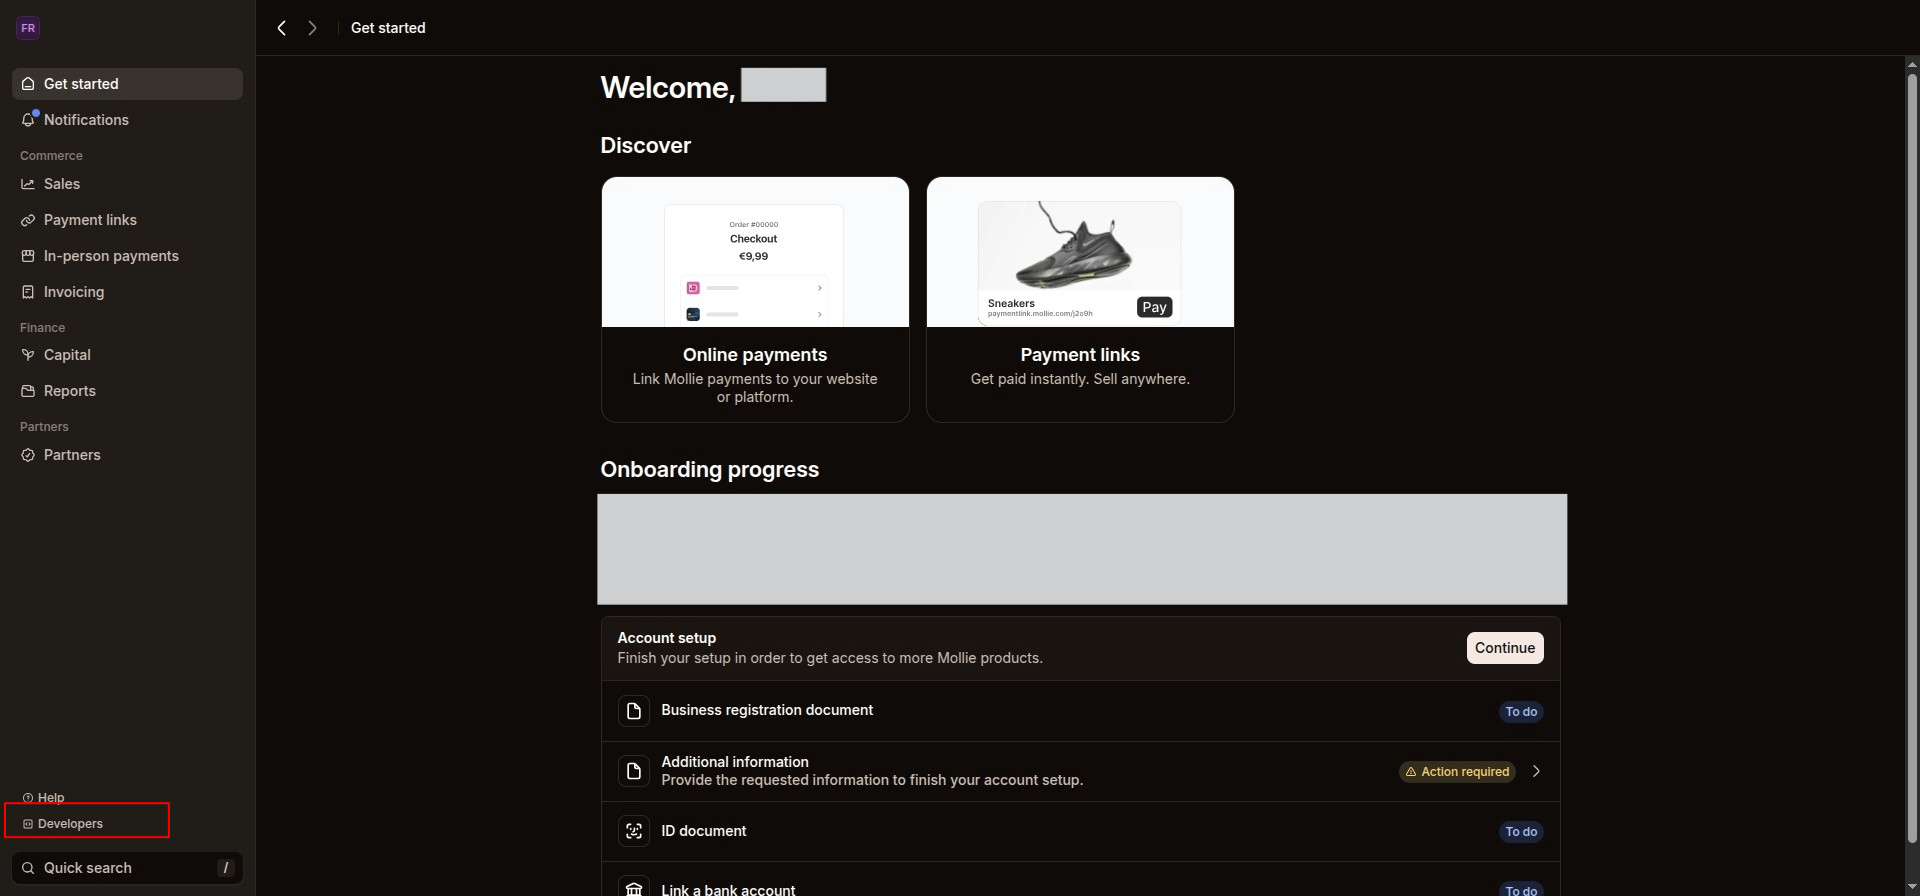
To obtain the required Mollie credentials(client ID and client secret)
Navigate to
Mollie Dashboard → Developers → Your Apps → Create Application
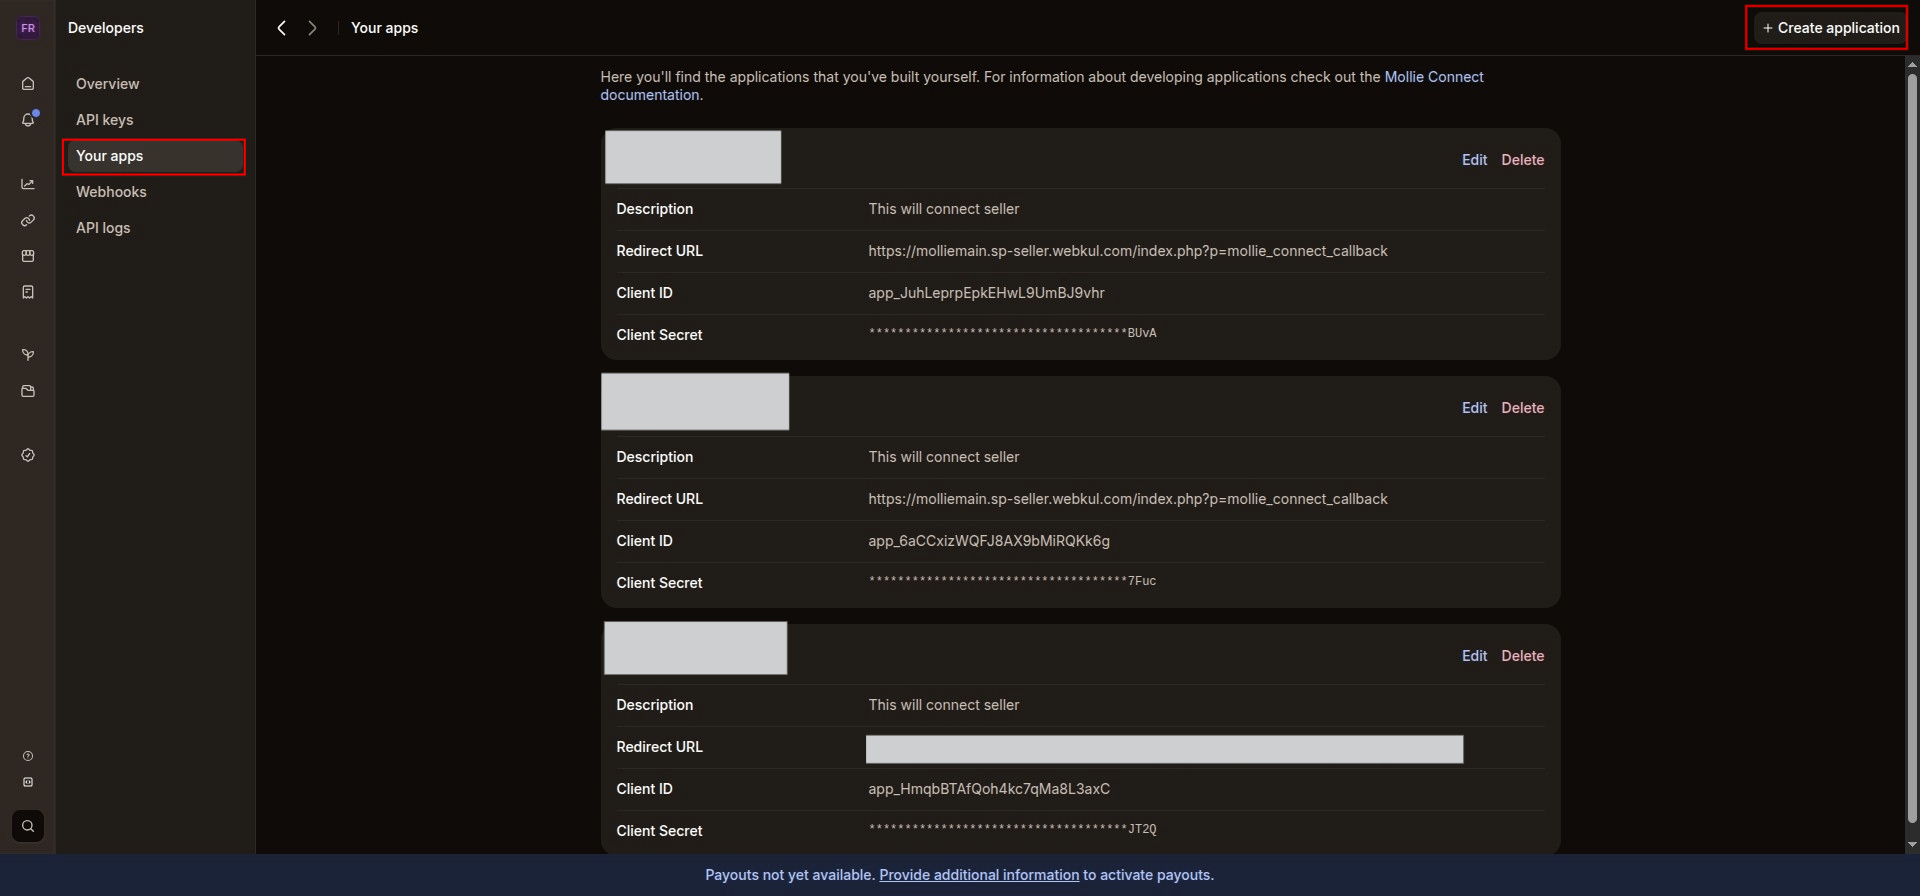
While creating the application, you will need to enter the Redirect URL.
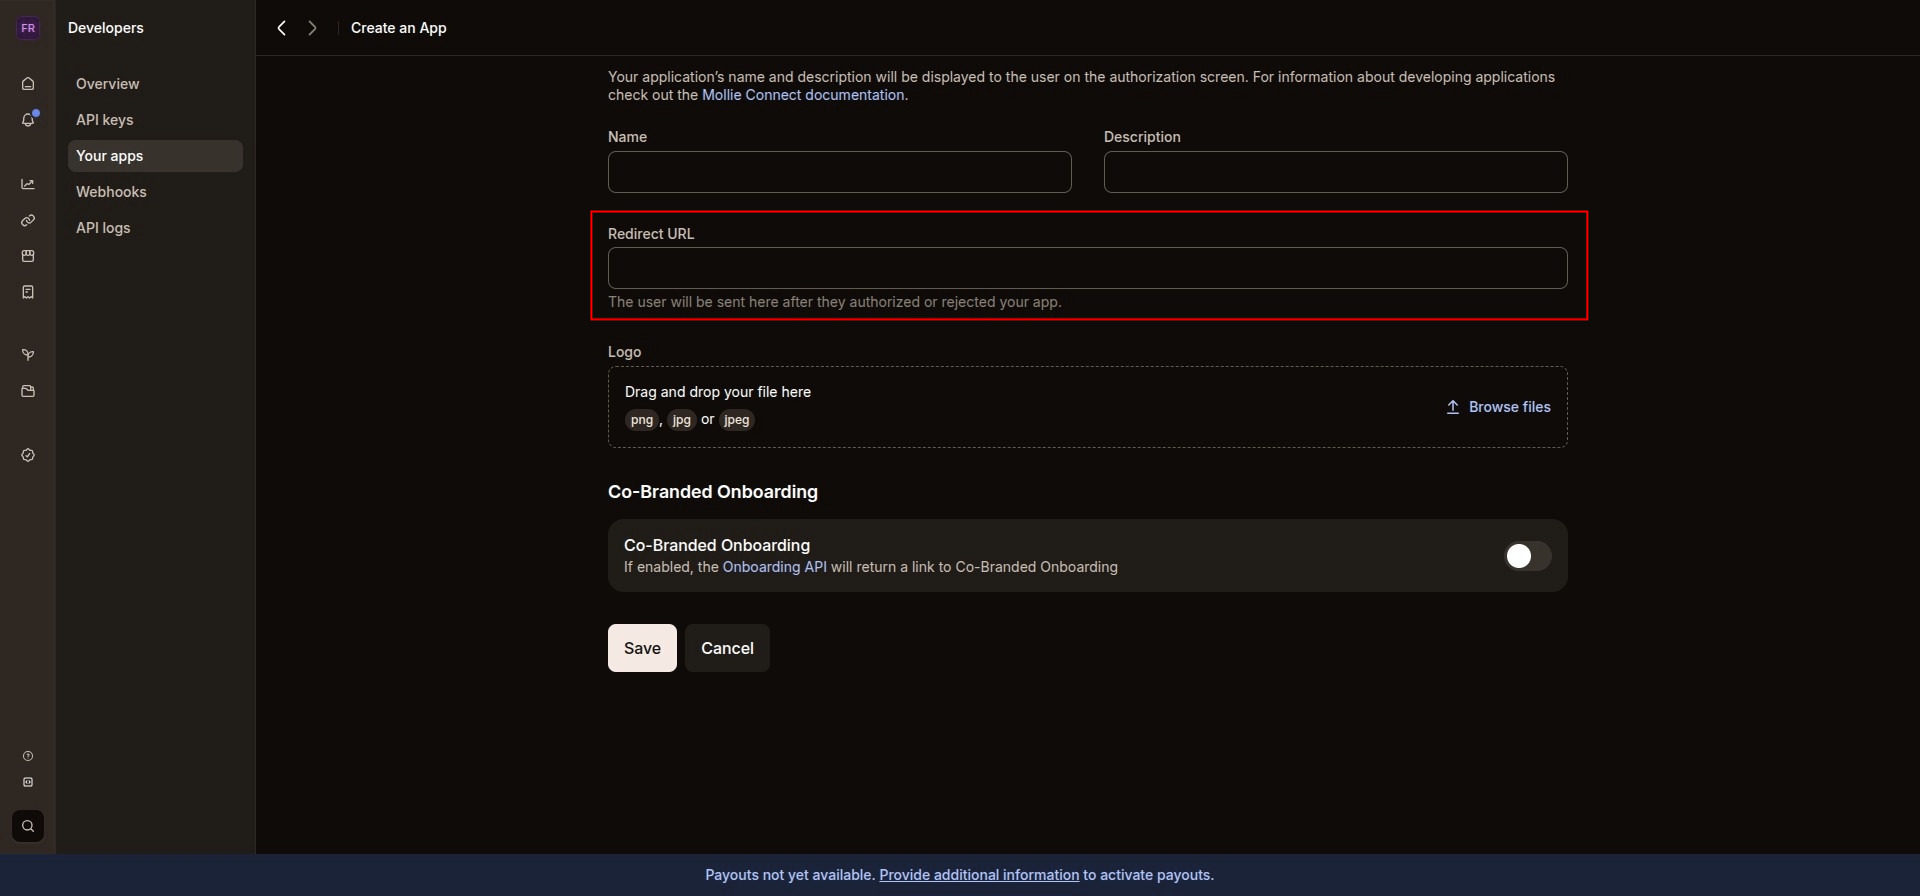
You can find the required Redirect URL under the Instructions section of the MultiVendor Marketplace application.
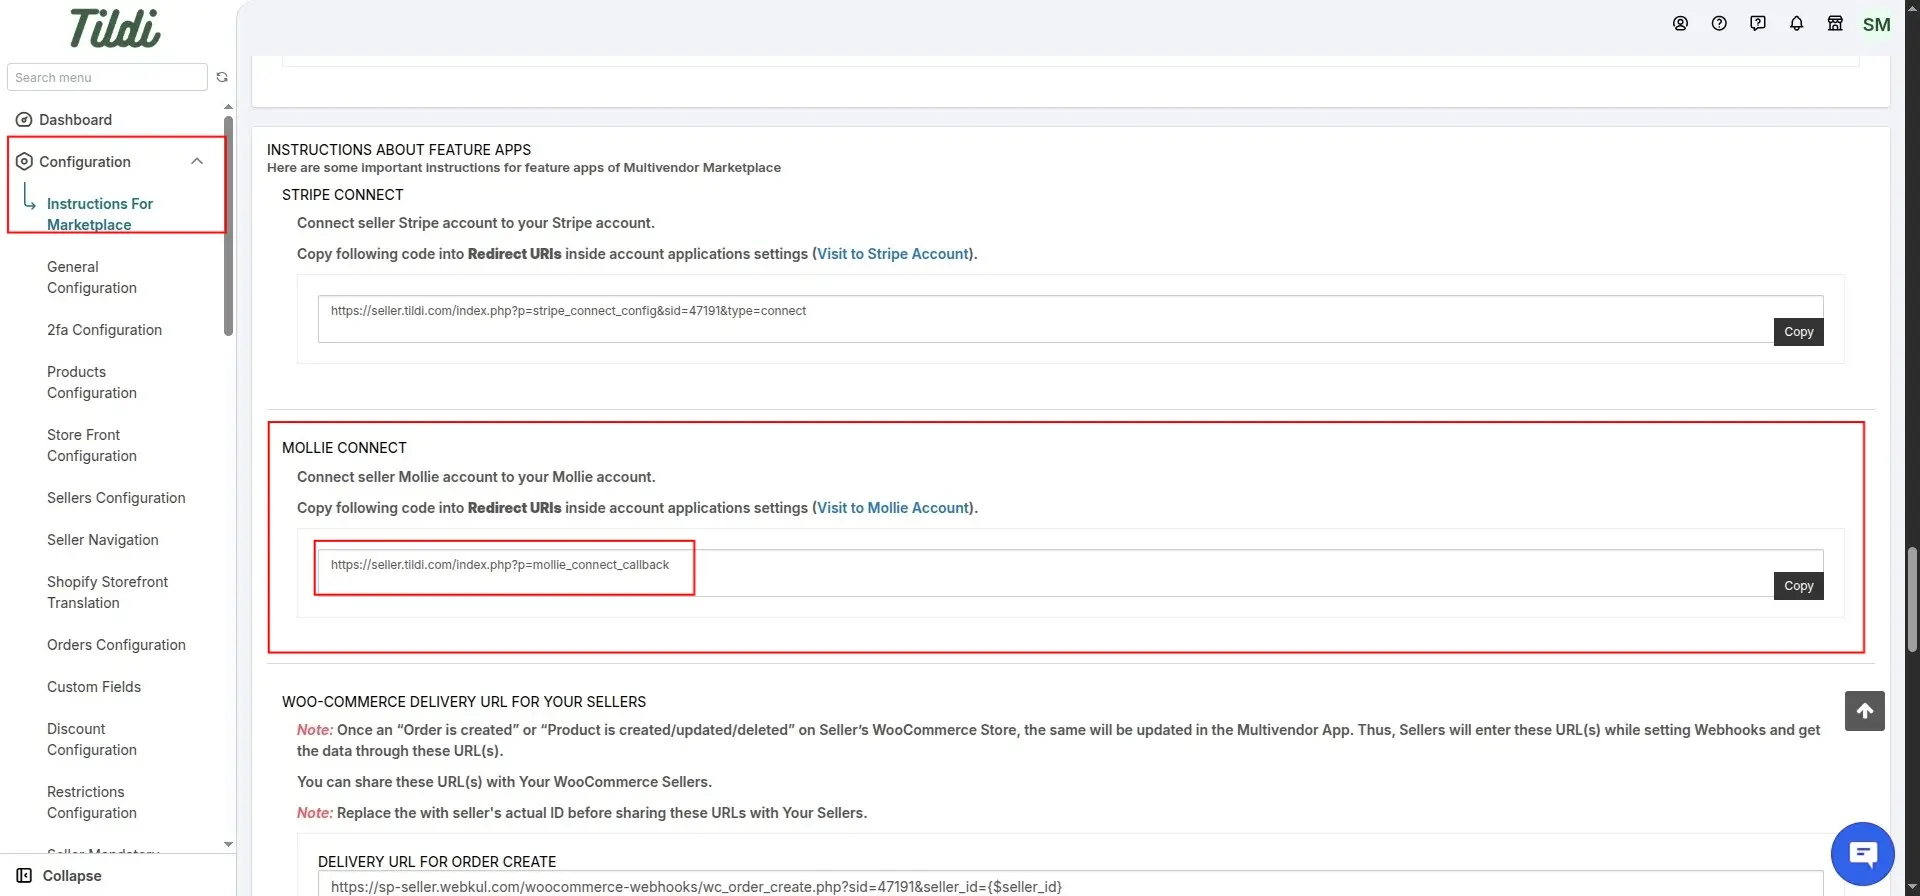
After creating the application on Mollie, copy the API credentials into the Mollie Connect Configuration section of your Marketplace Admin Panel to complete the setup.
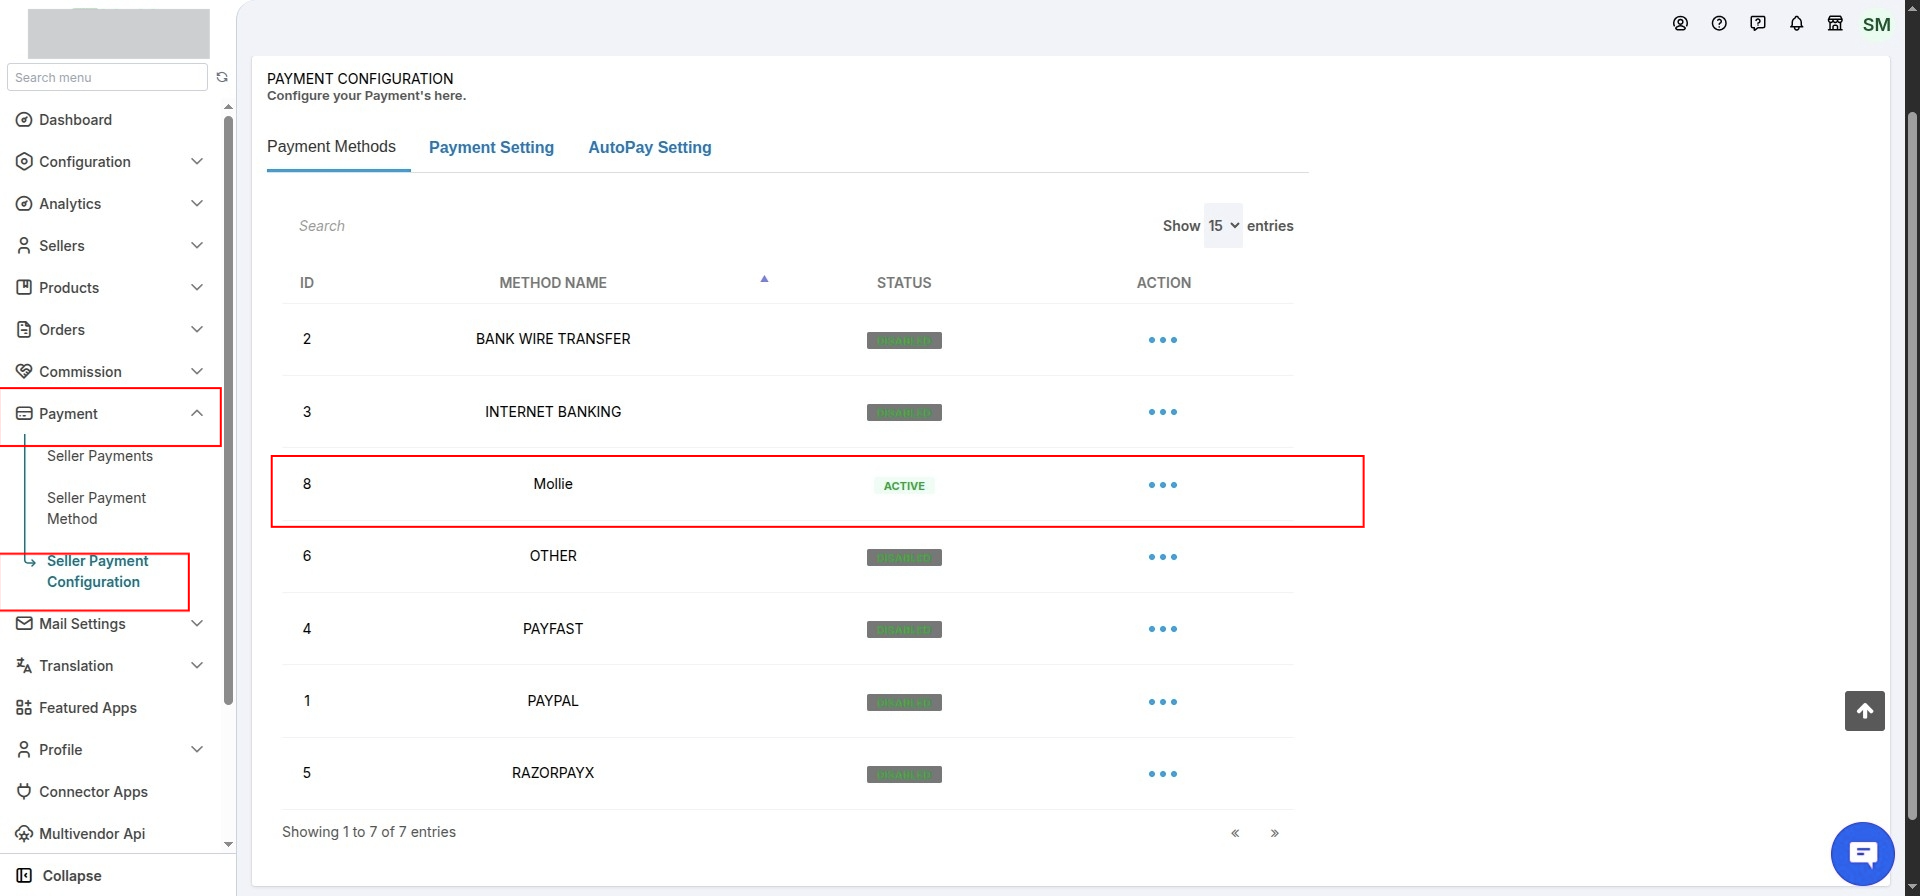
Enable Mollie as a Seller Payment Method
Navigate to:
Payments → Seller Payment Configuration → Seller Payment Methods
Enable Mollie.
Configure Seller Earnings
Navigate to:
Payment Settings → Add Seller Total Due Earnings → On Order Paid
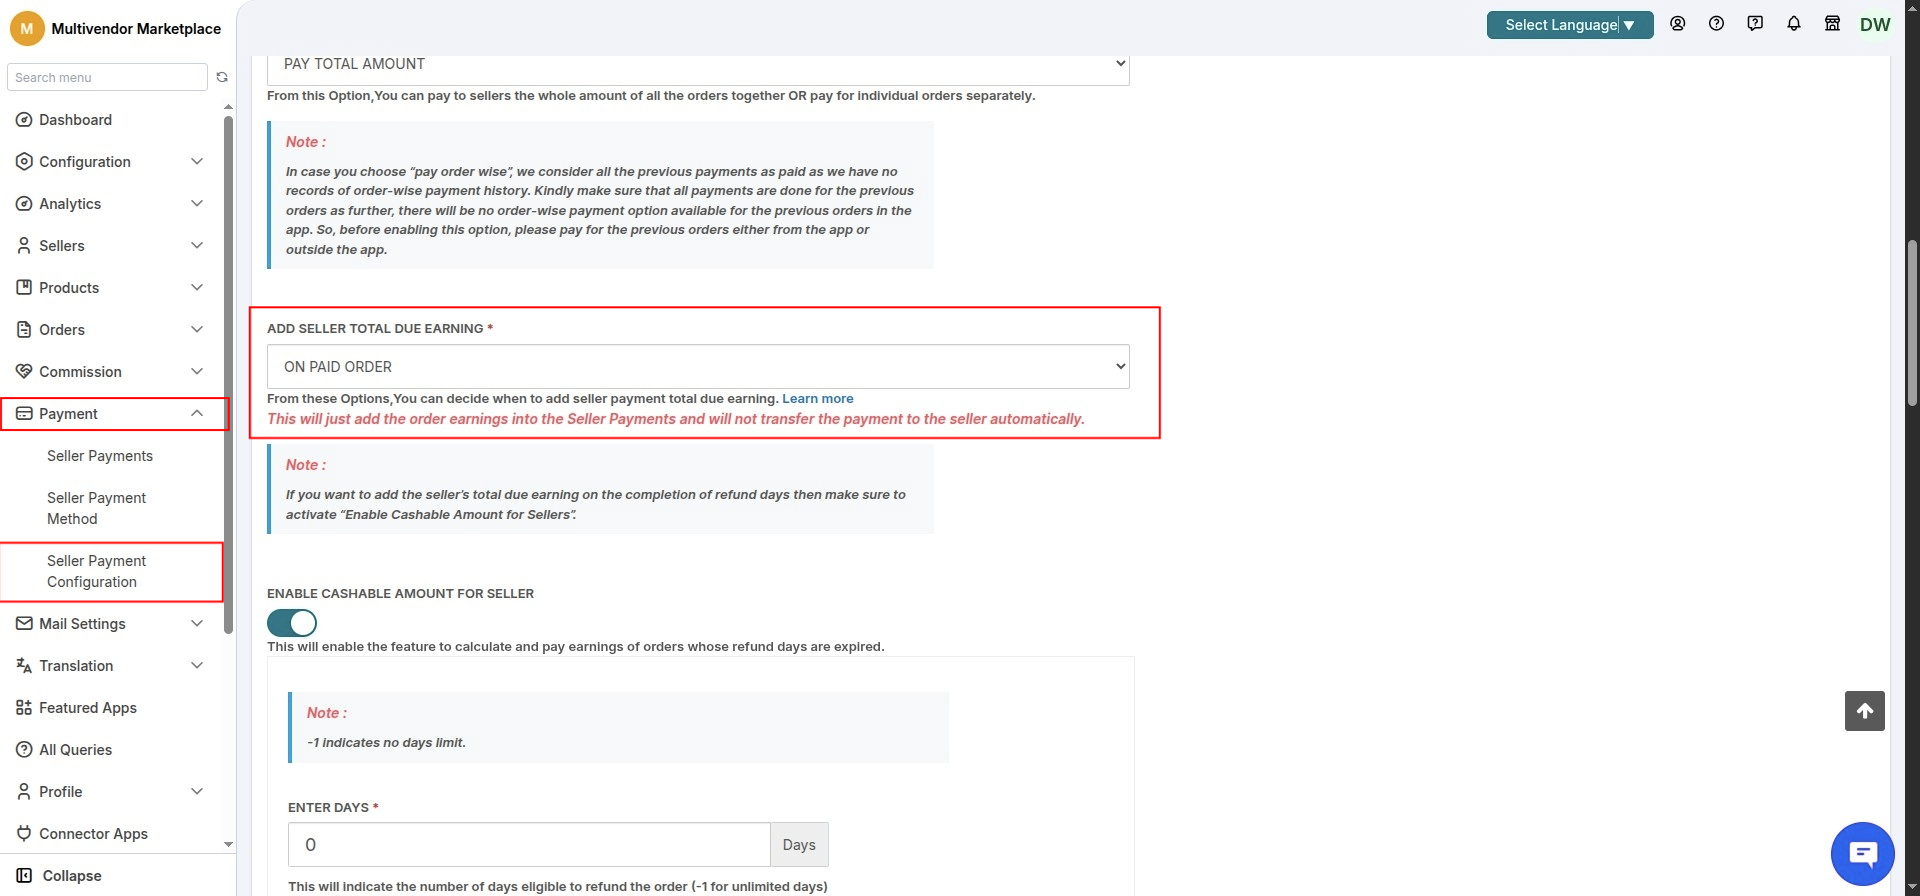
Enable this option and click Save.
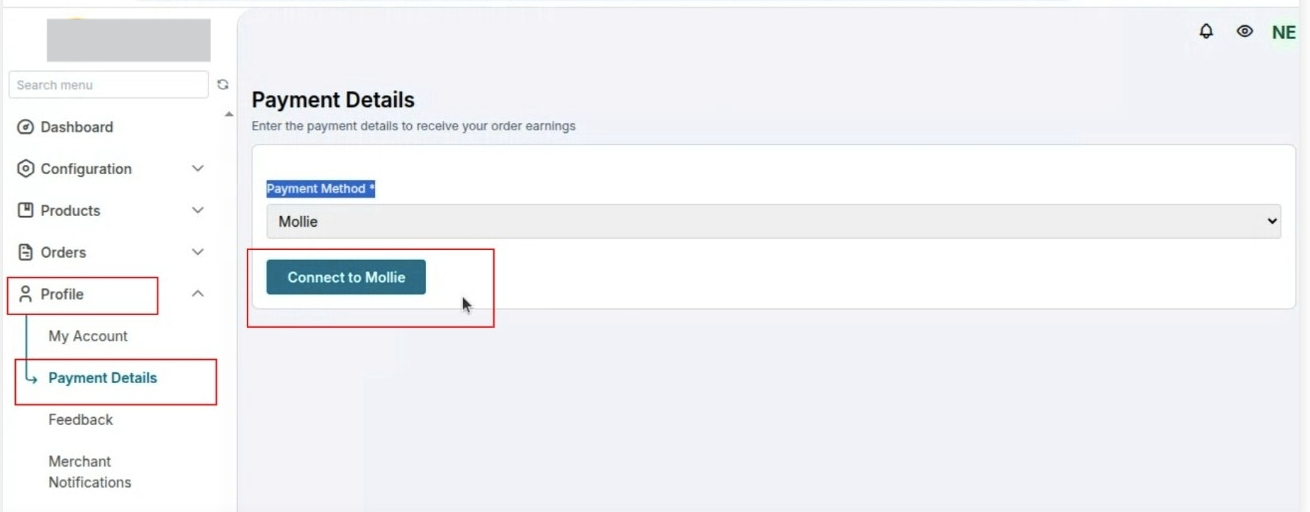
Seller Mollie Account Connection
Once the above configuration is completed, sellers will be able to connect their Mollie accounts from their seller panel:
Seller Panel → Profile → Payment Details → Connect to Mollie
Connected Sellers
You can view the list of sellers who have connected their Mollie accounts under:
Mollie Connect Configuration
For this, you need to navigate to configuration→ Mollie connect configuration
Payment Status Webhook
To ensure that seller payment status updates are properly communicated to the marketplace end, you will need to configure the following webhook on the Mollie end.
Navigate to:
Mollie Dashboard → Developers → Webhooks → Create Webhook
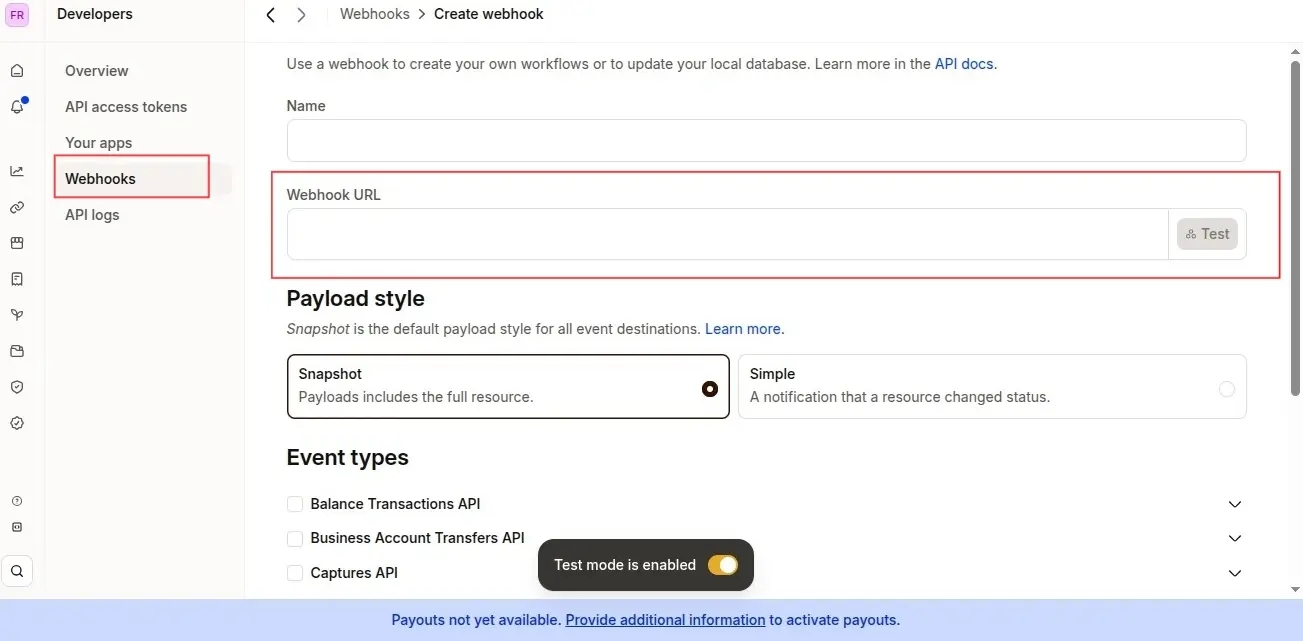
For the Webhook URL, use
https://sp-seller.webkul.com/mollie_webhook.php
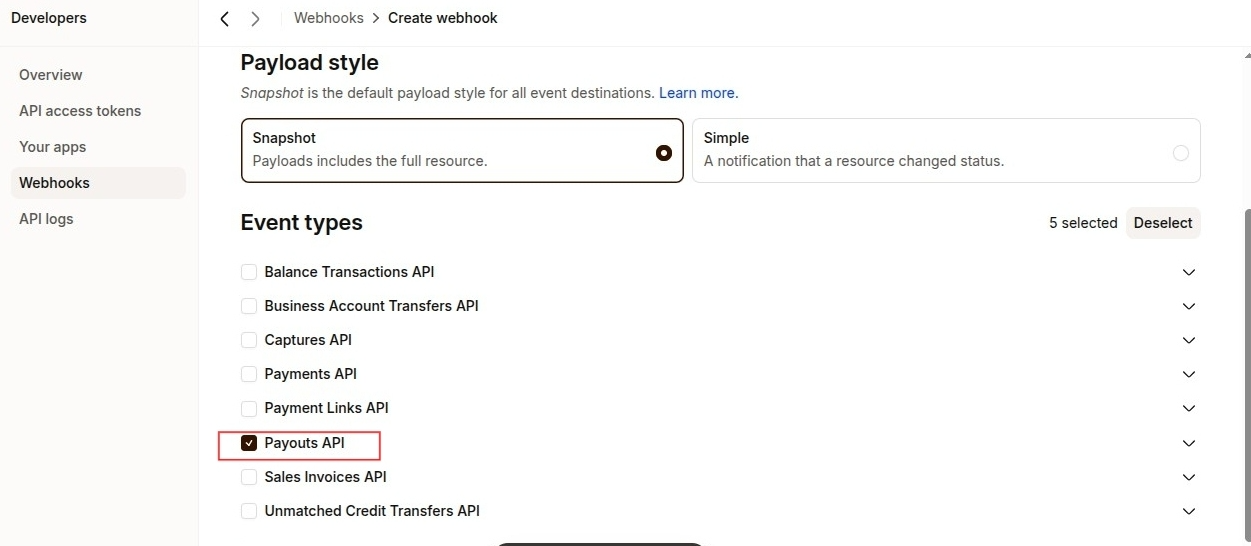
Under Event Types, select Payouts API.
Retrigger Option
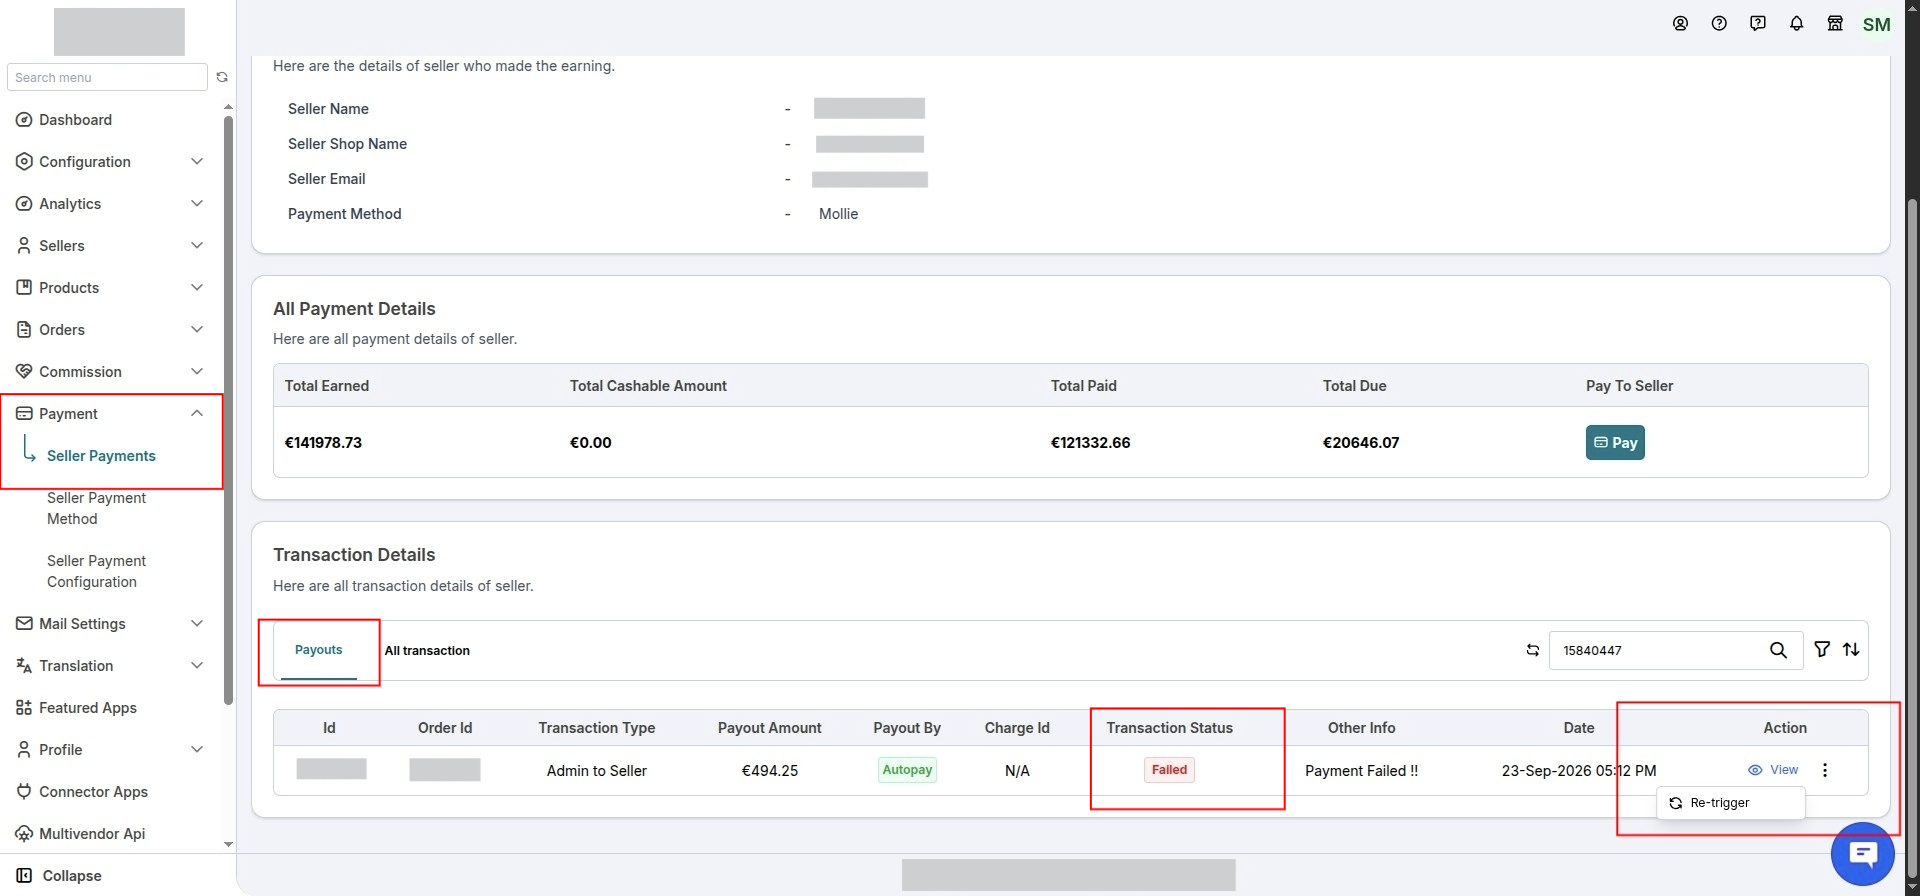
For failed transactions, we provide a retrigger functionality that allows the administrator to retry seller payments.
To retrigger a failed transaction, please navigate to Payments → Seller Payments → Payouts in the marketplace admin panel.
Locate the failed payout and use the available retrigger option to initiate the payment process again.
Support
Furthermore, if you require any assistance or consultancy, please raise a support ticket at http://webkul.uvdesk.com/ or email us at [email protected].
Thank you for reading this blog!

Be the first to comment.