Introduction
ERPNext Multi Website module lets you run several online stores from one ERPNext site. Each store gets its own domain, branding, products, and prices.
Do you sell under more than one brand? Or ship to more than one region? Then you know the trouble. Separate price lists, Separate logins, and scattered order data. All of it slows your team down.
This ERPNext Multi Website guide walks you through the setup process. We will cover installation, features, and building your first storefront step by step.
Features
- Manage multiple ERPNext Webshop storefronts from one site.
- Set a separate domain, company, and language per storefront.
- Apply website-specific branding, logo, banner, and theme.
- Control product visibility and pricing per storefront.
- Assign a dedicated price list and currency to each site.
- Set separate payment gateways and shipping rules per store.
- Tag every order and customer to its source website automatically.
- Track storefront performance with website-wise sales reports.
Installation
1. Once you purchase the app from the Webkul Store, you will receive a link to the module repository.
2. Extract the ZIP file. You will see a folder named ‘erpnext_multi_website’.
3. Set up the module in your git repository, then fetch it using:
bench get-app --branch version-16
https://github.com/your-org/erpnext_multi_website
(Replace “version-16” with your branch name, and replace the HTTPS URL with your own clone URL.)
4. Install the app on your site using the command below.
bench --site <your-site-name> install-app erpnext_multi_website
5. Run bench migrate to complete the setup.
Workflow of ERPNext Multi Website
Soon after you install the module, you can add a new storefront in a few simple steps. Here is the complete workflow for setting up ERPNext Multi Website on your site.
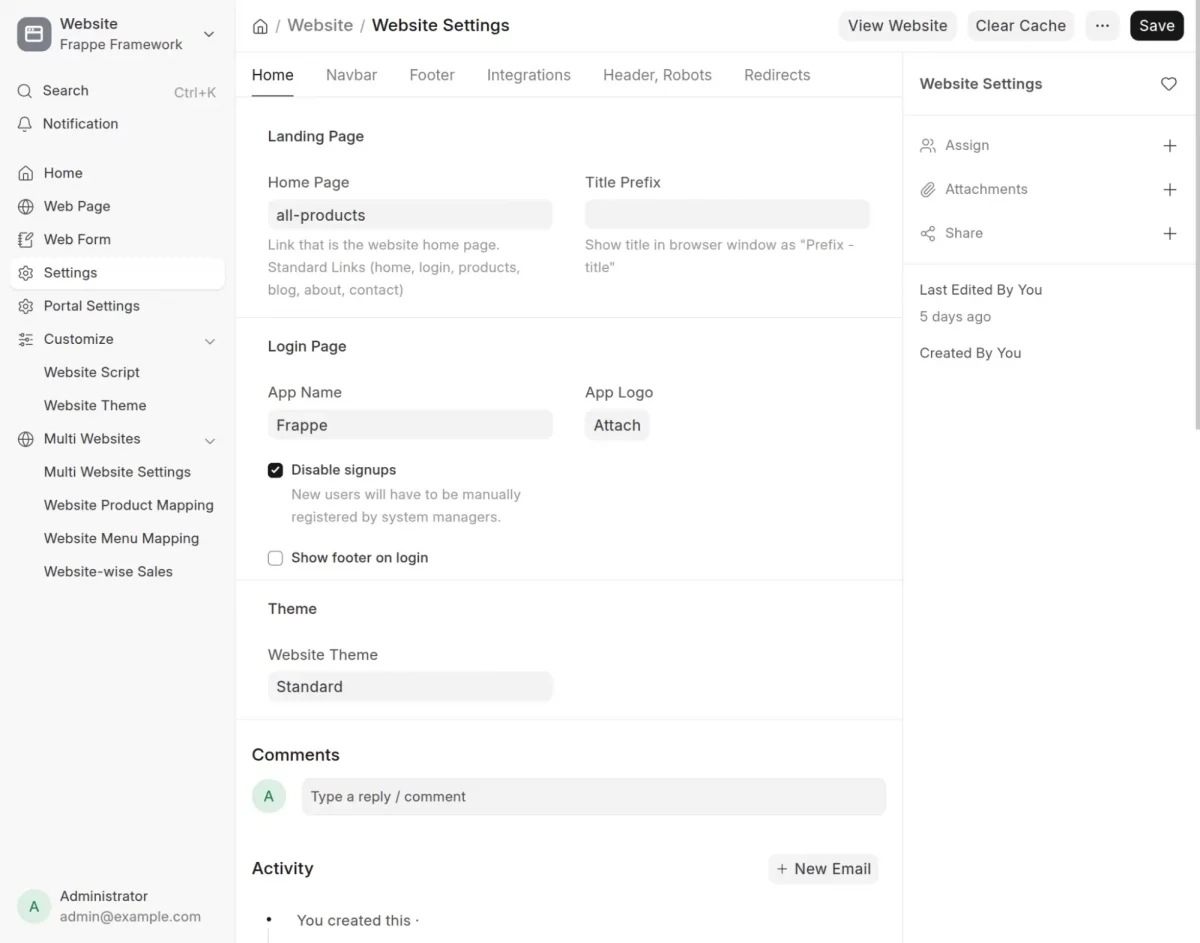
1. Open your ERPNext dashboard. Search for Website Settings under the Website section and enable Multi Store.
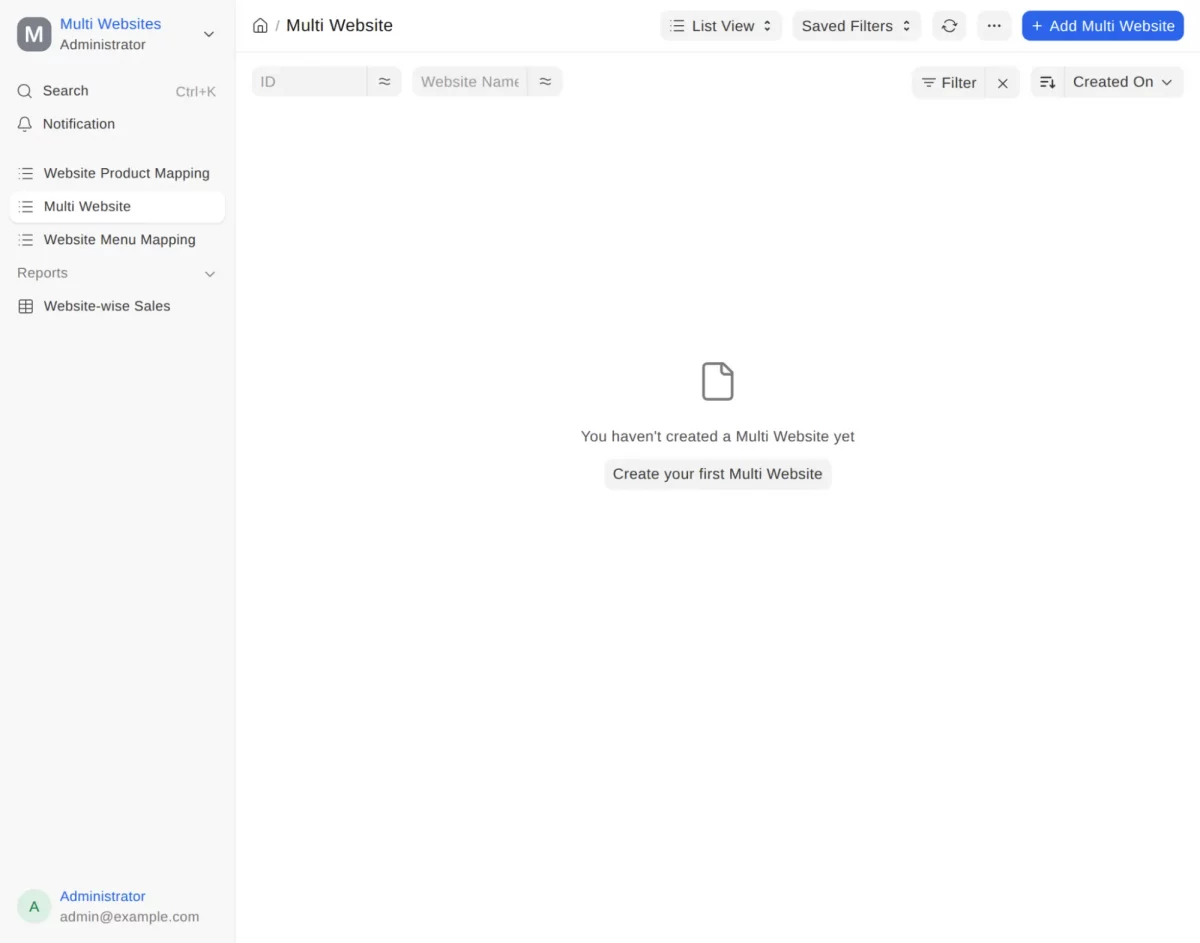
2. After that, click on the Multi Website option and add a website to create your first extra storefront.
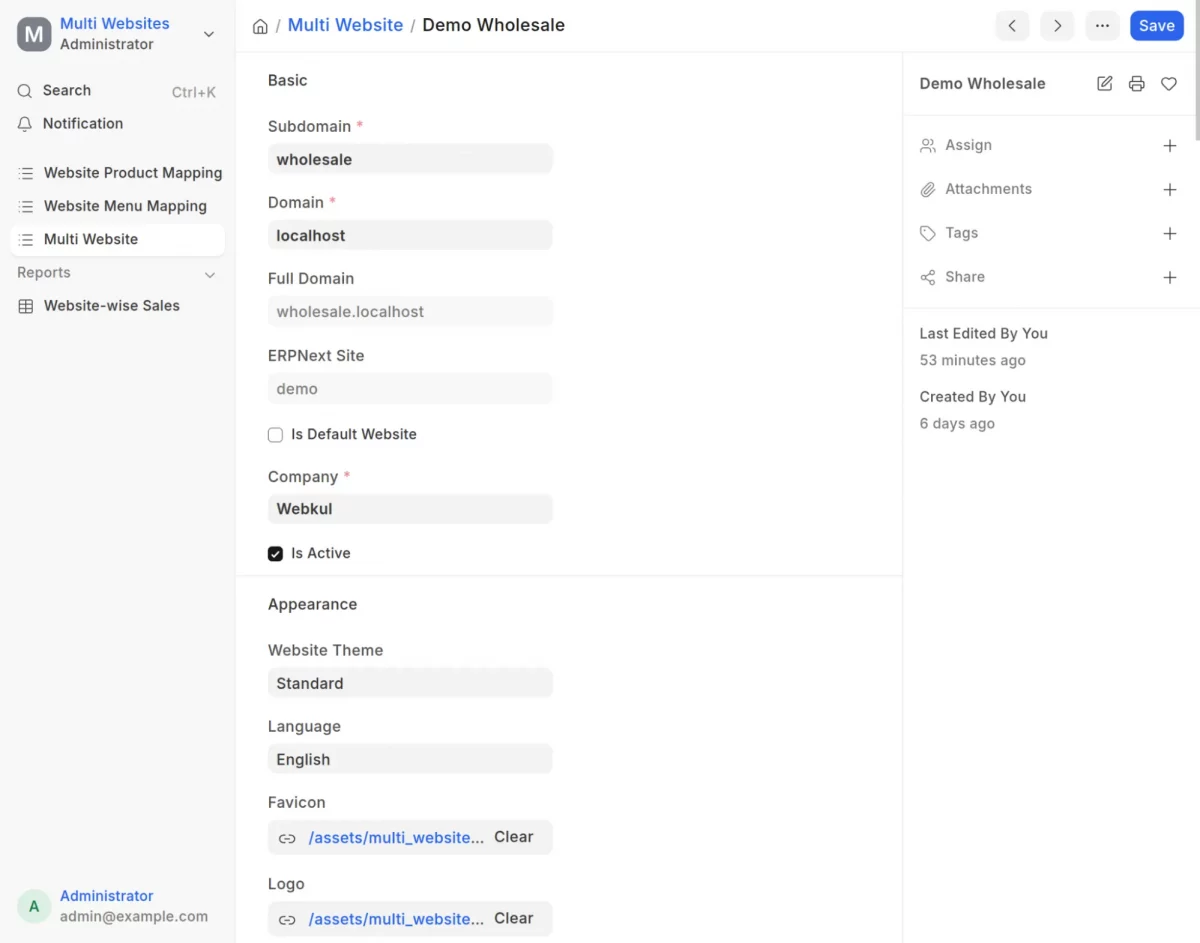
3. Enter a unique domain or subdomain for this site. Add the default company, language, logo, favicon, and banner image for this storefront.
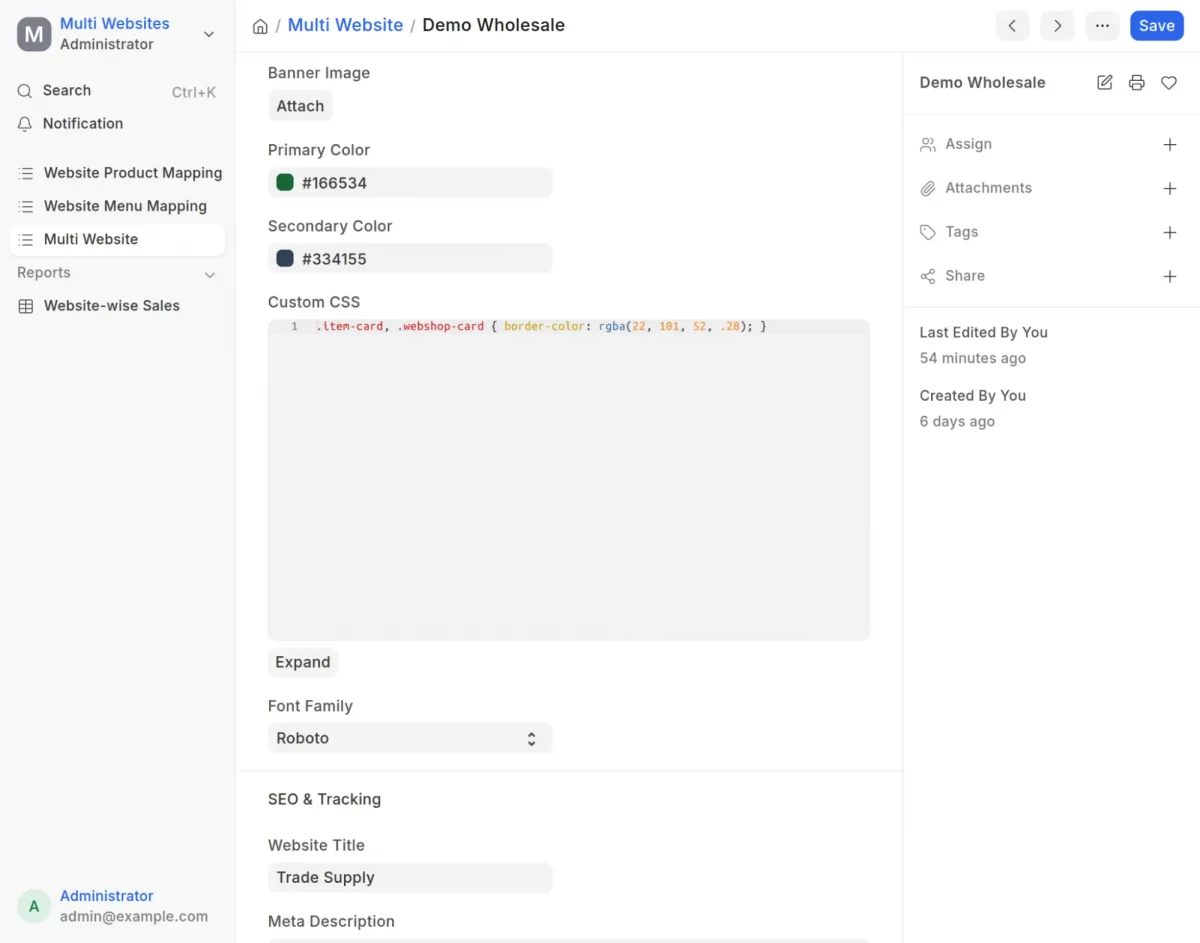
4. Pick your brand colors, font, and theme. Add custom CSS if you want a unique look for this multi-domain storefront.
5. Next, scroll down and assign a dedicated price list and currency for the new storefront, and click Save Changes.
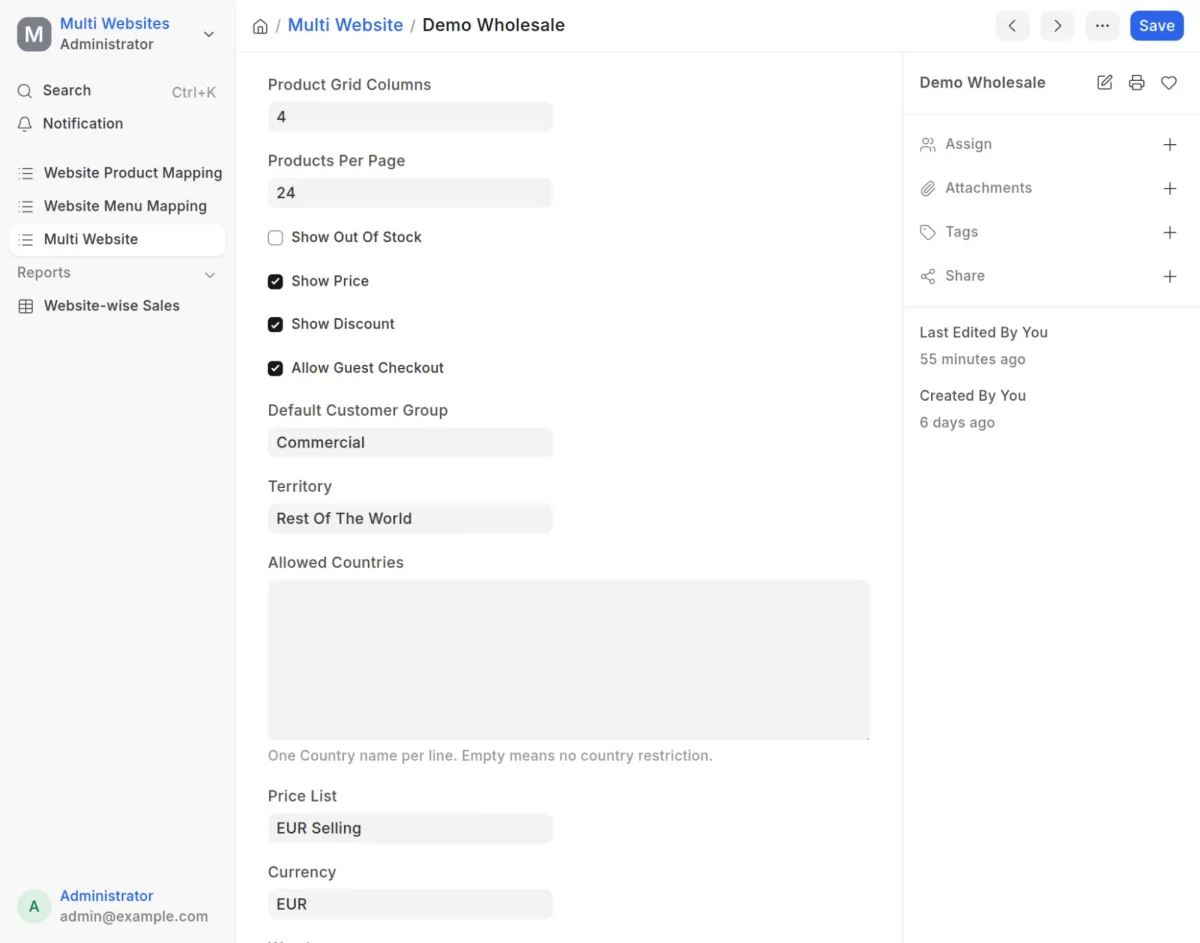
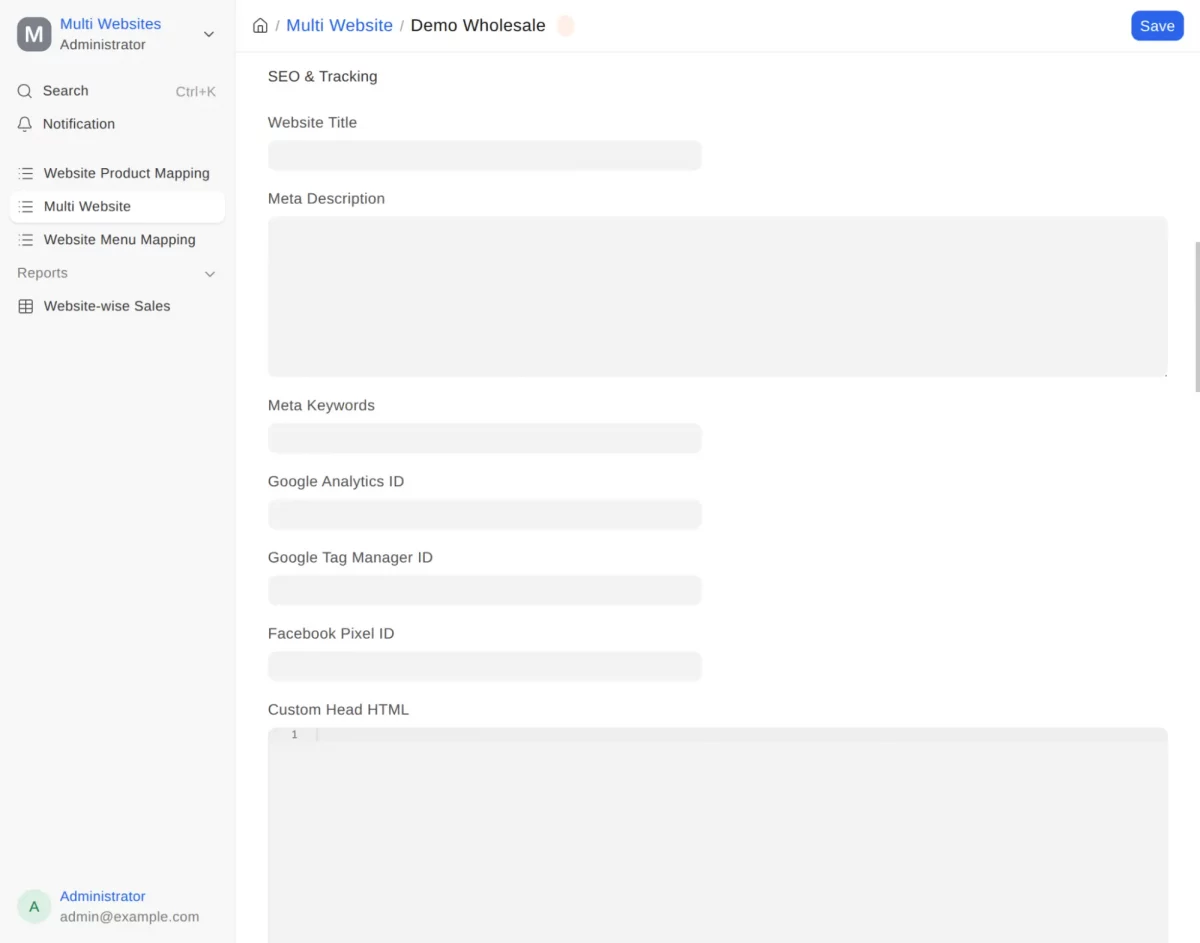
6. After that, in the SEO tracking section here you can complete an important SEO related workflow to optimize your site for on-page seo and customer tracking.
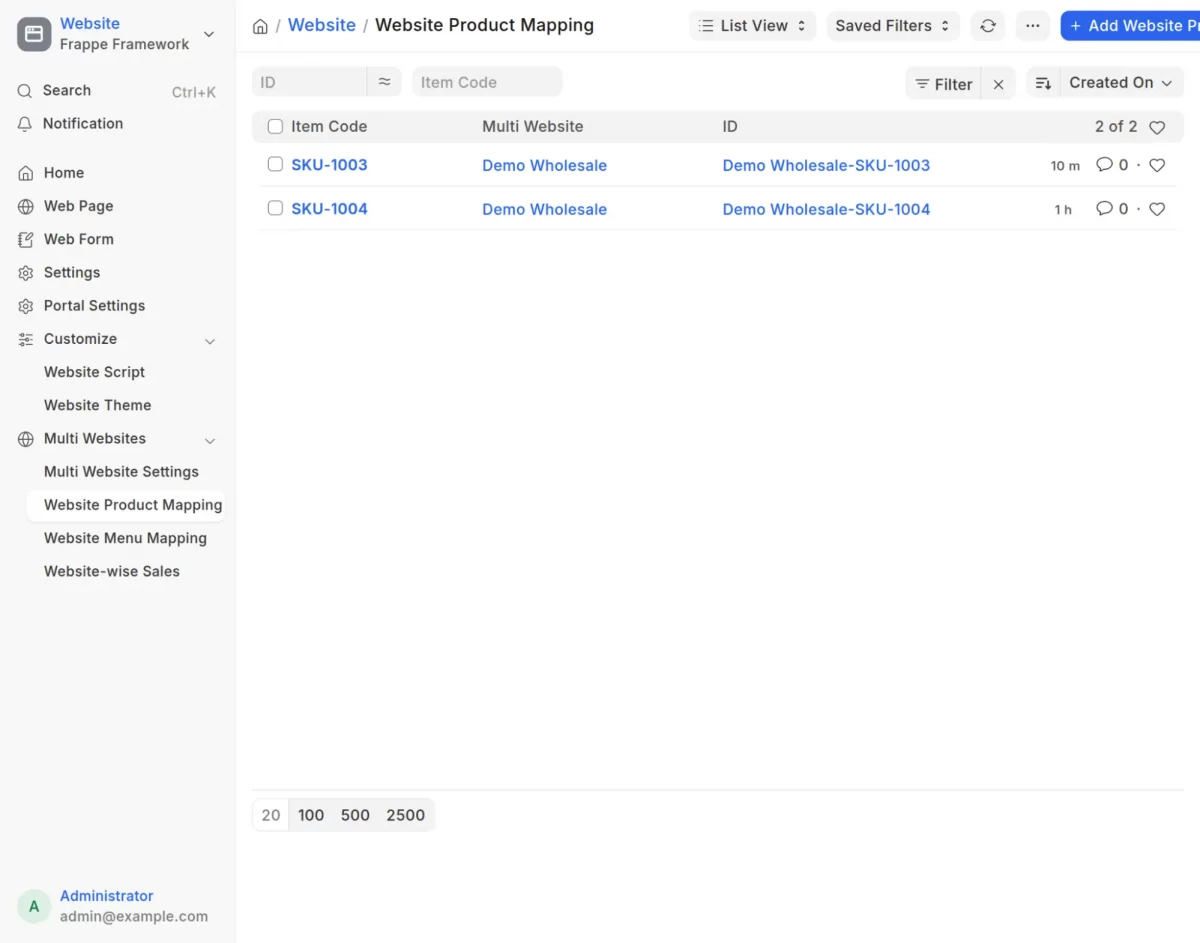
7. Go to the Website Product Mapping section. Create one mapping per website and product.
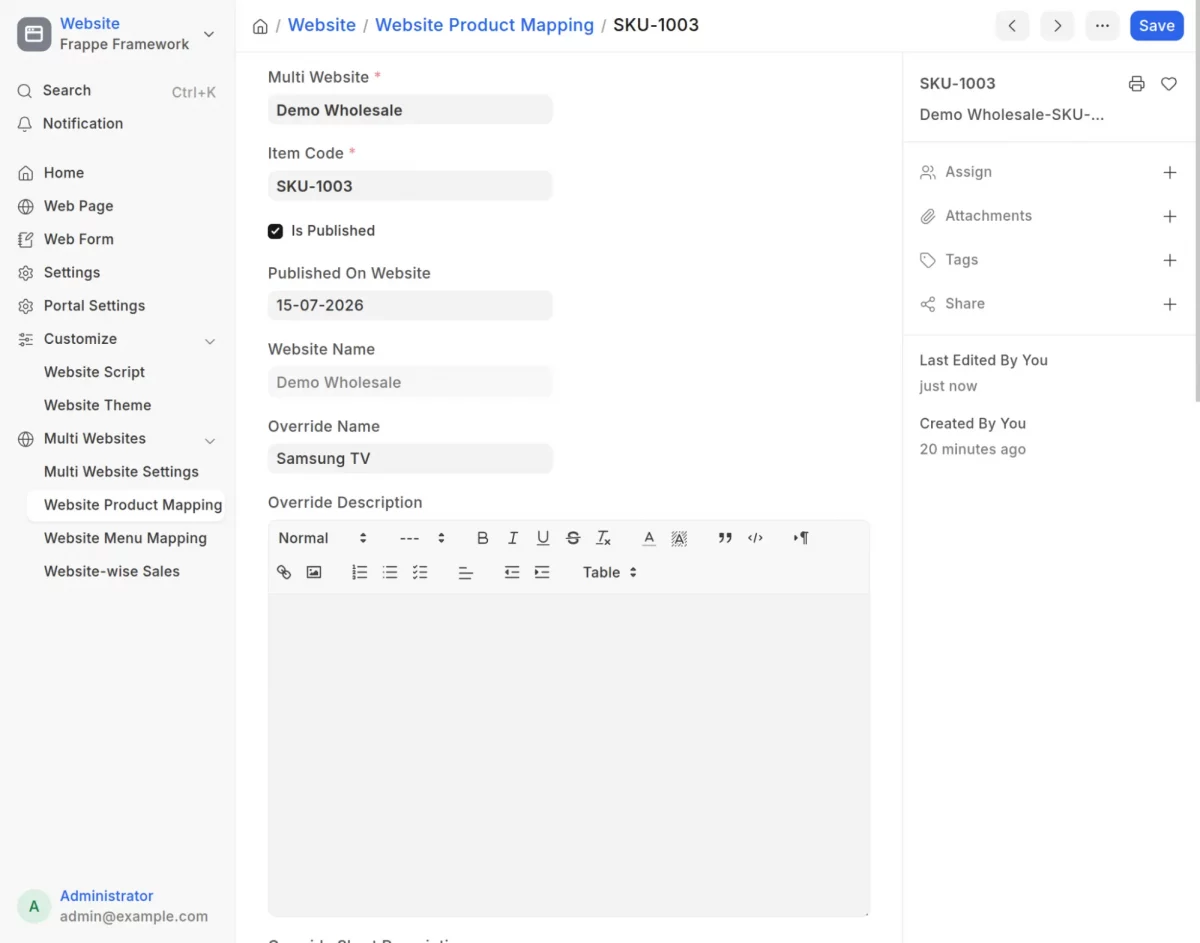
8. In this window, fill in the important fields. If a website has product mappings, only published mapped products are visible on that website.
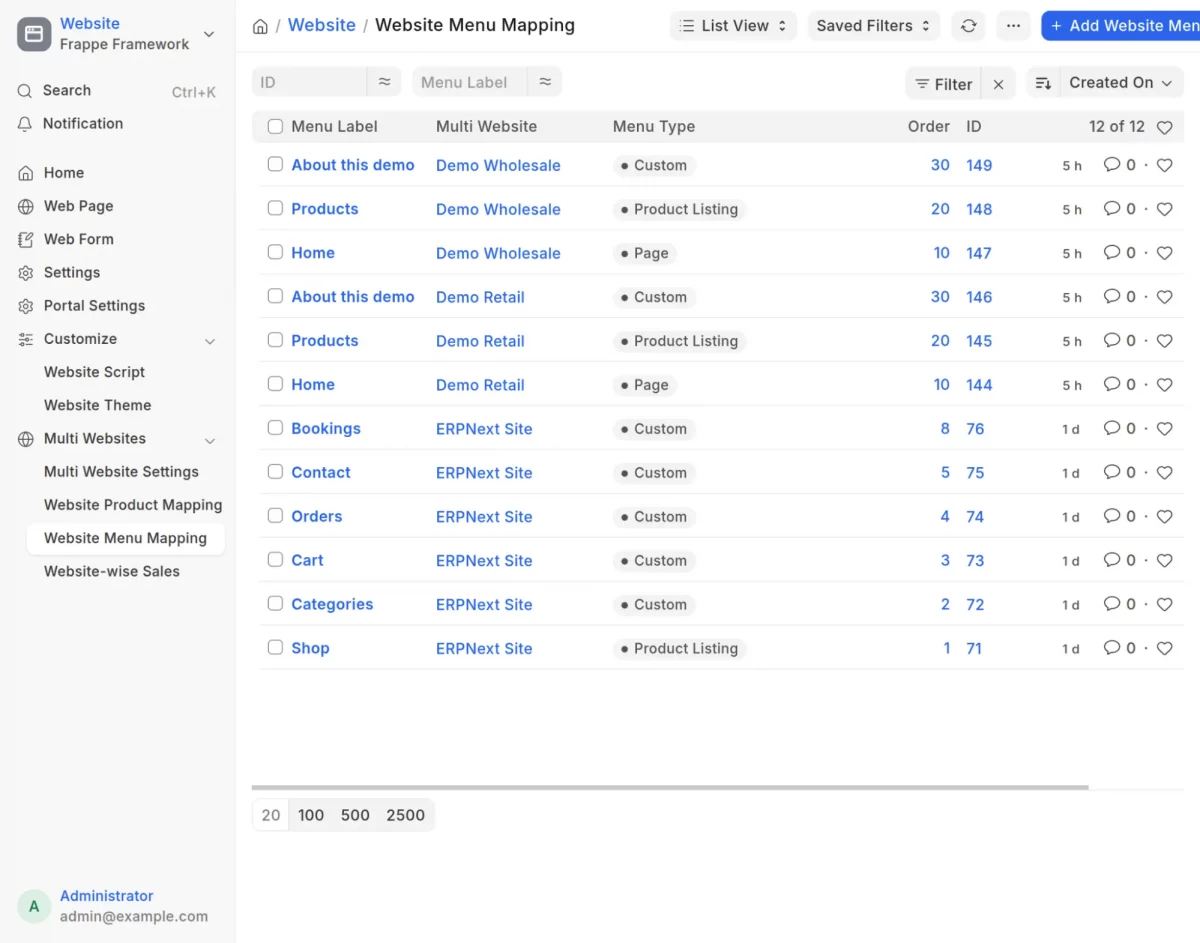
9. Move to Website Menu Mapping to create a parent and child style menu from here.
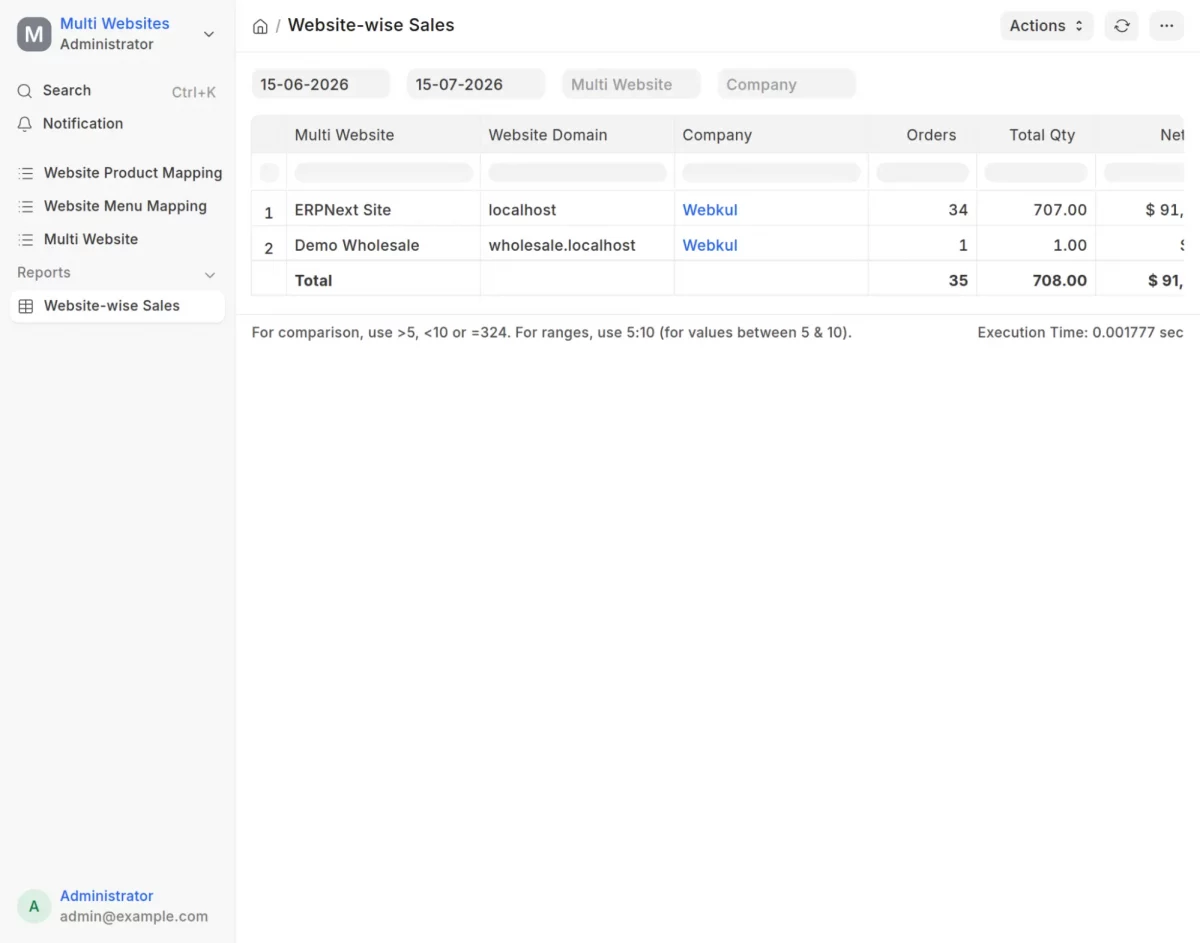
10. To further check website-wise sales, go to Reports and then click on website-wise sales. Here you can see separate websites’ sales report data.
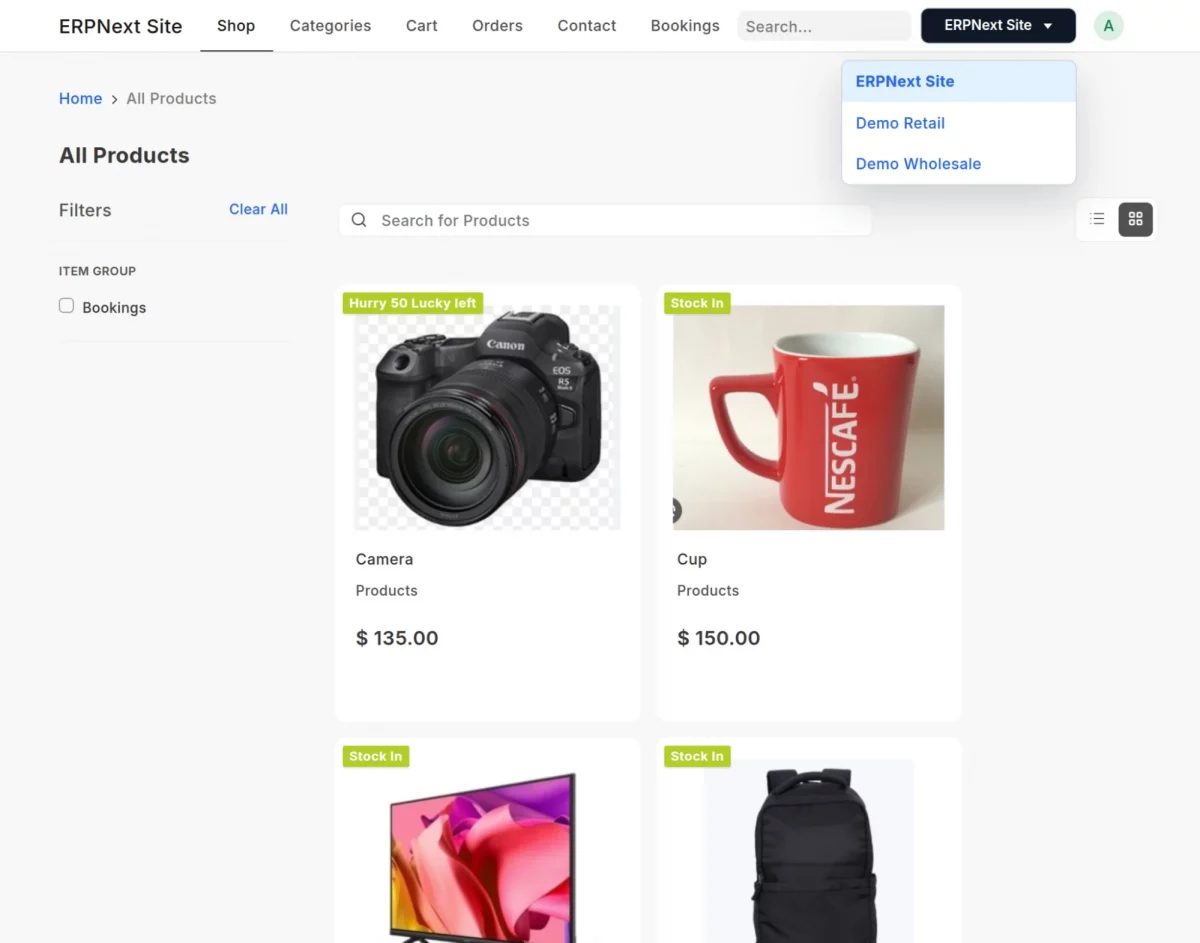
11. Now, while visiting your created store frontend view, the admin can see all their created stores from the top right corner and switch the store view directly from here.
It will only be visible to the store admin, not your customers.
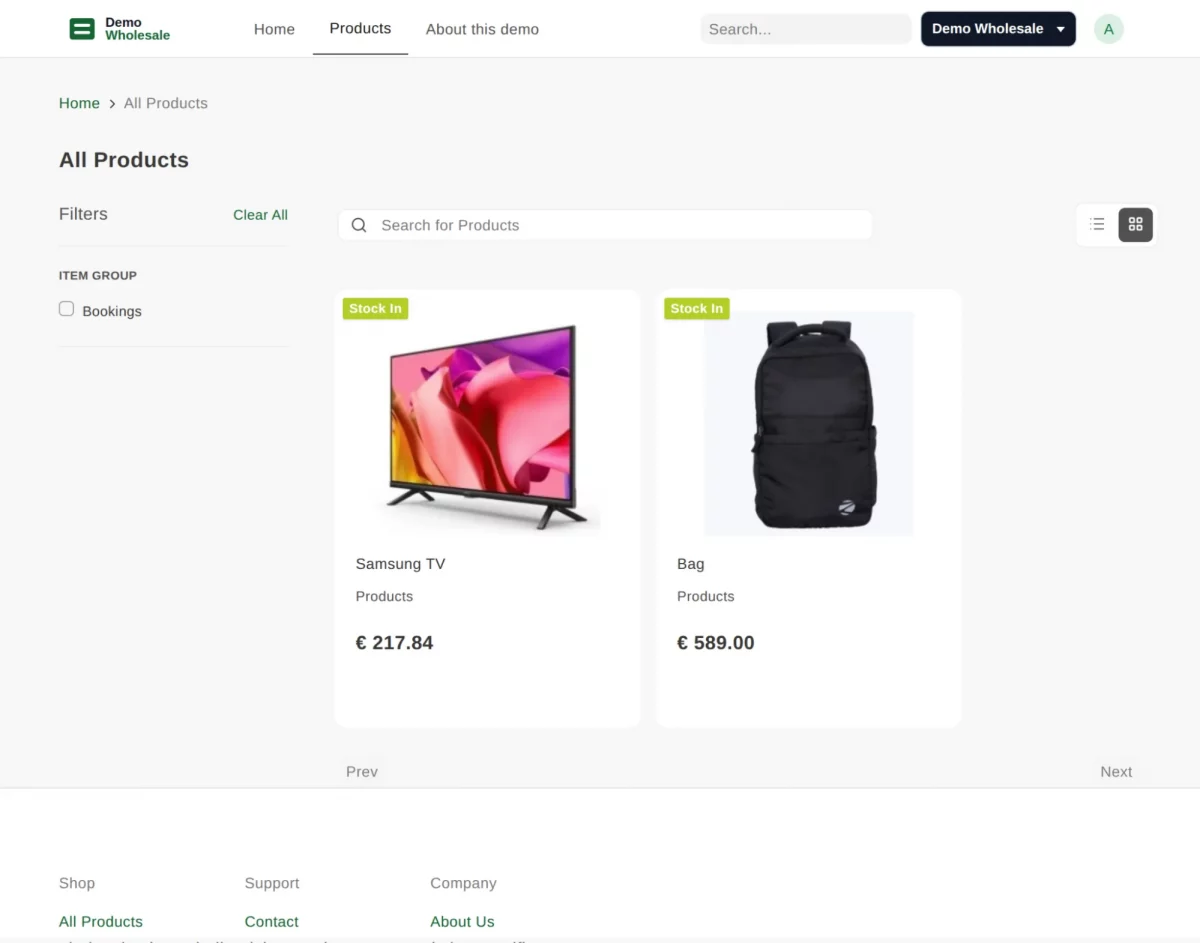
12. Click the preferred site, and you will be able to view that site.
Need Help?
Hope this ERPNext Multi Website guide helped you set up your multi-store e-commerce site! Please feel free to share your feedback in the comments below.
If you still have any technical queries or need a custom feature, please raise a ticket or contact us at [email protected].

Be the first to comment.