Krayin CRM Multi-DB SaaS gives every business on your SaaS platform its own complete CRM, in its own separate database.
Each tenant works at its own address with its own leads, contacts, quotes and users. Meanwhile the super admin still sees the whole platform in one place.
The CRM system facilitates the management of customer interaction across various sources and channels throughout the customer life cycle, involving both the customer and the sales department.
Features
- Database per tenant: every tenant runs a complete Krayin CRM in a database of its own, so no tenant can ever see another tenant’s data.
- Automatic setup: creating a tenant builds its database, installs the CRM and makes the owner its first administrator.
- Setup progress page: the tenant’s address shows Almost there… and refreshes itself until the CRM is ready.
- Verified sign-up: a 6-digit email code proves the address before any database is created.
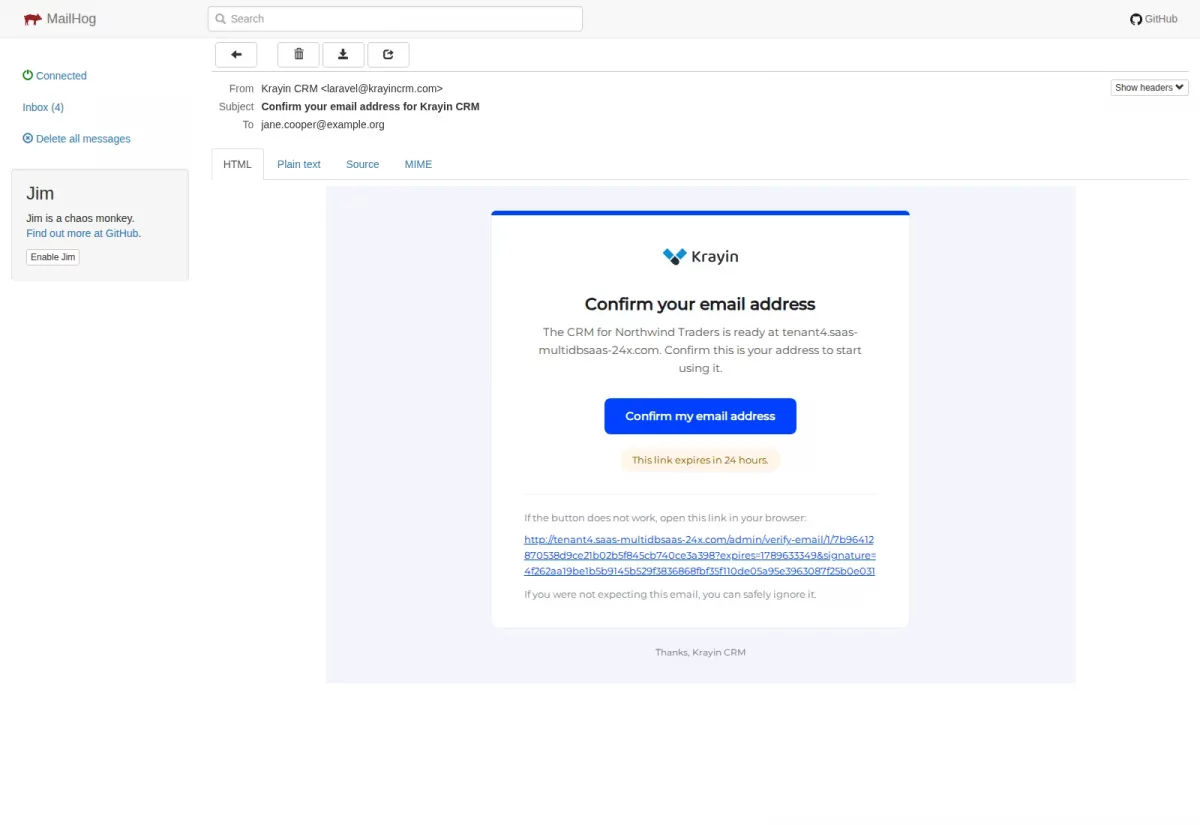
- Owner email confirmation: owners of tenants created by the super admin confirm their address through a signed link.
- Credential sync: name, email and password changed by the super admin reach the tenant’s own database.
- Locked usernames: the username that names a tenant’s address and database cannot be changed by mistake.
- Clean deletion: deleting a tenant also deletes its database.
- Cross-tenant reports: the super admin Dashboard, Leads and Quotes read every tenant database.
- Tenant SMTP: each tenant can send CRM email through their own mail server, with a test email.
- Safe mail hosts: private network addresses and non-mail ports are refused.
- Ten locales: ar, en, es, fa, ja, ko, pt_BR, tr, vi and zh_CN, including right-to-left layouts.
Requirements
- Krayin: v2.2.6
- Krayin SaaS extension installed
- PHP: 8.3 or higher
- Laravel: 12.x
- A MySQL or MariaDB user allowed to create and drop databases
- Wildcard DNS such as
*.your-platform.compointing at the server - A running queue worker and a working outgoing mail server
Krayin – Laravel CRM
Krayin is built on the most popular PHP framework available in the market today, named Laravel. Since Krayin inherits features of Laravel, it makes Krayin a super flexible and scalable CRM software.
With the code-driven approach and also the fully customizable structure, you can easily add/change anything and can even deploy your code in the Krayin CRM.
Installation
Unzip the respective extension zip and then merge the “packages” folder into the project root directory.
- Add this in
bootstrap/providers.phpunder the providers array:
Webkul\SaasTenancy\Providers\SaasTenancyServiceProvider::class,
- Add to
composer.jsonunder ‘psr-4’:
"Webkul\\SaasTenancy\\": "packages/Webkul/SaasTenancy/src"
- Add this in
config/concord.phpunder the modules array:
Webkul\SaasTenancy\Providers\ModuleServiceProvider::class,
Run these commands below to complete the setup
composer require stancl/tenancy:^3.10
composer dump-autoload
php artisan migrate
php artisan vendor:publish --
provider="Webkul\SaasTenancy\Providers\SaasTenancyServiceProvider" --tag=config
php artisan optimize:clear
Finally, keep a queue worker running, because tenant databases are built in the background.
php artisan queue:work
No other file needs to change. The module attaches its middleware, routes, menu entry and permission by itself.
It also overrides the Krayin SaaS pages it changes from its own package. As a result the SaaS extension stays untouched and survives upgrades.
Module Configuration
The module works with its defaults. To change a behaviour, add the matching setting to your .env file.
SAAS_TENANT_DB_PREFIX: the start of every tenant database name, for example saas_acme. Default saas_.
SAAS_REGISTRATION_OTP: asks for an email code during Merchant Registration. Default true.
SAAS_REGISTRATION_OTP_TTL: seconds a sign-up code stays valid. Default 600.
SAAS_REGISTRATION_OTP_ATTEMPTS: wrong codes allowed before a new one is needed. Default 5.
SAAS_REGISTRATION_OTP_COOLDOWN: seconds to wait before another code can be sent. Default 60.
SAAS_OWNER_EMAIL_VERIFICATION: asks owners of super-admin-created tenants to confirm their email. Default true.
SAAS_OWNER_EMAIL_VERIFICATION_TTL: minutes a confirmation link stays valid. Default 1440.
SAAS_TENANT_MAIL: lets tenants use their own SMTP server. Default true.
SAAS_TENANT_MAIL_FALLBACK: sends through the platform’s mail server when a tenant’s server refuses a message. Default true.
SAAS_TENANT_MAIL_PORTS: ports tenants may choose. Default 25,465,587,2525.
SAAS_DROP_TENANT_DATABASE: deletes a tenant’s database when the tenant is deleted. Default true.
SAAS_TENANT_PROVISIONING_REFRESH: seconds between refreshes of the Almost there page. Default 5.
SAAS_PASSWORD_MIN: minimum password length. A number and a special character are also required. Default 6.
Notably, every setting has a safe default. Consequently a fresh installation needs none of them.
Step-by-Step: Changing a setting
- Open the
.envfile in the Krayin root folder. - Add the setting, for example
SAAS_REGISTRATION_OTP_TTL=900. - Save the file.
- Run
php artisan optimize:clearso the new value is used.
Permissions
The module registers one permission in every tenant’s CRM: Mail, under Settings → Other Settings. Grant it per role in Settings → Roles.
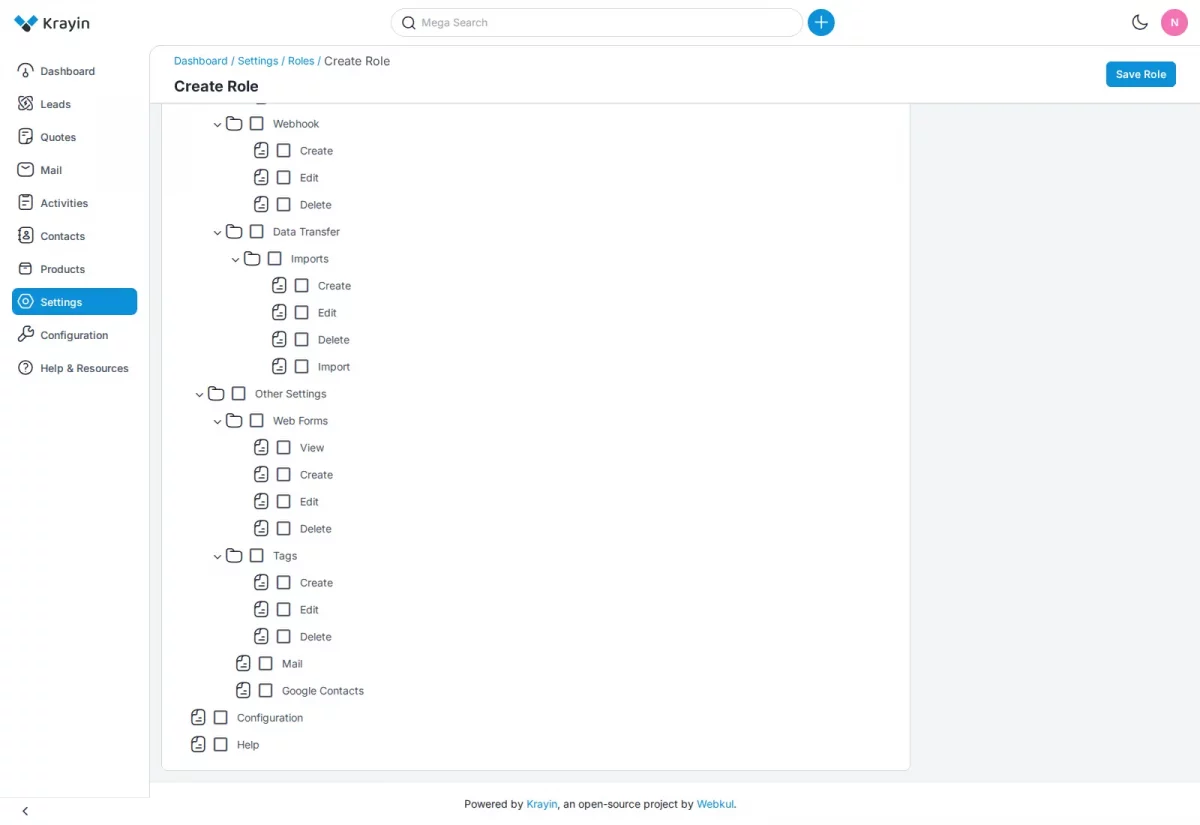
Mail: allows a role to open, save and test the tenant’s outgoing mail settings.
Users whose role lacks it do not see the Mail tile at all. Therefore only trusted administrators can change where the CRM’s email is sent.
Step-by-Step: Granting mail settings access
- In the tenant’s CRM, open Settings → Roles and edit a role.
- Set Permission Type to Custom.
- Expand Settings → Other Settings in the permission tree.
- Tick Mail.
- Click Save Role.
Creating a Tenant
The super admin creates a tenant from Tenants → Create Tenant. Saving the form does more than add a row, however.
The module creates a new database for the tenant, installs a complete Krayin CRM in it, and makes the email and password you enter its first administrator.
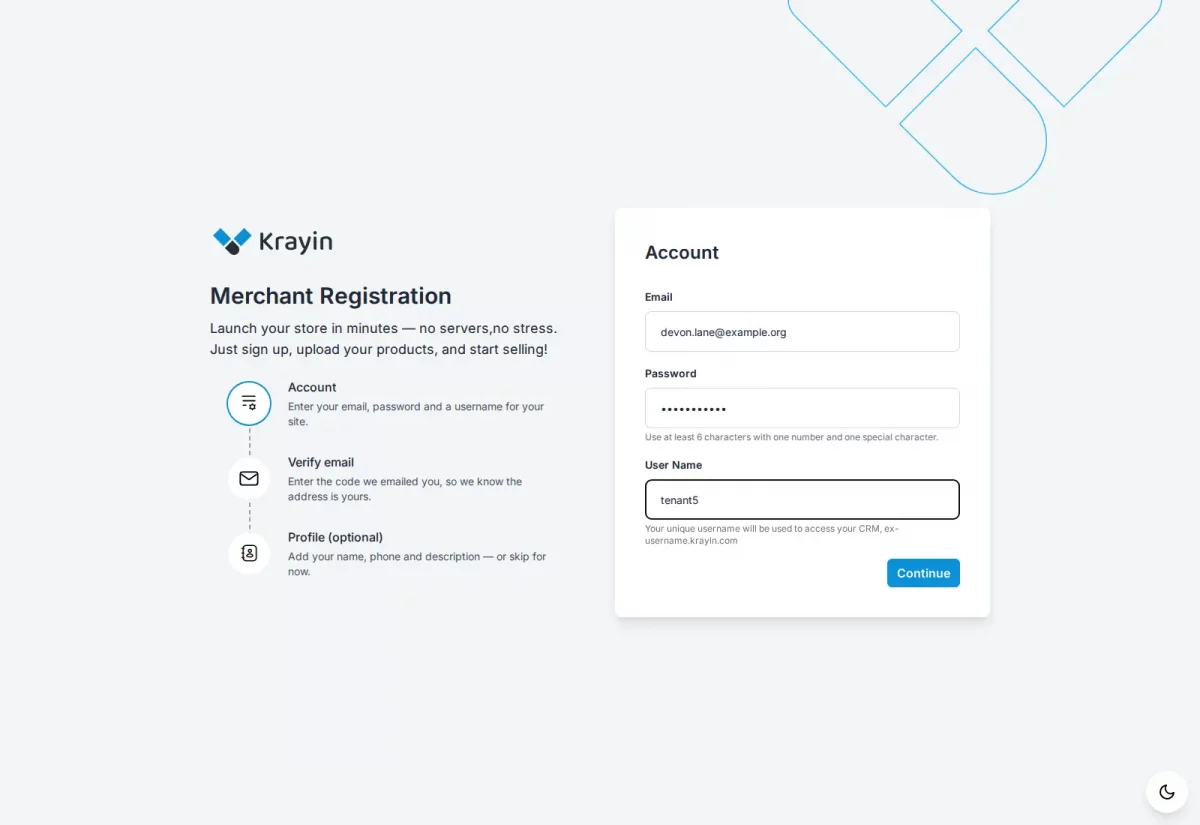
Email: the address the tenant’s owner signs in with.
Password: the owner’s first password, with at least 6 characters, one number and one special character.
User Name: names both the address and the database. For example acme becomes acme.your-platform.com. Consequently it cannot be changed later.
CName: an optional custom domain such as crm.acme.com. It cannot be the platform’s own domain or one of its subdomains.
Name: the business name, shown on the tenant list and in the emails the owner receives.
Status: off by default. Switch it on, otherwise the tenant is saved blocked.
The tenant appears in the list straight away. Additionally the module adds an Outgoing mail column, which reads Platform until the tenant connects their own mail server.
Step-by-Step: Creating a tenant
- Sign in to the super admin panel at
/super/login. - Open Tenants and click Create Tenant.
- Fill in Email, Password, User Name and Name.
- Switch Status on.
- Click Save as Tenant.
Building the Tenant Database
A tenant’s database is built in the background, and it usually takes less than a minute.
Anyone who opens the tenant’s address meanwhile sees Almost there…. The page refreshes itself and opens the sign-in page once the CRM is ready.
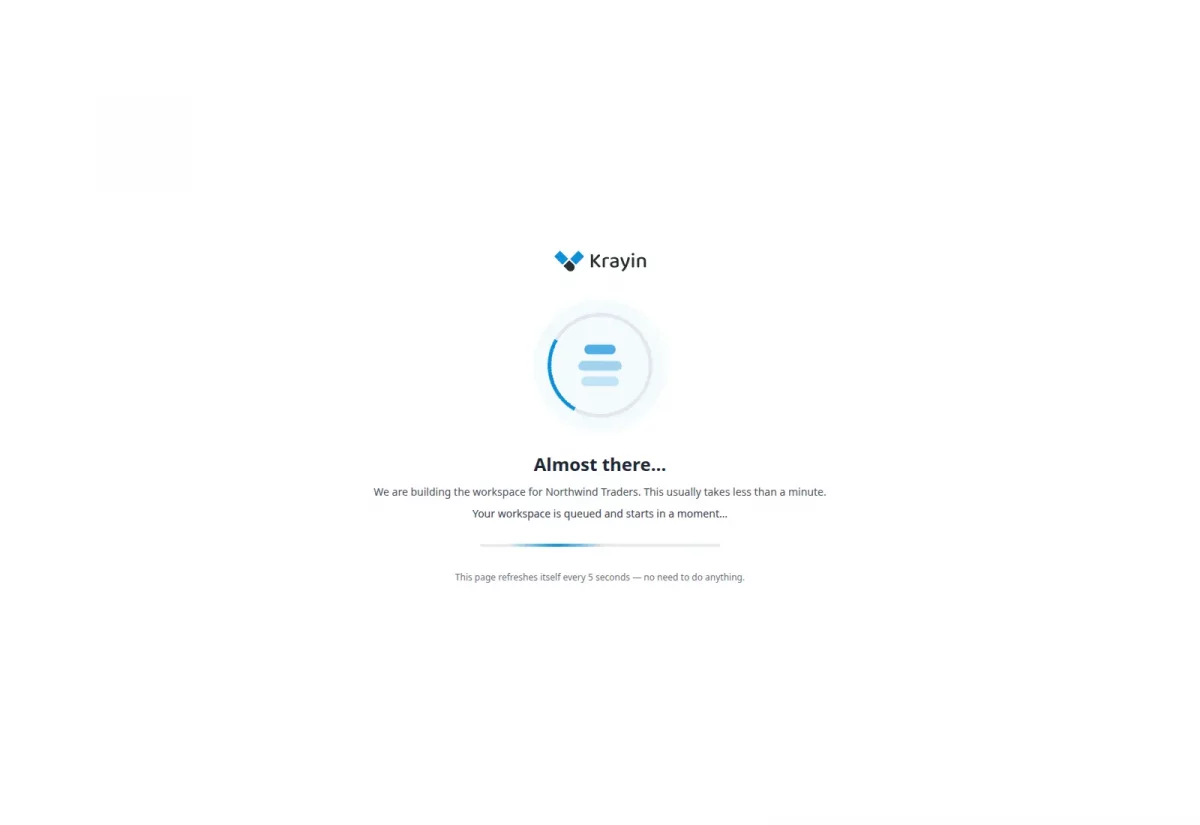
Note: the page only moves on while a queue worker runs. If it changes to Setup failed, rebuild the tenant with php artisan saas:tenant:provision <username> --fresh --sync.
Step-by-Step: Opening a new tenant
- Open the tenant’s address, for example
acme.your-platform.com/admin/login. - Wait while Almost there… is shown; there is nothing to click.
- Sign in with the owner’s email and password once the sign-in page appears.
Merchant Registration
Businesses can also create their own CRM from Merchant Registration, reached through Register Now on the platform’s home page.
The module adds a Verify email step to that form. Therefore no database is created until a one-time code proves the address belongs to the person signing up.
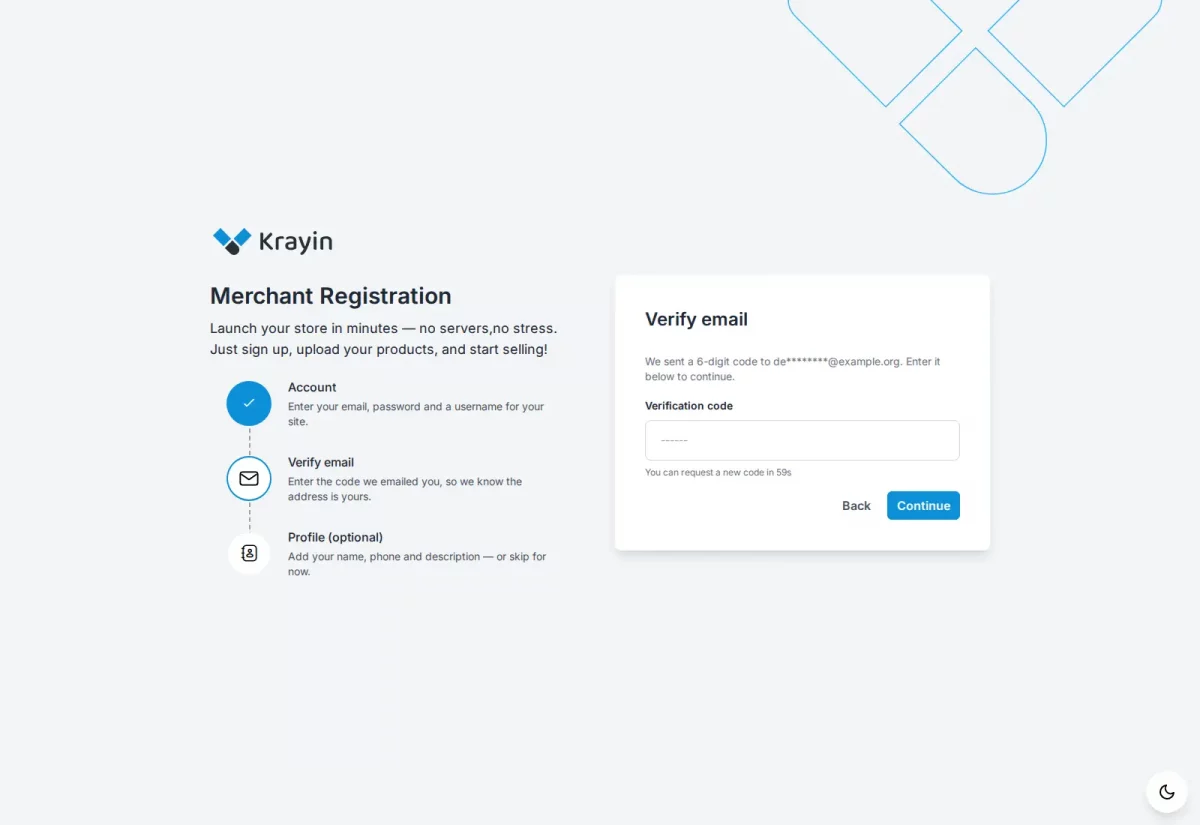
Account: enter an email, a password and a user name. The user name becomes the CRM’s address.
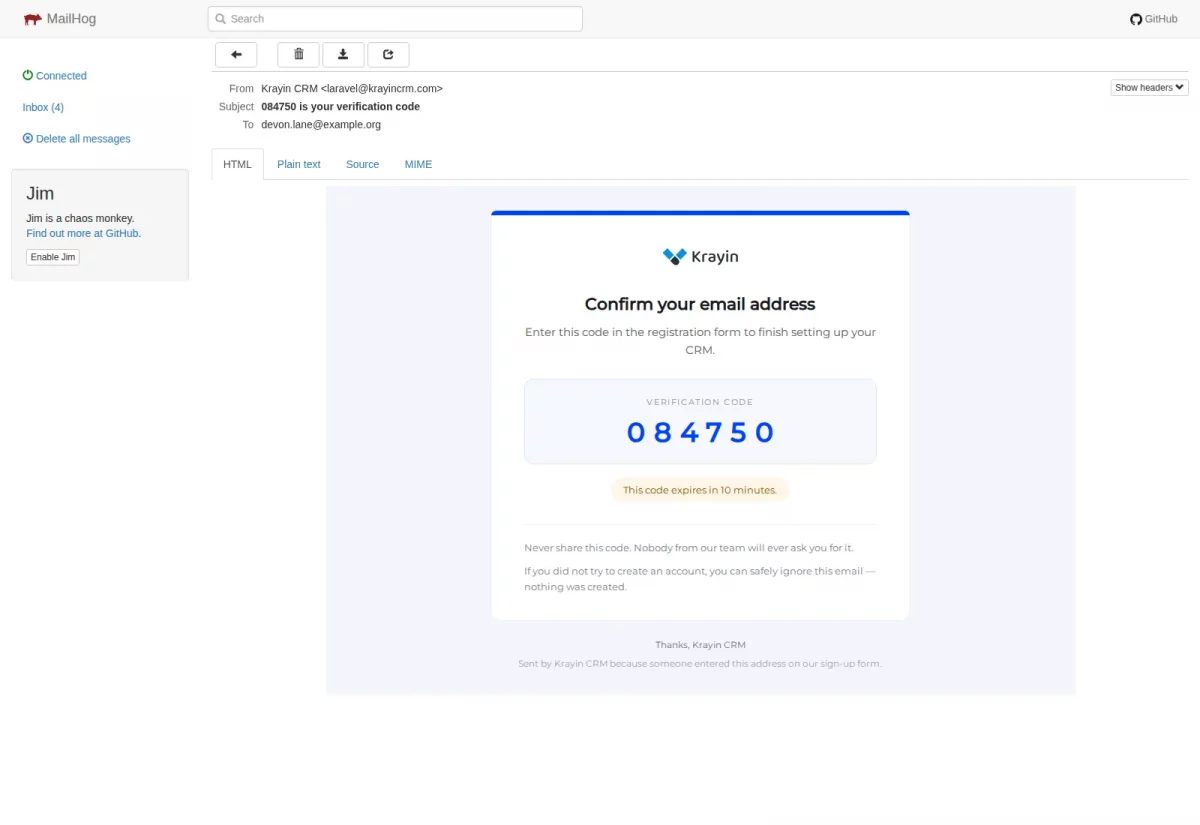
Verify email: a 6-digit code arrives by email and stays valid for 10 minutes. A new one can be requested after a short countdown.
After five wrong attempts the code stops working. In that case the visitor simply sends themselves a new one.
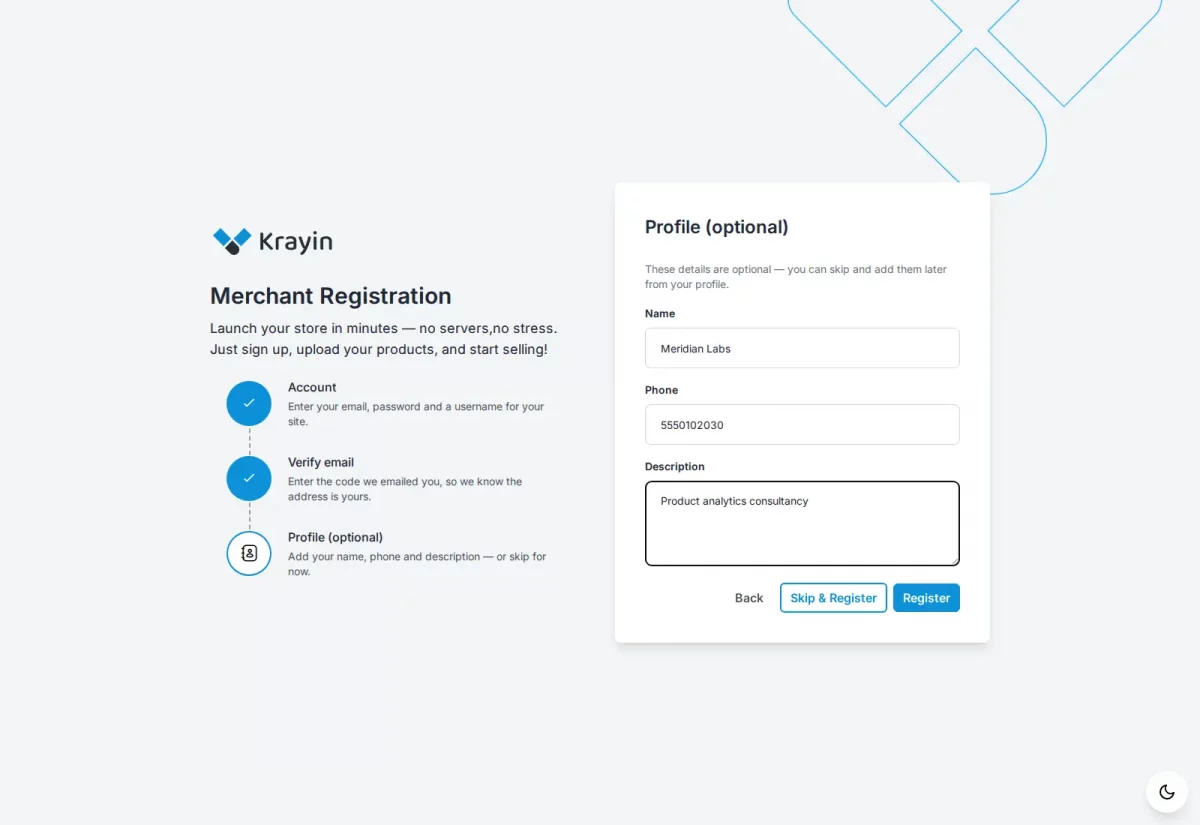
Profile (optional): a name, a phone number in digits only, and a description. Submitting it starts building the tenant’s database straight away.
Step-by-Step: Registering a new CRM
- Open the platform’s home page and click Register Now.
- Fill in Email, Password and User Name, then click Continue.
- Enter the emailed code in Verification code and click Continue.
- Click Register, or Skip & Register to leave the profile for later.
- Wait for Almost there… to finish, then sign in; no further confirmation is needed.
Confirming the Owner’s Email
A tenant created by the super admin has an owner whose address nobody has proven yet.
The module therefore emails that owner a confirmation link as soon as the database is ready. Until it is used, the owner stays on a One more step page.
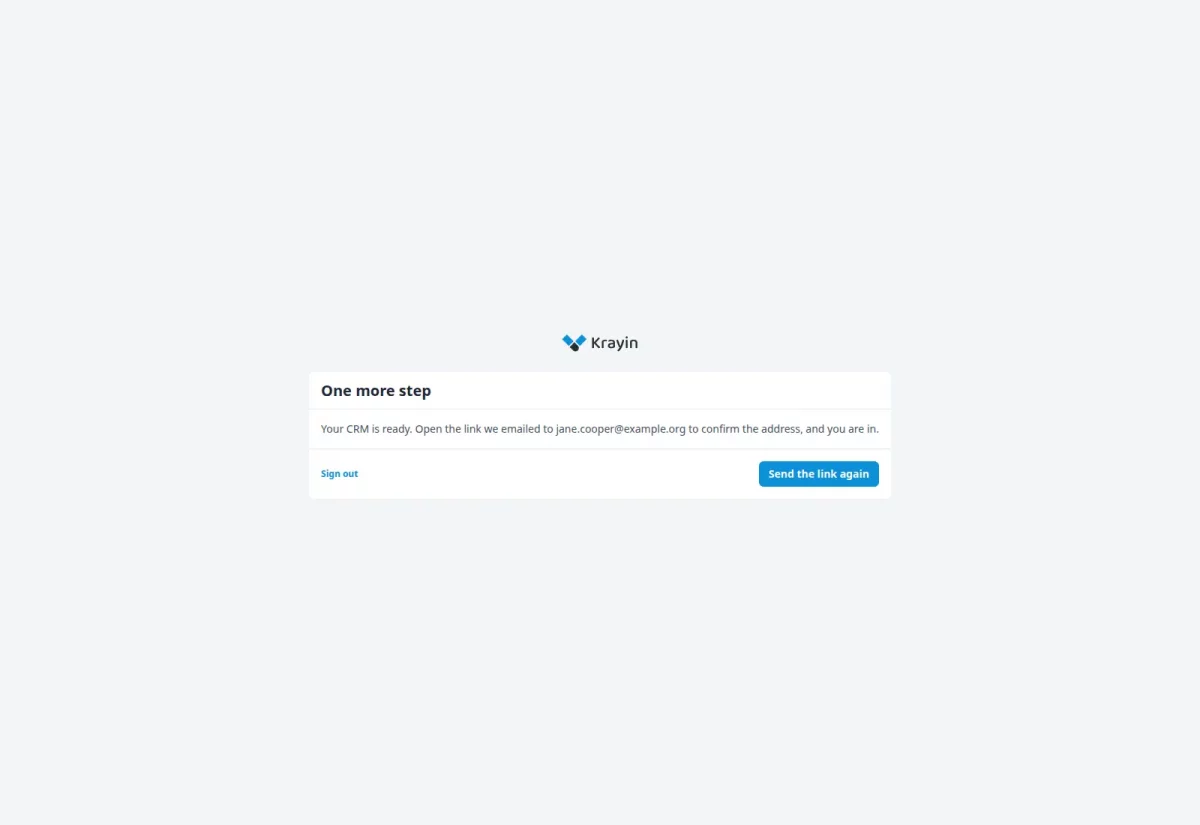
Send the link again sends a fresh email, while Sign out leaves the page.
The link expires after 24 hours. Additionally it works only for the address it was sent to.
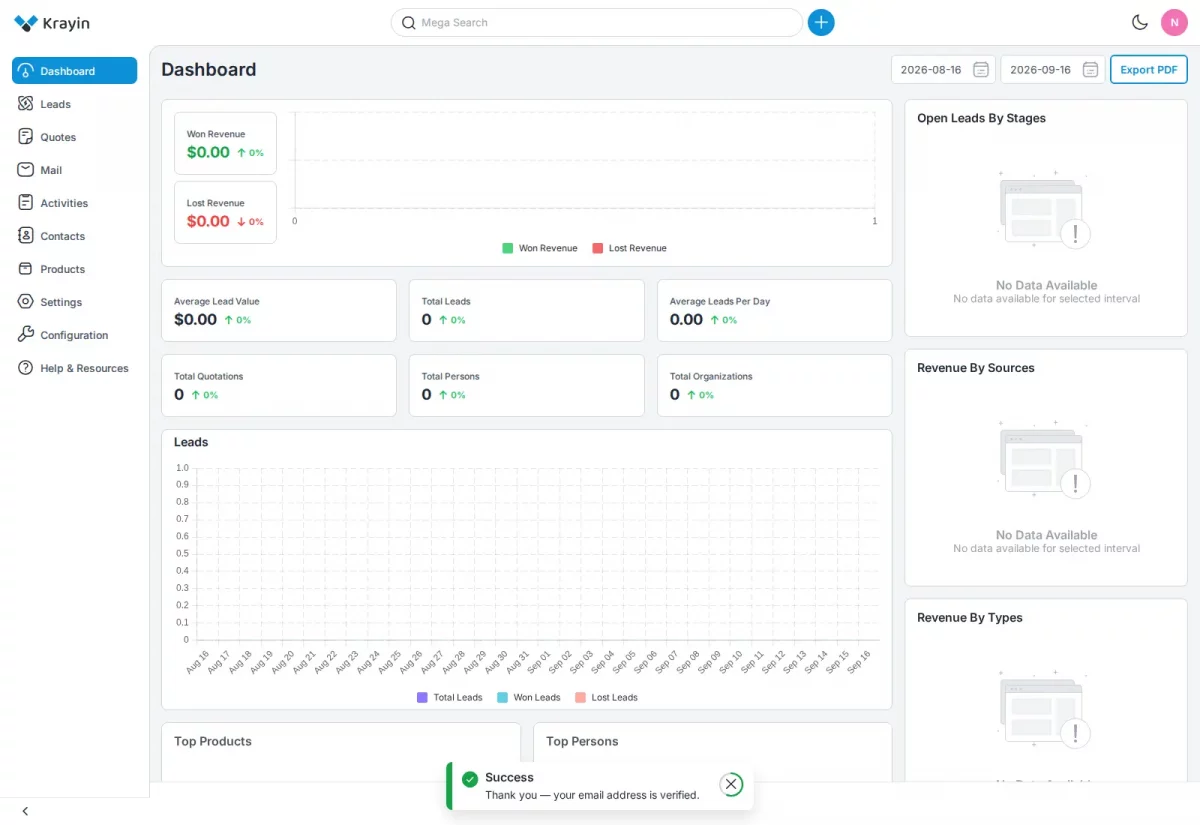
Only the owner is ever asked. Colleagues the owner adds later sign in straight away, and tenants that registered with a code skip this step.
Step-by-Step: Confirming the owner’s email
- Sign in at the tenant’s address with the details from the super admin.
- Check the address shown on One more step, and click Send the link again if no email arrived.
- Open the email and click Confirm my email address.
- The CRM opens with Thank you — your email address is verified.
Managing Tenants
The owner’s account lives in the tenant’s own database, not in the platform’s.
Consequently the module copies changes to Name, Email and Password into that database, and the owner signs in with the new details straight away.
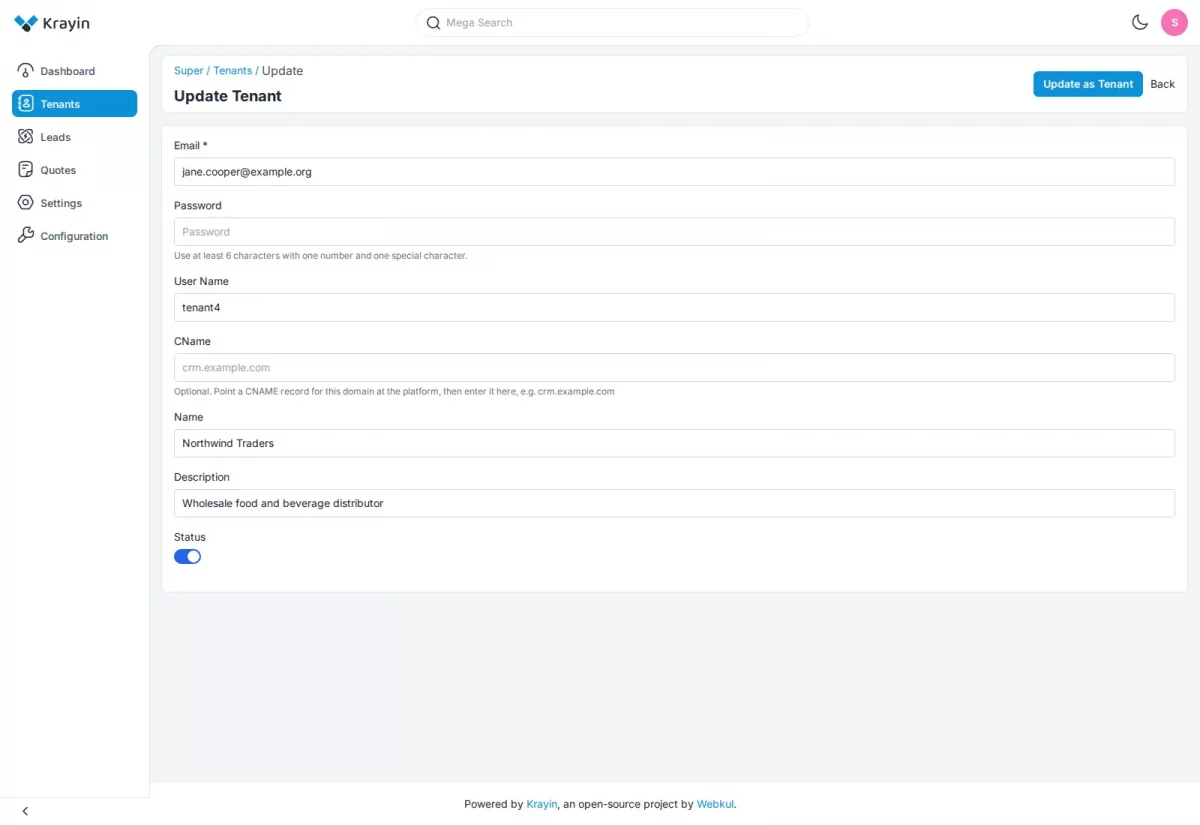
Leave Password blank to keep the current one. The User Name, however, is refused if changed, because the address and database are named after it.
Block: switch Status off. The tenant’s address then shows Company blocked by administrator, and every record is kept.
Delete: removes the tenant and deletes its database with it. Notably this cannot be undone.
Step-by-Step: Updating a tenant
- Open Tenants and find the tenant with Search.
- Click the edit icon on its row.
- Change Name, Email, Password or Status.
- Click Update as Tenant, then tell the owner if their sign-in details changed.
Reports Across All Tenants
The platform’s own database holds no CRM data. The module therefore reads every tenant database to fill the super admin dashboard, leads and quotes.
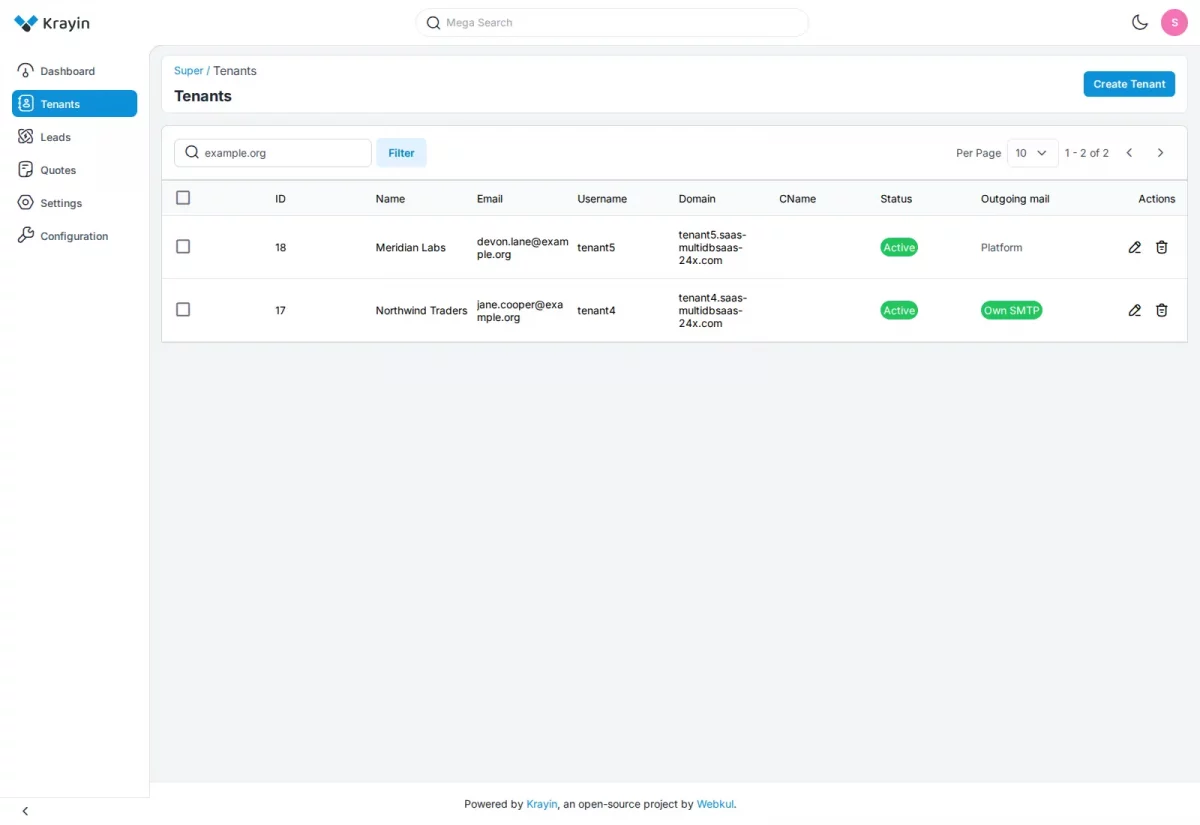
- Total Tenants, Active Tenants and Blocked Tenants count tenants by status.
- New Tenants counts tenants created in the last 30 days.
- Total Leads and Total Quotes add up every tenant database.
- Converted Leads counts leads in the Won stage, and Conversion Rate is their share of all leads.
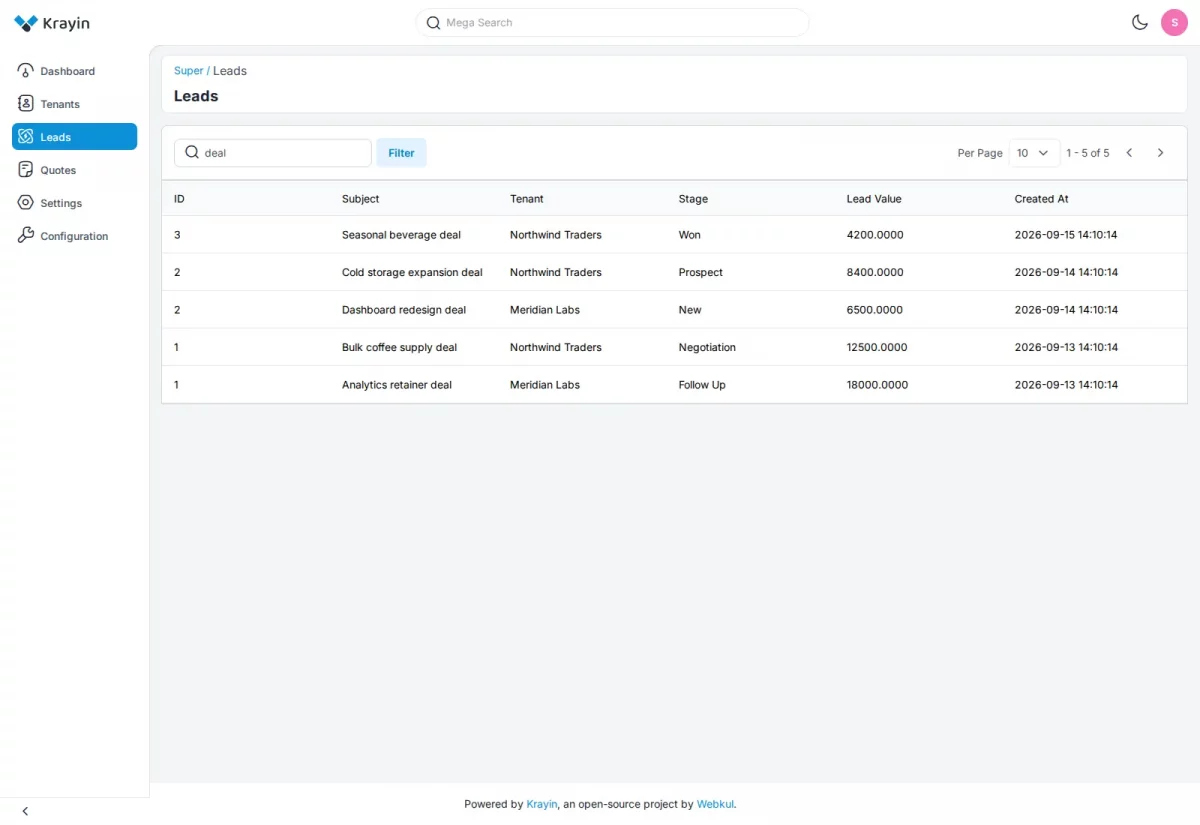
Leads lists every tenant’s leads with the Tenant each belongs to, its stage, value and date.
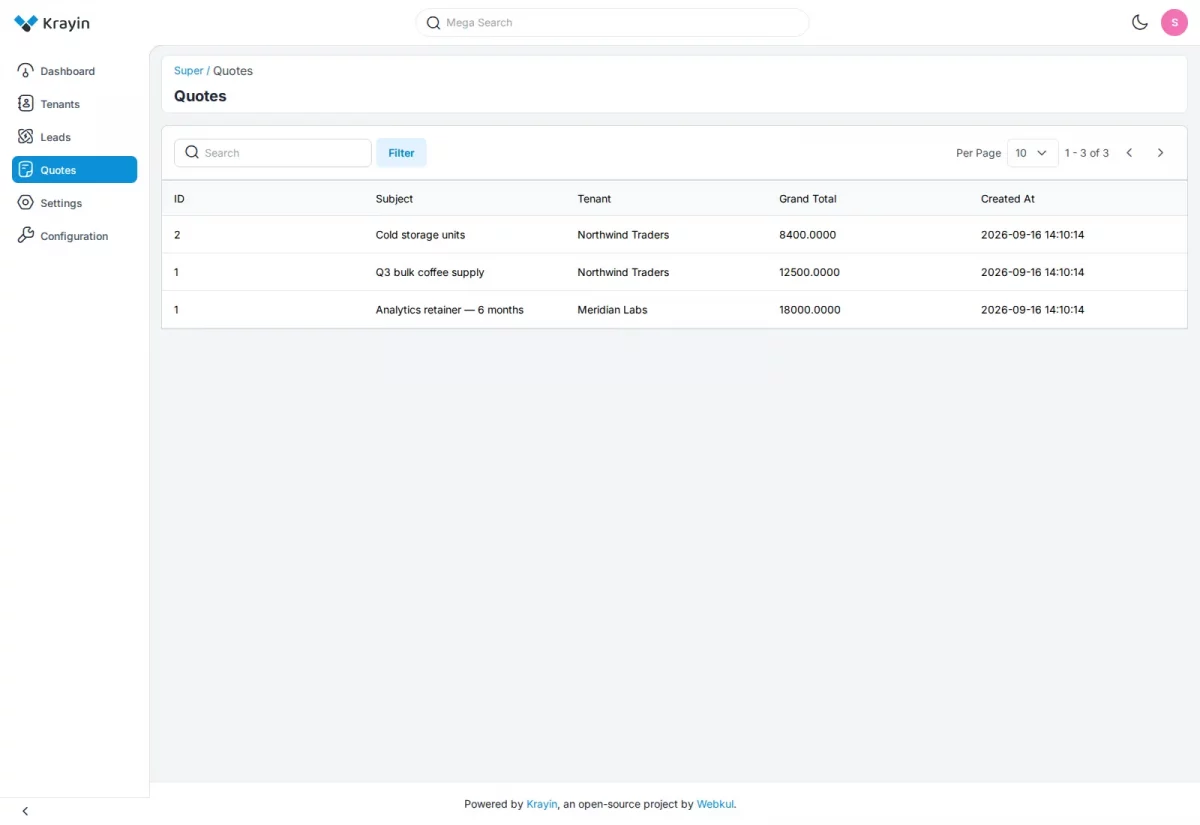
Quotes does the same for quotes, with each grand total.
Each tenant numbers its own records from 1. As a result the same ID can appear twice, so read the Tenant column to tell rows apart.
Step-by-Step: Reviewing the whole platform
- Sign in to the super admin panel.
- Open Dashboard for the platform totals.
- Open Leads or Quotes for the full lists.
- Use Search and Filter to narrow them across every tenant.
Tenant Outgoing Mail (SMTP)
By default a tenant’s CRM email goes out through the platform’s mail server. The module lets each tenant connect their own server under Settings → Other Settings → Mail.
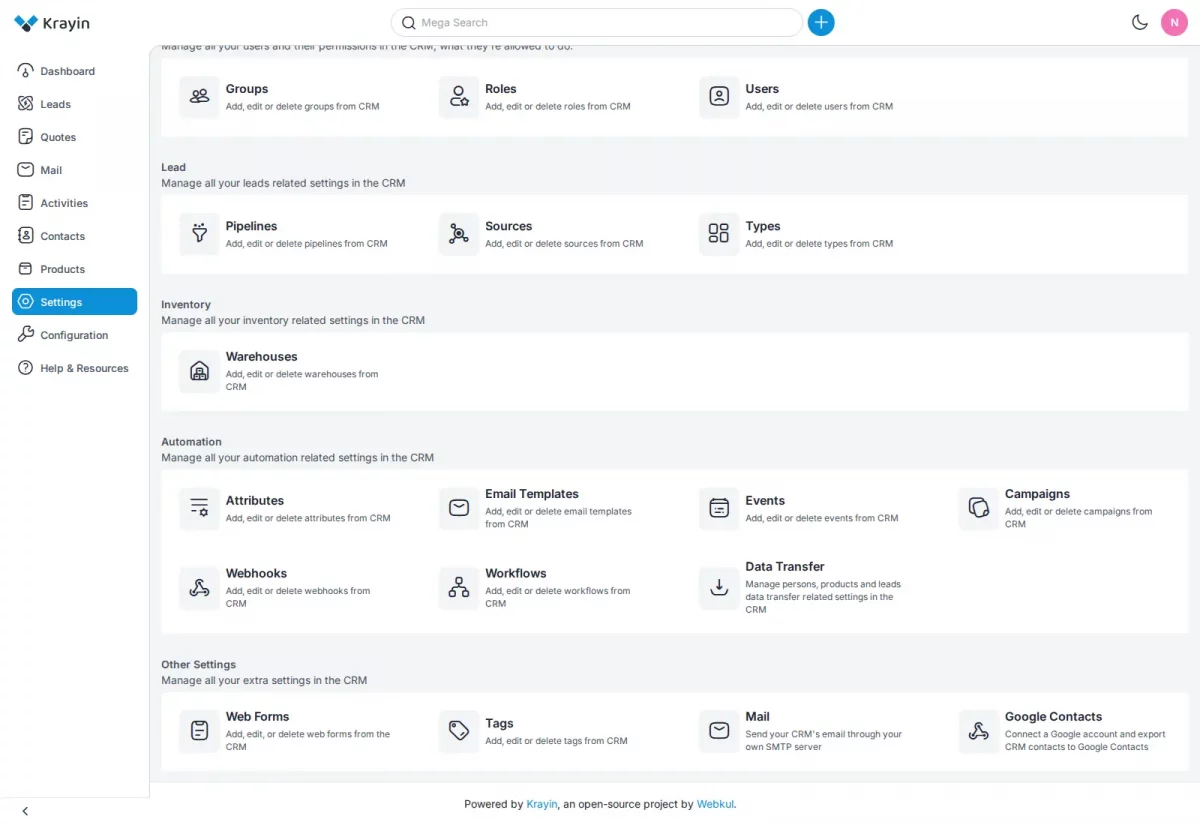
The settings live in the tenant’s own database. Additionally the password is stored encrypted and never shown again.
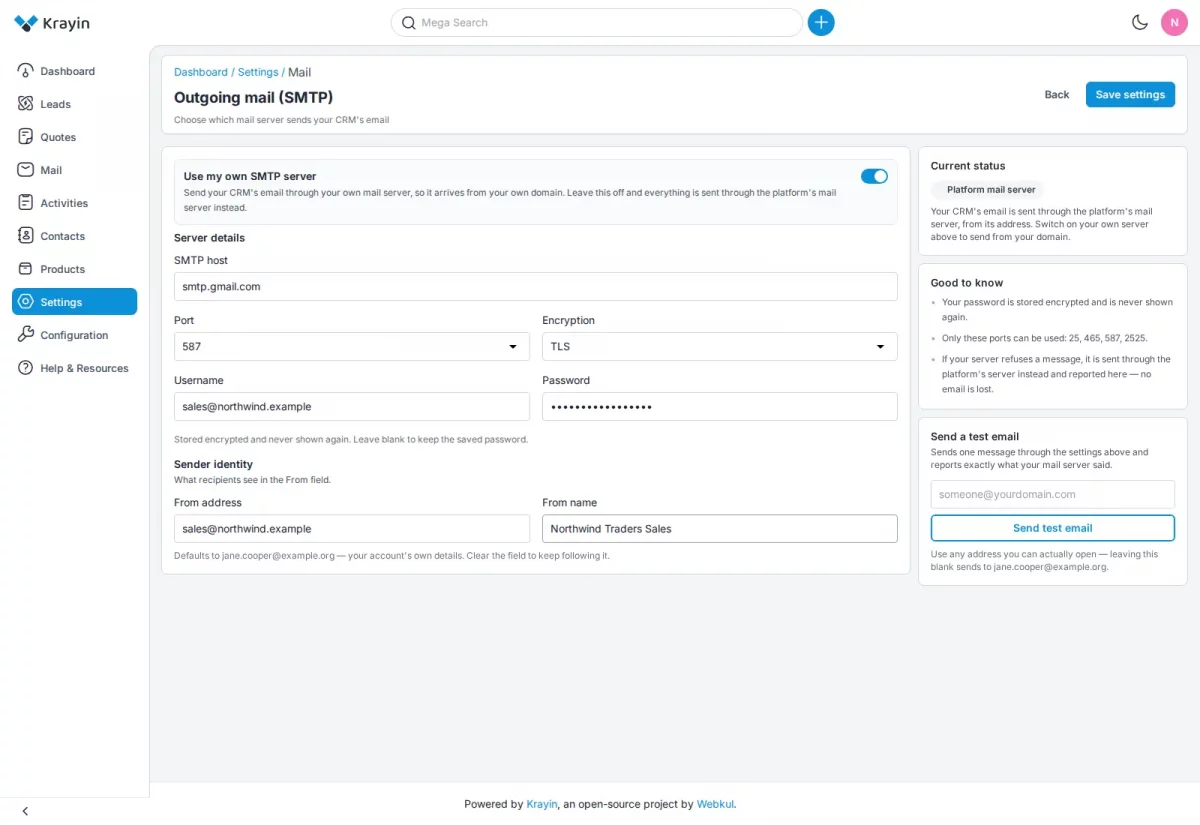
Server details
SMTP host: the provider’s outgoing server, for example smtp.gmail.com.
Port: one of the ports the platform allows, usually 587 with TLS or 465 with SSL.
Encryption: None, TLS or SSL, as the provider specifies.
Username and Password: the mail server login. Leave the password blank to keep it, or tick Remove the saved password.
Sender identity
From address and From name are what recipients see. Left blank, they follow the tenant account’s own email and name.
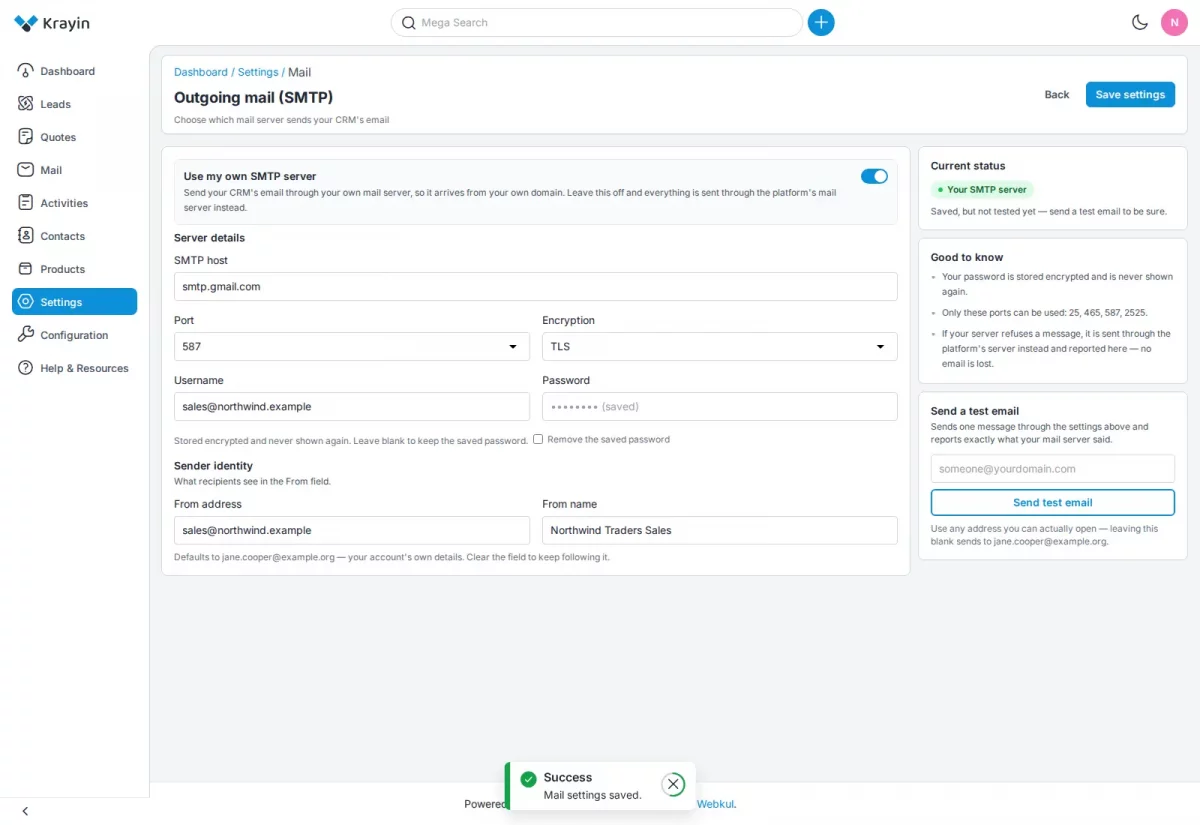
Send a test email
One message goes out through the saved settings. Consequently the page reports exactly what the mail server answered.
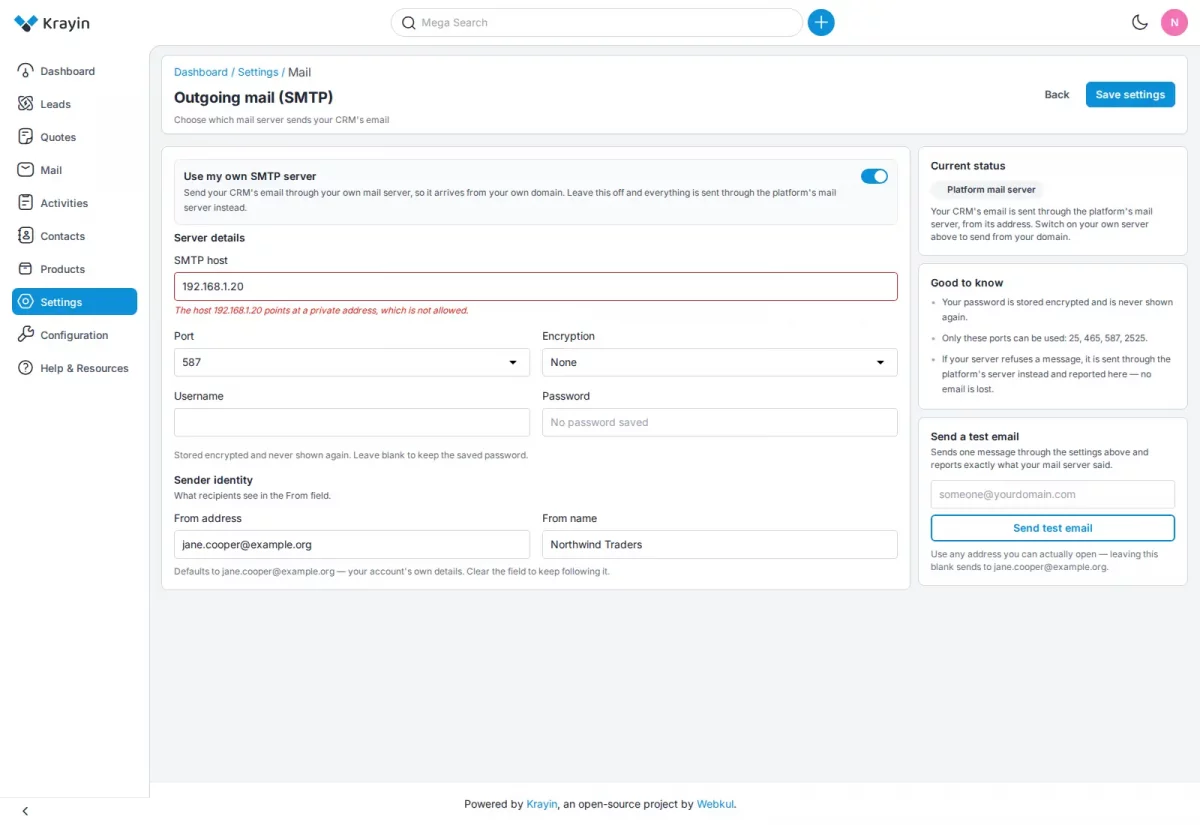
Private addresses are refused
The host must be a public mail server. A host pointing at a private address, such as 192.168.1.20, is refused on save.
What happens after a failed send
When the tenant’s server refuses a message, it goes out through the platform’s mail server instead, and the failure is reported on this page.
Meanwhile the super admin’s tenant list shows SMTP failing for that tenant until the settings are fixed.
Step-by-Step: Connecting your own mail server
- Open Settings → Other Settings → Mail in the tenant’s CRM.
- Switch on Use my own SMTP server.
- Fill in SMTP host, Port, Encryption, Username and Password.
- Click Save settings.
- Under Send a test email, enter an address you can open and click Send test email.
Maintenance Commands
Run these commands from the Krayin root folder whenever a tenant needs attention.
Rebuild or finish a tenant
php artisan saas:tenant:provision acme --fresh --sync
--fresh deletes and rebuilds the database, and --sync runs it now instead of on the queue. Additionally --verified treats the owner’s email as confirmed.
Update every tenant database
php artisan tenants:migrate
Run it after upgrading Krayin or this module, so every tenant database receives the new tables.
Find leftover databases
php artisan saas:tenant:prune-databases
php artisan saas:tenant:prune-databases --drop --except=saas_keep_me
It lists databases whose tenant no longer exists, and --drop deletes them. Notably it matches by the saas_ prefix, so exclude any database that is not a tenant.
Move uploaded files per tenant
php artisan saas:tenant:migrate-files
php artisan saas:tenant:migrate-files --apply
The first run only reports. With --apply it copies files uploaded before the module was installed into each tenant’s own storage.
Support
So, that is all about Krayin CRM Multi-DB SaaS. If you have any queries regarding the plugin, contact us at Webkul Support System.
For developer documentation visit devdocs.krayincrm.com, and for user guides see docs.krayincrm.com.
Current Product Version - v2.2.6
Supported Framework Version - v2.2.6

Be the first to comment.