Bagisto Blog Extension lets store owners create, manage and publish blog posts straight from the admin panel.
The module scores every post for SEO while you write, holds weak content back from publishing, and adds categories, tags, scheduling and threaded comments.
Discover our premium-quality Bagisto Extensions to extend and enhance your store’s functionality.
Features of Bagisto Blog Extension
Bagisto Blog Extension provides a complete blogging solution for creating engaging content, improving SEO, and enhancing customer interaction.
Key features of Bagisto Blog Extension :
- Score every post out of 100 across eight SEO checks while it is still being written.
- Block publishing until a post reaches the configured minimum score, while drafts still save.
- Emit canonical URLs, Open Graph tags, Twitter cards and BlogPosting structured data.
- Keep one slug per post across all twenty-two locales, so a single URL serves every language.
- Organize blog posts by categories, tags, and authors for easy content management and navigation.
- Show the number of blog posts associated with each category and tag.
- Enable or disable the comment widget individually for each blog post.
- Support nested replies in comments to encourage organized discussions and user engagement.
- Moderate comments through pending, approved and rejected states, emailing the commenter on each change.
- Preview unsaved edits on the storefront, then frame the live page inside the admin panel.
- Page through the blog listing without reloading, with a compact paginator on small screens.
- Schedule blog posts for automatic publishing on a specified date and time.
Installation of Bagisto Blog Extension
- Unzip the respective extension zip and then merge “packages” folder into project root directory.
- Goto composer.json file and add following line under ‘psr-4’
"Webkul\\Blog\\": "packages/Webkul/Blog/src"
- Goto bootstrap/providers.php file and add following line under ‘providers’
Webkul\Blog\Providers\BlogServiceProvider::class,
- Run these commands below to complete the setup
composer dump-autoload

php artisan blog:install
That’s it, now just execute the project on your specified domain.
For more on extending the platform, see the Bagisto developer documentation.
Configuration of Bagisto Blog Extension | Admin configuration
After installation, go to Configure > Blog > Blog in the admin panel. Every setting here applies per channel.
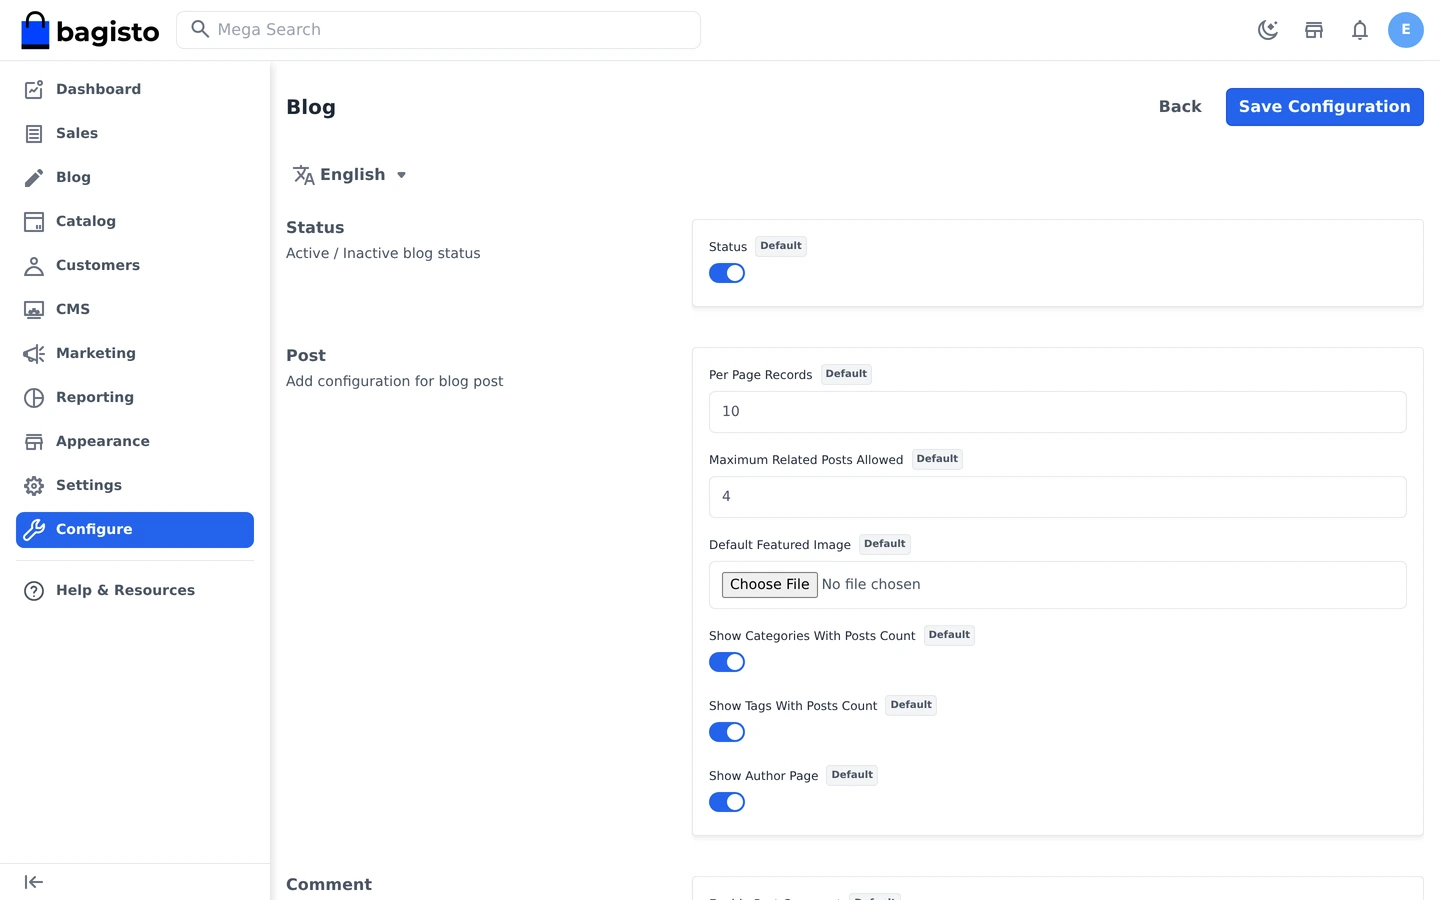
General
A single switch sits in the General group.
- Status: turn the whole blog on or off for the current channel.
Post
The Post group shapes how the listing and the article pages behave.
- Per Page Records: how many posts one listing page shows before the paginator appears.
- Maximum Related Posts Allowed: how many related posts sit at the foot of an article.
- Default Featured Image: the image used whenever a post carries none of its own.
- Show Categories With Posts Count: list categories in the sidebar with a running count.
- Show Tags With Posts Count: do the same for tags.
- Show Author Page: turn author names into links to everything they wrote.
Comment
Commenting rules live in the Comment group, which also caps how deep a discussion runs.
- Enable Post Comment: allow commenting across the storefront.
- Allow Guest Comment: let visitors comment without signing in first.
- Allowed Maximum Nested Comment Level: how deep a reply chain may run.
SEO
Finally, the SEO group sets the publishing bar and the fallback metadata for blog pages.
- Minimum SEO Score To Publish: the score out of 100 a post must reach to go live.
- Block Publishing Below The Minimum: enforce that score, or merely report it.
- Meta Title, Meta Description, Meta Keywords: the default metadata for blog pages.
Blogs
Navigate to Blog > Blogs. The grid lists every post with its author, category, tags, status and publish date.
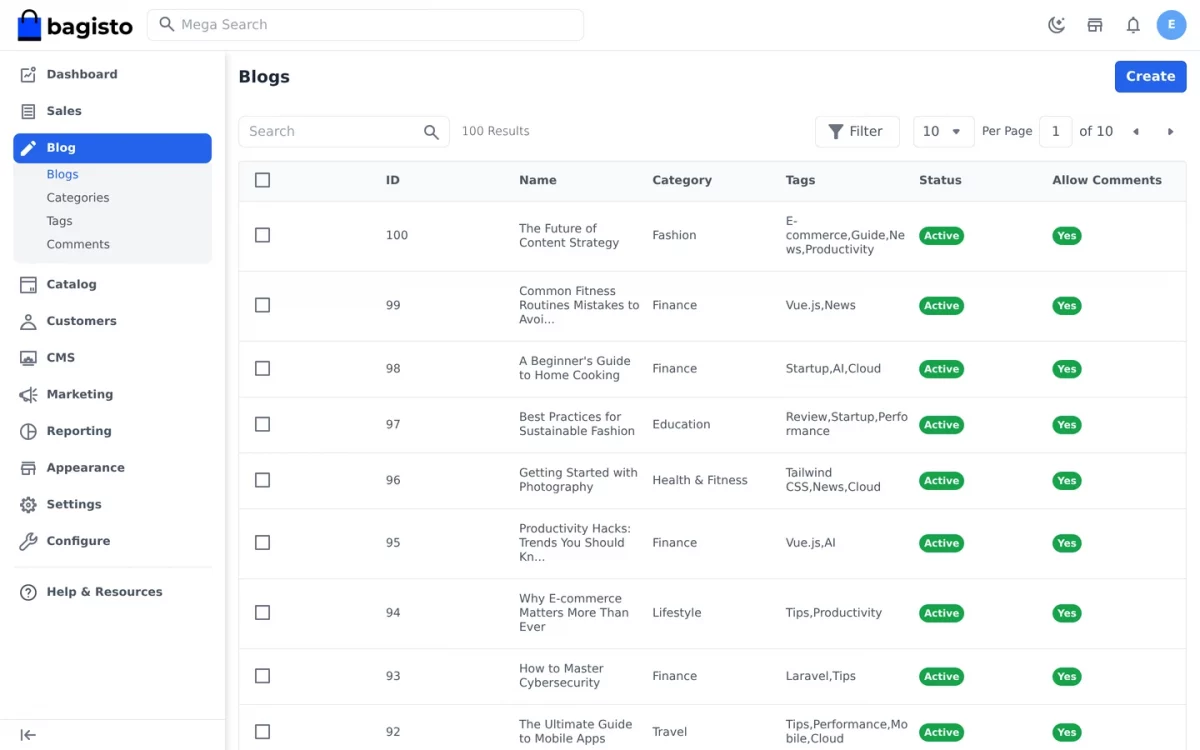
Click Create Blog to open the editor. The left column holds the content, whereas the right column carries categories, tags and publishing options.
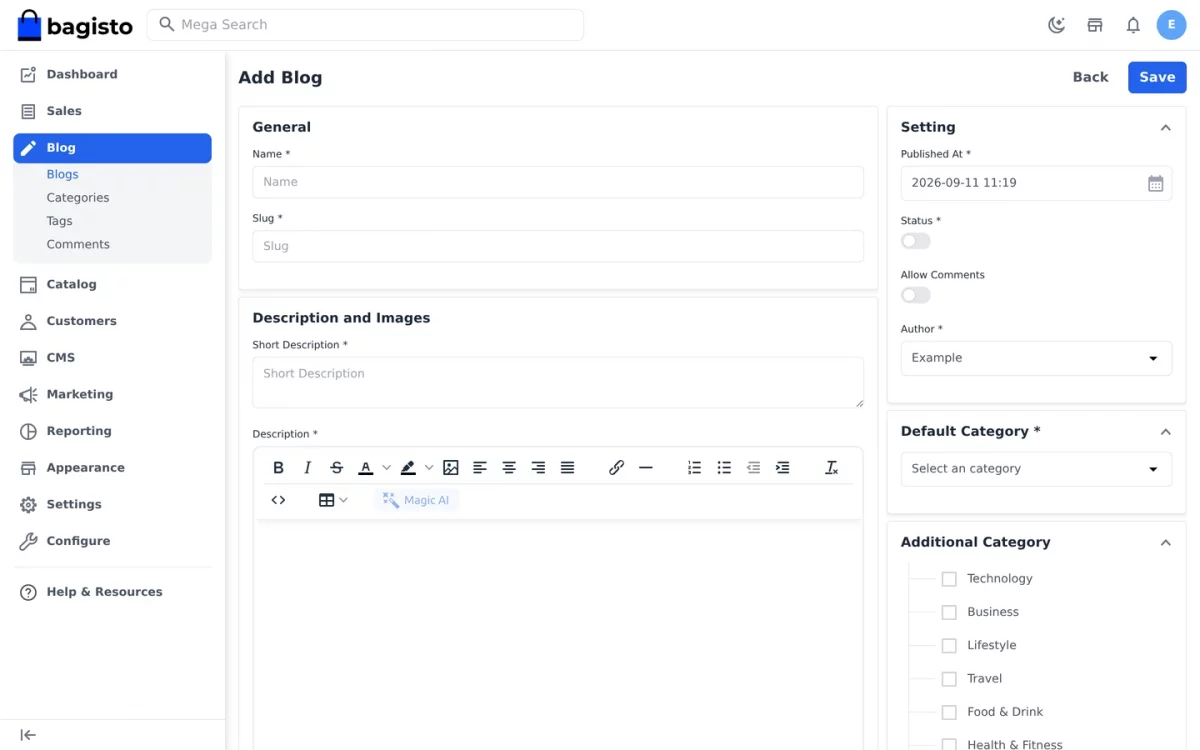
General
Content for the post itself sits in the General section.
- Name: the post title, which also seeds the slug automatically.
- Slug: the URL segment, shared by every locale rather than translated.
- Short Description: the summary shown on listing cards and in search results.
- Description: the article body, edited through the rich text editor.
- Thumbnail and Featured Image: artwork for the card and the article header.
Search Engine Optimization
The SEO score panel grades the post out of 100. Each of the eight checks reports separately, so the author sees exactly what still needs work.
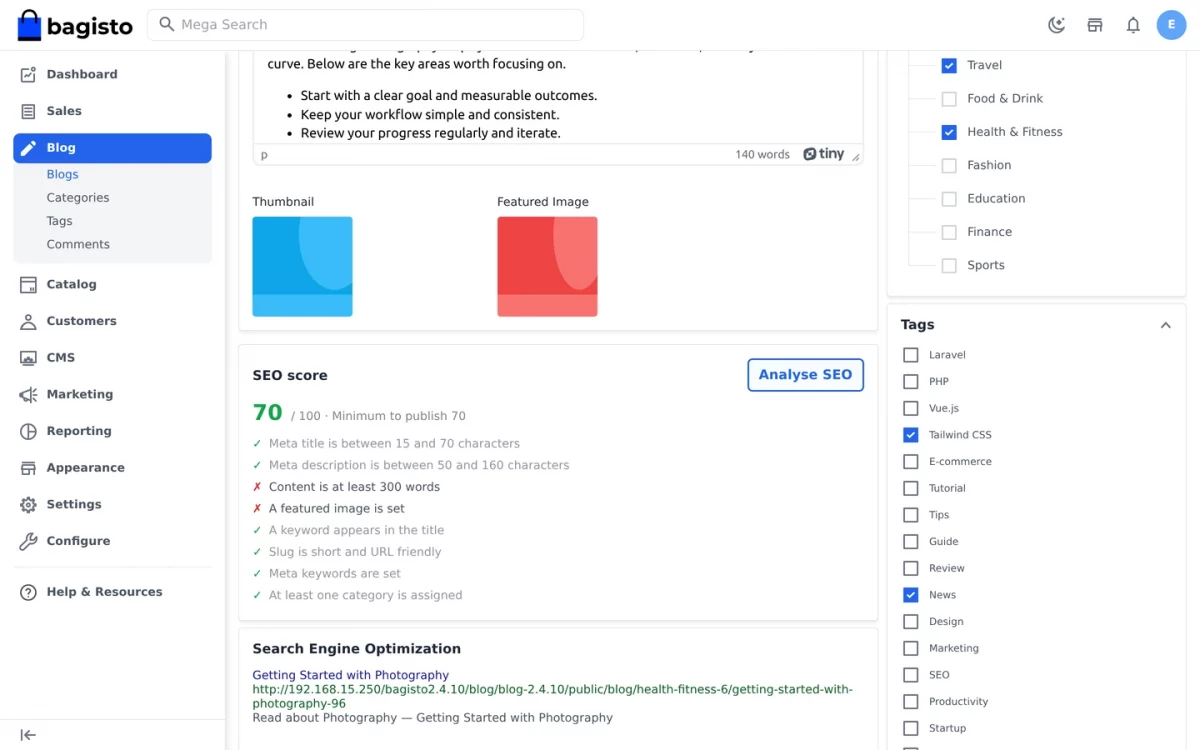
The analyser runs on its own as the author types. Alternatively, clicking Analyse SEO re-scores the post at once.
- Meta Title: between 15 and 70 characters.
- Meta Description: between 50 and 160 characters.
- Content: at least 300 words of body text.
- Featured image: one is set on the post.
- Keyword in title: a meta keyword appears in the title.
- Slug: short and URL friendly.
- Meta Keywords: filled in rather than left blank.
- Category: at least one is assigned.
Publishing below the minimum simply fails. Instead of saving, the form returns the score, the shortfall and the checks still to fix.
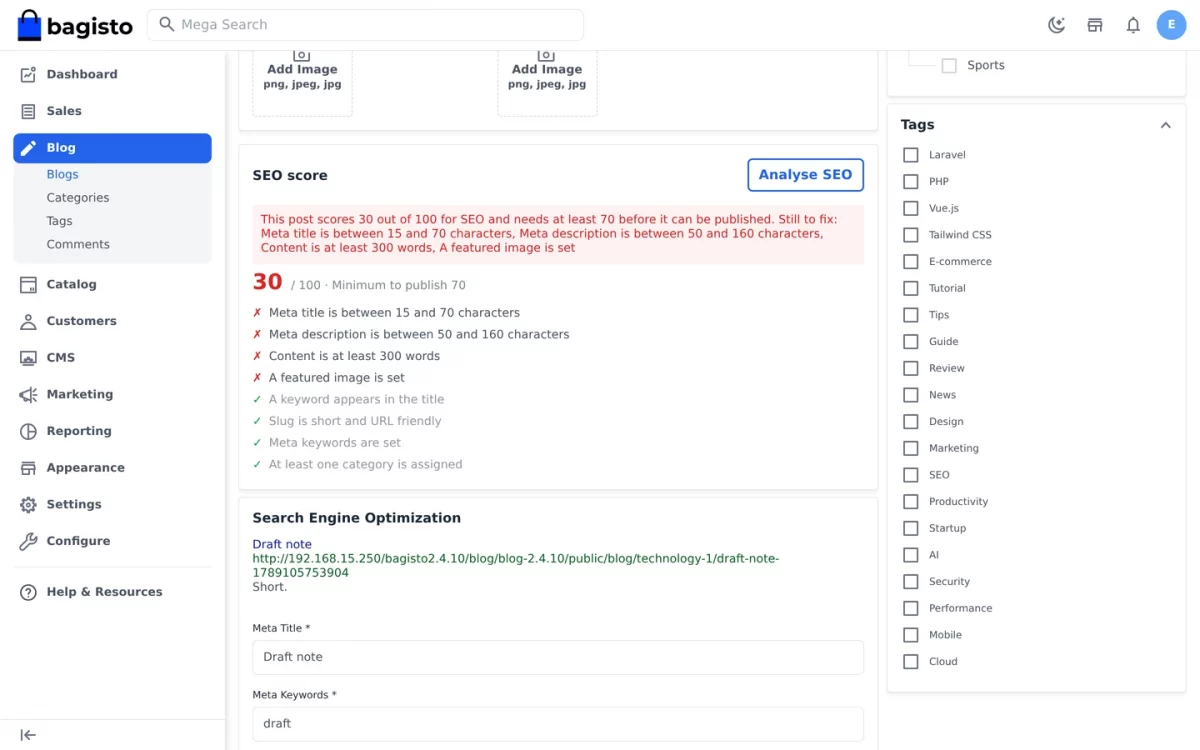
The gate guards publishing only. Drafts always save, therefore work in progress is never lost because its score is still low.
Settings
The Settings section controls when the post appears and whether readers may reply to it.
- Author: the admin credited with the post.
- Published At: the moment the post goes live, which may sit in the future.
- Status: publish the post, or keep it as a draft.
- Allow Comments: open or close commenting on this post alone.
A future Published At date keeps the post off the storefront. Until then the URL returns a 404 to visitors.
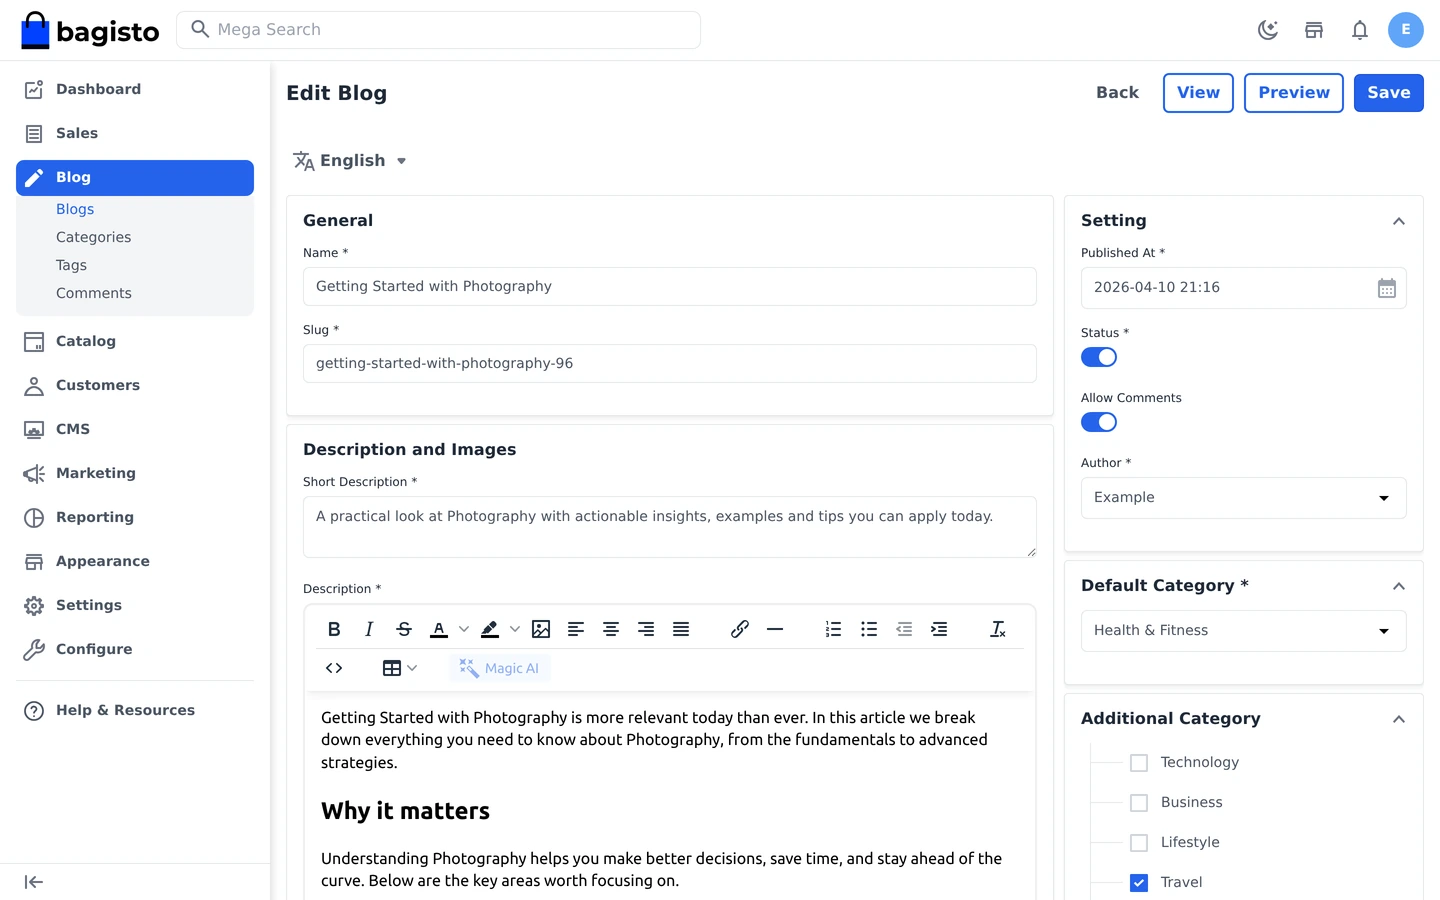
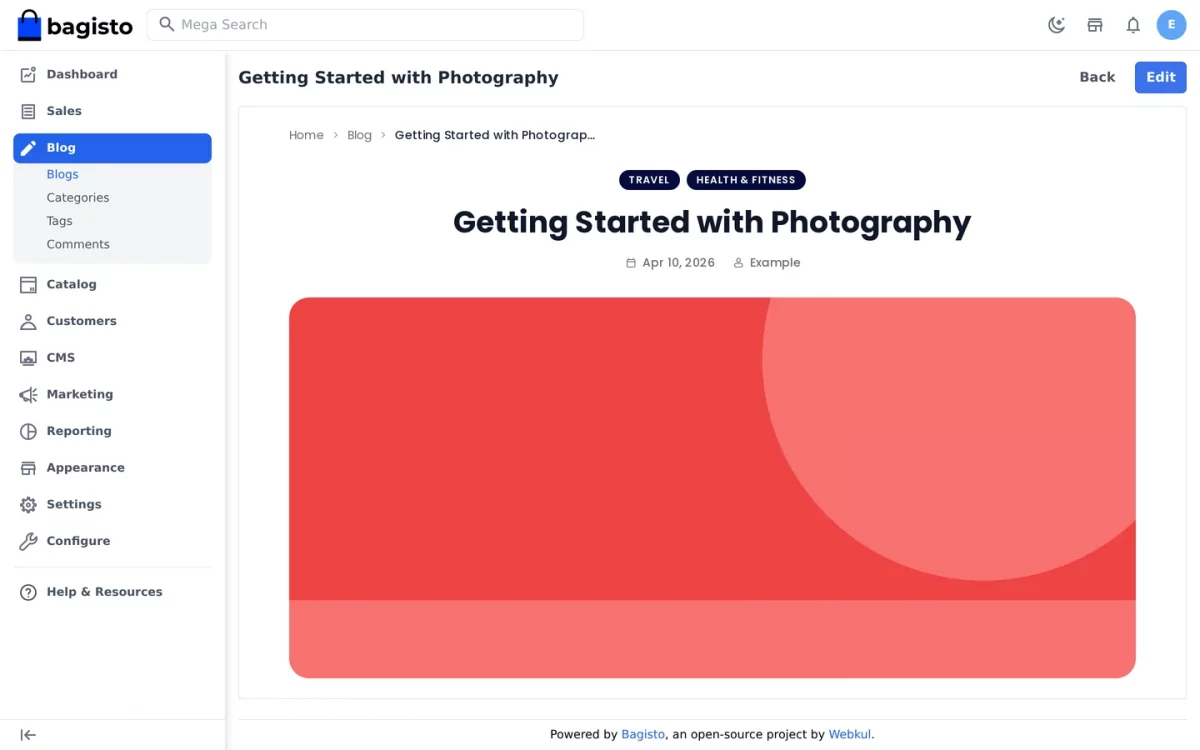
The edit screen also carries a Preview button. Furthermore, the listing offers a view action that frames the live page inside the admin.
Categories and Tags
Categories give the blog its structure, while tags cut across it. Each post takes one primary category, plus any number of extra categories and tags.
Categories
Navigate to Blog > Categories to see every category with its parent and status.
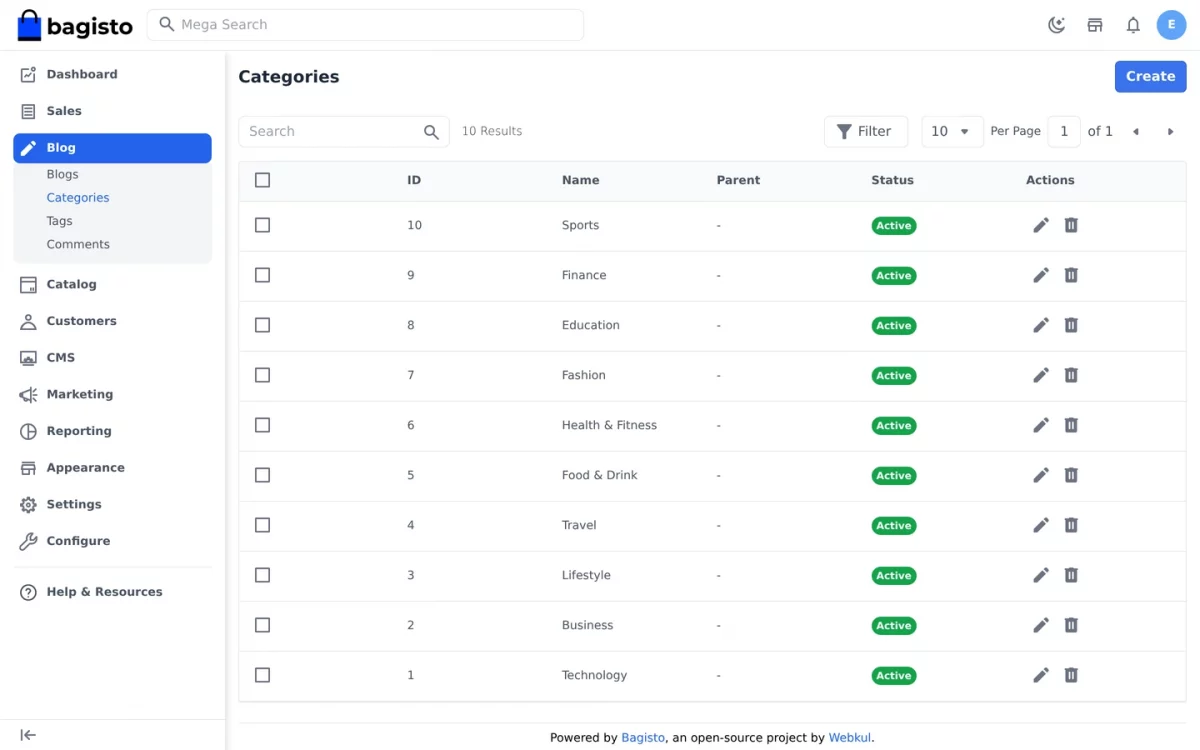
Click Create Category to add one.
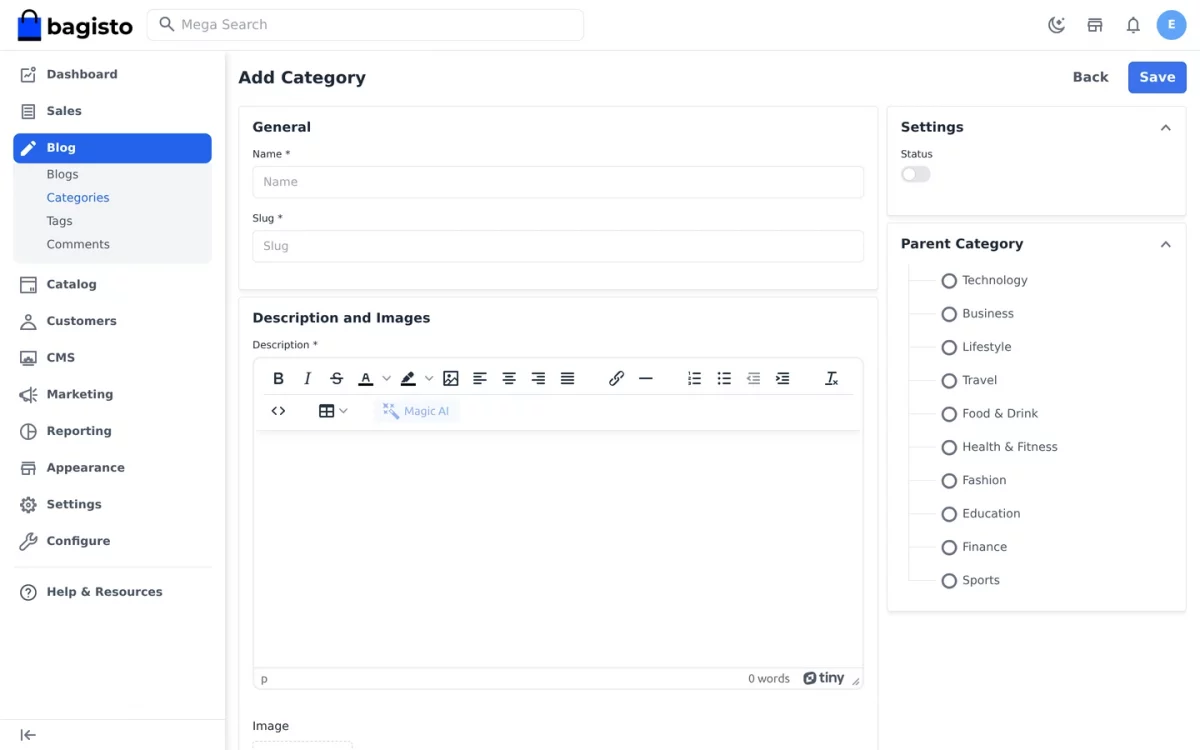
General
- Name: the category name shown on the storefront.
- Slug: the URL segment, again shared across locales.
- Description: the copy shown at the head of the category page.
- Image: artwork for the category.
Search Engine Optimization
- Meta Title: the title search engines display.
- Meta Description: the snippet beneath that title.
- Meta Keywords: keywords associated with the category.
Settings
- Status: show or hide the category on the storefront.
Parent Category
A category may sit under another one, which builds a nested tree. Consequently the storefront can present broad sections with narrower topics inside them.
Tags
Navigate to Blog > Tags. Tags work like categories but stay flat, so none of them nests inside another.
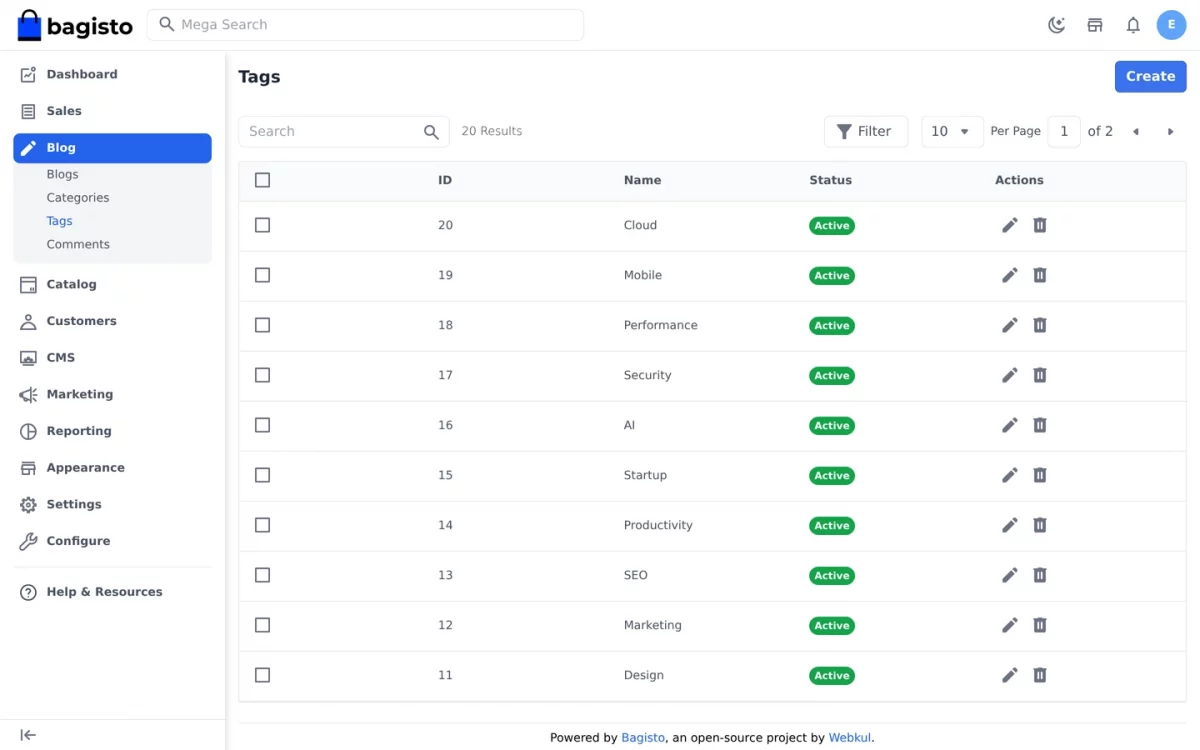
General
- Name: the tag label shown beside a post.
- Slug: the URL segment for the tag page.
- Description: the copy shown at the head of that page.
Search Engine Optimization
- Meta Title, Meta Description, Meta Keywords: the metadata for the tag page.
Settings
- Status: show or hide the tag on the storefront.
Comments
Navigate to Blog > Comments. Each row shows the commenter, the post, the content and the current state.
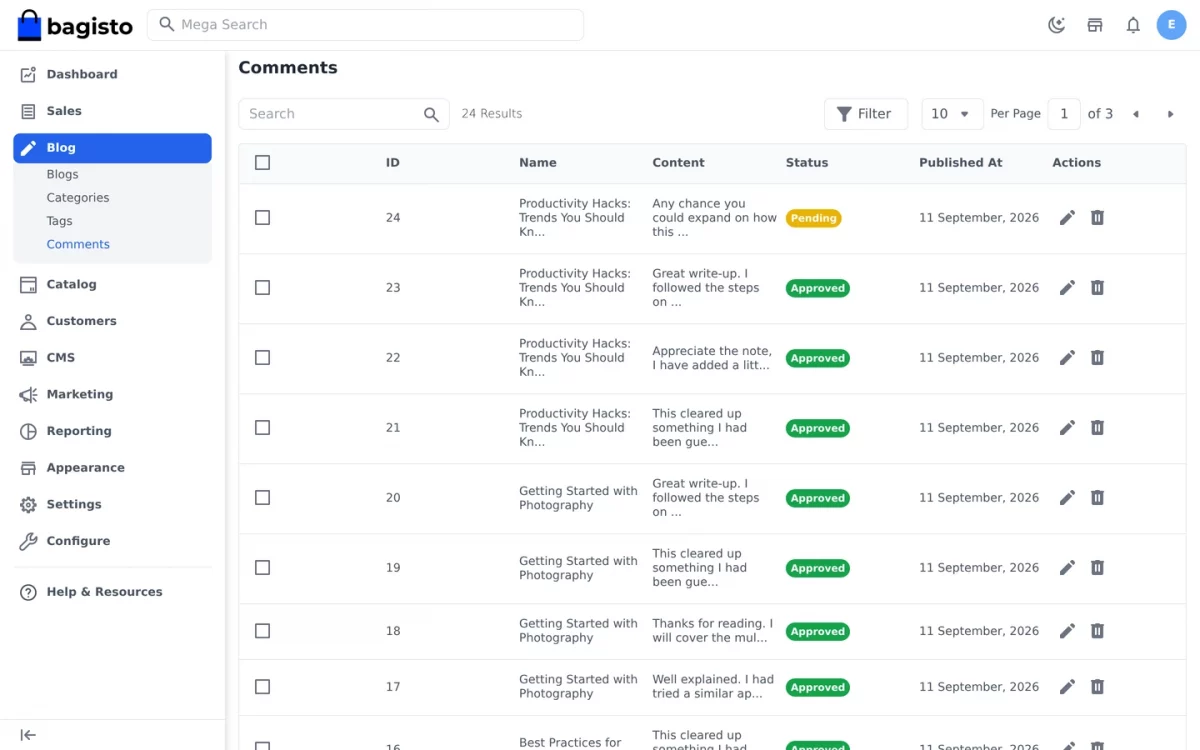
A comment moves between three states: Pending, Approved and Rejected. Only approved comments reach the storefront.
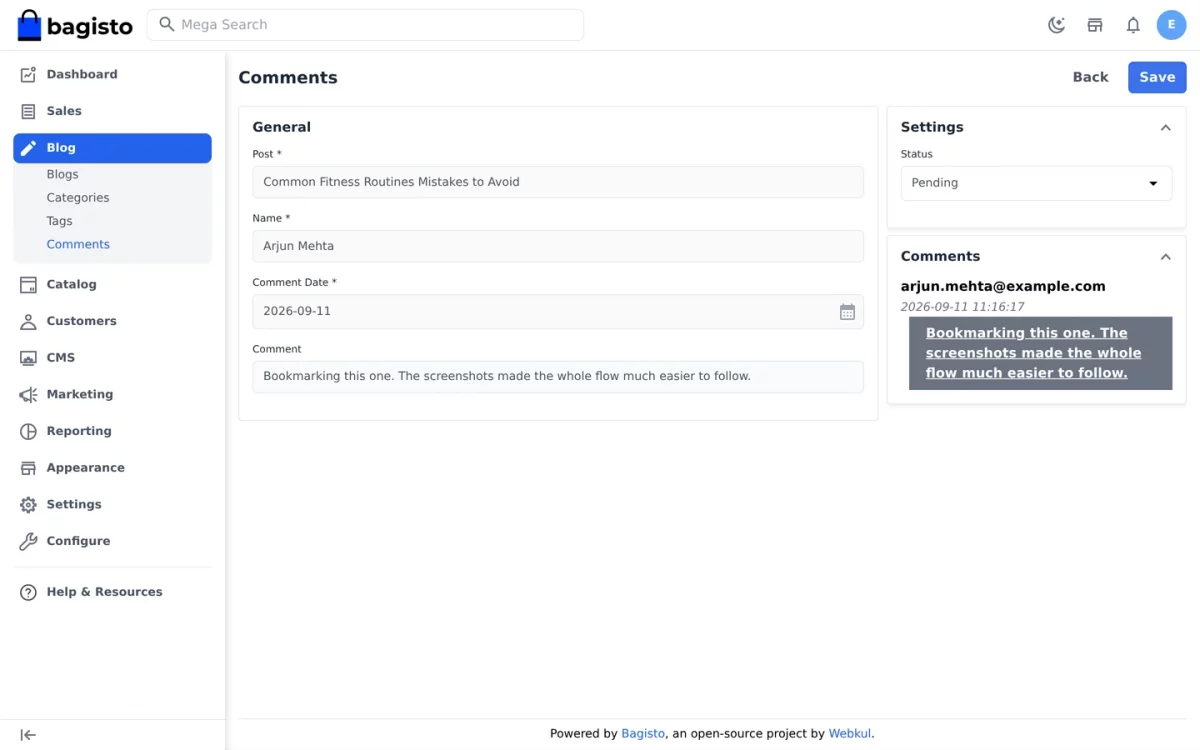
Changing a status emails the commenter automatically. Similarly, the mass-update action notifies everyone whose comment actually changed state.
Shop Front
A Blog link joins the storefront navigation and the mobile drawer. The listing then opens with a featured hero above a grid of cards.
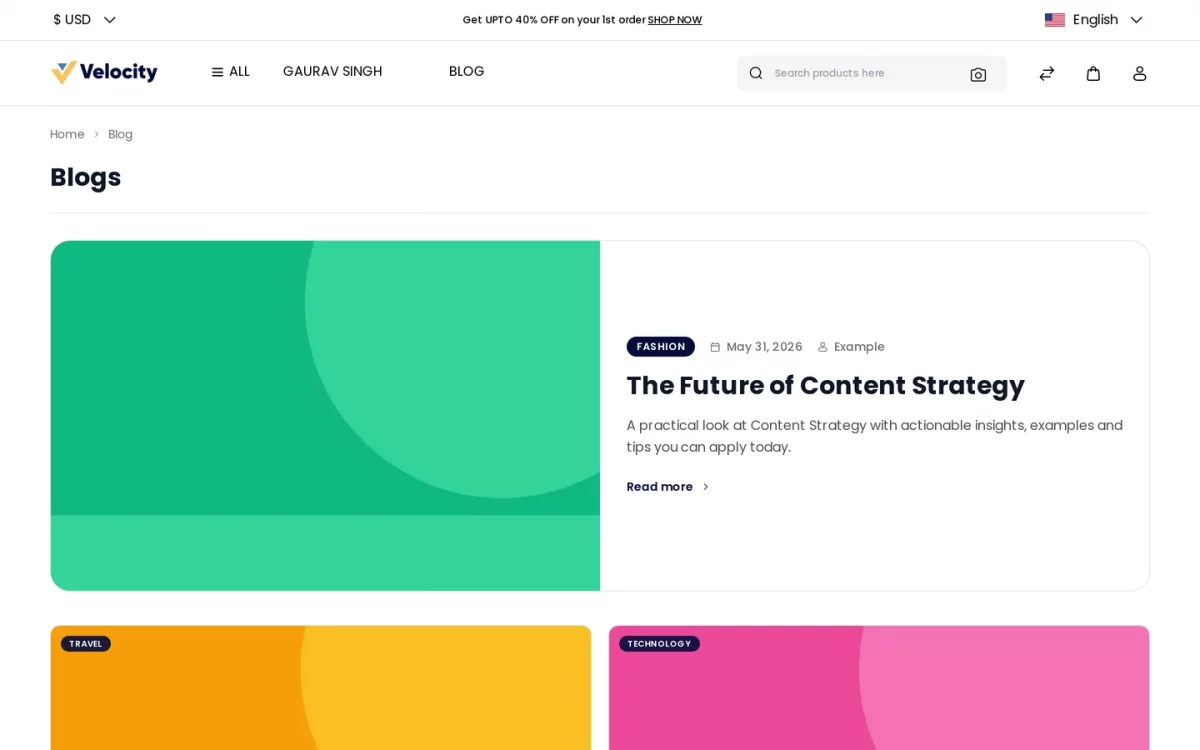
Below the hero, the remaining posts form a responsive grid. Meanwhile a sidebar lists categories and tags with the number of posts in each.
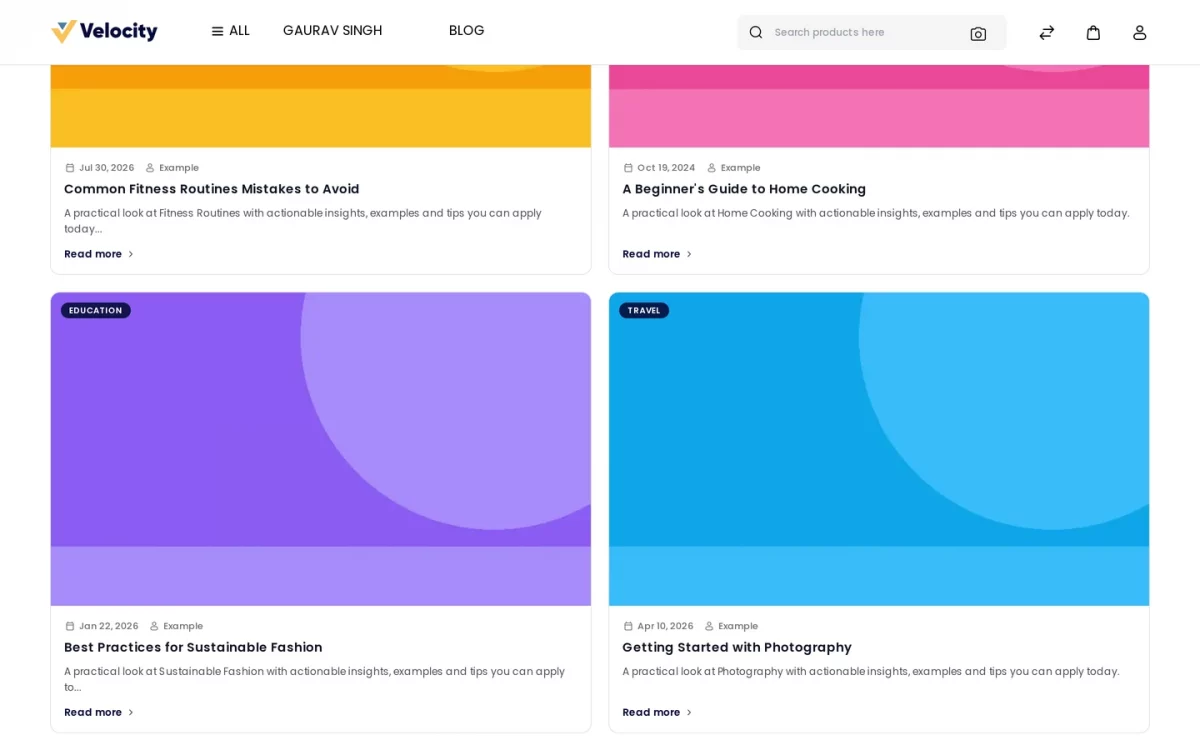
Paging through the listing swaps the posts in place rather than reloading. However, a normal page load still happens when scripting is unavailable.
Categories
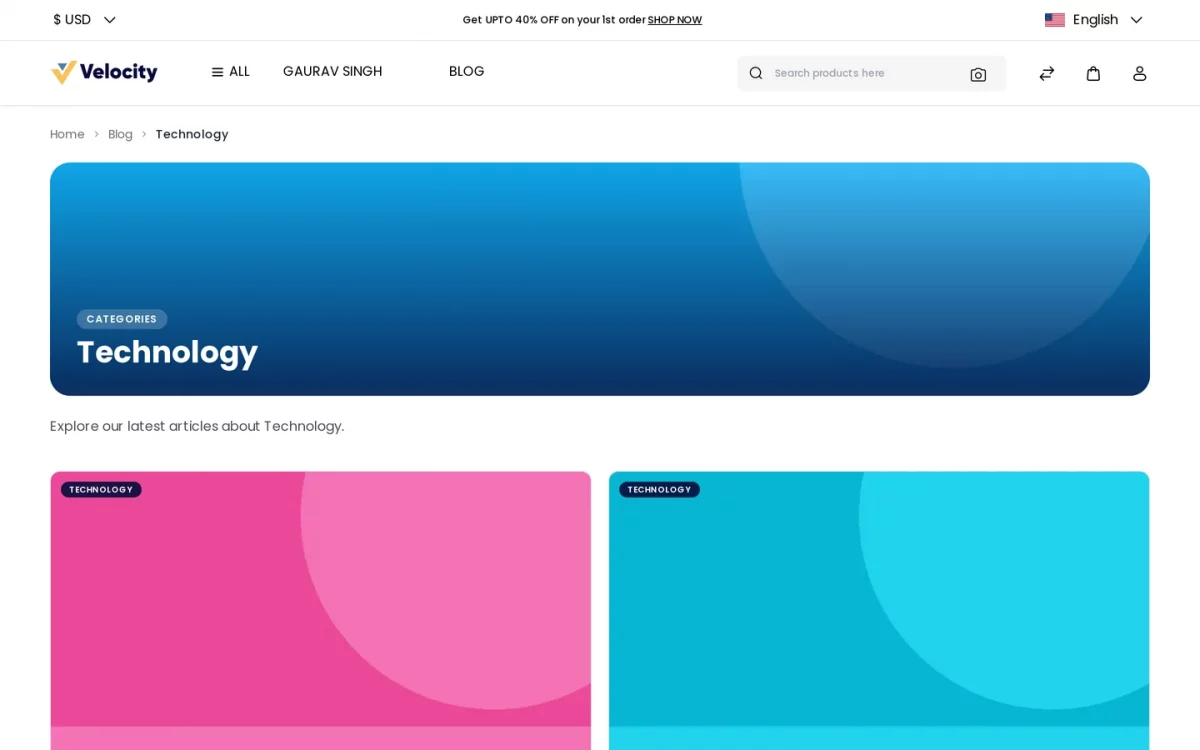
A category page collects every published post filed under that category, so the sidebar count matches what the page shows.
Tags
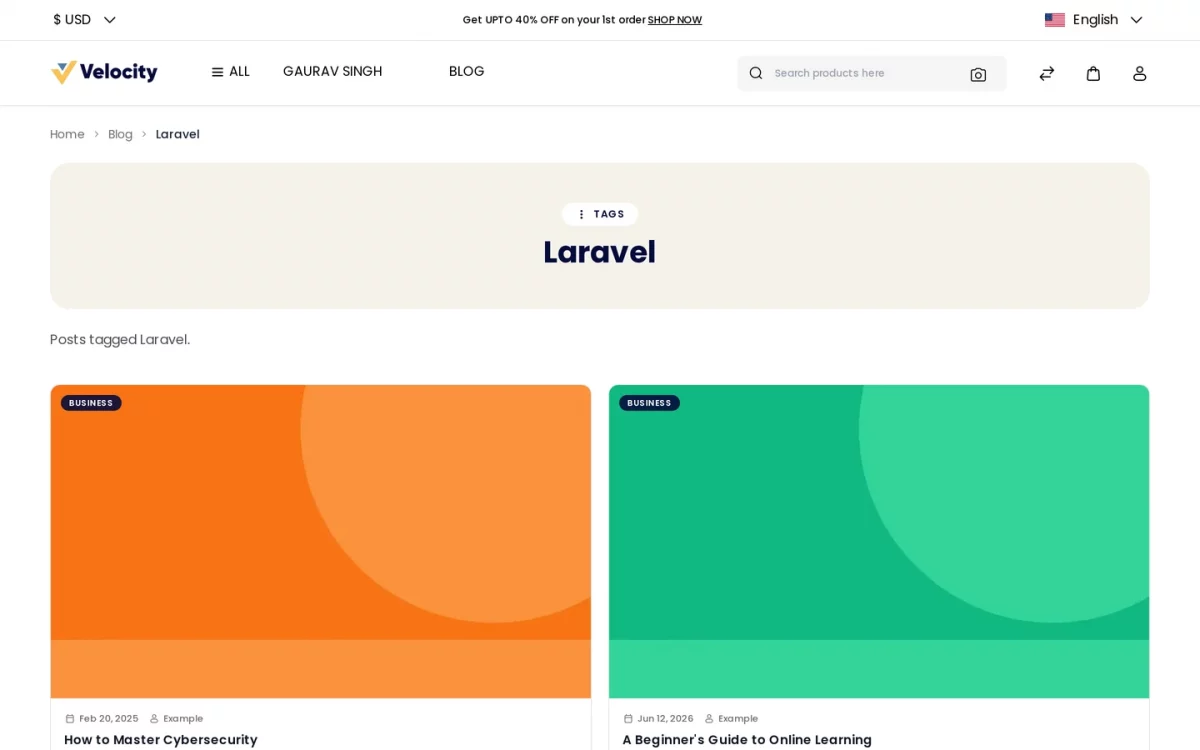
Tag pages behave identically. In addition, an author page gathers everything one writer published, provided Show Author Page is enabled.
Comments
An article opens with its featured image, title, author and date. Underneath, the body renders exactly as the editor arranged it.
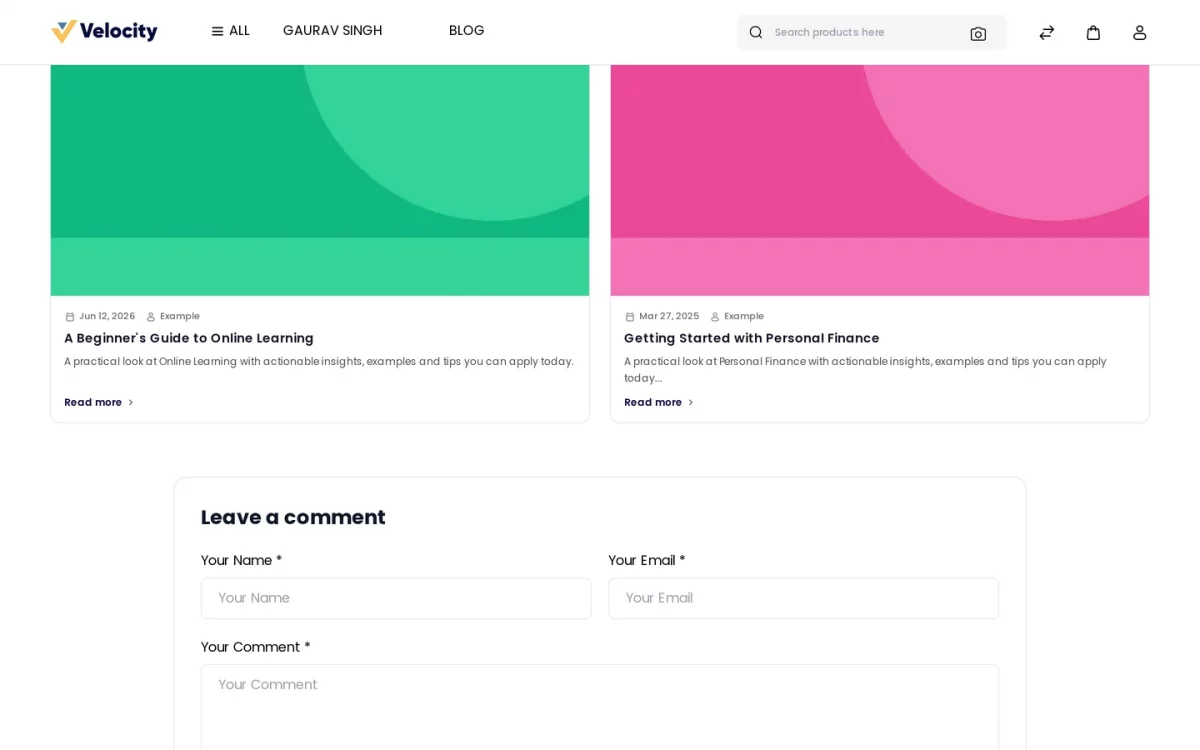
The Comments section lets customers join the discussion by reading every approved comment on the post.
Customers can read user feedback. Furthermore, if enabled by the admin, they can reply to comments and join threaded conversations.
Support
So, that was a bit about the Bagisto Blog Extension for Laravel eCommerce. For any queries or doubts, reach out to us at [email protected].
Additionally, You can also raise a ticket at our HelpDesk System.
Current Product Version - v2.4.10
Supported Framework Version - Bagisto v2.4.10

Be the first to comment.