1. Overview: WooCommerce AI connector
WooCommerce AI connector utilizes the WordPress Core AI Connector, which allows sites to connect to providers such as OpenAI, Anthropic, and Google through a single configuration page under Settings.
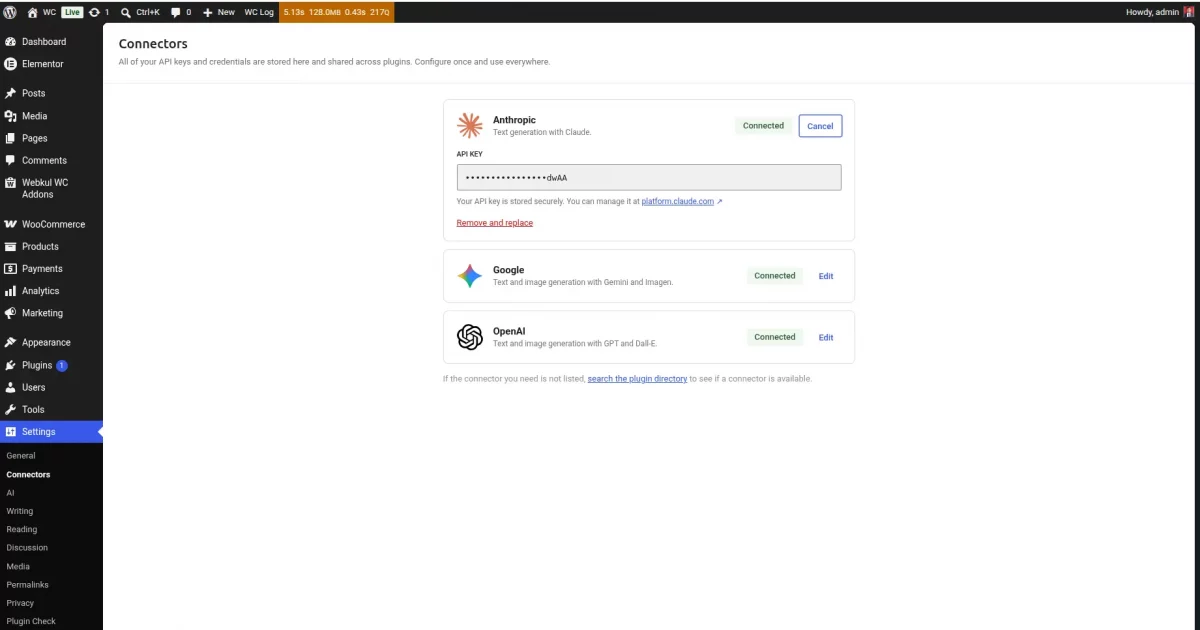
We use these AI models to develop and maintain our WooCommerce Addons, helping us deliver intelligent features while keeping the integration simple and consistent.
We are utilizing the AI models in developing and maintaining our WooCommerce Addons.
2. Introduction
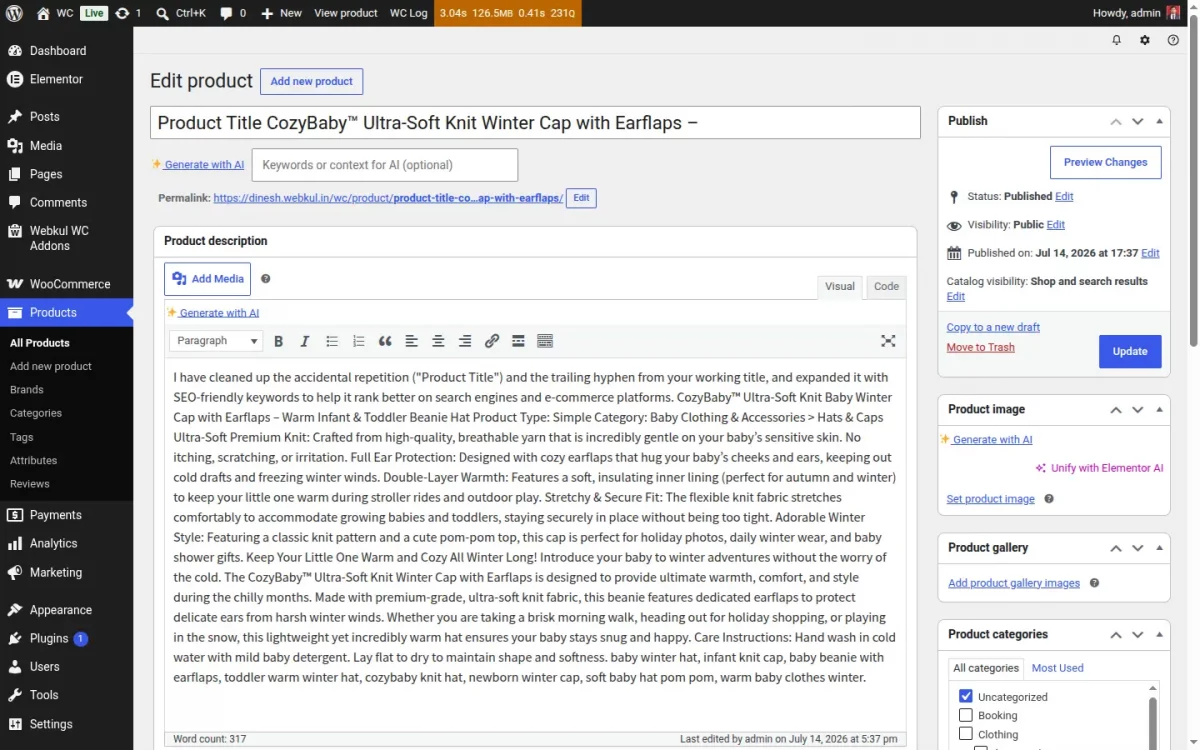
This article explains how we can build a WooCommerce AI Connector using Core AI Plugins. Also explains registering AI abilities to communicate with the AI provider and generate images for products.
3. Abilities, Not Direct API Calls for WooCommerce AI Connector
The AI Connector plugin is designed to prevent plugins from calling OpenAI, Anthropic, or other AI provider SDKs directly. Instead, you register an Ability class that defines the requirements.
public function register_abilities() {
require_once WCAI_PLUGIN_DIR . '/includes/Abilities/class-wkwc-ai-product-title-
generation.php';
wp_register_ability(
'woocommerce-ai-connector/product-title-generation',
array(
'label'=> esc_html__( 'Generate Product Title', 'wc-ai-connector'
'description'=> esc_html__( 'Generates a WooCommerce product title from
),
product data.', 'wc-ai-connector' ),
'ability_class' => WKWC_AI_Product_Title_Generation::class,
)
);
}
Once registered, WordPress automatically exposes the ability through a standard REST API endpoint. This single registration creates the endpoint:
POST /wp-json/wp-abilities/v1/abilities/woocommerce-ai-connector/product-title-generation/run
Each feature follows the same pattern. Four abilities power four “Generate with AI” buttons while sharing a common REST API structure.
4. Understanding an Ability
Every ability extends the Abstract_Ability class provided by the AI Connector plugin and implements three core methods:
input_schema()– Defines the required input parameters.permission_callback()– Verifies whether the current user can execute the ability.execute_callback()– Performs the requested action and returns the generated result.
The product title generation ability is the simplest example and demonstrates the complete implementation from start to finish.
protected function execute_callback( $input ) {
    $product_id     = absint( $input['product_id'] );
    $prompt_content = wkwc_ai_get_product_context( $product_id, $context );

    $prompt_builder = $this->get_prompt_builder( $prompt_content );
    $result         = $prompt_builder->generate_text();

    if ( is_wp_error( $result ) ) {
        return $result;
    }

    $result = wkwc_ai_strip_restricted_keywords( $result, wkwc_ai_get_restricted_keywords() );

    return wkwc_ai_sanitize_generated_title( $result, wkwc_ai_get_settings()['title_max_length'] );
}
Before generating the title, wkwc_ai_get_product_context() collects product information like the category, attrs, price, etc. Then get_prompt_builder() combines them to create the final prompt.
5. Image Generation: Same Workflow, Different Output
The image generation ability follows the same workflow as the text generation abilities. However, instead of calling the generate_text(), it uses generate_image_result() to generate an image.
$result      = $prompt_builder->generate_image_result();
$base64_data = $result->toImageFile()->getBase64Data();

$attachment_id = $this->sideload_generated_image(
    $base64_data, $settings['image_format'], $product_id
);

$validated = wkwc_ai_validate_generated_image(
    $attachment_id, array( $settings['image_format'] ), $settings['image_max_size_kb']
);

$product = wc_get_product( $product_id );
$product->set_image_id( $attachment_id );
$product->save();
The sideload_generated_image() method decodes the Base64 image, saves it as a temporary file using wp_tempnam(), and imports it into the WordPress Media Library with media_handle_sideload().
6. Wiring the “Generate with AI” Buttons
All “Generate with AI” buttons use a shared runAbility() helper defined in product-ai-buttons.js. This helper sends a POST request to the ability’s REST endpoint using wp.apiFetch().
function runAbility( abilityName, input ) {
    return wp.apiFetch( {
        path: '/wp-abilities/v1/abilities/' + abilityName + '/run',
        method: 'POST',
        data: { input: input },
    } );
}
The title and short-description buttons write straight into their fields. The description button also reads the in-progress title and short description off the page and sends them along as context.
So the generated description stays consistent with whatever the merchant just typed above it — even before hitting Update. The image button just swaps the featured-image thumbnail in place.
7. WooCommerce AI Connector: An Admin Settings Tab, Not Hardcoded Limits
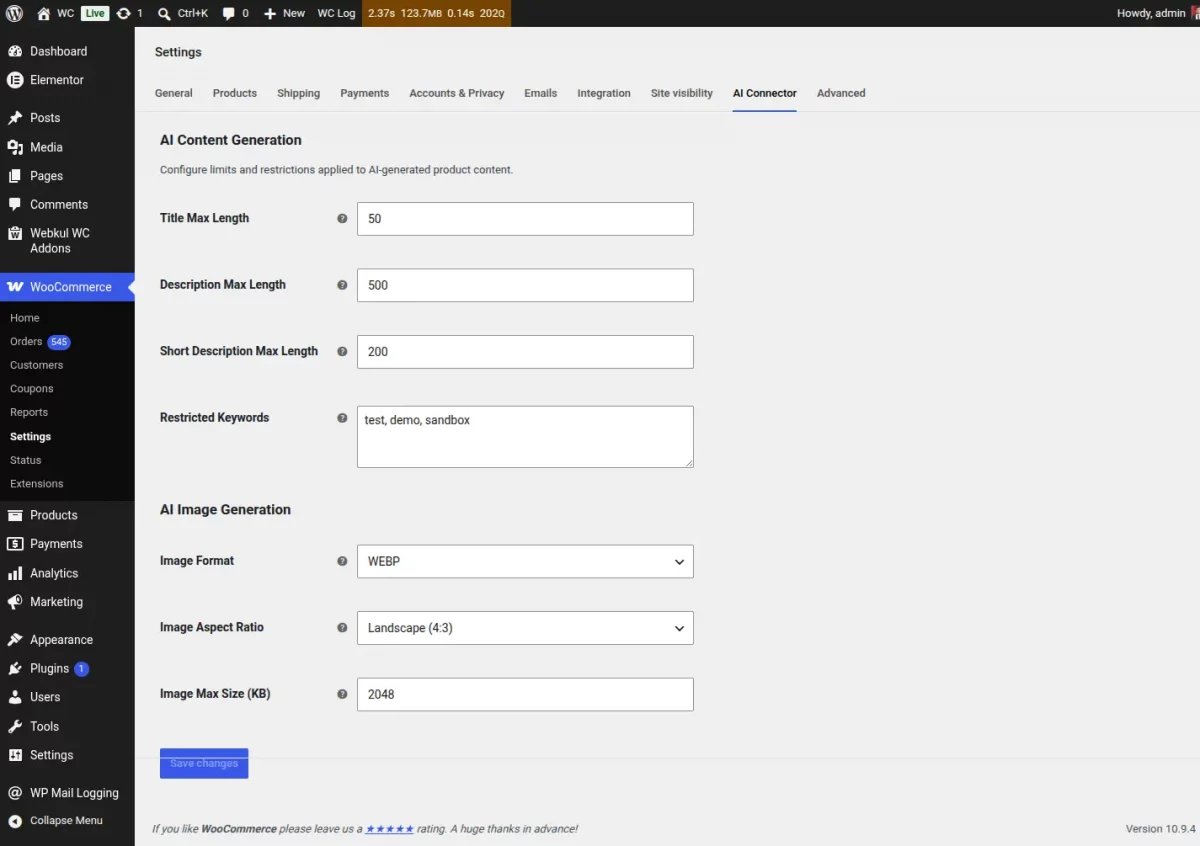
Configure the title length, description length, restricted keywords, image format, aspect ratio, and maximum file size from WooCommerce Settings → AI Connector.
Conclusion
WooCommerce AI Connector provides four AI-powered capabilities via a shared REST API without introducing new API keys. It focuses on prompt generation, output sanitization, and UI integration.
Support
For any technical assistance, please raise a ticket or reach us by email at [email protected]
Also, you may Hire WooCommerce Developers for your custom project development.

Be the first to comment.