Introduction
Odoo ShippyPro Shipping Integration helps businesses manage shipping operations from a single platform. With this module, users can compare shipping rates, create shipments, generate shipping labels, track deliveries, manage returns, and cancel shipments directly from Odoo.
Additionally, the module connects multiple shipping carriers through ShippyPro. As a result, businesses can simplify daily shipping tasks and manage shipping activities more efficiently. It helps reduce manual work while keeping shipment details organized within delivery records.
Features
- Connect multiple shipping carriers through ShippyPro from a single shipping configuration.
- Compare shipping costs, carrier services, and delivery estimates before choosing a shipping option.
- Create shipments directly from delivery orders without using external carrier portals.
- Generate shipping labels automatically after successful shipment creation and validation.
- Support both PDF and ZPL formats for shipping label generation.
- Track shipment status, delivery progress, and tracking history in real time.
- Create return shipments and generate return labels directly from delivery records.
- Cancel created shipments from delivery orders when supported by the carrier.
- Synchronize carrier package types automatically from ShippyPro into Odoo.
Installation
- Once you purchase the App from the Webkul store, you will receive a link to download the module’s zip file.
- Extract the file on your system after the download finishes. As a result, you will be able to see a folder named- ‘shippypro_delivery_carrier’.
- Copy and paste this folder inside your Odoo Add-Ons path.
- Now, open the Odoo App and click on the Settings menu. Here, click on Activate Developer Mode.
- Then, open the Apps menu and click on ‘Update Modules List.’
- In the search bar, remove all the filters and search ‘shippypro_delivery_carrier’.
- You will be able to see the module in the search results. Click on ‘Activate’ to install it.
Workflow
Configuration of Odoo ShippyPro Shipping Integration
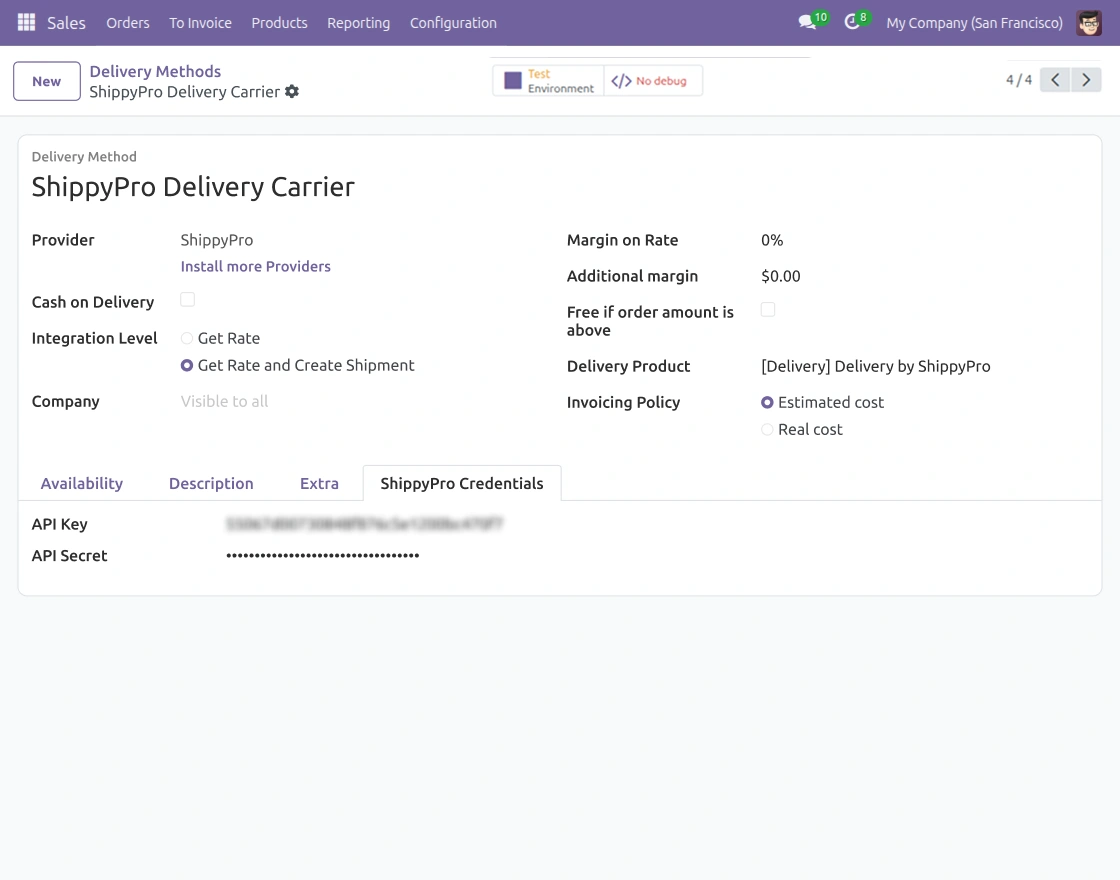
1. Navigate to Sales → Configuration → Shipping Methods and create or edit a shipping method. Next, select ShippyPro as the delivery provider. Then, add the API credentials and configure the required shipping settings according to your business requirements.
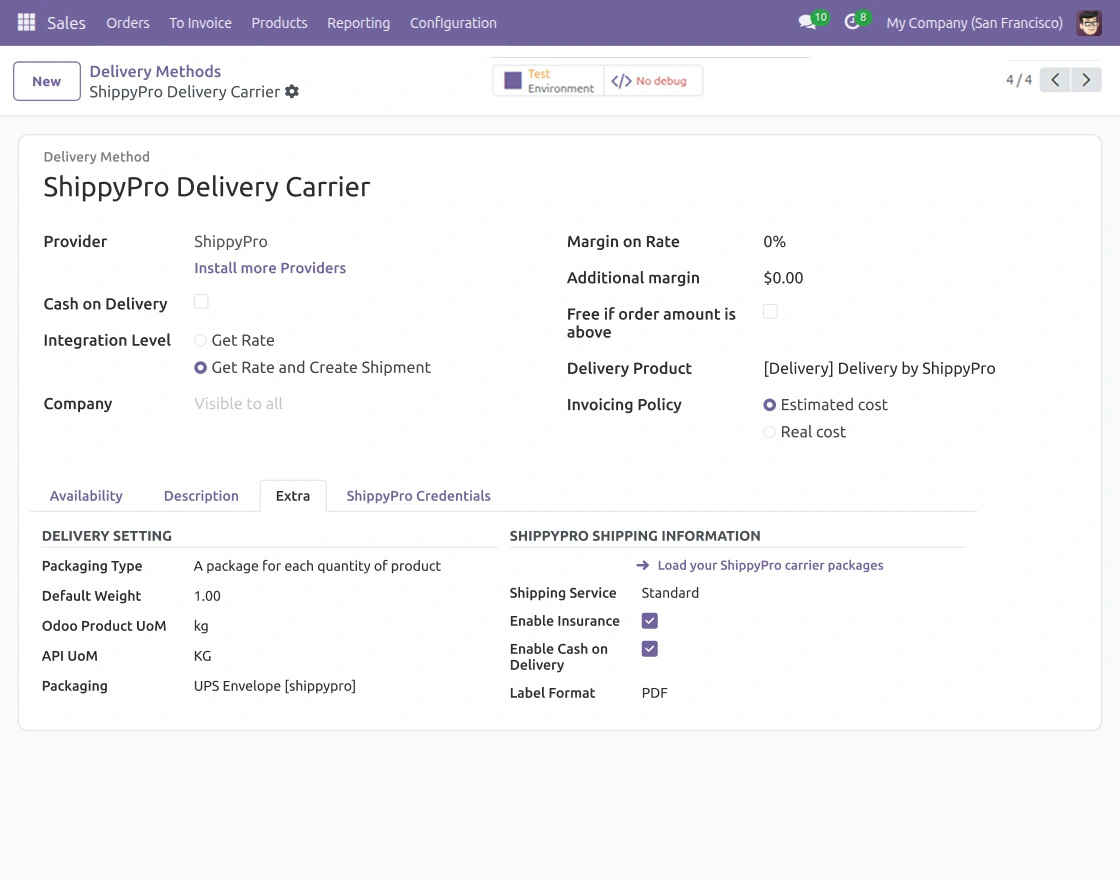
2. Open the Extra tab to configure shipping services, package settings, insurance, COD options, and label formats. You can also sync available carrier package types directly from ShippyPro using the package sync option.
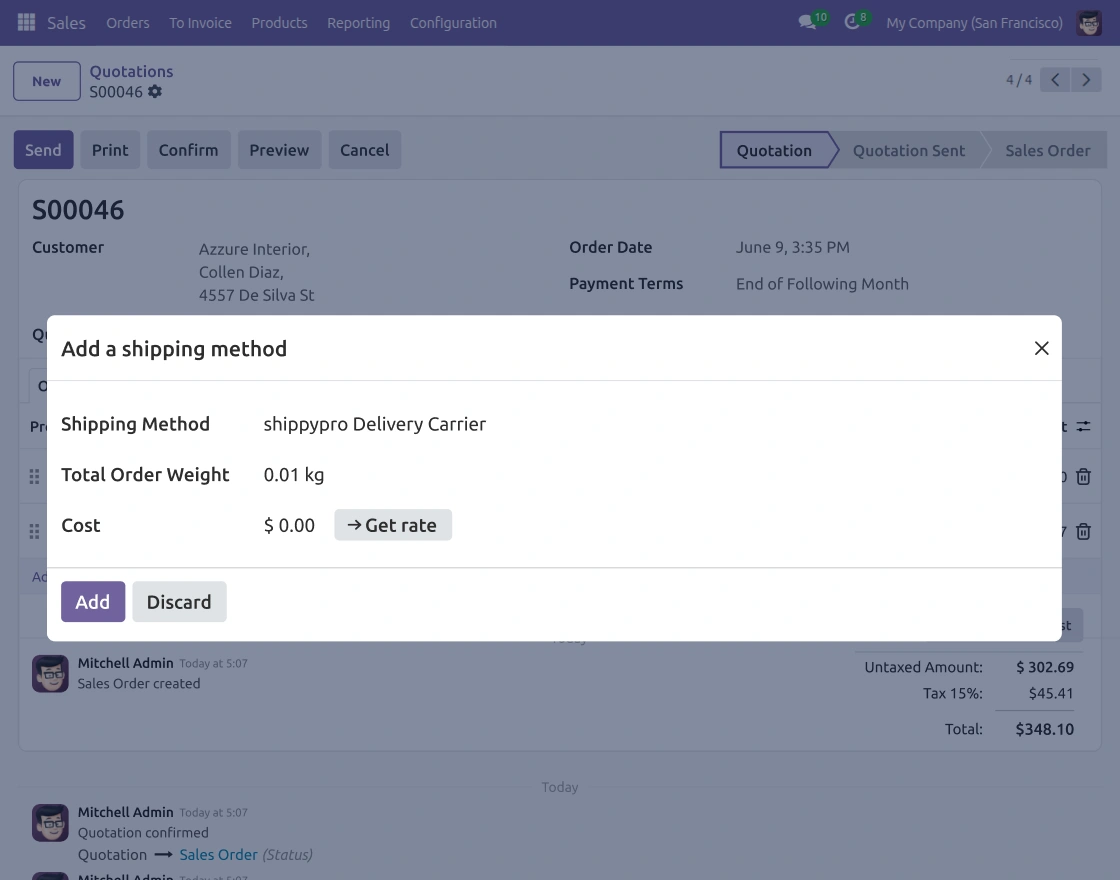
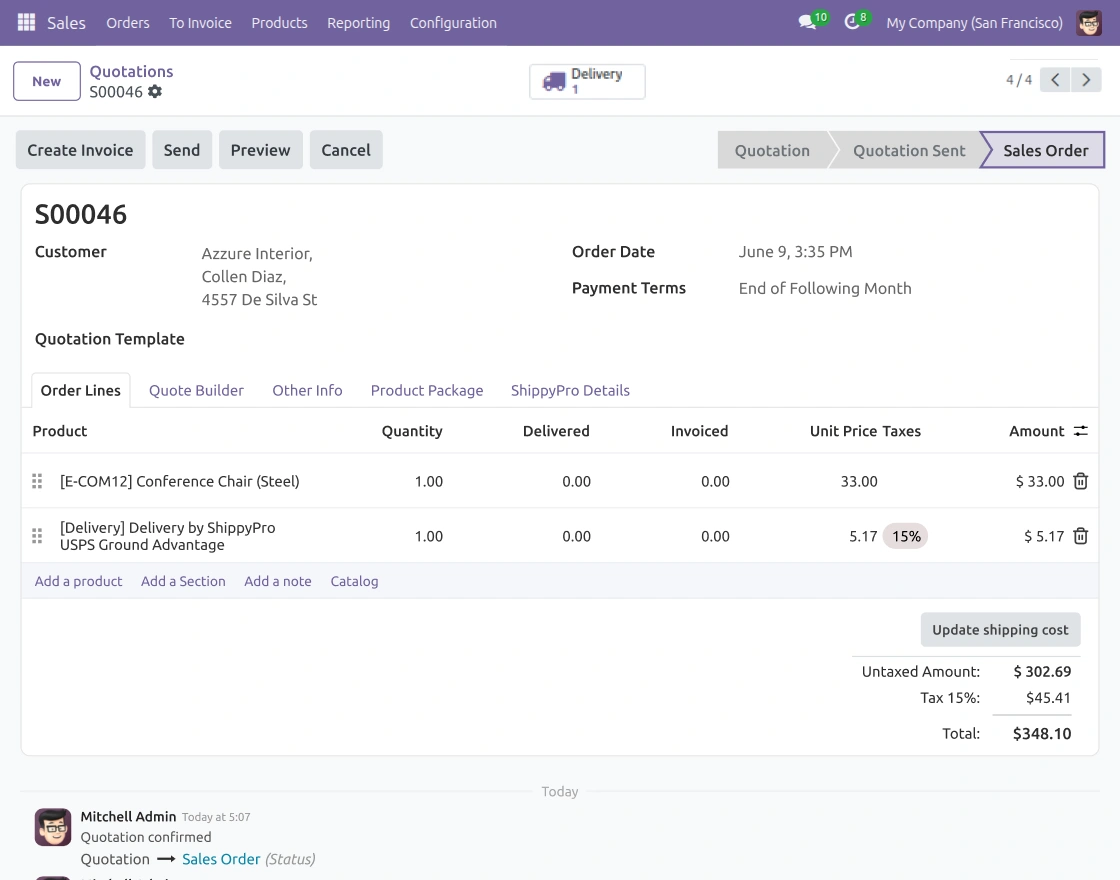
3. Open a sales order and click Add Shipping. Next, select the configured ShippyPro Delivery Carrier. After that, click Get Rate to fetch live shipping rates from available carriers.
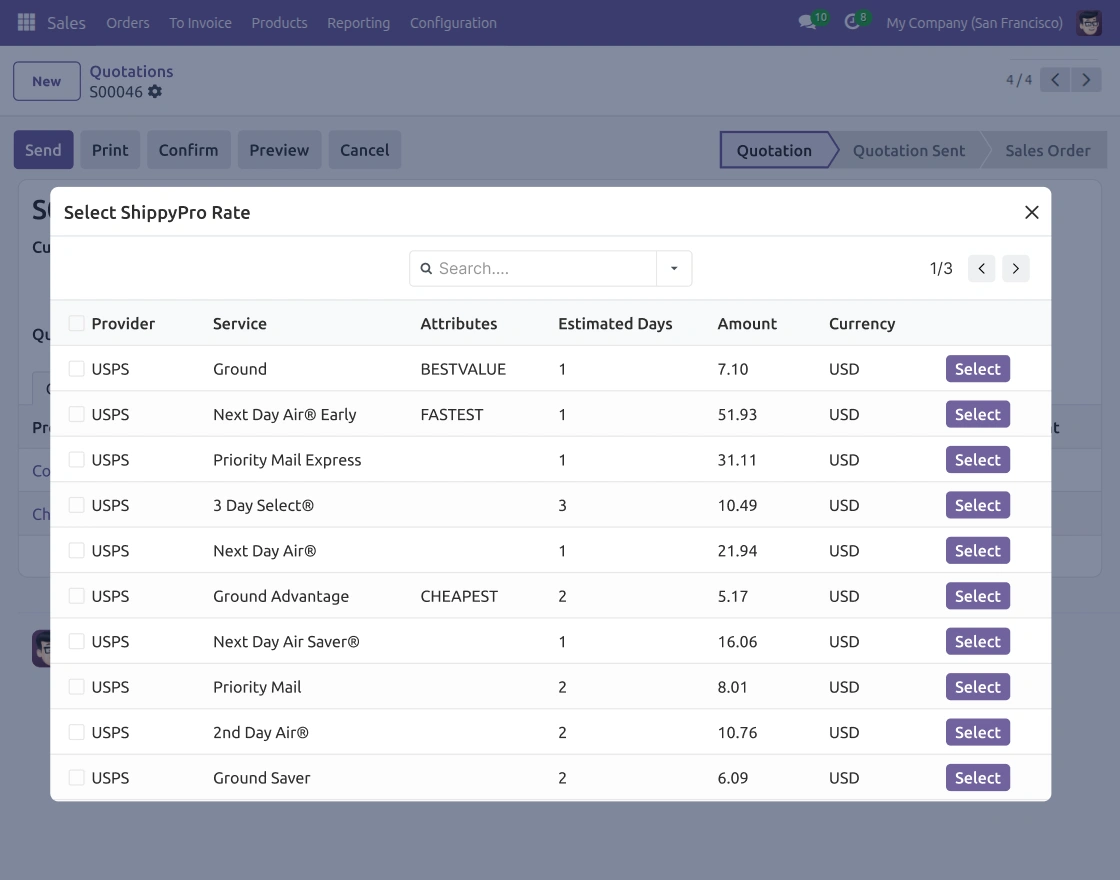
4. Review the available carrier services, shipping costs, and estimated delivery times. Next, compare the returned shipping options carefully. Then, select the most suitable shipping service. Finally, apply the selected shipping option to the sales order.
5. After selecting the shipping service, the shipping charge is added automatically to the sales order. Next, review the order details and shipping information. Then, confirm the sales order. As a result, the delivery order is created for shipment processing.
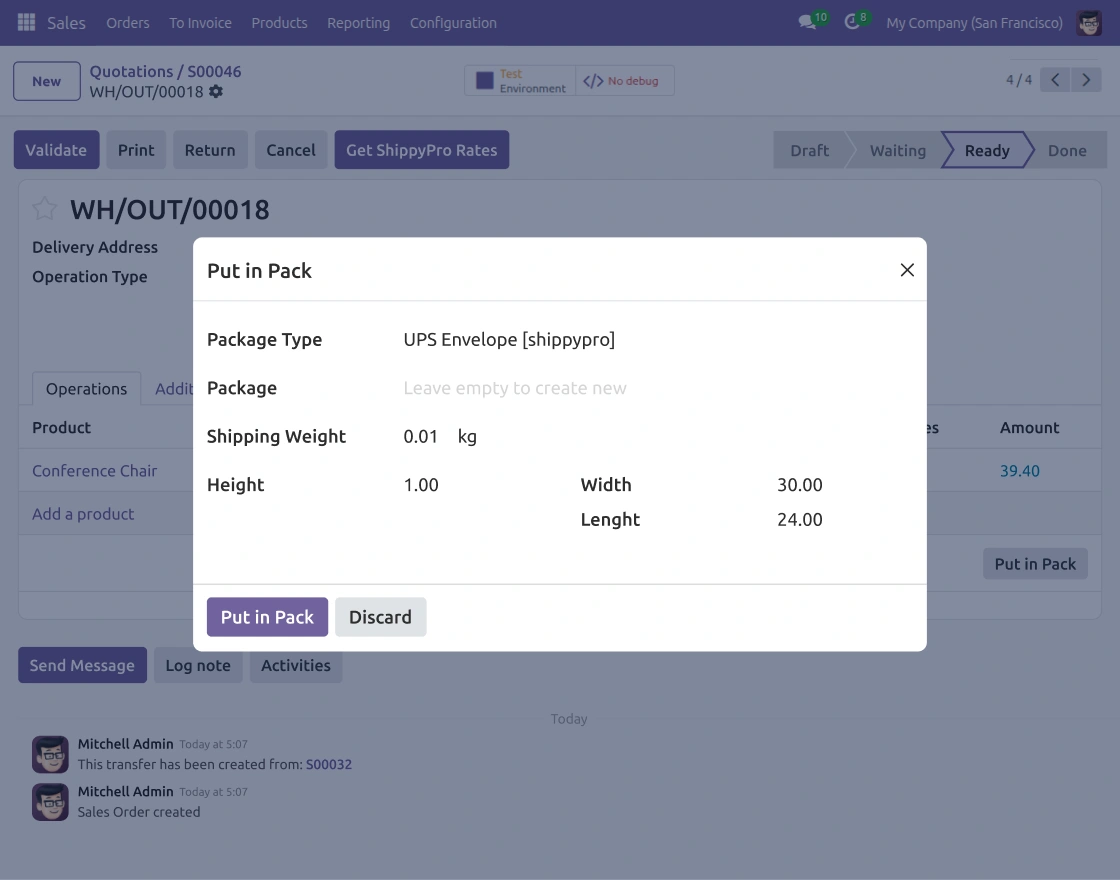
6. Open the delivery order and click Put in Pack. Next, select the package type for the shipment. Then, enter the package dimensions and shipping weight. Finally, save the package details to continue with shipment creation.
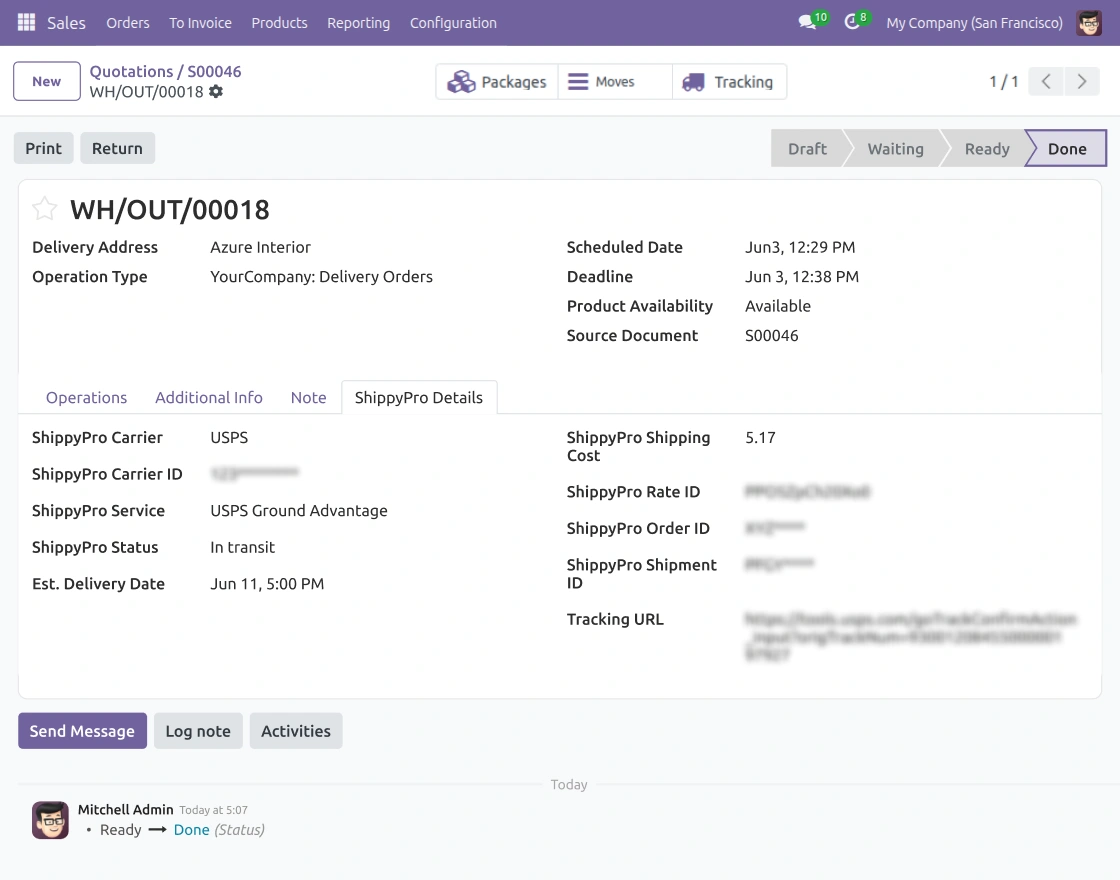
7. Validate the delivery order to create the shipment through ShippyPro. Once the shipment is created, the system automatically saves the shipment details. In addition, it stores the carrier information, tracking URL, and estimated delivery date for easy access.
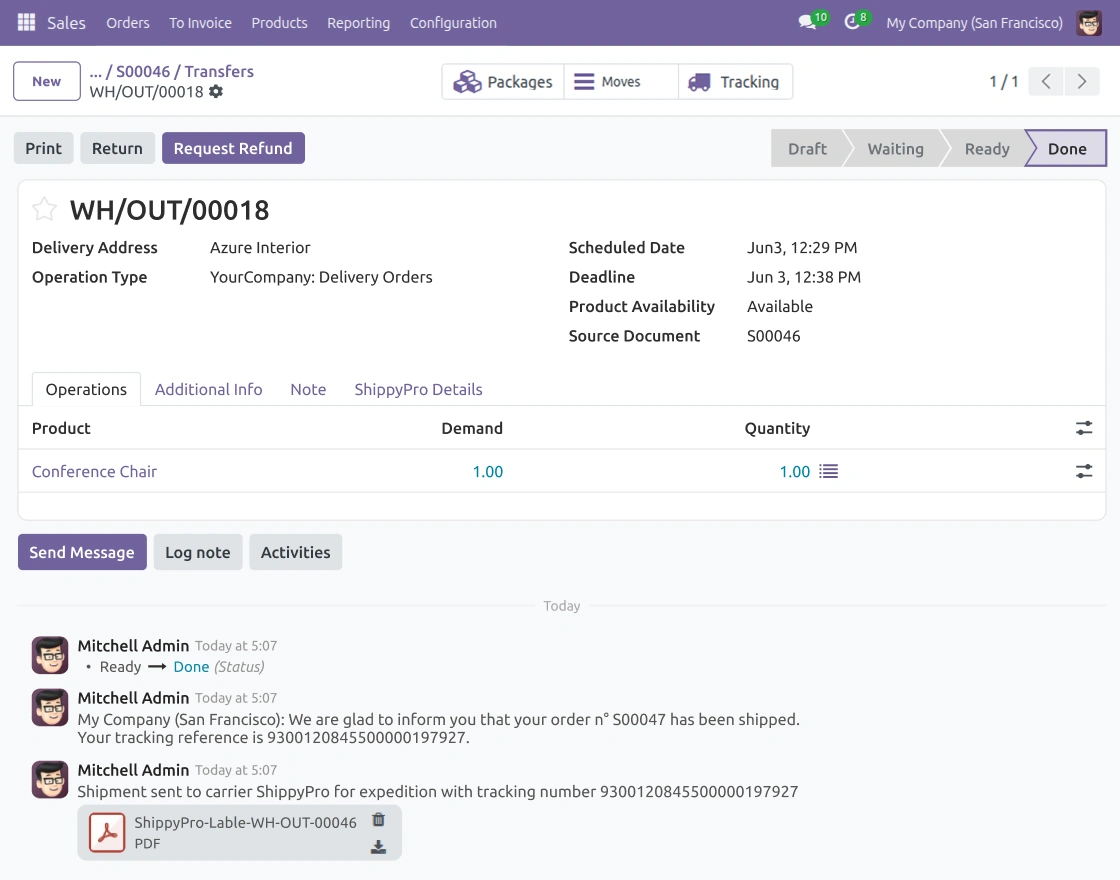
8. Once the shipment is created, the system automatically generates and attaches the shipping label to the delivery record. Additionally, the label is stored within the shipment details. Users can then download the generated shipping label directly from the shipment activity log.
9. Use the tracking reference or tracking URL to view live shipment updates from the carrier. Monitor the shipment status, delivery progress, and tracking history until the shipment is delivered.
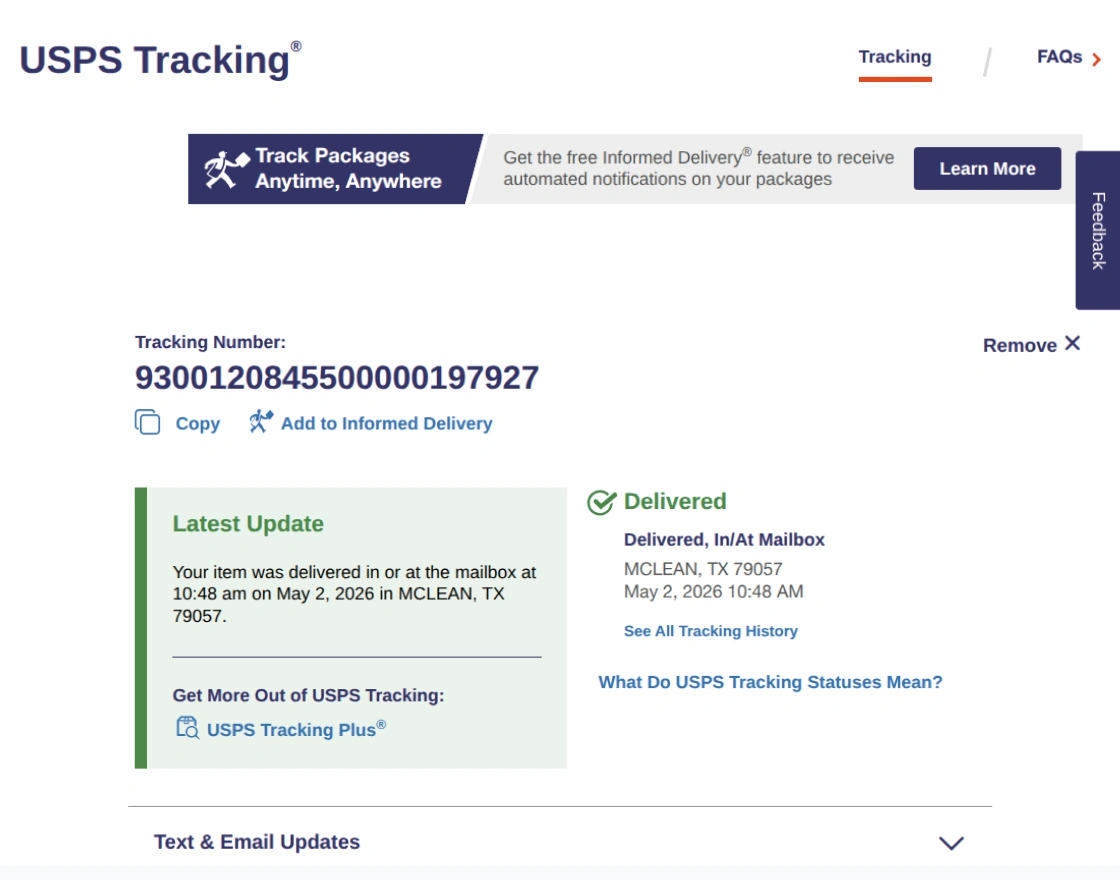
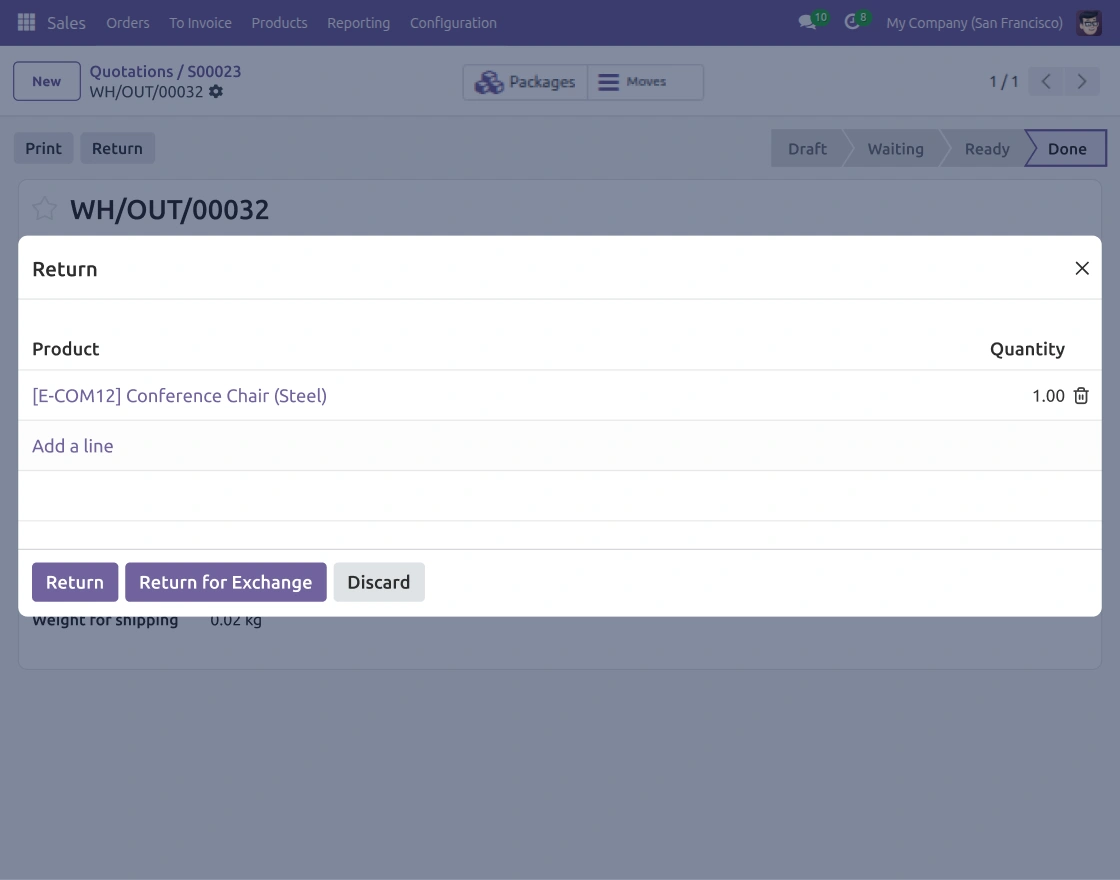
10. Open the completed delivery order and click Return. Select the products and quantities to return, then create the return shipment.
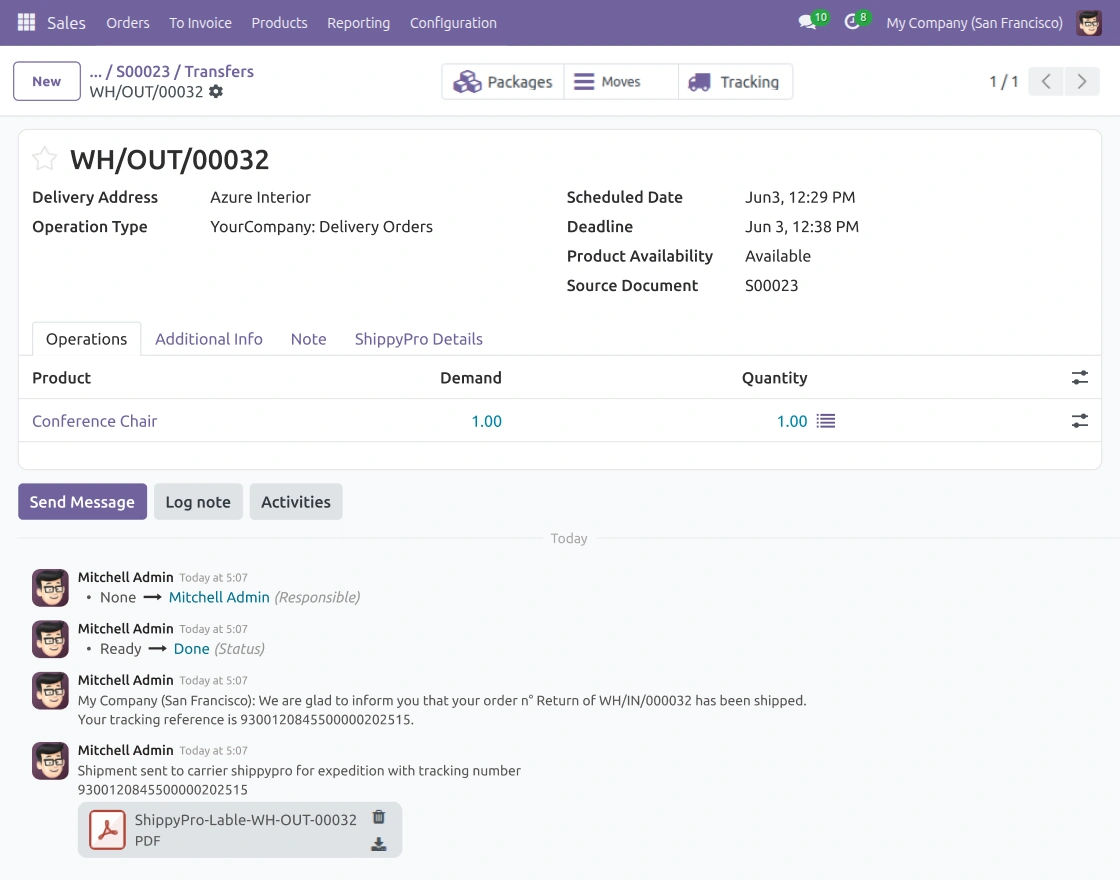
11. Validate the return shipment to create the return shipping request through ShippyPro. Once ShippyPro processes the return shipment request, it generates the return label automatically. Then, the system attaches the label to the return delivery record for quick access.
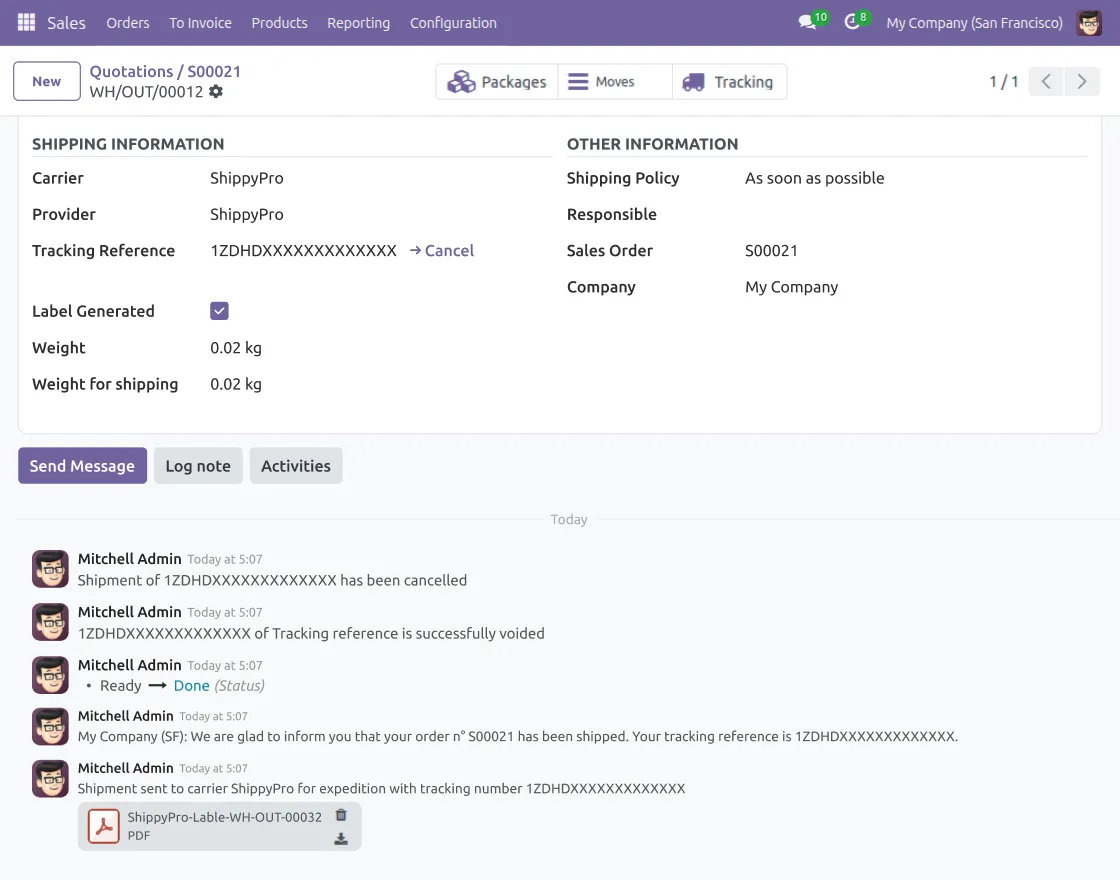
12. Open the completed shipment and navigate to the Additional Info tab. Next, review the shipment details before proceeding. Then, click the Cancel option to send a shipment cancellation request through ShippyPro.
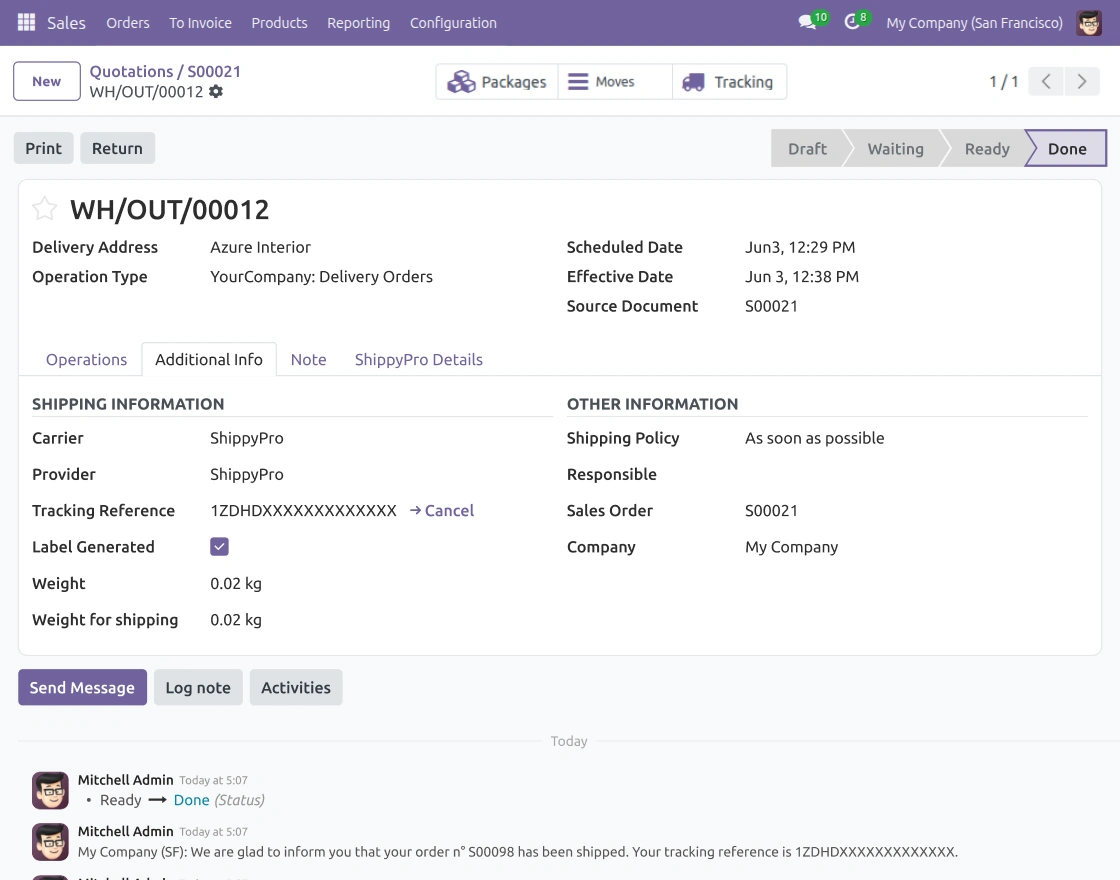
13. After the cancellation request is processed, the shipment status is updated automatically. The tracking reference is cleared, and the cancellation confirmation is recorded in the activity log.
Need Help?
Hope you find guide helpful! Please feel free to share your feedback in the comments below.
If you still have any issues/queries, please create a ticket at the UV Desk.
I hope this helps. In case of any further queries, contact us at our support mail.
Current Product Version - 1.0.0
Supported Framework Version - ODOO 17, 18, 19

Be the first to comment.