Introduction
ERPNext Multi-Channel Shopify Connector helps businesses connect one or more Shopify stores with ERPNext and manage their eCommerce operations from a single platform.
ERPNext Multi-Channel Shopify Connector syncs important business data, including categories, products, customers, addresses, and sales orders, between Shopify and ERPNext.
This reduces manual work and helps keep information organized across both systems.
It also supports automatic stock updates, order status synchronization, feed-based data processing, and multi-store management.
This makes it easier to manage Shopify stores while maintaining accurate data in ERPNext.
Prerequisites for using ERPNext Multi-Channel Shopify Connector
ERPNext Multi-Channel Shopify Connector works in conjunction with the following module:
You must install the module mentioned above to use the ERPNext Multi-Channel Shopify Connector.
Features
- Connect and manage multiple Shopify stores with ERPNext Multi-Channel Shopify Connector.
- Sync categories between Shopify and ERPNext with automatic mapping support.
- Sync simple and configurable products using feed-based processing.
- Sync customers and customer addresses from Shopify into ERPNext.
- Sync sales orders and process them through configured mappings.
- Automatically update stock quantities from ERPNext to connected Shopify stores.
- Sync invoice, shipment, and cancellation status from ERPNext to Shopify.
- Export categories and products from ERPNext to Shopify stores.
- Process synced data manually or automatically using feed evaluation.
- Maintain mappings for categories, products, customers, currencies, shipping methods, and order statuses.
Installation
1. After purchasing the app from the Webkul store, you will receive a link to download the module ZIP file.
2. Extract the downloaded ZIP file, and you will see a folder named ‘erpnext_shopify_connector’.
3. Set up the module in your Git repository.
4. If the app is hosted on GitHub, fetch it using the command:
bench get-app –branch main
https://github.com/your-account/erpnext_shopify_connector.git
(Replace “main” with your branch name and replace the “HTTPs URL” with your HTTPS clone URL.)
5. Install the app on your site using the command:
bench –site <your-site_name> install-app erpnext_shopify_connector
6. Finally, run the “bench migrate” command to complete the installation.
Workflow
Channel Details and Configurations
1. To get started, click Multi Channel from the left side menu. This will open the main dashboard of the ERPNext Multi-Channel Shopify Connector.

2. After that, to view all existing channels, click Channels from the menu.
A page will open showing all the channels that have already been created. From here, you can also create a new channel if needed.

3. To view the details of an existing channel, click on it. A page will open showing all the details related to that channel.
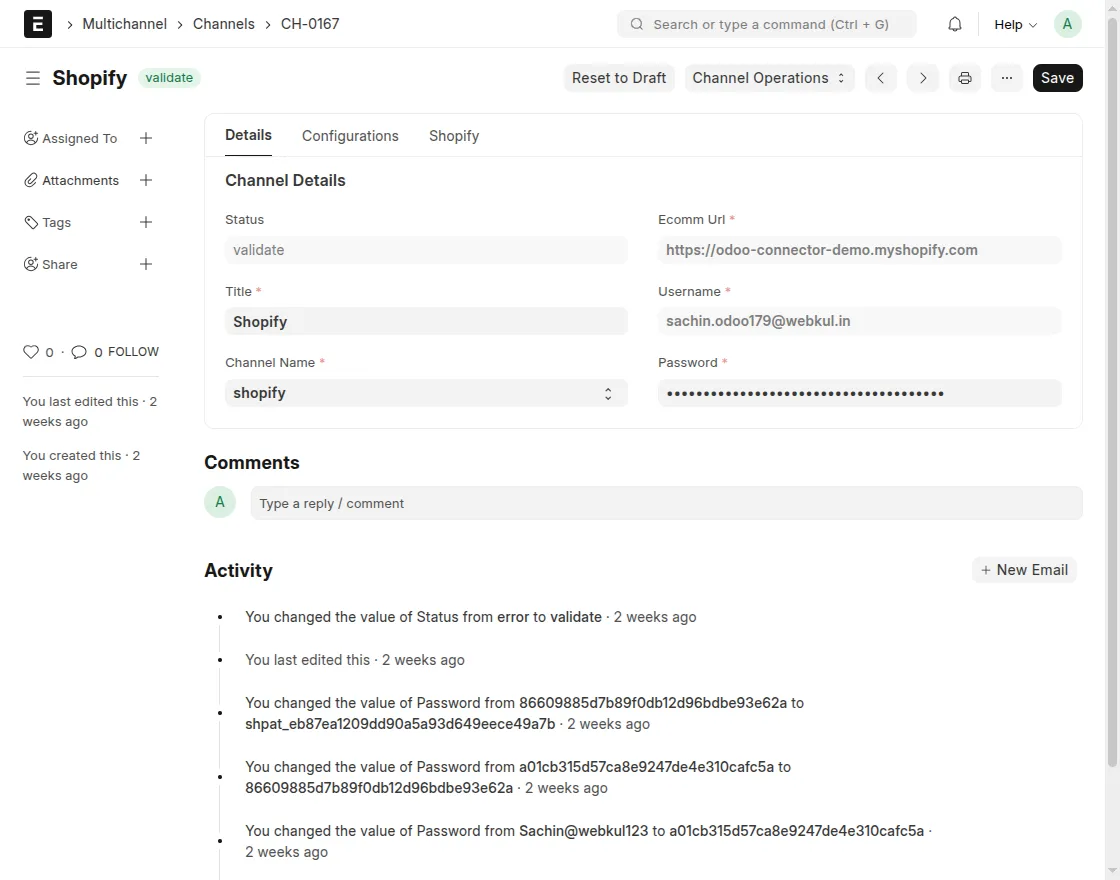
4. To view the channel configurations, click Configurations.
This will show all the settings available for that channel. From here, you can turn the Auto Sync Settings on or off according to your needs.

5. To create a new channel, click the Add Channel button in the top right corner of the Channel List page.
A new page will open where you need to fill in the required details, such as Channel Title, Channel Name, Ecomm URL, Username, and Password.

6. After filling in the channel details, configure the channel according to your needs. This includes Product Settings, Sales Settings, Tax Settings, Customer Settings, and Auto Sync Settings.
Once all the details are filled in, click Save to create the new channel.

Exporting Data from ERPNext to Shopify
To export data from ERPNext to Shopify, click the Operations button on the channel page.
A pop-up will appear where you need to select Export as the Operation and choose the Object type, such as Product.
Once the details are filled in, click Submit to start the export. The selected data will be sent from ERPNext to your connected Shopify store right away.

Importing Data from Shopify into ERPNext
To import data from Shopify, click the Operations button from the channel page.
A pop-up will appear where you need to select Import as the Operation, choose the Object type, select the Import Type, and enter the ID of the record you want to import.
Once done, click Submit to bring the data into ERPNext.

Export/Update Individual Products
You can also export or update a single product directly from its item page in ERPNext. Open the item you want to export or update and click the Export/Update Products button.
A pop-up will appear where you need to select the Channel and the Operation type such as Export or Update.
Once done, click Submit to apply the changes to your connected Shopify store.

Creating Mappings and Feeds
1. To create a category mapping, click Category Mapping from the main dashboard.
A new page will open where you can view or edit existing mappings between ERPNext and Shopify. To add a new mapping, click the Add Category Mapping button.
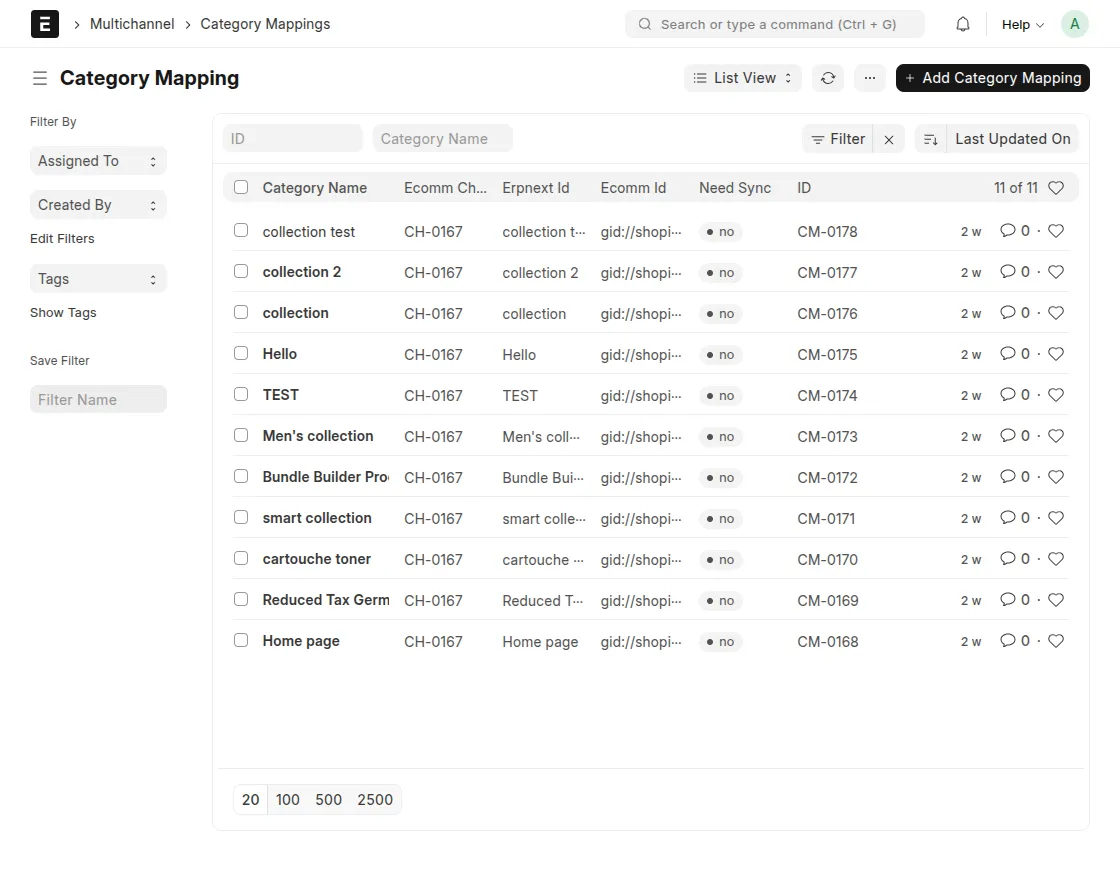
2. After clicking the Add Category Mapping button, a pop-up will appear where you need to fill in the required details such as Category Name, Ecomm Channel, ERPNext ID, Ecomm ID, and Need Sync.
Once all the details are filled in, click Save to create the new mapping.

3. To create a product mapping, click Product Mapping from the main dashboard. A new page will open where you can view or edit existing mappings between ERPNext and Shopify.
To add a new mapping, click the Add Product Mapping button.

4. After clicking the Add Product Mapping button, fill in the required details, such as Product Name, Ecomm Channel, ERPNext ID, Ecomm ID, and Need Sync.
Then, click Save to create the new mapping.

5. Now, to create a new customer mapping, go to the main dashboard and click Customer Mapping.
Click the Add Customer Mapping button and fill in the required details, such as Customer Name, Ecomm Channel, ERPNext ID, Ecomm ID, Address ID, and Need Sync.

6. To create a new order status mapping, go to the main dashboard and click Order Status Mapping.
Click the Add Order Status Mapping and fill in the required details such as Ecomm Channel, Ecomm Order State, ERPNext Order State, and Invoice State.
Then, click Save to create the new order status mapping.

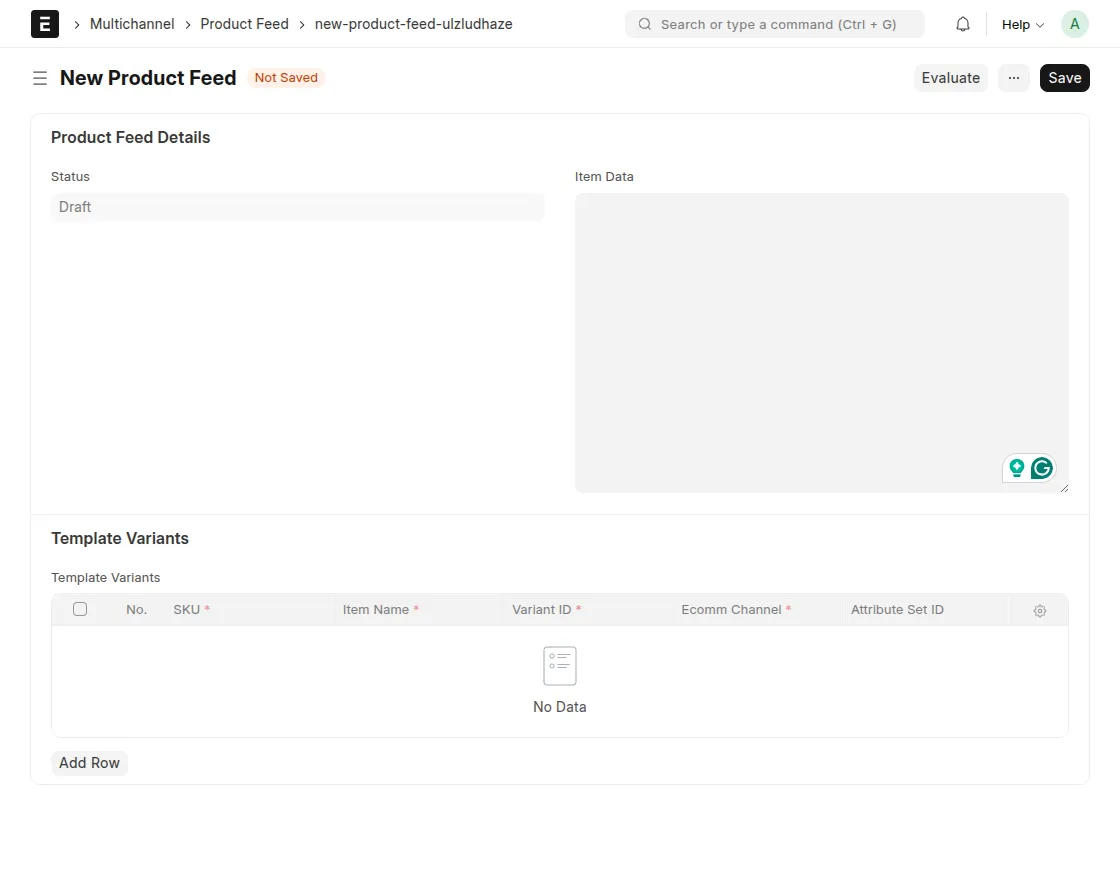
7. To create a new product feed, click Product Feed from the main dashboard of the ERPNext Multi-Channel Shopify Connector.
A page will open showing all your existing product feeds. To add a new one, click the Add Product Feed button.

8. After clicking the Add Product Feed button, a new page will open where you need to fill in all the required details to create the new product feed.
Note: – All other mappings in the connector can be created by following the same steps mentioned above.
Need Help?
Hope you find guide helpful! Please feel free to share your feedback in the comments below.
If you still have any issues/queries, please create a ticket at the UV Desk.
I hope this helps. In case of any further queries, contact us at our support mail.
Thanks for paying attention!!
Current Product Version - 1.5.0
Supported Framework Version - ERPNext V15

Be the first to comment.