Bagisto Mercado Pago Payment Gateway enables secure payments through Checkout Bricks, allowing customers to pay quickly using debit or credit cards.
Admins connect the store using Public Key and Access Token for a fast, seamless hosted checkout experience across multiple locales.
Please Note – Before buying, check if Mercado Pago supports your country and currency, as rules and cards vary by region.
Features
- Admin can enable or disable the Mercado Pago extension.
- Set a custom title, description, and checkout image for the payment method.
- Shoppers can pay with credit or debit cards via Mercado Pago Bricks.
- Hosted Brick keeps card data off your server, ensuring secure payments.
- Easily switch between Sandbox and Live mode from the admin panel.
- Choose a Brick style: Default, Dark, Bootstrap, or Flat.
- Uses the official mercadopago/dx-php SDK for all payment operations.
- Orders are created only after Mercado Pago confirms payment.
- Automatic invoice creation when the order allows it.
- Order totals stay synchronized via the built-in invoice event listener.
- Includes translations for multiple locales: English, Spanish, Portuguese, French, German, Arabic, Hindi, and more.
- The Brick automatically adapts to the store’s locale (e.g., es-AR, pt-BR).
Installation: Bagisto Mercado Pago Payment Gateway
Unzip the respective extension zip and then merge “packages” and “public” folder into project root directory.
Goto bootstrap/provider.php file and add following line under ‘providers’.
use Webkul\MercadoPago\Providers\MercadoPagoServiceProvider;
return [
    MercadoPagoServiceProvider::class,
]
Next, goto composer.json file and add following line under ‘psr-4’
"Webkul\\MercadoPago\\": "packages/Webkul/MercadoPago/src"
Register the module service provider in config/concord.php:
Webkul\MercadoPago\Providers\ModuleServiceProvider::class,
Run the command below to complete the setup:
composer require mercadopago/dx-php:^2.0 --with-all-dependencies
composer dump-autoload
php artisan vendor:publish --provider="Webkul\MercadoPago\Providers\MercadoPagoServiceProvider" --force
php artisan optimize:clear
Admin Configuration:
Once you successfully execute the commands, you will see the Mercado Pago Payment by navigating through Configure → Payment Methods → Mercado Pago.
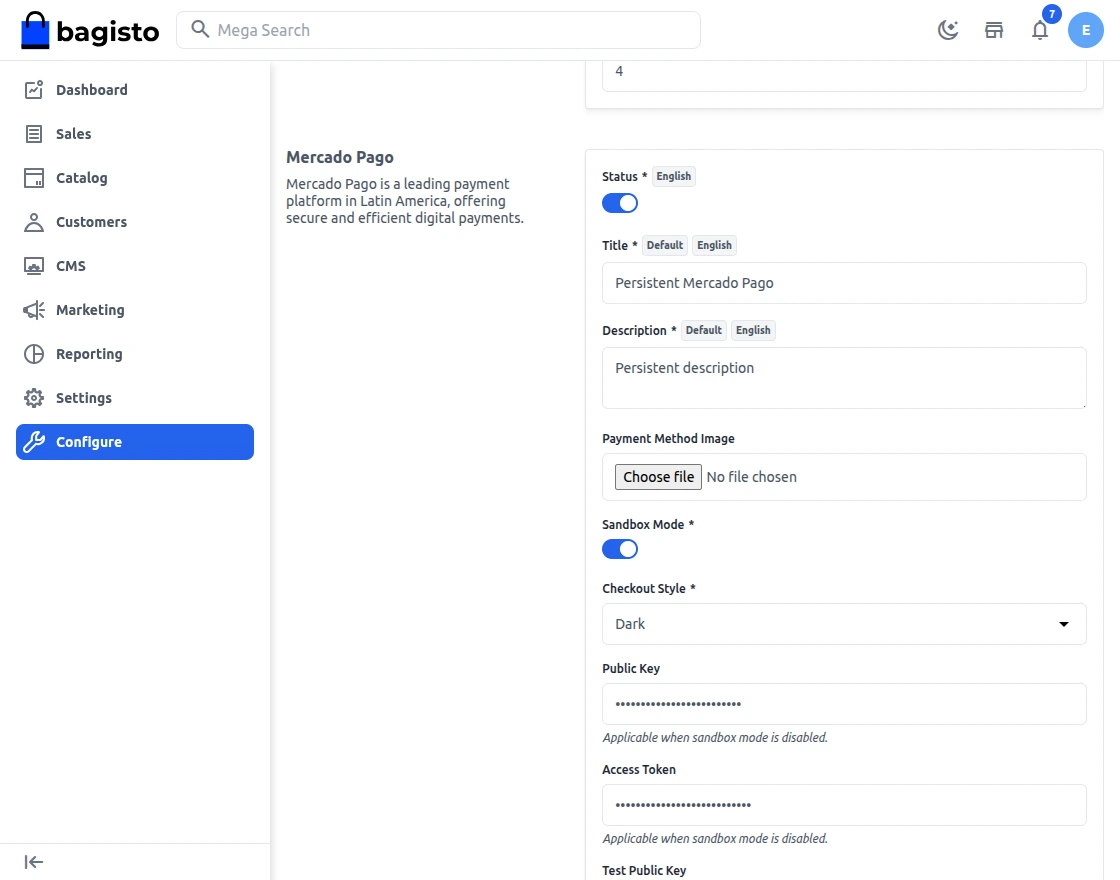
Settings
Here, the store admin will be able to configure the initial settings –
- Status – Turn the module on or off with the toggle.
- Title – Set the title that shoppers see at checkout.
- Description – Set a short description that shows on the checkout page.
- Image – Upload a logo that shows next to the payment method.
- Sandbox – Turn this on to test in sandbox mode. Turn it off to go live.
- Style – Pick a Brick style: Default, Dark, Bootstrap, or Flat.
- Public Key – Add your live public key from the Mercado Pago dashboard.
- Access Token – Add your live access token from the Mercado Pago dashboard.
- Test Public Key – Add your sandbox public key for testing.
- Test Access Token – Add your sandbox access token for testing.
After setting all configuration, click on Save button.
Storefront
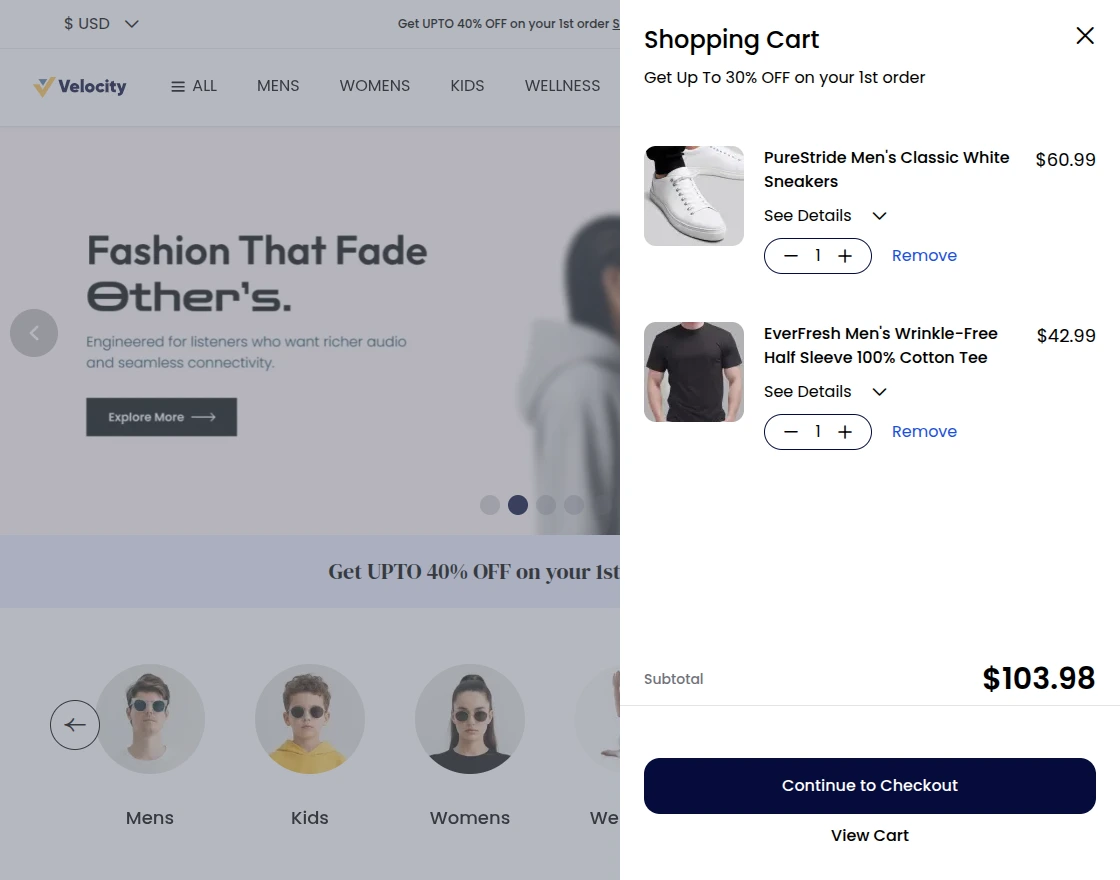
Once you have successfully added the product in your cart, tap the Continue to Checkout button.
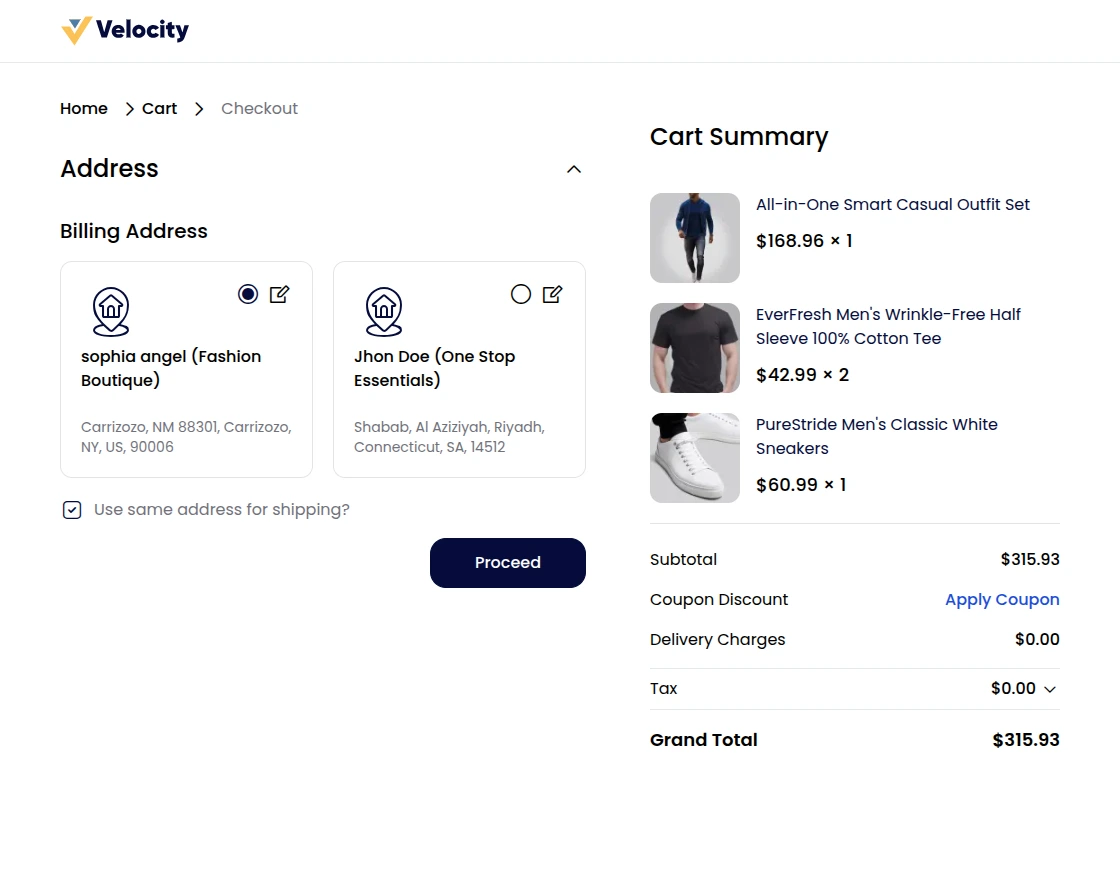
Now, select the shipping address and tap Confirm button.
After that, select the Mercado Pago Payment method under the payment methods section.
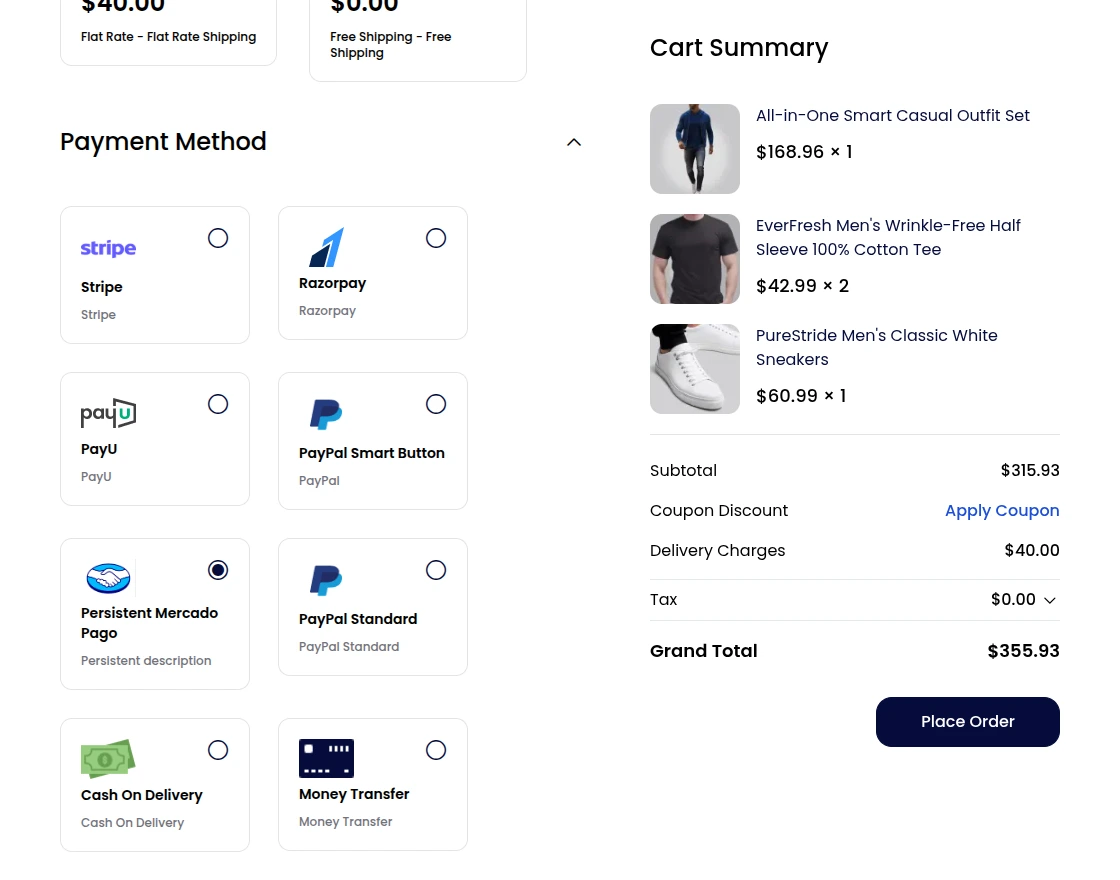
After selecting the Mercado Pago payment method, the customer can click on the Place Order button.
Bagisto sends the customer to the Mercado Pago redirect page inside your store. The page loads the Mercado Pago Brick with your chosen style.
The shopper fills in card details inside the Brick. The Brick sends the card data to the Mercado Pago SDK in a safe way.
Once Mercado Pago approves the payment, the module creates the Bagisto order with a Processing status and generates an invoice when applicable.
The customer lands on the order success page with a clear confirmation.

The customers can check order status and the selected payment gateway in their order history.
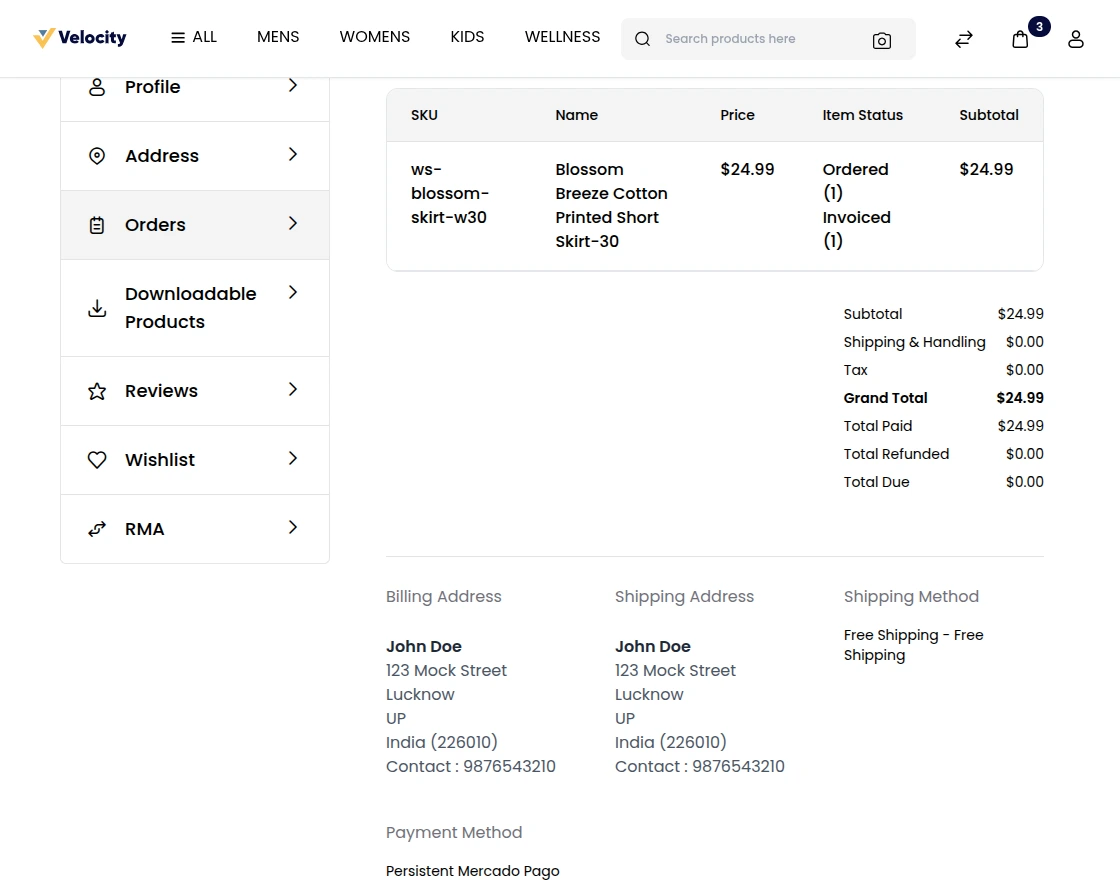
Customers can also check the selected payment method in their order invoice.
Order Details – Admin Backend
The admin can view the respective orders and can see the chosen payment method for the orders.
Apart from that, the admin can see the selected payment gateway for an order by opening the same.
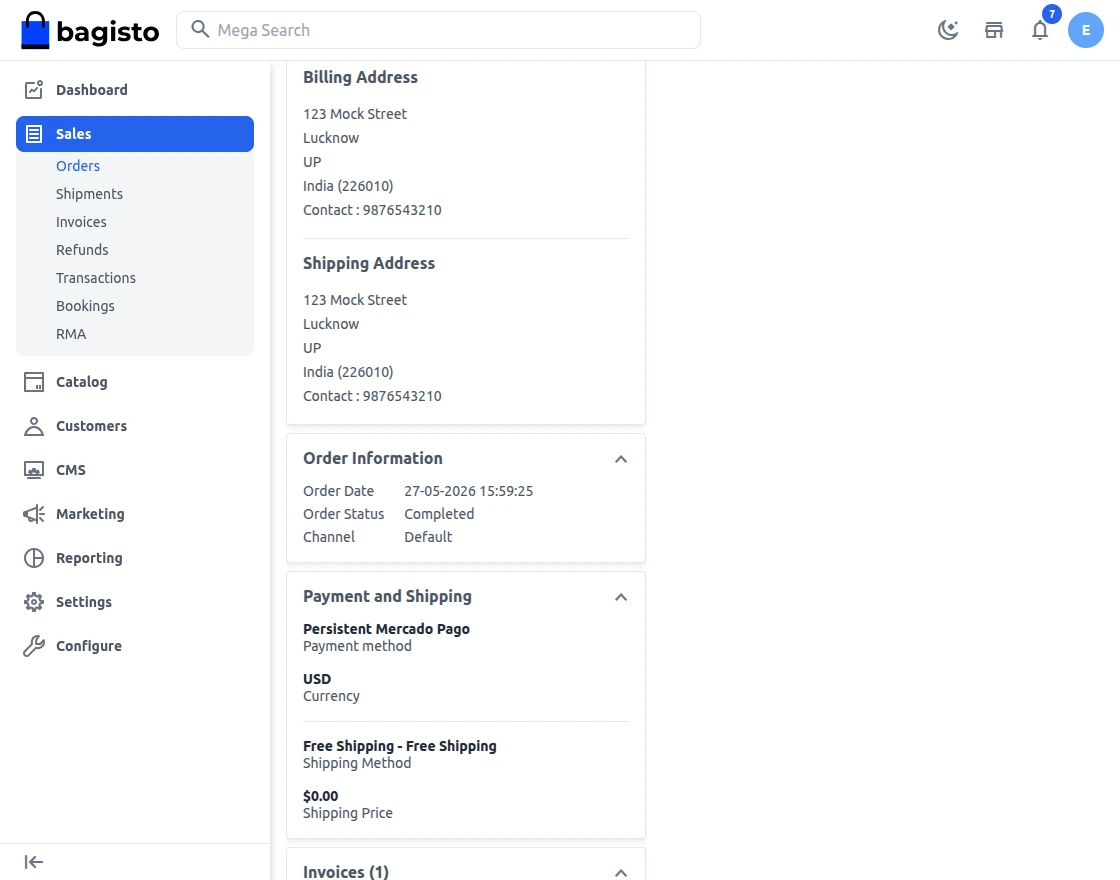
The admin can also view the payments for the orders done via Mercado Pago payment gateway on the Mercado Pago dashboard and generate refunds from there as well.
Support
That’s all for the Bagisto Mercado Pago Payment Gateway. If you still face any issues, feel free to raise a ticket and share your feedback at bagisto.uvdesk.com
Current Product Version - v2.4.10
Supported Framework Version - v2.4.10

Be the first to comment.