Introduction
Odoo Quality Control Management ensures that every product meets the required standards before moving through sales, purchase, or warehouse processes. It streamlines inspections using quality teams, reusable templates, and automated checks.
The module reduces manual errors by applying clear rules and predefined actions. This makes inspections faster, smoother, and easier to manage for different operations.
With Odoo Quality Control Management, managers can track results through parameters, alerts, and dashboards. It ensures compliance, maintains consistency, and keeps records audit-ready at all times.
Features
- Build and manage quality control teams with defined roles.
- Create reusable templates for products, categories, or operations.
- Automate QC tasks in sales, purchase, and warehouse workflows.
- Define inspection parameters with Yes/No, text, grading, or checklists.
- Set task priorities and assign responsibilities with rules.
- Configure actions on QC failure such as restrict validation or allow with alerts.
- Send automatic system notification or email on failure.
- Perform multi-level inspections with inspection, approval, and review.
- Track performance with dashboards and visual reports.
- Maintain audit-ready inspection history for compliance.
Installation
- Once you purchase the App from Webkul store, you will receive a link to download module’s zip file.
- Extract the file on your system after download finishes. As a result, you will be able to see a folder named- ‘wk_quality_management’
- Copy and paste this folder inside your Odoo Add-Ons path.
- Now, open Odoo App and click on the Settings menu. Here, click on Activate Developer Mode.
- Then, open Apps menu and click on ‘Update Modules List.’
- In the search bar, remove all the filters and search ‘wk_quality_management’
- You will be able to see module in the search results. Click on ‘Activate’ to install it.
Workflow
After installing Odoo Quality Control Management, go to Quality Control → Configuration.
Here, you will find all the configuration options required to set up Odoo Quality Control Management.
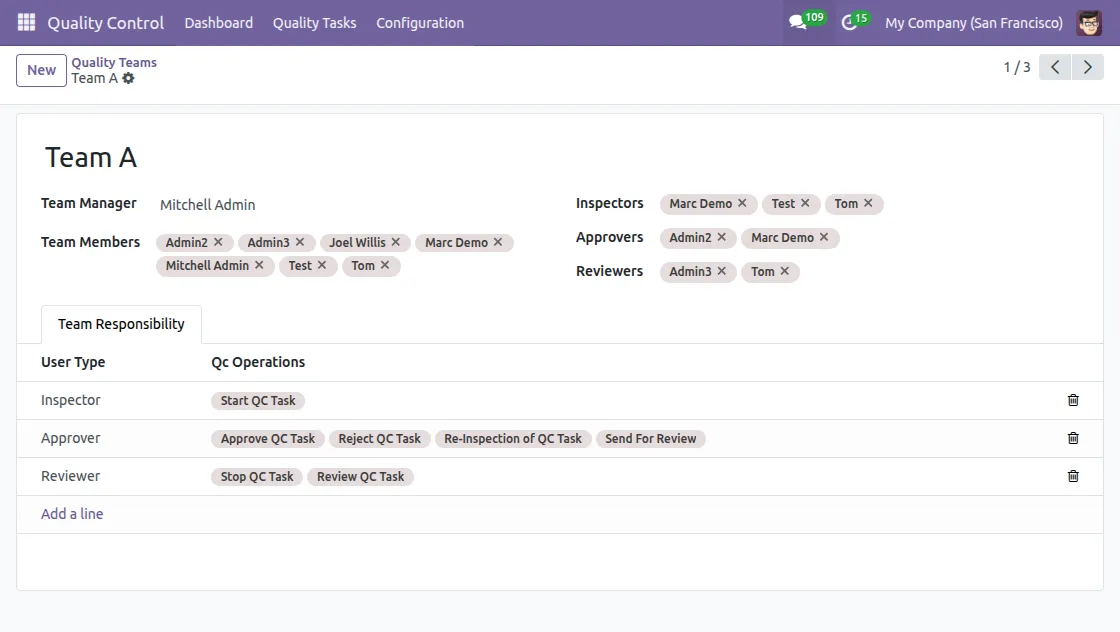
1. Create Quality Teams
- Navigate to Quality Control → Configuration → Quality Teams.
- Create a new team and assign roles to team members.
- Team members include:
- Team Manager – manages and monitors the QC team.
- Inspector – starts QC tasks and performs inspections.
- Approver – approves or rejects QC tasks, can send tasks for re-inspection or review.
- Reviewer – performs final reviews and closes QC tasks.
2. Create QC Template
Go to Quality → Configuration → QC Templates and set up your template.
- Choose Picking Type (Sales or Delivery) and apply it to products or categories.
- Define the priority level (High, Medium, Low).
- Assign a QC team and configure failure actions (restrict or allow with alerts).
- Set notification type as system alert or email in case of failure.
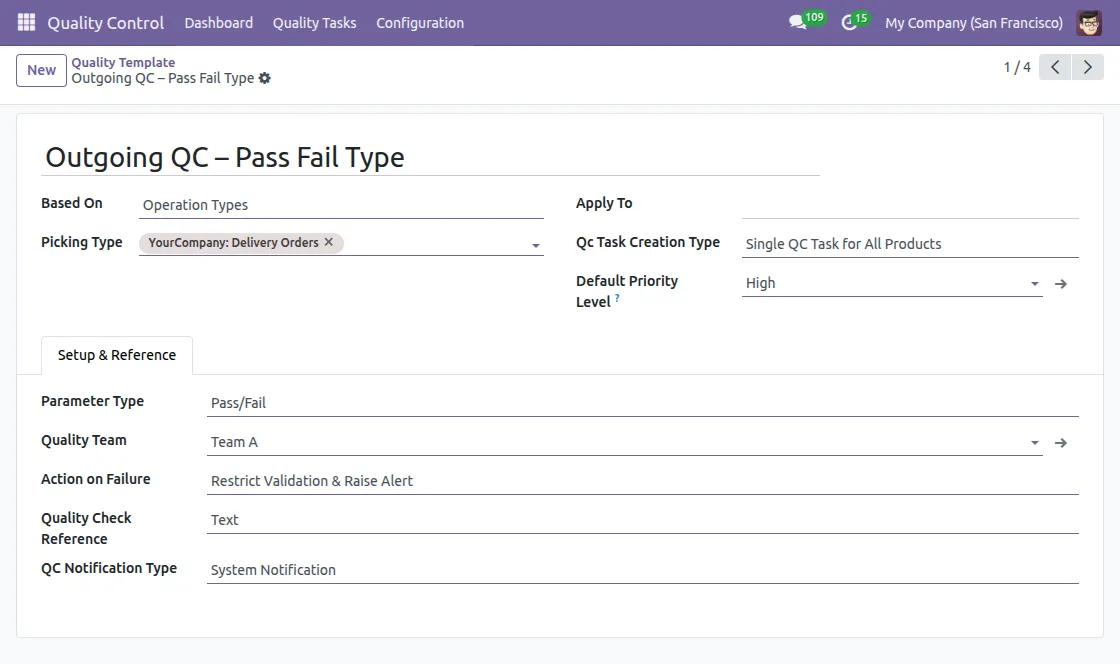
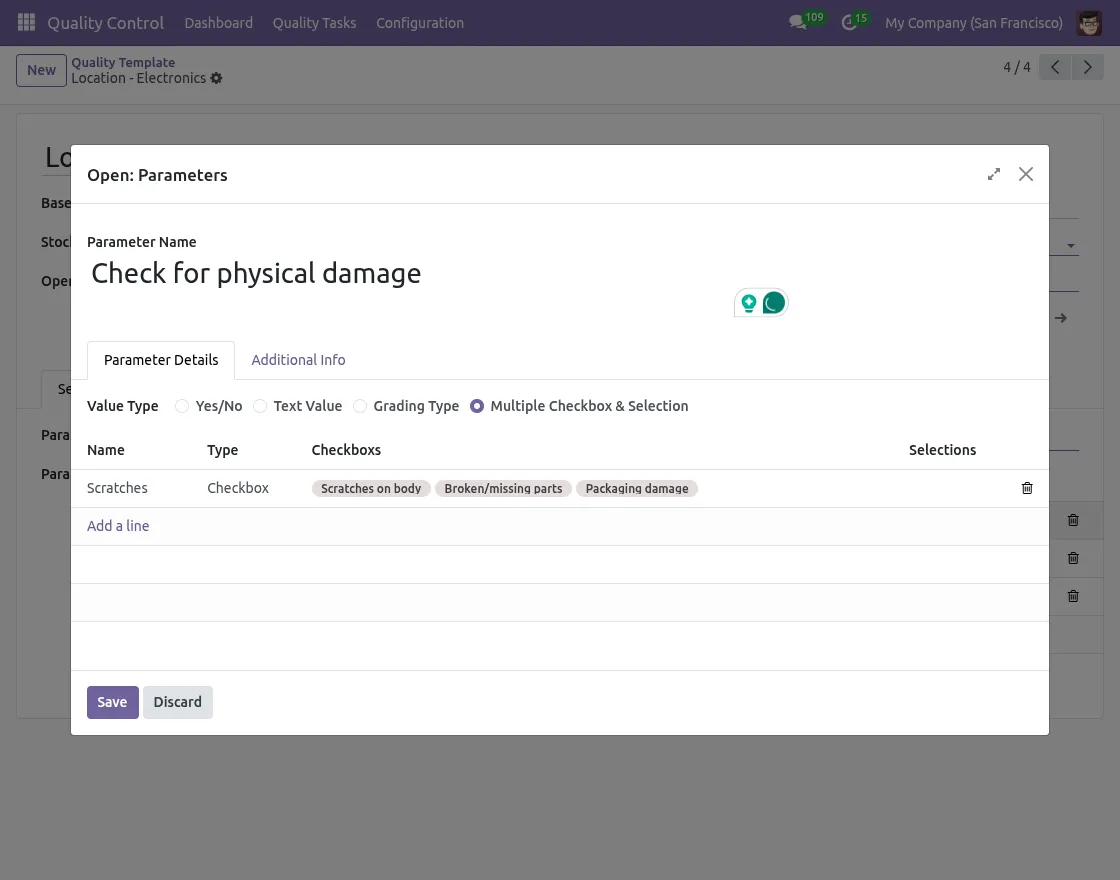
- Create or select parameters to define how inspections are checked. You can set them as simple Pass/Fail values or use custom pass and fail conditions based on specific rules.
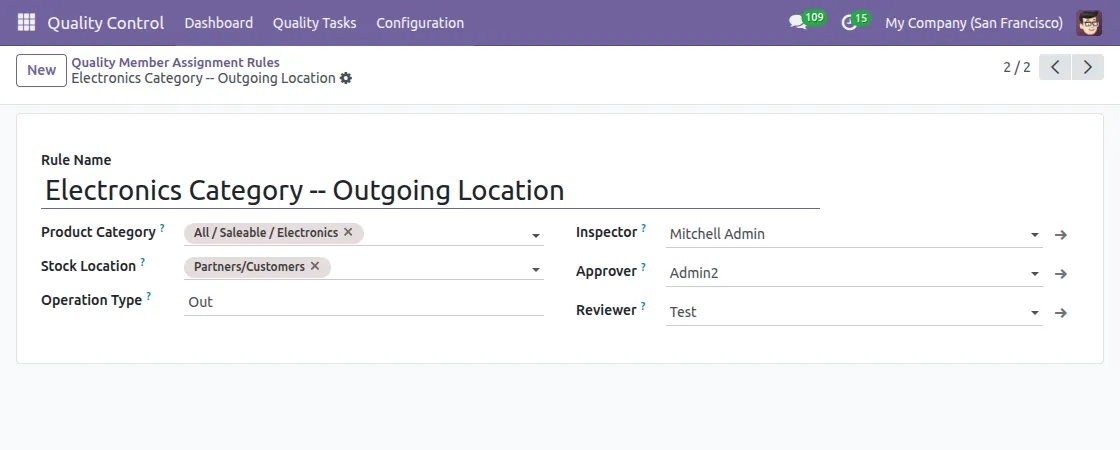
3. Create Member Assignment Rules
Configuration → Member Assignment Rules.
- Define a Rule Name to identify the setup.
- Select the Product Category, Stock Location, and Operation Type (e.g., Outgoing, Incoming).
- Assign members to roles such as Inspector, Approver, and Reviewer for the rule.
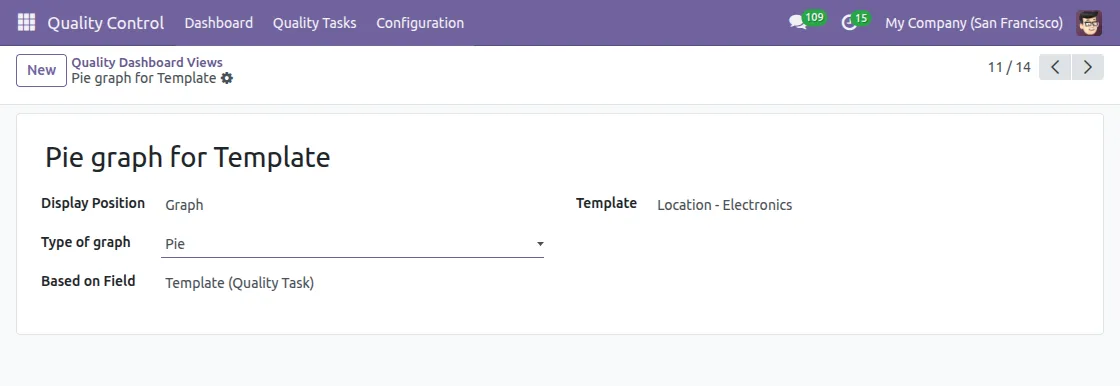
4. Set Dashboard Views
Navigate to Configuration → Dashboard Views to configure how results appear.
- Choose whether to display the data as a Graph or Header.
- Select field on which the dashboard is based.
- Define the state of inspection, such as Draft, Waiting Approval, Passed, Failed, or Under Inspection.
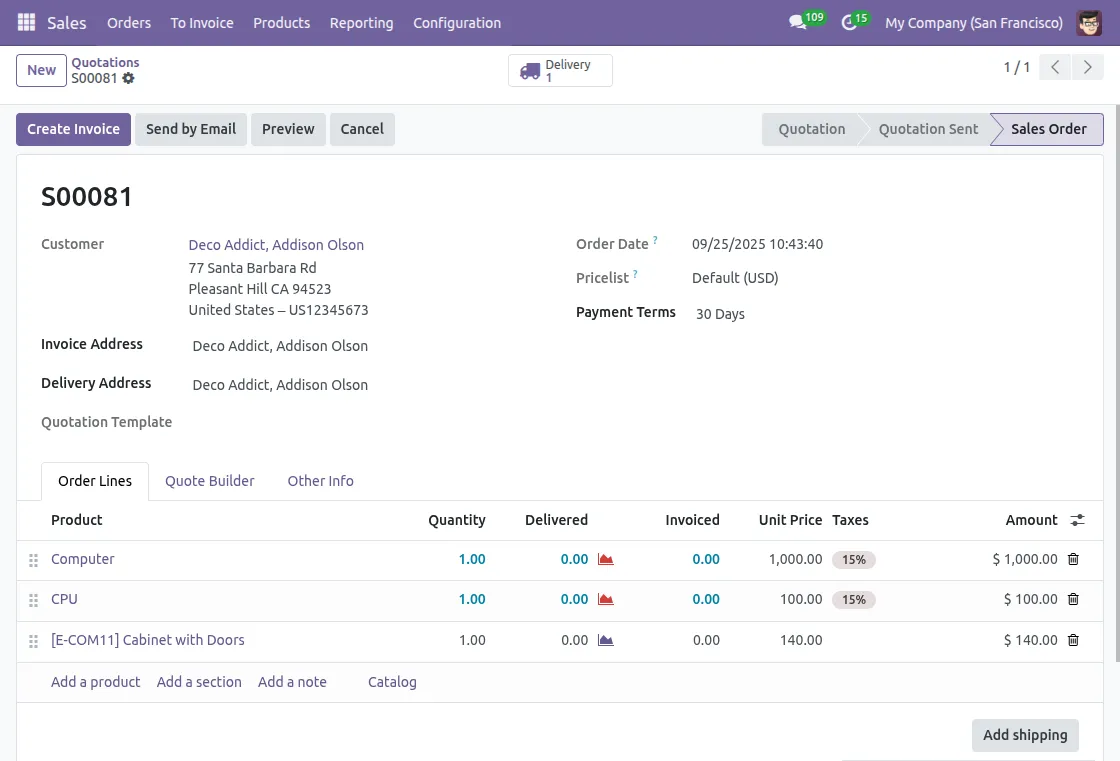
5. Create and Confirm Sales Order
Go to Sales → Orders → Create New.
- Fill in customer details and add products to order lines.
- Once done, click on Confirm to confirm sales order.

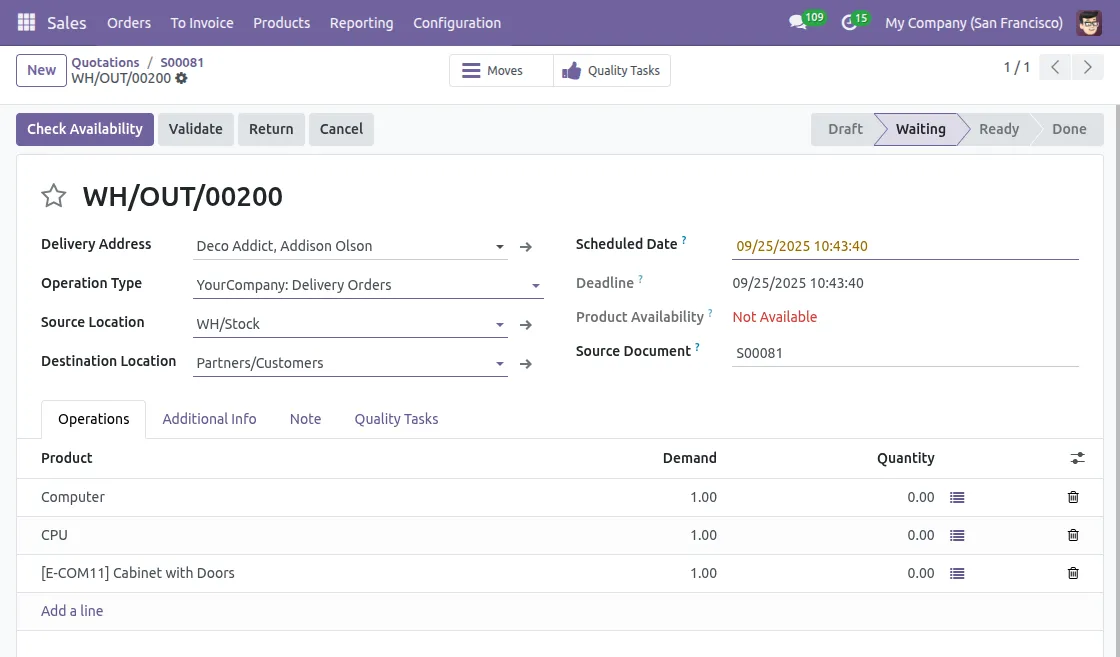
6. Trigger Delivery and QC Tasks
After confirmation, a Delivery button appears at the top of sales order.
- Click on this button to generate delivery order.
- QC tasks are also triggered automatically as per the configuration.
7. QC Tasks and Validation Button
After clicking on Delivery button, a QC Tasks button appears.
- By clicking on it, you can view assigned QC tasks that must be completed before validation.
- Once all tasks are finished, you can validate the delivery by clicking on Validate button, as per configured rules.
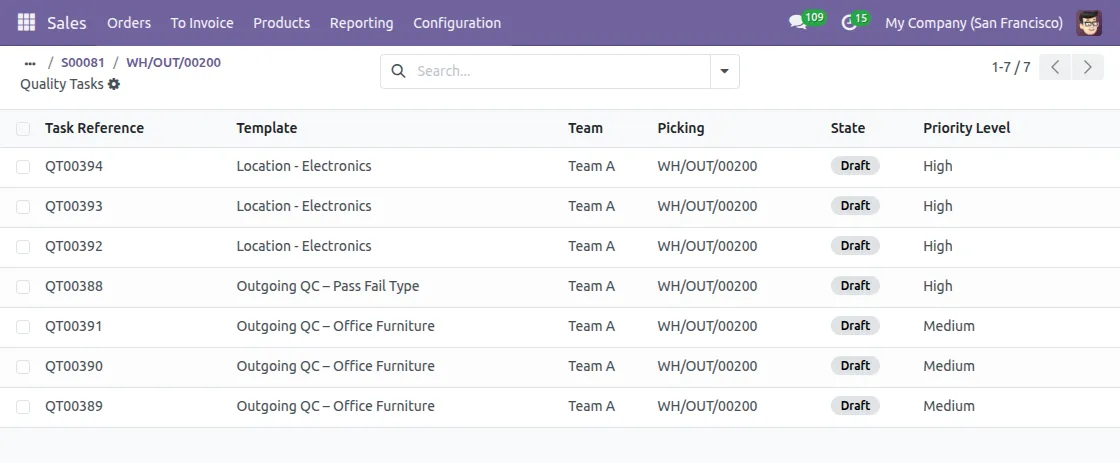
8. Review Assigned QC Tasks
Open QC Tasks list to check the tasks generated for this delivery order.
- The list shows task reference, template, assigned team, picking reference, state, and priority level.
- Inspectors can now start performing the assigned tasks.
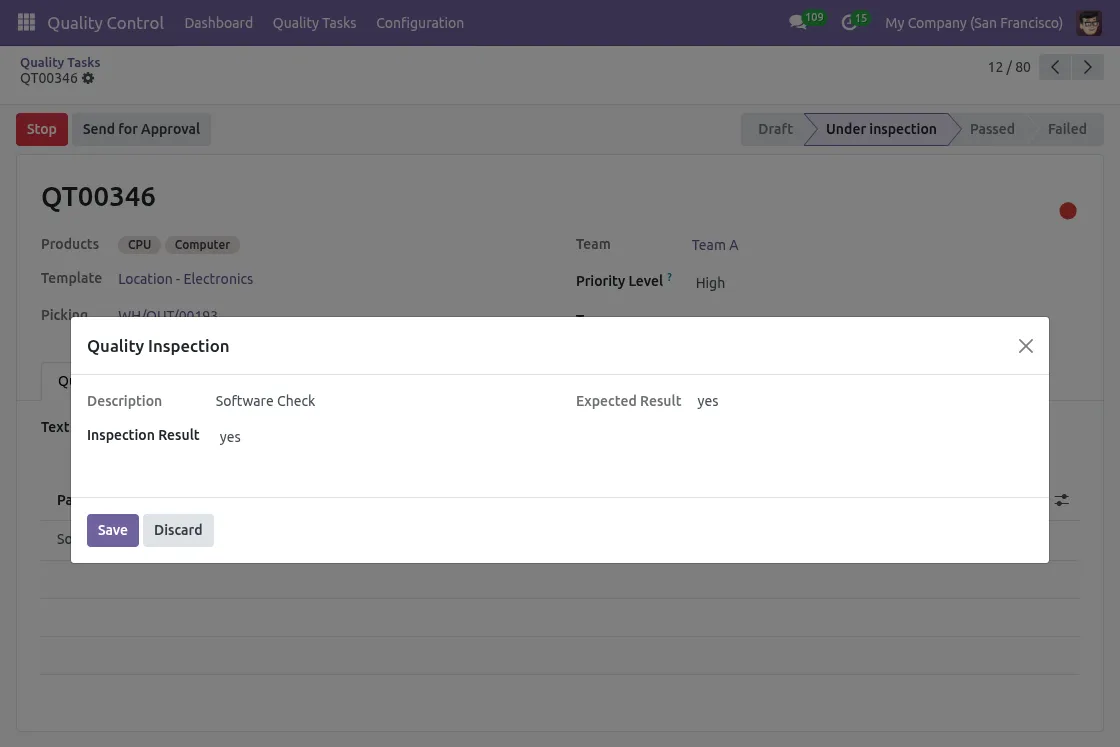
9. Inspector’s Role
The Inspector starts QC task and performs checks as per defined parameters.
- Records results such as pass/fail, grading, or checklist completion.
- Sends the QC task forward for approval.
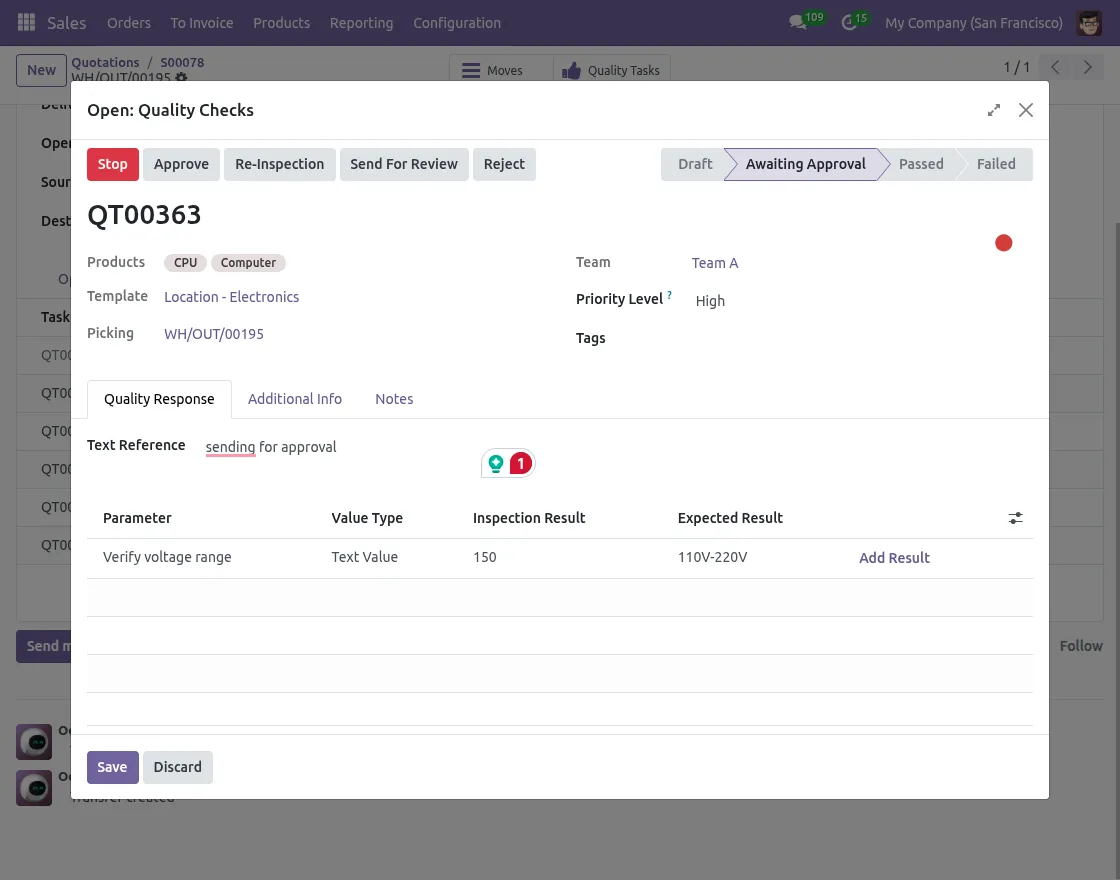
10. Approver’s Role
The Approver reviews the results submitted by inspector.
- Approves if the results meet standards.
- Rejects or sends the task back for re-inspection if issues are found.
- Can also forward the task to Reviewer for final review.
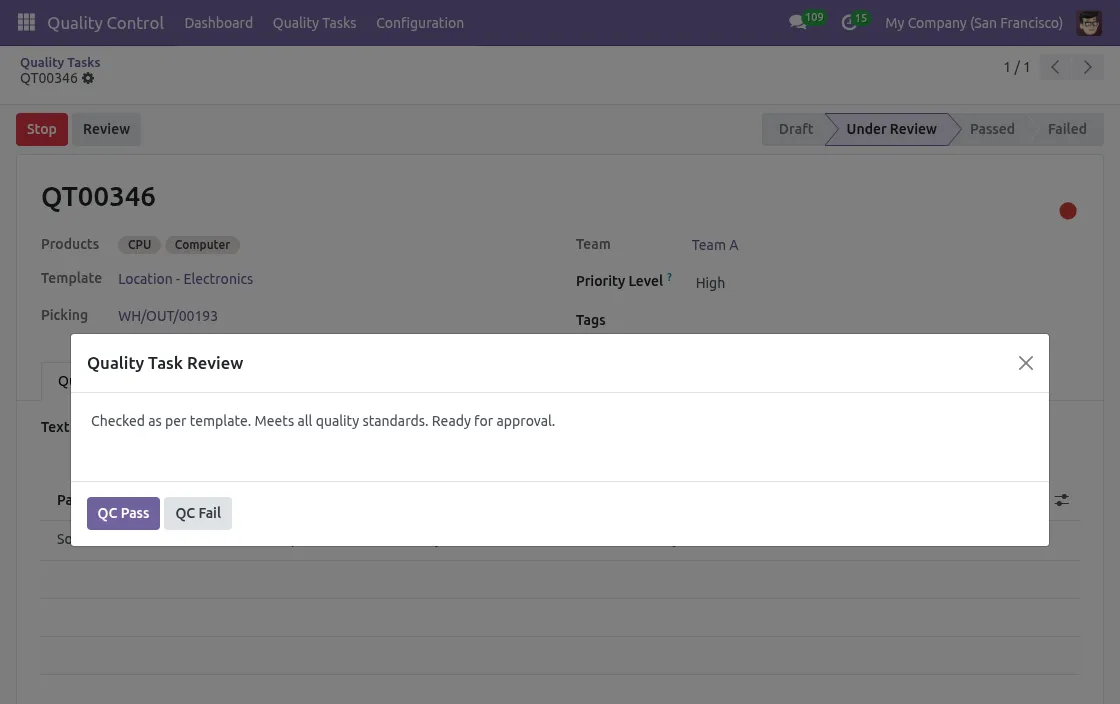
11. Reviewer’s Role and Validation
The Reviewer receives the task from approver for a final check.
- Confirms QC outcome and ensures compliance.
- Marks the task as passed, failed, or closed.
- Once review is complete, Sale Order can be validated by clicking on Validate button.
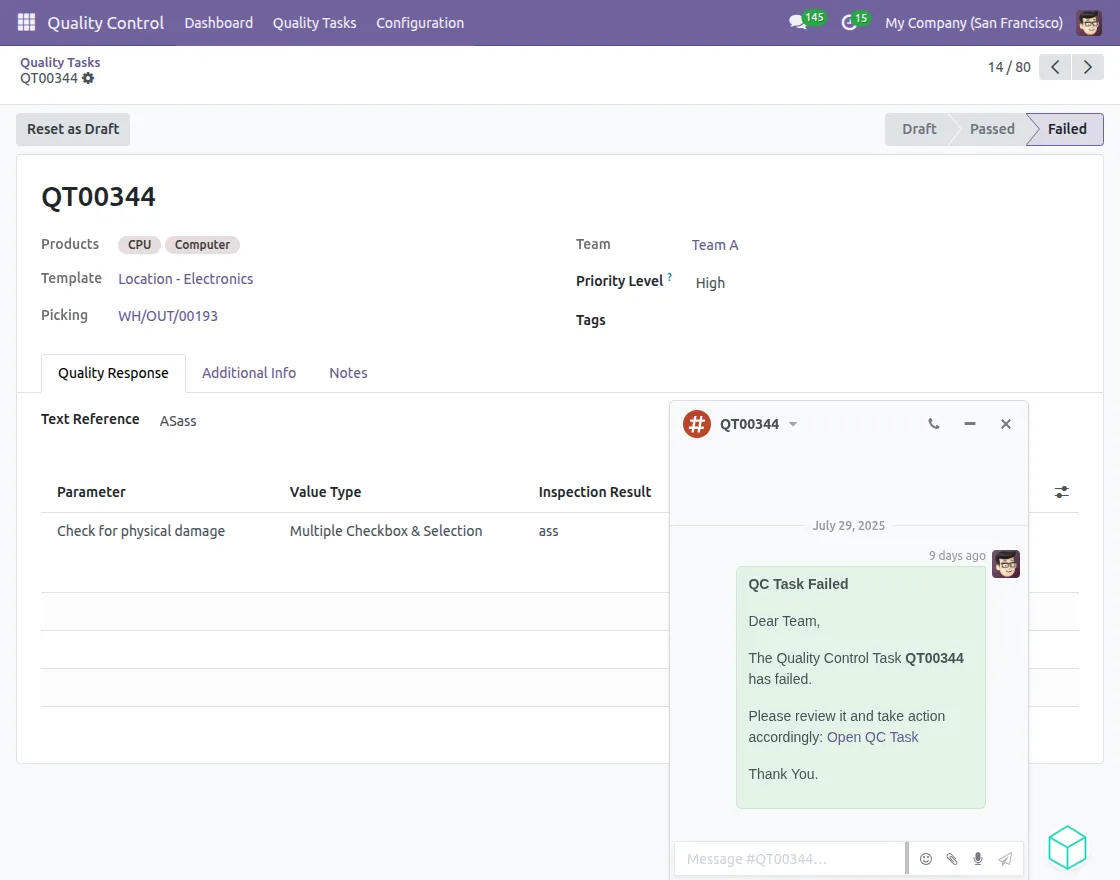
12. Notifications on Failure
In case of QC task failure, a notification is sent automatically – either as a system notification or an email, depending on the configuration.
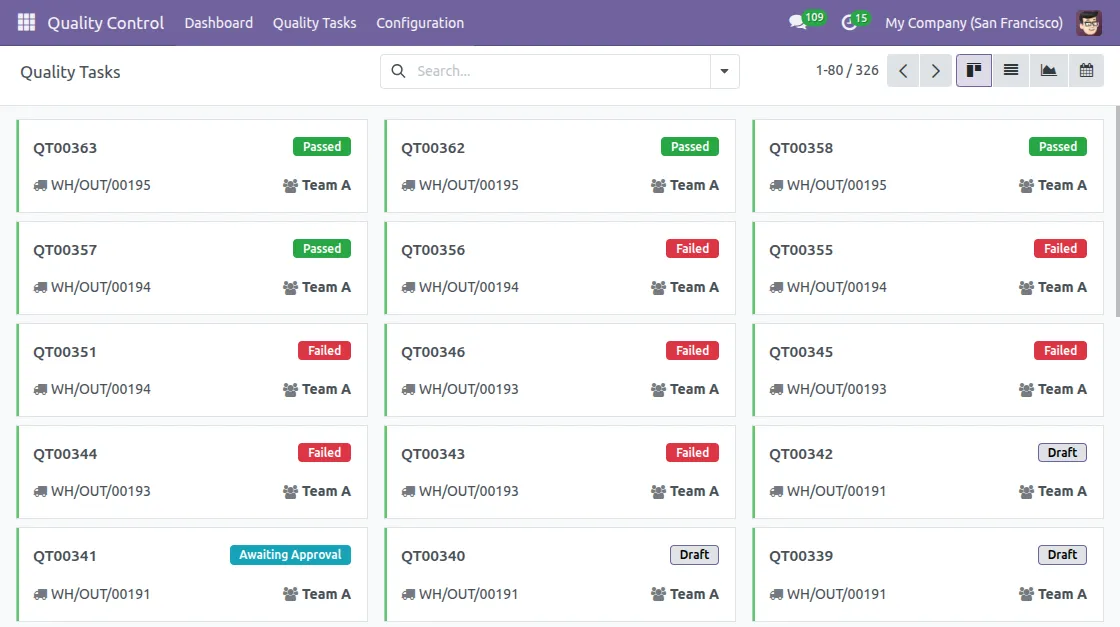
13. Track Quality Tasks
Navigate to Quality Control → Quality Tasks.
- Here, you can see all the generated quality tasks along with their status, assigned team, and other key details.
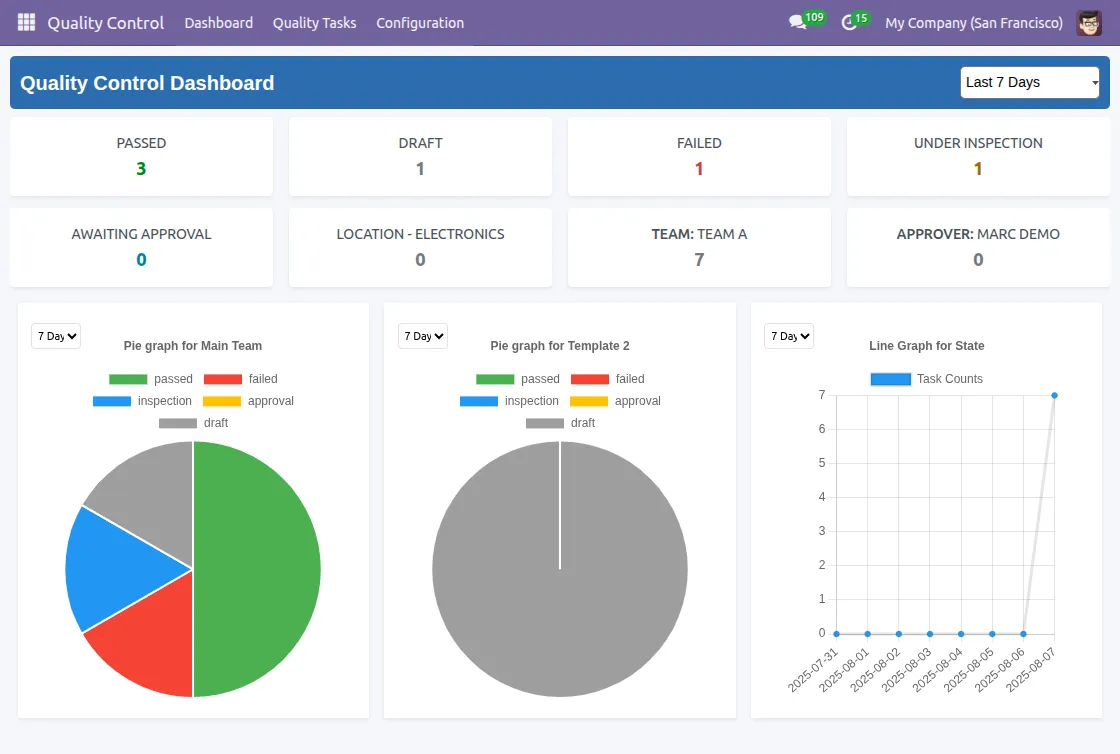
14. Analyze Dashboards
Go to Quality Control →Dashboard tab to analyze quality metrics.
- View graphs, charts, and performance indicators based on the dashboard configuration.
- Track inspections across draft, under inspection, waiting approval, passed, or failed states.
Need Help?
Hope you find guide helpful! Please feel free to share your feedback in the comments below.
If you still have any issues/queries, please create a ticket at the UV Desk.
I hope this helps. In case of any further queries, contact us at our support mail.
Thanks for paying attention!!
Current Product Version - 1.0.0
Supported Framework Version - V17.0, V18.0, V19.0

Be the first to comment.