PrestaShop Cloudflare Turnstile: Protect your forms against spammers, bots, and hackers by integrating your PrestaShop store with Cloudflare Turnstile.
A modern alternative to CAPTCHA that blocks spammers from form that a user might fill out like login, registration, or contact form.
Note: PrestaShop Cloudflare Turnstile module is compatible with PrestaShop multi-store feature.
Features of PrestaShop Cloudflare Turnstile
- Display Turnstile on back office login, customer login, registration, personal details, and contact us pages.
- Multiple theme options for Turnstile to choose from i.e. auto, light, or dark.
- Select the size of Turnstile as normal or compact.
- Track the users who have successfully completed the widget.
- Choose to use cloudflare turnstile in sandbox mode.
- PrestaShop Cloudflare Turnstile module is MultiShop Compatible.
Custom hook information
The following custom hook needs to be added to the PrestaShop files to ensure the correct functioning of the”PrestaShop Cloudflare Turnstile” module.
1.) Customer Login Form:
For Prestashop 1.7.x.x/8.x.x/9.x.x
Hook:
{hook h='displayWkCustomerLoginForm'}
File name: login-form.tpl
Path: /themes/_YOUR_THEME_NAME_/templates/customer/_partials/
Position: Add this hook before the end of the block element ‘login_form_fields’.
Refer to the screenshot for the Prestashop classic theme:

Refer to the screenshot for the hummingbird theme (Prestashop version 9.x.x):

2.) Customer Contact Form:
For Prestashop 1.7.x.x/8.x.x/9.x.x
Hook:
{hook h='displayWkCustomerContactForm'}
A.) File name: contactform.tpl
Path: /modules/contactform/views/templates/hook
Position: Add this hook after ‘displayGDPRConsent’ hook before the section closing tag.
Refer to the screenshot for customer contact form [module]:

B.) File name: contactform.tpl
Path: /themes/_YOUR_THEME_NAME_/modules/contactform/views/templates/widget
Position: Add this hook after ‘displayGDPRConsent’ hook before the section closing tag.
Refer to the screenshot for customer contact form [theme]:

3.) Admin Login Form:
For PrestaShop 9.x.x
Hook:
{{ renderhook('displayWkAdminLoginForm') }}
File Name: form_theme.html.twig
Path: src/PrestaShopBundle/Resources/views/Admin/Login/form_theme.html.twig
Position: Add this hook inside the block {% block submit_row -%} before {{- form_widget(form) -}}
Refer to the screenshot for the admin login form, Prestashop 9.x.x:

Hook:
\Hook::exec('actionWkAdminLoginControllerSubmit');
File name: UserBadge.php
Path: vendor/symfony/security-http/Authenticator/Passport/Badge
Position: Add this hook inside the getUser() function after the user check condition.
Refer to the screenshot for UserBadge.php, Prestashop 9.x.x:

For Prestashop 1.7.x.x/8.x.x
Hook:
{hook h='displayWkAdminLoginForm'}
File name: content.tpl
Path: /admin/themes/default/template/controllers/login
Position: Add this hook inside the login form, after the password field <div class=”form-group”>……</div>
Refer to the screenshot for the admin login form Prestashop 1.7.x.x/8.x.x:

Hook:
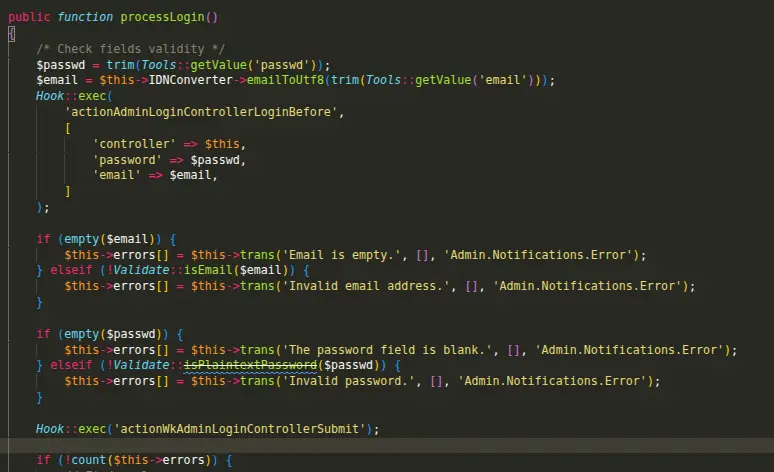
Hook::exec('actionWkAdminLoginControllerSubmit');
File name: AdminLoginController.php
Path: /controllers/admin/
Position: Add this hook Inside processLogin() function, after ‘password’ validation check
Refer to the screenshot for AdminLoginController, Prestashop 1.7.x.x/8.x.x:
How to Install PrestaShop Cloudflare Turnstile
- Firstly, go to the module manager in the back office and click on ‘upload a module’.
- After that, drag and drop the module file or select the file from the system.
- In this way, the module installation will be successful.


PrestaShop Cloudflare Turnstile Configuration
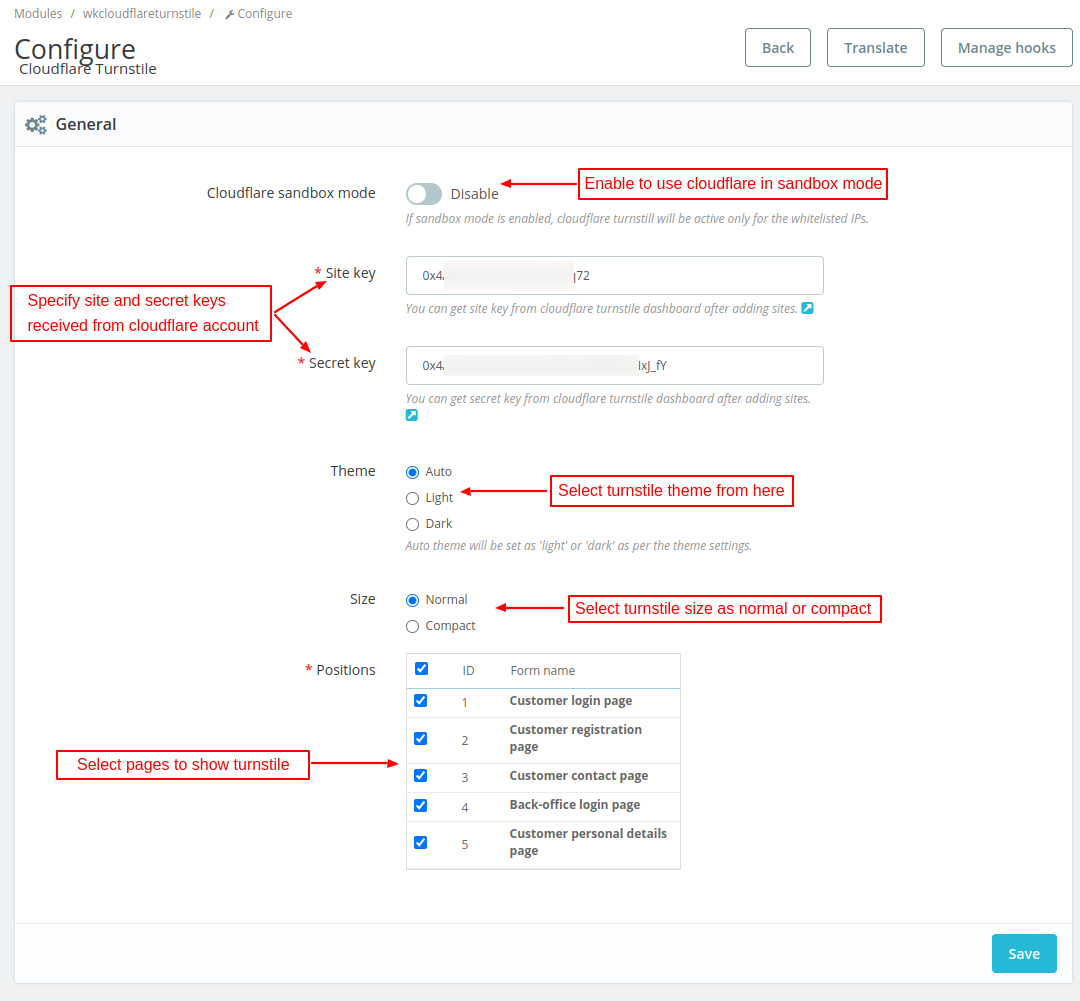
Under Configuration, you can:
- Enable or disable cloudflare sandbox mode.
- Specify the site and secret keys that you have obtained from the Cloudflare account.
- Select Turnstile theme as auto, light, or dark.
- Select Turnstile size as normal or compact.
- Configure pages where you want to show Turnstile. You can show Turnstile on back office login, customer login, registration, contact, and personal details pages.
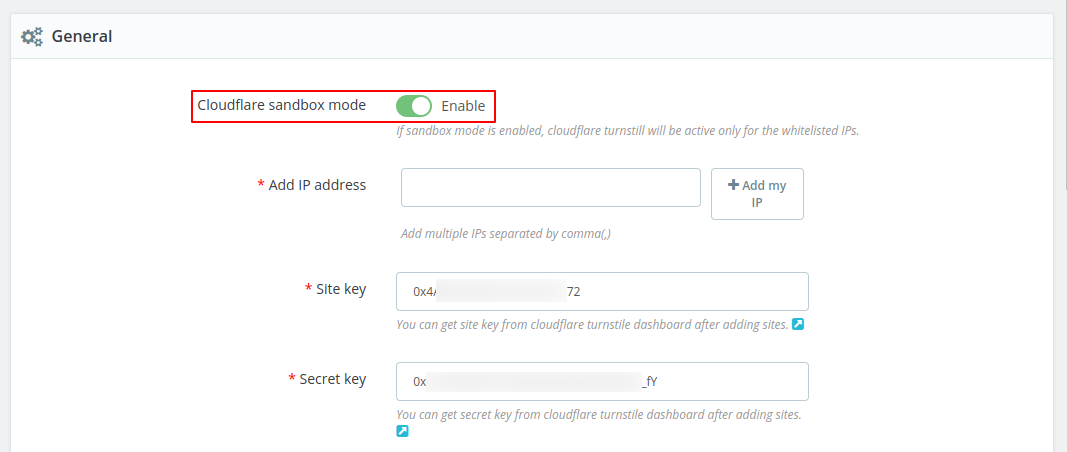
Cloudflare sandbox mode
Enable the sandbox module to test cloudflare on the website. Specify the IP addresses where you want to test cloudflare turnstile.
How to get Site and Secret Keys
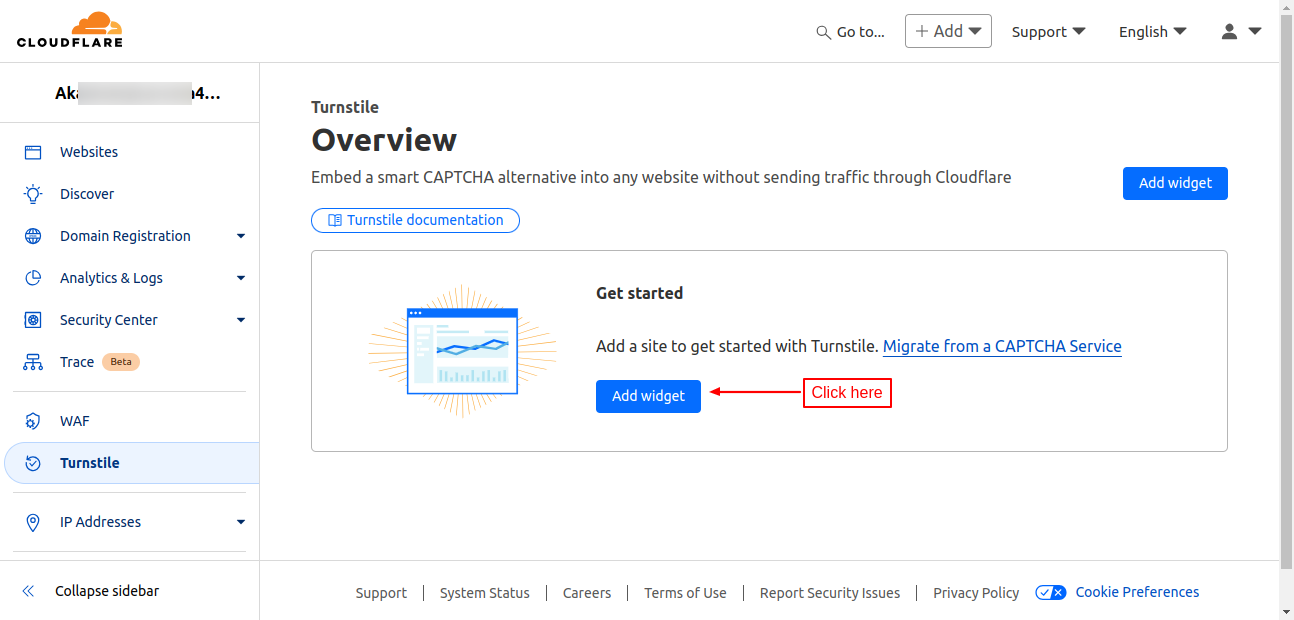
For obtaining the site and secret keys, you need to login to your Cloudflare account.

Once you have logged in, click on Turnstile on the dashboard page.
On Turnstile page, click on ‘Add widget’ button.
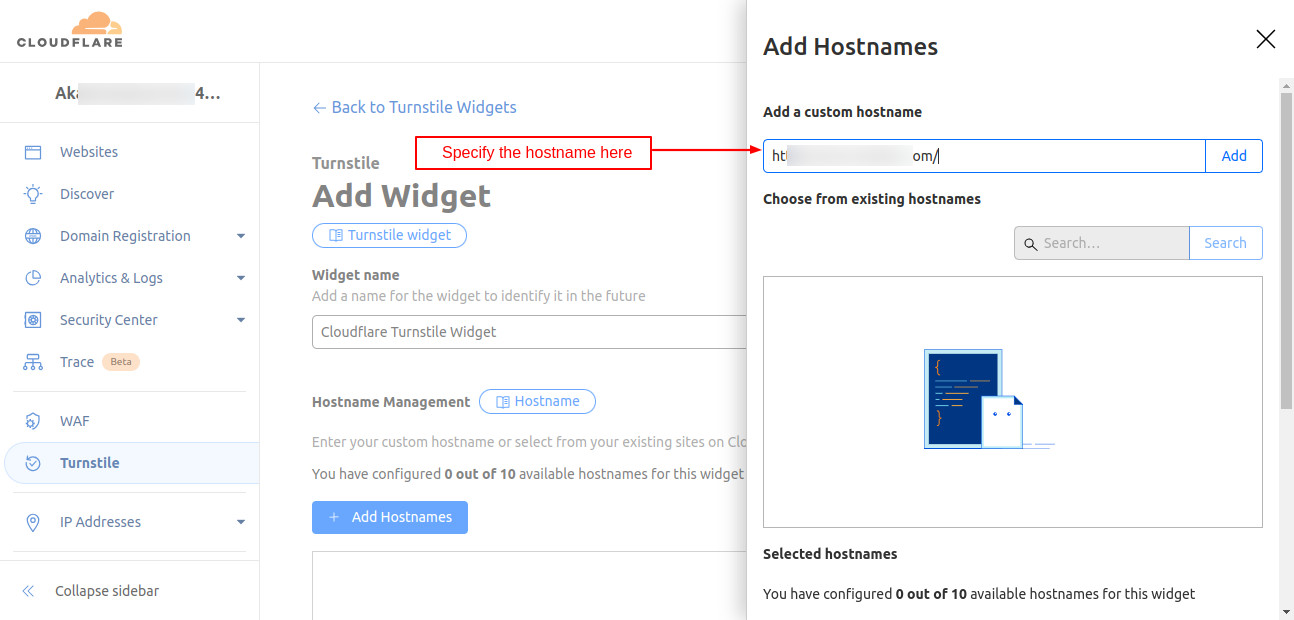
Specify the widget name and click on ‘Add Hostnames’ button.

On clicking the ‘Add Hostnames’ button, a form appears on the page where the you need to specify the hostname and then click on ‘Add’ button.
Now, select the hostname and click on the ‘Add’ button.
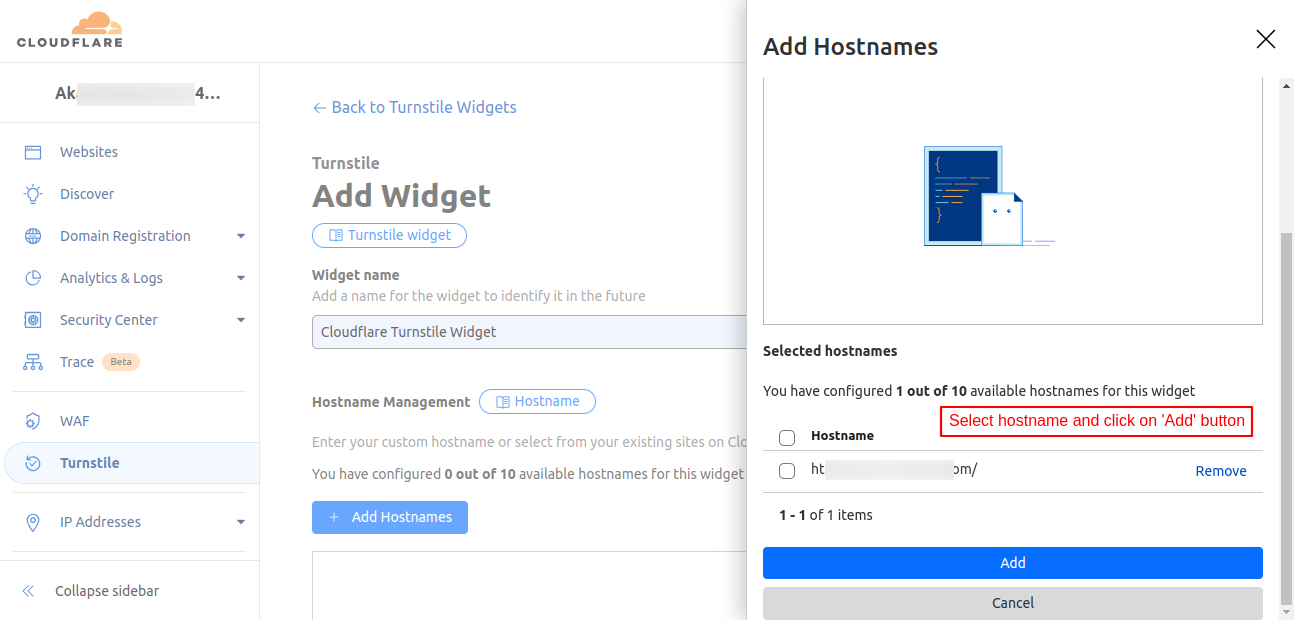
Once added, select the widget mode, pre-clearance, and click on ‘Create’ button.
It is recommended to disable pre-clearance for the creation of keys. You can enable it later on.

On clicking the ‘Create’ button, site and secret keys get generated.

Front End Workflow
Turnstile will display on the store pages selected by the admin while configuring the module settings.
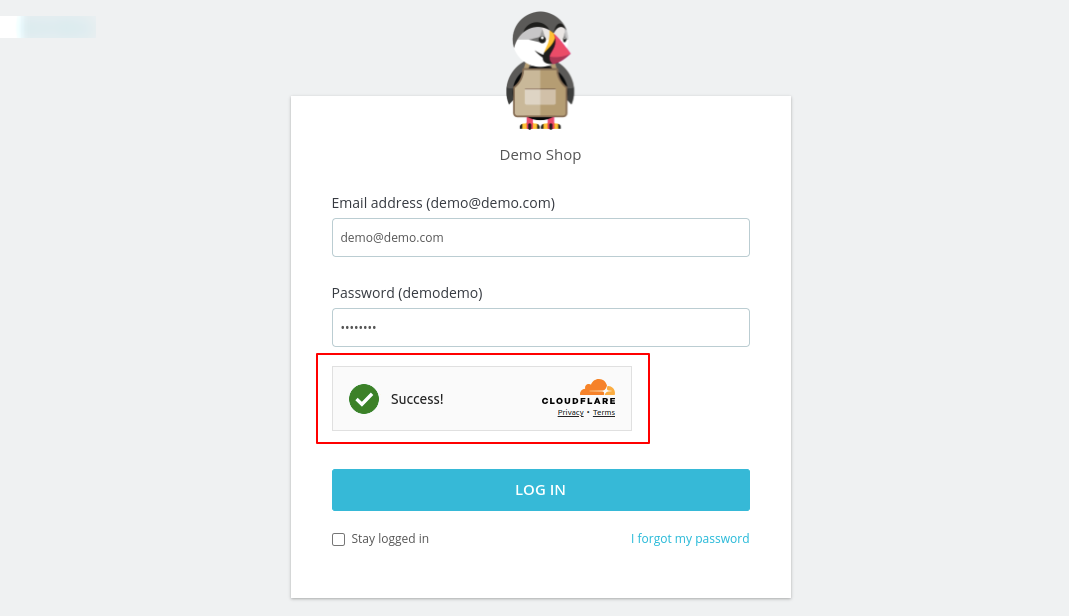
Customer Login Page


Dark Theme View

Turnstile Size – Compact

In the above screenshot, it can be seen that Turnstile is low in size. This is because the admin has selected compact in the size field.
Cutomer Registration Page
Customer Contact Page

Back Office Login Page
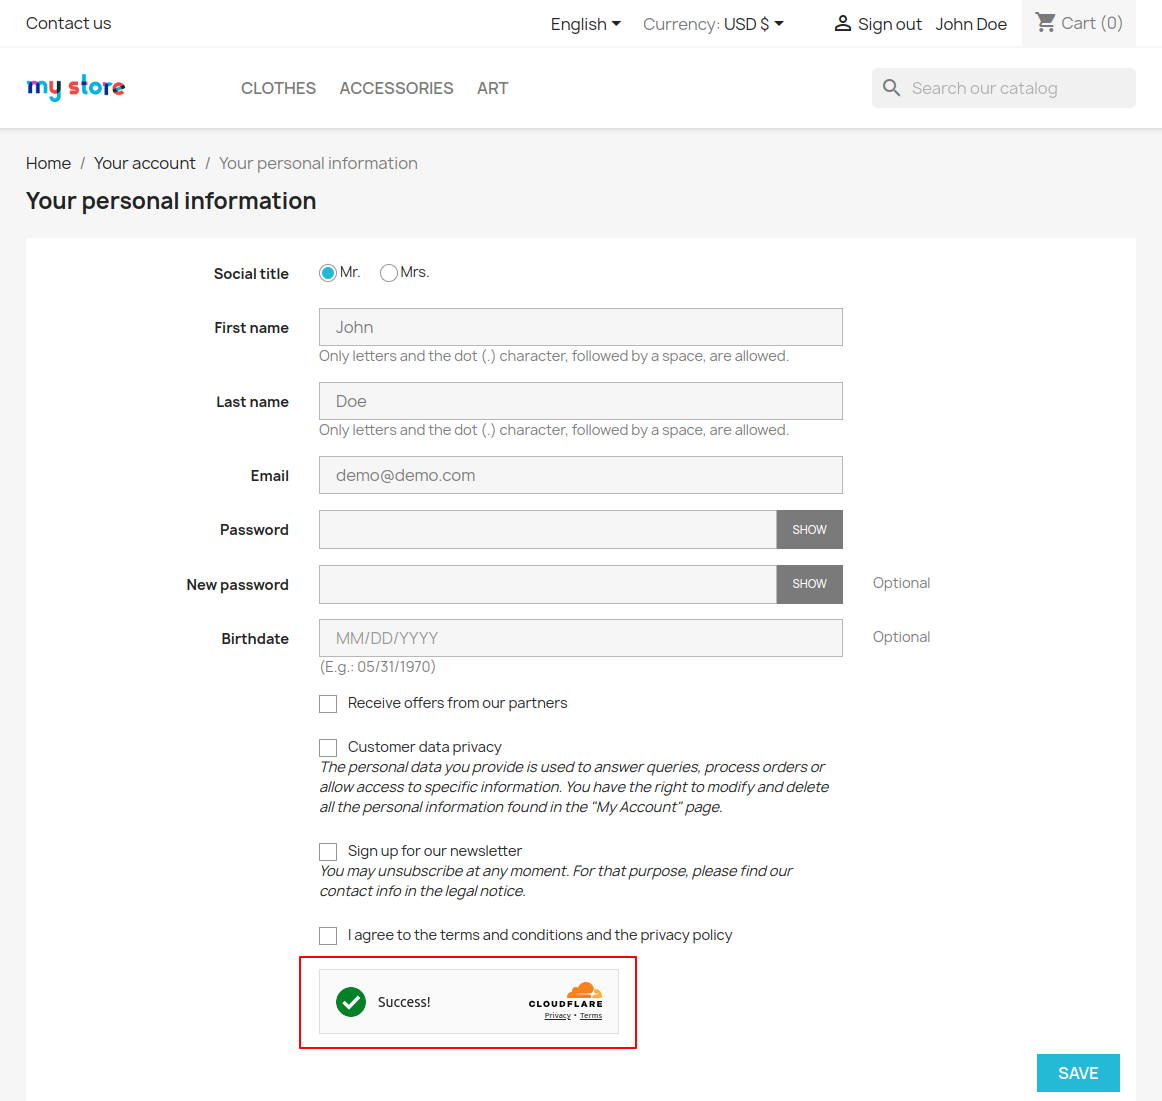
Personal Information Page
Website Analytics
In cloudflare account, you can check analytics of your website like challenges issued, visitor solve rate, and API solve rate.
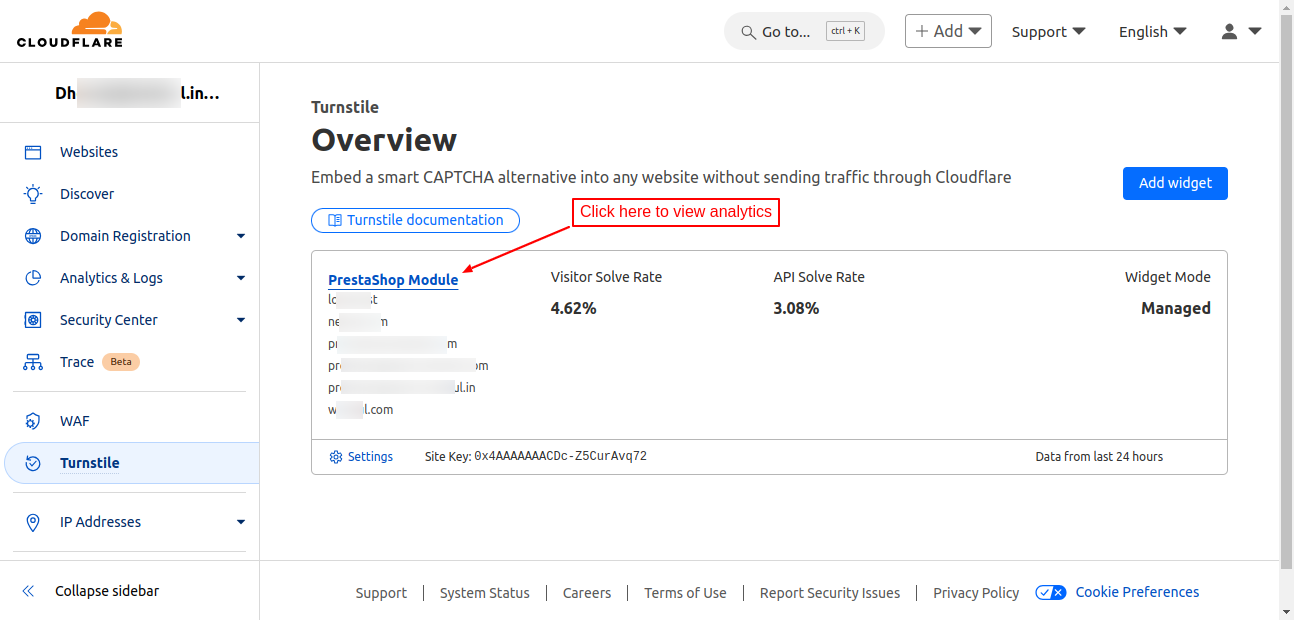
On clicking the website link, dashboard will open where you can view analytics.

Challenges Issued: This means the number of times the widget has been displayed on the website.
Visitor Solve Rate: Percentage of users who have seen the widget and completed it.
API Solve Rate: Percentage of users who have completed the widget and then performed the action on the page successfully like login on completing the registration.
Support
For any kind of technical assistance or query, please raise a ticket or send us a mail at [email protected]
Also, please explore our Prestashop development services and a vast range of quality Prestashop addons.
Current Product Version - 1.1.2
Supported Framework Version - 9.x.x, 8.x.x, 1.7.x.x

Be the first to comment.