Multi Vendor Mobile App for WooCommerce is meant to convert the store on the Multi Vendor Marketplace for WooCommerce to an app.
In the evolving world, mobile apps play a vital role in bringing exponential growth to the business structure.
Moreover, the app follows the latest technology of Flutter wherein one can use Dart to build in a mobile app.
Thus, it helps the building of a mobile app with rich mobile UI with the help of declarative components.
Furthermore, the Multi Vendor Mobile App for WooCommerce has both sellers as well as the customer centric feature to allow easy access of the store to them.
We provide a production version of the plugin. If you want a development version then you can get it at an additional cost. Please contact [email protected] for it.
Check the Android end mobile app workflow –
See the backend configuration for the mobile app home page –
Also, you can utilize the WooCommerce Mobile app to enable users to conveniently browse your single seller WooCommerce website using their mobile devices.
Features- Multi Vendor Mobile Application for Woocommerce
- Increase the accessibility of the store as with the help of the app it can be accessed anywhere and anytime.
- Seller/vendor list displays collectively.
- The customer can view the seller’s profile and the reviews before placing an order.
- The sellers can manage their profiles.
- Informative and interactive app with fast and responsive features.
- The admin can configure the app from the backend.
- From the product section, the seller can add the products within the app.
- Supported product types are Simple, Grouped, External/Affiliate, and Variable products.
- Additionally, the seller can view a record of his transactions and sales charts on his dashboard. He can view his order history for all the orders, change his password, and even ask questions to the admin.
- Multiple sellers can register and upload their products.
- Separate Seller Profile, Shop Logo, and Seller Collection Page with Banner Image.
- Sellers can put up queries to the admin and these queries will be listed under the Queries option.
- The admin can reply to the queries of the seller.
- A seller can edit their profile information.
- Seller’s products can be edited or deleted by the seller as well as the admin.
- SEO-friendly URL structure has been incorporated into the Marketplace.
- Also, allows the admin to set the default commission for every seller.
- Unlimited push notifications for customers
Note– To develop the WooCommerce Multi-Vendor App, you must have the Webkul Multi-Vendor Marketplace for WooCommerce plugin.
Installation of Multi Vendor Mobile App for WooCommerce
For installation, the user will get a zip file which he has to upload in the “Add New” menu option in the WordPress admin panel.
Login to the WordPress Admin Panel, and Under the Dashboard hover your mouse over the “Plugins” option inside the menu which brings out a Sub-Menu and then selects the “Add New” option.

After this, you will see an option on the top of your page that is “Upload Plugin”, click on that option to upload the zip file.

After clicking on the “Upload Plugin” option, below that you will see a button “Choose File” click on the button to browse for the zip file as per the snapshot below.
Browsing the file, click the “Install Now” button to install the plugin as per the snapshot.

Now, when the plugin is installed correctly, you will see the success message and an option to activate the plugin. Click on “Activate Plugin” to activate the installed plugin.

Multi-Vendor Mobile App for WooCommerce Admin-End Configuration
Mobikul Application Woocommerce Admin-End Configuration allows store owners to manage and configure the app from the backend.
The admin can manage the app easily from the backend in easy steps.
From the admin panel, the admin can manage the banner images, featured products, featured categories, and notifications.
Walkthrough Information
The admin can manage the walkthrough from the backend panel. Here, the admin can edit, trash, or add a new walkthrough information.
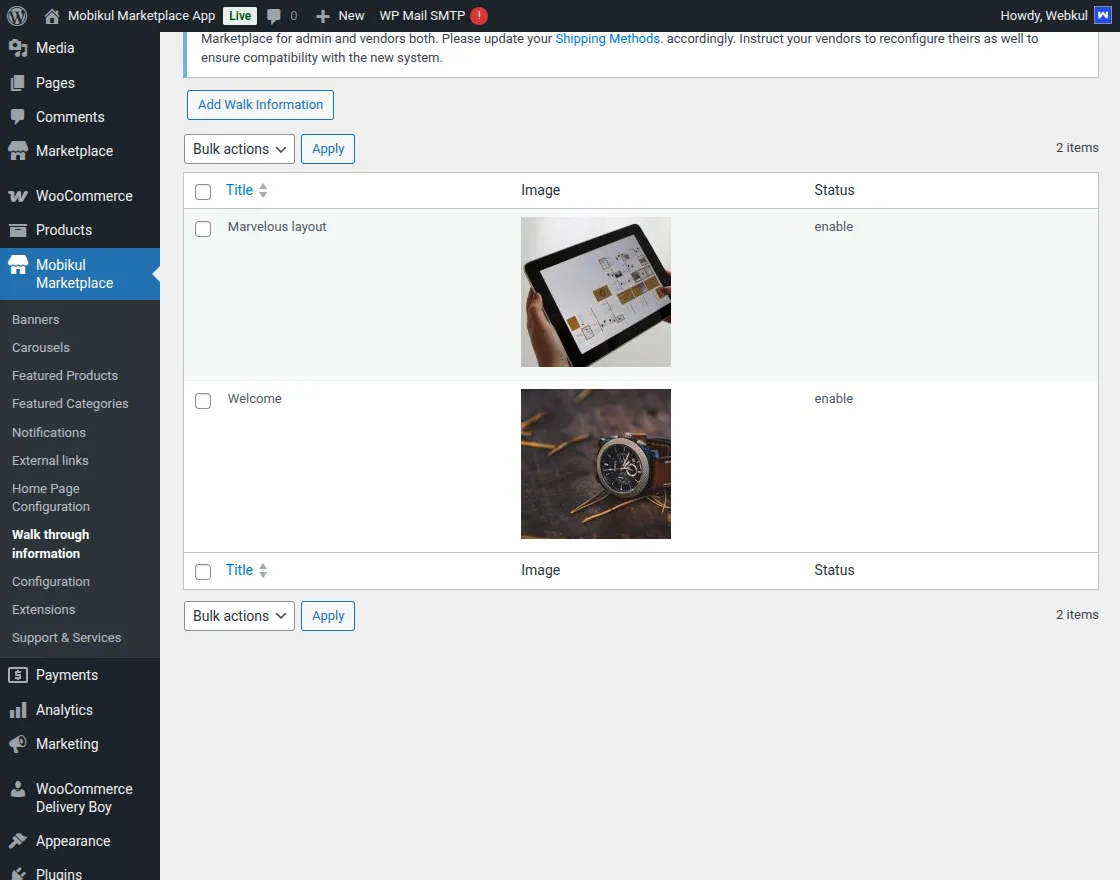
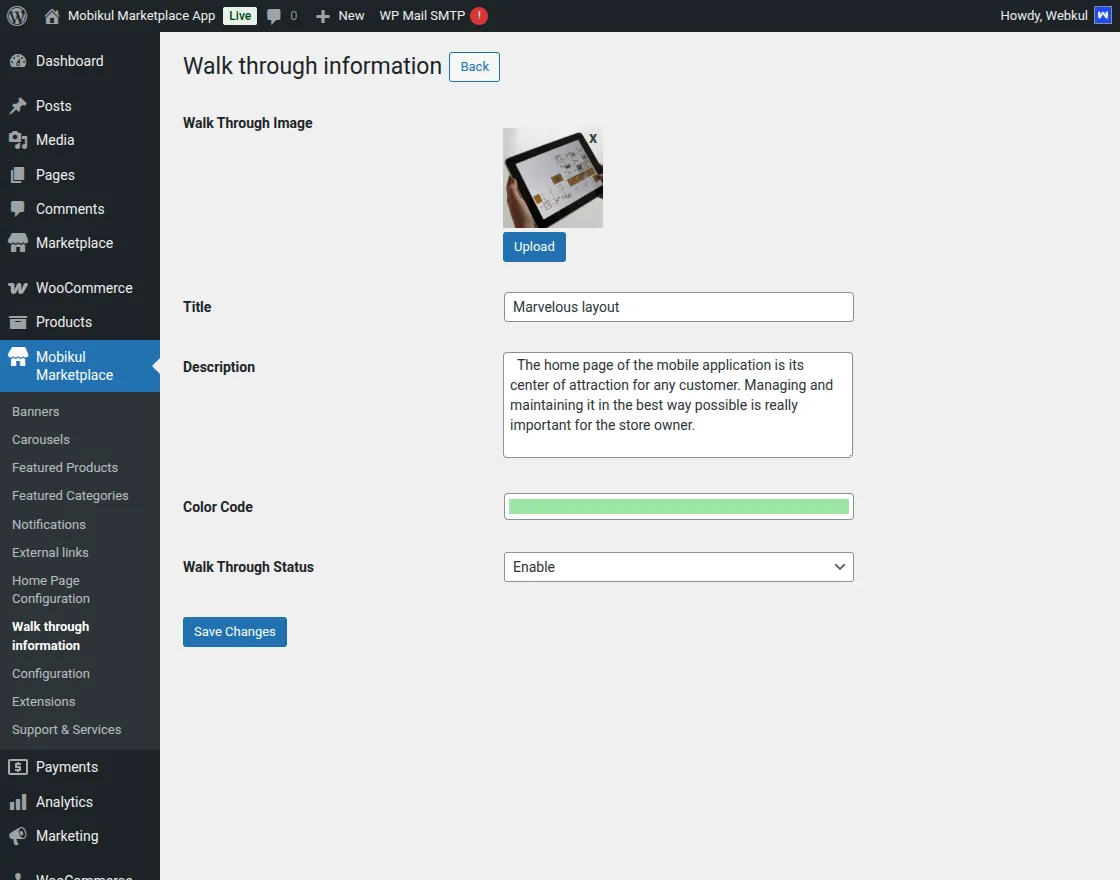
By clicking on Add Walk Information, the admin will be redirected to the page mentioned below.
Here the admin needs to upload the image, add a title, and description, choose colour code, and set the status, then click on submit to save the changes.
From the admin dashboard, the admin can navigate to Mobikul, here the admin can manage the
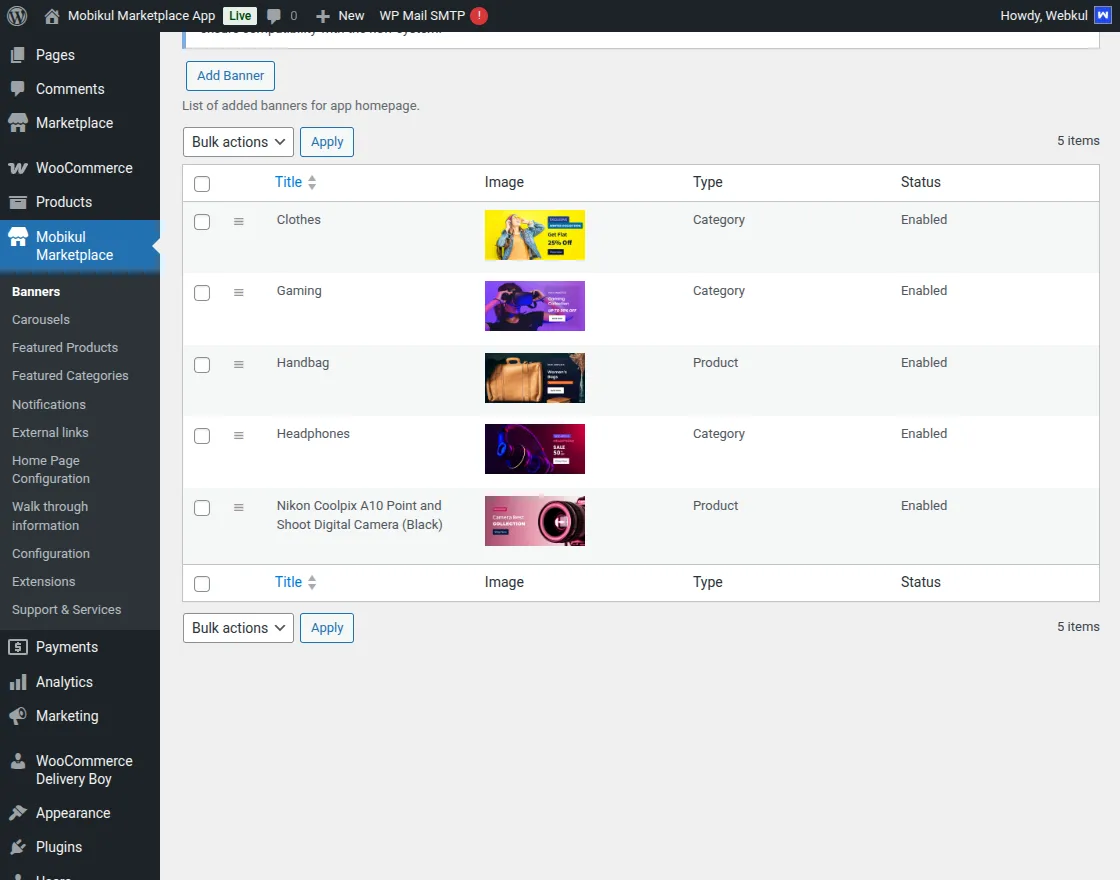
Banner Image-
Banner Image section, the admin can manage or add new banner images for the mobile app. The admin can even manage the images in bulk to move the images in the trash.
The admin can click on the edit button to edit the existing image.

Now, by clicking on the Add Image button, the admin can add the Banner Images as shown in the image below-
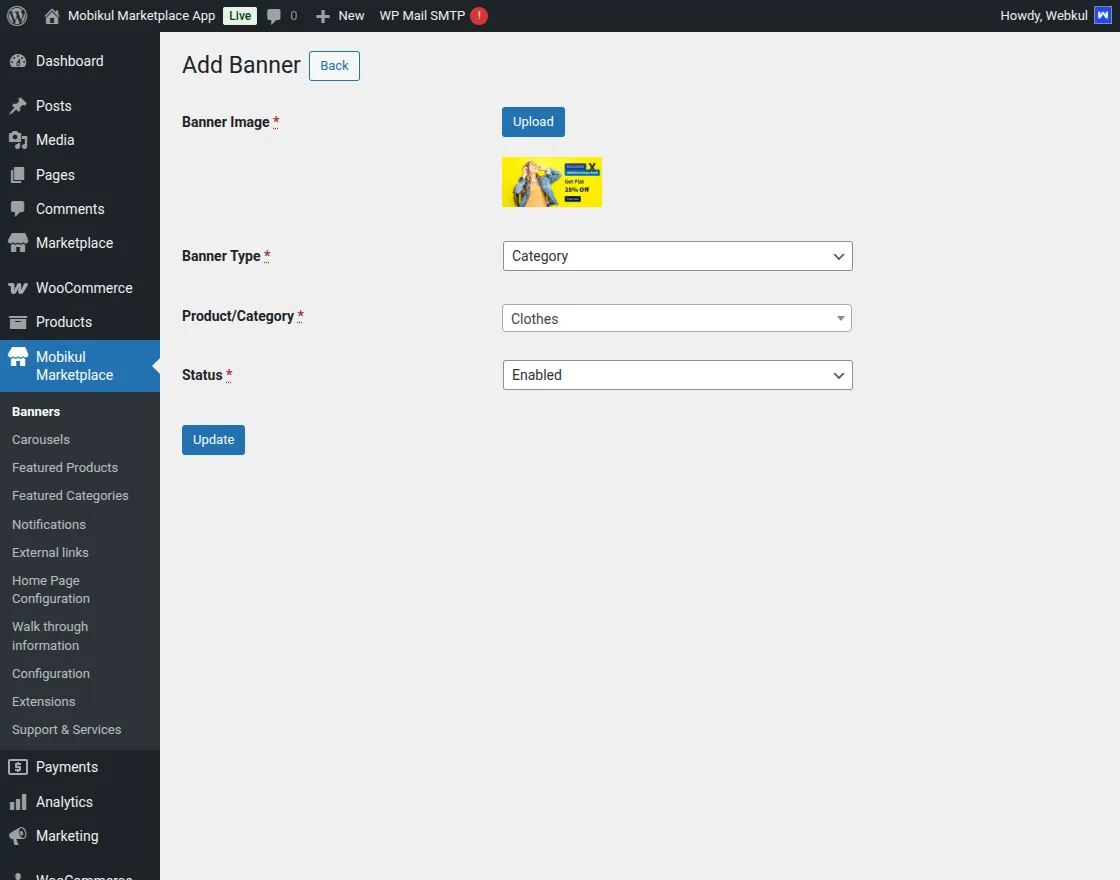
Here, the admin will need to upload the banner image, manage the sorting of the banner, select the type of the banner, select the product/category ID, and the status of the banner image to show on the mobile app, and then click on save.
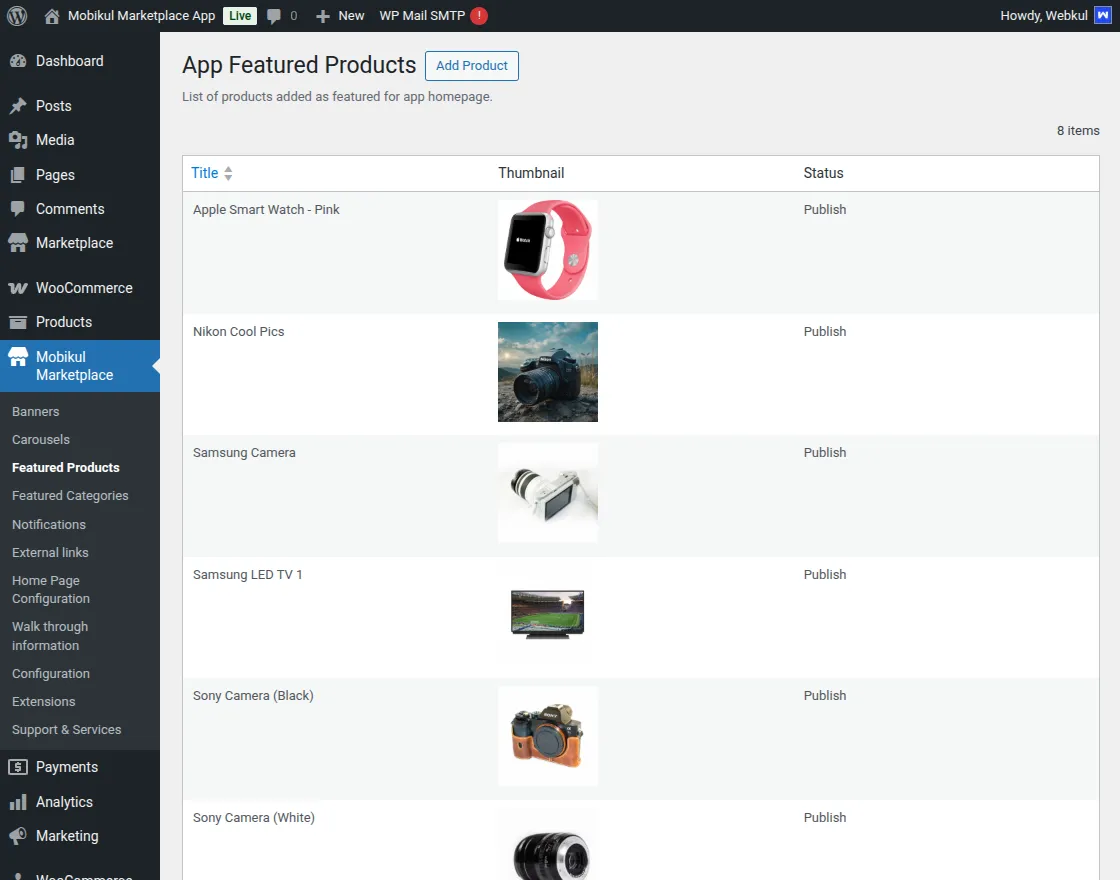
Featured Product List
The admin can manage the featured product list from the admin panel and manage the featured product in bulk to move the products in the trash.
The admin can also click on the edit button to edit the existing product and click on the “Add Featured Product” button to add the more featured product to the app.
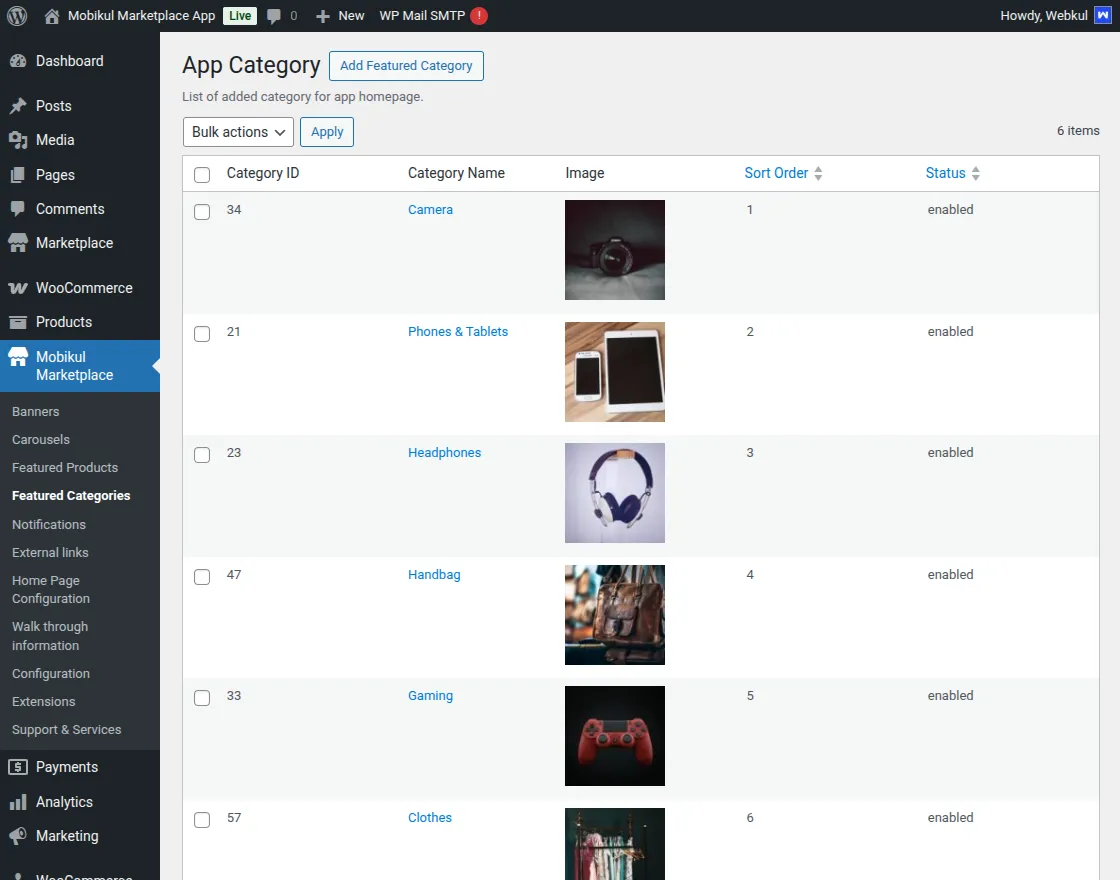
Featured Category
From the admin panel, the admin can manage the Featured Category.
The admin can manage the existing featured category list or add more featured categories from the dashboard as shown in the image –
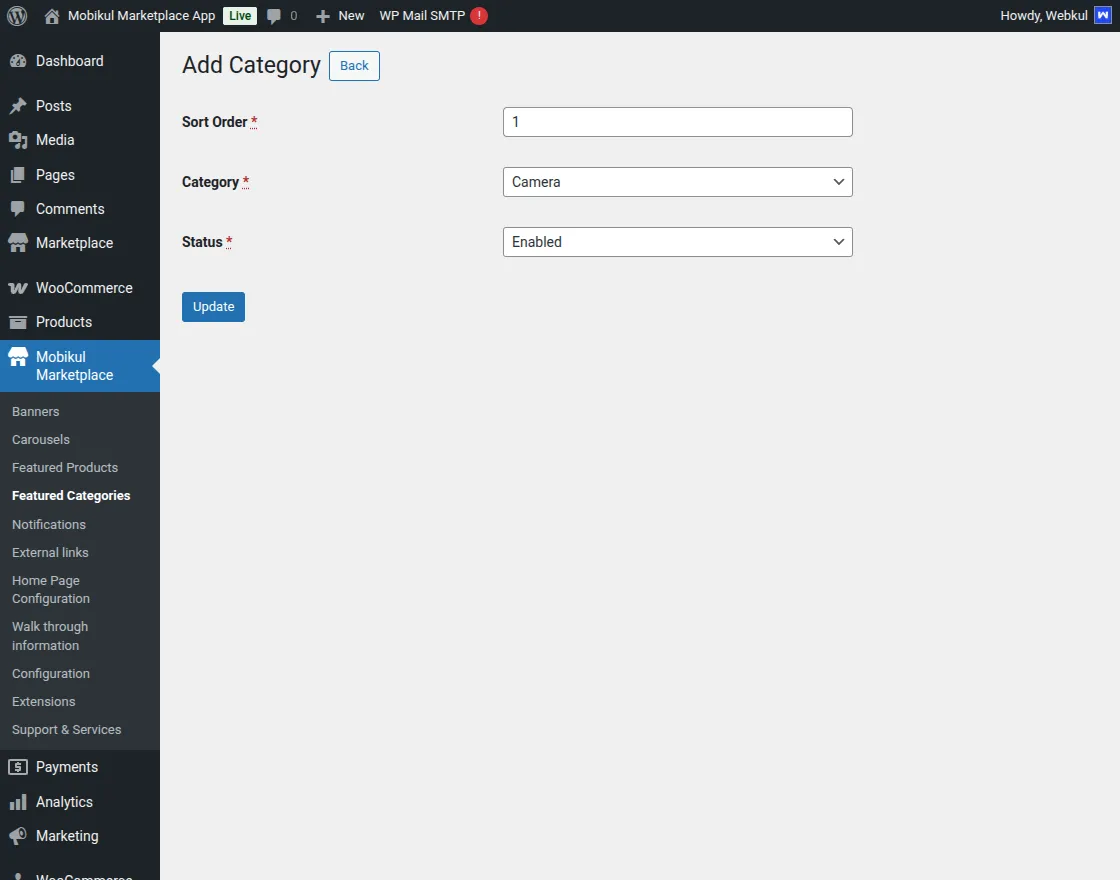
Here, the admin can
- Sort the order of the selected featured category,
- select the featured category according to the requirements, and
- enable or disable the status of the selected featured category and
- click on save to show on the mobile app as shown in the image below-
Manage Notification
Push notifications
The Admin can simply add push notifications to display them on the Mobile app. At the same time, all mobile app users can receive notifications from the back panel which the admin will push.
So admin will set the push notification configuration. To do this, go to the Mobikul tab > Manage notifications.
Afterwards, the admin will push the corresponding notification. These notifications will be visible on the user’s device in addition to the automatic push notifications of the sale.
The admin can manage the notification or create Push notifications to send on the mobile app through the admin.
Henceforth to do this the admin can manage the existing notification or click on Add Notification.
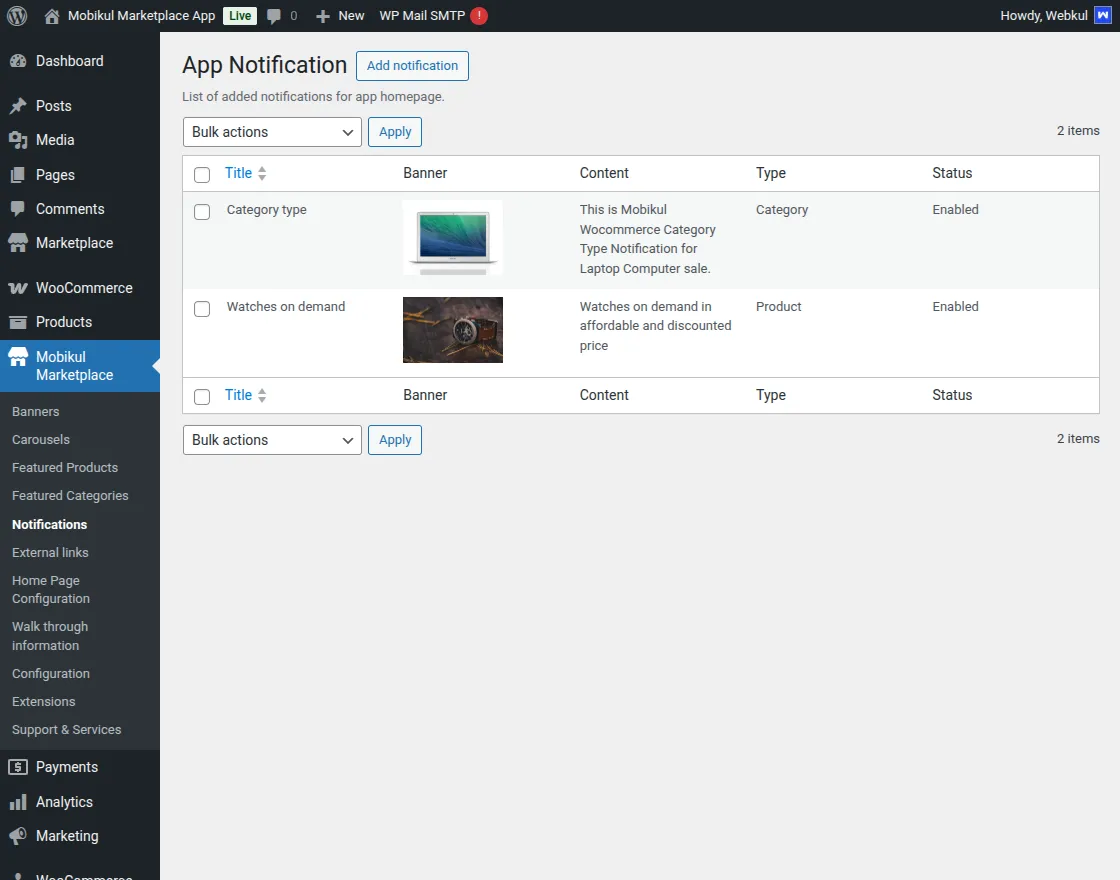
These notifications are used to send notifications to the users by the admin to the mobile app.
Thus, by clicking on the Add Notification, the admin can add the notification information as shown in the image below-
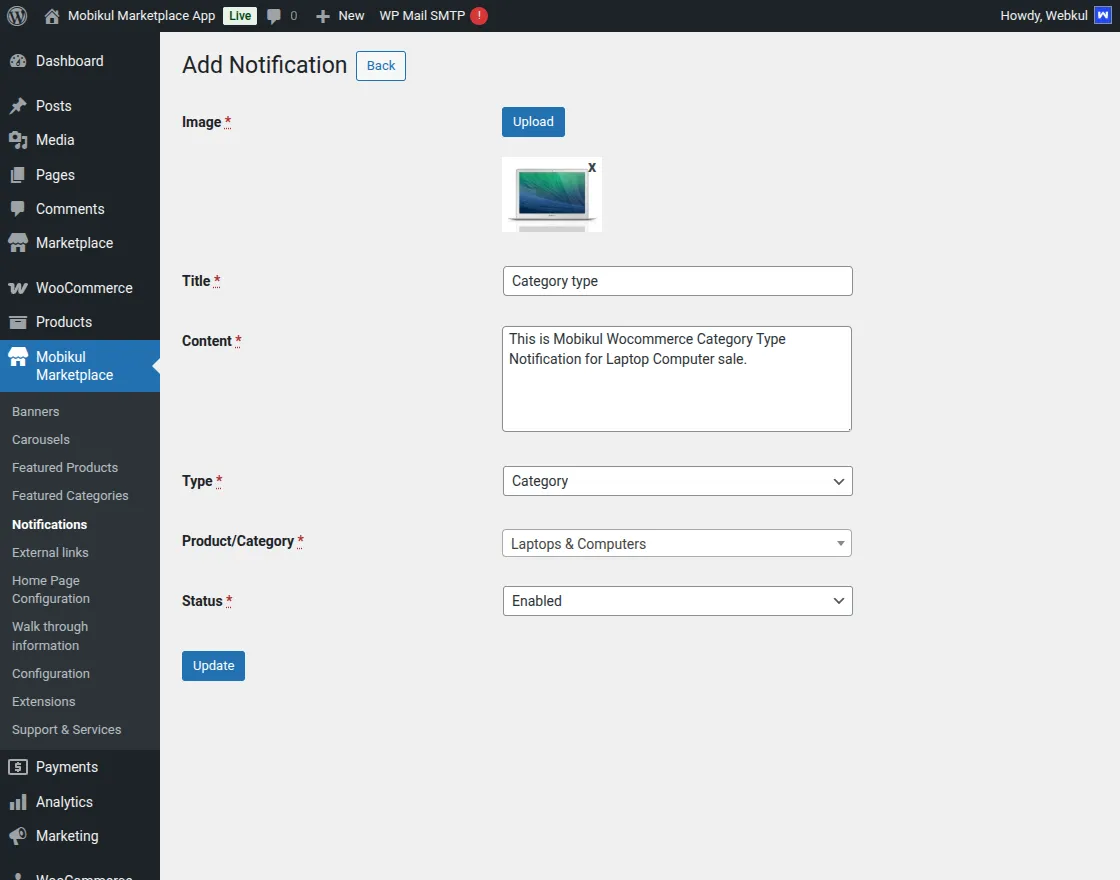
So, the admin can-
- Upload the image for the notification
- Enter the title of the notification
- Enter the content for the notification
- Select the type of the notification as product or category
- Select the product/category ID from the list
- Enable or disable the status of the notification and click on the save button.
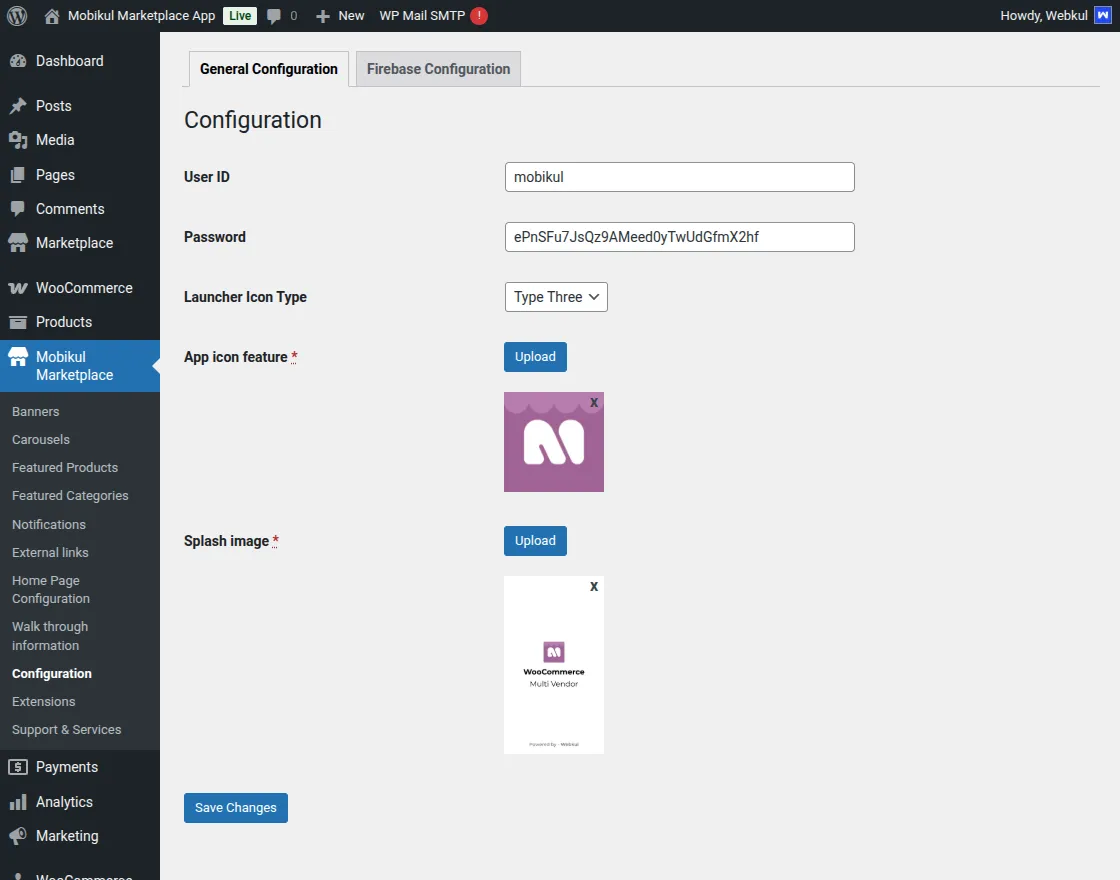
Configuration –
The admin can set the launcher icon, App icon feature, and splash screen. This will be visible to the customers in the mobile application.
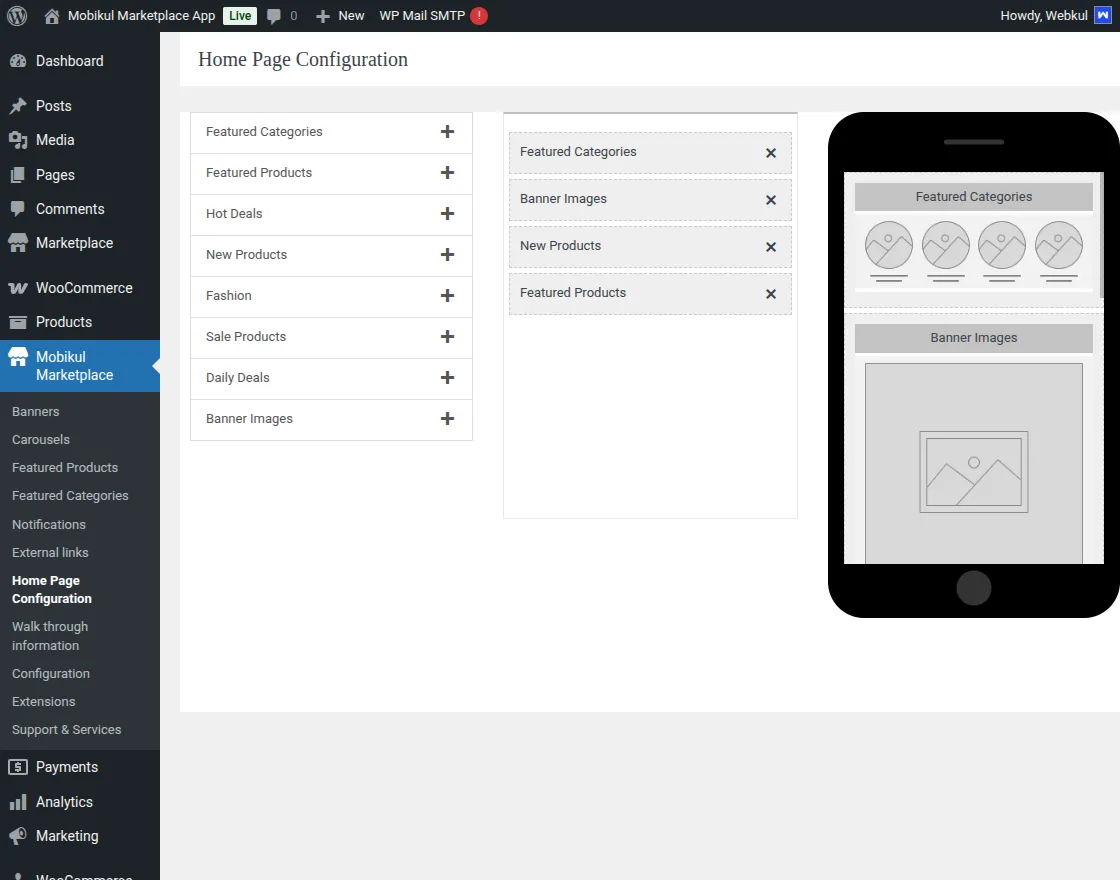
Homepage Configuration –
The admin can configure the homepage settings from here.
Launcher Icon
When the user installs the app the launcher icon will display on their mobile screen the color and style based on admin backend settings.

Splash Screen
Once the app is downloaded, when customers open the app they will see the splash screen for 4 to 5 seconds then it will open the walkthrough screen.

Walkthrough
Now walkthrough of the app. It will guide the user on how to use the app or how to perform the step-by-step process.


Homepage
Now the customer will check the home page with various details like icon images, products, banners, and more.

Category
The next tab after Home is List which will display a list of categories that are linked with the products. So, this will allow the customer to shop by category.

Hence, the customers can click on one of the categories to view the related product along with the star rating and price of the product.

So, this section can allow the app user to execute multiple functionalities like-
- Sort
- View Grid
Sort
The app user can sort the products in the category to allow quick and easy navigation. Thus, the app user now can sort the product according to the
- Default Sorting
- Popularity
- Average Rating
- Newness
- Price.

Product Search by Text or Image Scanning
The product can be searched by the app user to optimize the product purchase process. Thus, click on the search tab icon.
Text Search
The App user can enter the desired product keyword and it will display all related search results in the list. It redirects to a collection page with all the products linked to that keyword.


Text Scan Search
Customers can scan the text and there you will get a list of the products, customer can choose the product they want and can check the same as mentioned in the snapshot below:


Image Search
The customer can also search for products by image search. Scan the product that the customer wants to search for and choose the particular product from the list that appears on the screen and can check the same as mentioned below in the snapshot:


Recently Viewed Product
Customers can check the products they have recently viewed. From there they can go through the product details and description and can manage as needed.

Share Product
Customers can share the product which they are viewing on the app with others via social media, by clicking on the shared icon on the top right-hand side. Once you click on that you can see different options with which you can share the products as mentioned in the snapshot.


Account
This section is one of the major sections as it has all the information linked to the Account holder. Thus, when logged out this section has- A seller List, Login facility, and Register facility.
Seller List
The customer can easily view the list of sellers in the marketplace from this section.
This will allow the creation of trust between the customer and the seller. Hence, they can now see the type of seller in the marketplace.

The app user can simply click on one of the Seller’s images to view the details of the Seller Profile.

Hence, this will comprise of-
- Contact details,
- Star rating(on the basis of price, value, and quality),
- list of the latest products by the seller,
- and the latest reviews and ratings received by the seller on their product.
Seller Account
The seller account is a combination of all the features offered by the app for the sellers. You can create an account using your email Id or log in from Google or Facebook.

If you already have an account, you can directly log in by entering your login details.
Create Seller Account
Admin can easily create an account to fill in the credentials according to required things, and select the field of I am a seller and make an account or to sign up with Email/Username.


Seller Profile
Once you open the profile of the sellers, you get access to their personal information like email id, location, and phone numbers.
Further, you also get to view their price ratings along with the value and quality of the products.
Moreover, you can view all the products for sale by the seller and the customer reviews about the purchased products.
Meanwhile, the buyer has an opportunity to allot stars for each category, making it easier for other customers.
Seller Product
As a seller, you can add multiple products of your choice to your account. Moreover, the sellers can choose from a variety of products ranging from clothing to electronics.

Product Description
After, selecting the product type and category proceed to step further to add the Product name, About the product, Product thumbnail, SKU, Regular price, Sale price, and Details of the product.
In the end, fill in all the details successfully, and click on the save button.


Moreover, after adding the desired products to your account, they will be available as a list, along with the prices and availability of the products.

Edit Order
However, the seller can edit or delete any product from the list without any difficulty.


The seller can edit the inventory and shipping according to new immediate changes in the product.


Here, The seller can also edit linked products and change the product status.


Seller Order
This section provides details of all the orders received by the seller, along with the price and current status. Moreover, the sellers can access the order details, address book, and reviews.
However, this helps the seller to manage all the orders effectively.

Notification
There are several actions performed in the marketplace related to a seller like new order, change in order status, approval of a product, a review post by the buyer, and many more.
In the notification area, the seller will be notified as shown in the image below.
Cart
On the top right corner of the screen, the customer can view the cart icon. Hence, this section will contain all the products that the customer has added to the cart.


Here, the customer is powered with multiple functionalities wherein the customer can-
- Remove Item.
- Edit the quantity of an item.
- Enter the discount code if available.
- Amount to be paid Details.
- Proceed To the Checkout Facility.
Checkout
The customer can checkout with the desired product after clicking on Proceed. This will contain the billing and shipping address. Along with this, the customer can change the addresses for the order.
The customer has to select the shipping method for the products.

Thus, the customer even needs to select the desired payment method from this section.

Now, the customer can finally review the complete order before finalizing the purchase using the Multi Vendor Mobile App for WooCommerce.


So, now after the final review, the customer can click on Make Payment which will display the following message.

From here the customer can go back to the home section.
This is all about the WooCommerce Multi Vendor Mobile App plugin. Still, have any issue, regarding the WooCommerce Plugins feel free to contact us at http://webkul.uvdesk.com and let us know your views to make the module better.
Current Product Version - 3.3.0
Supported Framework Version - WordPress6.9.4 WooCommerce,:10.7.0

Be the first to comment.