Woocommerce Marketplace Vendor Attribute Manager module allows the admin to create a vendor’s custom attributes.
Vendors can fill the attributes on the registration page and can update these attributes on the vendor profile page.
With the help of this module, users can find all custom attributes created by the admin on the vendor profile page.
Therefore, Customers can see custom attributes on Vendor’s/seller’s profile page.
** Note: This module is an add-on to the Woocommerce Multi-Vendor Marketplace module.
To use this module you need to install the first WordPress Woocommerce Multi-Vendor Marketplace.
We provide a production version of the plugin. If you want a development version then you can get it at an additional cost.
Please contact [email protected] for it. Send messageLog note Pinned Message Schedule activity
Support
Dear Customers, for any question/query, please raise a ticket at webkul.uvdesk.com and we will do our best to answer as quick as it is possible.
So please, don’t give us a low rate without contacting support on the issue you’ve faced with. We are always happy to help you out.
Watch the below video tutorial to understand the extension workflow:
Feature
- The admin can create the Vendor’s/seller’s custom attributes.
- Ability to show custom attributes on the registration page and profile page.
- The vendor/seller can update custom attribute values very easily.
- The admin can create unlimited custom attributes for Vendor/seller.
- Customers can see custom attributes on Vendor’s/seller’s profile page.
- The vendor’s custom attributes visibility depends on admin by enabling/disabling functionality.
- This plugin is now compatible with WooCommerce’s latest High-Performance Order Storage (HPOS) and Cart and Checkout block.
Installation
The user will get a zip file which he has to upload in the “Add New” menu option in the WordPress admin panel.
For this login to WordPress Admin Panel and Under the Dashboard hover your mouse over the “Plugins” menu option which brings out a Sub-Menu and then select the “Add New” option.

After this, the user will see an option on the top of the page that is “Upload Plugin”, click the option to upload the zip file.

On clicking the “Upload Plugin” option, the user will see a “Choose File” button. Click on the button to browse for the zip file as per the image below.

Thus, after browsing the file, click on the “Install Now” button so as to install the plugin as per the snapshot.

Now when the plugin is installed correctly, you will see the success message and an option to activate the plugin. Click on “Activate Plugin” to activate the installed plugin.

Check how to Activate WooCommerce Plugin through the purchase code and get updates on Webkul Modules directly on the Plugins page
Admin Configuration
After the successful installation of WooCommerce Marketplace Vendor Attribute Manager.
The admin will find the configuration settings panel by navigating through Marketplace->Vendor Attribute->Settings as per the snapshot below.

Here, the admin can set-
Woocommerce Marketplace Vendor attribute settings:
- Enable custom attribute list– The admin can set the “Enable” option to make visible the custom attribute list.
Enable Terms & condition and Privacy setting :
- Status- The admin can choose “Enable” option to make visible terms and condition and privacy setting.
- Privacy Popup Model Heading- The admin will enter the Privacy Popup Heading that will be visible on the Privacy popup.
- Term and Condition Popup Model Heading- The admin will enter the Terms & Condition Popup “Heading” that will be visible on the Terms & Condition popup.
- Model Button Text- The admin can set the Button’s text that is visible on the Terms & Condition and Privacy Popup.
- Button Text Color– The admin can set the Button text colour on the Terms & Condition and the Privacy Popup.
- Model Button Color– The admin can set the Color of the Button on the Terms & Condition and the Privacy Popup.
- Model Background Color– The admin can set the background colour on the Terms & Condition and the Privacy Popup.
- Show Content as– The admin can get the content displayed as normal “Text” or “HTML”.
- Terms & Conditions– The admin can set the Terms & Conditions.
- Privacy & Cookie Policy– The admin can set the Cookie Policy.
Add New Attribute
On clicking the Vendor Attribute Manager tab “Custom Attribute List” page will open up.

Therefore, the admin can view the custom attribute list and create new attributes for the seller by clicking on the “Add New Attribute” tab.
Admin can enable or disable attributes by selecting the created attributes and choosing Bulk Actions → Enable/Disable.
They can also update existing attributes by clicking on the “Edit” option.
However, When the admin clicks on “Add Attribute,” below page will appear.
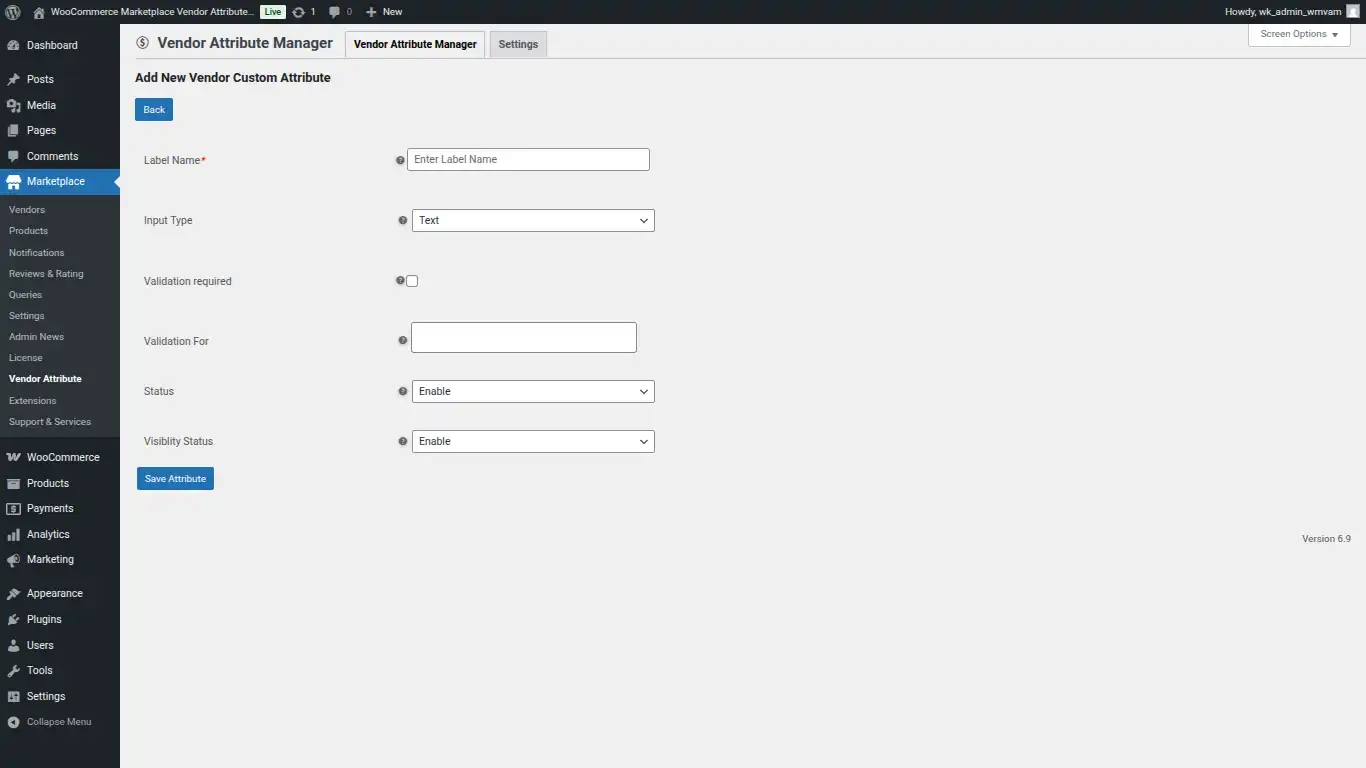
Here the admin can –
- Label Name – It will be displayed as the label for the attribute created.
- Input Type – This field describes what kind of data the attribute will store. What’s set here determines how data entry for this attribute will take place, such as Text, Textarea, Email, Number, Date, Select (Dropdown), Checkbox, Radio Button, and File Upload.
- Validation required – Click on Checkbox button to enable Validation.
- Validation For – set the validation for the attribute.
- Status – set the “Enable” option to make Visible the Vendor Attributes on the Vendor Registration page.
- Visiblity Status – The admin can enable and disable the status of the attribute details at the customer front end in the seller profile.
Seller Fronted
Sellers can register directly from the Login / Registration page.
To display the vendor registration option on this page, the admin must enable “Allow Vendor Registration on My Account” from
Marketplace Settings → General Settings.
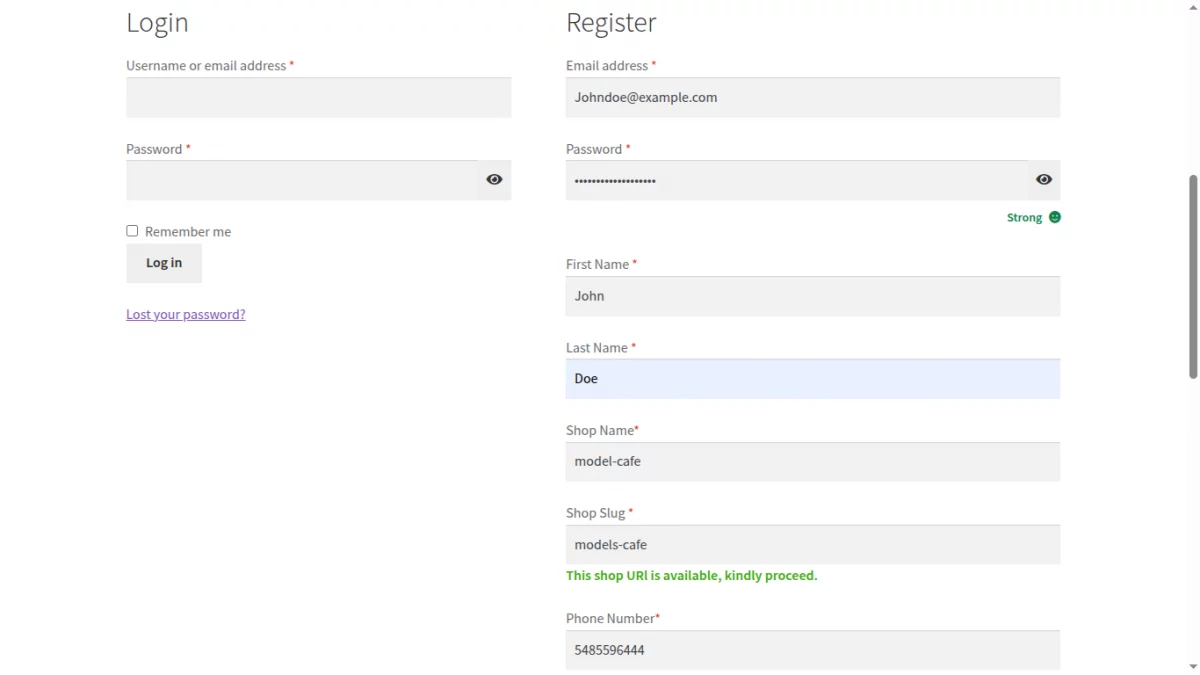
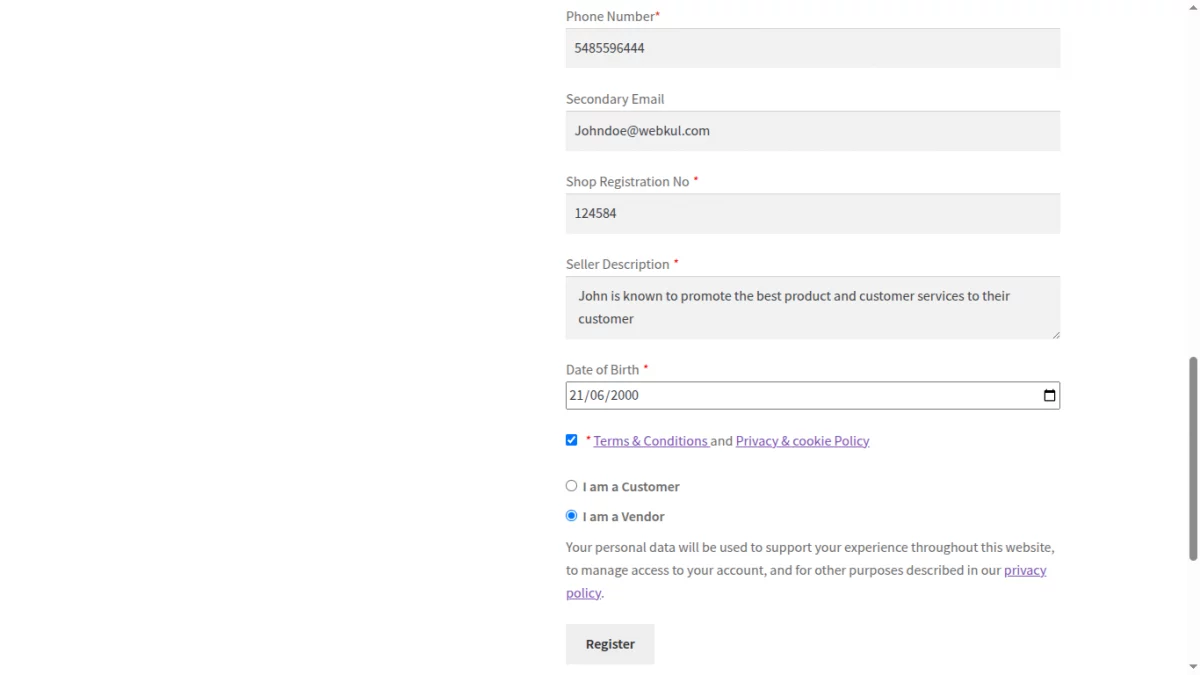
The extra admin-created custom attributes will be visible on the vendor/seller registration form and the seller profile page.
Sellers are required to fill in these custom attributes while registering themselves on the marketplace, as shown in the screenshot below.
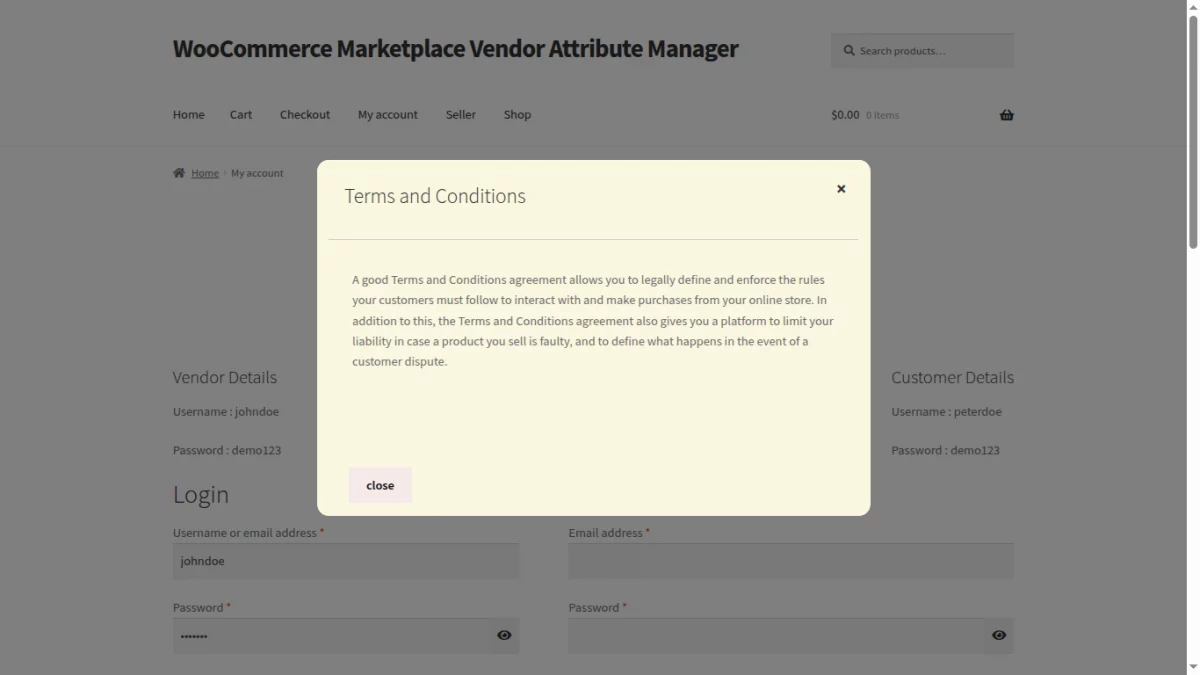
Additionally, Terms & Conditions and Privacy Policy pop-ups are displayed during registration.
Therefore, the seller/vendor click on the term and condition link, then this page will appear where all the terms and condition given by the admin will appear as shown in the screenshot given below.
When the seller/vendor click on the Privacy policy link, then this page will appear where all the privacy policy details given by the admin will appear as shown in the screenshot given below.

Sellers can also register from the Seller Central page available on the marketplace storefront.
The Seller Central page provides a dedicated option for users to register as a seller. By clicking Seller Central → Become a Vendor, the seller registration form opens with all admin-defined custom attributes.
For more details about the Seller Central page and its functionality, please refer to the WooCommerce Multi-Vendor Marketplace Seller Central documentation:
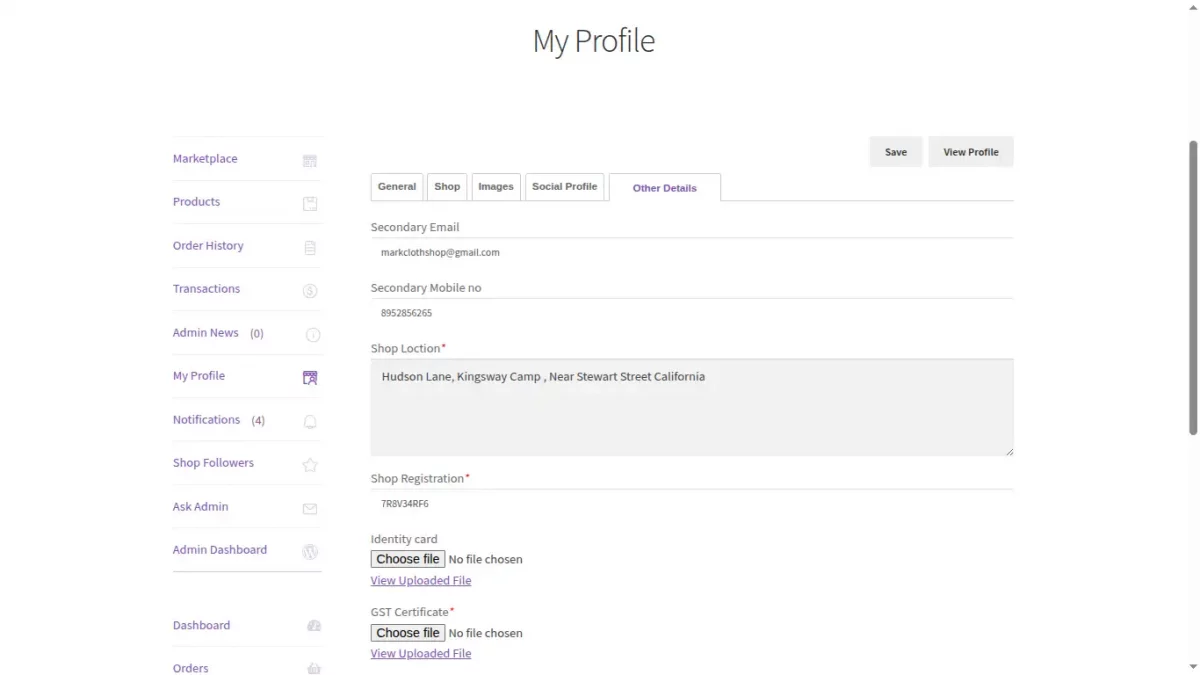
After the seller successfully registers, the seller/vendor can view the custom attributes on their Vendor/Seller Profile page and update them at any time.
- Vendor can edit their custom attribute details by navigating to:
My Account → My Profile → Other Details - All admin-created custom attributes are displayed in this section.
- Vendor can easily update and save their attribute values from the profile page.
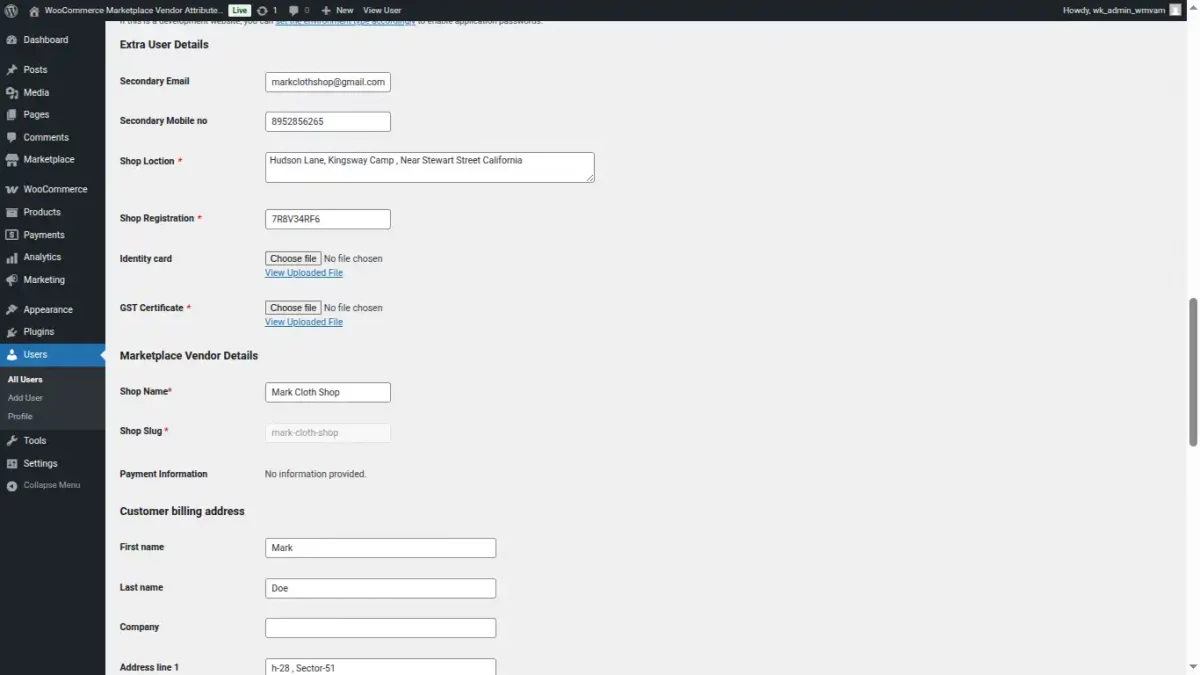
In addition to the seller side, these custom attributes are also visible at the admin end:
- The admin can view the vendor’s custom attribute details by navigating to the User Edit page in the WordPress admin panel.
- This allows the admin to review, verify, or manage seller-specific information directly from the backend.
Customer Front End
Here, the customer can also see custom attributes on Vendor’s/seller’s profile page as shown in the screenshot given below.
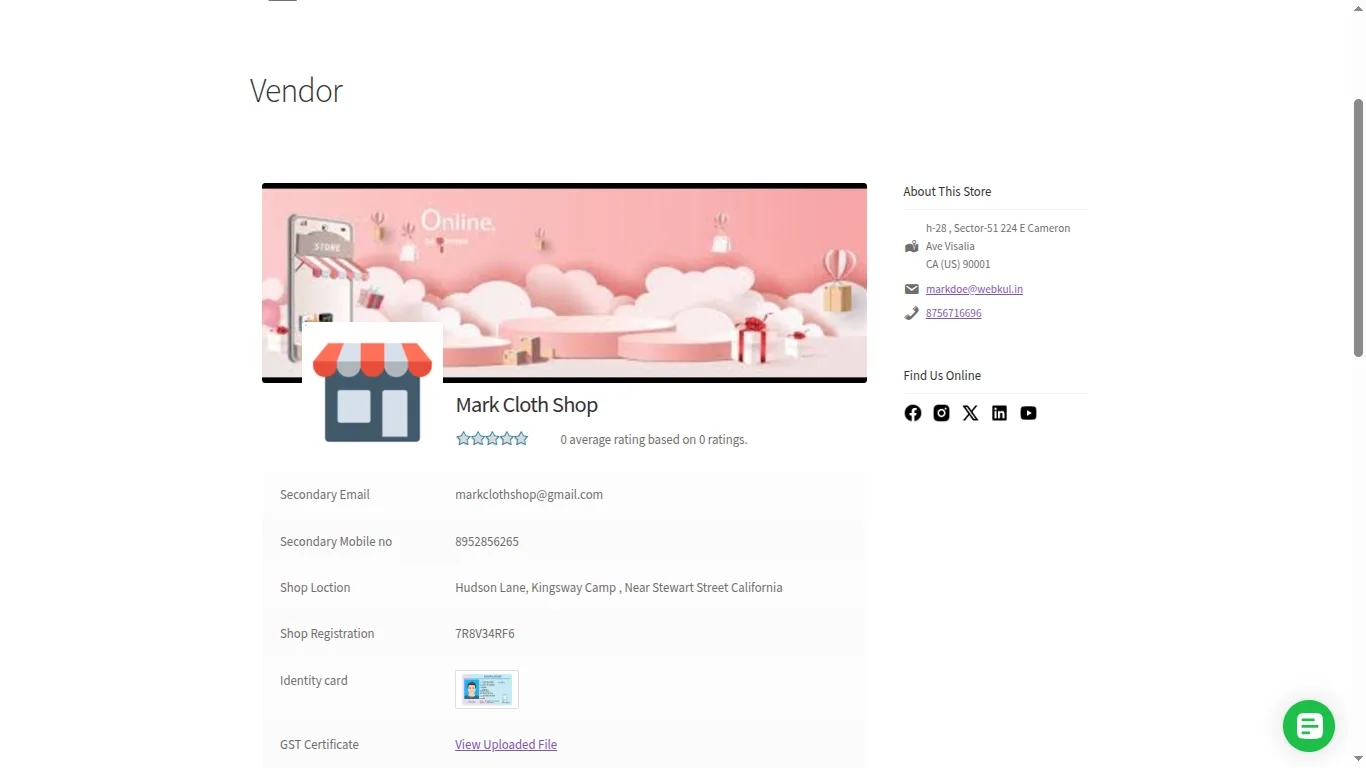
Note: For the input file types are rendered directly on the frontend. Other file types are accessible via a “View Uploaded File” link, as shown in the above image.
Conclusion
Hence, This extension will allow the admin to take more details from the sellers which may include Secondary Email id, Shop registration number, Date of birth, Seller description.
These attributes will be visible at the vendor registration form and the seller profile page.
Now, Sellers will have to fill extra information while registering themselves at the marketplace stores.
That’s all for the Woocommerce Marketplace Vendor Attribute Manager plugin.
Thus, still have any issue, feel free to add a ticket and let us know your views to make the plugin better at webkul.uvdesk.com
Current Product Version - 1.3.0
Supported Framework Version - WordPress: 6.9, WooCommerce: 10.4.3., Woocommerce Marketplace: 6.4.0

Be the first to comment.